Daylily care in the garden
How to care for daylilies
Planting daylilies and caring for them are simple procedures and anyone can do it. No wonder these plants are called flowers for lazy people. Daylilies, of course, require attention, like any other garden flowers, but there is very little trouble with them. You will need to water them, feed them, weed, loosen the soil around the bushes, remove wilted flowers and faded arrows, take protective measures against diseases and pests, and mulch the surface of the site with organic material, for example, dry peat, wood chips, shavings or crushed bark.
Watering daylilies
The root system of daylilies is so powerful that the plant is not afraid of drying out the soil surface, since it can extract moisture from the depths. When moistening the site, it is desirable to achieve a position in which the topsoil is dry, and at a depth of 20-30 cm, where the plant's suction roots are located, moist. The easiest way to achieve this result is by mulching the surface of the site with a layer of organic matter 6-7 cm thick.
Daylilies do not like frequent and superficial watering. Plants need moisture only in prolonged drought, but if you want to see this plant in its best form, then water it during the growing season at least once a week. Water consumption depends on the texture of the soil. Water is poured so that it does not spread, but soaks the soil well. Try to prevent water droplets from falling on the leaves, and even more so on the flowers, the delicate petals of which are easily covered with burns. After watering, loosen the soil around the bushes and remove weeds.
Freshly planted plants should be watered daily for the first week.
Feeding daylilies
When the leaves begin to grow at the daylilies in the spring, full mineral fertilization should be applied under the daylily: "salt" the soil around the bushes with dry granules, trying in no case to get into the center of the bush, seal them into the soil and water the area. It is more convenient, of course, to apply liquid dressings, for example, by dissolving 1 tablespoon of Nitroammofoska in 10 liters of water. In April-May, in order to stimulate the intensive growth of daylilies, complex feeding is also made, but with a predominance of nitrogen (urea or calcium nitrate), and plants are sprayed on the leaves with a solution of magnesium sulfate, adding 5 g of carbamide for every 10 liters of solution to avoid burns on the leaves. In June, when buds begin to form, daylilies growing in scarce soils are fed with liquid organic fertilizers - a solution of mullein, fermented grass or chicken droppings.
The main dressing is applied in August, during the dormant period, which begins a month after the peak of flowering, before the start of new growth, when the flower buds of the next year are laid. A solution of Nitroammofoski is used as a fertilizer, and in areas with a cool climate - superphosphate and ash. This feeding also contributes to a decrease in the growth rate: it is time for the plant to start preparing for winter.
The basic rule when fertilizing daylilies is: after fertilizing, be sure to water the plants.
Daylily transplant
In one place, a daylily in the garden can grow up to 15 years, expanding in breadth and in depth. However, gradually the buds of the plant become smaller and smaller, and less of them are formed than before. To prevent the growth of daylilies, they should be transplanted once every 5-6 years. Usually, the transplantation procedure is combined with the reproduction of the daylily by dividing the rhizome.When is the best time to do it? The fact is that this culture is insensitive to the transplantation procedure, so it can be performed at a convenient time for you, but no later than early autumn: the delenk or a whole bush will need at least six weeks to root.
The bush is carefully removed from the ground along with a large lump of earth, transferred to the planting site, placed in a pre-prepared planting pit and planted in the same order as during the initial planting. When preparing the pit, keep in mind that the size of the root system of an adult plant is much larger than that of a seedling.
We will talk about how to divide the daylily bush a little later.
Reproduction methods
Daylilies can reproduce vegetatively and by seed. The most convenient way is to divide the bush. The event is best carried out in the spring so that the plant has time to take root well before the cold weather. Some plant varieties are easy to separate with your hands, but more often you have to use a sharp knife or shovel.
The bush is divided into several large parts. Each pruning should have a piece of root tissue, 2-3 buds, several leaves. You can simply cut off the side of the mother bush. After the procedure, an adult plant is not watered for several days so that the cut site does not rot.

Reproduction by dividing the bush
Proliferation (rooting of inflorescences) is a method of vegetative reproduction of the daylily. The peduncle is not removed until the upper part dries. At this time, small rosettes of young plants are formed in the place of inflorescences. The peduncle is cut off, the foliage is shortened by a third. The seedlings are placed in water for the emergence of roots. Stimulation of root formation is carried out by adding 1-2 drops of Epin or Zircon.
When the roots grow up to 3-5 cm, the shoots are planted in small pots. Leave for the winter at home. They are planted in open ground in May, when the danger of frost has passed.
Daylily seeds are rarely used for propagation. This is a long process. Plants bloom only in the third year. Sowing seeds is justified for breeding purposes or when you need to grow a large amount of planting material.
Interesting information! During seed propagation, the varietal qualities of the mother plant are lost.
Seed propagation rules:
- The seeds are soaked in a 3% solution of hydrogen peroxide (15 ml per 1 l of water), covered with a plastic bag and removed to a dark place. Germination takes 5 to 15 days. It is necessary to periodically check whether the seeds have hatched.
- When the roots appear, the germinated seeds are placed on a layer of small pebbles and placed in the light.
- The seedlings develop a root system and small leaves appear. Young bushes can be planted in separate pots.
- Plants are planted in open ground when the leaves reach 15-20 cm in size.
Sowing seeds is carried out in March. If there is a backlight, you can sow seeds early - in January-February.
Plant resuscitation
In most cases, if you do not run the problem too much, the daylily can be reanimated and it will begin to bloom again. To do this, it is necessary to determine the reason due to which the buds of Krasnodnev do not bloom and eliminate it as soon as possible.
It is also important to remember the basic rules for caring for a plant:
- it is necessary to water the bush at the root, avoiding water getting on the leaves and inflorescences;
- before the beginning of the vegetative period, the daylily must be fed with nitrogen-containing substances. As soon as the first flowers appear on the bush, it can be watered with a solution of phosphorus and potassium. When the buds wither, the procedure can be repeated. Such actions will help the plant to more actively form buds for the next season;
- a young plant must be watered after planting;
- for the winter period, provide the shrubs with a reliable shelter. For this, spruce branches or straw are suitable.
Such a set of measures will help revive a weakened daylily and restore its ability to bloom.
Growing krasodnev in a garden plot, you can get a bright decorative bush. The main thing is to make sure that no problems affect its flowering. If they occur, you need to know what is the matter, if the daylily grows poorly, and immediately take measures to eliminate negative influences.
vote
Article Rating
Appropriate daylily care
After planting, the plants need watering and care. There are no strictly defined rules. Experienced growers, based on their practice, recommend adhering to some simple rules when growing a daylily.
- The planted crops are watered daily for 7 days. Adult daylilies will moisturize only during prolonged droughts, and with exceptionally warm water, which is poured under the root.
- To prolong flowering, wilted flowers and faded stems are regularly cut.
- The root neck of the daylily is deepened strictly by 2 cm, otherwise the flowers may not appear at all and will have to be transplanted.
- After watering, the soil must be loosened.
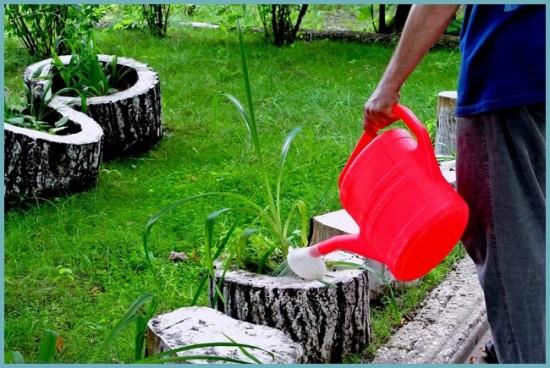 Watering the daylily
Reproduction of daylilies
Division of the rhizome of daylilies
The easiest way to propagate daylilies is by dividing the rhizomes during transplantation: this method allows you to preserve the characteristics of the parent species and variety in young plants. Usually bushes that have reached at least three years of age are divided. It is best to hold this event in the spring or summer, so that the dealers have time to grow roots before the autumn cold. You can start digging as soon as the leaves of the daylily grow 8-10 cm. The roots of the bushes extracted from the ground are placed in a bowl of water so that the earth moves away from them, or they are washed out with a strong jet of water. Then the root system is examined, rotten, damaged and dried roots are removed, roots that are too long are shortened to 15-20 cm, and the sections are treated with crushed coal or fungicide. To divide the rhizome, you just need to pull on one or another fan of leaves. If a break occurs in any area, treat the injured area with a fungicide. Delenki are planted in the ground in the way we have already described.
For the implementation of the division of the rhizome, try to choose a not hot, and preferably a cloudy day. Autumn separation is best done after the daylilies have faded, but no later than a month and a half before the onset of cold weather.
Seed reproduction of daylilies
The disadvantage of seed reproduction of daylilies is that it does not preserve the varietal characteristics of the parent plant in the seedlings, so it makes sense to propagate only species daylilies in this way. However, since today in garden pavilions and specialized stores a wide range of both species and varietal representatives of this crop is presented, the method of growing daylilies from seeds is mainly used by professionals and breeders, whose goal is to get new varieties and hybrids of this plant.
Reproduction of daylilies by leaf rosettes
When the daylily has faded, rosettes of shortened leaves can be found in the axils of the leaves on the peduncles of some varieties. These sockets are used for grafting. How can it be done? Here's a rough outline:
- do not cut the rosettes from the plants until they have formed roots (if you cut it before they appear, hold the rosette in a container of water until white threadlike roots form);
- in order to give stability to the handle, cut the rosette 4 cm above and 4 cm below the node;
- a rosette with strong roots, cutting off the leaf bundle at a height of 8 cm, is planted in the fall in a light substrate covered with a layer of sand 1 cm thick, and placed in a bright place until spring. Care consists in watering, feeding and supplementary lighting. If you have 6-8 weeks before the cold weather, it makes sense to plant a rosette with good roots directly in open ground, dipping the roots in Maksimarin-gel with Kornevin for confidence.
The percentage of successfully rooted daylily cuttings is 80-90%.
Secrets of growing daylily
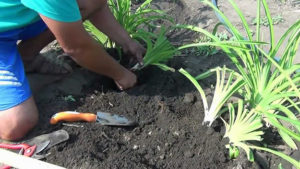 Daylily photo
Surely almost every gardener has daylilies. The variety of varieties and ease of care do not leave indifferent both beginners and avid lovers of flowering perennials.
More than 60 thousand varieties, both hybrid and natural, are different in color, size and shape of the flower, the height of the bush and the location of the peduncles.
Terry, simple and corrugated, plain and variegated - all of them can become an irreplaceable decoration of the site.
Daylily photo
How to choose a good seedling
Daylily is a rhizome plant and reproduces by division. An incorrectly and inopportunely divided bush can die
When buying a seedling, you should pay attention to the condition and number of roots. They must be elastic, and the socket itself must not be damaged or cut.
You can safely buy planting material in late autumn or even winter. Many nurseries offer different varieties for selection from catalogs. A good seedling can be stored for several months before planting. When purchasing in late autumn, the plant should not be planted.
It is best to place it in the refrigerator and store it until it buds at 3-8 ° C.
Daylily photo
Planting a seedling in open ground
When buying seedlings in spring or summer, you can immediately plant them in a permanent place. Daylilies perfectly tolerate transplantation and division during the period of active growth and flowering. After the end of flowering, it is better not to disturb the plants. At this moment, they begin a period of transition to a state of rest.
The soil for growing these incredibly beautiful flowers must be well drained and also well fertilized. If daylilies bloom poorly or do not produce peduncles at all, it is worth adding a complex of organic fertilizers. On too acidified soils, these garden flowers do not show themselves well. Avoid planting in acidic soil or take measures to neutralize it.
For planting, both sunny and fairly shaded places are suitable. It is worth considering the characteristics of the varieties of daylilies. Dark-colored flowers in bright light will quickly lose their shape. Given that the flower only blooms for a day, the sun cuts its attractive appearance in half.
But the light varieties of daylilies will feel great in open flower beds. In the shade, they may have a faded color.
For these reasons, when buying seedlings from photographs, do not forget that, most likely, the samples were grown in the correct lighting conditions and will match in color if all planting requirements are met.
To plant the daylily in the ground, prepare a hole so deep that the roots of the plant can be vertically located in it, and their base is at a depth of no more than three centimeters. It is not necessary to deepen the seedling too much. This will help prevent decay of the root system. After planting is complete, compact the soil around the plant and water liberally.
If you plan to plant a plant in a permanent place that has been stored for a long time with an open root system, then in two to three days place it in the Kornevin solution to achieve the highest viability.
Daylily photo
Leaving and reasons for the lack of flowering
Daylilies are unpretentious and completely easy to care for. They perfectly tolerate a prolonged absence of watering, provided they are planted in a suitable soil quality. Watering is carried out at the root until the soil is completely saturated with water. Avoid getting moisture on the flowers during the flowering period. In this case, in a matter of hours, they will lose their decorative effect.
The lack of flowering can cause several reasons that are simple enough to eliminate. With an excessive deepening of the base of the rhizome into the ground, the daylily does not bloom or gives a small number of peduncles.This problem can be easily solved by replanting the plant to a new location, following simple rules that will ensure abundant flowering.
Excessive moisture content in the soil for a long time also leads to the absence of peduncles on daylilies. This can happen if the plant is planted in heavy soil that can hold water. In this case, a transplant will also help.
Excessive potassium or phosphorus content in the soil can cause the daylily to fail to bloom. It is difficult for an ordinary gardener to determine by eye what element in the soil is in excess. Therefore, it will be quite difficult to take measures to correct the composition of the soil.
The easiest way is to transplant the plant to a new location.
Various varieties of daylilies perfectly complement each other in group plantings. With their beauty they are able to win the heart of even the most fastidious and sophisticated gardener.
Planting a daylily
When to plant a daylily
Plants are planted from spring to autumn - planting time depends on your climate. If winter comes early and quickly in your area, it means that the daylily planted in autumn may not have time to take root before frost and die, because on average, a plant needs a month to take root. But if you choose garden forms with an early or medium flowering period, then even in latitudes far from the south, your daylilies may have time to prepare for wintering in the garden. In addition, mulching the beds with wintering daylilies can protect them from cold and frost.
In the photo: How daylilies grow in a flower bed
From these considerations, proceed when deciding when to plant flowers. Florists believe that the best time to plant a daylily is in the middle lane in May or August. It is also better to divide and replant daylilies in spring or August.
How to plant a daylily
Before planting a daylily, pre-purchased planting material should be soaked in water or highly diluted mineral fertilizer a few hours before planting in the ground so that the roots swell and come to life, and then you will immediately see which of the roots should be carefully removed. Cut the rest of the roots to a length of 20-30 cm.
In the photo: Young daylily
Dig a separate hole up to 30 cm deep for each bush or cut, and do not forget that you are planting a daylily for a long time, and the bush that has grown over time up to 50-70 cm in diameter should not be cramped. Pour a mixture of sand, peat and humus into each hole, add ash with superphosphate or potassium-phosphorus fertilizer, lower the roots into the hole, distribute them over a mound so that there are no voids under the roots, fill the hole with soil, but not completely.
Plant Heuchera - will look great next to
Then, holding the plant with one hand, squeeze the soil around it well, water abundantly, filling the hole with water to the brim (if the water is quickly absorbed, it means that you have poorly compacted the soil, so pour dry earth on top and compact it again), and only now pour soil to the edges of the hole
It is very important that the root neck of the daylily is at a depth of no more than 2-3 cm, otherwise growth retardation and the risk of plant decay are likely. If you did everything correctly, then the moisture received during planting should be enough for the plant to root.
Daylily transplant
Daylilies grow in one place for up to 15 years, but age affects the quality of flowering. As soon as you noticed that your already middle-aged luxurious daylily began to lose its former beauty, there are fewer flowers on its peduncle, and they themselves are smaller, which means it's time to plant a bush
Dig in the bush along its outer border and carefully remove it along with the clod of earth, being careful not to damage the roots. Place the roots under a strong jet of water to wash away the soil, then gently fan them apart.
With a certain skill, you can do without knives or pruners, but if you still had to cut the roots somewhere, treat the wounded places with a fungicide.
Planting and replanting plants is best in cloudy weather, and if you had to wait for it, dig in the delenki and daylily bushes in the sand so that new roots do not grow immediately, and you may not remember them for two weeks. Before planting, shorten the roots by removing the rotten and dead ones, trim the leaves to 15-20 cm in the shape of an inverted "V" and plant the cut in the place that you defined for it as described above.
In the photo: Dense planting of daylilies
Caring for a plant in the garden from spring to autumn
Daylily is deservedly considered a "flower for the lazy." But minimal care is also necessary for him:
- Watering. In principle, the plant has enough natural precipitation. But keep in mind that old varieties of daylilies are less drought tolerant than modern ones. In the heat, the flowers are watered every 3-7 days, spending 20-30 liters of water each. The soil should be saturated with water about 0.5 m deep. Watering is carried out in the evening. Avoid getting water on the buds.
-
Top dressing. There is no clear-cut scheme, it all depends on the nutritional value of the soil. The plant has a very negative attitude to an excess of fertilizers in the soil, even in the poorest substrate, daylilies are fed no more than once every 3 weeks, using any fertilizer for decorative flowering. Two dressings are required for them - in the spring, as soon as the leaves begin to grow (25–30 g of mineral nitrogen fertilizers per 10 liters of water, 5–8 liters per socket) and about a month after flowering (the same complex fertilizer). All dressings are applied only to wet soil or in the form of a solution.
- Mulching. Prevents the growth of weeds and rapid evaporation of moisture, prevents the soil above the root collar from turning into a crust. Layer thickness - 6–7 cm. An alternative to mulching is regular weeding and loosening.
-
Preparing for winter. Depends on the type of daylily. In sleeping leaves, the leaves die off in the fall, evergreens retain their rosette. Semi-evergreens in the southern regions of Russia do not lose their foliage, in temperate latitudes they are “balding”. If the plant is "dormant", the leaves are cut off, leaving 15–20 cm. The base of the rosette is mulched with needles, fallen leaves, sawdust (layer 10–15 cm). Evergreen daylilies are thrown with spruce branches and straw in the first 2-3 years after planting.
Landing rules
Daylilies are planted in open ground after a little preparation. At this stage, the roots of plant seedlings are carefully examined, dead, damaged or diseased fragments are removed using a sharp scalpel or pruner. Places of cuts are treated with charcoal powder.
The leaves of the plants are cut with pruning shears or garden shears, leaving only the lower part of them 18-20 centimeters high. This procedure is carried out to stimulate the growth of the green mass of seedlings after planting.
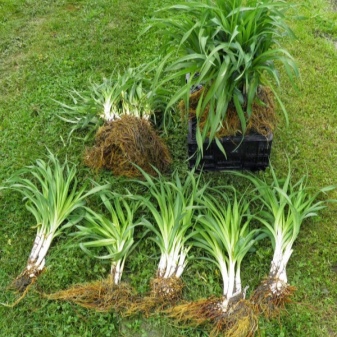
In parallel with the preparation of seedlings, planting pits are arranged with a depth of at least 30 centimeters. On heavy and dense soils, it is recommended to equip pits 1.5-2 times larger than the diameter of the root ball.
To fill the holes, it is advisable to use a fertile and loose soil mixture consisting of peat, leaf humus, garden soil and sand. Additionally, it is recommended to add fertilizers containing phosphorus and potassium to the soil mixture.
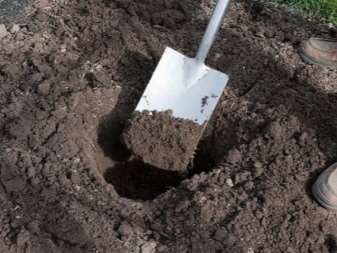
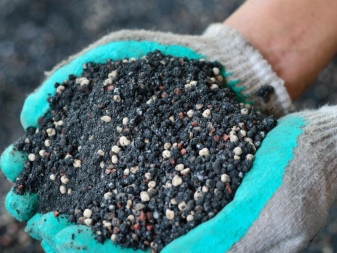
Planting seedlings is carried out as follows:
a small layer of drainage is laid at the bottom of the planting pit and a nutritious soil mixture is poured, forming a mound out of it;
holding the seedling by the root collar, place it vertically in the hole, after which the roots of the plant are carefully spread over the surface of the mound;
partially fill the planting hole with nutritious soil mixture, cover the roots, carefully tamp the earth around the seedling;
water the plant with warm, settled water and wait for it to be completely absorbed;
fill the hole with earth to the very top.
During planting, the degree of depth of the root collar should be monitored. It should be buried in the ground only 2-3 centimeters.Its deeper location in the ground in the future can negatively affect the development and growth of the seedling.
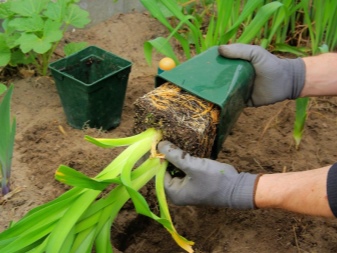
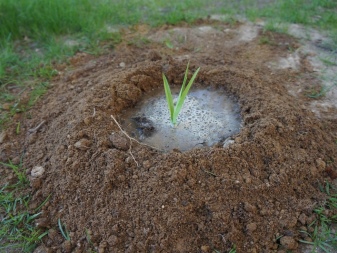
It is also important to consider the recommended planting dates for daylilies. These flowering perennials should be planted in open ground in the spring or during the summer (depending on the climatic characteristics of your region)
Autumn planting can threaten the fact that the plants will not have time to take root in a new place before the onset of cold weather. In particular, it is not recommended to plant beautiful days in autumn in regions with early winters.
Observations show that it takes 3-4 months for seedlings to adapt to new conditions. This time is usually enough for young daylilies to fully take root in a new place.

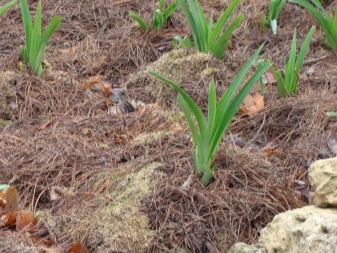
How to choose high-quality planting material when buying?

Daylily rhizomes
Shops and gardening centers offer daylily rhizomes. Before purchasing, you should carefully inspect the transparent plastic wrap to ensure that the root system is vibrant, healthy and dense. It should be taken into account that if there are few roots and they weak and thin, then such a plant will gain strength for flowering for another 2-3 years. The rhizome should not have soft and rotten parts.
When buying new products, you should find out how the variety or hybrid is adapted to the local climate. Hundreds of new daylilies appear on the market every year. Most of these plants were bred in the subtropics of the United States and it may happen that in the middle Russian latitudes their acclimatization will be difficult, therefore, experts often advise flower growers not to forget about old reliable and proven varieties.
Examples in landscape design
Unpretentiousness, richness of colors, shade tolerance and winter hardiness determined the popularity of daylilies in landscape design. These beautifully flowering bush perennials are able to organically fit into the atmosphere of any garden.
Krasodnevs are equally attractive in both single and group plantings. Low-growing and border varieties of daylilies are used by designers to decorate alpine slides and rocky gardens, to create low flower beds and hedges. With their help, you can delimit the backyard territory, highlight its main functional areas, and designate the location of garden paths.
The proximity with other plants allows you to emphasize and enhance the expressiveness of flowering daylilies. However, here it should be borne in mind that these colors need an appropriate background. In this case, lawn grasses, tall conifers and deciduous crops planted in the background can be used as background plants.
Blooming daylilies, growing with hosta, tulips, daffodils, hyacinths, look very impressive.
The classical scheme for arranging a flower garden with daylilies and other ornamental crops provides for the observance of a certain order when placing plants. So, tall plants are always placed in the background, medium-sized ones - in the central part of the flower garden, dwarf ones - in the foreground.
A flower bed of perennials blooming throughout the summer will fit well into the landscape of any backyard area. In the foreground of such a flower bed, you can plant undersized Gaillardia and Heliantemum, in the central part - a medium-sized daylily, a catchment and hybrid tea roses. A tall lavatera and a fan can be used as background plants.
When arranging flower beds of daylilies and other perennials, the color of flowers and foliage of plants should be taken into account. For example, daylilies with purple and red flowers will look great against the background of purple and white phlox. Purple and blue delphiniums will help emphasize the beauty of yellow-lemon beauty days. Graceful thuja with emerald needles will be a wonderful backdrop for daylilies with flowers of coral shades.
In the next video, the correct planting and reproduction of daylilies are waiting for you.
3 Landing rules
In order to get healthy and well-developed plants, you need to know how to plant a daylily. They are light-loving plants, but direct sunlight is contraindicated for them, which can cause burns to both foliage and buds. Therefore, it is best for them to choose lightly shaded areas. Bushes planted in strong shade will develop poorly, and flowering may not come at all.
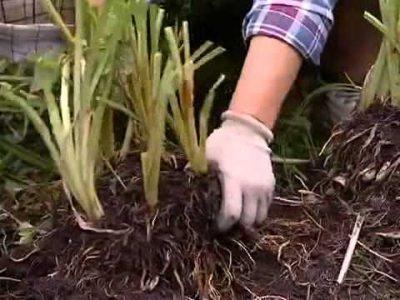
The land for planting these plants requires loose and very nutritious with a slightly acidic reaction. On clay soils, moisture stagnation will form, which adversely affects the condition of plants, causing fungal diseases. Sandy areas will dry out too quickly and lose nutrients.
For planting daylilies in a prepared, dug area, holes are made with a depth of at least thirty centimeters. They should be located at a distance of at least sixty centimeters from each other, since the daylily bushes grow rapidly and can interfere with neighbors in the flower garden. Next, you need to prepare a nutritious potting soil mixture:
- Sod land - three parts;
- Humus - two parts;
- Peat - one part;
- Coarse sand - one piece.
With this substrate, it is necessary to fill the prepared wells and plant the plants. Before this, the root system of each bush must be cleaned of soil residues, rinsed and dried and rotten roots removed. The cut points must be covered with crushed activated carbon to avoid further decay. The bushes are located in holes, covered with soil and slightly compacted. The root collar of plants should not be deeply buried in the soil. After that, the seedlings should be watered and covered with peat or sawdust. During the growing season, it is recommended to sprinkle the base of the bushes, if necessary, with a soil mixture about five centimeters so that the rhizome does not come to the surface. A daylily planted in spring usually blooms in the first year of growth.

Reproduction of daylilies
There are several ways to breed daylilies, each with their own advantages and disadvantages.
Dividing the bush
The easiest and most common way to get young daylilies, which in all respects will be identical to the mother's. If necessary, the bush can be divided throughout the growing season. As a rule, separation is started when the plant reaches 3-4 years of age. Another signal for transplanting is the chopping of flowers. The optimal time for dividing is the first half of summer - the beginning of autumn, then the plant will have time to get stronger before the onset of frost.
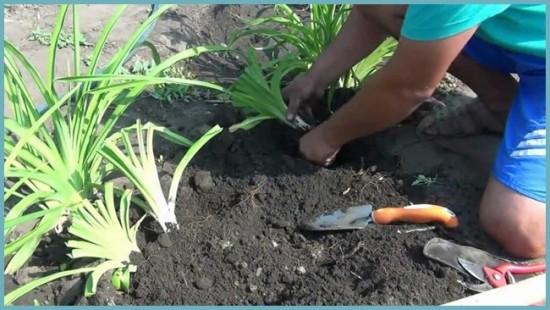 Dividing the daylily bush
Seed reproduction
It is used only for breeding activities, since in everyday life daylilies planted by this method are not able to maintain their specific characteristics.
Reproduction by offspring
Subject to all transplantation norms, it allows you to increase the number of plants from one manufacturer, while maintaining all species characteristics. But before planting outlets in open ground, you should plant them in pots and put them in a warm place for several weeks.
Daylily propagation by offspring If there are still 6-7 weeks before frost, plant the sprouts in the fall, and if they did not have time to take root, then in the spring (in mid-May).


