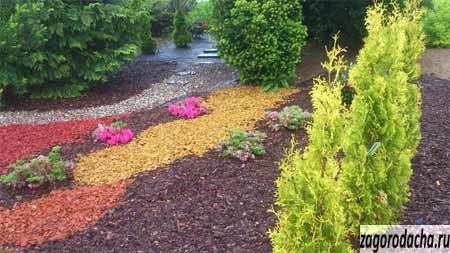
Top substrate manufacturers
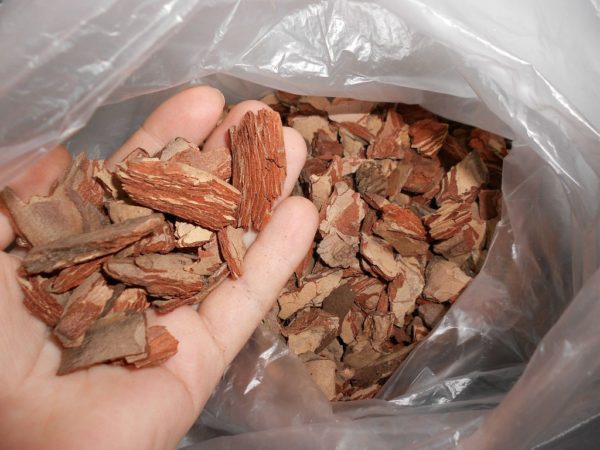 It is not difficult to prepare the bark on your own, however, some growers prefer to use an industrial substrate (with a complex of additional components). You can save time on collection and processing, but there is no guarantee that the store will have quality material without pests and pathogens. Unreasonable savings when choosing a purchased mixture threatens with the loss of a flower.
For those who do not have nearby plantings, forests, parks or woodworking industries, there is only one option, choose a ready-made substrate. But how to do this when there are many options and there is no way to get detailed, reliable advice. In order not to risk it, you need to buy mixtures from reliable firms verified by flower growers, we will describe the products of several of them.
| Substrate name and country of origin | Description |
| Morris Green (Russia) | Pine bark, suitable for all orchids. Raw materials processed from infections and parasites, consists of large fractions |
| Orchiata (New Zealand) | Granular material that does not cake for a long time. The substrate does not need to be processed, it is released already disinfected. Used for many types of indoor orchids |
| Complex Seramis (Germany) | Due to its balanced composition (bark, clay, nutrient complex, moisture regulator), the mixture remains friable, does not cake and does not become dense over several years |
| Royal mix (Ukraine) | Loose substrate consisting of bark, peat, charcoal, compound fertilizer and coconut fiber. The mixture itself retains its breathable structure for a long time, maintains a normal temperature, and protects the roots from various infections. Rich in magnesium, zinc and iron |
| Bio effect (Russia) | The mixture consists of Angara pine bark with the addition of dolomite flour (to normalize acidity). The product is suitable for all types and varieties of orchids, it is breathable, contains a large number of microorganisms that increase the immunity of the flower |
The main manipulation in the industrial processing of bark is debarking, during which the raw material is crushed, sand and other excess components are removed from it. The manipulation is carried out on large debarkers OK-66M and OK63-1. In the process of processing, the product becomes fresher, more breathable, its quality is doubled. After debarking, disinfection and other procedures are carried out.
How to plant a flower in a pot
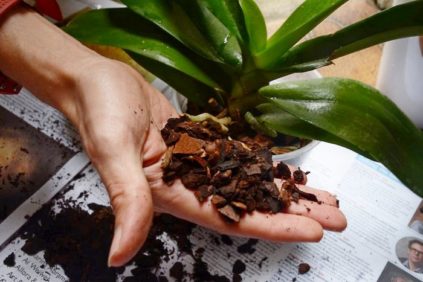 When planting orchids, the prepared bark is mixed with other components. A container for planting, drainage (expanded clay, pieces of foam), additional components of the mixture (charcoal or activated carbon, crushed peat, sphagnum moss) are prepared in advance.
They buy them in a store or procure them on their own. It is not difficult to collect the mixture: the components are mixed, maintaining the proportions: about 0.5 kg of moss, the same amount of charcoal and 0.3 kg of peat are taken for 10 liters of bark. If activated carbon is added, then 30 tablets are crushed.
Note! Peat is added only for those types of orchids that require enhanced nutrition. Additionally, the mixture may include broken brick, perlite.
Oak bark is suitable for Phalaenopsis orchids, the other components of the mixture remain the same. A number of gardeners grow orchids only on one bark, without adding components.
Filling the pot
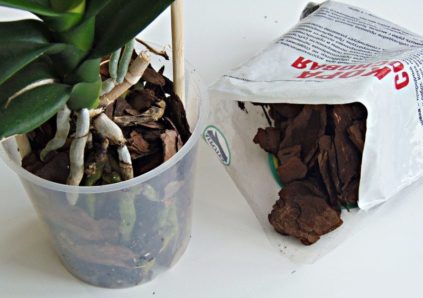 The container must have holes for the drain of excess moisture (on the bottom and along the bottom of the walls). Select plastic transparent or ceramic pots, taking into account the characteristics of the plant variety.Dishes and tools used must be disinfected with alcohol.
Drainage is calcined in the oven - pebbles, expanded clay. Then the first layer of drainage (2-3 cm) is poured onto the bottom of the container, on which the plant is installed.
Technology
The plant is previously removed from the old container. They exclude any damage to the roots during transplantation, therefore, if necessary, the pot is cut (if it is made of plastic). The orchid itself is dipped in water, the roots are gently washed. Cut off all deformed, rotten parts with a sterile knife, sprinkle the sections with charcoal. Places of trimming shoots and leaves are treated with iodine, brilliant green solution.
Next, the bush is kept in air to dry the roots (2-4 hours) and only then placed in a new container. The plant is installed with roots on the drainage, gently straightened, then sprinkled with a substrate. Tamping is not required, but there should be no voids in the container. The growth point should be above the surface after backfill.
Attachment methods
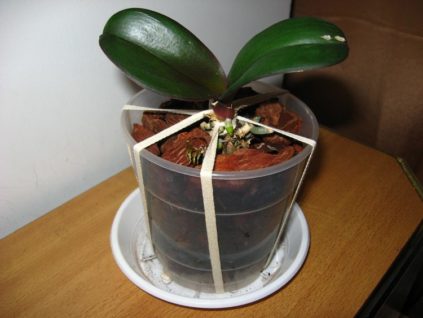 The orchid must be firmly fixed in the container. During the flowering period, the weight of the inflorescences is large, the plants can tilt, the shoots can break. For the stability of the plant and the support of the peduncles, various supports are used. A variety of devices come into play:
- plastic pins (sold with orchid pots);
- wooden sticks (can be used for rolls);
- wire.
Peduncles are tied up with a soft woolen thread, attached with hairpins "crabs". You cannot drag the shoot, otherwise it will dry out.
When growing epiphytes in a hanging position, no supports are placed. The flower stalks of plants hang down freely, as in the wild. It remains only to securely fix the plant in a container or on a block, to monitor the condition of the peduncles.
The bark can be used to grow orchids on blocks. But in this case, it is not suitable not crushed into fractions, but prepared in whole large pieces of raw materials. Bark is suitable for blocks:
- pine trees;
- oak;
- tree fern.
A hole is made in a piece of bark for fasteners, a hook is installed on which the block will hang. The plant is carefully placed on a block, the roots are fixed with a net, thin wire, nylon ribbons (stockings or tights can be cut into strips). It is advisable to plant the orchid so that the leaves look down, it is easier to prevent moisture from entering and stagnating in the sockets.
If the air in the room is dry, a little sphagnum is placed on the block under the roots or covered with coconut fiber, small bark. With sufficient air humidity (70-80%), the plant is placed directly on the surface of the bark.
Watering
After planting, it is important to ensure the first watering of the exotic inhabitant. To do this, the pot is immersed in a bowl of water so that moisture will saturate the substrate through the pan.
The duration is 15-20 minutes. Then the pot is removed, the water is allowed to drain and the container is placed on the shelf, window sills.
For plants planted on pieces of bark, watering is arranged more often, but the degree of moisture in the bark is controlled. Its excessive moisture and decay should not be allowed. It is also recommended to regularly spray the air around the flowers.
Traditional medicine recipes
 Regular consumption of pine extract improves memory, promotes recovery from concussions and head injuries.
The action of the active components of the Scots pine bark is used to increase the body's immune defenses, treat chronic fatigue, heart failure, and osteoporosis. It is recommended to apply a yellow film of young shoots to wounds, ulcers, carbuncles, boils. Regular consumption of pine extract improves memory, promotes recovery from concussions and head injuries. Chewing a piece of cinnamon is prescribed by herbalists for throat ailments. Gargling with broth helps to eliminate bleeding gums.
For cardiovascular disorders

Ingredients:
bark of pine and weeping willow - 100 gr.
Preparation:
Dry natural components, grind to a powdery state, mix. Take the resulting mixture for 1 tsp. in 30 minutes before the first meal.
To lower cholesterol
Collect the pine bark from young twigs. Dry, grind in a coffee grinder to a powdery state. Take 0.5 tsp. before meals 1 time per day, drinking plenty of water. Duration of treatment is 3 weeks. If necessary, take a break for 7-10 days and repeat the treatment course. It is recommended during the period of therapy to consume a lot of plant foods, especially pumpkin, beets, onions, garlic, mint, lingonberries, viburnum.
For hypertension

Ingredients:
- chopped pine bark - 2 tbsp.;
- vodka - 1 l.
Preparation:
Mix the components in a glass container. Place in a dark, warm place for 3 weeks, shaking the contents of the jar regularly. Strain, pour into a clean bottle. Take 1 tsp. before meals 2 r / d for 2 months.
From impotence

Ingredients - cinnamon trees in parts (collect in spring, strictly until mid-March):
- Scots pine - 1;
- juniper - 1;
- fir - 1;
- spruce - 1;
- birch - 1;
- aspen - 0.5;
- poplar - 0.5;
- apple tree - 1;
- linden - 1;
- oak - 1;
- larch - 1;
- alder - 1;
- willow - 1.
Preparation:
Dry the collected raw materials, remove dirt and insects, finely chop with a sharp knife or garden shears, mix. 1 tbsp. pour the resulting mass into 2.5-3 liters of hot water, boil with low heat for 30 minutes. Wrap well, leave for 12 hours. Strain, pour in 0.5 l of vodka, put in the refrigerator. Take 0.5 cups 3 r / d 30 minutes before meals.
Preparing the bark for orchids at home
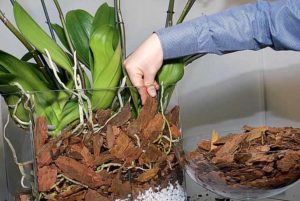
Features of soil for orchids
An orchid growing in a rainforest in its natural environment uses tree trunks or crevices in stones for support. From there, it extracts nutrients with its roots, and absorbs moisture from the air.
Part of the root system is hidden in folds on the bark of trees, while others remain in the air.
In addition to nutrients and water, the plant requires air, since the processes of photosynthesis are carried out by leaves and roots.
A suitable soil allows air to pass through well and maintains the desired moisture level. Therefore, when growing at home, the Phalaenopsis orchid is placed in a special substrate, the main element of which is tree bark.
It is lightweight, moisture and air permeable. Due to its composition, natural bark is a good source of nutrients. It promotes the growth and proper development of the flower, prolongs the flowering period.
Which tree bark is suitable for orchids
Among all tree species, pine bark and spruce are more commonly used for orchids. Raw materials obtained from cypress, cedar or thuja decompose slowly. Therefore, it is rarely used for the cultivation of epiphytes.
Oak bark and other deciduous trees work well for orchids. But in practice it is very difficult to find a deciduous tree whose bark can be used to plant epiphytes.
It is difficult to separate from other tissues.
The necessary substrate for epiphytic plants is often bought ready-made in stores. In addition to the bark, it contains nutrients. Therefore, the ready-made store-bought soil allows you to immediately start growing the plant, without wasting time on preparing and processing the material, mixing the components.
For self-mixing of the soil, a coarse bark is needed. Suitable material is obtained in parks, in the forest, in the woodworking enterprise.
You can go to the forest specifically to harvest pine bark, combining a pleasant walk with collecting material.
Preparing the bark for planting an orchid with your own hands
To prepare the bark of pine or other tree species for use as a substrate for planting epiphytes, preparation is carried out in several stages.To carry out the work, the following tools are required:
- long and short handled knives;
- a spatula made of wood with blunt edges;
- rope;
- galvanized bucket.
How to collect material
It is necessary to collect raw materials only from already dead trees, where the bark has already begun to flake off. This material is easy to prepare, since it is easily separated from other layers of wood. When tearing off the bark, it is necessary to ensure that the bast fibers do not come off along with the bark.
The selected bark should be of an even shade without darkening and blackness. The material is chosen dry. If it is ripped from a large trunk, it is best to use the upper part of the plant. After separation, the bark is tapped to get rid of insects hiding in the cracks.
Shredding
To prepare the bark for planting an orchid, it must first be crushed to the desired fraction. With the help of a secateurs, it is cut into small pieces of the same size.
For small orchids, pieces between 1 and 1.5 cm are suitable.For larger plants, pieces with sides of 2.5 to 3 cm are used.
Very small pieces will come in handy to make a mixture and grow epiphyte babies in it.
Soak
To prepare the substrate, the crushed bark is soaked in a solution of a preparation that destroys insects and pathogens. From above, the raw material is pressed with a light press so that the pieces do not float. Then the disinfected raw material is washed and dried.
At home, boiling can be used instead of soaking. The raw materials are placed in a galvanized bucket and poured with water, a small press is installed on top. In boiled water, raw materials must be cooked for 50 to 60 minutes. The bark should be boiled over low heat. After turning off the fire, the bark is left to cool without being removed from the water.
Oak roasting can be used to disinfect oak bark. To do this, pieces of bark are placed on a baking sheet and placed in an oven heated to +80 degrees for a quarter of an hour. This method of disinfection saves time and effectively destroys insect larvae.
Drying
The boiled bark is dried naturally. To do this, it is laid out on a dry, flat surface. It is advisable to dry the bark under a canopy or in a well-ventilated place.
Turn the pieces periodically. The whole process until the bark is completely dry takes from 20 to 30 days. You can check the readiness of the material for a break.
If the inside of the piece is dry, then the bark can be used to prepare the substrate.
How to plant an orchid in a pot
Before transplanting Phalaenopsis into a new substrate, examine its roots. For this, the root system of the extracted plant is washed under a stream of warm running water. Then the roots are carefully examined to detect damaged areas, signs of rot or insect infestation. All damaged parts are carefully cut off with sharp, disinfected scissors. Places of cuts are disinfected with cinnamon powder or crushed coal. If traces of the presence of insects are found, the root system is soaked for 20 minutes in an insecticide solution, then dried with napkins.
When transplanting a plant into a new container, proceed in the following order:
- The container is disinfected and a 3 cm thick drainage layer is laid.
- A layer of fresh soil is poured on top.
- Then the orchid itself is located. Its roots are evenly distributed over the surface of the soil. The base is positioned so that it is 1.5 lower than the edge of the container.
- Before backfilling the roots with a substrate, a support is installed close to the base of the bush. This will help avoid injury to the root system in the future.
- Gradually fill up the soil, closing the root system. Shake the box periodically to fill all voids.
It is not necessary to transplant the orchid into the substrate. Large blocks made from large pieces of bark can be used to anchor the plant.To fix the flower on such a block, cover it with a small amount of sphagnum. An orchid is placed on top and tied to the block using a soft wire of small thickness or fishing line.
After planting, watering is performed by immersing the container in water. After a quarter of an hour, it is taken out and the excess liquid is allowed to drain. Irrigation in this way is carried out every 10 days. It is possible to decrease or increase the interval between irrigations, depending on the microclimate in the room.
How to collect the mixture
DIY orchid soil can include:
- dried pieces of pine bark;
- fresh marsh moss (sphagnum);
- Activated carbon:
- scales of pine cones (they are separated, poured with boiling water for 5 minutes and dried).
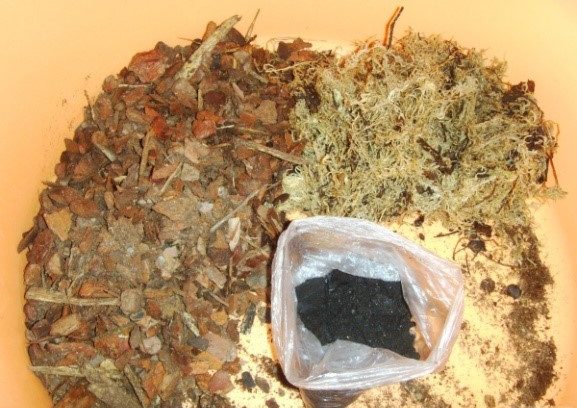
After preparing all the components, you can start mixing them.
Scales are not necessary for use, bark, moss and coal are enough. Store-bought moss will be dry and brownish in color. You can pick fresh green moss with your own hands. It grows in any lowlands or wetlands.
You need to look for moss away from the roads, next to a reservoir where there are stones and tall greenery. The collected moss is cleaned of litter, bugs, twigs and poured with warm (not hot!) Water for about fifteen minutes. During this time, the remaining insects will float up, they can be carefully drained along with the water. The workpiece is washed under running water and the moss is allowed to drain. Thus, you can prepare a living natural antiseptic with your own hands.
Before mixing the soil, the moss must be chopped with scissors, and the activated carbon must be crushed. For an 8-9-liter container with bark, a half-kilogram package of crushed dry moss (or more) and 30 tablets of activated carbon are enough.
The ingredients are thoroughly mixed and laid out in bags if the mixture, prepared by hand, is intended for storage. During transplantation, it is recommended to select whole large pieces from the old substrate and mix them into the new mixture. This will allow the fungi to which the plant is accustomed to transfer to the new soil.
Soil for Phalaenopsis orchids, prepared by hand, may contain not only pine, but also high-quality deciduous bark (spruce, oak, birch). But finding good deciduous material on your own is quite difficult - deciduous trees with peeling bark are rare in nature. Therefore, most often experts opt for pine. In addition, the rate of decomposition of the pine bark is low and allows replanting the orchid every two to three years.
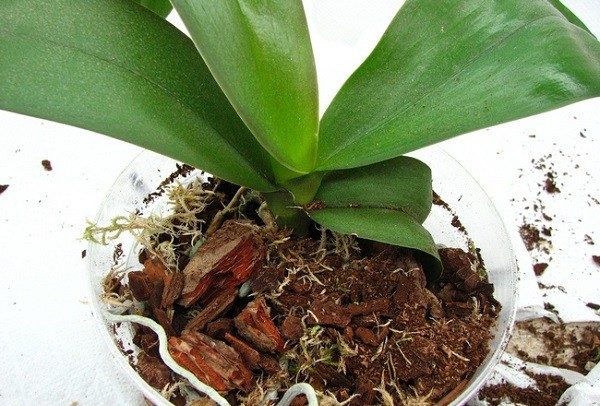
Self-prepared orchid substrate has advantages over purchased
A reliable soil for transplanting orchids must be chemically and biologically inert, have good air permeability, and at the same time perfectly retain moisture. A self-prepared substrate, in compliance with all the rules for harvesting, processing and storage, will serve as a reliable basis for growing healthy and beautiful orchids of various types.
Orchids in popularity in recent years have managed to overtake many houseplants familiar to our latitudes. Not only experienced flower growers are involved in the cultivation of orchids, but also beginner amateur florists.
Often, for a number of reasons, flower growers do not have the opportunity to purchase a ready-made planting substrate if it is necessary to reproduce orchids or transplant an already adult plant. In this case, you can always find a way out of this situation and do the preparation of the planting substrate with your own hands.
How to transplant flowers
By the amount of land to be replaced, the following types of transplants are distinguished:
- Complete transplant - when all the old earth is removed, this is done when the land is completely unusable and all nutrients are lost by it.
- Incomplete transplant - when more or less of the earthy coma remains in the roots.
- Renewal of the top layer of the earth - when part of the land is replaced by humus soil, since during irrigation, nutrients are leached from the top layer.
Transferring plants is a technique close to transplanting, with the difference that a clod of earth should remain mostly intact, and the plant is transplanted into a larger pot. This technique is suitable for young herbaceous, fast-growing plants that cross several times during the spring-summer period. Transshipment, in contrast to full transplantation, does not slow down the growth of plants. In young plants, it is not necessary to allow the formation of a felt-like layer of roots, but to carry out transshipment when the roots have not yet filled the entire pot. Transshipment also applies to plants that do not tolerate transplanting due to possible root damage.
The transplant is usually carried out in the spring from March to May. Delicate plants are transplanted a little later. Plants blooming in spring are transplanted at the end of flowering. If you transplant a plant at the time of flowering or budding, then it can shed both flowers and buds. In the summer, after spring flowering, conifers are transplanted. Plants that were in warm rooms are transplanted later than those that were in cool ones. Bulbous plants are transplanted at the end of the dormant period.
When transplanting plants, after the plant has been removed from the pot, carefully clean the soil from the roots with your hands or a stick and unravel the intertwined roots, being careful not to damage them. The root felt is removed with a sharp knife.
Also remove all rotten roots, if any. The cuts of the thick, juicy roots are sprinkled with crushed charcoal to prevent decay.
At the bottom of the pot, good drainage is arranged: one or more shards are placed on the drain hole, hump up, expanded clay 2-3 cm in height, and pieces of polystyrene can also be used as drainage. Good drainage has not prevented any plant, even if it says somewhere that the plant does not need drainage, do not be lazy and do drainage anyway. On top of the drainage, earth is poured into which pieces of charcoal are added, and the plant is lowered so that the root collar is at the level of the edges of the dishes or slightly lower, but not covered with earth.
The gaps between the pot and the roots are covered with earth, which is pushed through with a stick. Tapping lightly on the side of the pot also helps the soil to fit more tightly into the pot.
When transplanting a plant with thick or slightly branched roots, it is not recommended to prune them, since such roots do not tolerate pruning and damage well. Acacias, some conifers, orchids, bulbs and many other plants with a weak root system do not tolerate root pruning. Plants such as cyclamen, calathea or spathiphyllum also require careful handling when transplanting.
The entire transplantation procedure should not be stretched for a long time, since the roots of the plant removed from the pot quickly dry out and become injured. In general, it is better to prepare for the transplant in advance - choose the right tool, pick up and process pots, water for irrigation, charcoal, drainage, sticks for tying plants, a root formation stimulator, a spoon for adding earth, scissors, etc., i.e. everything that may be needed so as not to rush around the apartment during the transplant process, when all hands are in the ground.
Plants should not be transplanted in hot weather. When transplanting, plants are well watered and sprayed. But in the following days (a week or two), watering is limited. (After transplanting cacti are not watered at all for 6-7 days.) In addition, after transplanting, the plant is shaded and protected from drafts.
If rotten roots are found during transplantation, then they are removed with a knife, the old earth is thoroughly shaken off from the roots, the roots are washed with water. The cuts are sprinkled with charcoal and the plant is planted in fresh soil.If most of the roots are removed, then the plant is transplanted into a smaller pot.
Such plants, which had rotten roots, are watered especially carefully after transplanting.
Pine bark has long been widely used in personal plots, flower beds and indoor plant growing. If you have not come across such useful material in floriculture or gardening, then our article will be of interest to you. So why do you need pine bark?
Useful Tips
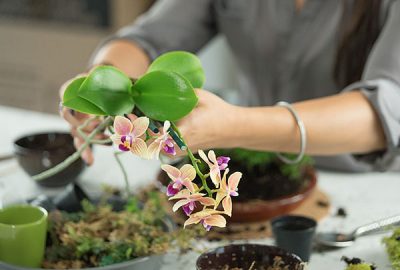
Flower growers have to deal with leaf wilting immediately after transplanting. This may indicate not only too little watering. The flower tolerates the lack of moisture surprisingly well, in contrast to mechanical damage. When transferring, the roots suffer more often, for which it is difficult to adapt to new conditions. The main causes of wilting can be:
- fractures of the main roots;
- overconsolidation of the substrate;
- lack of nutrients.
By focusing on which tree bark is best suited for a particular type of orchid, you can prevent micronutrient deficiencies. But if the substrate gives up few useful substances, you can carry out top dressing by making a weak solution of nitrogen and mineral fertilizers. To heal damaged roots, the forces of the flower need to be redirected. To do this, place it in a shaded place with a low temperature and leave it in this state for 2 weeks. The greens will stop developing, during this time the roots will be restored. Then resume care according to the standard regimen.
If the leaves begin to turn yellow, you need to carefully examine the flower. The discoloration of the oldest, inferior formations is quite normal. You need to wait until they completely wither and carefully separate. When the upper leaves turn yellow, check the conditions of detention. If the roots are green, it means that excess moisture is possible and you need to reduce watering. If brown and gray roots are visible, which slightly change color after watering, increase the moisture. It is necessary to protect the orchid from drafts and direct sunlight.
A common problem is the lack of flowering after transplanting for a long time. Experienced florists advise to cope with this by immersing the plant in conditions of artificial stress. Significantly reduce watering, completely cancel feeding, remove any lighting. After two weeks of this regime, the orchid is likely to release its buds abundantly.
How to cook it yourself?
Before starting work, you should definitely find out how to properly prepare and process the bark of a pine or other tree yourself. The further flowering of the orchid depends on the processing. There is no need to neglect any stages of preparation. Follow all the recommendations, especially if you are faced with this for the first time.
Required tools
Cooking equipment:
- A knife, without it, it will not be possible to separate the bark from the tree. It is best to have 2 knives: short and long handled.
- A wooden spatula with blunt edges, it is convenient for it to remove material. With the help of a spatula, the probability that part of the wood will catch on with the bark is small.
- A bag or bag for folding the bark.
Collection
There are certain collection rules:
- Bark particles should not show dark or black areas from coal, signs of rotting and decay.
- The drier the bark, the better.
- When collecting from a large barrel, it is best to start removing material from the top.
- Before folding the bark, you need to tap it on the ground to remove insects.
There should be no wood residues on the bark. If they do exist, the material must be cleaned.
Shredding pieces
Before processing, the bark is crushed; in the future, the crushed bark is more convenient to process and it will dry faster.
How does grinding work?
- A large piece of bark is taken and cut into pieces of suitable size with the help of a secateurs.
- Then the top layer is removed and the rotten areas are cut off.The material must be carefully examined, cleaned of insects and larvae.
- Then the raw material is cut into cubes from 1.5 to 2 cm and sorted. Perfectly even and identical cubes will not work, but this will not affect the quality of the soil.
How to cook correctly and how much?
Cooking the bark, which you have prepared yourself, is the most important stage, since the material is disinfected and getting rid of insects, fungi, larvae and resin.
The boiling algorithm is as follows:
- Raw materials are placed in a galvanized bucket and filled with water (the amount of water depends on the volume of the bark).
- It is necessary to provide a press, because during the cooking process, the bark will periodically float.
- After the water has boiled, you need to cook the bark for about 60 minutes over low heat.
- Then the container is removed from the fire. After complete cooling, the water is drained through a colander or sieve.
For reference! If a galvanized bucket is not available, then you should use utensils that will not be used in the future for cooking.
Competent drying with your own hands
It is better to dry the bark naturally. It is advisable to dry it indoors, so you can reduce the risk of fungi and larvae in the material. If it is not possible to dry it indoors, then be sure to cover the bark with a suitable material. The process can take 2-4 weeks. To check the dryness of the material, it needs to be broken.
Are additional components needed?
Suitable additional components:
- sphagnum moss;
- charcoal;
- peat;
- dry leaves, etc.
All components are taken in equal proportions, they bring various useful properties into the soil (air permeability, moisture retention, etc.).
Soak
Soaking can also get rid of possible larvae or bacteria. The raw materials are poured with an insecticide solution, a press is placed so that the material does not float.
The bark substrate can be kept in plastic bags, but do not close tightly to prevent ventilation.
Harvesting bark
Most often, pine bark is used for mulching the soil in the garden and vegetable garden. It is easily procured and has the greatest decorative effect. However, you can also use the bark of other trees.
You can buy bark mulch from the store. Today, many producers offer small, medium and large bark. The latter is the most decorative and is often used by professional landscape designers.
In addition to tree bark, many manufacturers also offer wood chips for soil mulching. Sometimes it is painted in various bright shades, which allows you to create original compositions and drawings on the site.
But if you decide to prepare the bark yourself, it is important to consider a few points:
bark is best harvested in spring or autumn;
harvesting bark from living plants is unacceptable, as it will lead to the death of trees;
tree bark is not harvested from young trees;
it is advisable to choose trees for harvesting tree bark that were felled no more than six months ago;
it is not recommended to use freshly prepared pine bark as mulch, it must first be dried;
be sure to pay attention to whether the tree was sick, whether there are traces of damage from pests on it.
Some gardeners and gardeners collect bark lying on the ground in the forest. This method has a significant drawback. You cannot be sure which tree this bark is from, whether it is healthy, whether you will introduce pest larvae into your area. Therefore, self-collected tree bark must be treated with special antibacterial agents and insecticides in order to protect the plants in your garden.
For disinfection purposes, some craftsmen heat the bark in a hot oven for 15 minutes.
If you don't have a garden shredder but want to grind the bark, you can put some of it in a coarse linen bag and smash it with a regular hammer.
Pine bark for mulching
Mulching is the covering of the soil surface between plants with a layer of organic or inorganic material. When mulching, it is very important to use the material at the right time and in the right amount. Mulching the soil in the garden brings many benefits such as preventing weeds, reducing moisture evaporation from the soil, and providing aesthetics. One of the materials most commonly used for mulching is pine bark.
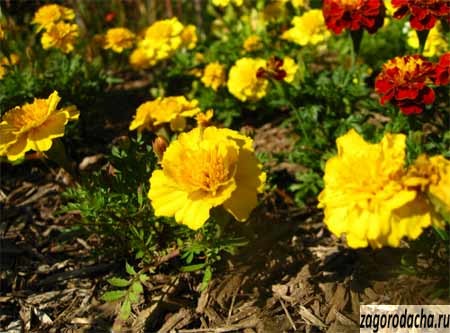
This organic material is generated as waste from wood processing. Pine bark is so commonly used in gardens that it has become synonymous with garden bark. Not surprisingly, this material has excellent nutritional and insulating properties, and pine bark takes longer to decompose from all types of garden bark. Basically, pine bark is poured onto pre-prepared black agrofibre, which makes the bark rot more slowly. You can also sprinkle the garden bark directly on the ground, but then you should take into account the fact that you will need to fill it up more often.
Types of pine bark
There are two main types of pine bark - compost bark and fresh bark (raw).
Compost bark is pine bark that has been composted for 1-2 years. Releases the greatest amount of mineral elements into the soil from all woody bark and mulch species. It does not deplete the soil for nitrogen compounds, on the contrary, it supplies these compounds. Compost pine bark acidifies the soil very well, therefore it is ideal for acid-loving plants such as azaleas and rhododendrons, American blueberries, conifers and trees. Thanks to this bark in the garden, acidification of the soil can even reach a pH of 4.5. Compost bark needs to be replenished more often, as it is already half decayed and rapidly decomposes further. This type of bark is dark brown, almost black.
Shredded raw bark is poorer in nutrients and makes soil nitrogen inaccessible. Heavy and good at inhibiting the growth of weeds, because it does not allow light to pass through, young weeds cannot break through the bark. Since raw bark decomposes slowly, it is more profitable as a mulch - it only needs to be refilled after a few years. Has a light brown or brown color.
You should be aware that pine bark is available on the market with varying degrees of crushing. The selection of the bark with the appropriate degree of crushing, or otherwise - appropriately fine, is of great importance. There are three main types of bark:
The bark is very finely crushed - very suitable for small areas where small or small plants are planted. The finer fraction of the grinding makes the pine bark more delicate. However, it should be remembered that shallow bark is easily blown away by the wind and is not suitable for use in open areas subject to strong gusts of wind.
Medium bark is the most versatile size. Such pine bark is the most versatile and is suitable for almost any planting, in addition, in relation to finely chopped bark, it is more resistant to wind.
Large bark is a type of bark that works well for large plants and large areas. Coarse bark is often used in parks or large gardens.
