DIY hanging drip irrigation from bottles
This watering is more suitable for short plants, including cucumbers or herbs. To make it, you need to make a frame in the form of the letter P or G.
1. Bury the posts in the ground at both ends of the garden and attach a long stick to them, which should be parallel to the garden bed. The height should be such that the neck of the hanging bottle is about 50 cm from the ground.
* Bottle length - no more than 40 cm.
* The number of plastic bottles depends on the number of plants.
2. Use an awl or screwdriver to make several holes in the bottom of the bottle. Also make holes in the lid (the number depends on how much you want to water the plant).
3. Cut off the bottom of the plastic bottle, and next to the cut edges make holes through which you need to push a wire or strong rope and hang it with the neck down to the frame.
* Water drops from the bottle should not fall directly on the plant, but between adjacent bushes.
* Now it remains only to add water as needed.
Do-it-yourself drip irrigation for summer cottages
You will need:
- plastic bottle with lid
- clerical knife or scissors
- an awl, screwdriver or small nail with a hammer
- thin fabric (cotton) or old nylon tights (to create a filter).
A cloth filter is needed so that soil particles or small debris do not clog the watering.
The size of the bottle depends on the size of the plant you are preparing to water for. For example, for one plant, a small bottle with one hole on one side is sufficient.
1. Make holes all over the plastic bottle. At the same time, leave a little more than 2 cm to the bottom of the bottle. You also do not need to make holes in the cap. A 2 liter bottle should contain about 10 holes.
2. Make a hole next to the plant. Its size should be equal to the size of the bottle.
3. Bury the bottle, leaving the neck on the surface.
4. Fasten the nylon stocking on the neck.
* The bottle can be closed with a lid, or left without a lid. The only difference is in the rate of evaporation of water from the container.
Now just refill the bottle with water as needed.
Overview of ready-made drip irrigation systems for summer cottages
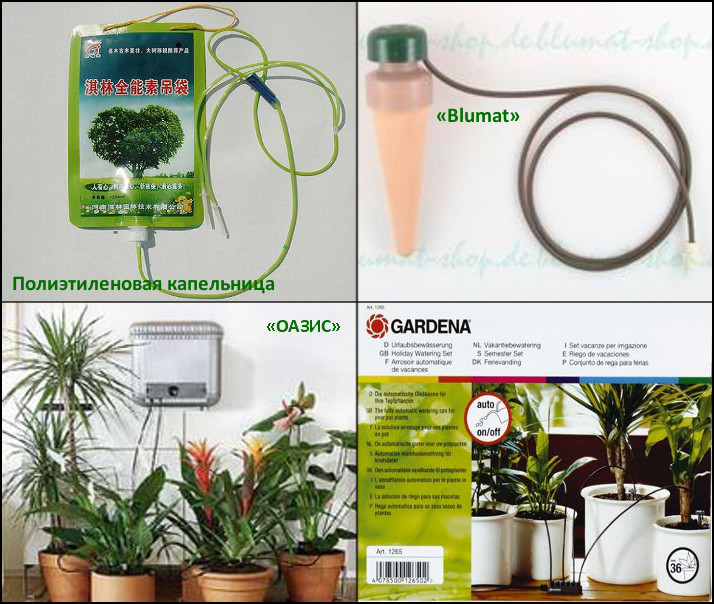
Manufacturers offer a wide range of equipment. Among summer residents, a number of models deserve special attention:
- Aquadus. The Belarusian supplier offers various systems, taking into account the irrigated area. Kits are produced with a controller, without it, with a connection to a barrel, a water supply line.
- Bug. A product of domestic manufacturers with connection to a barrel, a central highway. A complete set for 30-60 plants, a filter, a timer and the ability to purchase equipment for 20 bushes are advantages in favor of the choice.
- Water strider. Suitable for the arrangement of drip irrigation in small greenhouses. The set consists of a 12 m hose, connecting elements with 40 drippers, a controller. Connection only to the tank, standard pressure no more than 1 bar.
- A drop. The set includes an emitter tape with droppers. The spacing of the droppers is 30 cm, the system is supplemented with complex labyrinths inside the pipes, therefore it is maximally protected from blockages. The set is purchased for irrigation of an area up to 25 m2, the network is connected to a barrel or water supply.
The simplest systems include Harvest-1, Tomato. The first option is equipped with long belts, filter, automation. The second one is supplemented with splitters, it is inexpensive, therefore it is convenient for owners of small gardens with greenhouses.
Of the models with a high price, Istok is popular. The 25 m long drip tube is equipped with holes with a pitch of 30 cm. Filters, fittings are included in the kit, and it is also possible to purchase a controller and a pump.
Varieties
In order for the plant not to die, it needs water.In our case, we need a source from where it will evenly, but in the right amount, enter the flower pot. Since this problem is not new, there are all sorts of gadgets commercially available. But in the confusion, you can forget about them, and it's not difficult to do something like this yourself.
From the bottle
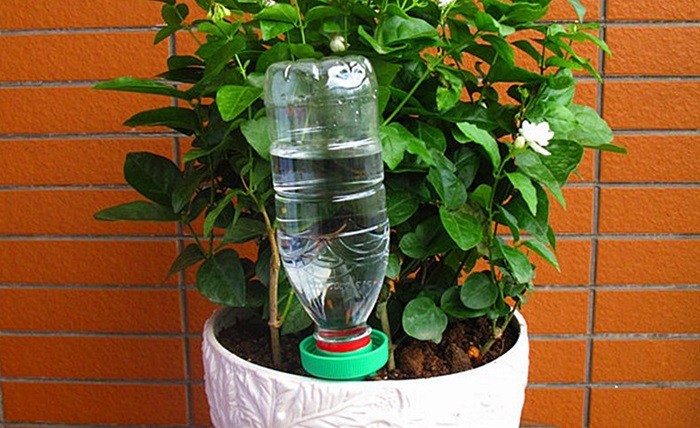
The first option requires a bottle. Ideally, plastic, but you can take any. The main thing is that it has a lid. Wine bottles framed by greenery look more aesthetically pleasing. They can also be painted, decorated using decoupage technique or decorated with ribbons, rhinestones, beads. This option will come in handy even with regular maintenance, for example, it will make it easier to endure the heat in the summer.
Manufacturing instructions.
- It is easier to pour water if the bottle has no bottom. But you can pour it through the neck.
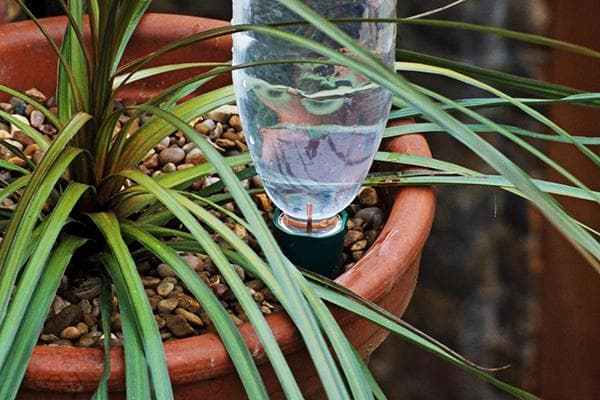
- We make one or two narrow holes in the cork so that the water drips. We close and install in the right place.
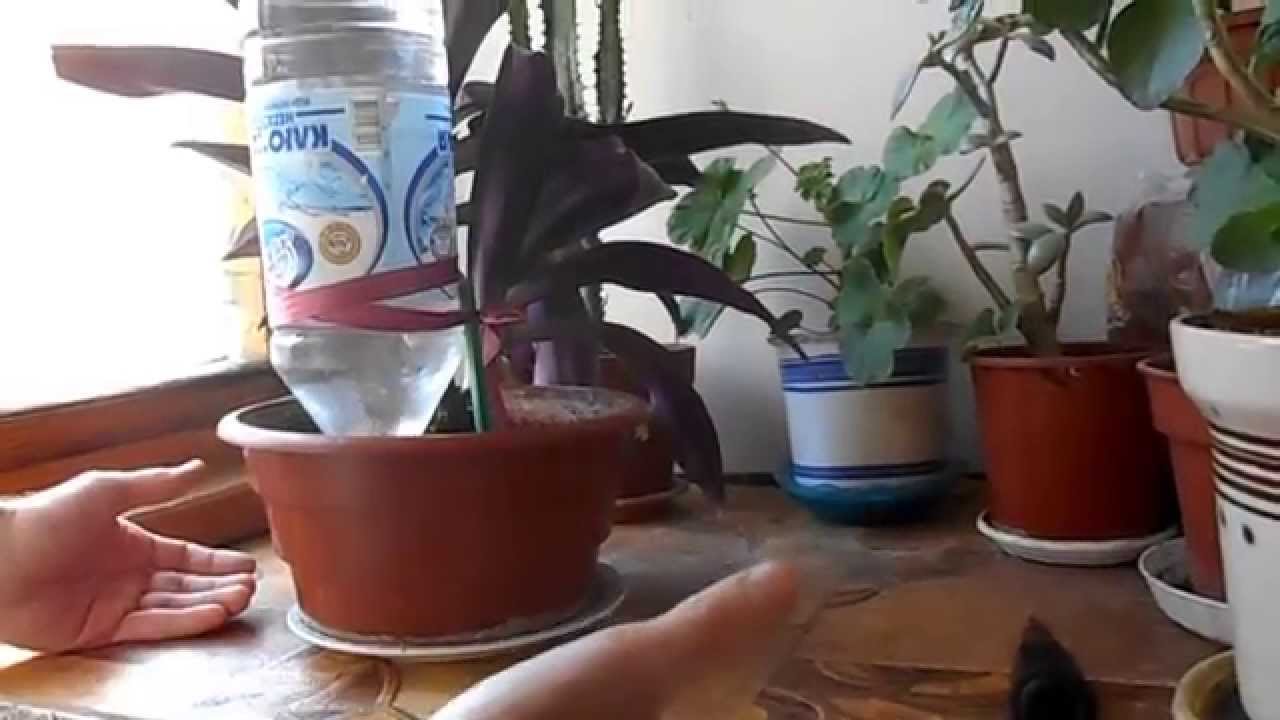
- You can simply put it down or stick it with its neck into the ground. Then you can judge the intensity of irrigation by the amount of decreasing water. The bottle can be hung over the flower, but not high.
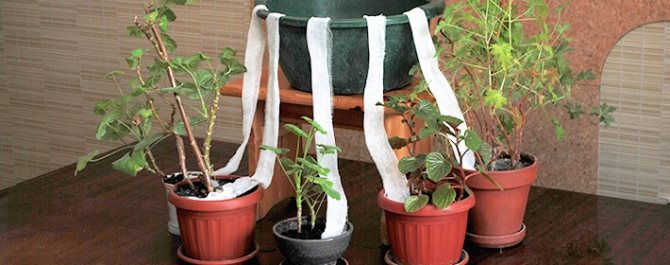
With rope
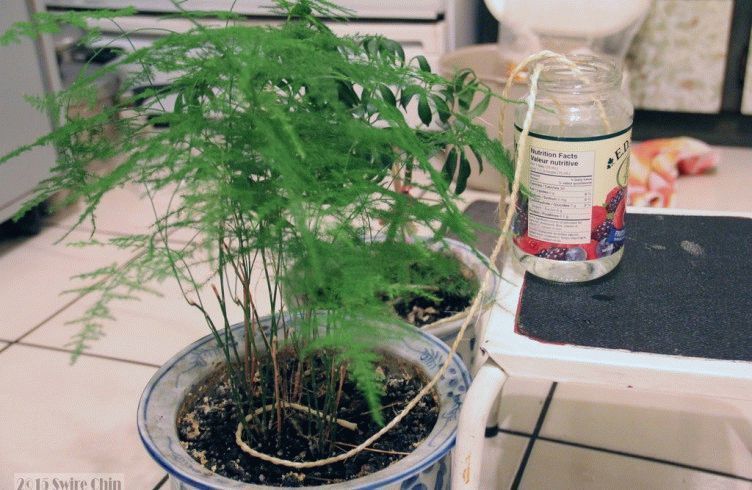
For this structure you need a lace, twine or any other rope. In the absence of such, strips of fabric twisted into bundles can be used. In this case, the rope should absorb water well. It is believed that synthetic fabrics are preferable to natural ones, as the latter can begin to rot. But for a week and with naturals nothing will happen.
The principle of operation of the structure.
- One side of the rope is lowered into a bowl of water, the other is placed in a pot.
- You can position the rope both from above - so that the free end lies on the ground, and from below, pushing it into the hole for water drain. In the latter option, more water will be retained in the soil, since it will evaporate less. But there is a risk that the rope will be pinched by the pallet and there will be no inflow.
With hydrogel
The automatic intake of moisture can be ensured with the help of various substances that can absorb water. After it evaporates, they usually dry out. The most popular are hydrogel beads. Even cut flowers can stay fresh in them for a long time. And some plants are planted in them as in the ground. A hydrogel is quite capable of temporarily replacing watering. This requires:
- hydrogel balls;
- a larger pot;
- water;
- plant.
Progress.
- Soak the balls in water to swell.
- Remove the plant and soil from the pot. To do this carefully, without damaging the roots, the soil in the pot must be moistened.
- Fill the bottom of the larger pot with balls. Then we put the removed plant with the ground in the center. Balls should fill all the remaining space around the circumference of the pot. They are also placed on top with a thin layer.
On pallet
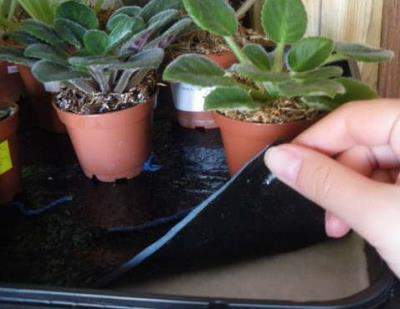
The easiest way to auto-irrigate is to place all the pots in a drip tray or tub of water. But, despite the simplicity, there are drawbacks here:
- moisture will only enter the lower layers of the soil, which is not suitable for plants with a weak root system;
- if you do not change the water for several days, it will turn into an ideal breeding ground for mold or mildew;
- in the lower part of the soil, water may stagnate and there will be no outflow.
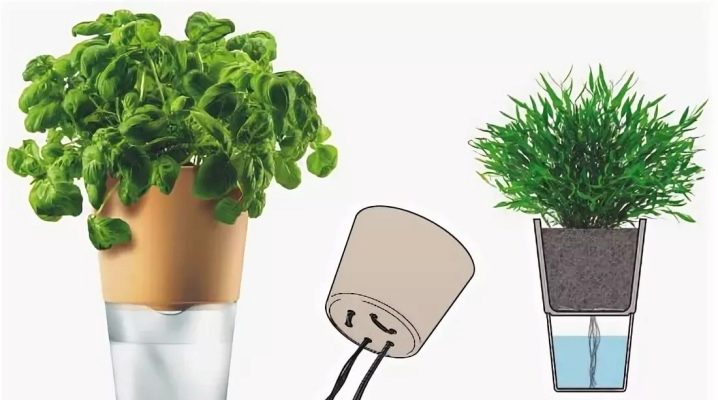
About the same principle, pots with automatic watering work. A cache-pot is a decorative container in which the pot itself is placed. In addition to the fact that it serves as a kind of decoration, it is into it that water flows from the drainage holes. The essence of autowatering is simple - water is poured into the pots, which feeds the plant through the same holes.
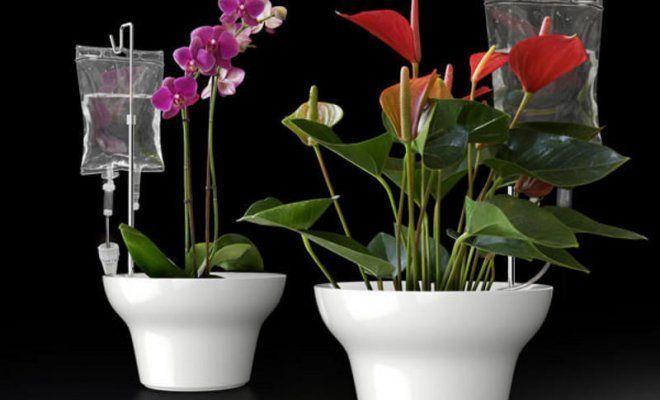
With dropper
- transparent material looks unobtrusive;
- the tubes can be joined to the required length;
- you can easily adjust the amount of incoming liquid.
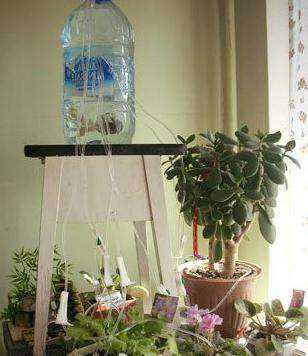
In order for the flow to be constant, it is important to correctly position the end of the hose and the container of water. The container should be above the level of the pot, the hose is at a slight angle
Its length is easy to cut. To prevent the hose from moving, it is loosely tied to a plastic or wooden peg.
Moisture source underground
The main purpose of any watering is to saturate the plant's root system with water. It is very convenient when the source of life-giving moisture is located in the immediate vicinity of the roots, that is, it is buried to a certain depth.
To arrange drip irrigation, take a bottle (1.5 liters) left over from mineral or carbonated water, and make holes in the plastic.
The bottle can be positioned in two ways: neck up and down. Let's consider these two options separately.
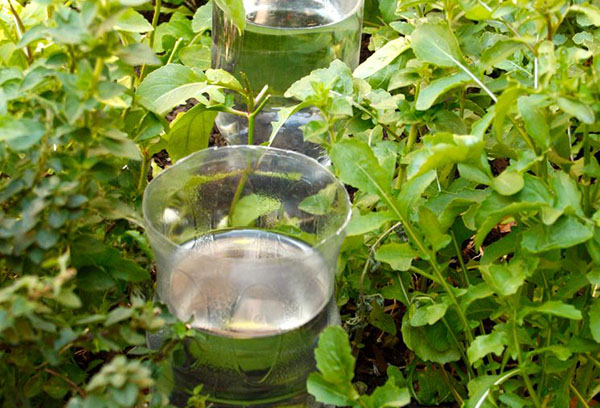
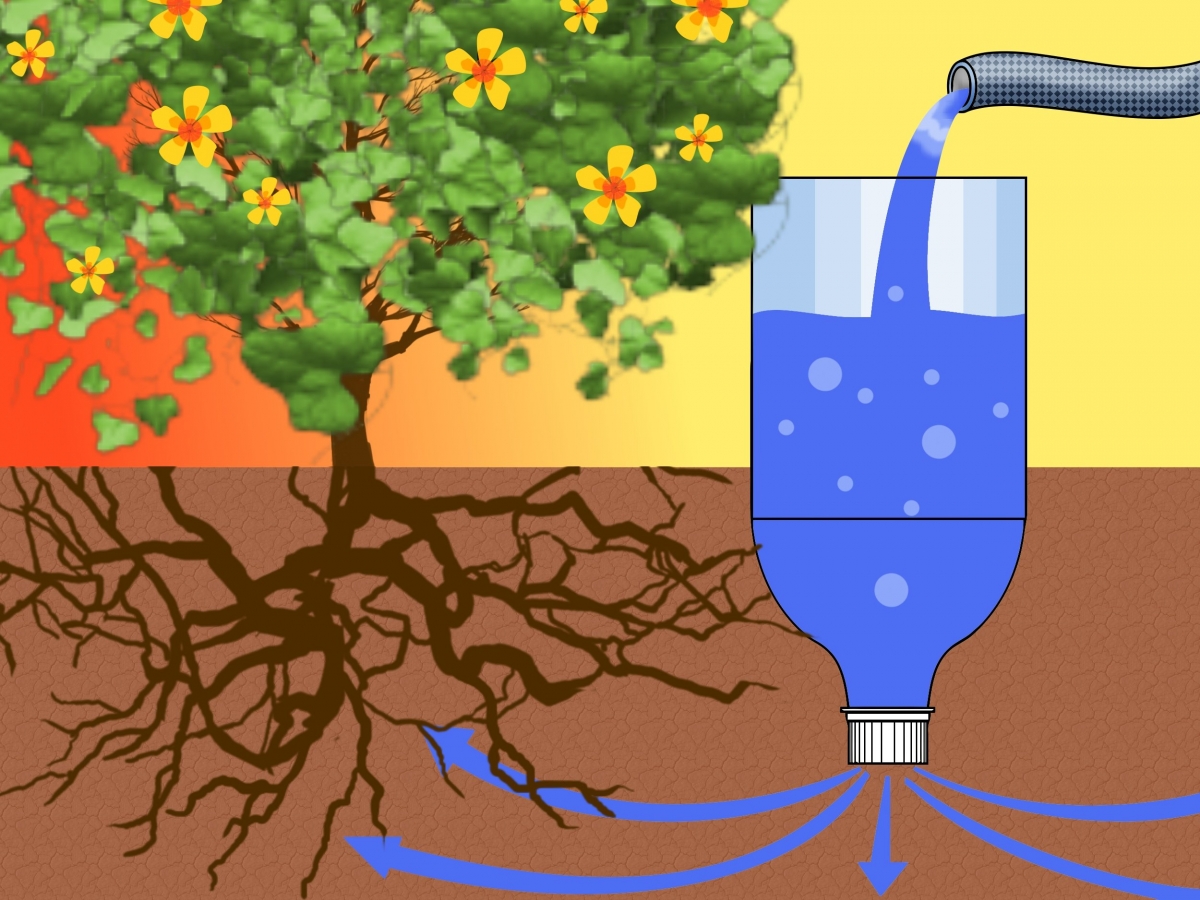
The container is buried in the ground with the neck down
Take an empty bottle and make 2-4 holes with a diameter of 1 mm with an awl or a thick needle in the neck. The more holes there are, the faster the water will flow.
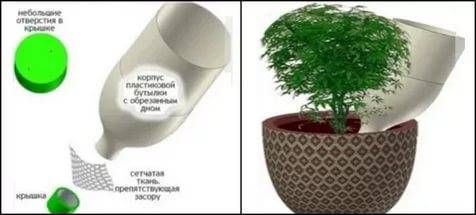
A piece of cotton or nylon material must be placed inside the bottle. This is necessary to ensure that the water is filtered and the openings are not clogged by small debris that could accidentally enter the container. The bottom of the bottle is cut off, but not completely, to get a kind of cap. It protects moisture from rapid evaporation, and lifting the lid makes it easy to add water.
The bottle is buried 2/3 of the height near the plant, 5 cm away from the stem. It is necessary that the holes are located on the wall that looks towards the roots, otherwise the water will not reach the desired goal and will not feed the plants, but the path between them. If one bottle is buried between two plants, then the holes must be made from all sides, in a circle.
The bottle is located with the neck up
This method of organizing watering using plastic bottles is not much different from the previous one. The only difference is that holes for water outlet are made in the lower part of the bottle, stepping back 2.5 cm from the bottom, and the container is buried with its neck up to a depth of 15-20 cm.
With this arrangement of the bottle, you will have to use a watering can or a funnel to add water, since the inlet is quite narrow. But the liquid in the container is better protected from the ingress of any small debris, which means that there is no need to use filtering material. In addition, animals and birds will not be able to drink from a container with a tightly twisted lid, and the plant will get all the water.
In the event that it is necessary to extend the watering time, you can use a 5 liter plastic container. Several holes are made in one wall of the bottle, and a small cap is cut out in the other, located opposite. The container is buried horizontally with the holes down and the lid up. Water is poured through the upper window.
How to make do-it-yourself drip irrigation
To make drip irrigation for indoor plants with your own hands you will need:
- The filling vessel is made of plastic.
- The water for use is clean.
- Tubes and hoses are cleaned weekly.
- After the first installation, the system is completely flushed.
- In the case of feeding the plant with fertilizers, tubes and flasks should be cleaned from residues and impurities.

Moistening multiple pots at the same time
There are several ways to make do-it-yourself drip irrigation:
- With the help of droppers.
- Ceramic cones.
- Plastic bottles.
Each of the options is convenient and easy to use in its own way.
How to make drip irrigation from medical droppers
Drip irrigation is best made from a medical dropper. The system has a fluid regulator. With it, you can control the level of water supply to the pot.
To install, do the following:
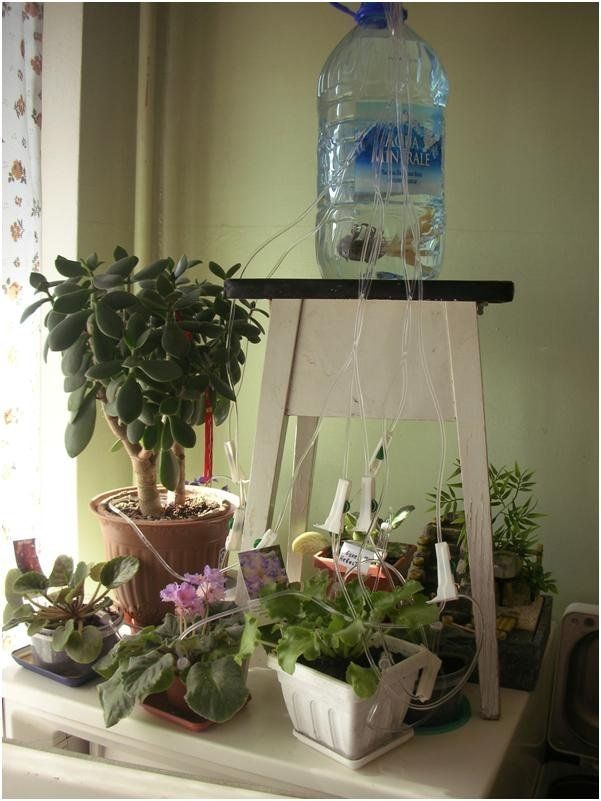
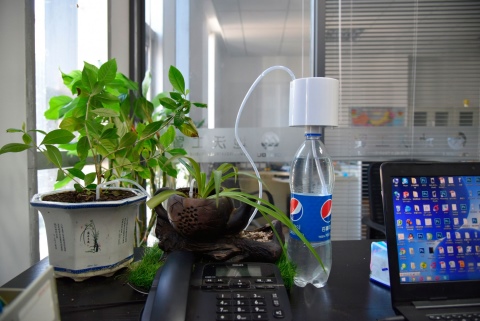
- The vessel is filled and suspended above the level of the pot (preferably using a plastic bottle).
- The tip of the system is connected to the vessel, and the lower part is lowered into the pot of earth.
- The control wheel switches to the water supply state.
For several days, it is necessary to monitor the level and rate of water supply to the pot. After installation for a while, you can not worry about the plant.
Attention! The medical dropper is one of the best used for irrigating plants.
Ceramic cones
Ceramic cones are another drip system designed for watering home flowers. The set includes a ceramic cone, a vessel and plastic tubes. The narrow part sinks into the ground. Water is poured into the other part. Thus, the liquid must drain into the ground under pressure. The feed needs no control.
The only rule is to install the tank at the correct height. With a high suspension, the liquid will come in slowly and poorly moisten the soil. At low, it threatens with an excess of moisture.
Plastic bottle
The most common and budgetary way. For manufacturing, you will need 1 plastic bottle for 1 pot and a minimum of physical effort:
- Make several holes with an awl on the lid.
- Bury the bottle in the ground with the neck down.
- Cut off the bottom and pour water into the bottle.
The roots are moisturized and do not need much maintenance.
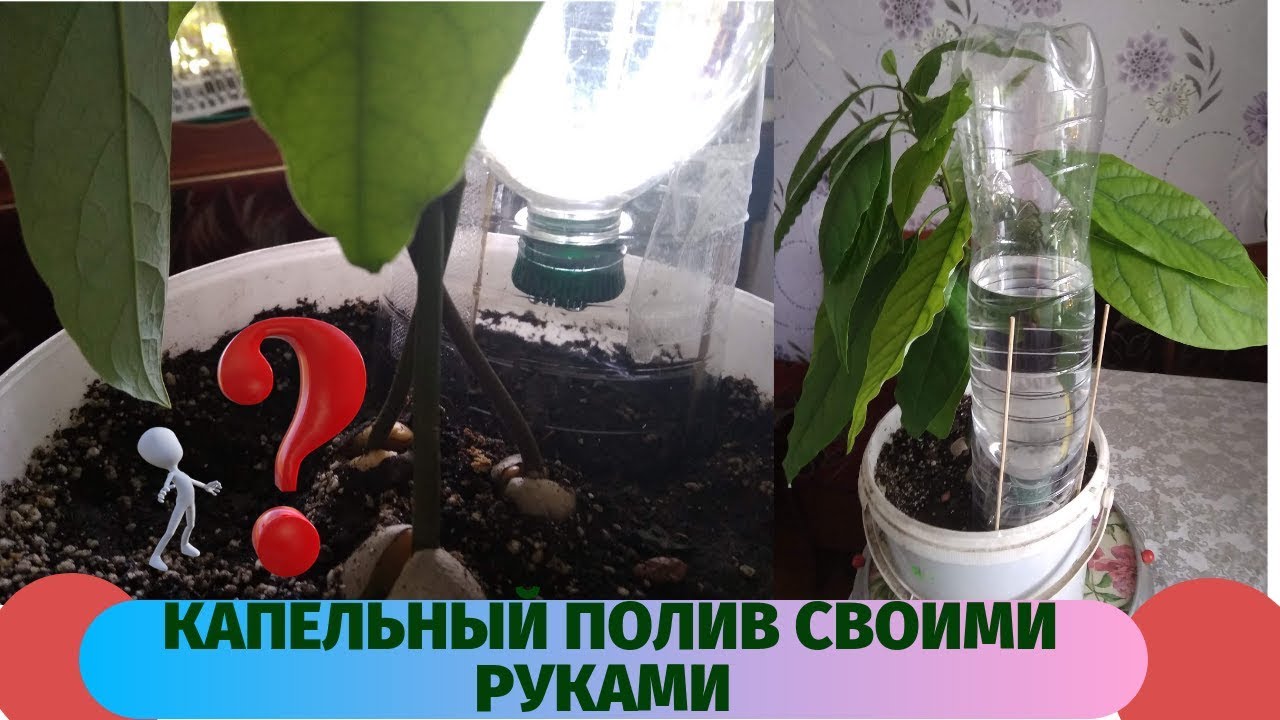
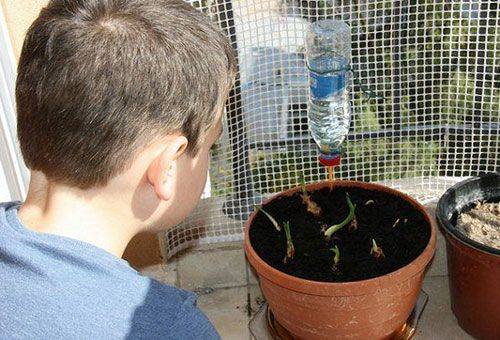
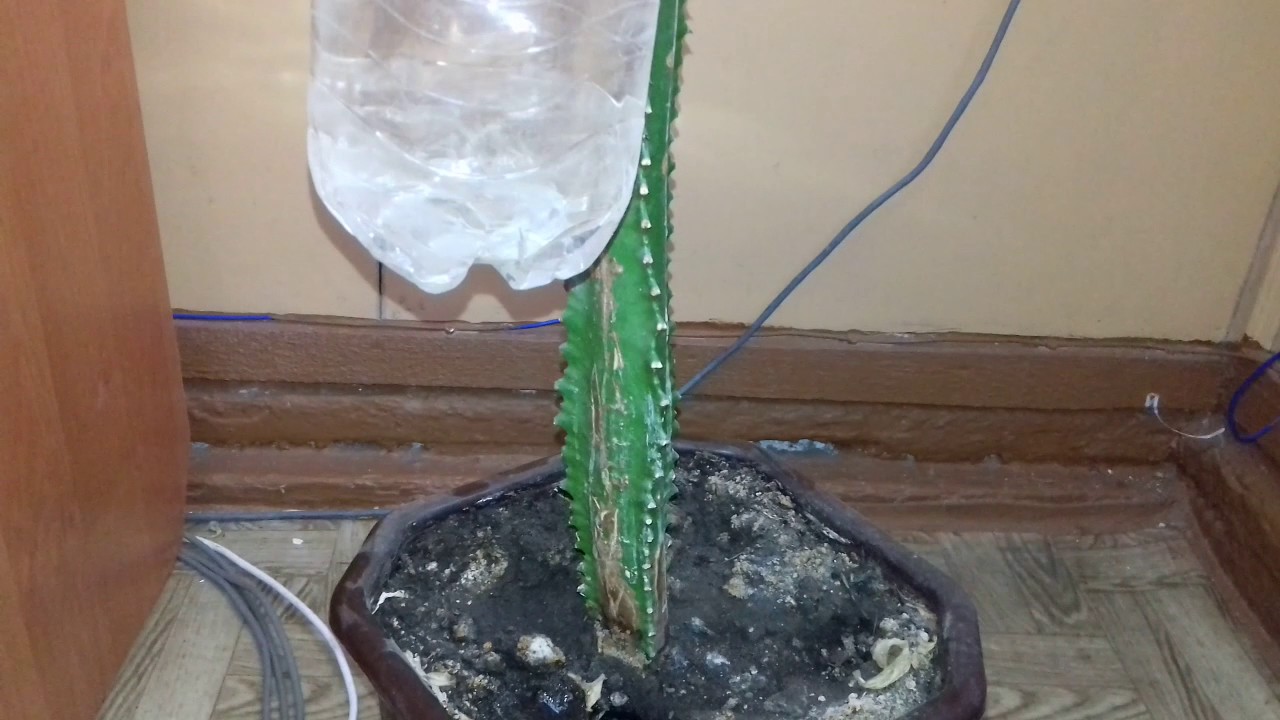
There is another option with a plastic bottle. The plastic container is suspended from the lower part with the neck down. It is attached to a wire to a wooden rail. In this position, the eggplant is stable and easier to refill.
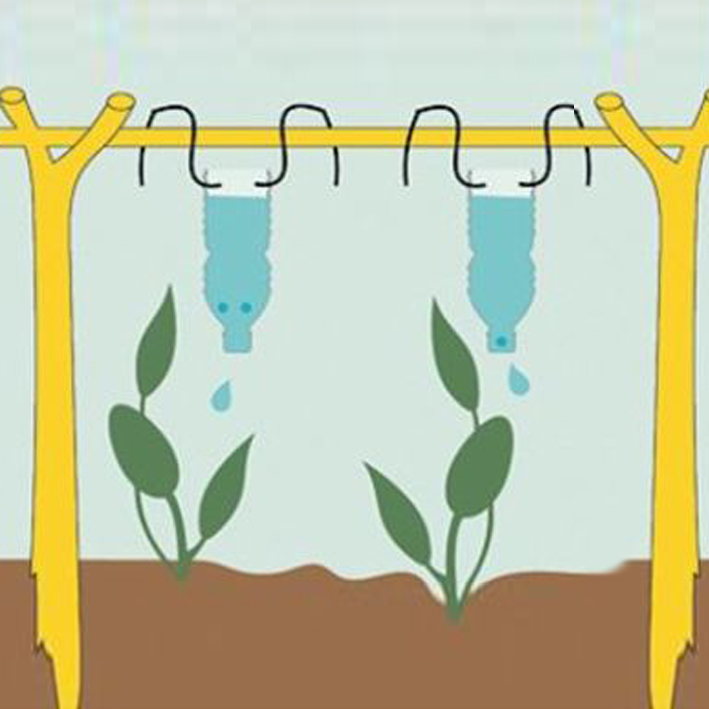
Hanging the bottle correctly
How is drip irrigation for indoor plants
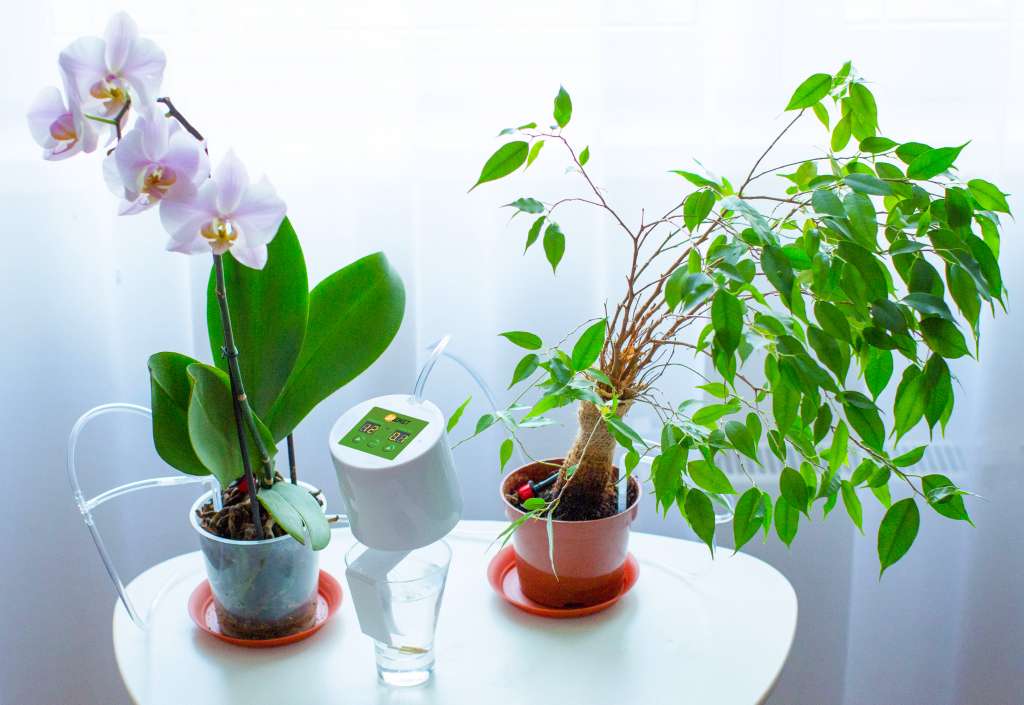
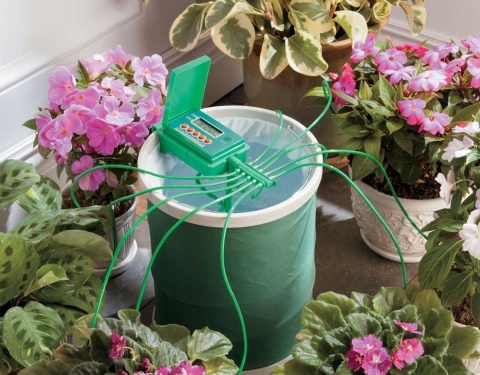
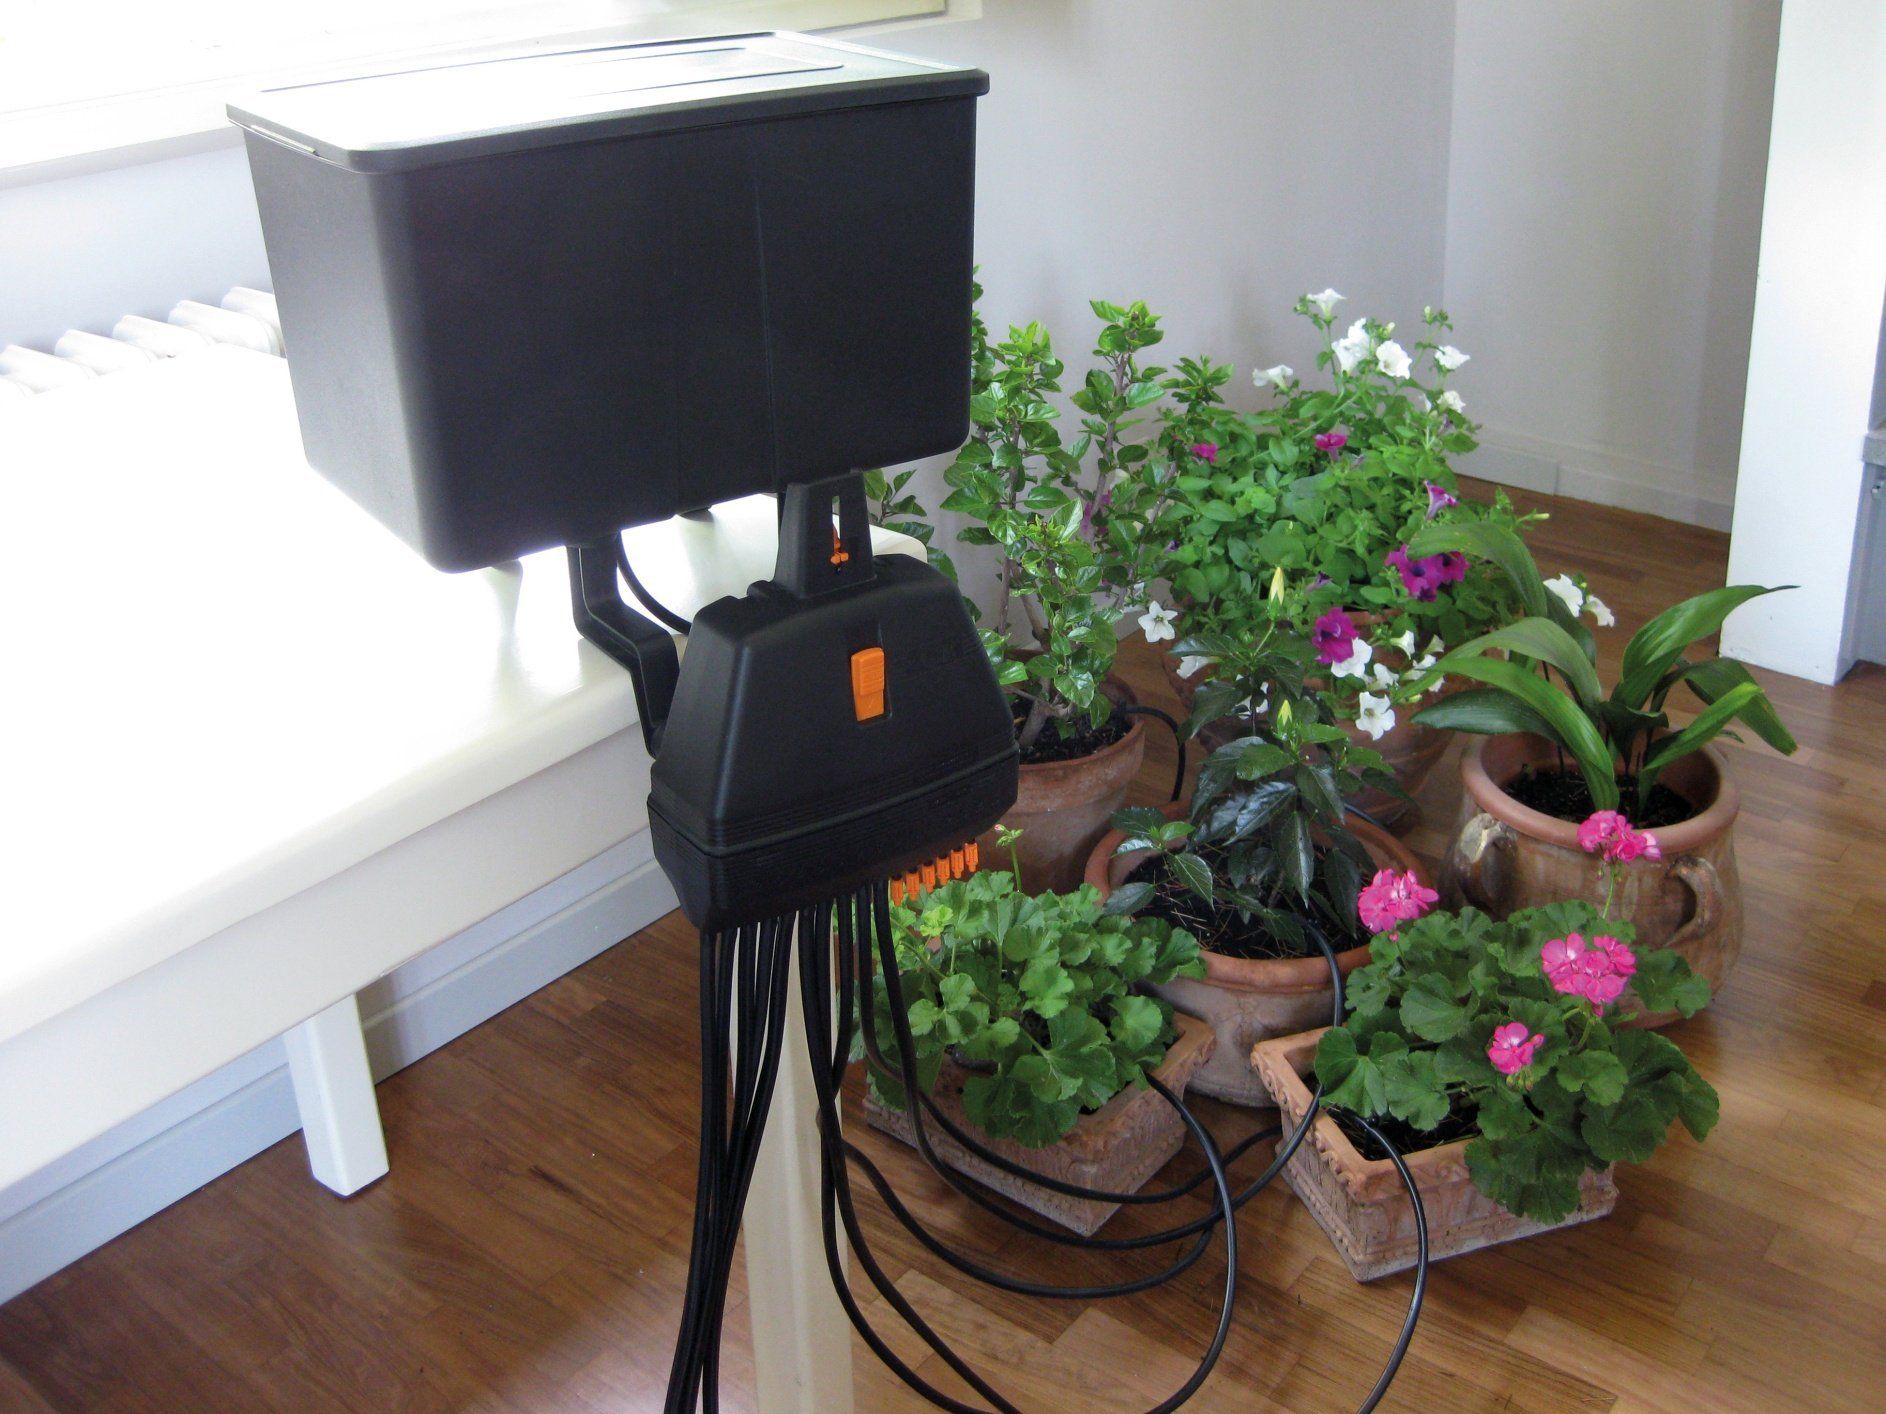
Automatic watering of indoor plants is a technical solution that allows you to water flowers much less often, but at the same time more efficiently. There are two ways: circulation of the same liquid, allowing excess moisture to drain into the sump, or an option that reduces the loss of liquid during evaporation after sprinkling.

Dropper
Views:
- Upper. You can adjust the frequency of falling drops from above.
- Intrasoil. The liquid is fed directly into the soil of the pot using a dropper or funnel.
- Root. Moisture rises from the container under the pot to the top of the plant.
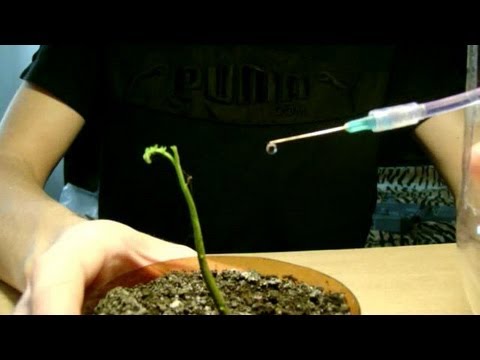
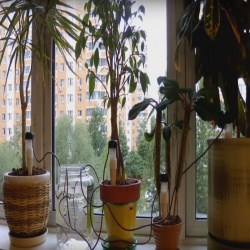
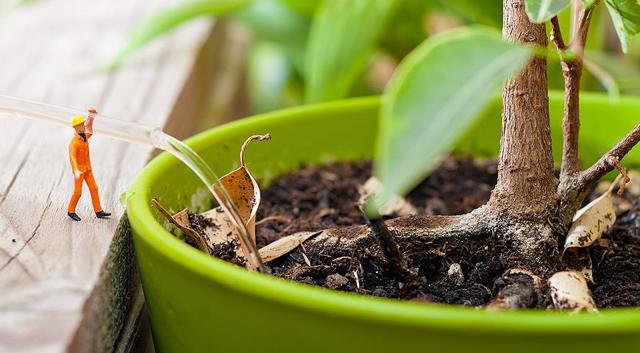
The irrigation system is carried out using medical droppers. For small flowers, the following are used: a container with water, a dropper and a tube, which is inserted into the ground located in the pot. If the flowerpot is large, then several tubes are used at the same time.
Important! Flowers planted in flower beds around the house can also be watered with automated drippers.
Desirable accessories for the autowatering system
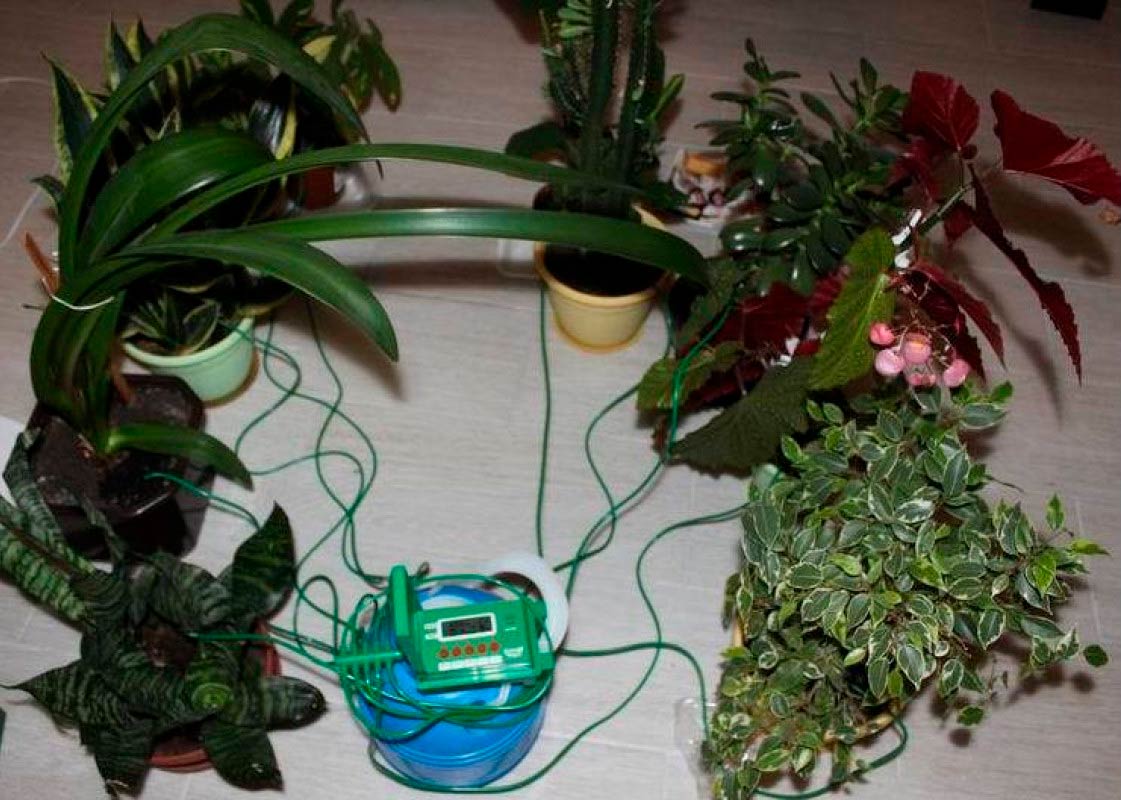
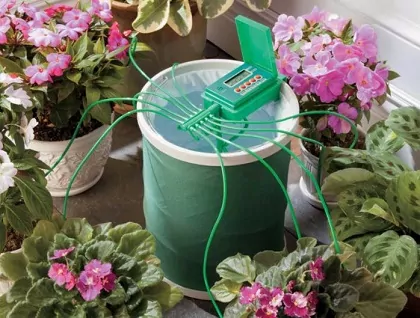
Timer (controller)
The automatic watering timer is not just an invention for lazy gardeners. Often, townspeople do not have the opportunity to live at the dacha all season, and in this case the controller is simply irreplaceable.
In systems where water is supplied by a pump, universal timers are suitable, installed directly into the outlet from which the pump is powered. You can buy these timers at any electrical store.
But for gravity systems (when water comes from a separate tank), as well as when the automatic irrigation system is connected to a water tap, specialized controllers are used.
There are several types of such timers for automatic watering. The simplest and cheapest is mechanical (the valve is closed by a spring). This type of timer is turned on manually and turned off automatically. And for summer residents of the "weekend", this option is not suitable.
Expensive electronic timers with software control are also not the best choice, due to the high cost and the need for complex program settings. This option is more suitable for farmers or professional gardeners caring for a large estate.
The best choice for home gardens is manual electronic timers. These controllers allow you to program the mode and duration of watering for one week.After the necessary settings are set, the timer will be able to turn on the system every day at the set hours and turn off after the set watering time has elapsed, completely without your participation.
Attention! If your auto-irrigation system will receive water from a separate container (tank), then when buying a timer, it is important to purchase a device in which the water supply / shutdown is carried out due to the built-in ball valve. Timers of a different type with an electromagnetic (solenoid valve) in this case may not work, since in gravity systems there is not enough pressure that is present in the central water supply
Filter
Usually, in summer cottages, the water in the water supply system leaves much to be desired, and the presence of mechanical suspension (sand, clay, etc.) clogs the drip tapes and reduces the service life of all equipment. To extend the operating time of the autowatering system, it is advisable to install a filter by placing it at the beginning of the system (between the tap and the main pipe).
There are several types of filters, but for private households, the most optimal are mesh and disc types. In the first, filtration is carried out due to the fact that water passes through the mesh cells, while the second has a porous structure, like a sponge. The level of water purification is characterized by the cell size. For drip systems, a grid frequency of 100-150 units will be sufficient.
Filters of various price categories are presented on the market, the cost of the device depends on the quality of the parts, the presence of a self-cleaning mechanism, the presence of a reducer to regulate the pressure in the system, and so on. For use in summer cottages, inexpensive models of mesh or disc filters are quite suitable, but it is better to refuse from very cheap filters (usually made in China) (as you know, "a miser pays twice").
The drip hose usually sits very firmly on the nose of the connector, but for reliability, we secure the tape with metal clamps. Lyudmila Svetlitskaya
Rain sensor
The rain sensor is used as an addition to software controllers as well as manual electronic timers. During precipitation, the rain sensor will stop the automatic irrigation or prevent the system from turning on again if the humidity is excessive.
Then, depending on humidity and temperature, the rain sensor will independently "make a decision" to resume the operation of the autowatering system in the previously set mode. The sensitivity level of the sensor can be manually adjusted according to the requirements of the crops grown. Typically, this device has a wide rainfall range: 3-25 mm. Using a rain sensor not only saves water, but also protects plants from overflow, which can be critical for some crops.
Features of installation and use of wick irrigation
It is much safer to use active autowatering techniques, one of which is the wick system. You can easily assemble it with your own hands, you just need to perform the following manipulations:
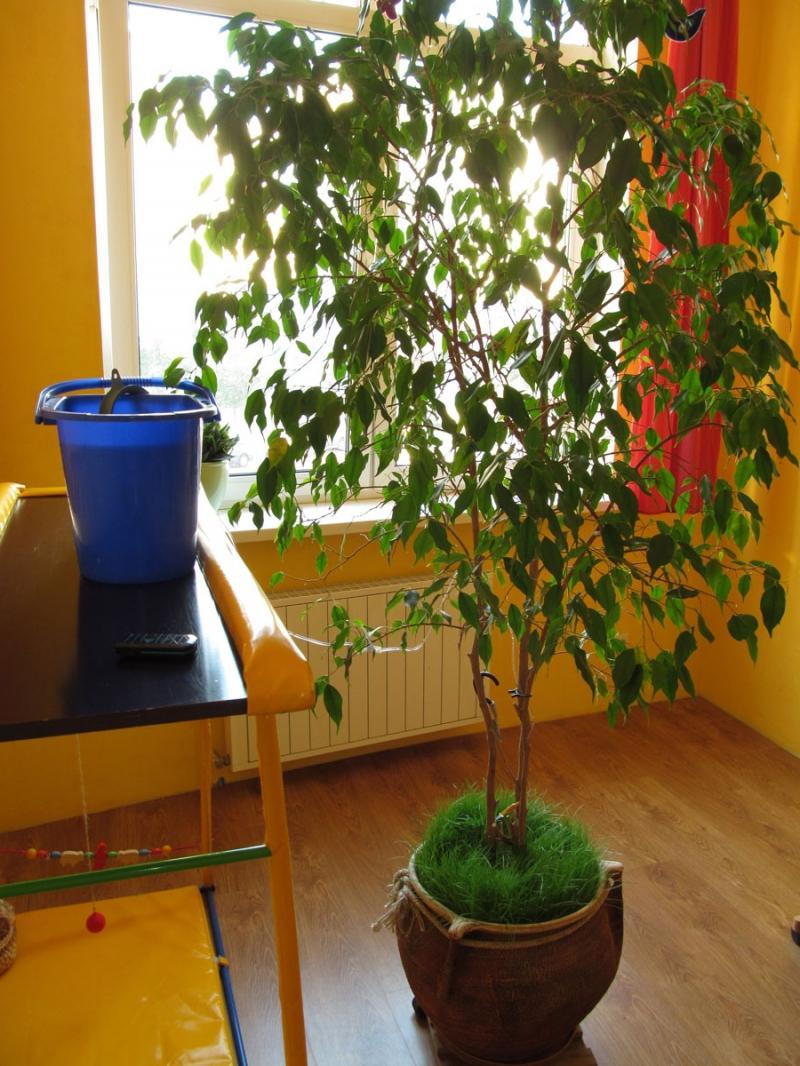
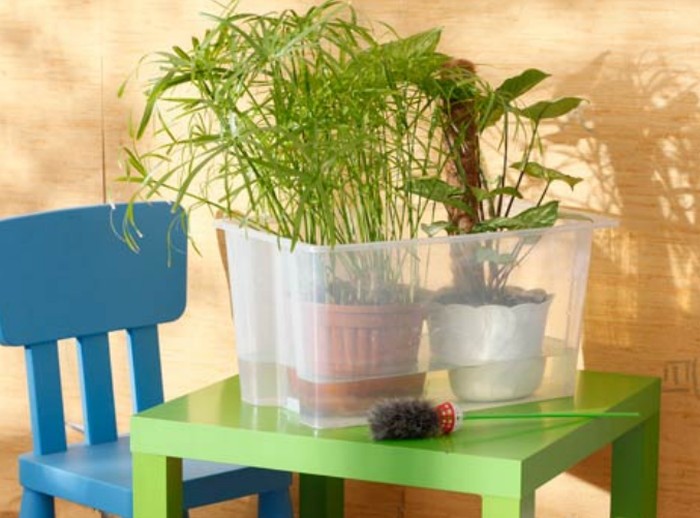
- We take a container of impressive size, fill it with water, set it up so that pots with green spaces can be placed around.
- Cut a long cord made of fabric fibers into pieces. We lower one end of each element into the water, the other - we bury the flower in the ground.
- If the manipulation is carried out at the stage of transplanting indoor plants, then it is better to pass the cord through the holes in the bottom of the pot.
- After the preparatory stage, you need to moisten the earthen lump and make sure that the wick is also soaked through and delivers moisture.
Contrary to popular belief, the system is positioned in such a way that the recharge is carried out from the bottom up, and not vice versa. Otherwise, the moisture will be too active and can provoke rotting of the roots.The effectiveness of a hand-made device and the duration of its action depend on the needs and dimensions of the sample.
Watering is the most important procedure for nourishing and growing all plants on earth. Water carries all the substances and minerals necessary for life. Photosynthesis and metabolism are directly dependent on it.
Excessive moisture in the soil can lead to root rot, disease and death. The needs of all plants are different. It depends on the climatic conditions and the homeland of the green pets. When using an automatic watering system for indoor plants, do not worry about the wrong dosage. The plant itself will tell you how much liquid it needs.
Attention! The most common top dressing when using automatic irrigation systems is urea and potassium. Phosphorus can be used only under the condition of maximum dissolution
Houseplants require constant care. Timely watering is in the first place in terms of importance.
How can I check that the selected option works?
It will be good if you have the opportunity to check the efficiency of the device you have created and see the reaction of the plant.
- Automatic watering, although done by hand, must correspond to the type of plant. For moisture-loving, your supply may not be enough, but for cacti it will be in abundance.
- If the water supply is from the bottom, you need to make sure that the soil is moistened to the root level. Plants with short roots may never get it. The moisture content of the soil can be checked with the same wooden toothpick or skewer.
- Track how quickly the water is used up. A container with a large volume may be needed. Or not one system, but two.
- It's good if after a few days someone can still check the condition of the plants. Water supply systems can be pinched or malfunctioned in any other way. Come and look at the flowers is not as troublesome as watering them fully. In extreme cases, during their absence, they can be monitored through cameras connected to the Internet.
For information on how to organize auto-irrigation of indoor plants using a dropper, see the video below.
Advantages of drip irrigation
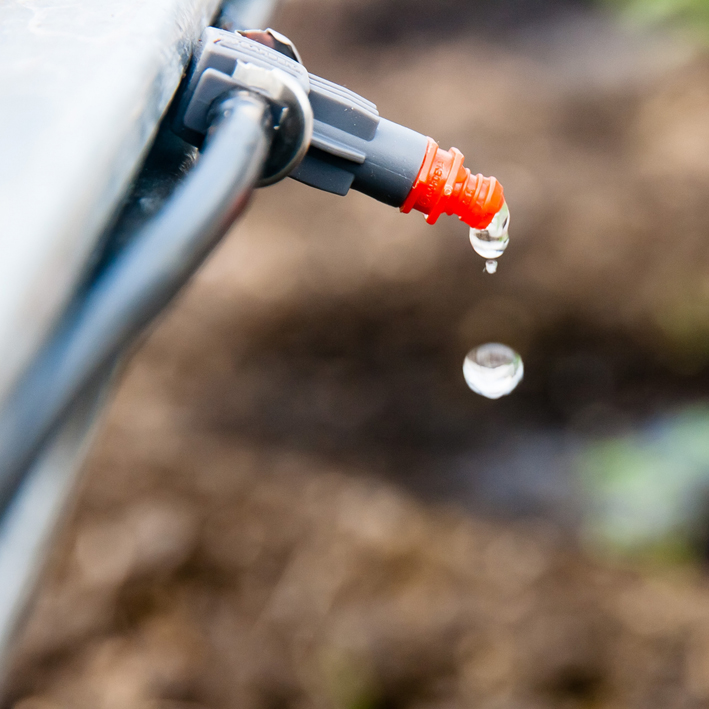
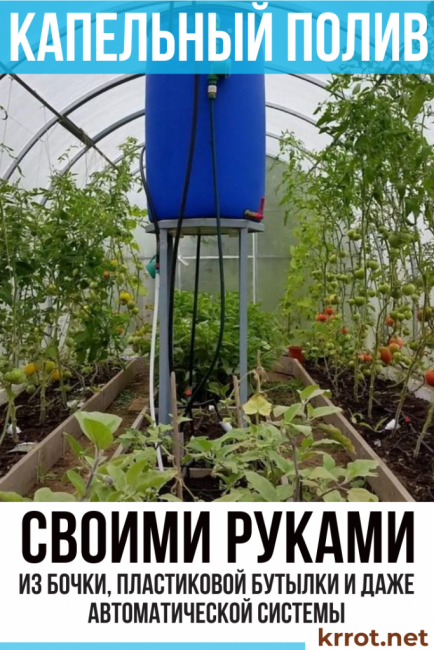
Drip irrigation has many advantages over conventional water delivery. Recently, many firms engaged in the arrangement of summer cottages have offered work to carry out a stationary point irrigation system. Automated control of the water supply completely frees the owner of the site from manual work. Moisture enters the soil through small holes in the plastic pipes along the beds.
If you turn to the help of specialists, then the arrangement of such a system will require considerable financial investments. It is quite difficult to independently make the layout of irrigation pipes throughout the site - you need to draw up a diagram, calculate the required volume of water and other necessary parameters. In addition, you will have to dig up the whole garden, since the pipes must be deepened to a certain level.
The use of plastic bottles is a universal method of drip irrigation. It does not require any financial costs at all, because free containers can be found in any farm. It is enough to make a few small holes, place the bottle in the right place - and the device is ready to use.
In addition, there are several more advantages of the "bottle" irrigation system.
- The water is supplied exactly where the plant's root system is located.
- Simultaneously with watering, you can fertilize with liquid fertilizer.
- Economical water consumption.
- You can leave the planting unattended for a while - the plants will not dry out.
- Moisture does not get to the surface of the soil, so there is no risk of fungal diseases.
- Without surface irrigation, the topsoil stays dry, so there is no need for frequent weeding and loosening.
- The drip irrigation system does not require any special maintenance; it is enough to replace the broken can with a new one.
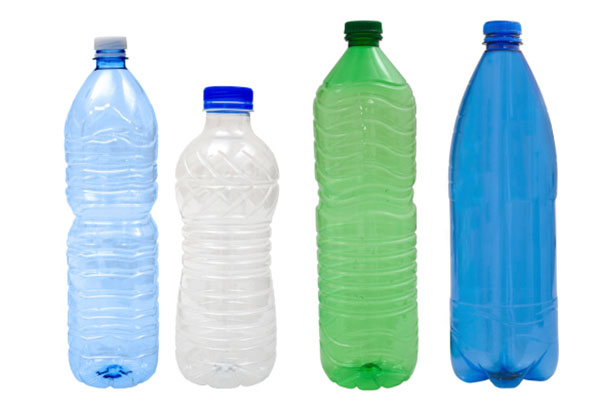
DIY drip irrigation
Method number 1: bottle neck down
The bottom of the bottle (about 5 cm from the bottom) is cut off with scissors or a knife. It is better to tighten the lid for this time, punch a hole and only then cut off the bottom - it is safer this way.
In the neck or lid, 2-4 punctures are made with a diameter of no more than 0.3-0.5 mm. The throughput depends on the number of holes and their diameter.
We make several holes in the lid. The intensity of irrigation depends on their number.
The bottle is buried 3-4 cm near the stem. A piece of fabric or a piece of nylon tights is placed inside so that the hole is not clogged with debris. They can be fixed at the very bottom - the water will remain clean all the time.
You need to put a mesh cloth inside the bottle so that it does not get clogged with debris.
If desired, the container can be hung near the bushes by the neck or upside down. With this option, the soil will not fall into the holes. In addition, it is easier to fill with water this way.
It is very convenient when everything is fixed on a wooden rail: you just need to thread a strong wire into the bottles and hang them on the bar using these "handles".
Convenient way to attach water bottles to a wooden bar
Method number 2: holes in the bottom
The simplest option: about 25 mm from the bottom, one or several holes of the required diameter are made, and filled plastic eggplants are placed at each plant.
We bury the bottle with the holes made near the plants
You can make more holes, and dig the bottle itself near the bush, which it should supply with moisture.
In this case, the container can also be placed between several plants.
The cover can be removed, and you can save yourself from the debris with the help of a nylon bandage.
You will have to use a watering can to fill in the water.
Another variation of drip irrigation: only one hole is punched in the bottle, a rod from a ballpoint pen is inserted into it. The writing tip is removed beforehand, the remaining ink is washed off with alcohol. The rod is directed to the area for watering and is fixed with a garden pitch or just plasticine.
We insert a rod from a ballpoint pen into the bottle and direct it to the irrigation area
Method number 3: for the lazy
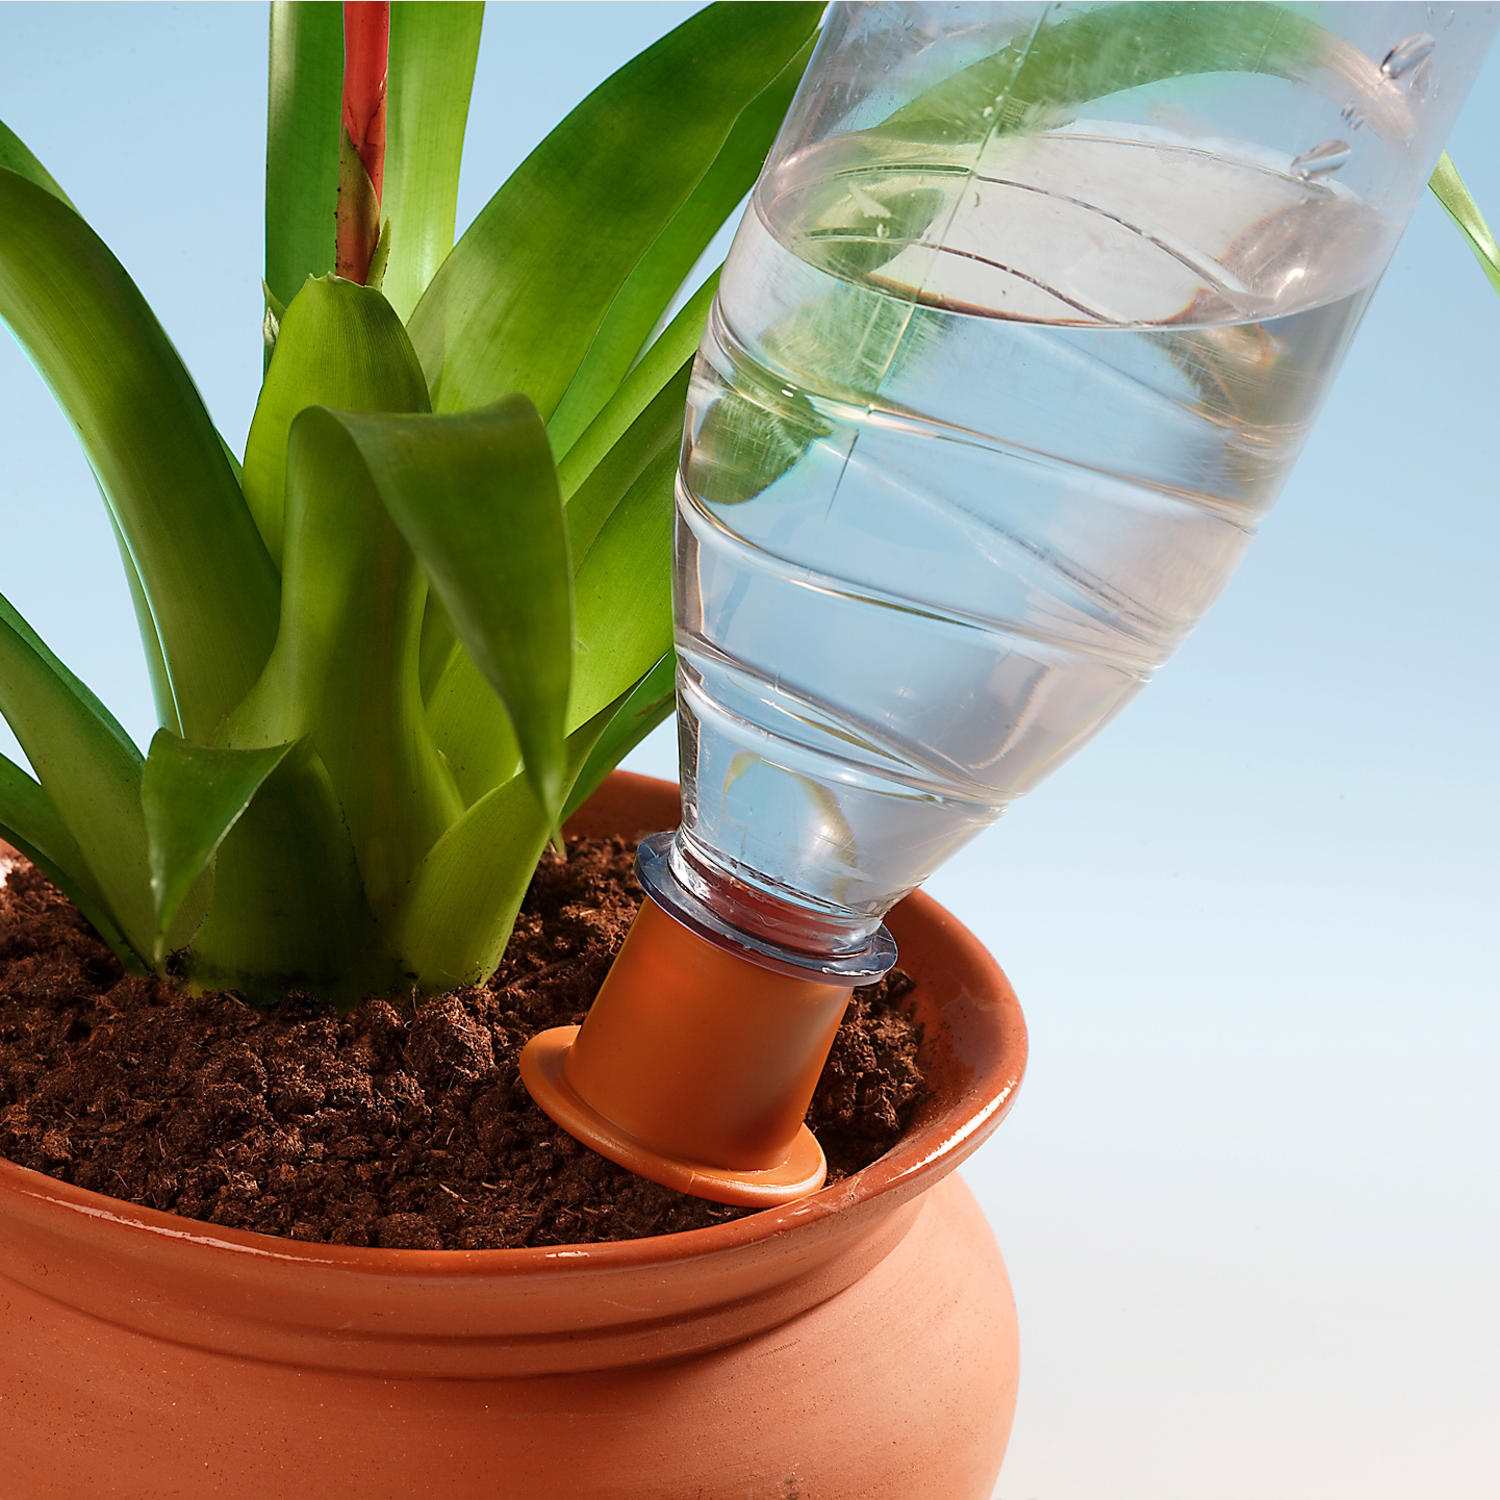
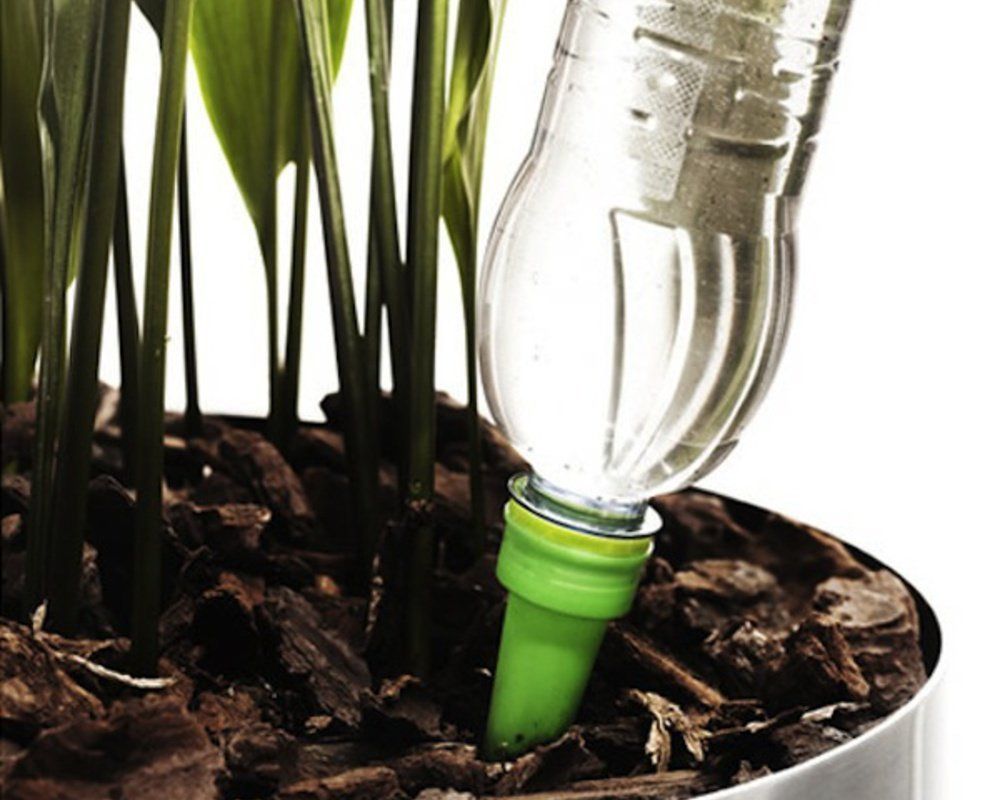
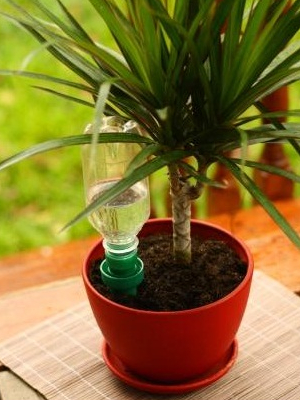
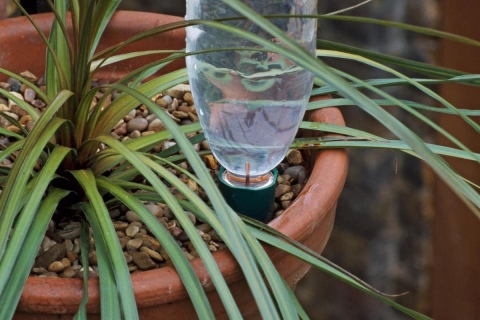
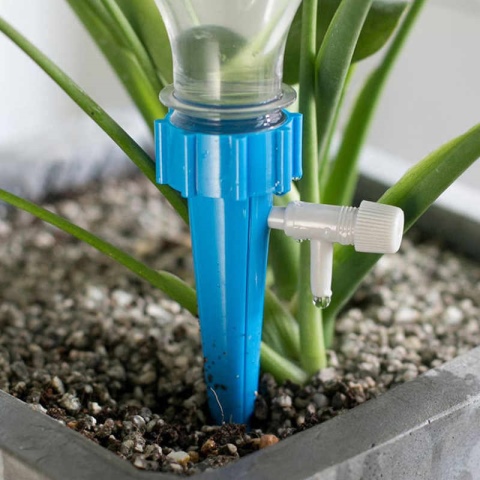
There are special perforated tips on sale. They are screwed on instead of a lid, after which the bottles are turned upside down and installed near each plant. It is convenient and quick to change water, garbage does not get inside, and in general, such an irrigation system looks aesthetically pleasing.
And one more method is for caring for seedlings in vases or indoor flowers.
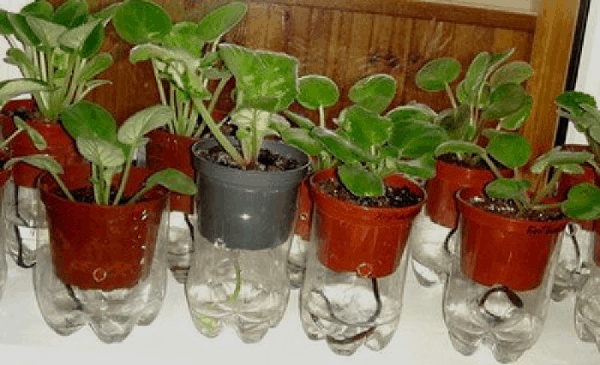
We make drip irrigation for the care of indoor plants
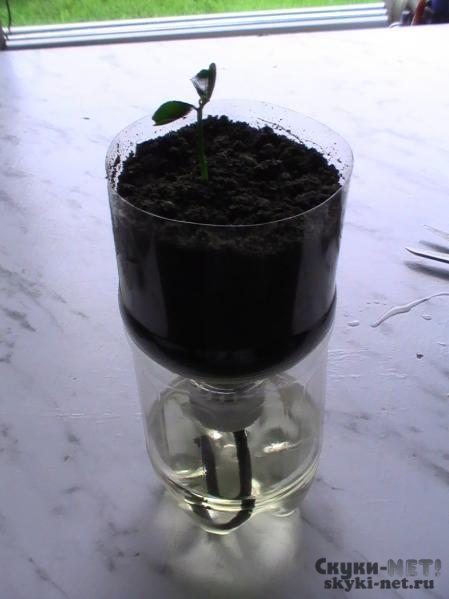
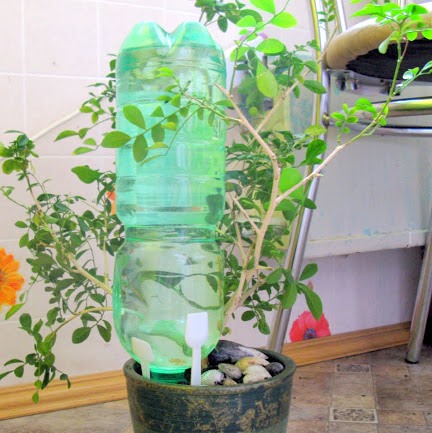
- The bottom is cut off from one bottle, and a hole is made in it, equal in diameter to the lid of the second eggplant.
- Two cuts (or cuts) are made in the neck of the second vessel, the lid is twisted, the prepared bottom of the first bottle is threaded up.
- The resulting structure is filled with water and quickly flipped onto a recessed tray or oven tray. All pots with flowers or seedlings are placed there.
The water will flow out gradually as it is absorbed. For such watering, it is better to take small bottles so that they cannot accidentally tip over under their own weight.
The system can be improved at your discretion: it can be equipped with hoses and a reservoir with a water supply so that the container can be filled autonomously, or additionally use droppers.
A little work and attention - and the garden, even in the driest summer, will turn green and bring the harvests deserved by good owners.
Jul 30, 2015
Article Information
Name
Making a drip irrigation system from plastic bottles
Description
This article is a step-by-step guide on how to make a drip irrigation system from old plastic bottles with your own hands. There are 3 different ways.
author
How to prepare plants for automatic watering?
Home flower care mainly consists of top dressing and regular watering. Top dressing is carried out depending on the season and the general condition of the plant, but usually not more than once a month. But without regular watering, green spaces will not live long. That is why, when planning to leave for more than a week, it will not be superfluous to purchase or design an automatic sprinkler in advance.
In order for indoor plants to withstand the upcoming "drought" with dignity, they must be properly prepared.
- A few days before departure, the remaining inflorescences and buds are broken off, if possible, the bush is thinned out, removing the widest leaves. This will reduce the evaporation area.
- At the same time, flowers are examined for diseases and pests. For the safety of healthy plants, damaged specimens must be processed and transferred to another room.
- All greens are removed from window sills, stands, bedside tables and grouped in the middle of the room, away from batteries and windows. He puts the pots close to each other. The less light and heat, the higher the humidity.
- After feeding, plants need a lot of water for better digestibility of minerals. Therefore, before leaving, in no case should fertilizer be applied. The last feeding is carried out three weeks before departure.
Now all that remains is to water the house plants abundantly, connect the automatic watering - and you can go about your business. In conditions of drip irrigation, flowers can grow from 7 to 20 days; it is undesirable to leave your green pets for a longer period.
