What conditions are needed for growing
The peculiarity of the bulbs is that they are not able to physiologically dormant. This means that they need constant air exchange and a certain humidity. Until the moment of sowing, they are stored in a dry, well-ventilated room at a temperature of + 20 ° C and a humidity of 60–70%. During this period, a flower bud is formed in the bulb.
In mid-October, the air temperature should be reduced to + 17 ° C. From this point on, you need to start pre-planting autumn preparation. It consists in cold treatment of the bulbs. By the time this effect begins, the future plant should be fully formed in it.
The cooling process is called distillation. For early flowering varieties, it should be 16 weeks. To begin with, the bulbs are placed in the soil.
The composition of the mixture can be different:
- clean river sand;
- a combination of sand and peat;
- only peat;
- sand with garden soil.
Did you know? Tulips grow even after being cut and placed in a vase. The bouquet may well grow by about 5 cm while standing indoors.
Some gardeners advise taking 2 parts of the soil from the garden, 1 part of compost and 1 part of clean sand. Add to the mixture 50 g of ash. Stir. Fill the pot 2/3, plant the bulbs and add the soil. After planting, watered with a pale solution of potassium permanganate. Then the containers are transferred to a cool place with a temperature from 0 ° C to + 10 ° C. This phase will take about 4 weeks. After that, the air temperature near the containers is lowered to -2 ° C and covered with foil to avoid unnecessary moisture loss.
As soon as the roots sprout, tulips are returned to a warm room. The first few days, the lighting should be dim, and the temperature should be about + 12 ° C. Plants can even be shaded to keep them from stretching. The lighting and temperature are gradually increased. The seedlings will need to be watered regularly and provide a suitable microclimate for growth.
Capacity selection
The best pot is considered a container in the form of a dish. It looks very decorative. But the bulbs also grow well in pots. Any portable container should have a drainage hole to provide good air exchange to the bulb. Sometimes tulips are planted in baskets. This is also convenient in its own way.
Soil composition
A neutral or alkaline soil is ideal for tulips. They love soil rich in organic compounds most of all. The addition of organic matter is mandatory to clay or sandy soils, since they are poor in nutrients. You can find one at your local garden center or make your own.
For indoor tulips, the following combination is suitable:
- sphagnum moss at the bottom of the pot;
- rich, fertile soil from about the middle to the end of the pot.
Well-drained soil is capable of passing a large volume of water. Poor quality soil does not allow water to pass through well, which means it does not provide proper growth and cultivation of the plant.
Did you know? Most tulips form one bud on one stem. But several varieties can have up to four of them on one stem.
Temperature, humidity and lighting
The temperature regime depends on the stage of development of the bulb. So, after collection or purchase and until the moment of distillation, the temperature should be + 20 ° C, humidity 60–70%. Then it is reduced to + 17 ° C, the bulbs are planted in containers and taken to forcing at temperatures from 0 ° C to + 9 ° C. After distillation, the temperature regime is gradually restored to + 20 ° C. And they support it until the moment of cutting or the end of the vegetative period.
Tulip growing technology
Now you can move on to the most important stage of work - growing flowers. It can be roughly divided into three stages:
- disembarkation;
- watering, lighting and feeding for growth;
- collection of bulbs with their subsequent canning.
Let's take a closer look at how to plant tulips on the balcony without making mistakes at any of the indicated stages.
Planting bulbs
The scheme of planting the selected bulbs in the ground:
- Fill work pots or boxes with substrate 2/3 of the way up. Pour it with a 10% solution of potassium permanganate.
- Prepare groups of bulbs for each container. Clean them from excess husks, spread them on the ground at a distance of 1-2 cm from each other and gently press down 1 cm deep.
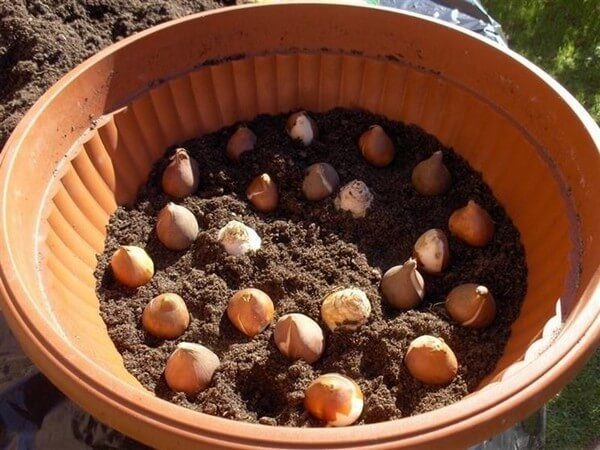
The bulbs must first be slightly deepened and only then finally covered with soil.
- Add soil to the top of the container - the soil should completely cover the planting material.
- Pour water over the substrate. If it subsides, add more soil.
The planted bulbs should be left on the glassed-in balcony for 13-16 weeks to cool. The air temperature should be at least + 3-4 ° C and not higher than + 6 ° C. Bulbs cannot be frozen, open balconies are not suitable for cooling. The container with planting material must be covered with newspapers or a dark cloth.
Top dressing, watering and lighting
During the cooling period, tulips are watered as the soil dries. 13-16 weeks after planting, the pots and boxes are transferred to a warmer place or provide heating to the balcony - the temperature should be at least 12 ° C. At this stage, the period of plant rooting begins.
For the next 6 weeks, you need to maintain constant soil moisture - this is important for the first shoots to appear. Dark cloth and newspapers can be removed
At the end of the rooting stage, the sprouts should reach a height of about 5-7 cm. Now the temperature on the balcony should be at least 21 ° C. At this stage, plant feeding is carried out - add 100 g of organic fertilizers and 20 urea and ammonium nitrate to the soil. You can also use 1.5% calcium nitrate for replenishment.
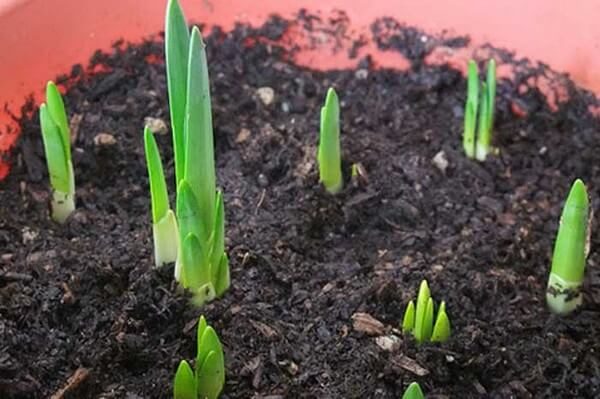
The first shoots are proof that rooting was successful
The next stage is active growth. Plants need good lighting at this stage. If there is little natural light, install a 40-60 W fluorescent lamp on the balcony: place it at a height of 30 cm from the top of the sprouts and raise it as the tulips develop. You need to light the sprouts for at least 12 hours a day.

When the sprouts are strong, the tulips need to provide quality lighting.
When the sprouts develop into strong stems and have the first buds, begin to gradually reduce the temperature on the balcony. Spray the leaves twice a day without affecting the buds. Artificial cooling and humidification will prolong the flowering of plants.
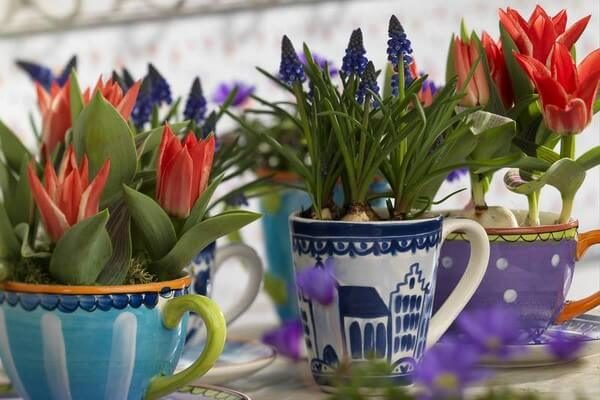
Work done reward - blooming tulips
Post-flowering care
After flowering, the bulbs need to be left in a pot or box on the balcony for another 4 weeks, continuing daily watering - this will allow them to fill with moisture and ripen to their maximum size before conservation. After a month, when the leaves of the plant become dry, carefully dig up the bulbs, remove their old peel and dry: a month at a temperature of 23 ° C, another month at 17 ° C, the next months at 14 ° C.
Next fall, planting tulips on the balcony using this seed will not work - the plants will germinate, but will not bloom. Therefore, it is better to let the bulbs rest for at least a year, and then repeat the whole procedure again. An alternative option is to plant the plants naturally in the garden.
Service prices *
| Name of service | Price |
| Consultation with a chemotherapist | Price: 5 150 rubles |
| Intrathecal chemotherapy | Price: 15 450 rubles |
| MRI of the brain | Price from 8 900 rubles |
| Chemotherapy | Price from 50,000 rubles |
| Comprehensive care program for cancer patients and HOSPIS | Price from 9 690 rubles per day |
| Gastrointestinal oncology program | Price from 30 900 rubles |
| Lung oncology program | Price from 10 250 rubles |
| Oncology program of the urinary system | Price from 15 500 rubles |
| Oncology program "women's health" | Price from 15 100 rubles |
| Oncology program "men's health" | Price from 10 150 rubles |
How to grow tulips in an apartment in winter. Magic flower bed on the windowsill: how to plant and grow tulips at home
Green stems and delicate tulip flowers look very impressive against the background of icy window panes. Friends will surely be surprised when, in the middle of a snowy winter, they see a multi-colored lawn on the windowsill in your apartment. These amazing flowers will bring you a lot of joy and brighten up the long wait for the spring sun.
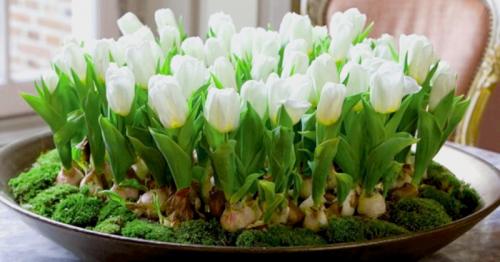
Growing tulips at home is not too difficult, and the bulbs can be used next season, so don't go for rare, exotic varieties from the start. Much less whimsical undersized tulips are best suited for a tiny flower bed. They are quite durable and do not require too painstaking care.
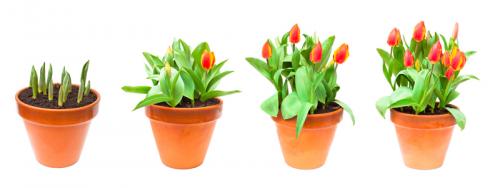
Even novice gardeners can handle this challenge. Moreover, if you follow our step-by-step instructions. So let's start: 1. How to choose the right bulbs for planting, as long as they are intact and free of external damage. The old and tough husk must be removed and the bulbs must be held for half an hour in a weak solution of potassium permanganate. You can also use special antimicrobial drugs. They are now sold in assortment in gardening stores.

2. How to prepare the soil. The quality of the soil is of great importance. You can buy specially prepared land or use homemade land from your own plot. But at the same time, the soil should certainly be loosened. You need to add about 5 grams (teaspoon) of nitrogen fertilizer per kilogram of soil. At the bottom of a bowl or pot, always with a hole to remove excess moisture, you must put a drain. Then pour the prepared soil into the pot almost to the top.

3. How to plant the bulbs. Just spread them out on the surface of the soil. Place them upside down and tight enough. Cover the top with a layer of soil and water liberally. Now you can take the tulip container to a dark, damp and cool place. Please note that the temperature should not exceed 12 degrees Celsius.
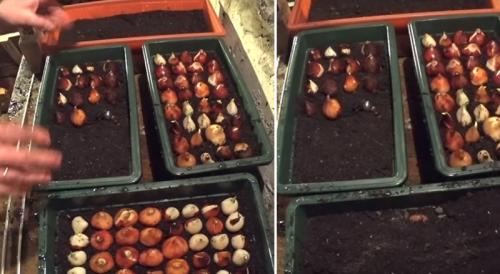
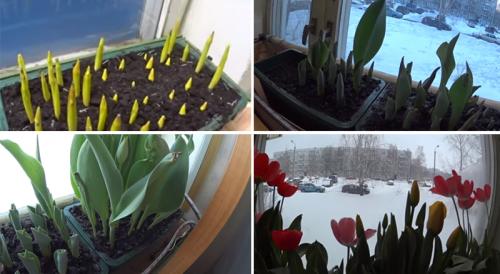
4. How to achieve flowering. Watering the future flower garden should be at least once a week. When sprouts appear, move the pot to a warmer room. It is desirable, of course, that the temperature rises gradually until it reaches the optimum - 16 degrees. Very soon, timid sprouts will turn into strong stems, and then, after ten days, buds are already formed. And after another week, beautiful flowers will finally bloom. In this case, you should not use additional sources of heat, because the flower will quickly lose the petals. We recommend that you immediately move the tulips closer to the cold window glass, then they will retain their pristine freshness longer.
As you can already see, growing these spring flowers at home is not too tedious and troublesome. It does not require additional equipment, a special cellar or greenhouse. A glazed balcony is fine. And for planting, you can use containers of any size. A tiny pot is suitable for a couple of bulbs, and a wide box is for a full-fledged flower bed.

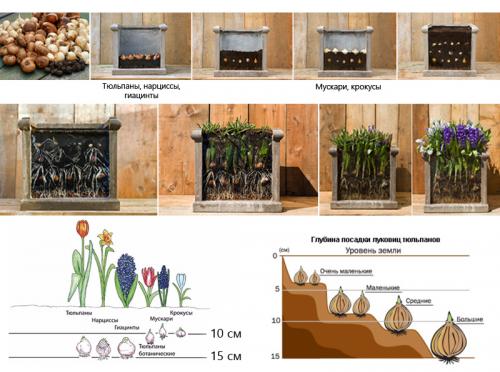
You can also plant different types of bulbs in one pot at different depths. Then they will sprout and bloom at different times. And you will always have bright and fresh flowers on your windowsill. Try not only tulip bulbs, but other spring flowers as well.For example, you can arrange the so-called "flower lasagna", that is, plant crocuses, daffodils and hyacinths in one container.
A couple more important tips. If you absolutely need tulips to bloom by March 8th, then they should be planted in late November or early December. This already largely depends on the variety.
However, on average, it takes about four months from planting to flowering, but keep in mind that for small bulbs, it is better to use low containers. You need to choose ceramic pots, they allow air to pass through and protect the roots of plants
Plastic containers heat up easily and block oxygen access.
As you can see, it is not at all difficult to create a flower bed of colorful tulips on your own windowsill. And if you don't have enough time to do forcing, don't be upset. You can always get houseplants that bloom all year round. You will only need to water them and enjoy the fragile and delicate beauty.
We grow tulips at home in winter. How to do it?
You can grow such a bouquet by a certain date. For example, by March 8th, when flowers are especially popular with us. Also, I think it will be nice to get live tulips for other holidays in winter. The very process of growing such a bouquet can be easily regulated. You can give it an acceleration, or you can slow down the rate of cultivation a little. Everything here is regulated quite simply.
How to plant tulip bulbs?
We will plant tulips in a pot. Anyone will do. It is up to you to determine the size of the pot. It all depends on what size "live" flower bed you want to get in the end. You can take any soil for filling the pot. When you fill the pot with soil, you can already plant tulip bulbs there. They do this very tightly, that is, the bulbs are pressed almost end-to-end. You can even plant them in two tiers, again, everything is just as tight to each other.
If you take a small pot, then you can plant 20 bulbs somewhere in it. After planting, the bulbs are watered, and the pot itself is then placed in a cellophane bag. Further, right in this package, the pot will need to be placed in the refrigerator. Find a place for it on the bottom shelf there. You should not forget about it. Remove the package periodically from the pot, do not let the earth grow moldy. But, you also do not need to give it and dry out. Timely watering is also very important here.
How to grow?
After spending a couple of months in the refrigerator, the tulip bulbs will root well, and you will see the first sprouts, which by that time will appear from the ground. Now, it's time to get the pot out of the refrigerator and put our tulips out for "distillation". In warmth, the sprouts will quickly go up. This growth will not be due to active photosynthesis or some kind of additional nutrition, but due to those nutrients that are present in the bulbs themselves. That is why this process is called “distillation”.

How quickly your tulips will grow is up to you. It can be regulated very simply. If we take the average, then this is about 2 or 2.5 weeks. During this time, on average, a good bouquet grows. But, if you need to speed up this process, for example, by a certain date, then from the window you need to put a pot of tulips in a warmer place. There they will bloom much faster. And when the timing does not matter, then let the pot stand in a cooler place. Then the tulips will bloom much later. Here you should be aware that flowers that developed more slowly will be stronger than those that you accelerated. Accordingly, such tulips will also last longer in a vase.
When the holiday comes, tulips can be cut and given to the one for whom you grew these flowers. Let this person appreciate your work and rejoice in the winter tulips. But, you can give flowers directly in the pot, that is, do not cut them. Just like tulips, you can grow other small-bulb flowers in your home.For example, crocuses, and besides them, Pushkinia or Scylla. These flowers, after being in the refrigerator, bloom even faster. Even in less than 7 days. So you get a bright, lively flower garden at home, which will grow right before your eyes.
This video will also help you grow tulips at home in winter. Here you will also be shown several ways to do this. We look.
Choice of colors and containers
The lion's share of the success of planting tulips on the balcony is a competent choice of plants and containers for growing them.
What to look for when evaluating bulbs and where should they be planted? Looking for answers further
Tulip varieties
Not all types of tulips are suitable for growing on balconies - there are no strict requirements for choosing a variety, but there are two important recommendations that should not be neglected if you want to get a decent flower garden:
- it is better to choose undersized varieties with a strong peduncle;
- plants must be immune to variegation, otherwise the buds will grow empty, pale and lethargic.
Taking into account these factors, the following varieties will be the most successful choice for landscaping a balcony:
Greiga is a flower with a classic goblet-shaped bud and large leaves with a pronounced pattern.
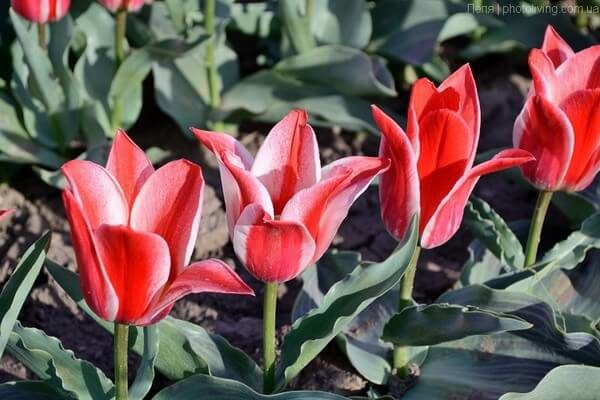
Greig
Armagh - with terry-fringed petals with a frost effect on the outside.
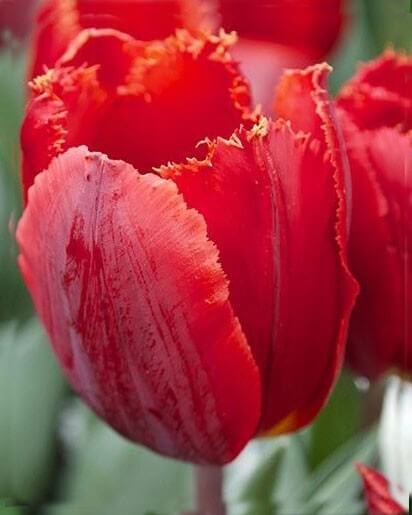
Arma
Kaufman - with goblet buds with characteristic pointed tops of the petals and contrasting stripes on the back of the leaves.
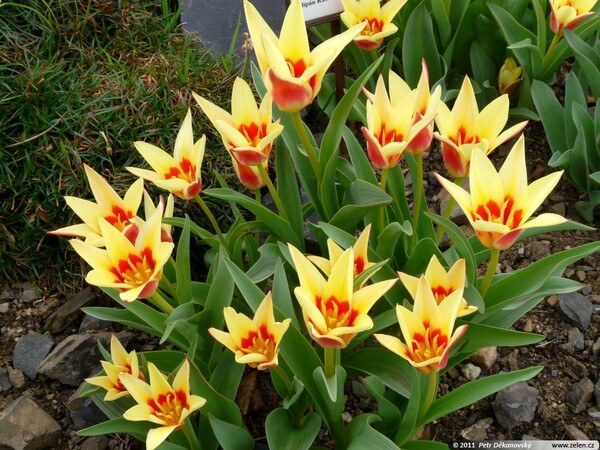
Kaufman
Foster - with large elongated buds and wavy leaves.
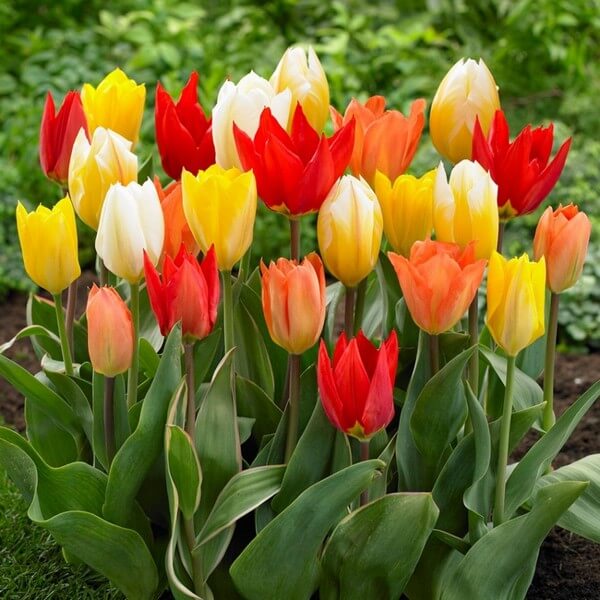
Foster
Types of working containers
For planting tulips on the balcony, two types of containers are most optimal: pots and boxes. Their shape can be variable, but the dimensions have minimum thresholds: depth - at least 25 cm, height - 30 cm, bottom width - 20 cm.In such a container, you can place five medium bulbs.
Another criterion for choosing a container is material. Most often, two types of containers are used to organize a garden on a balcony:
Plastic - retain moisture with high quality, are resistant to salts, provide roots with protection from hypothermia, and are distinguished by a low price. Among the disadvantages are rapid heating in the sun and low stability due to its low weight.
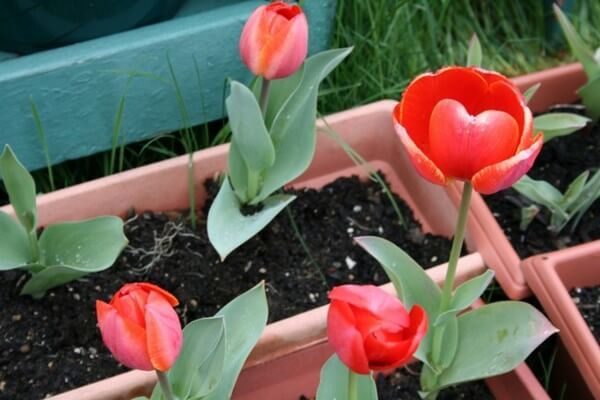
Plastic container - economical and practical option
Ceramic - have a spectacular appearance, provide active circulation of moisture and air, demonstrate high stability, maintain a stable soil temperature. Cons - high cost and tendency to the appearance of salt and lime deposits.
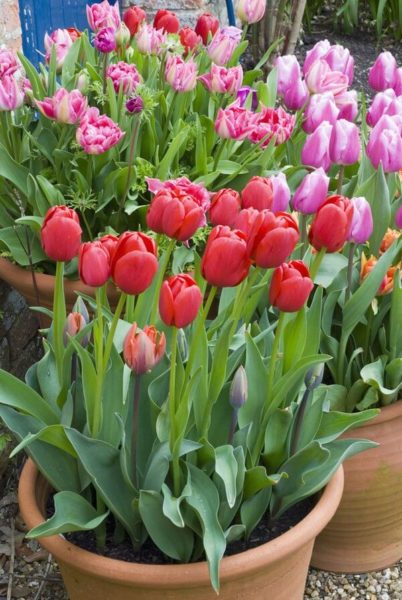
Ceramics - a solid and durable companion for tulips


