Ideal time to harvest bulbs
What to do next with plants when gladioli have faded? Unfortunately, most species are not resistant to frost and must be dug up. The climatic conditions of cultivation determine when to dig up gladioli. In general, you should be guided by the air temperature and the time limits of the flowering period of the plant.
The optimal time for excavation in the temperate zone is mid-September, even if the leaves are still green. In this case, about 6 weeks should pass after flowering, the ambient temperature drops to about 10 ° C.
Exposing the bulbs to the ground for too long can lead to their infection with various diseases and possible pest attacks.
Important! If the leaves are covered with yellow and brown spots and dry early, this may indicate that the fungus has attacked the plant. Then urgent digging is necessary, while there is still a chance to save him.
Cleaning weather
Dig on a dry sunny day to keep the ground dry. The bulbs are then easily cleaned and less likely to be damaged.
Step-by-step digging process
Digging is the basic procedure to do with gladioli after flowering. When the time comes, you need to take a shovel or a pitchfork and perform sequential actions:
The blade of the working tool must be immersed in the ground carefully, trying not to tilt so as not to cut the bulbs;
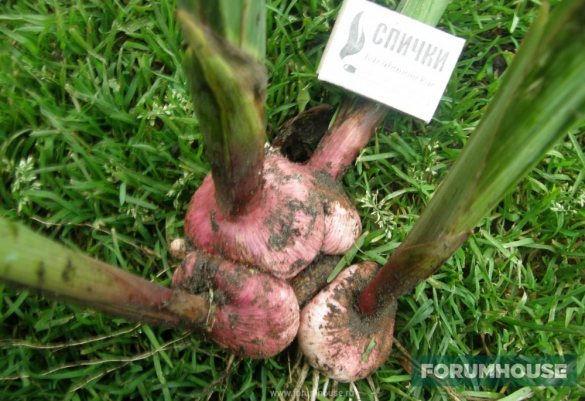
Dig up the plant and gently remove it from the soil by pulling on the stem. Shake off excess soil
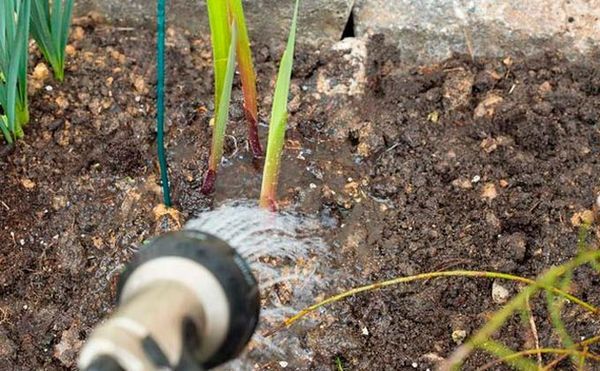
If the earth is stuck, it is recommended to rinse with warm water;
Prepare an oilcloth or polyethylene film to lay the dug gladioli on it. This way you can find all the bulbs, including babies;

Excavated gladioli
Important! When the stems have not yet turned yellow, the plants are left on oilcloth for 3-5 days, thus the remnants of nutrients from the aerial parts of gladiolus migrate to the corms
- Remove the old corm bottom. If it is ripe, then it is easy to do. Otherwise, let it sit for ripening and drying;
- Trim the roots;
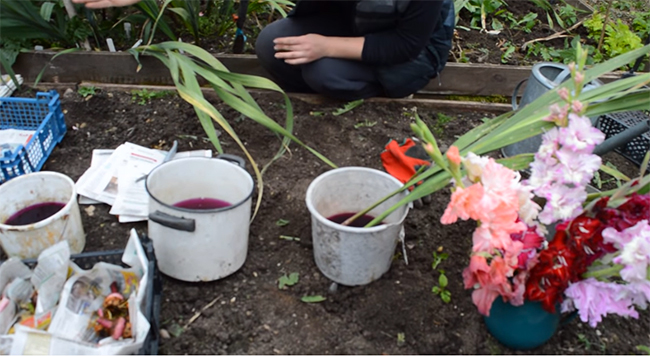
- Rinse and treat the bulbs with a strong solution of potassium permanganate (2-5 g per 10 liters of water). Keep in solution for at least half an hour.
- Then the stem is cut with a sharp secateurs. You can leave no more than 1-2 cm so that the thrips, possibly present on the yellow stem, do not pass under the scales of the bulbs, where they can safely survive the winter.
Storage in the apartment
But there is no home? How to store gladioli in an apartment? Many people advise putting the bulbs in the refrigerator, in the lower compartment with vegetables.
The secret of winter storage from seasoned summer residents: a refrigerator is not the best option for gladioli. The temperature there is suitable, but the high humidity (from vegetables, including) will force the roots to actively grow in a month. And the corms need to lie down until spring. So, in order to store gladioli in winter, a refrigerator is not an option. We are not worried!
- We wrap it in newspaper, paper.
- We put it in a cardboard box, a wooden box.
- Now we are smart and put it in the coldest place in the apartment.
But the most difficult thing is to find such a place. Previously, there were no double-glazed windows in the houses, there was a strong blow from the cracks and it was easy to store gladioli after digging.
But modern double-glazed windows are not at all the same: there is no necessary cold, or rather not at all. Glazed balcony, balcony can solve the problem.

If the winters are not very harsh, try storing there.But remember - gladioli cannot stand freezing temperatures, so watch the weather.
- If there is a strong minus, close the boxes with newspapers, wrap them up with blankets.
- Bring it home for a while, finally, if Santa Claus is outright dispersed.
- But don't just place the box on the balcony on the floor. Take care of the pallet so that the bulbs do not freeze or get damp.
But what if you live on the first floor of a multi-storey building? Catastrophe! So don't even take up storage? Do not panic! There are cellars, public attics. And in the apartment there are sure to be cool places where there are no batteries nearby. You just have to look. Ask your friends for help and take your treasure "for overexposure". The world is not without good people.
When the bulbs do not need to be dug out

Gladioli should not be dug up and stored if the bulbs are rotten or infected. If the variety is rare and it is a pity to throw out the onion, you can cut off the damaged area and cover it with brilliant green. When infected with viral diseases (mosaic, ring spot), the planting material must be thrown away, pathologies cannot be treated.
The onions should be thrown away if they deteriorate during storage - they become soft, covered with brown or greenish spots. Planting material should not be thrown away if the shell of the bulbs is cracked - the problem arises due to uneven development, when drought alternated with heavy rains in the summer season. When cultivating gladioli, it is necessary to observe the terms of planting and harvesting planting material. Subject to the storage conditions, the onions overwinter well and will be ready for planting in the spring. If everything is done correctly, a flower bed with gladioli will delight you with lush flowering for many years.
Useful articles from the "Bulbous" section:
Useful articles for the gardener:
- Planting gatsania seedlings in 2020: timing, cultivation and care
- Lovage: growing, care
- When to plant leek seedlings in 2020: timing
- Purslane: planting and care
- When to dig tulips in 2020 after flowering: timing, storage
- When to harvest walnuts: timing, storage
- Mushroom picker calendar 2020: when to collect, auspicious days
- Autumn work in the garden and garden: what needs to be done
- Do I need to dig a garden before winter: timing, what fertilizers to apply
- Apricot compote for the winter: delicious and simple recipes
How to store gladioli in winter?
The main danger that traps bulbs during winter storage is rot. In order to prevent decay, the gladiolus bulbs are disinfected after digging. To do this, they are first washed in running water, and then soaked for half an hour in a solution of Fitosporin (according to the instructions) or for an hour in a pink solution of potassium permanganate.
Next, the bulbs are left in the open air until they dry completely. Keep in mind that in this form, they are an attractive bait for pests. To prevent insects from laying eggs in freshly harvested bulbs, dry them in gauze or tulle bags.
On the street, the bulbs are dried in good weather for three days, they are brought into the room at night.
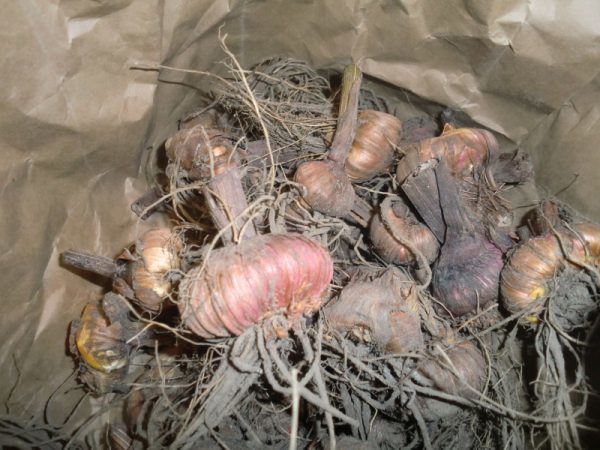
After "airing" the gladiolus bulbs are sent indoors for the winter. They are laid out in boxes, boxes or baskets in one layer and stored for a month at a temperature of 20-25 ° C, regularly turning over and inspecting for rot or dents. only after such a long and thorough drying are the bulbs ready to be sent to a well-ventilated basement or cellar.
In the storage, it is important to maintain not only the optimum air temperature not higher than 8 ° C, but also the humidity. So that the bulbs do not rot and dry out, it should be about 65-75%
Calendar planting bulbous and corm flowers
Table of dates for sowing seeds and planting tubers and flower bulbs.
When should you dig up gladioli for the winter?
Even beginners are well aware that bulbs are dug up after flowering. In the case of gladioli, this is autumn.But when exactly to dig up gladioli bulbs in the fall?
It is important to correctly determine the favorable digging time. If you remove the bulbs of gladioli too early, before they have gained strength for wintering and flowering next season, the plant may not emerge or not bloom.
If you overexpose gladioli in the ground, they can freeze and even die.
How to determine the ideal moment to dig the gladioli bulbs? The main criterion is the condition of the aboveground part of the plant. You must allow it to completely die off and turn yellow. Changes in color indicate that the plant is no longer producing chlorophyll and therefore has stopped growing. It is impossible to disturb the bulb earlier.
Do not cut, pluck or twist the stems and leaves of gladioli until they die off completely.
The exact timing of harvesting gladioli for the winter depends on climatic and weather conditions. As a rule, you can arm yourself with a scoop 30-50 days after the end of flowering. But again, we repeat that the main indicator is the state of the aboveground part of the plant.
10 important rules for growing gladioli
Do your gladioli bloom poorly and dry quickly? Check if you are looking after them properly.
First of all, they dig up the bulbs of early varieties of gladioli. Late gladioli are harvested last for the winter. Lavender, blue, purple, dark red gladioli tend to be harvested before whites, yellows, pinks and oranges. Later, you can dig up gladioli grown from children.
When to dig up gladioli bulbs in different regions
Of course, the timing of digging gladioli also depends on the climate in which you grow them. For example, in the southern regions, where in winter the temperature does not drop below 0 ° C, the bulbs can not be removed at all, but only cut off the ground part and mulched or covered with spruce branches, hay and any similar organic matter. In the northern regions, where only the earliest varieties of gladioli are grown, flower bulbs often do not have time to ripen. They have to be dug up immediately after flowering together with a clod of earth and "ripened" in pots for a month, and only then prepared for storage. In central Russia, gladioli are harvested from the second half of September, shortly before the first frost. In the south of the country and in Ukraine, gladioli are dug up until mid-October, focusing on the end of flowering. If it stops in mid-August, then in 30-50 days (from mid-to-late September) the bulbs will ripen and be ready for harvesting.
When to dig up gladioli of different varieties and colors
It will be easier to navigate the timing and sequence of harvesting gladioli if you remember which variety and where you planted it. Early varieties bloom first (in late July and early August), respectively, and they need to be harvested earlier than others (in early September). Together with them, all the bulbs whose leaves have already dried and turned yellow are sent to harvest. Firstly, they are definitely ripe, and secondly, there is a high probability that they are affected by a disease and need urgent disinfection.
If you do not know the varieties of your gladioli, and did not remember the flowering date, be guided by the colors - dig up black, red, purple and purple gladioli first, since they are more susceptible to diseases than others.
Young gladioli grown from babies, those specimens that did not bloom this year, as well as late varieties should be dug up the very last - their bulbs ripen for about 50 days, so there is no need to rush.
How to dig out a workpiece
Forks with wide flat tines or a regular shovel will do.

- The bushes are carefully dug in, trying not to touch the root.
- Gladioli are pulled by the stems and shaken off the ground.
- Be sure to select small daughter seeds, which are considered the most viable and resistant.
- If the stems are green, the flowers should lie in the room for several days on plastic wrap for the nutrients to transfer to the root.
- The yellowed aerial part is cut off immediately, leaving a centimeter tail over the tuber.
- It is not advised to leave a stump longer than 1.5 cm. Thrips attacking gladioli live at the base of the flowers, and can move into the bulbs, destroying all the seed.
- Spoiled and diseased workpieces are collected in a separate container. The mother's bulb is also torn off to protect the rest from infection and fungus. The rejected material is incinerated.
Digging and decontamination
Gladiolus in the hands of an experienced gardener will survive until spring without difficulty and the question "how to do it?" Beginners! Learn the simple rules of disinfection.
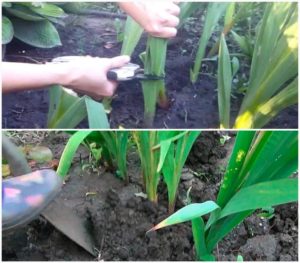
Dig out the plants first. Choosing dry weather and getting started. There is no need to hold the flower by the leaves and tear it out of the ground: the leaves will break off, the tuber will remain there.
- Get a suitable garden tool.
- We stick it vertically, not under the root, at a distance of ten to fifteen centimeters from the plant. So the onion will remain intact.
- We dig out carefully, shake off the tuber from the ground. Finish - rinse the entire catch in clean water.
- If you are a pedantic gardener, then divide the tubers by varieties.
- Fold in different containers, do not forget to sign the names.
Move on. Now disinfection. For what? Fungus, insects thrips - gladioli love, like people, only for different purposes. Gardeners are connoisseurs of beauty, and all sorts of garden byaki-beeches are looking for something to dine on. A poisonous solution will help prevent the gladioli bulbs from spoiling during storage.
Means for processing and disinfection
Which to choose? The industry produces broad spectrum poisons. Any specialty store has a large assortment. Here are several types of solutions suitable for gladioli tubers with dosage and disinfection time:
- potassium permanganate (we make a weak solution) - we stand for up to an hour;
- the drug "Maxim", an analogue of potassium permanganate (4 milliliters per 2 liters of water) - put for 30 minutes;
- solution of "Karbofos" (40 grams per 10 liters of water) + "Fundazol" (according to the instructions) - soak for 30 minutes;
- "Trichoderma veride" (2 liters of water + 1 teaspoon) - hold for 30 minutes;
- "Fitoverm", "Iskra", "Inta-Vir" - we dilute according to the instructions, hold for 30 minutes;
- 5 minutes in hot water (strictly 50 ° C).
How to store gladioli in winter at home

Photo: how to store gladioli after digging in boxes
In the apartment
In a city apartment, you can find quite good places for storing seed:
- in the vestibule or in the hallway. Each onion is wrapped in paper and folded into a plastic bag. There must be enough holes in the bag.
- on a glazed loggia. Flower tubers are placed in a single layer in boxes and placed on a raised platform. In severe frosts, the boxes are brought into the room and placed at the balcony door.
- on the windowsill
Important! Periodically, you need to inspect the seed and remove diseased specimens in time, as they can infect the rest of the bulbs.
In fridge
In the refrigerator, gladioli tubers can be stored in vegetable containers. Each tuber is wrapped in several layers of newspaper and placed in the appropriate compartment. It is imperative to control the humidity in the refrigerator. If mold appears on the tubers, then they need to be dried again and the paper replaced. If the humidity is high, the newspaper needs to be changed at least once a month.
Important! In no case is it allowed to store gladioli bulbs in the freezer.
In the cellar
A cellar or basement is considered the most suitable for storing gladioli bulbs. The low temperature and stable humidity allow keeping the material almost without loss. The tubers are laid out in boxes, which are stacked on top of each other. This will help save space and provide good air exchange.
It is not advised to place fruits and vegetables near the tubers, they can release a large amount of moisture. This can lead to mold growth. When mold appears, the tubers need to be sorted out, dried and replaced with the newspaper.
How to keep from pests and diseases
Gladioli tubers can be damaged by thrips and other microorganisms. Thrips are taken under the husk and completely drink the juice from the corm. After that, she dies. To protect the bulbs from pests and diseases will help:
- Garlic. In this case, together with the tubers, chopped cloves of garlic are laid in the boxes. When checking the planting material, dried slices are replaced with fresh ones.
- Paraffin. The candle is melted, the wax should not be hot. So that the composition does not freeze, it is placed in a water bath. Then each onion is dipped in paraffin and then in water. This procedure will protect against moisture loss and external infection. The paraffin layer can be easily scraped off by hand. For an already infected bulb, such a procedure will not be life-saving.
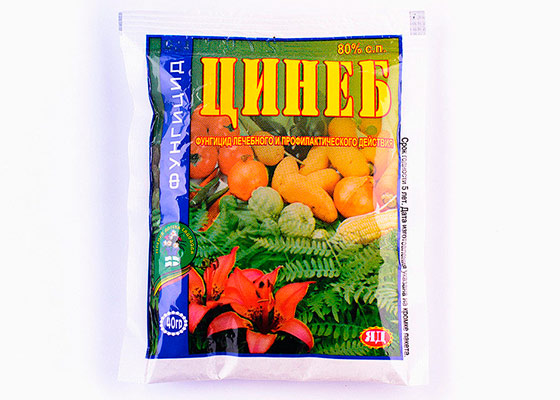
If pests do appear, you can use the drug Tsineb. The bulbs are immersed in it for 30 minutes, then dried well (about 2-3 days) in a ventilated room and put back into storage.
Choosing storage locations
People have different roofs over their heads. There are more conditions in a private house. Attic, drying shed. Storage cellar. How to keep gladioli in the cellar in winter? Think about packaging.
- Choose wooden boxes better.
- Are there no such ones on the farm? Plastic ones are fine too, although they are not made from natural materials.
- The cellar is not needed damp, with good ventilation, not freezing, without apples.
- Fruit will add moisture. As a result, gladioli can rot.
But what if the state of the basement is deplorable, not suitable for storage? In any case, there is a way out. You are in your house! Entrance hall, storage rooms, vestibule in front of the front door, and other cool places are at your service.

Interesting on the topic: Planting gladioli - varieties and storage conditions of bulbs
Advanced florists, seriously dealing with gladioli, buy special industrial boxes with ideal conditions for storing gladioli at home in winter. As a result, they don't have to fiddle with blankets and wraps. Put it down - connect it - forget it. Do not forget to just check in due time. True, it costs money, so homemade craftsmen try to save money and make boxes, lockers, chests with their own hands.
When to dig
Now consider the question of when to dig up gladioli in the fall. To determine the time for digging out corms, you need to remember the time of flowering and cutting flowers. Babies and bulbs ripen within 30-40 days from the day of flowering and cutting. For example, if the flower was cut on August 1, then the planting material is dug out on September 1.
If you have a lot of gladioli, then you will not be able to remember the flowering period of each. In such cases, a diary can be kept in which the flowering period of each plant will be noted. According to the records, the period when it is necessary to dig out the planting material is determined.
If you don't cut the flower, it will take 15-20 days longer to form the bulb. That is, it is possible to dig out planting material only 45–55 days after the beginning of flowering.

According to statistics, in the non-chernozem part of Russia, the flowering of gladioli begins in the second half of August. Therefore, the period for digging out the bulbs falls on the second half of September.
If the corm is not fully ripe, then the children are not yet separated from it, which means that when you dig up gladioli, you do not have to look for young bulbs separately in the ground. At the same time, early digging will not affect a healthy bulb in any way. An incompletely formed baby has a light gray or gray color. A fully ripe young bulb is dark brown, barely distinguishable from the color of the soil.

The tubers should be dug up in dry, sunny weather.First of all, you need to remove early varieties of gladioli from the soil, and then later ones. In order not to get confused about where which varieties, experienced gardeners grow early gladioli separately from later ones. If you adhere to these recommendations, then the question of when to dig up and how to store gladioli will become a thing of the past for you, and your flower bed will be complemented by delicious representatives of bulbous flowers.
What will happen if you do not dig up gladioli in time
If the gladiolus corms are dug up later than the prescribed period, in the cold, they may begin to rot during storage. The immune system of supercooled bulbs suffers, and water, when it freezes, destroys cells.

The peduncles are pruned when 1 or 2 lower flowers are open
In the winter season, negative temperatures are established on the territory of Russia and the CIS countries. One night in frozen soil is enough for the corm to die. All breeding hybrids are not winter-hardy and do not survive when the soil freezes. Neither mulching nor the construction of shelters helps.
If the bulbs are dug up ahead of time, they will survive if properly pruned and treated with pest chemicals. But they will need more time to adapt to storage conditions. The scales of such planting material are soft, they are easily scratched, and dents appear on the tuber with an accidental impact. The bulb spends a lot of energy preparing for winter and loses water. Do not dig up gladioli early. This can be done if the onions are affected by rot, pests, but the variety is valuable and you want to preserve it (but not earlier than July).
Drying of corms
The most crucial time is the first 14 days after removing the gladiolus from the ground.
It is important to dry it well, avoiding stagnation of moisture, so that the flower is stored reliably and for a long time. Bulbs are left outside during the day and brought home in the evening.
Drying is advised for 2-3 days. After this procedure, the tubers are laid out in one layer in separate boxes and left for several months in a ventilated room. In the first weeks, the bulbs are stored at above-zero temperatures of 25-30 degrees. After 15 days, it is lowered to 20 degrees.
Even during this period, it is necessary to periodically check the underground shoots of gladiolus for diseases and the presence of pests. If affected by mold, the tubers must be thoroughly washed with any detergent and sponge. You can use tar or laundry soap. Then the bulb should be treated with a disinfectant, cutting out the rotten parts. After that, the material is dried and placed in a new package for further storage, the old containers are discarded.
The timing of planting raspberries in the fall and preparation for the process
Do not remove the cover scales from the bulb before drying. Despite the fact that with the remaining moisture in the planting material, the top layer becomes a beneficial environment for the spread of mold, rot and harmful insects, it protects against drying out. Therefore, most growers prefer not to peel the tubers. Special preparations can help prevent the appearance of parasites in winter.
Before removing the gladiolus bulbs for storage, they must be divided into varieties and put into fabric bags. There is no need to use other material for such purposes, since they need air. In each bag you need to put a label with the name of the variety, so as not to confuse anything.
Stage 5 - pruning
Inexperienced growers are in a hurry to cut the peony immediately after its buds have crumbled. Do not do this! Everything has its time.
The process of photosynthesis takes place in the leaves, thanks to which the plant receives the nutrients it needs. Consequently, it is the stems with the leaves located on them that are the source of nutrition in peonies, as in other flowers. If you remove them, you strip the bush of these substances. The plant, of course, will not die from this, but you should not expect lush flowering from it.
If you want to cut a bouquet of peonies during the flowering bush, take no more than 1/3 of all shoots. Otherwise, along with the flowers, you will take the leaves and the plants from the plant - and with them the components necessary for photosynthesis.
Only bare inflorescences are worth cutting off immediately after flowering from a peony. They are removed to the first healthy leaf.
If the autumn is warm, the peony cut too early will begin to grow shoots. The very first frosts will cause irreparable harm to your bush.
When can you cut peonies after flowering? It is impossible to name the exact time, because it depends on the weather conditions. We recommend focusing on the ambient temperature. After the first frost, when the stems of the peonies "fall", they need to be cut off. In herbaceous peonies, the entire aerial part is removed. Remove the stems as close to the ground as possible, leaving no more than 2-3 cm.
Some gardeners cover the plants with pruned foliage for the winter. We do not recommend doing this, because the stems can be a breeding ground for pests. Cut plants are best collected and taken to a compost pit or burned.
Herbaceous and tree-like peonies: description of species with photo
What peonies to choose for planting in August? Up-to-date information about species and ITO-hybrids is in our publication.
Caring for tree varieties of peonies is somewhat different from caring for herbaceous species. Do tree peonies need to be pruned after flowering? Shrub species of peonies have strong tree-like stems (hence the name of the species). In no case should you cut them off, because the flowering of these plants mainly occurs on last year's shoots.
Such bushes need only sanitary pruning, which is best done in the spring. Dry, broken or weak branches should be removed from the peony bush. If necessary, formative pruning can be carried out every few years.
How to dry bulbs
After processing, the bulbs need to be dried.
- They are first dried at about 27 ° C for 14 days.
- Then you need to move the tubers to where the temperature is kept at about 22 ° C for a month.
The quality of the planting material depends on how competently the drying was carried out. If the bulbs are not completely dried, mold can develop. Florists still cannot come to a consensus on whether to remove the scales of tubers. Some people think that an infection develops under the scales, but experienced gardeners claim that the bulbs will remain healthy and scaled if dried well.
To scare away pests, you can put garlic cloves next to the tubers. You can sprinkle the planting material with naphthalene, this will also help prevent infectious ailments.
Gladiolus bulbs are protected from drying out by scales. It is convenient to store the bulbs by dipping them in melted paraffin wax. A layer of paraffin will protect the tubers from mold and prevent them from drying out. And when landing, it will not interfere.

Cleaning rules
It is necessary to start harvesting gladioli in autumn when the night temperature is below +10 0 C. The removal of corms begins with dismantling the pegs and binding material. You will need a shovel or pitchfork to work. The tool should be inserted vertically into the ground. Tubers are more likely to be damaged with inclined insertion.
It is necessary to extract the plant from the ground together with green foliage.
Where does the cleaning start:
- With a shovel or pitchfork, carefully raise the layer of earth at a distance of about 7 cm from the plant.
- Grasp the stem with your hand and gently pull it out of the ground. Put on the prepared place. Do not pull out the plant by force, so as not to harm the seed.
- Check for small onions left in the hole.
The stems should be removed immediately after harvest. Because the moisture accumulated in the tuber will evaporate through the leaves. During the growing season, useful substances have accumulated in the bulb, which will evaporate with moisture.Such planting material by the spring will be sluggish and become unusable.
There are two ways to remove the stem:
- Gently break off the stem with your hands.
- Trim with garden shears.
After removing the corms, they are cleaned of adhering earth, washed in water, and dried.
The mother bulb should be carefully removed so as not to damage it. You need to prune the roots through which moisture will evaporate. Damaged and wide-bottomed specimens are not left for storage.
It is not necessary to completely remove the roots of the bulbs grown from the buds, it is enough to cut them a little. The largest ones are taken for storage. They keep better and bloom earlier.
Growing corms from babies

Babies are small tubers on the main bulb. Their size can vary from 1 mm to 15 mm. A strong bulb is able to produce 20-30 babies at a time. These small tubers will become high-quality, young bulbs in the future. How to grow the bulbous babies of gladioli?
Site preparation for landing
For planting children, it is better to allocate a separate place with fertile soil. It is often also called a shkolka. The site should be sunny, protected from the winds on the north side. For southern regions with hot summers, light shading is allowed. For example, a tree or shrub growing nearby. This will prevent the soil from drying out and burning the foliage. It is recommended to change the location of the school every year.
The soil should be slightly acidic or neutral. Before planting, it must first be loosened, removed weeds, moistened.

When to plant gladioli
Planting dates depend on the region, climatic characteristics and weather conditions. The temperature of warming up the soil at a depth of 8-10 cm can serve as a reference point for starting planting. It should be at least 10 ° C. This is enough for the germination process to begin, and the baby is not damaged by rot in the cold ground.
The method of planting children is in rows. The recommended spacing of the rows is from 20 to 30 cm. The bulbs should be spacious enough in the row itself. On average, it is 15-25 cm, depending on their diameter. Planting depth is 8-10 cm. With this planting, the bulbs will quickly germinate, receive the necessary nutrition, and do not dry out.
Plant care

Subject to the planting conditions, seedlings will appear on the 15-20th day. The further task is to leave. How to grow strong and healthy gladioli from bulbs in a school? Care involves:
• removal of unwanted peduncles;
• protection from diseases and pests.
Gladiolus is a moisture-loving plant. Therefore, you need to water at least 1 time per week with deep soil moisture. In extreme heat conditions - every other day to avoid drying out. Water should not come into contact with the plant itself.
When plants develop 3-4 leaves, it is necessary to fertilize with fertilizers containing nitrogen and phosphorus. These are essential components for enhancing vegetation. Fertilization can be combined with watering. In dissolved form, they are more accessible and absorbed faster.

It is important to know: you cannot apply fresh manure under the plant. It can hurt him
During the entire period of growth of flower young growth, the soil must be loosened. This improves its structure, gas exchange and retains moisture. It is imperative to remove weeds that drain the soil and shade young shoots.
The appearance of peduncles on the plants of the school is not desirable. But the most powerful babies can release a peduncle. It will not be complete, and the bulb will weaken at the same time. Therefore, it is removed with an oblique cut. The direction of the cut is from top to bottom, so as not to pull the bulb itself out of the ground.
Disease prevention and pest control
Gladioli are sick no less than other plants. These are different types of rot caused by fungal infection. The defeat of viruses in the form of a mosaic, yellowing of the leaves. Bacterial scab and corm cancer are provoked by bacteria.How to grow gladioli from bulbs to make them less sick? A few recommendations:
1. According to the rules of flower order, it is impossible to plant a school where asters, phloxes, gladioli grew in the previous year. Tagetes, calendula, nasturtium help protect against fusarium. Landing alternation and correct predecessors is a preventive measure against diseases.
2. Thorough examination of the planting material and rejection if it is suspected that there is a viral or fungal infection. To do this, you can remove the upper scales. This makes it easier to detect fungal foci. The planting material and the adult plant itself with signs of viral infection are destroyed. It is very difficult to get rid of a viral infection, and the danger of spreading the virus to healthy specimens is great.

3. Preliminary soaking of the planting material for 15 minutes in a 1% solution of potassium permanganate. The use of fungicides will be a win-win. Amateur flower growers who know how to grow gladioli from bulbs in the country are advised to use a solution of copper sulfate. For this, 5 g of the substance is dissolved in 1 liter of water. You need hot water. After the agent has cooled down, the corms are immersed in it for 1-2 hours before planting.
4. Aphids, thrips, mites oppress the young plant. Therefore, if they are found, it is better to treat the school with special preparations against pests.


