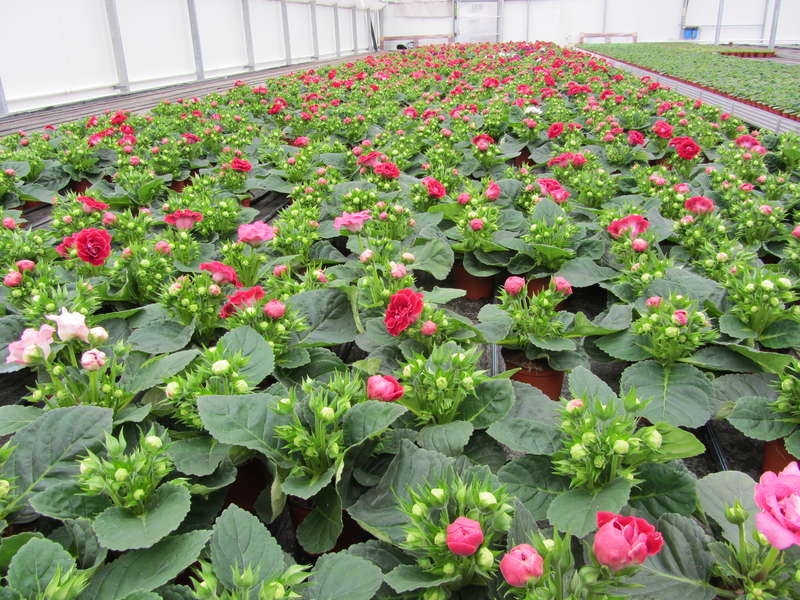
Popular types and varieties of gloxinia: photos, names and descriptions
In total, there are about 20 gloxinia species in nature, distributed mainly in Brazil. Popular types include gloxinia with the following names:

Gloxinia forest (G. sylvatica) with orange flowers.

Gloxinia perennial (G. perennis) with lavender-blue flowers.

Gloxinia fine (G. speciosa).

Gloxinia Royal.
Take a look at the photo with the popular and common types of gloxinia with the names:


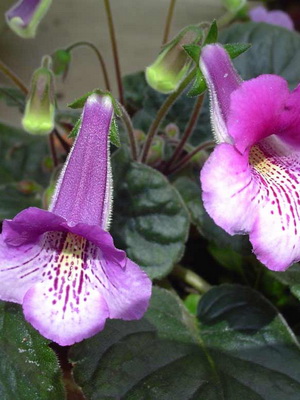

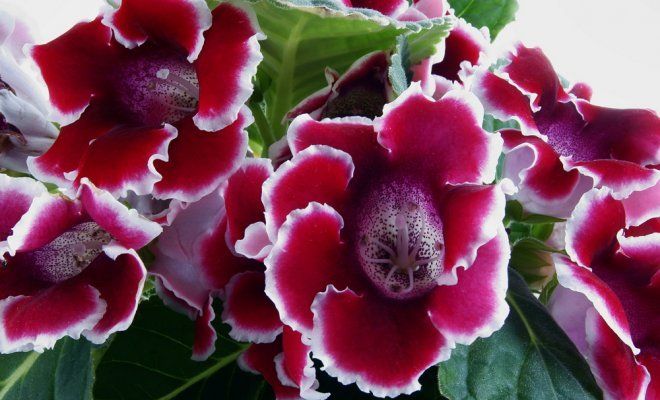
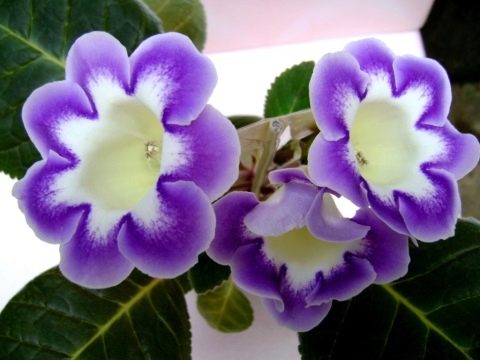
Gloxinia excellent has broad-oval bright green leaves with velvety pubescence, located on long cuttings. The plant does not have a pronounced stem. A relief pattern of veins is visualized on the surface of the leaf plate. Flowers resemble bells in appearance and can be white, blue, pink, purple and purple.

Gloxinia royal looks like a miniature bush due to the fact that its shoots are erect. The leaves are dark green, pubescent, with a silvery vein pattern. The flowers are located on elongated peduncles and are quite large bells (up to 7 cm in diameter). In nature, petals are purple in color, hybrid forms are distinguished by a variety of colors.
Take a look at the photo of what the listed types of gloxinia look like:


Terry varieties:

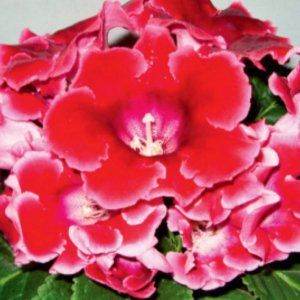
Scarlet - has bright red bells.

Red Storm - with dark red flowers, shaped like a rose.

Marshmallow is pale pink in color.

Kristin Irish - has petals with a white base and a red border.

Yesenia - with rich beet-colored petals.

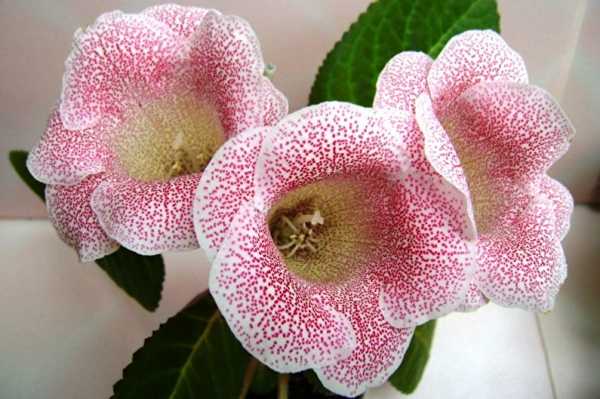
Winter Cherry - with burgundy petals with many white dots.

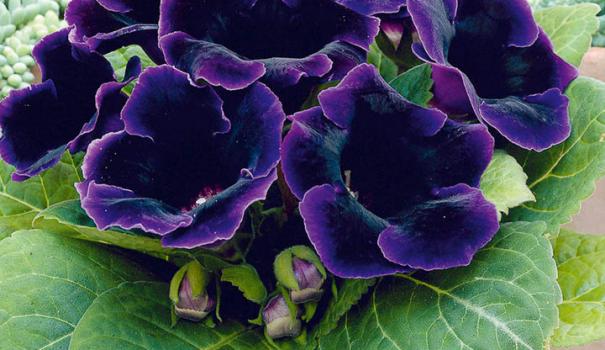
Southern Night - with dark burgundy, almost black flowers.
Take a look at the photo with a variety of terry gloxinia varieties:


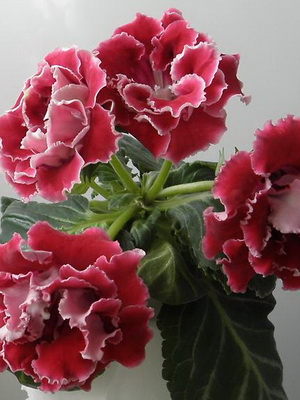
Such specimens are especially popular, because their petals are arranged in several rows, and the flowers are shaped like a camellia or a garden rose.
Semi-double varieties:

Mont Blanc - with white flowers with wavy petals.

Lilac fog - with smoky lilac bells.
Popular non-double gloxinia varieties with well-known names:

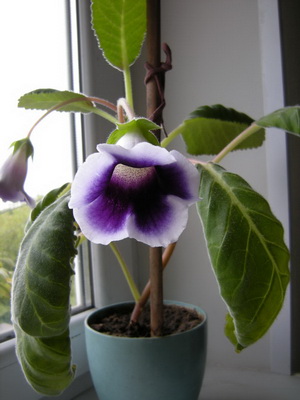
Tigrina Red - has bright red bells with a light center.

Kaiser Friedrich is a bicolor variety with large flowers with a light middle.

High Light - with large snow-white flowers, used in bouquets.
Look at the photo of non-double gloxinia varieties and their names:


According to the type of color, modern gloxinia varieties are divided into:
- Monochrome.
- Calico.
- Tigrines.
Monochromatic flowers have a uniform color of petals, can be from white and pink to deep purple. Only a lighter spot at the base of the neck can stand out.
In the chintz type, the corollas are evenly covered with contrasting spots.
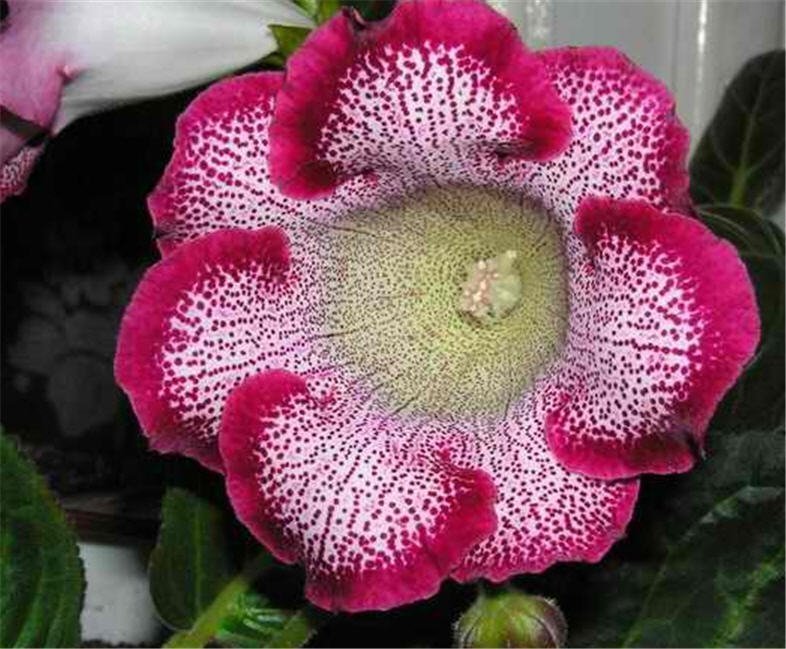
Tigrines have both contrasting spots and a border along the edges of the petals.


Gloxinia variety "Tigrina Red" corresponds to the description of the last type of color: the flower has a deep red corolla, white spots at the base of the petals and a light border around the edges.
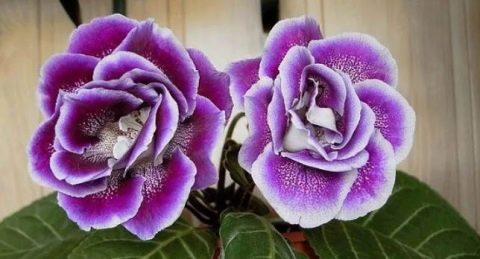
Another famous and very beautiful tigrine is Shagane's gloxinia, which has a bright purple color, and the blossoming flower resembles a rose. Corollas with a short greenish throat have a blue border, and most of the petals are decorated with white and purple spots of varying sizes and intensities. The peduncle is stable, low.
Gloxinia are also grouped into groups according to the shape of flowers, colors, sizes of outlets. A famous group of varieties is Avanti, which includes plants with a compact leaf rosette, against which large velvety flowers of various shades look spectacular and bright. The most common Avanti hybrids are:


Avanti Light Violet - purple. Avanti White - with white flowers.

Avanti Blue with White Edge, or Blue lace - with lilac flowers with a white border.

Avanti Scarlet - deep purple color.
All hybrid varieties are conventionally divided into groups by size:
- High - more than 25 cm.
- Medium - 12 - 25 cm.
- Low - 5 - 12 cm.
- Dwarf - less than 5 cm.
To date, thousands of gloxinia varieties have been bred, the appearance of which gives amateur flower growers a reason to replenish their collections again and again.
Microclimate for the care and cultivation of gloxinia
Tuber rooting takes place at a temperature of 24-25 ° C. When gloxinia forms the first leaves, the temperature is lowered to 22 ° C during the day.
Night air can be up to 4–5 ° C cooler. If the room is hotter, and the plant lacks light, which often happens when the buds are set at the end of winter, even with proper care, gloxinia stretches out, losing some of its decorative effect, flowers and leaves on long petioles become smaller.
The lower temperature limit for gloxinia is 18 ° C. In colder air, the plant slows down the growing season, and if you do not adjust the care of gloxinia at home in time, it can die. A prolonged increase in temperature above 28 ° C is just as detrimental to the plant during the growing season and flowering.
In addition to the temperature regime in the room, gloxinia is important for air humidity in the range of 60-80%. Discomfort associated with excessive dryness of the air is indicated by folded down, slightly tucked leaf plates.
How to care for gloxinia if the room is heated and the air humidity is much lower than the recommended values? The pubescent leaves of the plant do not tolerate spraying, often used to humidify the air. Therefore, in this case, it is better to put the pots with plants on wet expanded clay or use household humidifiers.
Reproduction
You can get young plants in several ways:
- Leafy cuttings,
- Stem cuttings,
- By dividing the tuber,
- Seeds.
Learn more about each of them.
Leafy cuttings
Breeding material is harvested during budding or at the beginning of gloxinia flowering. The bottom plate with a short and thick handle is separated from the leaf outlet. The size of the future tuber depends on its diameter.
Young leaves are not suitable for reproduction of gloxinia.
Anna Didkovskaya, "Charming Gloxinia". Neskuchny Sad magazine, No. 1-2 (18) 2008.
Cutting is carried out as follows:
| Step 1 | Step 2 | Step 3 | Step 4 |
| Immerse the cut stalk in water with the lower part of the petiole by 1-1.5 cm | Keep until roots appear. In this case, the water cannot be changed, it must be added as it evaporates. | The sprouted cutting is sprinkled with rooting powder or dipped in gel. | They are planted in a substrate for gloxinia, after adding a baking powder to it. It should be 2 times more than for adult plants. |
Stem cuttings
This method is used if several stems have sprouted from one tuber. One of them is cut off, germinated in water and planted as leaf cuttings.
Tuber division
In order to get young plants from the rhizome, it is necessary to wait for the emergence of new shoots. Moreover, there must be at least two of them.
The division procedure is carried out as follows
A sharp knife is disinfected with alcohol or chlorhexidine
This is necessary in order to prevent possible infection.
The tuber is cut into pieces so that one sprout remains on each section.
The cut is slightly dried and sprinkled with crushed activated carbon and or ground cinnamon.
Delenk nodules are carefully planted in a separate pot with fresh substrate for flowering indoor plants. The rhizome does not need to be buried; it is barely sprinkled with soil and watered carefully.
Despite all the measures taken in advance, cut tubers often rot and do not germinate. Therefore, this breeding method is considered the most unsuccessful.
Seeds
Gloxinia seeds can be purchased at many flower shops. some growers successfully get them on their own. This requires artificial pollination.
It is carried out like this:
As soon as the bud is fully blooming, you need to take a soft brush with natural bristles and move the pollen from the stamens to the stigma of the pistil. To consolidate the result, repeat this procedure again the next day.
If pollination was successful, then the perianth falls off in a few days and an ovary with seed rudiments begins to grow. They ripen in one and a half to two months. Their size is miniature, such seeds are called dusty. To collect them, you need to substitute a piece of paper under the box and pour them onto the paper with a light tap.
Gloxinia seeds are sown in seed boxes or plastic boxes filled with a mixture of peat and sand. They try to distribute small grains evenly over the surface of the moistened substrate. You do not need to sprinkle them, it is better to lightly press into the soil and cover with plastic wrap.
After 14 days, the first shoots will appear. When the seedlings reach the size of two true leaves, they need to be cut down. Each plant is planted in a separate pot, about the size of a disposable plastic cup or peat tablet.
After complete survival, after about a month and a half, a young plant with a lump (or together with a peat tablet) is planted in an "adult" pot for gloxinia.
There are already 18 gloxinia varieties in my home collection. Many of them reproduce well. First, I gave away young plants. Now I rent it to the store for sale.
How to get the buds to release?
Gloxinia buds appear only with proper care.
What to feed?
- In March, prepare fresh soil for begonia by adding magnesium sulfate and ammonium nitrate to it: 0.5 g per 1 kg of substrate. Plant the tuber in new soil.
- After one and a half - two months after planting, apply the first top dressing - a solution of complete mineral fertilizer containing nitrogen. Vito, Uniflor-growth, Uniflor-green leaf or Riga mix are suitable. Apply one hour after the main watering, along the edges of the pot. Do not allow the solution to come into contact with the leaves and the point of growth. After the procedure, the plant should not be in the sun.
It is better to apply fertilizers in the evening or in cloudy weather. Strictly observe the dosage. An excess of nitrogen leads to the active development of green mass to the detriment of flowering, and also provokes root rot.
Give nitrogen fertilizers only at the beginning of growth, until the buds appear.
- You need to feed begonia every two weeks, alternating full mineral fertilizers with organic ones. You can buy ready-made organic fertilizer or use fermented bird droppings: 250 ml of concentrated solution per liter of water. It is allowed to carry out procedures every ten days, but with a weaker concentration of the solution.
- When the buds appear, alternate organic matter with phosphorus-potassium mineral fertilizers, which enhance flowering. You can take Uniflor-flower or Uniflor-bud. Avoid an overabundance of phosphorus fertilizers, otherwise the flowering will be plentiful, but short.
- When flowering is over, carry out two fertilizing with potassium-phosphorus fertilizer with an interval of two weeks. This will help the tuber to recover and prepare for the dormant period. During the winter rest and in the first time after waking up, feeding is not required.
How much light and heat does a house need to grow?
- After planting the tuber, create a greenhouse effect by covering it with a glass jar overnight.
- When leaves appear, remove the greenhouse. Put gloxinia in the lightest place. The stem will be shorter, many buds will form, and the flowers will be vibrant. You can organize additional lighting - turn on special lamps for 10 - 12 hours. Maintain the temperature from +23 to + 25 ° C.
- When buds appear, move the pot with the plant to a less illuminated and cooler place with an air temperature of +18 to + 20 ° C. Do not expose gloxinia to direct sunlight.Increase air humidity, but not by spraying. Place the pot on a pallet with wet expanded clay or moss. Protect the plant from drafts.
When and how to send on vacation?
Adult gloxinia needs an annual rest period:
- In September - October, gradually reduce watering.
- When the leaves begin to turn yellow or dry, completely stop moistening the soil.
- After the dying off of the aerial part of the plant, store the tuber in a dormant state for three to four months.
Storage methods:
- Place the pot with the tuber in a cool place with a temperature of +10 to + 15 ° C. Make sure that the tuber does not dry out completely and does not wrinkle too much. Moisten the soil slightly several times during the dormant period.
- Two weeks after the complete withering away of the aerial part, dig up the tuber. Remove the remnants of the roots. Place in slightly damp sawdust or sand. Keep in a cool place. The middle or bottom shelf of the refrigerator door will work. Remove and inspect the tuber monthly. If the substrate is completely dry, moisten a little and return the tuber to it. Do not overmoisten the soil.
Read about how to care for gloxinia after it has faded in a separate article.
Video about the dormant period of gloxinia and storage of tubers:
How to cause reappearance?
In May or June, after the first flowering, carefully examine the gloxinia. If there is a growing point, after a while the plant will again delight with buds. If there is no growth point, pruning will help:
- Cut off the aerial part, leaving a shoot two centimeters high from the soil surface and two to four lower leaves.
- When the side shoots begin to grow, pinch off the weak ones and leave one or two of the strongest ones.
- Apply nitrogen fertilizing to stimulate the growth of stems and leaves.
- A month later, the process of bud formation begins. Replace nitrogen fertilizers with a phosphorus-potassium complex.
If the plant continues to bloom until the end of summer, you do not need to prune it. Gloxinia may not have the strength for a second flowering. It is better to let her prepare herself for the winter.
Reproduction of gloxinia
Growing from seeds of different types of gloxinia is possible. But it is not applicable to varietal representatives, since it does not preserve the characteristics of the parent specimens. Vegetative propagation methods are more productive - cuttings and root division. In the latter case, the tuber is cut into as many parts as there are processes on it. Places of damage must be sprinkled with crushed charcoal.
For your information! Each division is placed in a moist soil, and after reproduction, it is watered for the first time only after 3-4 days.
When grafting, which is carried out during flowering, a young leaf with a petiole is cut off. The shoot is rooted immediately in a soil mixture of sand and peat, taken in equal proportions. To increase efficiency, a glass jar is placed on top. Every day it is removed for 15-20 minutes, allowing the plant to "ventilate". The emergence of new shoots indicates successful rooting. The jar is removed. And a month later, the young specimen is planted in a permanent pot with a substrate for an adult culture.
How to plant gloxinia seeds at home
Novice growers often doubt whether gloxinia can be grown from seeds at home. Patience, scrupulousness and perseverance will be required for a grower who decides to grow gloxinia from tiny seeds. If you do not spare your efforts and time, tiny borings will gradually turn into a beautiful plant, gratefully blooming with bright large flowers.
Did you know? The main varieties of gloxinia were bred by the German Benjamin Peter Gloxin. More than thirty species of gloxinia are now known, grown by breeders.
When to sow
Sinningia loves light. Adequate natural light for healthy sprouts ─ in February-March. If possible, provide the home with lighting and heating with special lamps, flowers are grown all year round.
Planting tanks and soil
Gloxinia is a moisture and heat-loving plant, does not tolerate drafts.
You can get good sprouts by providing the correct container and conditions for the planting material:
- Clear plastic containers with lids are the best place to germinate seeds. The covers will ensure the preservation of moisture in the soil, good lighting, and keep the sprouts from drafts. Drainage holes are made in the bottom of the containers;
- peat tablets will become a good "house" for seeds, facilitate picking and replanting seedlings;
- you can grow synningia from seeds in a wooden box, which is covered with glass or foil before the sprouts appear;
- the soil is bought in a store or prepared independently: two parts of garden land, one each of river sand and peat soil. Before preparing the mixture, the garden soil must be sieved, all roots, pebbles are removed, and fried in the oven or microwave to exclude the presence of bacteria. Another method is to place the earth in a freezer for several days.
Important! When opting for an opaque container, you can place it in a zip bag to ensure greenhouse conditions.
Seed preparation
You can grow gloxinia from store seeds in granules or collect it yourself. The process is time consuming, but it will ensure the appearance of a hybrid created with your own hands.
Before planting, the seeds are soaked in warm water; a growth stimulator is added to accelerate germination. The liquid should not completely cover the grains, otherwise they will become moldy. It is better to place the planting material on a damp cloth, cosmetic disc.
Sowing seeds
Sinningia grows in good light, on a flat ground. Store seeds in granules are spread over the entire surface of the soil, slightly pressed down. Home seeds are spread over the cultivated area using a sheet of paper folded in half. Gently pressing the seeds to the ground, they are sprayed from a spray bottle with a weak solution of potassium permanganate.
Cover with foil, glass, creating a greenhouse effect. At a temperature of + 25 ° C, seedlings will appear after 10-14 days, if you lower the temperature, gloxinia will germinate in 40-50 days, the shoots will be weak, fragile. You need to install a container with seedlings in a well-lit place, illuminate it with a fluorescent lamp at night, while maintaining the desired temperature.
Care at first
Synningia seedlings are very delicate and fragile. Simultaneously with the leaves, a tuber is formed, so the plant slowly rises. The main condition: to provide the required humidity and illumination. When the soil dries up, the shoots will die, the lack of light will lead to the stretching of the stems.
A month after the appearance of cotyledon leaves, the first pick is made
Carefully transplant the seedlings into separate pots or boxes according to the 2 × 2 cm scheme, helping with a wooden skewer so as not to damage
The second pick is after the appearance of real leaves, 30 days after the first, always in separate pots. The moisture content of the soil is maintained by regularly spraying the seedlings with a spray bottle. The room temperature is maintained at + 20 ° C.
Did you know? The smallest size has a tiny sinningia – 5 cm in diameter is an adult plant.
Transplanting mature flowers
With proper care, the plant is transplanted after three months into permanent pots with a diameter of 9-10 cm. The leaves of the seedlings during this period reach 2-3 cm in diameter. Gentle gloxinia loves light, non-acidic soils (pH not more than 6.5) and good drainage. After transplanting, the plant is watered with water at room temperature under the root, avoiding contact with the leaves and stem.
Video: growing gloxinia from seeds
Gloxinia breeding methods

Growing from seeds
Planting material for such cultivation can be obtained independently by manually dusting the flowers, but more often gloxinia seeds are purchased in stores. Despite the large assortment, this step is considered rather risky.Gloxinia seeds retain their germination capacity for about 3-5 years. However, they may not retain the varietal characteristics of the parent plant.
Due to the almost microscopic size of gloxinia seeds, they are most often sold in granules. At the same time, a long germination period (up to 10 months) may be indicated on a pack with seeds, but this applies only to autumn or winter sowing. For healthy growth, seedlings are recommended to be illuminated during this period. If it is not possible to use lamps, it is better to wait for bright spring days and sow in March. Small gloxinia should be grown in an impromptu greenhouse. You can use special containers or take a fairly deep plastic container with a lid in which several holes are made for ventilation. You can plant seeds both in the ground and in peat tablets. Both should be placed in the selected container. The seeds are laid out on the surface of the ground or on a pre-soaked tablet without deepening and slightly moistened in order for the granule to begin to dissolve. After that, the greenhouse is closed and placed in a bright and warm (up to +23) place.
For two weeks, the earthen mixture is gently moistened as it dries. Seeds may begin to germinate already during this period.
When the first shoots appear, the seedlings are planted in separate pots. It is believed that picking has a positive effect on the growth rate of small gloxinia. The optimal moment is when the closely sown sprouts begin to touch the leaves. If the seeds were planted in tablets, then the seedlings are planted in an individual container with them. After that, they will need at least one more transplant - now in a permanent pot.
Plants from such seeds can bloom about six months after sowing. The exact timing depends on the specific variety and conditions of detention. Sometimes the first buds on such flowers are recommended to be removed so as not to interfere with the tuber formation process, but other gardeners, on the contrary, recommend not to disturb the flower. As a rule, the plant itself begins to shed extra buds if during this period it does not have enough nutrients.
Gloxinia from seed, full cultivation cycle

Reproduction using a leaf
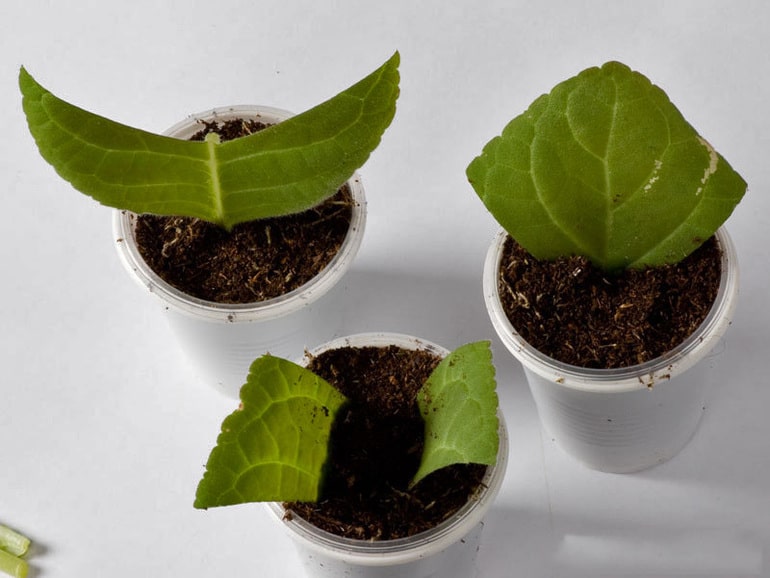
The leaf method of propagation of gloxinia is much more reliable and simple. It is they who are recommended to use if there is a choice in order to quickly and almost certainly get a new plant. Because the leaves of the flower are large enough, one of the smallest will be sufficient for reproduction. You can also cut out a part of a large leaf, separating it parallel to the transverse veins. The petiole can be shortened, leaving no more than 2 cm. To carry out this separation procedure, a very sharp, clean instrument is required. This will keep the main leaf healthy.
The resulting leaf cuttings are distributed in containers filled with moist and light soil or pre-calcined sand. Each pot should be covered with a greenhouse bag and placed in a warm and well-lit place. At the same time, within a month after planting, the packages are not removed and the cuttings are not watered. During this period, they should take root and take root. Such seedlings must be accustomed to indoor conditions gradually. Every day, the bag is opened briefly, increasing the airing time, and as a result, it is removed completely.
For reproduction, you can use other green parts of the plant, for example, pedicels. The flower can also multiply by dividing the tuber, which sometimes forms "children".
Planting gloxinia tubers
When sprouts appear on the tuber (no more than 1 cm), this means that it is "awake" and ready for planting. You can speed up the awakening by placing it in a zip bag with the addition of a small amount of peat, in a warm, bright place. To stimulate awakening, you can soak the tuber before planting in a solution of Epin or Zircon.
The tuber is cleaned of dead roots and tissues, the cut sites are treated with activated carbon and dried. You can use any bulb dressing agent before planting.
Drainage is poured onto the bottom of the pot (or a synthetic winterizer is placed), about 1/5 of the height of the pot, then 2/3 - soil. The tuber is placed in the middle so that a small part of it and sprouts protrude on the surface.
Later, after germination, you can completely cover the tuber with soil.
Important: if you stored the tubers in a dormant state in a pot, you must replace the soil with fresh

