Flowers on the balcony and cottage
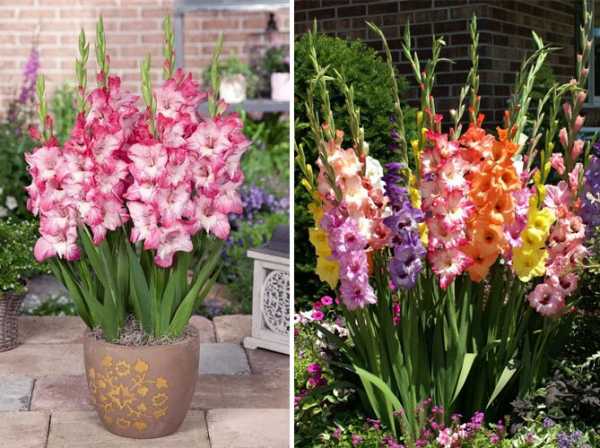
They are increasingly used in landscaping gladioli on the balcony, loggia, gazebo and garden area. For breeding in container pots, it is necessary to choose medium-flowered, small-flowered and miniature varieties.

When choosing containers, you need to try to keep them at least 40 cm in diameter. The container should be beautiful, fit the purchased variety and at the same time have enough space for useful soil.
It is necessary that the containers for plants include holes through which excess water will flow. Drainage material must be arranged on the bottom of the container. For this, it is more practical to use pottery shards from old products that are in any summer cottage. The water will seep through the drain well and the ornamental plants will not have to rot in a puddle of water. The fragments of the pots also prevent the soil from falling out of the holes.
On top of the drainage, you need to pour the purchased fertile soil. The earth should be airy, enriched with beneficial elements and at the same time moisture-consuming. The quality of the soil is of great importance, since the flowers are planted in the container about 2 times more densely than in the beds.
According to the rules, the gladiolus bulbs prepared for planting around April 15 - in early May, must be planted in containers to a depth of about 10 cm with a small interval between them. After about 21 days, the florist will see the shoots of flowers and the first developing leaves.
It is important to choose the right place for the container device. Flowers won't survive without warmth, proper lighting, and protection from cool winds and drafts
At the same time, the place cannot be such that the flowers get caught in the rain.
Growing beautiful flowers requires proper watering. The plant loves moist soil, but cannot stand in water. The lack of water in the ground also negatively affects the development of the flower, especially its peduncle, which from this becomes crooked, sick and loses its beauty.
The soil in the containers dries up very quickly. To prevent the earth from drying out too quickly, you need to mulch it. It is necessary to make spills in a timely manner on hot days, at least 2 times a day, and at the same time make sure that the earth is airy and permeable, otherwise the root system of gladioli may simply wither away.
It is necessary to feed plants in containers in the same way as in garden beds. It is useful to alternate fertilization for the root system with dressings outside the root, this should not be forgotten.

For successful growth, you need to do 4 foliar procedures with minerals (0.5 g of ammonium nitrate, superphosphate and potassium chloride per 1 liter of water):
- 1st - with the development of the 3rd leaflet;
- 2nd - when the 6th leaf appears;
- 3rd and 4th - during the development of the inflorescence.
It is imperative to feed with minerals, you can also add organic matter from time to time. If the development and flowering of gladioli is weak, then you can use stimulants - Zircon or Epin, but they can be processed only 2 times per summer.
An indispensable element of caring for gladioli that do not grow in garden beds is the fight against insect pests and diseases. Flowers growing in containers, container pots are weaker and more susceptible to disease than those that grow in street beds.
It is necessary to very scrupulously monitor the state of flowers, to carry out preventive measures in a timely manner.
The special advantage of growing gladioli in pots is that it is possible to increase the growing season and allow the bulbs of ornamental flowers to mature to the end.To do this, with the arrival of frost, it is necessary to remove the containers with gladioli into a not too dark room; a glazed balcony-loggia or a closed gazebo, where the desired positive temperature is kept, is well suited.
With the right choice of varieties and appropriate care, you can admire the incredible bloom of gladioli from the beginning of summer until the cold weather!
Inspection and preparation of planting material before planting
To plant gladiolus, gardeners use two methods: corms or seeds. The seed propagation method is used by professional breeders to develop new varieties, as this is a very painstaking and laborious process. Lovers plant a skewer with tubers, using grown bulbs or babies as planting material - small tubers sprouting on the mother's bulb.
Gladiolus bulbs suitable for planting
Before planting, it is necessary to prepare the material. For this:
A month before planting, remove the bulbs from the refrigerator or cellar (where the material was stored for the winter). Or purchase ready-made, good bulbs from a trusted specialty store. Carefully peel the bulbs from the protective scales so as not to damage the structure and tissue of the tuber
Please note that there should be small tubercles on the bottom - new roots in their infancy or slightly grown. Carefully sort out the bulbs, leave clean, without stains, rot, infected fragments
If there is a slight damage on the tuber, it can be removed to healthy tissue, treated with an antiseptic, for example, brilliant green or crushed activated carbon. It is better to discard overdried, dark, soft tubers; strong and beautiful flowers will not grow from such planting materials. Next, you should properly equip the place for germinating the bulbs: place the tubers in cardboard boxes with a small distance from each other, sprouts up
For this, a lighted, warm place with diffused light without direct rays is suitable. Immediately before planting in the ground, soak the material in a pink solution of potassium permanganate or Fitosporin. This will protect the flowers from diseases and pests. The holding time in the solution is from 30 minutes to 2 hours. As an additional stimulation of growth, you can soak the tubers in "Sodium Humate" or "Kornevin" for 10-11 hours. After soaking, dry the bulbs and leave in pots filled with peat until they are planted in the ground. If the corms begin to grow ahead of time (especially early varieties), place them in a cool place.
Tubercules (babies) of gladiolus
Note! Not very large bulbs with a diameter of up to 4 cm, a bottom size of 4-6 mm and one strong sprout bear fruit well. You can take an onion with two sprouts, it will need additional care, lighting and minerals. The second option is to divide the tuber into 2 parts with a pre-cut knife with a sharp blade
The cut site is disinfected with brilliant green or wood ash
The second option is to divide the tuber into 2 parts with a pre-cut knife with a sharp blade. The cut site is disinfected with brilliant green or wood ash
You can take an onion with two sprouts, it will need additional care, lighting and minerals. The second option is to divide the tuber into 2 parts with a pre-cut knife with a sharp blade. The cut site is disinfected with brilliant green or wood ash.
Diseases and pests
A flower grown in a container can be twitched with the same hazards as a gladiolus growing in an area. Although, of course, in closed rooms, troubles happen less often.
If gladiolus does not bloom, you need to look for the reason. Most often this is due to improper agricultural technology (waterlogging or overdrying of the soil, lack of fertilizers, ignoring the loosening procedure). May affect flower formation and disease.
The flower can undergo a fungal infection or viral disease.In the second case, the plant is immediately destroyed. Fungal diseases are treated with appropriate drugs. For example, the solution "Fundazol" is used both for prophylaxis and for solving a problem that has already appeared.


Of the pests, spider mites, aphids, and thrips are especially dangerous. The fight against them is carried out with insecticides ("Karbofos", "Aktellik", "Aktara"). It is also desirable to carry out preventive spraying.
You can learn how to prepare gladiolus bulbs for planting by watching the video below.
Questions and answers about the landing of gladioli
Is it possible to plant gladioli before winter?
For the formation of the root system, gladioli need low positive temperatures (10-15 ° C), active growth of shoots occurs at 20-25 ° C. However, in order for the corms to develop well, it is necessary to pre-store them at temperatures of about 3-9 ° C. During this period, the root system is not yet formed, so low temperatures cannot delay the development of the plant.
Corms can withstand not only low positive temperatures, but also short-term negative ones, but their development is delayed. Large corms die at minus 2 ° C. Therefore, planting before winter is possible only in the southern regions with shelter to create a wintering regime similar to the storage regime.
The baby, which has a hard, dense shell, tolerates low temperatures more easily, which can be observed in warm winters in the Non-Black Earth Zone. In such cases, it can withstand temperatures as low as minus 4 ° C.
Those growers who provide conditions on the site that protect the soil from freezing, plant gladioli before winter.
Gladiolus, 'Little Fawn' cultivar. Stand my ground
Is it possible to grow gladioli for the New Year and March 8?
This is possible, but for the normal growth of plants in winter, additional lighting is needed, maintaining a certain air and soil temperature, humidity and good air exchange - ventilation. All this is difficult to provide in a living space.
In specially equipped greenhouses, blooming gladioli are obtained at any time. However, the process of preparing the planting material and the culture conditions are very complex. For example, to get a cut by March 8, corms are dug up early, for cutting by the New Year, the corms of the previous year's harvest are preserved under certain conditions.
The staff of the Main Botanical Garden in Moscow has developed a light culture of gladioli. Articles describing their methods were published at different times in the "Floriculture" magazine.
How to ensure that gladioli do not bloom all at once?
There are several ways:
- plant corms of varieties with different flowering periods at the same time;
- plant corms of the same variety at different times;
- plant at the same time corms of the same variety of unequal size, since plants from small planting material bloom later than from large ones.
Is it possible to cut a corm with two sprouts?
A corm with two sprouts is cut if they want to propagate a variety and get many flowering plants. Cut vertically, making sure that part of the bottom is preserved on both halves. Immediately after the operation, the cut is sprinkled with crushed coal or filled with brilliant green and planted.
Can a baby with a cracked shell be planted?
You can plant such a baby if it is not affected by fungal and bacterial diseases, which can be seen when examining the tubers.
During the winter, the corms have dried out a lot. What should be done with them before boarding?
A healthy corm will never dry out. If she wrinkled, became hard, then undoubtedly she was struck by some kind of disease. If the corm was stored at an elevated temperature, it may dry out a little, but it will remain healthy. Before planting, such corms are soaked for several hours in a warm solution of baking soda (one teaspoon per 1 liter of water).However, it is better to soak the planting material in a solution of trace elements (see Table 2).
I bought an interesting variety. How to multiply it faster?
If a baby is bought, then it is necessary to increase the growing season for her, that is, to plant it early in a greenhouse, under a film or in boxes at home. If there is one or more corms, then before planting they are cut into several parts so that in each part there is one bud and part of the bottom.
Can a baby be planted in a shell without cleaning?
You can plant in a shell, but the baby will not germinate longer. To accelerate germination, before planting, it is soaked for a day in a warm 0.2% solution of potassium permanganate or 0.1% baking soda. After planting the children, it is good to water the area and cover with foil until shoots appear.
Preparation before planting gladiolus in a pot
Planting gladioli in a pot or any other container is slightly different from the usual process of planting the bulbs of this plant.
In order to properly understand the process of how to plant gladioli in pots, it is important to carefully prepare and complete all the stages preceding planting. Consider the features of each stage of preparation
Stage 1. Choosing a gladiolus for planting in a pot
First of all, special attention must be paid to gladiolus bulbs, since it depends on them whether you will grow a full-fledged flower.
If you have already dealt with the cultivation of gladioli in the garden, you can try to separate the children for subsequent planting in pots or start dividing the corms.
However, in this case, you should be very careful, because not all varieties of gladioli are suitable for containers and pots. The root system of this flower grows very much, so large-flowered varieties are unlikely to be suitable for this venture.
Give preference to dwarf varieties or small-flowered
Such gladioli grow less and will not interfere with each other after planting and during flowering.
The optimum height for an adult flower should be approximately 50-60 cm.
It is important to select varieties of gladioli for planting in pots, taking into account the color scheme you need.
If you want to plant gladioli in pots at home, it is better to purchase dwarf varieties, which can have a height of only 30-40 cm.
It is recommended to purchase planting material in specialized garden centers or nurseries that breed plants. This way you can be sure you are getting exactly the plant you want.
Better to buy a whole, healthy onion without damage and dry areas
It should be free of mold stains or wrinkled areas. The bulb should be about 2-4 cm in size.

Stage 2. Selection and preparation of a container for planting gladioli in pots
The second important preparation before planting gladioli in pots is choosing the right container or pot.
For planting gladiolus, pots can be made of a variety of materials: ceramics, clay, plastic.
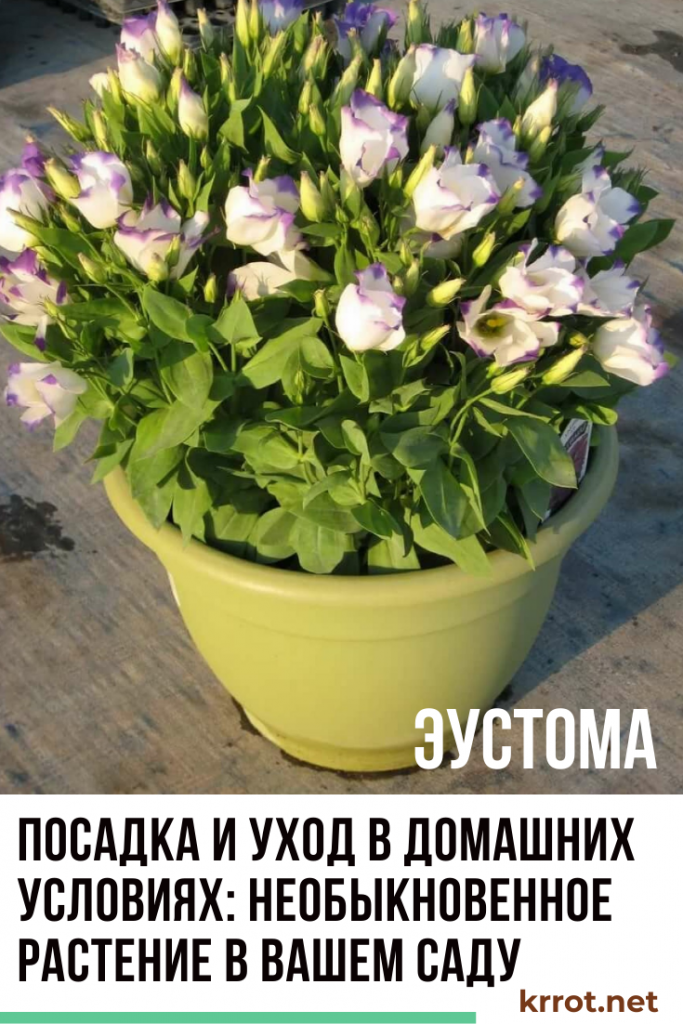
You can pick up a pot, container, planter, flowerpot for planting gladiolus bulbs
For example, a flowerpot or pots are perfect for decorating balconies and loggias, and containers and pots can be used to create a garden composition.
It is important to select containers taking into account the height of future flowers. On average, the diameter of the pot should not be less than 30 cm, and the depth should not be less than 40 cm
The deeper the acquired pot, the better for gladioli.
The pot must have drainage holes, since this plant absolutely does not tolerate stagnant water. The pot can be placed in a special saucer so that the water can drain there.

Stage 3. Preparing the soil for planting gladioli in pots
Gladioli prefer to grow in a nutrient medium.
Since a rather large number of gladiolus bulbs are planted in one container, it is important that fertile soil is used.
It is necessary to purchase light and moisture-permeable soil, which is perfect for planting these flowers.
A similar soil can be purchased at specialized garden stores.

How to plant a lily in a pot
Drainage (sea or river pebbles, broken brick, expanded clay) is poured onto the bottom of the container with a layer of 5 cm, and on top of it is a previously prepared fertile soil with a layer of 10 cm. On the surface of the earth, the bulbs are laid out with the bottom down, straightening the roots. Fertile soil is poured on top with a layer of about 20 cm. After that, the soil is slowly watered with warm water so that it is evenly saturated with moisture.
When planting lily bulbs in a pot, keep in mind that the earth is not poured to the top. About 7 cm should remain to the edge of the container, since as the stem grows, it will be necessary to add soil to the pot, which will cover the overgrown roots.
Preparing gladioli bulbs in spring
If you have not yet grown spaggers on your site, and you do not have planting material, you can easily purchase it in a specialized store or on the market.
PLEASANT DAYS FOR PLANTING IN 2019 OF BULBS AND FLOWER STUDIES ON THE LUNAR CALENDAR YOU CAN STUDY HERE:
Attention! Buy only onions adapted to our climatic conditions! It is not recommended to buy Dutch bulbs grown in tropical conditions, since in our climate such plants in most cases bloom only in the first year or may not bloom at all. It is necessary to plant the bulbs in the ground with a sprouted sprout, therefore, three to four weeks before planting, they are taken out and cleaned of dense scales
The planting material must be examined and the affected and diseased onions must be destroyed. If the lesion is small, then it can be cut out and greased with brilliant green
It is necessary to plant the bulbs in the ground with a sprouted sprout, therefore, three to four weeks before planting, they are taken out and cleaned of dense scales. The planting material must be examined and the affected and diseased onions must be destroyed. If the lesion is small, then it can be cut out and greased with brilliant green.
For germination of the shoot, the planting material is laid out in one row in a bright, warm place. The onions should be sprouted up.
On the day of planting, gladioli must be processed to protect them from fungal diseases and pests. To do this, you can use a 0.3% solution of Fundazol and soak the bulbs in it for an hour, then rinse under running water. If there is no special preparation, then use potassium permanganate, half a gram of which is diluted in one liter of water. In this solution, the planting material is kept for 30 minutes and planted in a flower bed without rinsing.
Children of gladioli begin to prepare two weeks before planting. This requires:
- select babies with noticeable root buds and a diameter of about 8 mm;
- free the onions from the shell;
- spread out in diffused light;
- on the day of planting, sprouted children are disinfected for 9 hours in a solution of potassium permanganate (one liter of water - one gram).
Pathogenesis
Rice. 1. Occurrence of arrhythmia by the macro-re-entry mechanism in SVC syndrome
Rice. 2. Occurrence of arrhythmia by the micro-re-entry mechanism
Under the influence of one or more etiological factors, one or more functions of the heart are impaired:
- automatism (automatic generation of pulses by cardiomyocytes by the pacemaker)
- excitability (the ability of cardiomyocytes to generate an action potential in response to irritation)
- conduction (impulse conduction through the cardiac conduction system)
- contractility (contraction of contractile cardiomyocytes)
- refractoriness (electrical inertness of the CMC for some time after the impulse, which does not allow the return of the conducted impulse and the imposition of a subsequent one)
- aberration (the ability to conduct an impulse along additional pathways of the cardiac conduction system)
So, the most famous mechanisms of disturbances of excitability (extrasystoles, paroxysmal tachycardia) are:
- re-entry mechanism: macro-re-entry (circulation around the vena cava, with Wolff-Parkinson-White syndrome: from the atria through the Kent bundle into the ventricular myocardium, then through the Purkinje fibers, legs and trunk of the His bundle atrioventricular node - back to the atria; Fig. 1), micro-re-entry (with pre-trophic and necrotic changes, an incomplete unidirectional block of conduction of excitation to the myofibril of the working myocardium of the atria or ventricles occurs (Fig. 3). But in the same place the ability of antidromic conduction remains If the impulse is looped once or twice - extrasystole occurs, if three or more - paroxysmal tachycardia; Fig. 2.)
- uneven myocardial repolarization
- increase in the amplitude of trace potentials
- increased automatism of heterotopic foci
At the heart of arrhythmia is a change in the conditions for the formation of excitation of the heart muscle or an anomaly in the pathways of its propagation. Arrhythmias can be caused by both functional disorders and severe organic lesions of the heart. In some cases, congenital features of the cardiac conduction system are the cause of cardiac arrhythmias.
Various diseases, accompanied by a violation of the anatomical structure of the heart or the metabolic processes occurring in it, cause types of arrhythmias of different duration and nature, and only a doctor can establish a diagnosis, whose conclusions are based on clinical and electrocardiographic data.
So, the most famous mechanisms of disturbances of excitability (extrasystoles, paroxysmal tachycardia) are:
- re-entry mechanism: macro-re-entry (circulation around the vena cava, with Wolff-Parkinson-White syndrome: from the atria through the Kent bundle into the ventricular myocardium, then through the Purkinje fibers, legs and trunk of the His bundle into atrioventricular node - back into the atria; Fig. 1); micro-re-entry (with dystrophic and necrotic changes, an incomplete unidirectional block of excitation conduction to the myofibril of the working myocardium of the atria or ventricles occurs. more - paroxysmal tachycardia; Figure 2.)
- uneven myocardial repolarization
- increase in the amplitude of trace potentials
- increased automatism of heterotopic foci
A certain role in the occurrence of arrhythmia is played by the state of the nervous system. For example, mental, emotional stress causes changes in the pace, and often in the rhythm of heart contractions, including in healthy people. Arrhythmia often occurs in people with diseases of the central and autonomic nervous system.
Various diseases, accompanied by a violation of the anatomical structure of the heart or the metabolic processes occurring in it, cause types of arrhythmias of different duration and nature, and only a doctor can establish a diagnosis, whose conclusions are based on clinical and electrocardiographic data.
Disembarkation and further storage
In open ground, gladiolus begins to be dug up in the second half of September or in October. In indoor conditions, it blooms a little longer, from which the planting dates are shifted. If you are attracted by planting and caring for gladioli on the balcony next year, you need to take a number of actions:
- Stop watering flowers 10 days before planting;
- After the right time has passed, carefully dig up the onion. In no case do this by simply pulling on part of the peduncle! From such manipulations, the root bottom can be damaged, and the planting material will not survive until spring.
- After digging up the bulbs, remove the remaining soil from them with your hands, and you certainly should not shake them or knock them on a hard surface at the same time.

Before storing, gently remove soil residues from the bulbs with your hands.
- Cut off most of the stem, leaving a "stump" a couple of centimeters away from the stem.
- Set the bulbs in a warm, dry place and let them dry completely for 10-14 days.
- You can store tubers in a cardboard box or paper bags in the refrigerator. This can also be done in the cellar, but provided that the temperature is maintained in it no higher than 3-5 degrees.
Finally, I will tell you a little trick that many growers resort to for better storage and protection from drying out of the bulbs. Such manipulation will not take much of your time, but it will help the bulbs to hold out until the next planting.
To do this, you just need to dip the tubers in paraffin, melted to 35 degrees, and immediately immerse them in cold water. You will then remove the formed thin film just before planting.
No less beautiful than in the photo, you can plant the flowers yourself
Seating and caring for your gladioli can be a lot of fun. And what can we say about the delight caused by flowering plants that so nicely decorate the balcony?
Features and description of gladioli
The gladiolus flower is a perennial corm plant that belongs to the Iris family. These flowers have been known for a long time. In nature, gladioli grow in South Africa, Europe and Asia and have about 200 different species. Translated from Latin, the word "gladiolus" means "sword", which perfectly describes the appearance of this majestic flower. In ancient Greece, 300 years BC. gladioli were considered common weeds, but today it is perhaps one of the most popular and beautiful flowers. Growing gladioli on his site is considered by every gardener to be practically a duty. And with the help of new varieties bred by breeders, these flowers can be grown in garden pots or containers, as well as in indoor pots, which makes gladioli even more magnificent.

Description of gladioli:
- Gladioli are perennials that reproduce with baby bulbs. All species are most often thermophilic, since the natural habitat is the southern regions. That is why, in our climate, gladioli are dug up for the winter. When growing gladioli in pots, you can take the containers indoors during the cold season, and expose them to fresh air in the spring.
- Gladioli have a fairly developed root system, so you need to select suitable containers or pots for planting tubers.
- The gladiolus bulbs are renewed every year, giving all their vitality and nutrients to the new tubers. Due to this, baby bulbs are formed, which are planting material.
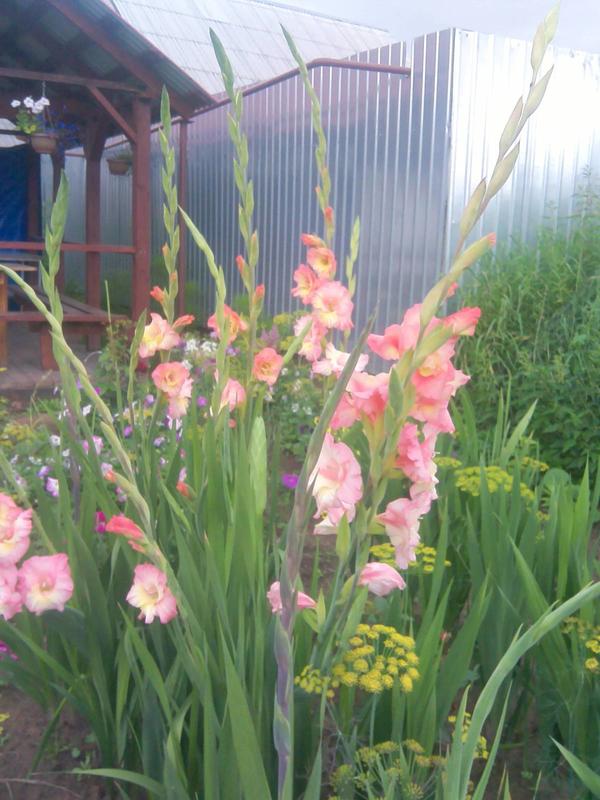
- The stems of these flowers grow vertically upward and are erect. The height of the plants depends on the specific species and variety of gladioli and is approximately 50-150 cm, in some cases 200 cm.
- Long and narrow, linear and xiphoid leaves grow along the stems, the average length of which reaches 50-80 cm.
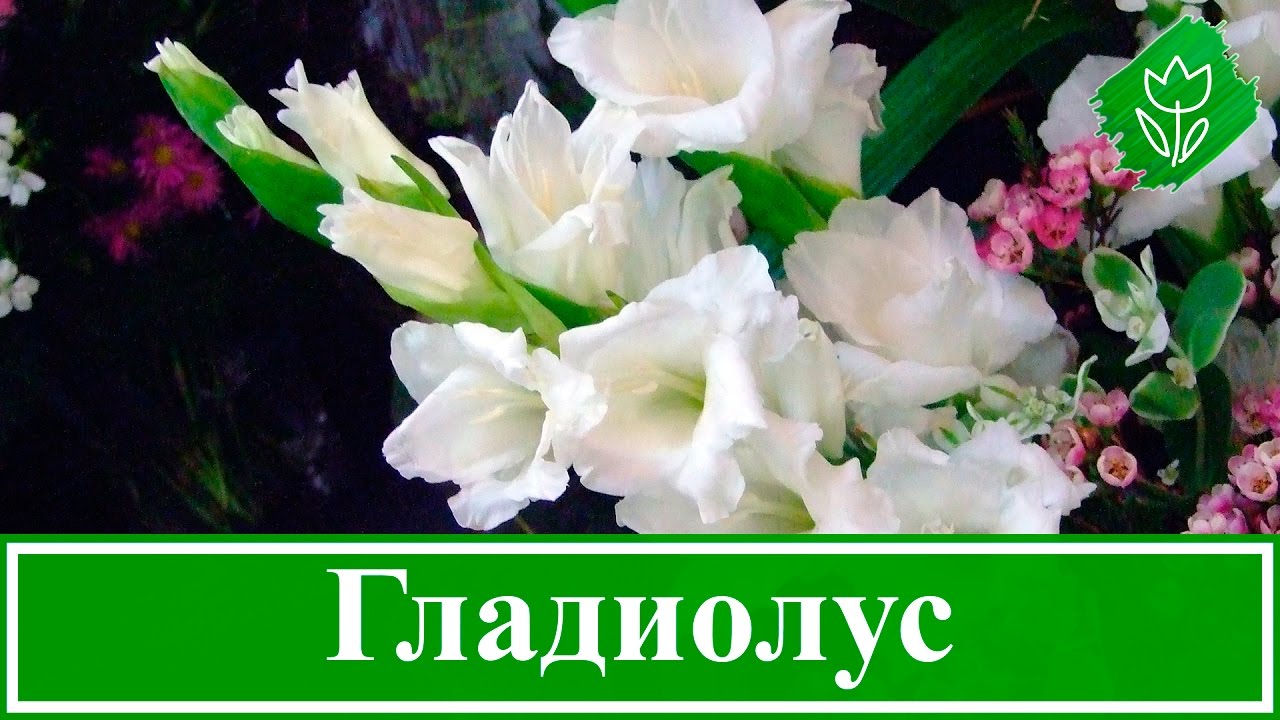
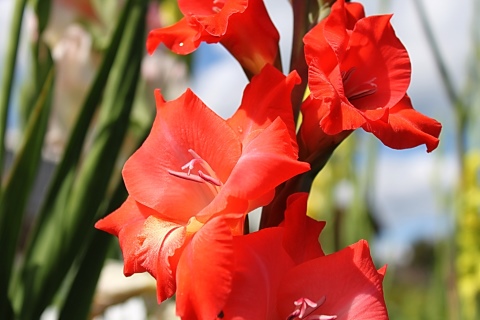
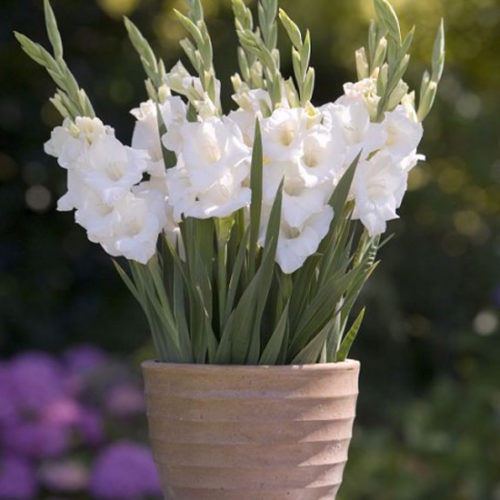
- Gladiolus flowers are funnel-shaped and come in a variety of sizes. They consist of 6 petals of various shades: white, red, pink, purple, yellow and others.
- Flowers are collected in a spike-shaped inflorescence, which reaches 60-80 cm in length.
- The shape of the petals can also be very different: corrugated, simple, folded, terry, dragon.
- During flowering, from 15 to 22 flowers can bloom on one peduncle.
- Today there is a rather complex classification of gladioli, which make it easier to choose the variety you need. Breeders have bred about 2000 different varieties, which differ in appearance, flowering period, flower color, flower size.
- Each variety of gladioli is assigned a specific digital code, in which the first number indicates the size of the flowers: 1 - 6.5 cm, 2 - 6.5-9 cm, 3 - 9-11.5 cm, 4 - 11.5-14 cm, 5 - from 14 cm.For planting gladioli in a pot, mini (6.5 cm), small-flowered varieties (6.5-9 cm), medium-flowered varieties of gladioli (9-11.5 cm) are suitable. The next two numbers indicate the color of the petals of gladioli, for example 01 is white. If a letter is present in the code, it indicates the flowering period of a particular gladiolus variety. All of these options make it easier to classify and select colors.

How to plant in a container or planter?
In order for gladioli to grow and bloom, you must strictly follow the planting instructions. It is divided into several important components.
Container preparation
To begin with, a container is selected. Growing in containers must be carried out correctly so that the bulbs fully develop. This will require a container with a depth of 40 cm and a diameter of about 20 cm. In addition, moisture should not stagnate in the pot, so you will need to make holes in the bottom through which water can drain. The holes must be drainage.
Where to grow - the choice of location and soil
Do not forget that gladiolus needs warmth and light, so you need to choose the right place in the house that would combine these qualities. The best place is near the window. You can also place gladioli on the balcony in warm weather. Flowers do not like drafts, so in colder times it is better to remove them from there.
For planting gladioli, a structured loose soil is suitable, which absorbs water well. The most fruitful is black soil, although loam can also be used with the subsequent addition of coarse sand.


