Hibiscus diseases and pests
- If your plant does not receive moisture for a long time during a drought, then it may be susceptible to pests such as aphids and spider mites. To destroy them, it is better to treat the plant with insecticides.
- Among the diseases that affect hibiscus, the most common is chlorosis, the lower leaves begin to turn yellow and crumble, and new ones also grow yellowish. The reason for this is the lack of nitrogen fertilizers and iron in the soil. For this, it is watered with a liquid complex fertilizer with the addition of the necessary substances.
- If your plant refuses to bloom and has slowed down its growth, then there is a lack of phosphorus and boron in the soil, and if the shoots are inhibited in growth, there is a lack of nitrogen fertilizers, you should treat the plant with fertilizer with the addition of nitrogen, and then flowering will surely appear.
Fulfilling all the prescriptions correctly, your plant will develop and delight your garden plot with its active growth and abundant flowering.
to the table of contents
How to make hibiscus bloom
Sometimes novice growers wonder how to grow hibiscus and what conditions to create for it to bloom. After all, a situation often occurs when every year the plant produces fewer and fewer buds, and gradually the bush degenerates.
This phenomenon can occur for various reasons. But the most obvious is the wrong growing conditions. If the bush does not gain color for a long time or does not bloom for long, then it must be pruned and transplanted into fresh soil mixture. Then put on a well-lit area and wait. After a while, the plant will gain strength and bloom.
Another likely reason is the lack of temperature differences. Florists noticed that during a prolonged early autumn, when it was already getting colder, but there is still no warmth in the houses, hibiscus begins to form buds very quickly, and then blooms for a long time and profusely. If the apartment is warm all the time, then the plant can bloom only in spring.
The third reason is the lack of normal pruning, in which all old branches are removed, and living space is freed up for young buds and shoots. If the plant is not cut off and does not form a crown, then every year it will bloom more and more poorly.
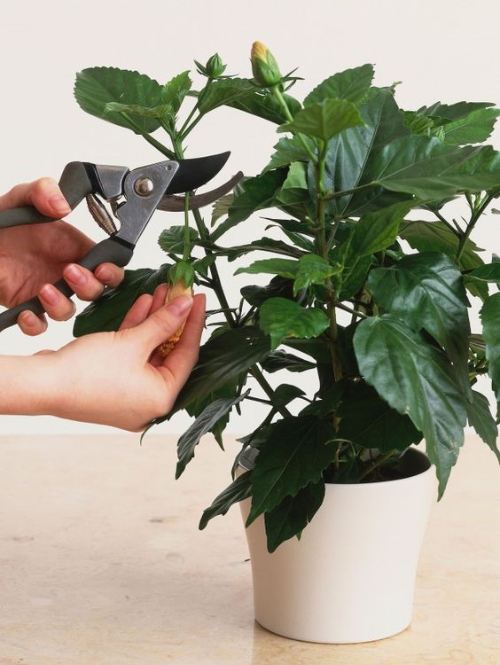
Successful pruning rules
- First you need to decide for what purpose the pruning is carried out, and in what way it will be carried out. The formation of flowers in the Chinese rose occurs at the tops of the stems. When pruning branches, the tree begins to bush more and more flowers are formed. The plant is pruned in early spring, hibiscus can be pruned a little in the fall.
- Pruning tools must be clean and very sharp. Poorly sharpened scissors and knives make the cut ragged, worsen the appearance of the plant, and the cut branches will take a long time to heal. Before each trimming procedure, the instruments are not only washed, but also disinfected. It is best to use alcohol for disinfection.
- It is best to prune hibiscus after transplanting, in spring or summer. After the procedures, the care for the rose remains the same.
- Even before you start trimming, you need to decide which shape is needed. All cuts must be done at an angle of 45 degrees. Caring for the rose immediately after pruning, in order to avoid contamination of the Chinese rose and for faster healing of wounds, includes sprinkling all the cuts with crushed charcoal. You can use charcoal or activated charcoal.
- The top of the plant is pruned, stepping back from the place where the last upper branches grow. Secondary shoots are shortened when the plant finishes flowering.
- The main rule for pruning a Chinese rose is that no more than 2/3 of all branches can be cut.
Thanks to these rules, the plant will receive minimal injuries that heal quickly.
How to prune hibiscus
The most popular form of hibiscus, which has a very effective appearance, is the stem.
It is not so easy to form it at home, and after the plant takes on the desired shape, regular care is required for the branches to maintain the standard shape of the crown. But if you follow the instructions, you can get an amazing Chinese rose stem tree.
- To obtain a standard form, a young hibiscus is chosen. Its central shoot must be straight. Then this shoot is tied to a reliable support at the same distance and do not remove it until the moment when the trunk becomes strong and stable. The growing side shoots are periodically removed.
- When the plant reaches the required height, pinch the top of the plant. This is done to stimulate the growth of side shoots.
- After removing the top, the hibiscus will begin to actively branch. Therefore, the side branches are shortened and pinched monthly. This measure will promote the growth of dormant buds and the growth of new shoots.
- All lower shoots continue to be removed, and the upper ones are not touched. Over time, the plant will acquire the desired spherical shape.
To maintain a neat decorative shape at home, careful care is required. The hibiscus is periodically trimmed, not allowing the crown to grow. A haircut is done once a year in the fall months. If you do this at a different time, then the hibiscus will not bloom.
You can try to grow a bonsai-style tree from hibiscus. But the formation of a Chinese rose for such a purpose, the plant is very difficult and time consuming. Professional florists can receive beautiful trees decorated with many flowers.
Such plants will look very impressive and unusual in the interior. The main problem with bonsai formation is that the hibiscus twigs quickly become thick and woody.
To form a bonsai, you need to take a young plant. Its branches are tied to supports and tensioners.
Their growth must be guided very carefully; this can be done with the help of a wire
When a young plant begins to form, this can affect flowering, but for the sake of a beautiful well-groomed shape, it is worth waiting for the flowers to appear. In trees that are already formed in the bonsai style, the shoots are shortened after flowering.
Chinese roses quite steadfastly endure the procedure of pruning shoots and shaping, therefore, special care for them after the work done is not needed. All fertilizing and watering is done as usual.
Do not be afraid to radically cut and thin out the hibiscus, but on the contrary, getting rid of old and unnecessary branches, the plant receives more nutrition for the formation of flowers and the growth of new strong shoots. The correct formation of the crown of the plant will make the hibiscus the main decoration of the house or greenhouse.
Reproduction methods
You can propagate hibiscus in the garden with a whole list of methods, you just need to choose an available option and get acquainted with a detailed guide on how to plant a plant.
Cuttings
Step-by-step landing instructions:
- Prepare everything you need:
- a container made of dark plastic or glass;
- stalk;
- activated carbon tablet;
- a little growth stimulant;
- greenhouse.
- Fill the container with settled water at room temperature (2/3).
- Add an activated carbon tablet to the water and dissolve the root formation stimulant in it.
- Dip the stalk into the water.
- From above, the container with the shoot must be covered with a greenhouse.
- Place the vessel in a warm (+ 20C - + 25C) and bright place (but without direct sunlight).
- Sometimes the greenhouse needs to be opened slightly, to shake off drops of condensate from its walls.
- After the roots grow to 2 - 3 cm, they can be planted in the ground.
Layers
Step-by-step landing instructions:
- Prepare everything you need:
- sharp garden knife;
- a piece of plastic;
- Kornevin;
- sphagnum moss;
- polyethylene film.
- Choose a healthy, semi-lignified branch without visible damage.
- Make an incision in the bark with a garden knife, after removing all the leaves from this place.
- To prevent the incision from overgrowing and staying slightly open, you need to slip a small piece of plastic into it.
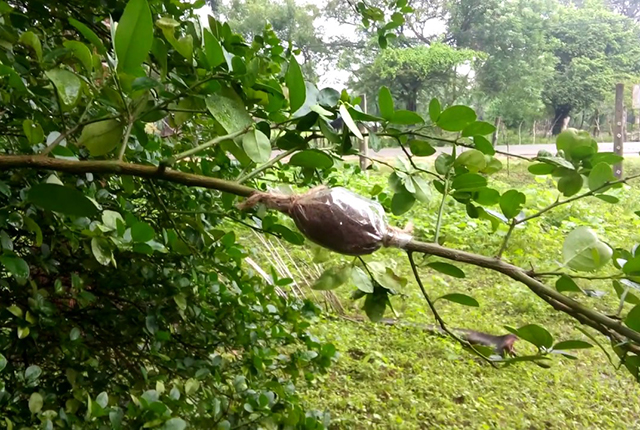
- Place the incision with a rooting stimulator and wrap it with moistened moss.
- Moss must be wrapped with foil and strong thread.
- If the moss is dry, then it must be watered using a medical syringe.
- When young roots are visible through the film (after 2 - 3 months), the plant can be separated.
Vaccination
Reference! The rootstock is the plant that is being grafted. A graft is a plant, a part of which is grafted into another to give it new properties.
Step-by-step landing instructions:
- Prepare everything you need for grafting:
- sharp garden knife;
- blade;
- rooted cuttings as a scion;
- polyethylene film;
- an adult young plant as a rootstock.
- The rootstock cut at the desired height must be split in the center with a knife.
- The scion stalk must be sharpened in a wedge-shaped manner.
- Insert the scion stalk into the split.
- Wrap the vaccination site tightly with plastic wrap, firmly fixing it.
Seeds
Step-by-step landing instructions:
- Prepare the necessary for sowing:
- container;
- substrate;
- drainage;
- seeds;
- spray bottle with water;
- glass or plastic wrap.
- Fill the bottom of the container with drainage, then a layer of moistened soil.
- The seeds are spread over the surface at a distance of 0.5 cm from each other, and they are also sprinkled on top with a thin layer of substrate so that the seeds are buried by 5 mm.
- Moisten the top layer liberally with a spray bottle.
- The pot is covered with glass or polyethylene, placed in a warm, bright place, but without direct sunlight. The recommended temperature for keeping is + 25C - + 27C. The first shoots will appear in 2 - 3 weeks.
- It is necessary to maintain constant humidity in the greenhouse, do not forget to ventilate it and regularly spray the seeds and soil.
- When the first leaves appear on the seedlings, they must be planted in individual pots.
- In mid-May, seedlings are planted in open ground.
By dividing the bush
Step-by-step landing instructions:
Prepare everything you need: a sharp knife;
secateurs.
Dig up a bush.
Carefully remove the soil from the roots (it is better to wash it off with water).
Each trunk is separated with a knife so that each of them retains a part of the roots (at least 1 - 2 roots 1 - 3 mm long).
With pruning shears, you need to cut off all the soaked parts of the roots.
Land in pre-prepared landing pits.
Reproduction and cultivation of hibiscus can be done not only on the street, but also at home. You can learn more about this by reading the following articles:
- How to grow indoor hibiscus from seeds?
- Reproduction of hibiscus by cuttings at home.
Rules and features of reproduction
Reproduction of garden hibiscus is possible both by cuttings and by seeds.
Using the cutting
The simplest method of breeding this plant, since by the onset of cold weather, it will have time to take root well and grow a little, which, if it is properly covered for the winter, helps to painlessly endure the cold.
But still, it is recommended to transplant it into a pot for the first winter and take it to a warm room.
The stalk must have several internodes, the cut site must be treated with a growth stimulant, placed in water and wait until it takes root.
This usually occurs over a period of two weeks. After waiting for the roots to appear, planting is carried out in prepared soil to a depth of no more than 10 cm.
The recommended soil composition is a mixture of peat and sand in equal amounts.To facilitate the rooting process of the cuttings, greenhouse conditions are created: the plant is covered with a transparent jar or polyethylene.
The hibiscus should finally take root within 20-30 days, during which it is required to maintain the ambient temperature within 23-25 degrees and constantly water it, preventing the land from drying out. After rooting, the young plant can be planted in a garden or other prepared area.
Seed use
Initially, they must be soaked for 10 hours in a solution of epin, which is a growth stimulant. Landing takes place from January to March.
For this, a soil mixture containing an equal proportion of sand and peat is poured into the vessel. For the fastest germination of seeds, it will be necessary not only to maintain a high temperature in the room (at least 25 degrees), but also to have a lower heating of the soil. Seedlings will need to be periodically ventilated and sprayed.
When the first leaves appear on young shoots, they are seated in separate containers. After the onset of warmth, you can plant the plant in an open area.
Like any other plant, replanting the Syrian hibiscus is necessary in the spring. First of all, it is worth updating the plant by cutting off the branches and removing the dead ones.
Pre-watering the bush, which will prevent damage to the roots, it is dug up and planted in a prepared place. In order for the plant to take well, it is necessary to prevent the earth from drying out by watering the soil abundantly.
When to start preparing and what exactly should you do?
To grow hibiscus outdoors, you need to immediately pay attention to the frost-resistant varieties. It is known that terry varieties winter worse, so shelter is necessary for them even in a fairly mild climate.
It is also imperative to monitor the condition of the planting material: the seedlings should be free of damage and signs of disease. It is better to give preference to trees from famous nurseries, which have managed to establish themselves with the quality of plants.
When planting a seedling in the ground, it is necessary to choose the right place and prepare the planting hole well
It is necessary to pay attention to the flow of groundwater - they should not flow close to the surface of the earth. This can lead to stagnation of moisture, weakening of the condition of the roots and, as a result, a decrease in the frost resistance of the plant.
It is better to choose a place on a hill or even create an artificial hill or alpine slide specifically for planting hibiscus. At the same time, hibiscus loves lighted places.
Low-growing shrubs with a developed root system can be planted next to the hibiscus. They will help to retain the necessary moisture and protect the plant from the winds.
If the hibiscus is already growing on the site and it's time prepare it for the next winter, you can start with abundant watering. This should not be delayed. The temperature should not be below freezing so that the water does not remain as a crust of ice over the roots. Phosphorus and complex fertilizers can also be applied to the soil.
Next, you need to trim. This can be done when the average temperature reaches between -5 and -10 0С. Remove all seed pods, shorten the shoots by an average of 10 cm and pinch the side branches so that new growths form in their place. It is absolutely impossible to carry out formative pruning - this will weaken the plant. You can learn more about spring pruning here.
Hibiscus roots must be mulched before cold weather. Garden perlite or dry straw is suitable for this.
After the soil is well fertilized and moistened, the plant is cut, and its roots are mulched, you can cover it.
Reproduction methods
Reproduction of hibiscus is carried out by cuttings, dividing a shrub or by seeds
When deciding to germinate a culture from seeds, it is important to understand that such a process is possible only after stratification.
The planting material is covered with a loose layer of soil, slightly moistened, for example, by spraying, and sent to the cold for 30 days. After that, sowing takes place in a pre-prepared substrate from a sand-peat mixture.
The container is covered with glass or polyethylene and left at t 25-27 degrees
It is important from time to time to ventilate and irrigate the soil in the container with water. When the seeds germinate a little, you need to wait until several leaves are formed.
Then the seedlings are placed in separate pots.
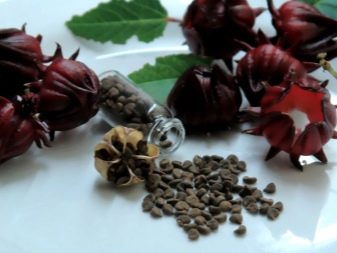
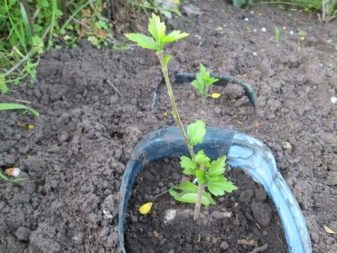
If the culture is propagated by cuttings, then the best time for this is not autumn, but spring. Upper cuttings with several internodes are cut from young shoots. Trimming is carried out 5 cm below the location of the node. Then cut off the top of the stem directly above the node and make a cut on the resulting cuttings. It is necessary to partially remove the stem and leaves from below. The few remaining sheets are cut in half.
To accelerate development, the stalk is often treated with growth stimulants and then buried in the ground at the level of the nodes. The planting is covered with a film and kept for a month at t 18–20 degrees. When the shrub takes root, it is planted in a specific place. The plant will give flowers a year later after planting in the ground.

Hibiscus care at home
Highlights in care:
- When young shoots appear on the plant, dead and old stems should be removed.
- Periodic loosening of the soil around the plant has a very beneficial effect on growth. To prevent the bush from thickening, it is recommended to remove weeds.
- Frequent watering is a must, especially during a hot season.
- If a transplant is necessary, then it is best to do this in early spring, before flowering, after cutting off the shoots by half the length.
- If lavender is planted near a bush, it will protect the plant from aphids.
- For abundant flowering, pruning is recommended every two years.
- A place for planting a new bush, you should choose a sunny and draft-free.
1. Lighting
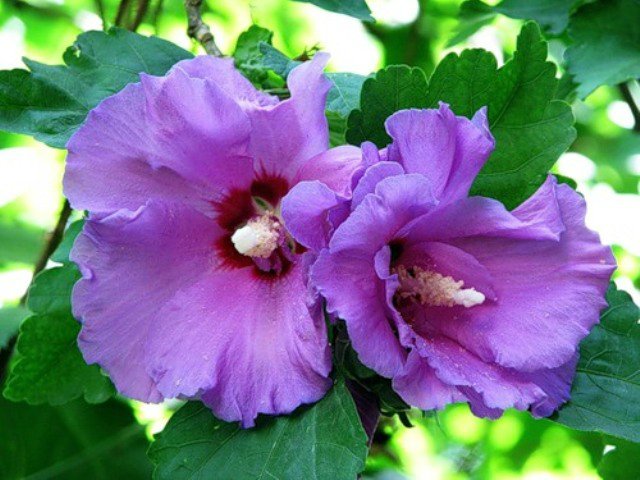
Full lighting is very important for hibiscus. The scorching sun can also destroy him, but the shady part of the garden will not fully please
Therefore, for planting, choose a well-lit area, without drafts.
2. Temperature conditions
Despite the fact that hybrid hibiscus are frost-resistant, to preserve the plant, it is worth digging it up for the winter if the weather temperature during this period is below -15 degrees.
3. Watering
A dry period or hot days have a very negative effect on hibiscus, therefore constant watering is important during such a period, provided that the ground under the bush is completely dry.
4. Soil
For full-fledged growth and abundant flowering, fertile, fertilized and permeable soil, not very sandy, but also without a lot of clay, is well suited.
5. Top dressing
From June to September, the hibiscus begins its active growing season. During this time, the bush is fertilized with phosphorus and nitrogen a couple of times a month. And in the autumn, when the bush is prepared for winter, potash fertilizers are also added to the complementary foods.
6. Transfer
A Chinese rose transplant is often done in cases where the place is not suitable. This is best done in early spring, before flowering.
If the plant needs to overwinter, then the bush is cut off and transplanted into a container or large pot, keeping it in a cool place until spring.
7. Blooming
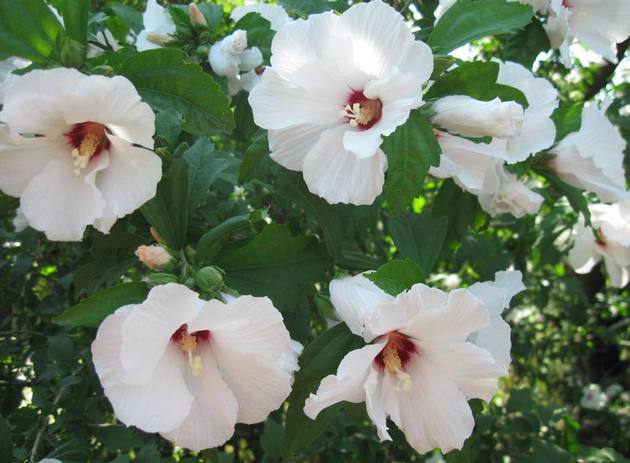
If the hibiscus feels good in the conditions that you have created for it, then soon it will delight with its flowering. The only thing is that the flowers bloom for a couple of days, after which they wither, but instead of them new ones appear. So, throughout the month.
8. Diseases and pests
Hibiscus is very resistant to diseases and pests, but sometimes it happens that insufficient soil moisture can portend the appearance of thrips, aphids and spider mites.To eliminate them, disinfection is carried out with special solutions or even simple soap, once a week.
With insufficient fertilization, the plant undergoes chlorosis - a disease in which the leaves fall off, and new ones appear with a yellowish tinge. Therefore, when watering, iron chelate should be added, and in the spring, pamper hibiscus with complex fertilizer, with nitrogen.
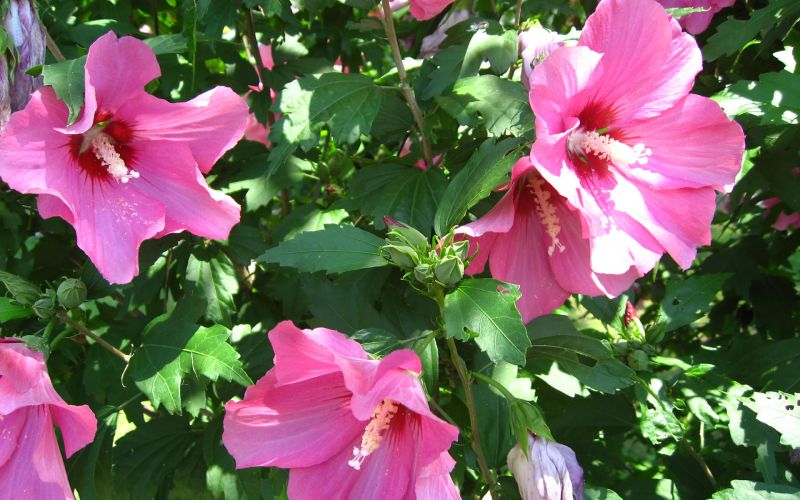
Three main problems and the fight against them:
- Leaves turn yellow mainly due to inadequate fertilization, from chlorosis or trauma to the root system, as well as due to insufficient watering in hot, dry weather. Eliminate them according to the recommendations.
- If you fully, as it seems, care for the hibiscus, but it still has not bloomed, then the reason still exists. Most likely, it is related to fertilization. Correct and complete fertilization will soon delight you with abundant flowering.
- If the leaves of hibiscus thin out in the fall, this is the norm, but if they began to fall off earlier, then the reason lies in watering or a damaged root system. Therefore, follow the recommendations for soil moisture.
How to propagate plants by layering
This plant propagation method is suitable for the most inexperienced and lazy gardeners. At the same time, with the help of it, you can propagate woody, ornamental and fruit plants while maintaining varietal characteristics.
The procedure is very simple, below we describe the process of reproduction by layering step by step. The essence of the method is that the formation of roots is stimulated at the branch of the plant that needs to be propagated, after which the resulting specimen is separated and planted in a prepared place.
The best time for propagation by layering is the period of active growth, that is, spring and early summer. But at other times the method works, it just may take more time for rooting. In some cases, to stimulate vegetation, the plant is pruned in advance. But, as a rule, this is not required for the needs of ordinary gardens, there is always a couple of young twigs that can be dug in.
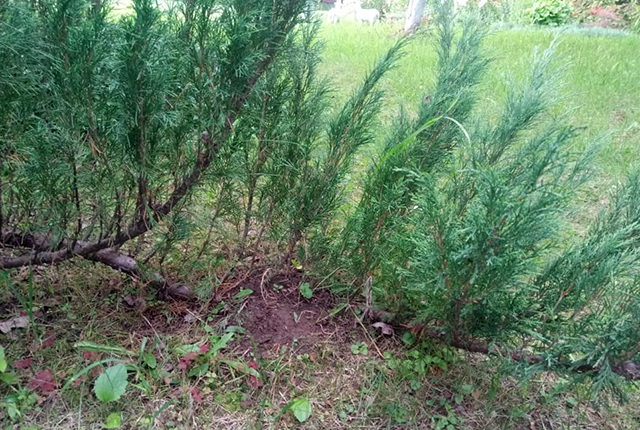
How to propagate plants in the garden by layering
- We choose a young twig from the desired plant, one or two years old, it is desirable that it be flexible.
- We tilt the twig to the ground. We will not dig in the edge of the branch, but a place closer to the middle. The top of the head remains sticking out on the surface. It is preliminarily recommended to dig up the earth a little at the place of the digging, you can enrich and make a small depression. Experts recommend cutting off the leaves and side shoots in a place that will be covered with earth.
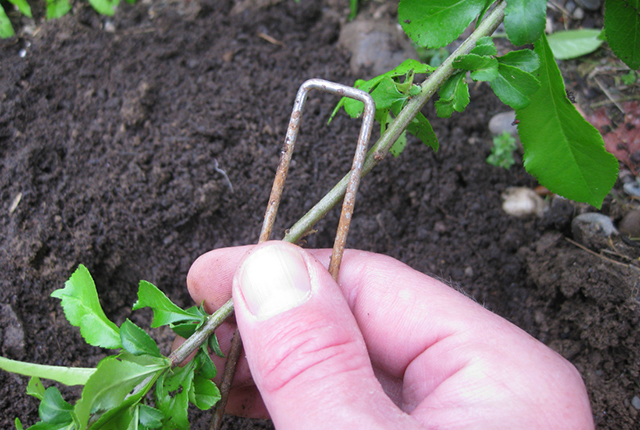
- We press the twig to the ground. You can just sprinkle it, but by inertia it will tend to rise to its original position. Therefore, it is fixed with a wire bent in half, a stone or any other available method. Top covered with earth. It is in the absence of sunlight that the formation of the root system begins. You can pinch the top of the branch.
- If the weather is dry, then the rooting site is watered as needed.
- As a rule, rooting takes place in one season. That is, if you dug in a shoot in the spring, roots will form by the fall. Next, you need to cut off our young plant from the mother plant and leave it for 2-3 weeks in order for it to adapt to independent life. After that, it can be transplanted to the prepared place. But you can leave it until spring or for a year, so that a good root system is formed and the plant gets stronger.
- If we need to root a lignified twig, then it is recommended to make an incision at the place of the digging, treat it with a fungicide and then follow the indicated scheme.
Treelike hydrangeas, spireas, vesicles, lilacs, forsythia, barberries, derens, fruit shrubs, lianas and many, many other plants reproduce very well by layering. You can try absolutely everything.
The video below shows reproduction by layering using the example of birch spirea.
Reproduction by layering by weight
It is not always possible to tilt the branch of the plant so low to the ground to dig it in. But in this case, you can use the method of reproduction by layering. Everything will happen on weight. The method is suitable for fruit trees.
The whole procedure takes place right on the branch. A branch is selected, not an old one, but one that is actively developing.
- Having retreated from the edge of the branch, several internodes, an incision must be made and treated with a fungicide so as not to infect the tree. The incision can be longitudinal and deep, to the core. You can make a circular incision about 5-7 mm wide and remove the bark in a circle. You can wire the branch over to break the top layer of the bark.
- For the early development of the root system, it is better to treat the incision site with Kornevin or another drug that stimulates the development of the root system.
- After that, the prepared place must be placed in the ground. This can be done with a plastic cup, cut-off plastic bottle, or a plastic bag. The container is cut and filled with moist fertile soil. The twig is placed between the halves of the glass and is firmly clamped by them, tightened with electrical tape, tape or rope. the ground will need to be watered, since its volume is small and it dries quickly.
How exotics winters

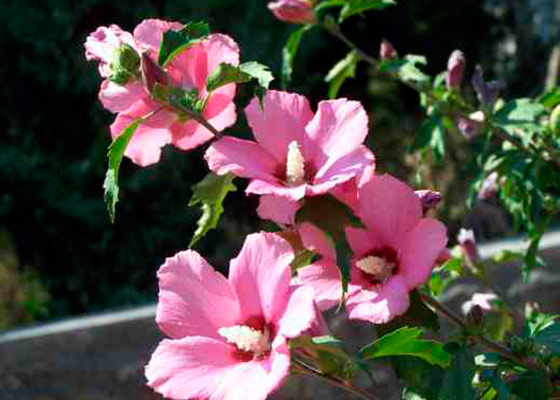
In order for hibiscus to survive the Russian winter safely, you will have to work a little. Your labor will not be in vain, since no other plant is capable of embellishing your yard in such a way. You should know that hibiscus with double flowers tolerates winter cold better.
If frosty winters are observed in your area, then it is best to transplant hibiscus bushes to the basement for the winter or provide it with reliable protection from the cold. Install a rigid frame around each trimmed bush and cover it with agrotex. Such protection is quite effective at ambient temperatures up to minus 15 degrees.
If your winters are harsh, then more reliable insulation will be required. The branches of the bush must be tied up, bent to the ground as much as possible and a bag pulled over them. On top, build a hut of thick spruce branches and strengthen it with poles or dense fabric. For example, for the Moscow region, such protection is sufficient.


