Basic concepts
 In this article, we tried to collect the most necessary and interesting information for a violet grower:
- everything about the children of violets: photos and descriptions, methods of obtaining and separating them;
- what stepchildren are and how violets are reproduced with their help;
- proper care of young plants (starters).
Kids
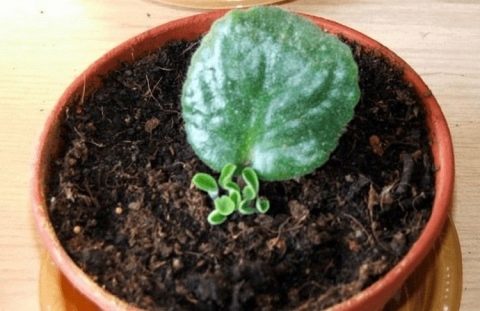
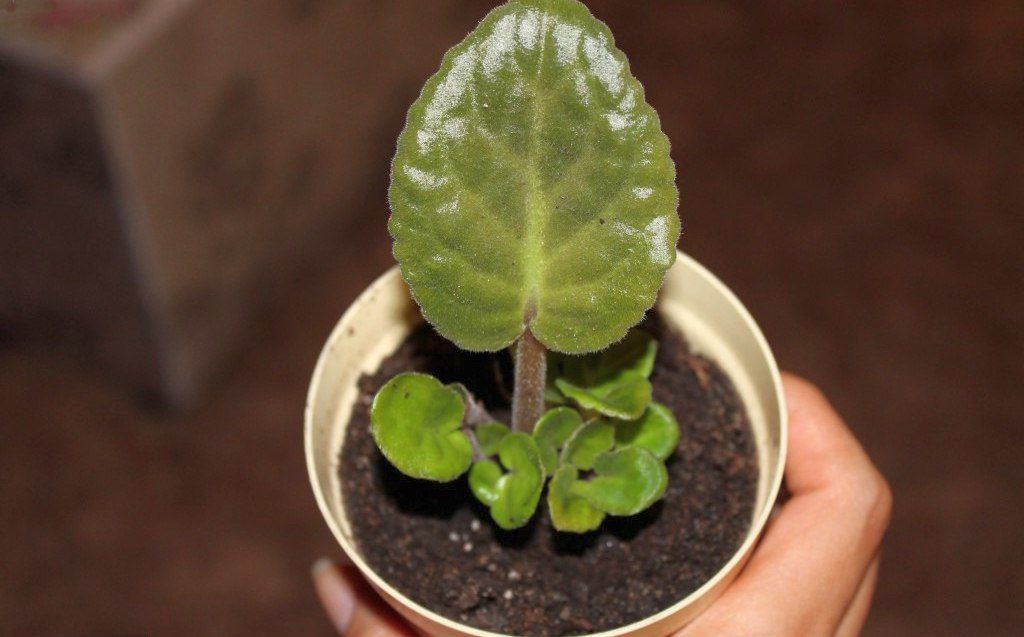
Most often, a violet is propagated by a leaf cuttings - a fresh leaf that has been separated from the mother plant. Once rooted in the ground, it is called a rooted leaf (stalk). It is already stress-resistant and able to grow without greenhouse conditions.
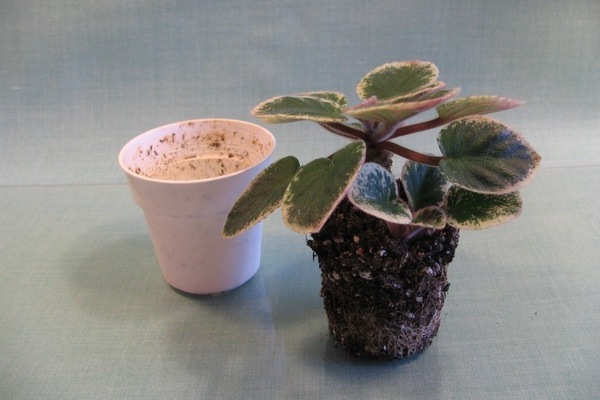
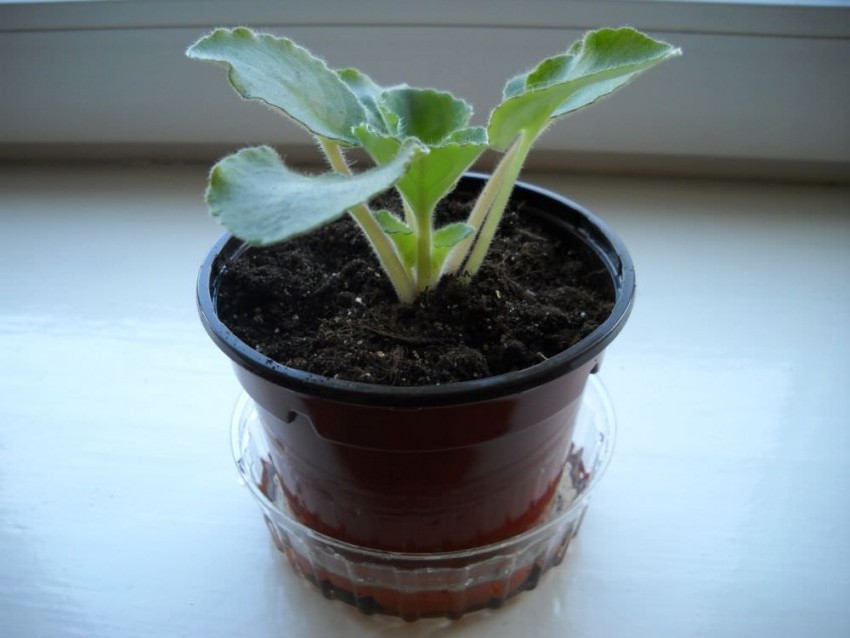
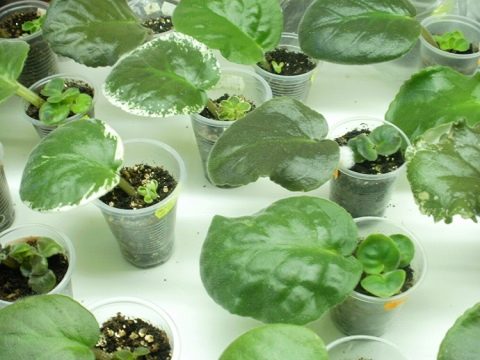
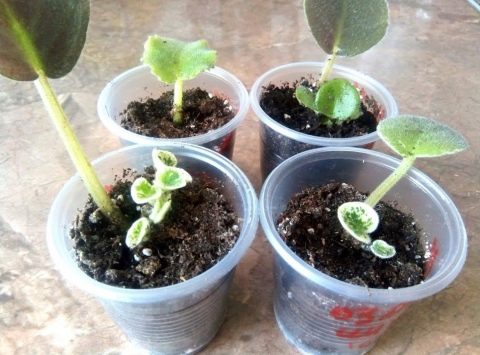
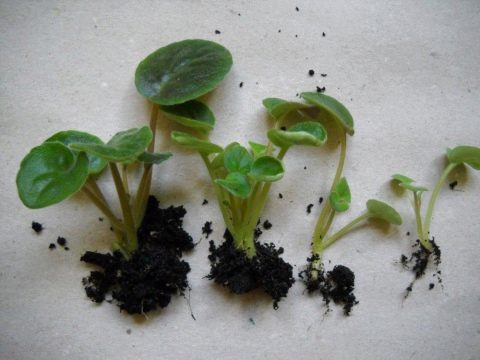
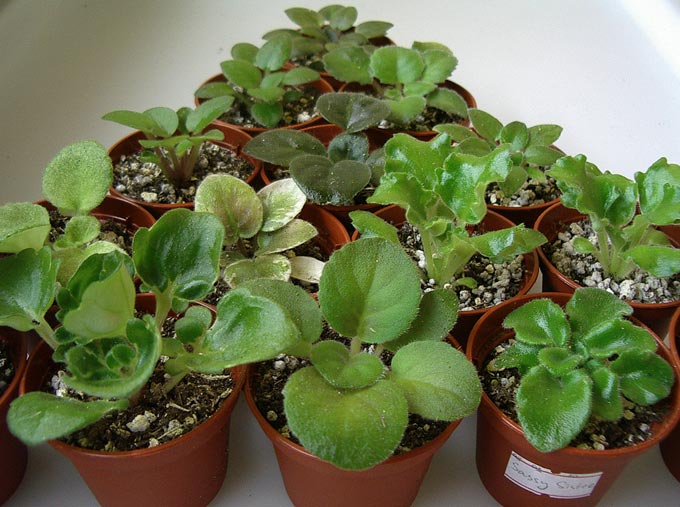
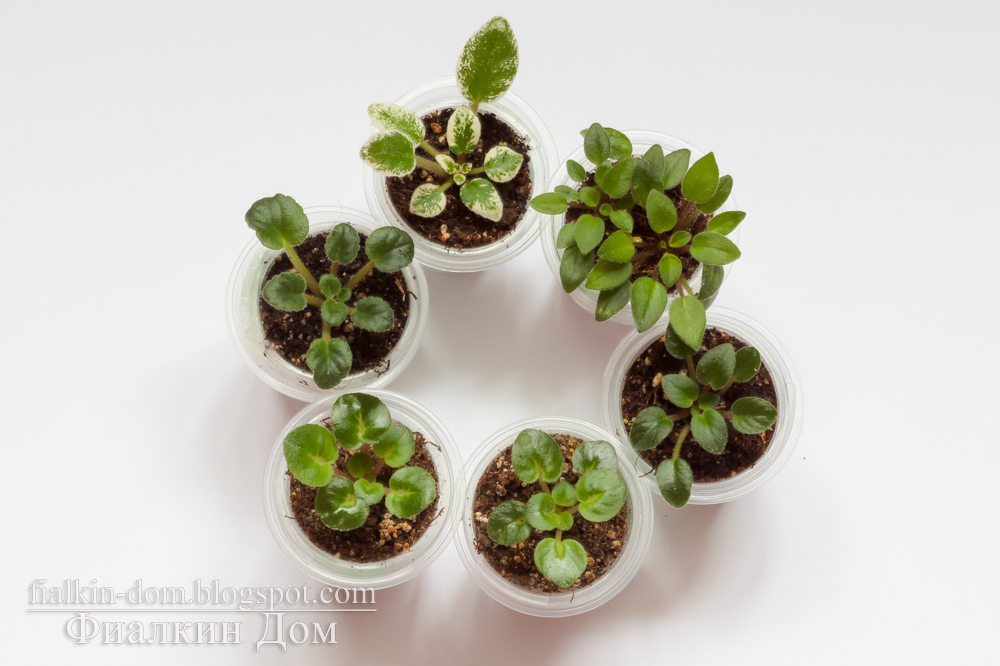
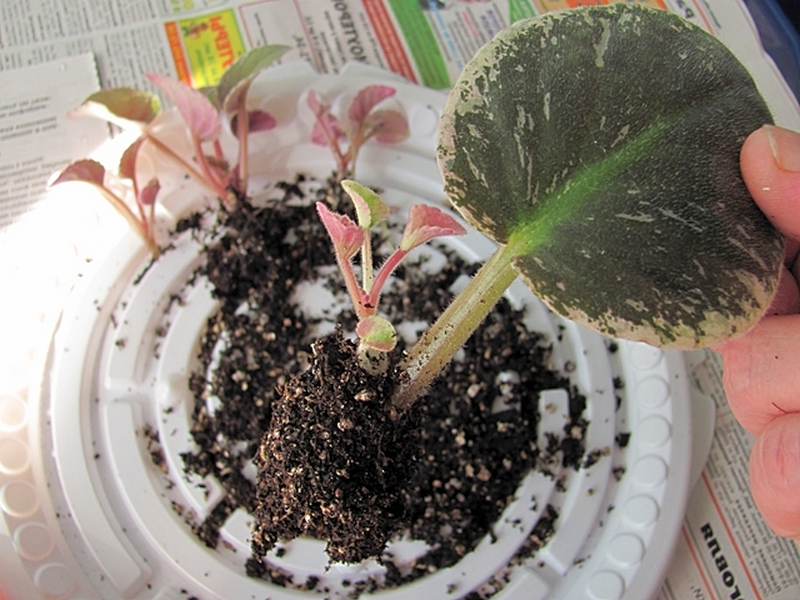
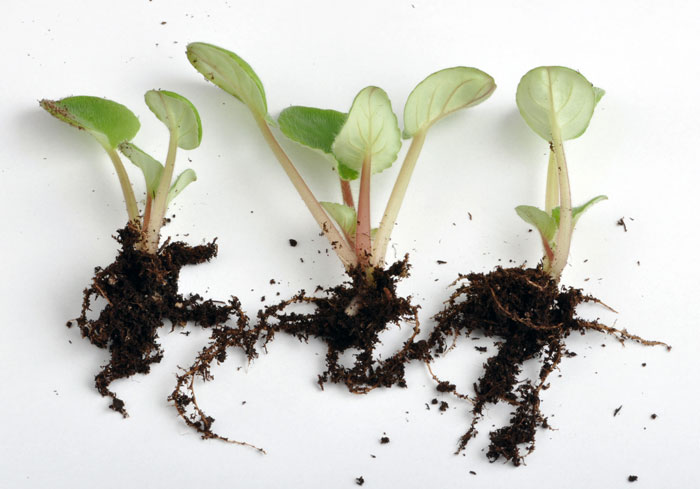
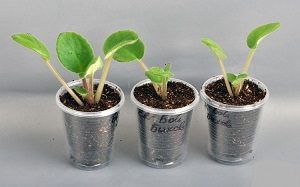
Some time after planting, children develop at the base of the cutting - small plants with their own root system. They can grow independently and bear all the characteristics of an adult plant. When the baby forms 2-3 pairs of leaves the size of a nail, it is deposited.

Violet babies.
And if the children of violets do not grow - what to do? We will talk about this below.
Stepchildren
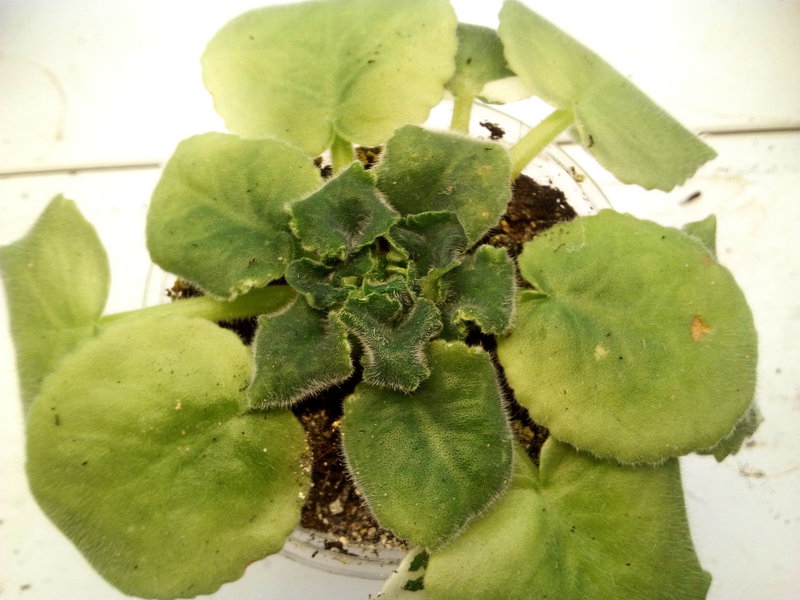
Sometimes a small plant develops in the leaf axils - a stepson. They are especially often formed before the violet bloom.
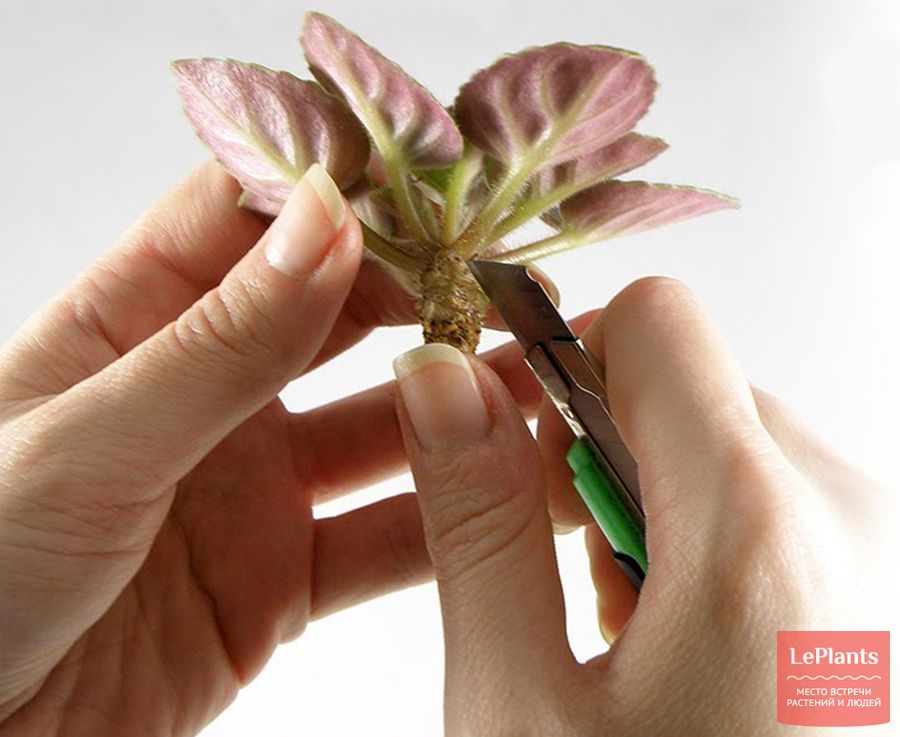
To prevent them from deforming the outlet, it is better to remove them at the earliest stages of development.
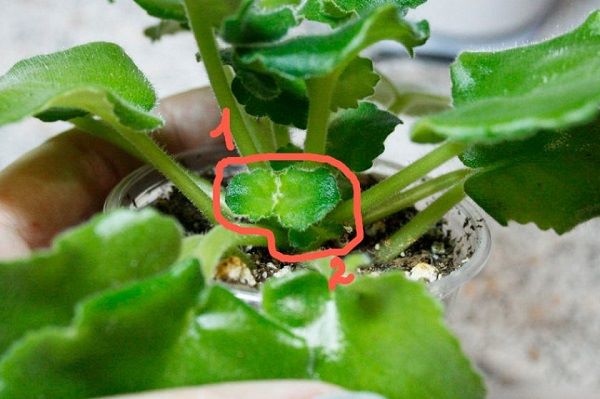
Stepson.
The main stages and nuances of rooting
Although it is believed that reproduction of violets by a leaf is the easiest way to increase the collection, without performing certain actions and observing some of the nuances of planting, it is unlikely that a positive result will be obtained. There are two ways, but they have one goal - rooting the cut leaf:
- rooting in water;
- rooting directly into the ground.
In water
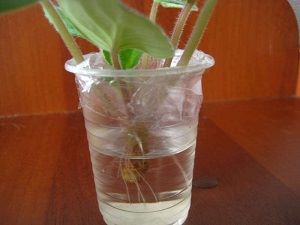 This method will require:
- a clean container with a volume of no more than 0.2 l (preference is given to disposable cups);
- warm, clean, boiled water;
- Activated carbon;
- correctly selected saintpaulia leaf;
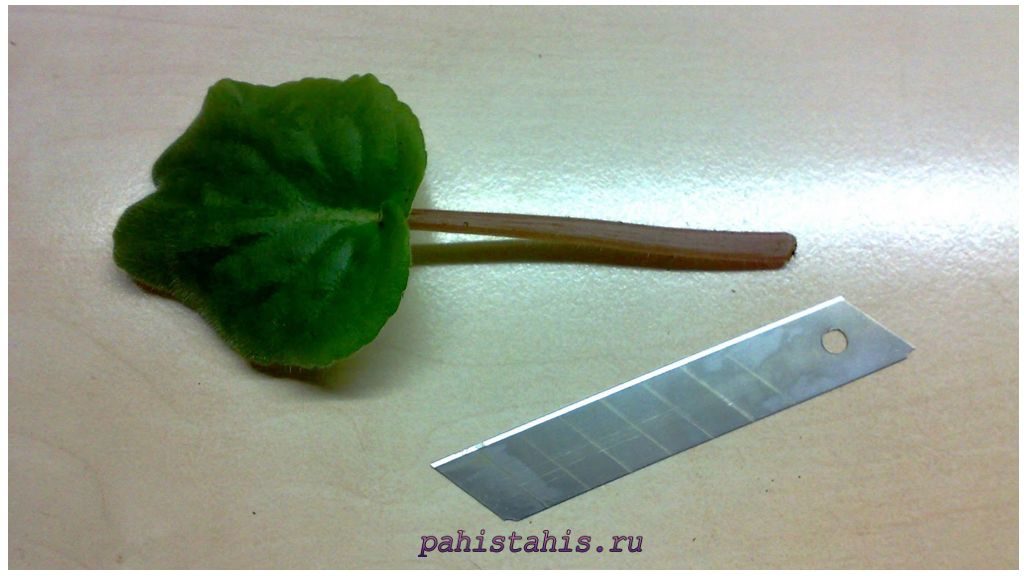
- sharp, disinfected cutting tool.
Water and an activated carbon tablet are poured into the container. The prepared sheet, with a cut updated if necessary, is immersed in water to a depth of no more than 1 cm. The container is removed to a warm, bright place without direct sunlight until roots form at the cut site. As it evaporates, water should be added.
After the formation of roots and their growth of at least 1 cm, the rooted leaf is transplanted into a prepared and high-quality soil.
The positive aspect of this method is the visual observation of root formation. An unsafe transplantation of the leaf that gave the roots into the ground is considered a negative point. Delicate roots are easily damaged by careless transplantation.
Recommendation! When the cut site decays, the rooting operation begins from the initial stage of leaf preparation.
Directly in the ground
Before planting a leaf in the ground, prepare:
- capacity 0.2 l;
- boiled clean water;
- inert material for drainage (polystyrene, expanded clay, etc.);
- special soil or vermiculite with perlite;
- prepared saintpaulia leaf;
- disinfected, sharp instrument.

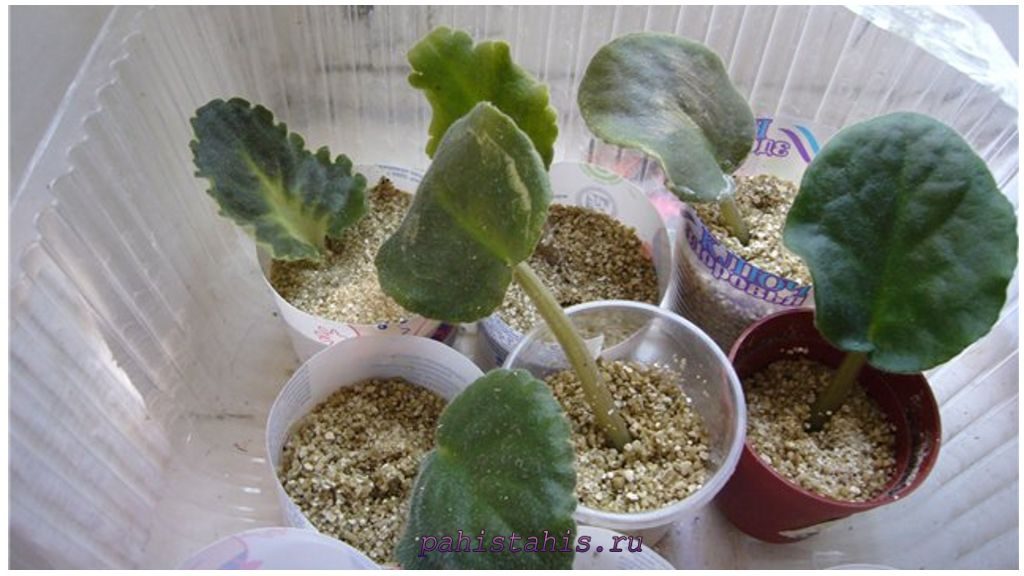
Rooting in the ground.
Drainage holes are made in the container at the bottom to release excess moisture. A small drainage layer of inert material is evenly laid on the bottom. A leaf with a petiole is planted in the laid soil, to a depth of about 1 cm.
The container is installed in a warm, bright place without direct sunlight, and the sheet is covered on top with a glass or plastic transparent cup. If there is a lack of moisture, cover the structure with a plastic bag. The soil is periodically watered, but not waterlogged.
The pros and cons of this method are exactly the opposite of the first method.
The rooting time for both methods depends on the growing conditions.Usually, the formation of roots in water occurs within 2-4 weeks, and rooting in the ground occurs with the formation of children, after about 1.5-2 months.
Preparatory stage
Every beginner is interested in how to transplant a violet shoot and where to start? It is easier to remove a plant from a small pot with moist, loose soil.
Priming
Many fans of violets do not rack their brains when selecting soil. Take in stores special for violets:
- Basic requirements for the substrate:
- Air and moisture permeable;
- Loose;
- Fat content is moderate.
- This state is provided by:
- Garden land;
- Humus;
- Peat;
-
River sand.
The soil for violets is mixed with additional materials.
- Florists with experience in growing Saintpaulias prefer to prepare the soil for them themselves. And they will definitely add something else:
- Vermiculite. Increases the acidity and looseness of the soil;
- Perlite. Its addition prevents soil compaction;
- Sphagnum moss. To maintain the required humidity;
- Charcoal. Improves soil structure. As an antiseptic, it prevents soil acidification and root rot.
And they may also advise you to use at your discretion:
- Needles;
- Pine bark (small);
- And even coconut flakes.
Capacity
- For children and pots are needed proportionate. As for adult plants. It all depends on the stage of development and its size
Even for adults, flower growers do not use pots larger than 9 cm. If you want healthy violets to bloom.
:
- Planting in small containers 5-6 cm in diameter will allow both to grow roots and ensure good vegetation of the leaves:
- A loose pot is useful for growing roots;
- And the upper part of the nutrients will not get enough. And not enough for flowers.
- The size of the container for violets is optimal if it is two times smaller than the outlet;
- There are different opinions about the material from which the pot is made:
- Plastic:
- Light;
- Many colors;
- You can also make additional holes on the sides. For better ventilation.
- Clay. Not with a glazed surface;
- Each of you will find their advantages and disadvantages. So the choice is yours.
Attention! Do not forget to wash well and treat with an antiseptic (potassium permanganate is fine) already used containers
Instruments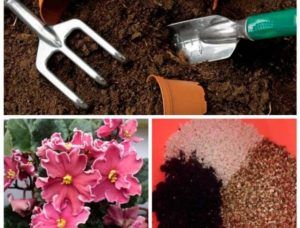
When freeing children and transferring them, do not overload the workplace with unnecessary items. It is more convenient to do this at the table. Squatting - not quite. Especially at the age:
- Scissors, knife (scalpel);
- Root cleaning brush;
- Sticks (toothpicks);
- Clean, sharp and processed.
How to avoid being sprinkled by stepchildren?
The stepson is a daughter rosette of a violet, which grows in the axils of the foliage of the mother's rosette, and sometimes at its base. Growing up stepchildren is a natural process.
If there is no purpose to propagate the variety in this way, then it is better to remove them, because they take power from the mother's outlet. But they should be carefully examined so as not to be confused with a nascent bud.
Daughter sockets are removed in any convenient way: with a toothpick, scalpel, cuticle knife, etc., but peduncles will not form in their place.
To avoid stepchildren, you need to carefully review the mother's sockets and remove the daughter ones. Already after the first flowering, Saintpaulias are much less stepsons.
Cactus variety
Many cacti are very fertile and it is normal for them to grow overgrown with many children, and they do this even with comfortable maintenance and good care. For example, the popular mammillaria, especially of the proliferative or shoot-bearing species, is distinguished by its "large number" and it is even difficult to imagine such a specimen without an abundance of baby crumbs.
But, in some cactus in "ordinary" life, shoots are absent or they are very modestly and reluctantly detached. And if such succulents are suddenly covered with an abundance of children, then most likely this is due to a violation of the microclimate or other failures.As a rule, succulents that are in dense, nutritious soil, rich in organic matter, grow and multiply abnormally. Such soil is not suitable for cacti, as it contains a large amount of nitrogen and should be replaced with a poorer, lighter and more airy soil mixture. When the flower falls into the usual land, its growth will normalize and the children will diminish. In addition, there are the following situations:
- There are cases when a baby appears on these plants in place of buds. The cactus is preparing to bloom, but under the influence of unfavorable conditions, this process is disrupted and the bud turns into a baby.
- With poor care and maintenance, the succulent can "turn on" defense mechanisms. And the cactus, thinking that imminent death awaits him, tries to leave behind as many successors of the genus as possible.
- Most of the specimens raised from children also produce a considerable amount of them.
- New shoots can appear in a plant with a damaged growth point. Sometimes cactus growers use the last feature of cactus for further reproduction and replenishment of the collection - they cut off the top of the flower and grow a mother plant from it, a specimen that gives many children.

Reasons for the absence of children
The reason why a violet leaf does not give babies may be in a cuttings that are too deeply planted. The shoots formed at its base simply cannot hatch through the thickness of the soil.
The problem, why the stalk does not give babies for a long time, can also be hidden in the composition of the soil. The soil for vegetative propagation should be loose and breathable, then there is more chance that the leaf will sprout.
Sometimes flower growers decide to radically deal with the problem of the absence of offspring. If the babies do not grow, what they do: re-cut and root the mother leaf. The chances of success with this method increase significantly.
Reproduction of violets using root babies
Sometimes, adult violets, growing, form basal rosettes. Often, these babies interfere with the development of the mother bush. In such cases, they should be separated and transplanted into separate pots (or simply removed). It is best to carry out the procedure for separating daughter outlets in the summer - then the mother plant will be able to restore its strength and prepare for the arrival of winter.
So, you decided to propagate your violet with the help of a baby. To do this, proceed as follows:
- Carefully dig the daughter outlet (baby) out of the ground with a sharp, clean object. Try not to damage the mother bush.
- If the baby has few roots, but there are many leaves, remove some of the leaves so that rooting is easier.
- Place the baby in a small (5x5) pot with a loose substrate similar in composition to the soil in the mother's pot.
- Moisten the soil moderately.
- Cover the pot with a jar or plastic to create a microclimate.
- Place your mini greenhouse in a warm place with plenty of ambient light.
- Ventilate the Saintpaulia every day, moisten the soil if necessary.
After a week or two, the shelter can be removed, the baby should strengthen herself and begin an independent life.
2> Rules for the care of regrown outlets
Violets are relatively unpretentious indoor flowers, look after them not difficult. However, in order for Saintpaulia to develop and bloom well, some rules must still be followed.
- You should not put young plants on the windowsill if direct rays of the sun periodically fall into the window. The delicate leaves of violets can get burned.
- For transplanted outlets, proper watering is very important. Saintpaulia reacts negatively to both excess moisture (the root system rots from it) and insufficient moisture. While the children have not yet grown up, it is better to water them in very small portions using a syringe or syringe. Monitor the condition of the soil in the pots. When the earthen lump from above becomes dry, irrigation must be carried out.Immediately after transplanting, young plants should not be watered for a couple of days at all.
- Indoor violets feel most comfortable at a temperature of about 22 ° C. The air should not be too dry.
- Young rosettes need good lighting, especially if it is winter or late autumn. At this time of the year, daylight hours are very short, so there is not enough natural light for the plants. It is recommended to arrange an additional light source for violets and turn it on for 3-4 hours a day. At the same time, do not forget to turn the pots and cups so that the flower bush forms correctly and beautifully.
- After transplanting, violets do not need feeding. After 3 months, you can periodically fertilize the soil. It is best to purchase a liquid preparation containing a ready-made complex of substances.
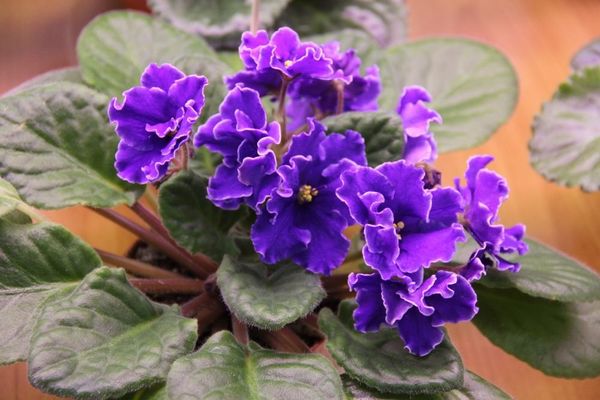
Newly rooted violets differ little from mature plants. The comfortable temperature for them is 23 ... 24 ° С. It is necessary to monitor the humidity in the room. Young leaves are afraid of water; when watering, it is necessary to prevent it from getting on the plant; do not use a spray bottle.
The shoots require frequent, but not abundant watering under the bush. Perlite is added to the soil so that the delicate roots are not damaged by rot. Over time, sump watering can be applied.
Transplant and care
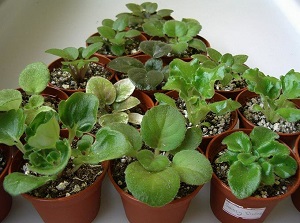 The moment of transplanting adolescents comes when the root system is completely entwined with an earthen lump. Then there is no need to postpone the transplantation or transshipment of the plant, since it is in the active stage of growth. And a baby pot with a poor soil composition only inhibits the growth of Saintpaulia.
If you look closely at the violet, you can see that the lower row of leaf plates has a different shade than the rest of the plant. The fact is that harmful substances accumulated during the growth of the flower are deposited there.
On the other hand, when the starter ceases to have enough nutrients or water due to the small volume of the cup, the lower leaf plates give their resources to the young leaves.
Important! A change in the color of the lower row of leaves indicates that the starter needs a transplant.
There are two ways to move the violet to a larger pot:
- transplant;
- cross over.
In the case of transplanting a teenager, you can change the main principle of selecting a pot for a plant, that is, take a container not 1/3, but 1/2 of the diameter of the outlet.
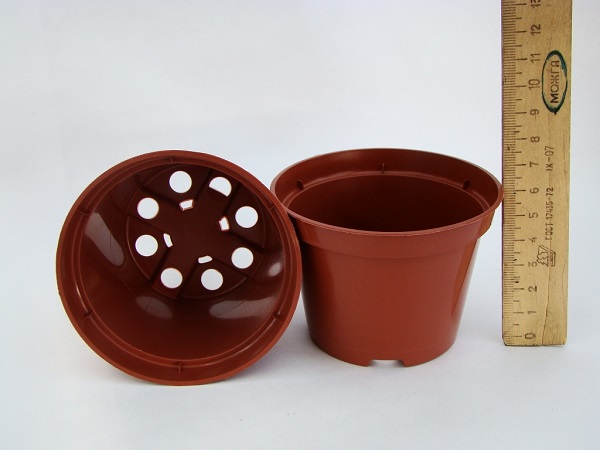
For starters, take pots half the diameter of the outlet.
The soil mixture is prepared with a higher organic content than when planting children. But overfeeding with nitrogen is not recommended, this leads to thickening of the middle of the outlet and loss of immunity. The substrate should be slightly damp before use, but not wet.
2-3 days before moving the violet, it must be watered and the bottom row of leaves removed, even if they have not changed their color. After transplanting or transshipment, these sheet plates will still wilt, they will have to be removed.
Starter transplant is carried out using the following technology:
Pour drainage into the prepared pot by 1-1.5 cm
and some prepared soil with a mound in the center;
Slightly wrinkle a glass with a teenager with your fingers so that the violet can be easily removed;
Carefully free the roots from the old soil by shaking, it is not necessary to wash under water;
Place the starter in the center of the pot so that the bottom row of leaves is slightly below the edge of the container;
Distribute the roots inside the container, carefully fill in the soil, avoiding deepening the center of the outlet.
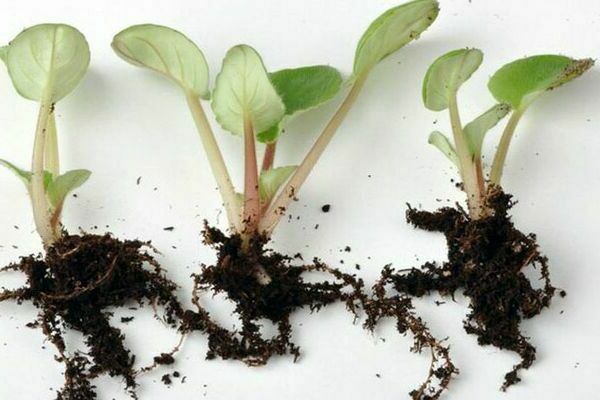
When transplanting, the roots are freed from the ground.
The first 2-3 days, the transplanted violet is not watered, since the delicate roots damaged during transplantation can easily rot and destroy the entire plant. That is why it is safer to reload starters rather than replant.
The transshipment of Saintpaulia follows a similar scenario:
- Pour drainage 1-1.5 cm into the prepared pot and a little prepared soil, you do not need to pour a slide;
- Place the same cup in the center of the container as that of the transplanted plant and fill the gap between the walls with soil. It must be slightly compacted so that when the glass is removed, the substrate does not crumble;
- Slightly wrinkle the glass with the plant with your fingers so that the Saintpaulia can be easily removed;
- Place an earthen ball with a violet in the recess of the pot so that the ground levels match.

When transshipment, the old earthen lump is not touched.
With this method of planting, the roots are not injured, the starter recovers faster from stress and begins to grow. After transshipment, the plant can be lightly watered with Zircon solution.
Until the roots of the teenager have mastered the new pot, moisten them very carefully, without applying watering through a pan or dipping. The lower part of the soil gets wet more than the upper one, and the root system has not yet grown there, and cannot take water from there
Below, the earth turns sour, being wet all the time, the lower roots begin to rot, posing a threat to the entire plant.
Top dressing of starters begins 1.5-2 months after transplanting. Although during this period Saintpaulias intensively build up their green mass, overfeeding the plant will not lead to anything good.
 It is best to use complex balanced fertilizers with equal NPK content, so as not to cause premature flowering and not overfeed with nitrogen.
Saintpaulia begins to form a beautiful rosette even in childhood. All juvenile, gnarled, damaged leaves are removed. As the starter grows and the lower leaves age, they must be removed.
The formation of peduncles and stepchildren may occur earlier than the violet leaves adolescence.
Attention! To make the Saintpaulia rosette strong and beautiful, stepchildren and flower stalks are removed.
A young violet starter is considered only after the second and sometimes third flowering.
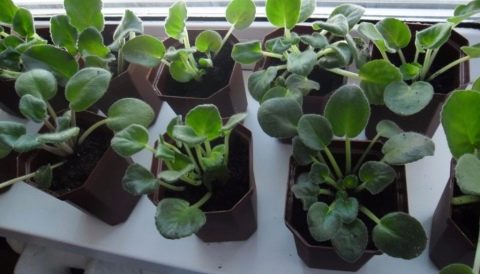
Violet baby care
Saintpaulia is ready for offspring in 1 calendar year. The countdown is from the planting of a leaf for reproduction until the end of the first violet flowering.
Violet babies can be obtained in different ways:
-
new offspring get vegetatively:
- from the sheet. The middle leaves of Saintpaulia are detached from the mother bush and planted for the formation of children. Cuttings (3 cm from the leaf) are grown in water or soil. Children in the ground grow stronger specimens than in water;
- part of the sheet. The sheet is cut to 1/3 part. Usually this is the top of the leaf with veins. The sheet is left to dry after cutting. Then, it is dipped in ash or crushed activated carbon and planted in the ground. It must be squeezed tightly with soil. Each vein will give roots and babies;
- stepchildren. The stepsons are separated from the mother bush and transplanted into a separate pot;
- from peduncles. Peduncles are cut off together with stipules and planted in the ground.
- the second way to get babies is by seeds. The seeds are sown in the ground and covered with glass. Children who have reached 4 cm, with 5 leaves, are planted in a separate pot.
It is interesting! When multiplying by a fragment of a leaf, the largest number of children appears. When children appear, the daylight hours are increased to 12 hours, watering is carried out as needed. The greenhouse is ventilated once a day. They are pulled out of the greenhouse at the time of transplantation. Having previously prepared them for room temperature, humidity.
Stages of development
As soon as the offspring from the leaf appear, cut the leaf in half. This will make it possible to develop faster. If you are going to continue to grow further shoots, then this is not worth doing. You just have to be patient and wait.
Saintpaulia goes through four growth phases before ripening:
-
The first stage is the appearance of children;
- The second stage - the development of a young plant is called a starter. This is the time when the rosette is a teenager, it looks like an adult specimen, but still miniature. Sometimes the color is not yet fully determined, the surface is covered with light spots. During this period, the flower should receive enough light.Turn it periodically around its axis so that the development is the same on all sides. Remove leaves that make the rosette asymmetrical;
- The next phase is a young rosette with a grown cover, bright color, ready for bud formation. You can distinguish it from an adult by its elastic, shiny leaves;
- The fourth stage is the formation and set of buds. Saintpaulia enters the "violet-on-bud" stage. Tear off the first buds so that the rosette gets stronger and blooms with a hat. Also remove stepchildren, they delay flowering and make the rosette one-sided. After the flower stops throwing out the buds, the plant is ready for new offspring.
Separation from the mother plant
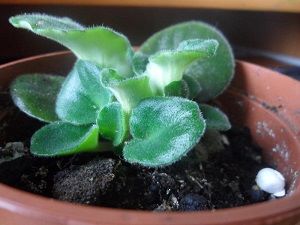 The growth of baby saintpaulias is different. Some specimens quickly rise and become overgrown with leaves. Other offspring hinder development.
When stepchildren appear, some care requirements must be met. Provide 12-hour daylight hours. If not, equip additional blessing with lamps.
As soon as there are 4-5 leaves on the offspring, the growth will be 4 cm, the plant is ready for transplantation.
Smaller offspring with 3 leaves can be transplanted, but they will require more careful care. Choose the right pot, soil, provide it with consecration, normal humidity, high air temperature up to 24 degrees C.
It's important to know! Varieties with dark leaves require more light.
What are juvenile leaves?
The first leaves of the newly grown stepson, which eventually become the lower row of Saintpaulias, are called juvenile. They differ from other brethren in their rounded shape, thin, unexpressed veins, small in size, without a gun.
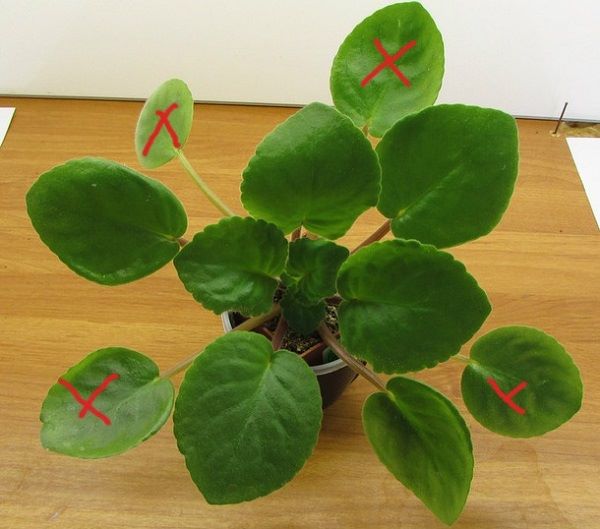
Juvenile leaves are marked in red.
Over time, juvenile leaves acquire an unsightly appearance: they turn yellow, become depleted. To preserve the decorative effect of the flower, they are removed. This is done with a sharp blade or knife. Pre-disinfect the instrument. The place of the cut is sprinkled with activated carbon.
Some growers try to propagate violets with their help. But, as a rule, babies appear for a very long time and in a small amount. Although some lovers of Saintpaulias claim the opposite. This is most likely an exception to the rule.
What kind of violet is called a starter?
Violet starter is not a variety or subspecies of a plant, it is a flower ready to bloom, and close in age to a young adult violet. It takes 8 months to raise a starter baby. This will be followed by the stage of an adult violet.
Flowering conditions
Before purchasing a plant, you need to know how to care for it. These flowers are considered capricious, but they are not. With proper care, the plant will delight the eye with flowering almost all year round.
The constancy and splendor of flowering in violets is postponed at the genetic leveltherefore it is important to choose the right variety and provide the flower with proper care. To do this, you must observe the following rules:
To do this, you must observe the following rules:
The soil should be loose, light, breathable, and moderately fertilized. Once a year, Saintpaulias are transplanted into new soil.
Experienced flower gardens recommend choosing a pot that is not deep and not wide, it should be smaller than the outlet, otherwise the plant will begin to grow leaves, and there will be no flowering.
The temperature in summer should be + 20 ... + 25 ° C. In autumn and winter, + 18 ° C. At night it is recommended to keep the temperature + 15 ° С
If this does not help, after a month you need to cut off the bottom row of leaves.
Air is important for an adult violet, the next thing you need to pay attention to is this indicator in winter because
batteries dry the air. Room humidity should be at least 50%.
Water the saintpaulias 2-3 times a week as the soil dries up with a moderate amount of water. It should be settled or thawed, at room temperature. In winter, water less often.
A large amount of potassium in the fertilizer stops growth, contributes to yellowing of foliage, greens grow from a high nitrogen content, but flowers appear late. Complementary food, which contains phosphorus, provokes violet flowering. Complex fertilizers are used for stimulation.
Light is important for Saintpaulia, but it shouldn't be too much. The flower is more comfortable in partial shade. A plant with dark foliage needs more light than a flower with light leaves. Daylight hours for Saintpaulia are no more than 12 hours, excess light leads to burns. If the foliage stretches upward, this indicates a lack of lighting or improper placement of the pot.
The foliage is periodically wiped from dust, otherwise the violet will suffer from a lack of oxygen and carbon dioxide. Wipe it with a damp cloth; it is forbidden to rinse the leaves under running water.
If the plant is transplanted once a year, then it will bloom because it will have enough. You can plant and put him for a long period of time if you provide him with complementary foods. After 3 years, the rosette is seated; the entire procedure is sufficient for the flowering of the plant.
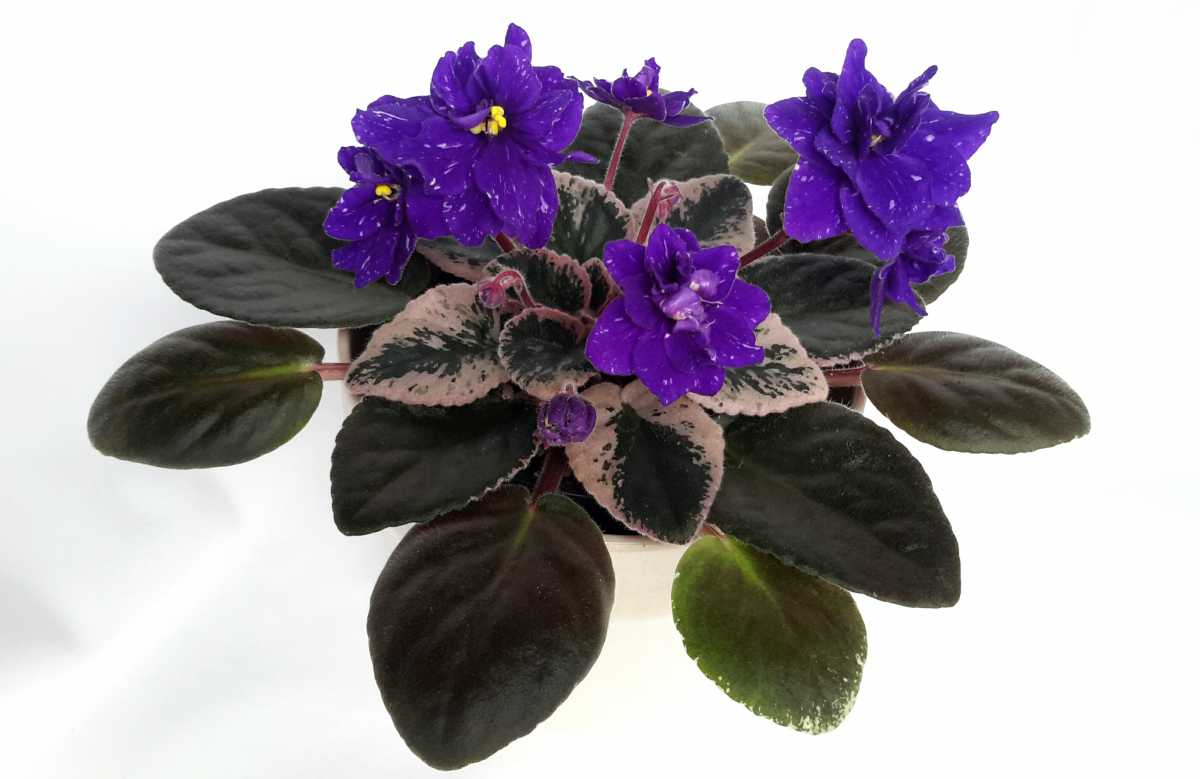
Features of variegated violets in raising offspring
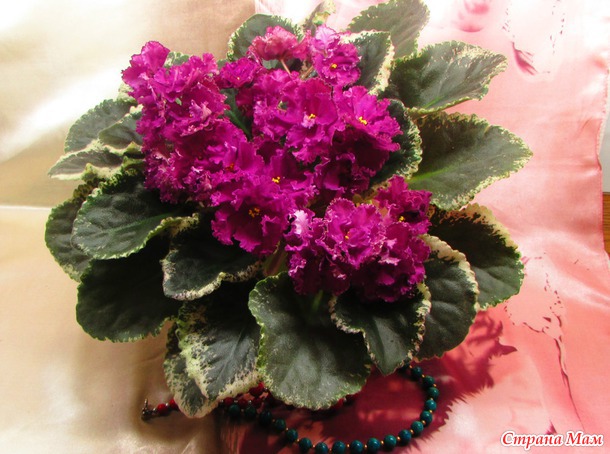
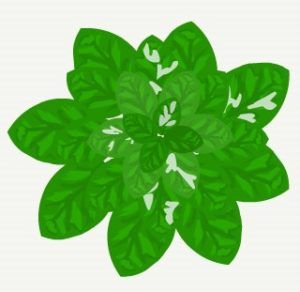
Variegated violets have a special place. Their leaves are not monochromatic, but with drawings. Rather, with patterns:
- It is of three types:
-
The variegation of Tommy-low. The leaves have a border of numerous light points;
Variegated violets.
-
Crown. Lighter leaves are placed in the center of the rosette. The further from the middle, the darker the leaves;
Crown violets.
-
Mosaic color is evenly distributed over all leaves.
Mosaic violets.
-
These signs will be present during reproduction.
Important! Spontaneous forms of variegated leaves can remain in a single copy. Temporary phenomena
 For reproduction, their features must be taken into account:
- Their chlorophyll content is lower. What creates problems in growing from cuttings;
- You need to choose the greenest leaves. If possible;
- Therefore, it is recommended to purchase children. Not everything may work out with cuttings;
- When white leaves appear. Place the cups in warmer, shaded areas. To make the leaves turn green;
- Transplant babies only when at least one green leaf appears.

