Content
To grow indoor plants, growers often buy ready-made mixtures. For planting flowers, in addition to ordinary soil and soil with the addition of peat, you can use a coconut substrate. What is its peculiarity, and for which plants it can be used, we will tell in this article.
Coconut flower substrate
Coconut substrate is a mixture of fibers and dust obtained from the processing of nut shells. Due to the fact that this is a completely natural product, it is perfect for growing various plants in it. The substrate is sold in a crumbly state and compressed (in the form of discs, bricks or briquettes).
Why is growing plants so good on coconut? This is due to its physical properties and chemical composition.
Features of coconut substrate as soil
The distinctive features of the coconut substrate include:
- The increased lignin content ensures that the substrate is sufficient slowly decomposes, beneficial bacteria multiply well in it, which contribute to the development of the root system.
- It contains some chlorine, soda and nitrogen, while calcium, phosphorus and potassium enough.
- His acidity (pH 5.8 - 6.0) is optimal for growing plants. They do not develop chlorosis, and there are no problems with the absorption of iron.
- Such a substrate perfectly retains water (almost 8 times its mass). Moisture is evenly distributed over it, which provides access to it for all roots. At the same time, the top layer always remains drier, which prevents the development of fungal diseases on the plant. The porous structure not only provides water retention, but also air access, so there is no need to drain the pot.
- Its structure does not change with stirring, that is, it does not settlelike peat.
Coconut substrate is used in pure form or by adding 30-50% to the ground. It can grow plants for 7-8 years without regeneration. There are no specific recommendations for disposal of used material.
How to use coconut substrate?
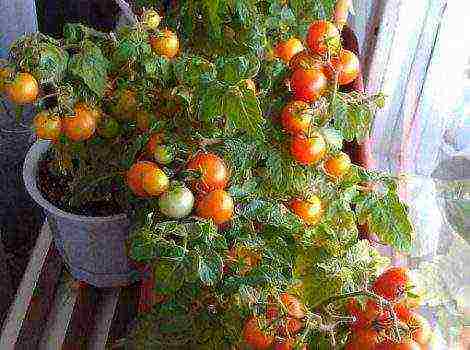
Coconut substrate can be used to grow cucumber or tomato seedlings, as well as most indoor flowers (dracaena, roses, hibiscus, hoya, adenium, violet). But not every grower knows how to properly prepare a coconut substrate for planting plants in it.
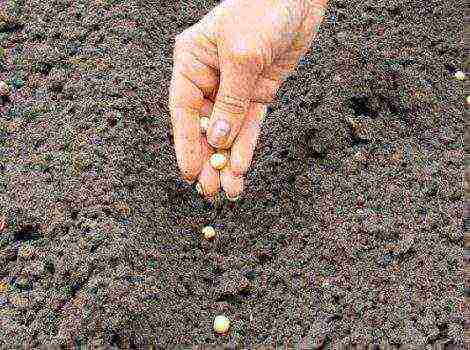
First, it must be soaked. To do this, put the compressed briquette in a bucket, and then pour hot or warm water. As the liquid is added, it will swell and disintegrate. From 1 kg of substrate, 5-6 kg of soil ready for planting is obtained. Some growers recommend rinsing under hot running water after it swells. To make it convenient to do, even a dry piece should be put in a nylon stocking. Be sure to only do this if you will be using coconut in hydroponics.
After you have planted the plant in the coconut substrate, it must be fertilized. At this point, it is necessary to use nitrogen-containing preparations (ammonium or calcium nitrate) or complex fertilizers, but only with a small potassium content. In the future, fertilizing should be made depending on the needs of the plant itself.
Due to the fact that the root system of plants grows well in the coconut substrate, more and more people use it when transplanting or propagating their home flowers. It also becomes widespread in the cultivation of vegetable and berry crops, because on the coconut, an earlier and higher yield is noted, which cannot but rejoice.
Soil for cacti
First, once again about the soil for cacti. It should be loose, water and air permeable. One of the main loosening components of any substrates is sand. But we often omit the postscript, taking it for granted that the sand should be river sand, well washed, and sifted from dust. If this is not done, then the sand will not add loosening, but cementing properties to the entire soil. Take a look, there are two types of sand in the photo, one is taken in a sandbox near the house (it got there from a construction site), the second is river sand, washed and larger (sifted), they even differ in color. After wetting, the first sticks together in lumps, the second, on the contrary, does not keep its shape - it crumbles, and, of course, only this is suitable for us.
Another component is zeolite granules made from cat litter ("Barsik-standard" or any other, only non-clumping filler). They are also added for loosening, but for this they are prepared: they are thoroughly washed and then sieved. A coarse fraction is added to the soil. The remaining components of the substrate, traditionally: garden soil or universal soil from the store and small expanded clay. The earth can be replaced with a coconut substrate, which has the main advantage - friability, it does not stick together into a monolithic piece, allows the roots to breathe, and its acidity is close to neutral. When adding coconut substrate from briquettes, it must be borne in mind that it swells when it first gets wet, increasing in volume three times. In order not to be mistaken with the quantity, and after the first watering the cacti did not "kicked out" from the pot, it is better to wet the coconut substrate in advance and dry it again, and then mix it into the soil.
 Suitable fillers from cyolite (clay) for cacti.
Drainage in a pot
For cacti, drainage is essential, especially if you don't know how to choose the right pot size, if you are planting in a pot with small holes in the bottom, or if you are planting a composition of several cacti in one pot. Even drainage holes will not exclude stagnation of water in the roots, because excess water remains in the sump, from where it does not always have time to be drained. The dimensions of the drain are relative - at least 1/6 of the volume of the pot, maximum - 1/3.
As a drainage, you can use expanded clay, small pieces of red broken brick, fine gravel, as well as pieces of foam, or a wine cork cut into small pieces. The cork is the easiest - it can be easily cut into pieces of about 5 mm. But when transplanting, the old drainage must be thrown away - it accumulates salts. To drain well from the roots, thoroughly water the cactus before transplanting. But after you shake off the old soil, leave the succulent to lie in the shade with an open root system for two hours. It is also a good idea to add broken egg shells to the drainage for cacti.
Preparing for transplanting cacti
The best time to transplant cacti is late March, April, early May, i.e. when plants are just starting to grow. But if necessary, you can transplant cacti throughout the growing season. When transplanting healthy cacti, with a noticeably grown root system, the new pot should be slightly larger than the old one. The old pot should be free to fit into the new one. If rotten or dead roots are found during transplantation, they must be carefully removed with nail scissors. In this case, the pot is taken a little less than the old one, and more sand and pieces of charcoal are added to the soil.Slow growing cacti, which have grown little root system since the last transplant, can be planted in the same pot, just replace the soil with fresh one.
It is best to disinfect both the pots and the soil before replanting. Pots can be doused with boiling water, and the potting mix can be kept in the oven for about half an hour. Before transplanting, cacti are not watered for 2-3 days, because part of the moist earth will inevitably remain on the roots, and with injuries, cracks and breaks of roots, moisture quickly leads to decay. The soil mixture for planting should not be cold, dry, but may be slightly damp, but in no case soggy. Let me explain what slightly moist soil means - this is exactly the moisture that the soil bought in the store when opening the package has. It is not dry to dust, but when clenched in a fist, it slightly lumps, but quickly disintegrates.
How to plant a cactus
To remove a cactus from an old pot without hurting your hands on the thorns, it is very convenient to use plastic tweezers. But there is another way - the plant is wrapped in a strip of paper folded in several layers, then the pot with the plant is turned over, and lightly tapping on the bottom, it is taken out. As the famous Zaletaeva I.A. wrote, a healthy cactus must have a very strong root system, and it is defined as follows: if a cactus is taken by the trunk and lifted, then it must either rise with the pot, or be taken out of the pot with all the earthy clod, braided by roots. If the roots break, some of them will remain in the pot, and the rest will remain with the plant - then this is a sign that your cactus did not feel well, was sick. Most likely, some conditions of detention were violated, possibly waterlogging, which led to poor growth of the root system, or its decay and partial death.
In the event that the cactus "stuck" to the ground and the pot, you need to squeeze the plastic pot with your hands from the sides, or separate the ground with a knife along the side of the pot.
If, on the contrary, the cactus easily fell out of the old pot, having found scraps of roots, it is necessary to remove all rotten areas, and sprinkle the cuts with crushed charcoal. If the root system has suffered significantly and many roots have been removed, then the new soil mixture should contain more sand, and the pot should be selected less than the previous one.
Drainage is poured into a new pot at the bottom, then a little of the substrate mixed in a bowl, and then the plant is planted, gently spreading the roots and evenly pouring the earth between them. Tamping, pressing the earth strongly is unnecessary, you can only knock on the wall of the pot so that the earth falls asleep between the roots. It is important when transplanting a cactus that the stem (trunk, body) is not covered with earth, the soil is covered only up to the root collar. If the stem is in the ground, then when watering the cactus, its decay will begin, which will lead to the death of the plant, or upon contact with moist soil, corking begins on the stem of the cactus - the formation of a dry brown crust. Schematically, the correct transplant is shown in the figure above, where the pot is shown in section (the size and ratio of the pot-cactus is almost life-size). We have already mentioned how to water cacti correctly, do not forget that the frequency of watering depends on the temperature.
Since the root collar is narrow, and the stem expands further, the plant will sit in the soil rather unstable. Therefore, you need to strengthen the cactus in the pot by overlapping it with pebbles or decorative stones (from an aquarium store). This is called top drainage. The stones should not be too small, as they create a too dense layer, and the soil breathes worse, dries more slowly. It is very difficult to hold long large cacti with pebbles, then they have to be tied to a support. A pot for large specimens of cacti should not be taken too large, otherwise the earth will turn sour.And so that the pot is stable and does not overturn the thorny giant, a large stone is placed on the bottom of the pot among the usual drainage.
When transplanting, it is recommended to shake off the old soil from the roots of the cactus, doing this as carefully as possible. But if the roots are thickly entwined with an earthen lump and formed, as it were, a root felt, then in no case should you pick out the old earth. Transfer to a new larger pot with fresh soil added. But for cacti bought in a store, it is advisable to shake off all the ground, since they are planted in clean peat, which is in no way suitable for growing cacti. From my own experience, I can say that in some cases it is easier to get rid of store soil if it is dry (for large cacti), and sometimes you have to soak the root ball in warm (almost hot water), and then carefully remove the peat fibers from the roots.
After transplanting healthy cacti are not watered for at least 3 days, if the plant had a lot of damaged roots, then it is not watered for 5-7 days. If, at the same time, the temperature in the room or outside is not lower than 20 ° C, then the cactus can be sprayed with a very fine spray, preventing the formation of drops and their flowing onto the ground. In addition, the newly transplanted cactus should not be placed in direct sun, it is usually shaded for 4-6 days.
Young cacti are transplanted, up to three to five years old annually, older plants are transplanted after a year. Epiphytic cacti are replanted annually after flowering. Also, after flowering, all cacti that bloom in early spring or late winter are transplanted.
Root bath for cactus
A special healing method (or root bath) for cacti with a damaged root system, used during transplantation. I once read about this method in an old book about cacti, applied it myself and had positive results (with the exception of epiphyllums and Decembrists). It so happens that the cactus is apparently healthy, but it grows very poorly, and the roots during transplantation turn out to be poorly developed and weak. Then you can try the following procedure. The cactus, after being removed from the pot, is shaken off the old soil, you can even rinse the roots in warm water, but carefully so that there are no breaks. Then hot water is poured into a cup or glass, at a temperature of about 50-55 ° C. To do this, you need a thermometer.
A dense matter is taken, which is fixed on a glass above the water. A hole is made in the middle and a cactus is placed there, while the roots should be in hot water up to the root collar, but neither the stem nor the root collar should touch the water. In this hot water, the cactus is kept for up to 15 minutes. It is important that the water does not cool down, but remains at the same temperature all the time, you can wrap the glass with a woolen shawl, or add hot water, monitoring the temperature by a thermometer, but in no case cover the glass with the cactus. This procedure stimulates root formation in cacti. After that, the roots of the cactus must be dried for 12-24 hours, and then planted according to all the rules.