Content
- 1 Planting asters
- 2 Aster varieties
- 3 Home aster
- 4 Asters in the open field
- 5 Caring for asters
- 6 Astra: photo
- 7 Astra: video
- 8 Description and features of culture
- 9 Instructions for seedless aster cultivation
- 10 Instructions for seedling growing asters
- 11 Caring for asters
- 12 Description
- 13 Aster seeds
- 14 Seedling method for asters
- 15 Landing in open ground
- 16 Caring for asters
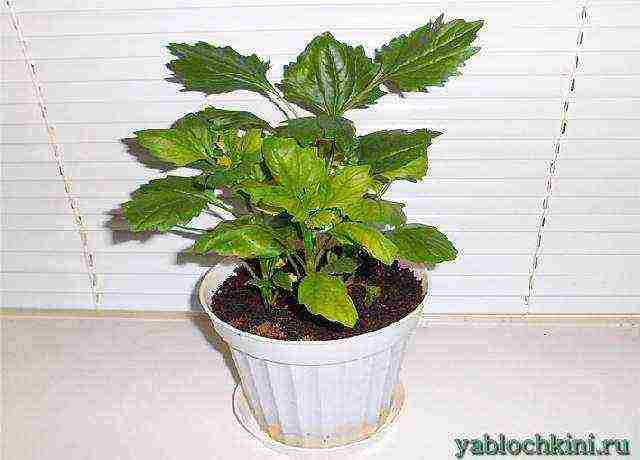
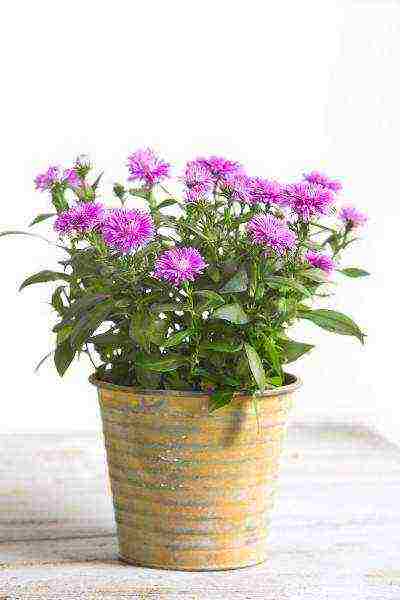
Growing asters indoors is easier than growing other flowers on a windowsill, but it still has its own characteristics.
Aster in flower pots does not react so painfully to the limitation of the feeding area by the size of the pot as to the lack of light. Then the bush will not be lush, the stems will be abnormally elongated, the flowers will not be large.
Growing an aster on a windowsill in winter will not do without additional lighting with fluorescent lamps or phytolamps to increase illumination and extend the daylight hours by 3-4 hours.
For the successful cultivation of asters in pots in an apartment, it is necessary: the presence of the sun (at least 3-4 hours a day), the presence of a high-quality earthen substrate and additional lighting in the winter.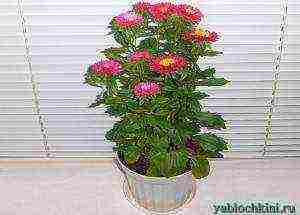
Planting time for aster seeds. You can plant aster seeds for growing on a windowsill in an apartment all year round. It all depends on the desire.
An aster planted in spring, summer and early autumn will grow easier and easier. There is a lot of heat, enough light, daylight hours are long. In this case, you will need a little vermicompost in a pot, a light window sill and systematic watering.
Aster planted in late autumn and winter will require additional efforts and costs. This is mainly the problem of providing enough light. In winter, on sunny bright days, the bush will need to be illuminated in the evening (lengthening the daylight hours by 3-4 hours). And on cloudy days, also during the day, since daylight will not be enough.
From the moment of planting the seeds to the budding stage, an average of 3.5-5 months will pass, depending on the variety of the selected aster.
When choosing seeds, pay attention to the shelf life, aster seeds very quickly lose their germination (usually seeds are taken no older than 2 years). Seeds for growing asters on the windowsill are chosen, giving preference to undersized, early crops.
As containers for growing asters on the windowsill, take ordinary flower pots, always with holes at the bottom (for the waste of excess moisture), with a capacity of 1.5-2 liters. It can be other containers and boxes, about 20 cm deep.
expanded clay as drainage
Drainage must be placed on the bottom. Usually it is expanded clay or gravel. The height of the drainage layer should be 2-3 cm.
Seed treatment. If the seeds are fresh (last year's), then two to three hours of processing in a pink solution of potassium permanganate (before planting) will be enough.

seed dressing in potassium permanganate before planting
If the seeds are 2 years old, it is recommended to first soak them in warm water overnight and only in the morning to pickle them in potassium permanganate for 2-3 hours. Otherwise, the seedlings will not be friendly, and therefore some seedlings will be larger, others will be smaller, and over time, large seedlings will oppress smaller ones. Seeds that are 3 years old or more are not recommended to be planted; such seeds have a very low germination capacity.
The aster seeds etched in a pink solution of potassium permanganate are filtered and spread on a regular cotton pad (it is cotton pads that absorb moisture very quickly).In just 5-10 minutes, the seeds will acquire a free-flowing state and it will be much easier to plant them. Purchased processed seeds (in casings of red, green) are not soaked or etched in potassium permanganate, but planted dry. Soaking such seeds can only harm germination.
A mixture of vermicompost and coconut fiber has proven itself very well as an earthen substrate.
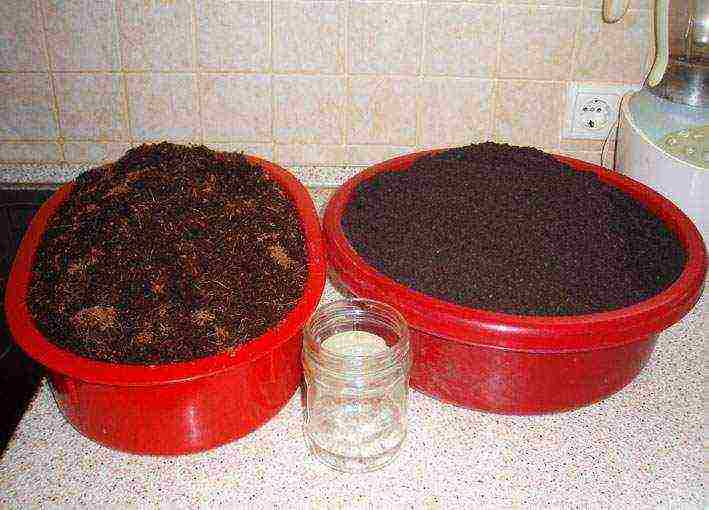
cocofiber (left) and vermicompost (right)
Vermicompost is very rich in micronutrients, contains natural growth stimulants, does not contain pathogenic flora (which excludes disease of seedlings), and cocoa fiber is a filler that drains vermicompost well, gives the substrate lightness, friability, removes excess moisture well, also does not contain pathogenic microflora.

cover with foil until germination
Vermicompost is purchased ready-made. Coconut fiber is usually sold in pressed briquettes. It must first be filled with plain water. After 1-2 hours, the cocoa fiber will take on a crumbly, loose appearance and will be ready for planting.

soak the cocoa fiber
Further, in a large container (an ordinary basin), mix vermicompost and cocoa fiber in a ratio of 1: 2 (pour 1 part vermicompost and 2 parts coconut fiber).

aster shoots (7 days after sowing the seeds)
It is convenient to use a liter jar or other similar container, alternately pouring vermicompost and coconut fiber, periodically stirring well.
Next, the seeds are planted. Pour the prepared mixture into the pot (not forgetting about the drainage). After a little tamping (pressing with your fingers), spill well with water. After watering and settling the soil in the pot, the height of the soil layer should be 4-5 cm lower than the height of the pot itself.
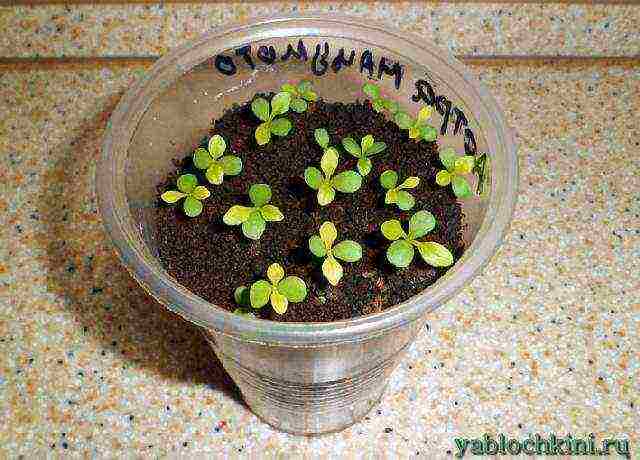
aster shoots (14 days from planting seeds)
Then aster seeds are laid out on the surface of the soil and covered with an earthen mixture on top to a height of about 2 cm. Again, lightly press down with your fingers and watered a little.
aster dive into the pot
The height of the soil above the seeds should not exceed two cm, otherwise the aster seeds will sprout for a long time, or they may not sprout at all.
The remaining height (2-3 cm) will be needed to raise the ground level. After about a month, add soil to the edges of the pot.
After planting and watering the seeds, the pots are covered with cellophane (this will prevent the soil from drying out before germination, which is not unimportant for germinating seeds) and placed anywhere (before the emergence of seedlings, light is not required for the planted seeds). Every day it is necessary to look under the film so as not to miss the beginning of seed sprouting. When seedlings appear, the polyethylene is removed and the pots with aster seedlings are placed on a light windowsill.
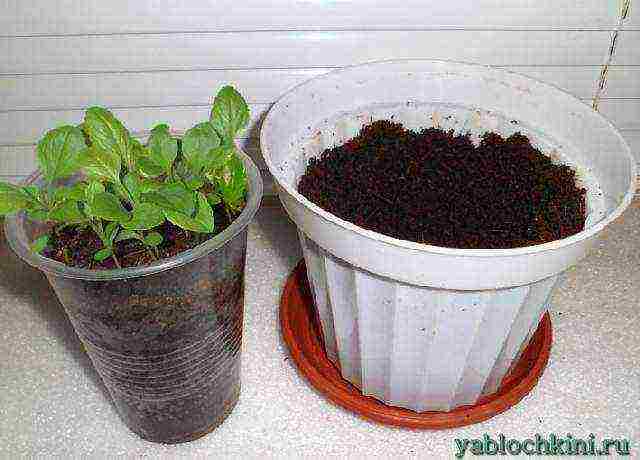
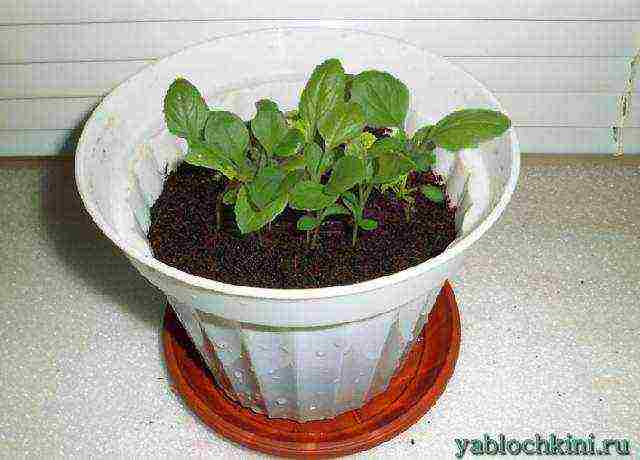
aster seedlings a month after the pick
If the seeds were planted in small containers, then at the age of 4 weeks the seedlings are transplanted into a permanent pot. Transplanted seedlings are watered abundantly already in large pots.
When planting seeds immediately in large pots, at the same time (3-4 weeks after germination), fill the pots with earthen substrate to the top (to the height of 2-3 cm remaining from planting seeds).
Watering and spraying seedlings. Asters are watered differently throughout the year. In the first month of life, the seedlings should be watered regularly, but very sparingly. At this stage, it is important not to overflow the seedlings, as there will be a threat of various diseases. In winter, you do not have to water them often, since there is little sun and heat.

three-month aster in pots, photo
In winter, they adhere to the rule "it is better not to top up than to pour." But since the end of March, moisture consumption will increase, and the sun will do its job with warmth. In summer, it is important not to let the soil dry out in pots. In the summer, they adhere to the rule "it is better to pour than not to top up."
On warm and sunny days, the bushes are systematically sprayed, it is better to do this every evening.
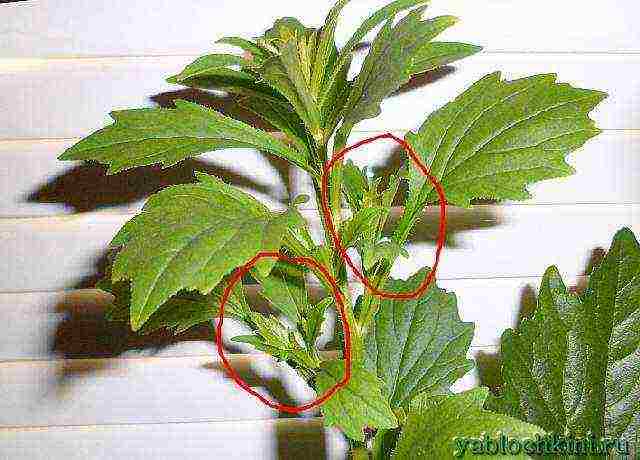
varietal asters begin to bush themselves, in non-varietal asters we pinch the first bud
Rotation of asters around its axis 1 time per day.Pots with asters on the windowsill must be rotated 180 degrees around their axis once a day. A plant that receives light only from the side of the window tends to bend towards the light. Therefore, so that the plants are not crooked, not symmetrical and ugly, they systematically rotate them around their axis.
Top dressing of vegetable beds in pots:
Thanks to vermicompost and pressed coconut flakes, powerful and healthy aster bushes will grow from seedlings, but to help them overcome such difficulties as lack of light, limited nutritional area, during their growing season, it is advisable to regularly feed with mineral or organo-mineral fertilizers.

three and a half months - budding
The first feeding is carried out two weeks after the pick, then every 2 weeks.
Top dressing is alternated. The first week the seedlings are sprayed with fertilizer (we prepare according to the instructions), the second week - they are watered under the root. Good results are obtained with ROST fertilizer (concentrate or universal). They are sold in almost all stores.
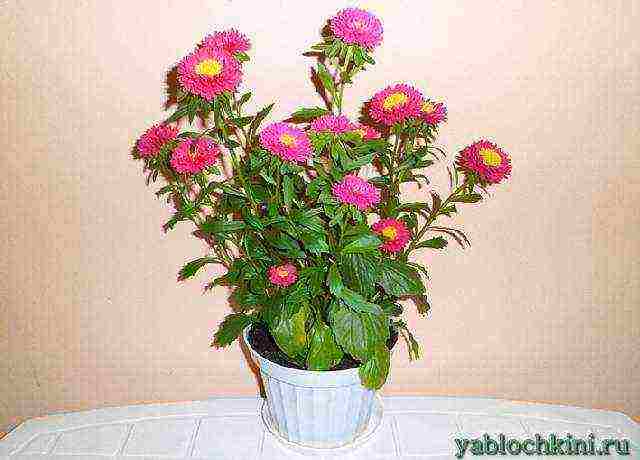
four months - flowering
Agrolife (concentrated chicken droppings) has also proven itself well.
Pinching is needed only for non-varietal asters (pluck out the first central bud), and such asters are rarely planted in pots.

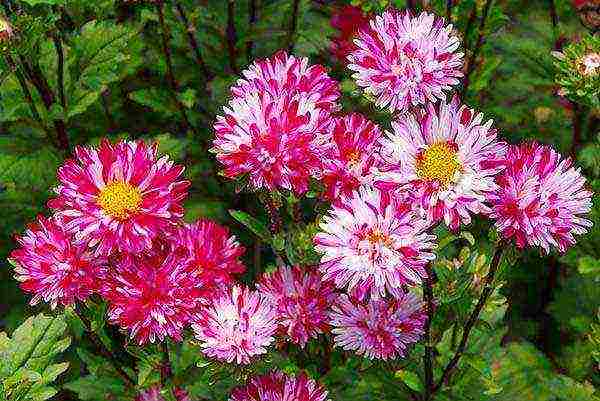
Perhaps there is no such person who has never heard of asters. These undemanding annuals with colorful spots paint gardens in the fall. They can be white, yellow, red, purple, and there are also types with a double color. Growing them and caring for them is a snap.
Planting asters
Almost anyone can breed asters. Even an inexperienced gardener can do this. You can grow this flower from seeds. This is done in two ways:
- Growing seedlings.
- Planting seeds directly into the ground.
The first method requires additional time, but this method is the most suitable for plant propagation. Sowing seeds for seedlings is necessary in May or April. The specific time is determined by the plant variety. Before planting, aster seeds must be wrapped in a piece of cloth and left for several hours in a solution of potassium permanganate of low concentration. Then the seeds must be placed in a plastic bag at room temperature for germination. Any pot or other container is suitable for breeding seedlings.
 Astra needs a light earth rich in nutrients. Before planting, the soil must be watered with a potassium permanganate solution for disinfection and grooves of small depth must be made in it. Place the germinated seeds in these furrows and sprinkle with a little sand. Then close the top of the drawer with glass and put it in a warm room.
After a few days, the first shoots will germinate. As soon as they appear, remove the container to a less warm place and water the sprouts moderately. With the appearance of 4 leaves, transplant the seedlings in small containers, while pinching the root. For transplanting, take soil with the same composition, adding a little ash to it. Don't water the aster seedlings too often to keep it from getting sick.
Aster varieties
Now there are over 4,000 different varieties of asters. Thanks to the tireless work of breeders, all new varieties are being developed. The most popular types of asters are:
- Alpine aster grows up to 40 cm in height. This flower has single and large inflorescences of pink-lilac colors. The flowering period is May-June.
- The Italian aster reaches 60 cm in height. The flowers of this variety grow up to 4 cm in diameter and are painted mainly in lilac-purple colors.
- The stone-leaved aster can grow up to 40 cm in height. This aster has small pink or purple baskets.
Home aster
At home, keeping and growing asters is not difficult. It is important to create an optimal level of illumination for the flower. To do this, regularly rotate the plant pot on the windowsill.So you will achieve uniform growth of all parts of the plant and the bush will turn out to be symmetrical. Water the plant sparingly to keep moisture from stagnating in the pot, but also keep the soil from drying out. Asters do not like stuffiness, so periodically ventilate the room where the aster lives.
 Some types of asters look worse with excessive spreading. Due to the extra side shoots, the flowers become smaller and no seeds are formed. In this regard, remove unnecessary shoots in a timely manner.
Every 4 years, the aster bush must be divided. After flowering, the bush is removed from the pot and carefully freed from the old soil. The bush is divided in such a way that at least 3 shoots are obtained in each part and a healthy root remains. These parts should be planted in new pots and cared for as usual.
Asters in the open field
The seeds of this plant can not be grown as seedlings, but immediately sown in open ground. This can be done in April or May when the soil is well warmed up. You can sow seeds in the fall with the onset of frost.
- Make 2 cm deep furrows in the soil. Before that, for disinfection, it is recommended to water the planting site with a weak solution of potassium permanganate to prevent diseases.
- Place the seeds in the grooves and cover with earth. Water with warm water if planting in spring. Cover the planting site with foil before the first shoots appear.
- When the fourth true leaves appear on the seedlings, thin out the planting. At the same time, try not to damage the removed plant. It can be transplanted to another location.
- Cover the autumn planting of seeds with a layer of humus up to 4 cm and leave until spring. In the spring, loosen the aisles without removing humus until sprouts appear.
Caring for asters
When watering an aster, remember that this flower does not tolerate excess dampness. But at the same time, in hot weather, the plant must be watered intensively. Be sure to water the aster abundantly during bud formation. This will ensure the lush bloom of the aster.
 Asters do not need frequent feeding. The first time to fertilize is necessary a couple of weeks after planting, using mineral fertilizers. With the appearance of buds, feed the plant with nitrogen-containing substances. Use the fertilizer for the third and last time during the flowering period. At this time, add superphosphate or potassium sulfate. It is not necessary to introduce organic matter, asters do not like it.
Prune the bush regularly and remove side branches if necessary. This will form the correct plant. Pruning is necessary to increase the flowering period.
Astra: photo
 Astra: video
Aster can be safely called one of the most popular garden crops among flower lovers. It decorates flower beds and summer cottages until the first cold weather, when all other perennials have already faded. In addition, aster is a rather unpretentious and easy-to-care plant, so growing it from seeds is a very interesting activity.
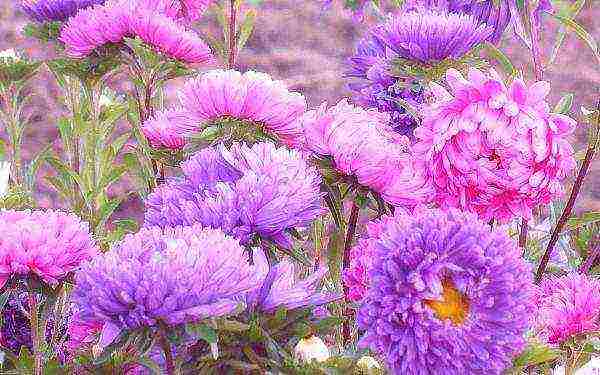
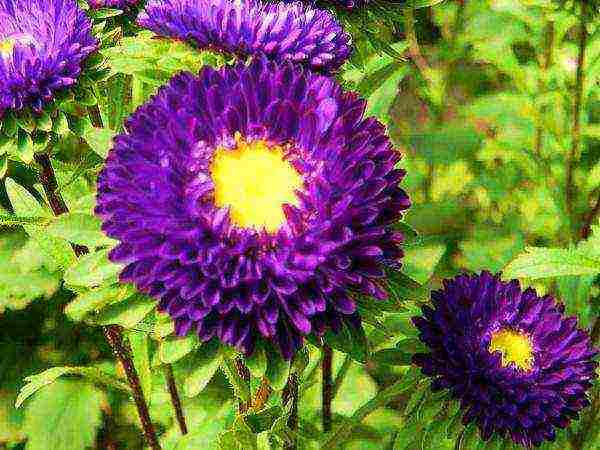
Incredible bright shades of aster colors
Description and features of culture
It is difficult to find a garden plant that is more species-rich than the aster. Today, about 4 thousand varieties of this culture are known: they are distinguished by the flowering time (early, middle, late), by the height of the bush, the structure of the inflorescences and other characteristics. In our gardens, the most common are perennial New Belgian and New England varieties, as well as annual callestifus, which are also called Chinese asters.
Aster "Ostrich feather"
Callistephus chinese
Frost-resistant aster "American beauty"
In height, the bushes of the plant can reach from 25 to 160 cm, the stems are branched or simple, the root is fibrous, powerful and well-branched. Basket-shaped inflorescences can be coronal, curly, semi-double, spherical or needle-like, and differ in a huge variety of shades - breeders have not yet bred only green and orange flowers.
Astra "Duchess"
Astra "Victoria"
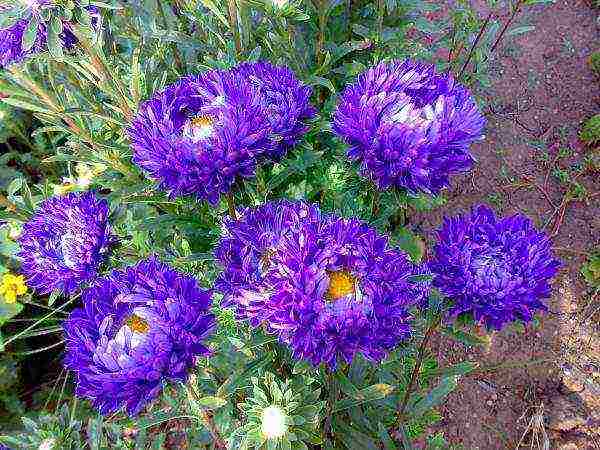
Aster needle violet-blue
In general, among the huge assortment of aster varieties, the gardener can easily find what he likes, but for growing a crop it is very important to know its main features.
- Asters love fertile, well-drained and breathable soils with low or neutral acidity.
- It is preferable to choose open or slightly shaded areas, sheltered from drafts, with deep groundwater to avoid excessive moisture. Arid places, where direct sunlight constantly falls, is best avoided, otherwise the flowers will grind and lose their decorative effect.
Growing asters
- You should not plant a crop where tomatoes, potatoes, gladioli and tulips used to grow. Ideal predecessors for planting are marigolds, marigolds and perennial herbal plants. In addition, the plant can only be planted in the same place for six years, after which a four-year break is required.
Beautiful asters bloom subject to agricultural technology
- The site for planting asters should be prepared in the fall - it is good to dig up the soil and add a sand-peat mixture, or a mixture of compost with peat (at the rate of 2-4 kg per square meter). If you apply top dressing just before planting plants, they can be affected by fungal diseases.
We prepare the garden in the fall
- In the spring, the soil must be dug up again and fed with superphosphates (20-40 g per square meter), as well as potassium salt and ammonium sulfate (15-20 g each).
We fertilize the garden in spring
- Aster seeds are best harvested on their own, since their germination ability is quickly lost - fresh (last year's) material is suitable for sowing.
Collecting seeds
- It is very important to plant asters at a specific time: seedlings - in late March - early April, seeds - in late April-early May (sometimes in winter or late autumn). You should not be afraid of late frosts, as plants can withstand temperature drops down to -4 ° C. Late sowing of asters simply does not make sense - the plants will not have time to gain strength for flowering before their life cycle ends.
It is possible to grow asters from seeds both in seedling and seedling methods, that is, by sowing the material directly into the ground. The first method is more difficult and painstaking, but gives much more chances to grow healthy, strong flowers.
Instructions for seedless aster cultivation
The seedless method is more suitable for experienced gardeners who can recognize high-quality seed, since not all aster seeds have the ability to germinate in the open field. The procedure can be performed in late autumn (from 10 to 20 November), in the spring (April-May) or even in winter (December-January), right on the snow. The algorithm of actions in this case is as follows.
Step 1... It is not necessary to germinate seeds before sowing, as young shoots can freeze or die. If the seed has been treated with preparations for germination, it must be well dried.
Growing asters outdoors - seeds
Step 2. On a previously prepared area, rows are made up to 2 cm deep at a distance of 10-15 cm.
Cooking the garden
Step 3. The seeds are sown so that the intervals between them are at least 1-2 cm, watered from a small watering can (if sowing is carried out in cold weather, there is no need to water the planting), and sprinkled with soil or mulch (layer thickness 2-2.5 cm).
Step 4. Spring crops must be additionally covered with a film, which is removed after germination.
Photo of seedless sowing of asters. Bottles used instead of film
Step 5. As soon as the first real leaves appear on the shoots, it is better to thin out the planting so that a distance of 12 cm remains between the bushes.
If planting is carried out in winter, the seeds are sown directly into the grooves in the snow, and it is very important that the thickness of its layer is at least 10-15 cm. From above they are mulched with pre-ventilated peat or compost so that the crops are not washed off with water during the thaw period. As soon as the snow begins to melt, the seeds will be in the most favorable conditions - the optimal temperature regime without the risk of overheating, and the required amount of moisture.
Many gardeners claim that asters, which have been planted in a seedless way, grow strong, healthy, and also more resistant to disease.
Blooming asters in the garden
Instructions for seedling growing asters
The seedling method involves growing seedlings of asters, which are subsequently transplanted to a permanent place, and consists of several stages.
Seedling aster from seed
Stage one: preparing everything you need
To grow seedlings you will need:
- containers or boxes with a depth of at least 5 cm;
- glass or film;
- nutritional mixture;
- river sand, perlite and wood ash;
- potassium permanganate, from which a weak solution is prepared.
A nutritious soil mixture is prepared as follows: take equal parts of garden soil, sand and compost, mix and steam well. After that, add wood ash (a glass of ash is taken on a bucket of soil) and a handful of perlite. It is also recommended to bake some river sand separately in the oven in order to subsequently cover the seeds with it - this will protect them from waterlogging and black leg disease.
Nutrient potting mix - cooking
Stage two: sowing seeds
Sowing seeds for seedlings is the most important step, so it is very important to follow the correct sequence of actions.
Step 1. Rinse containers for growing with soap and water, treat with potassium permanganate solution and dry well.
Step 2. Pickle the seeds in any fungicide (for example, in the preparation "Maxim", at the rate of 4 ml per 2 liters of water, soak the seed for 30 minutes) to protect them from diseases.
Aster seeds can be soaked
Seed preparation
Step 3. Fill containers with nutrient mixture, tamp lightly and pour with potassium permanganate solution.
Place the seedling soil in a container
Sowing aster seeds in a box, soil is filled up inside and grooves are prepared
Soil disinfection
Step 4. Make small grooves in the soil (up to 2 cm deep, 2-5 cm apart) and spread the seeds in them.
Spread the prepared seeds evenly over the wet soil.
Step 5. Sprinkle the seed with a thin layer of soil or calcined sand.
Sprinkle aster seeds on top with well-washed sand
Step 6. Cover the crops with glass or foil, and put them in a lighted place (the optimum temperature is 20-22 ° C).
Cover crops
Step 7. If everything was done correctly, the first shoots will appear after 5-10 days. After that, you need to remove the shelter and move the containers to a cool place (temperature up to 15 ° C).
Seedling seedlings
Aster shoots (7 days after sowing the seeds)
Caring for crops at this stage consists in regularly moistening the soil - it is best to do this with a spray bottle so as not to flood the sprouts.
Stage three: we dive the seedlings
Saplings dive immediately after 2-3 leaves appear on them. Aster sprouts tolerate transplantation well, but the procedure should be performed in a timely manner so that they do not have time to stretch too much.
How to dive asters
Step 1. Fill the pots or other containers with the same mixture that was used for sowing the seeds, but add a tablespoon of complex mineral fertilizer to it and mix well.
Step 2. Tamp the soil and make a small depression in the center of each container.
Step 3. Transplant the shoots into pots, deepening them so that about 1 cm remains between the lower leaves and the soil surface, and compact the soil again.
Place the seedling in the hole
Gently compact the soil around the seedling
Step 4. The sprouts are watered with water at room temperature, starting from the edges of the containers and gradually moving to the middle so that the leaves remain dry.
Pour gently from edge to center
Step 5. Seedlings are placed in a lighted place, where direct sunlight does not fall. The recommended temperature regime is 20 ° C.
As the soil dries up, young asters are watered with warm water, trying not to overdo it. As soon as 4 leaves appear on the stems, you should start hardening the plants - take them to a shaded place in fresh air, gradually increasing the residence time. Transplant shoots into open ground immediately after the soil warms up well.
Stage four: replanting plants to a permanent place
Planting asters in the ground
Best of all, the transplant is tolerated by shoots 5-7 cm high, on which there are 5-6 well-developed leaves. The site should be well prepared in the fall, and before the procedure, the soil should be fed with nitroammophos (40-50 g per square meter) and mixed well so that the fertilizer is distributed in the upper layers of the soil. For transplanting, it is better to choose the evening hours so that the sun does not scorch the young leaves.
Step 1... Dig small holes on the site at a distance of 15-30 cm from each other (depending on the type of aster).
Step 2... Transplant the shoots together with a lump of earth, deepening them by 2-3 cm, and tamp the soil a little.
Planting seedlings of asters
Step 3. Water the seedlings at the root and mulch with peat, which will prevent the soil from petrifying.
Watering
In most cases, aster seedlings take root well, since the plant is distinguished by its ability to regenerate its root system after damage. The most important thing is properly organized planting care.
Transplant of asters
Caring for asters
Preventing a disease is easier than curing it. Therefore, it is better to choose a variety of asters for the garden that have a high resistance to diseases.
- Asters do not like excessive dampness and waterlogging of the soil, but in dry summers they need to be watered regularly. Watering is especially important at a time when buds begin to set on the stems.
- Another prerequisite is loosening and weeding. It is better to carry them out after rains or watering, the optimal loosening depth is 5 cm, and it is better not to touch the ground within a radius of three cm from the stem so as not to damage the roots.
- If the soil on the site has been properly prepared, planting can do without feeding, but fertilization will benefit young flowers. Usually they are fed with mineral fertilizers two weeks after transplanting, and then during flowering, using any fertilizers without nitrogen components.
- Asters do not like organic fertilizers, in particular, fresh manure, so they should only be applied when the flowers are growing on poor soil.
- To prevent various diseases (especially fusarium, which asters are most susceptible to), it is recommended to feed the plantings with potassium salt, regularly inspect the plantings for signs of disease and follow the rules of agricultural technology.
Pruning asters
Asters, which live in favorable conditions and receive appropriate care, begin to bloom in July-August (depending on the variety), and delight their owner with bright, lush flowers right up to the very frost.
Asters - queens of autumn
Video - Asters. Growing seedlings
The word "aster" is translated from Latin as a star. Such a heavenly name was given to a genus of herbaceous plants belonging to the Asteraceae or Astro family, and consisting of annual and perennial crops. Astra is unpretentious, planting and caring for it is quite within the power of novice gardeners. 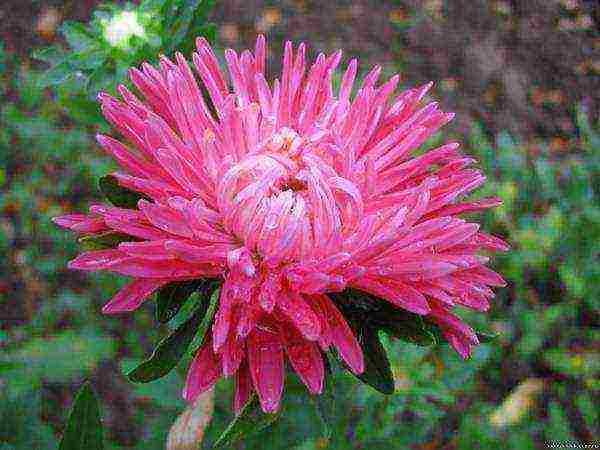
Today, there are several hundred types of flowers. Their appearance in Europe is associated with a French monk who smuggled the plant from China.An ancient legend said that two monks, not reaching the heavens through the Altai mountains, saw a meadow with beautiful unusual flowers at the foot. Disappointed in the search for stars, they gave a heavenly name to these plants, dug up some shoots and began to grow them in their monastery.
We will tell you about the methods of planting, growing this amazing flower, share some care secrets and methods of dealing with insect pests.
Description
Callistephus or annual aster is known among gardeners as Chinese or garden aster.
The description of the plant includes:
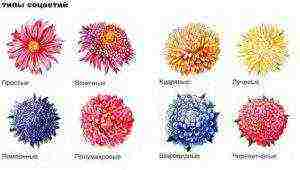
Aster types of inflorescences
- stems - branched, simple green, sometimes dark red;
- leaves - petiolate, alternate;
- root - powerful with many branches;
- inflorescences - simple in the form of baskets;
- the fruit is achene.
Today, the annual aster is represented by 4 thousand varieties, and many of them are similar to peonies, chrysanthemums and other garden plants. Breeders have made attempts to bring order to the groups and varieties of annual asters, but to date, none of the classifications are ideal.
Aster seeds
To grow asters, purchase seed not only from foreign companies. Domestic seeds are more reliable (for example, they are more resistant to fusarium) and are designed for our climatic conditions.
Don't buy seeds at the first store you see. Some unscrupulous sellers list expired or left-handed seeds for sale. Purchased sometimes in huge quantities, they do not have time to be sold in the first year or two. It is hardly possible to achieve good germination from such a seed.
Remember
You need to buy seeds only in specialized stores! No sales at markets, megamarkets or temporary booths at bus stops!
When purchasing bags of seeds, check the expiration date. If no shoots appear, try buying seed from another store and planting again. The beautiful appearance of aster flowers depends on planting and care.
Seedling method for asters
One-year-old asters are planted in two ways. The first, seedling, is more laborious, but the inflorescences appear several weeks earlier. If you want to have a lush bouquet of asters in the garden by September 1, choose the first method. It is also suitable for obtaining seeds.
The seeds are deepened to 0.5-1 cm. It is recommended to water the plantings with a weak solution of potassium permanganate. Until the first shoots appear, containers with asters are kept under a transparent cap in the shade, and then opened and placed in a permanent bright place.
It is up to each gardener to decide whether or not to dive. Some people prefer not to disturb young plants, not to transplant them separately. Moreover, the seedlings grow well in a large group. And when planting in the ground, they simply separate the plants from each other, gently releasing the roots.
Aster seedlings care includes weekly feeding with complex fertilizer. Seedlings are transferred to open soil in May, when they have a strong stem up to 10 cm high and several strong leaves. It is better to transplant in the evening, so that the young shoots get used to the new place a little overnight.
Compost or humus is preliminarily introduced into the soil for seedlings, wood ash and dolomite flour can be added. The seedlings are well moistened, and then rooted in pre-watered grooves, keeping a distance of 20-30 cm between them. Sprinkle plantings with dry earth.
Landing in open ground
Choosing the second cultivation method, the seeds are dipped directly into the ground in May. Moreover, the seeds and seedlings of asters easily tolerate a night temperature decrease to -4 ° C.
Seat selection
Asters love sunny areas of gardens, and grow well in light partial shade. They prefer light, fertile soils (neutral or slightly alkaline).
Flower beds are prepared in the fall.For this, the selected area is dug to the depth of a bayonet shovel with the addition of a choice of humus or compost (up to 4 kg per m²). If the soil is depleted, then 1 sq. m during spring digging, you can add superphosphate - up to 40 g, ammonium sulfate and potassium salt - 20-30 g each.
Remember
Do not add fresh manure to the soil. This can cause fusarium disease and the flowers will begin to wilt.
Predecessors
Astra Ribbon Red
Experienced gardeners know that in order to get a good harvest, lush flowering, plant crops need to be periodically transplanted to other places. In addition, it is worth carefully choosing sites for those plants that do not tolerate certain predecessors. It is not advisable to plant asters in a place where tomatoes and potatoes have already borne fruit. A flower bed of asters will grow poorly after tulips, carnations, gladioli.
Remember
The landing sites of asters need to be changed periodically. The constant presence of these flowers in the same area can lead to diseases.
Before planting asters with seeds, small grooves are formed. Why put seeds in them, sprinkling them on top with a layer of earth one centimeter thick. Water the seedlings with plain water, or diluted with potassium permanganate to a slightly pink color.
After planting, in order to avoid rapid drying of the soil, asters should be mulched, for which peat or a special film is used. Use the shelter until the first shoots hatch.
Young asters thin out when the first two true leaves appear. A distance of up to 15-20 centimeters is left between the flowers. Some varieties require more space. It depends on the height of the flower.
Caring for asters
Caring for asters includes a full range of measures: watering, feeding, loosening, disease prevention and treatment in case of disease.
Watering
For proper flower formation, good watering is needed. You should not allow prolonged drying of the soil or strong waterlogging of the site with water. For hot weather, abundant, but rare watering at the rate of 30 liters per square meter is preferable. Do not forget to loosen the beds after it.
Remember
Lack of watering leads to the loss of the culture of its decorative appearance.
Top dressing
Outdoor care for asters requires mandatory feeding. Only the use of fresh manure, which leads to fusarium, is not allowed. It will be safer to use mineral fertilizers.
Several dressings are carried out during the season:
- fifteen days after rooting of seedlings or when seedlings reach a height of 10-15 cm, any complex fertilizer can be applied.
- During the laying of inflorescences, it is better to use either ammonium nitrate or a complex fertilizer with a nitrogen content.
- When pushing out the buds, it is better to take full mineral fertilizer.
- For the flowering period, mixtures with phosphorus and potassium or wood ash are suitable.
Remember
For the proper development of asters, only potash fertilizers that do not contain chlorine are suitable.
Periodically, you need to water the plants on top with a solution of potassium permanganate of a slightly pink color. This allows you to achieve lush and beautiful inflorescences. But only the stem and leaves are moistened; there is no need to pour water on the flowers themselves.
Bloom
 After planting, the aster flower can bloom almost until the onset of frost. Various varieties form inflorescences from late July to early September.
Flowering times are different:
- early varieties require 90 days after germination;
- for medium - 110 days;
- for late - 130 days.
Asters decorate gardens until the first autumn frosts. Annual varieties are great for forming bouquets. When cut, they can retain their beautiful fresh appearance for up to two weeks.
Transfer
Asters normally relate to transplanting, recovering quickly even after changing a permanent place of growth.Having carefully dug a flower with an earthen lump, it can be transferred to another area or planted in a container, decorating a courtyard or balcony. So you can plant new plants instead of dead or faded ones, or you can simply create a new look for a flower garden.
Seed collection
After flowering, asters are burned. It is done in order to destroy harmful insects and various viruses. Seeds are collected after wilting and darkening of the flowers. The fluff that appears in the center is cut off and laid out in paper bags. Seeds are collected in dry weather. Because wet seeds will require drying.
Remember
Aster seeds do not lend themselves well to storage, and after a year or two, their germination capacity decreases by 2 times. Therefore, take last year's seed material for planting.
Seeds are planted before winter, but in a different area. They are laid along the grooves, and covered with dry humus or peat on top. You can sow seeds in December and January. Gardeners argue that such sowing is even more reliable, since the material is not afraid of temperature fluctuations. After the snow melts, to accelerate germination, the area is covered with a film.
Diseases of asters
A common disease of this culture is Fusarium, which manifests itself mainly in an adult plant. A suddenly yellowed flower begins to fade. There are no cures yet. Therefore, preventive measures such as crop rotation and crop rotation are imperative. Diseased plants are destroyed to prevent the spread of the disease.
Other cultural diseases include:
- Sulfuric leg is manifested by the blackening of the base of the stem in seedlings and adult plants. Sick flowers are removed, the soil is disinfected with a solution of potassium permanganate.
- Rust can be identified by bulging on the underside of the leaves. For prevention, you should not plant flowers next to conifers. Sick individuals are sprayed with a 1% solution of Bordeaux liquid. A sick flower is already being treated for her.
- Jaundice is caused by a virus carried by aphids and cicadas. First, the vectors of the disease are destroyed, and then the flowers are sprayed with insecticides. Affected specimens are destroyed.
Insect pests
You can fight insect pests with the help of folk remedies or pesticides. For example, a plowed slug can be simply collected by hand or metaldehyde can be used to destroy it. Plants with spider mites, meadow bugs, scoops are sprayed with karbofos, fosfomycin. Fundazole is used to combat the common earwig.
There are a number of preventive measures to prevent insect pests.
It includes:
- digging land for winter;
- destruction of dead and faded plants;
- the right choice of varieties;
- improving soil quality;
- observance of distances when planting plants.
Asters look great in a flower bed with other flowers. You can choose a certain combination of shades and heights, getting a cascading flower garden. Asters are unpretentious. And having sown these flowers for the first time in your area, you can fall in love with them for life.