Content
- 1 Hello dear readers!
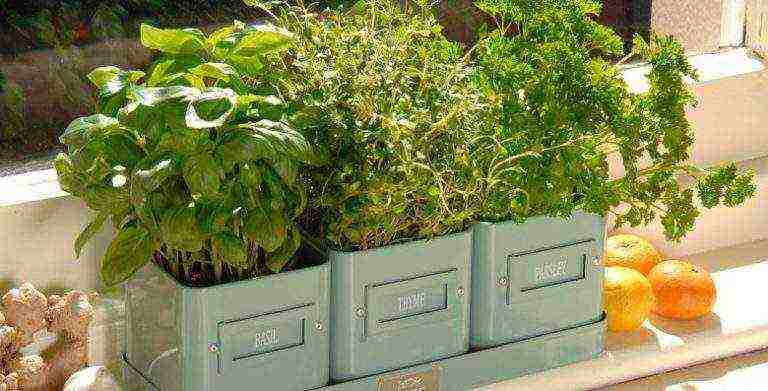
- 2 What you need for a mini-garden
- 3 Growing dill
- 4 Growing parsley
- 5 Growing cilantro
- 6 Soil preparation and containers
- 7 All types of greens, how to grow
- 8 Borago and marjoram
- 9 Lettuce and mustard
- 10 Green onions: growing in boxes (video)
- 11 Parsley, dill, basil and onion
- 12 How to grow dill at home in winter (video)
- 13 Gallery: greens at home (15 photos)
- 14 How to grow onions for herbs?
- 15 Greens at home: how to grow dill and parsley at home?
- 16 Homemade greens: how to grow salad on the windowsill?
- 17 How to grow greens on a windowsill: basil
Hello dear readers!
I think you will agree with me that it is very pleasant to come to the kitchen on a cold winter morning to drink aromatic coffee and make yourself a sandwich with herbs.
Yes, not a store, expensive and grown in no one knows where, but from your own small home garden.
How sweet it is to look at a frosty window and see a tender greenery on the windowsill - little hello to sunny summer.
So let's create it!
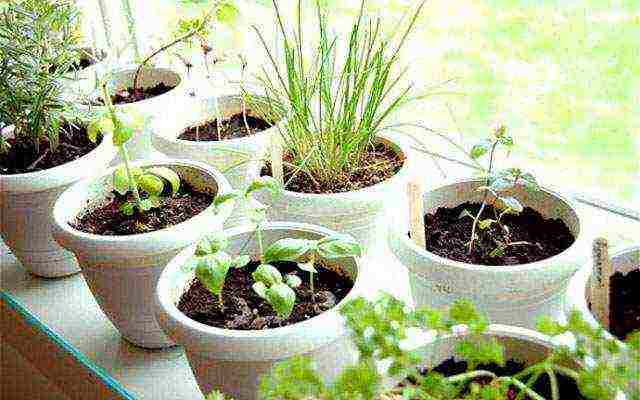
What you need for a mini-garden
◊ Containers. Best of all are plastic (wood can leak) or wide clay pots. Each type of greenery needs its own home (many plants do not go together).
◊ Ground. Suitable soil is a mixture of garden soil, sawdust, peat and clean sand in equal proportions. You can buy ready-made soil for seedlings. Before pouring it into containers, put a thin layer of small pebbles, pieces of broken brick or crumbled polystyrene on their bottom. This is drainage (it is necessary to drain excess water during irrigation, otherwise the greenery on the windowsill can rot).
◊ Lamps (luminescent, white spectrum). It is necessary to illuminate a small garden in the winter months so that the duration of daylight hours is 13-15 hours.
- You can purchase special timers and set the backlight time in advance, which is very convenient.
◊ Plastic wrap. It is necessary to create a greenhouse effect so that seeds germinate better.
But the most important thing that is needed is your desire to always have fresh greenery on the windowsill in winter, good mood in autumn, constant supply of vitamins in spring and beauty of tender seedlings in summer.
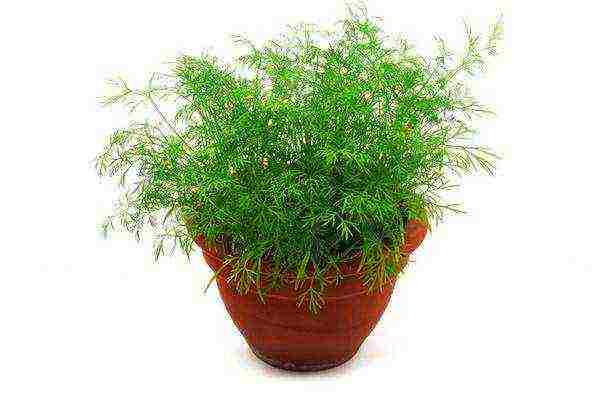
Growing dill
This fragrant herb is rather unpretentious for home life. Knowing some tricks, you can provide yourself with a constant supply of fragrant and very healthy herbs.
Choosing a variety
Not every variety of dill will give you a lush greenery on the windowsill with excellent taste. For a mini-garden, the following varieties are better suited:
♦ Early maturing. Harvesting will be possible 35 days after the first shoots.
- Grenadier... Delicate dill, beautiful, with a light shade of leaves. It is unpretentious, with juicy greens.
- Gribovsky... Resistant to diseases, undemanding in care, temperature conditions. The dark green leaves are fragrant and delicious.
♦ Mid-season. They form more greenery and leaves. Dill of these varieties will be ready to decorate your table 40-45 days after germination. They also form umbrellas and seeds ideal for pickling, canning and seasoning.
- Richelieu... Fragrant blue-green lace leaves. One of the most beautiful varieties that will become a highlight in our mini home garden.
- Aelita (abundant leafy). The large, dense dark green crown has a great aroma and excellent taste.
♦ Late ripening. Forms lush, fragrant greenery. Such varieties are distinguished by a high content of nutrients.
- Kibray... The wide, green leaves with a pale yellow tint have a large supply of vitamins and have a sweetish taste.
- Salute... The dark crown of a bluish shade is spicy and aromatic. Greens on the windowsill with this variety of dill are very fruitful. It grows back quickly after being cut.
Seeds
Soak the seeds for a day in heated water. Change the water every 6 hours. Then dry them a little and immediately sow them into abundantly moistened soil.
Sow in 15 cm beds in the pre-made grooves. Or directly on the soil, sprinkling on top with a layer of soil of 2 cm.
- Advice. Sow seeds every 3 weeks. Then you will provide yourself with fragrant greens for the entire winter.
Cover the dill kindergarten on top with polyethylene and hide in a darkened place for a week, where the temperature will be at least + 20 ° C.
As soon as the first shoots appear, lower the air temperature overnight.
Dill care
| What does dill need | Tips | |
| Watering | plentiful drink | regular watering, especially during seed germination |
| Top dressing | complex mineral fertilizers ("Rainbow" is better suited) | fertilize the soil every 14 days after watering |
| air temperature | the best t ° for him is from + 18 ° to + 20 ° С | dill on the windowsill will also transfer a lower temperature (up to + 8 ° С), if the temperature exceeds the limit of + 20 ° С, increase the illumination (otherwise it will grow sluggish and too light) |
You can sow greens all the time (every three weeks) on the freed area after cutting.
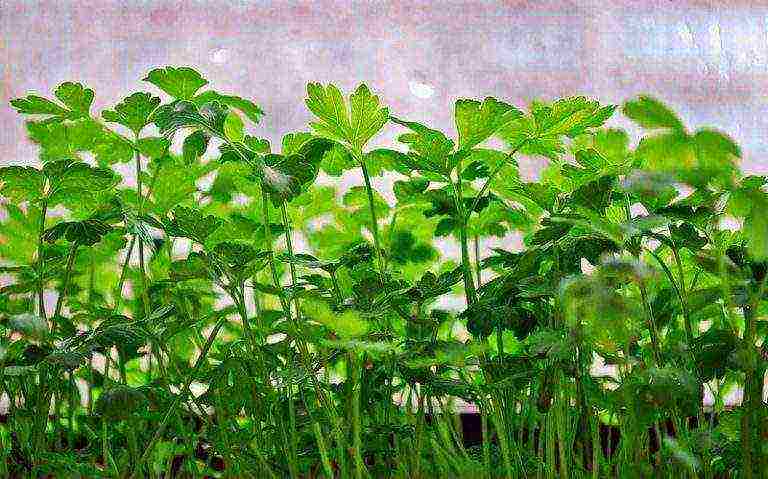
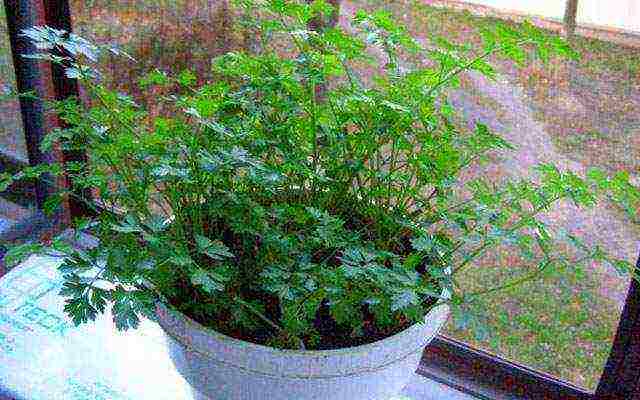
Growing parsley
Fragrant parsley will become a useful decoration for any dish and a constant supplier of vitamins all year round.
Like dill, this greenery on the windowsill is quite unpretentious in home gardening.
Choosing a variety
There are two types of parsley. Root (use its roots in cooking, to prepare medicinal decoctions) and leaf (to get lush, thick and fragrant greens to the table).
♦ Root parsley. It forms thickened light roots. Early ripening varieties are best for drying, and late ripening varieties for long-term storage.
- Sugar (early variety). 3 months after the first sprouts appear, this parsley is ready for use. Such root greens on the windowsill have the best taste.
- Yielding (mid-season). Parsley fully ripens in 4-5 months. The white pulp of the root vegetable has a mild aroma.
- Berlin (late ripening). The crop can be harvested after 5-6 months. This variety has a delicate spicy taste, very juicy.
♦ Sheet. These varieties are grown for lush, aromatic greenery. Leaf parsley has two types of leaves: regular and curly (they are very effective when decorating dishes). Cut leaves retain their aroma for a long time and do not turn yellow for a week. Leafy greens on the windowsill grow back very quickly after cutting.
- Curly Sue (early maturing, curly). You can cut it after 1-2 months after germination. Differs in dark green, curly leaves. It is fragrant, rich in vitamins and exquisitely beautiful.
- Esmeralda (mid-season, curly). The dense curly crown is very aromatic and has a sweetish taste. The crop can be removed after 2 months.
- Bogatyr (late ripening, smooth). One of the best varieties of leafy parsley. Differs in especially fragrant leaves and high yield. Parsley of this variety can be cut to the table in 2-3 months.
Seeds
Soak a cotton cloth (or gauze) in boiled water, put the seeds in it. Wrap gauze with parchment and place in the cold. Let the seeds stay there for a week.
Ventilate them every day, re-moisten the gauze. After a week, the seeds are ready to take root in the ground.
Sow them 0.5 cm deep, cover them with a layer of soil on top. Then cover the pot with plastic and put it in a shaded place.
Cover the ground with a damp cloth. Water every two days. Keep an eye on the seeds - ventilate and moisturize every day with a spray bottle. After three days, the first timid shoots will appear.
Remove the cloth from the ground and transfer the pot to a well-lit windowsill. As soon as there are more shoots, build a dome-shaped support from thick wire and use it to raise the film a little higher.
It can be removed completely when the shoots are pricked up. Spray the young growth with water often.
Young shoots must be thinned out so that the distance between them is at least 4 cm.
Parsley care
| What parsley likes | Tips | |
| Watering | moderate watering | do watering every 3-4 days, do not allow completely dry soil or vice versa, excessive soil moisture |
| Top dressing | standard superphosphate solution | dilute 5 grams of granules per 1 liter of boiled water, parsley at home requires feeding once a month |
| air temperature | the best t ° from + 22 ° to + 24 ° С | this greenery is very afraid of drafts and cold |
If the leaves of the grass begin to turn yellow, remove them immediately. Perhaps this is a sign of a disease. In case of recurrence of yellowness, make an aqueous solution of organic soap and spray it all over the plant.
Growing cilantro
Cilantro (or coriander) is a very unpretentious, cold-resistant plant. It is of the same class as parsley (it is even called "Chinese parsley").
But this greenery on the windowsill will fill the whole garden with a stronger, deeper aroma. Kinza is brighter, richer in taste, and its leaves are softer.
Choosing a variety
To get a rich harvest, it is best to plant coriander of essential oil seed varieties: Ray, Amber, Change.
By the way, coriander greens must be eaten before flowering. During the appearance of flowers, cilantro develops a specific, not very pleasant aroma.
Seeds
In order for the cilantro to rise faster, its seeds must first be germinated in wet sawdust at a temperature of air from + 17 ° C to + 20 ° C.
As soon as the first sprouts appear, we replenish our greenery on the windowsill with a new plant. We plant sprouted cilantro seeds in moistened soil to a depth of 2 cm. Sow in rows with a distance of 5-10 cm, cover the seeds with a layer of earth on top.
Cover the pots with foil for the first time. But be sure to check them every day, water and air them.
After two or three weeks, coriander will make itself felt by the first shoots. And we solemnly transfer them to our home garden.
At first, greenery needs good air humidity (spray it more often from a spray bottle).
Cilantro care
| The whims of coriander | Tips | |
| Watering | moderate watering | water constantly, in small portions, do not allow the soil to dry out, otherwise the plant will be weak |
| Top dressing | complex fertilizers (best of all "Flora") | dilute the composition at the rate of a liter of water for 3-5 ml of the product |
| air temperature | favorable temperature from + 10 ° С to + 12 ° С | cilantro can withstand frosts down to -5 ° C (it is best to grow coriander on the balcony) |
The first harvest after the emergence of sprouts can be removed after a month. Cilantro on a windowsill can only carry one cut. But if you remove 1-2 leaves from the coriander, then extend this period by two weeks.
After you cut all the plants, dig up the soil, renew it by one third and add ash (50 grams of ash per 6 kg of soil). Then moisten the soil with a heated manganese solution (1%) and sow the coriander again.
The greenery on the windowsill will bring you a lot of pleasure, joy from the beauty you have created yourself, which, with gloomy autumn and frosty winter, will remind you of a warm summer.
I wish you a rich home harvest!
Now, my dear readers, you know how to grow lemons, vitamin greens (dill, parsley, cilantro) at home, and in the next article of this series ("Garden on the windowsill") I will talk about growing peppers at home. What other plants would you like to grow at home? Write about it in the comments and I will try to describe in detail the process of growing these plants.
See you soon!
You can also read on this topic:
Tags: cilantro, parsley, dill
Many would like to have a mini-vegetable garden on their windowsill, supplying the whole family with useful fresh vitamins. Greens at home can grow all year round, and for this you need basic knowledge of proper care.
Greens are less whimsical than vegetables, but you still have to take care of good lighting. For example, in winter, to grow these useful plants, artificial lighting will be required to get the desired yield.
Almost any greens are suitable for growing in an apartment: parsley, onions, dill, spinach, watercress, basil, marjoram, mint, celery. The list goes on, but everyone chooses a product to their liking. Let us dwell in more detail on some types of greenery that can grow on a windowsill for a whole year. It is not difficult to grow them.
back to content ↑ Growing dill
 Dill is a plant with a strong and persistent aroma, indispensable in the preparation of many dishes. The following varieties are suitable for growing in an apartment: Gribovsky, Kibray, Richelieu, Gourmet, Grenadier, Salute.
Remember that early harvest varieties stretch quickly and do not produce the same results as later maturing varieties.
Temperature, feeding and watering
The most comfortable temperature for this greenery is + 18-19 degrees, but the plant is able to withstand rather low thermometer readings (up to + 7-8 degrees). Dill can be grown on a windowsill in winter or on an open balcony in summer. Choose the most lighted window, because the plant loves light.
When the indoor temperature rises to +21 degrees, the bush will need even more lighting to bring a good harvest.
Dill needs regular, moderate watering, but in summer it should be more abundant. The culture can be fertilized with a universal mineral fertilizing once every 14-15 days.
Instructions for growing dill:
- For planting dill, use plastic containers or flower pots with a hole. Prepare a fertile soil in advance so that your greens at home give an excellent harvest all year round. To do this, you can mix regular garden soil with store-bought soil for houseplants. The pot should be rather big so that the bushes are not crowded.
- Take care of the drainage layer, for this take a pebble or chipped brick, fill it on the bottom of the container 2 centimeters thick.
- Dill seeds have a high content of essential oil that slows down germination, so you should get rid of unnecessary substances. Before sowing, put the seed in a gauze layer and soak it in room temperature water, change it every 5-7 hours for a fresh one. At the same time, remove the gauze with seeds to provide oxygen access.
- Just before planting the spinach, water the soil well and apply the seeds to the ground, sprinkle them with a layer of humus and peat mixture.
- The container should be covered with cellophane wrap and removed for 7-8 days in a dark room with a temperature of 19-21 degrees.
- After the first shoots appear, the greenhouse is removed, and the shoots are thinned out, leaving an interval of 2 centimeters. After that, place the container in a lighted place on the windowsill. In winter, the plant needs to be illuminated with a fluorescent lamp (5-6 hours a day).
- When you cut the leaves, they will not grow back, so you will have to plant new seeds in the vacant area every 20-30 days if you want to receive fresh greens all year round right on your windowsill.
back to content ↑ Growing basil
 It is possible to grow this plant on a windowsill without any problems for a whole year. Basil contains many vitamins and other substances beneficial to the body.
These herbs are often added to dishes to give them a special flavor. Let's figure out the basic rules for growing these greens.
The plant loves regular abundant watering, it is recommended to water the bush daily. The Basilica likes warmth and good lighting. To grow this crop in winter, artificial lighting will be needed.
Often these greens are grown from seeds planted in fertile soil. Sprouted seedlings can be fertilized with universal fertilizing. You can find out more information in our article. growing basil at home.
back to content ↑ Growing spinach on a windowsill
 This plant is rich in nutrients, it contains a lot of protein, iodine and iron. In addition, these greens do not lose their vitamin properties after heat treatment, so spinach dishes are especially useful.
This culture can be grown all year round in your apartment on the balcony or on the windowsill, but additional lighting will be needed in winter.
For home planting, it is advised to buy seeds of early bushy varieties, for example: Mazurka, Melody, Victoria, Godry, Tarantella.
Care: temperature, light and watering
Spinach loves good lighting, so it is better to choose windows facing south or southwest, southeast. The plant needs regular, moderate watering, but you shouldn't water it. Water the spinach more often and spray it with a spray bottle in summer. On the windowsill where the container is located, you need to provide an influx of fresh air, so more often put the window for ventilation.
A comfortable temperature for growing these greens is + 16-20 degrees, but it can withstand a drop to +8, so you can get good results all year round. Rotate the container 180 degrees once every 24 hours so that the stems are beautiful and grow evenly throughout the year.
Growing instructions:
- Let's start preparing seeds for planting in the ground. Soak them overnight in water, drain the liquid in the morning and soak the seed in a warm manganese solution, the color of which should be moderately pink. For this procedure, a couple of hours will be enough, and after that spinach will not be susceptible to disease.
- After removing the seeds from the manganese solution, place them on cotton wool or a layer of gauze to get rid of excess moisture. For planting, leave only those seeds that lay at the bottom of the container, they have a high chance of germination.
- Get a suitable plastic or ceramic container with a drain hole. Make a drainage layer of expanded clay or pebbles.
- Pour the prepared soil on top. For growing spinach on a windowsill, a mixture of humus, sand and turf in a 2: 1: 2 ratio is suitable. You can also mix sawdust, peat, sand and ordinary soil in equal proportions.
- Dried seeds can be sown in ready-made moist soil. You can plant the seed in rows or in a checkerboard pattern, you can also do it just in any way you want.
- Then sprinkle the seeds with one centimeter of potting soil and water again.
- We are making a greenhouse, for this take a plastic wrap and cover the pot. Place the container on the windowsill. Keep the temperature in the region of 17-19 degrees, it is most favorable for growing.
- The first shoots should appear in a week, then the film must be removed. Now we take care of our young plants according to the standard scheme.
- After another week, fertilize the greens with a complex universal dressing.
- 21-30 days after germination, it is advisable to add a few more centimeters of soil to avoid the picking procedure.
- The first crop can be cut in 30-45 days.
You can plant and grow any greenery on your windowsill, but keep in mind that it is advisable to supplement it in winter. In general, growing and caring for these beneficial plants is quite simple. To please the whole family with fresh vitamins all year, you need only a little diligence on your part.
Happy Harvest!
Similar articles:
 Many housewives have large windowsills and are thinking about how to grow greens at home. In fact, there is nothing complicated, many types of green plants do not require special care, feeding and additional lighting. Greens can be grown all year round. It is tasty and healthy, especially during the period of vitamin deficiency.Indispensable food additives can be grown.
Juicy spicy herbs are indispensable for activating metabolic processes in the body, has an expectorant, disinfectant, diuretic effect.But first things first.
Soil preparation and containers
It is better to grow greens in plastic containers, wooden boxes are not practical, heavy and often leak. Several varieties of herbs can be planted in one long container at once, but taking into account their combination with each other, irrigation conditions. For example, dill, parsley and celery will get along in one container, but marjoram, thyme and oregano need their own space.
The most optimal composition of the earth (soil) is peat, earth, river sand and sawdust, taken in equal proportions. For drainage, it is advisable to put pebbles or expanded clay on the bottom of each vessel with a layer of up to 5 cm. To create the required moisture level, you need a piece of plastic wrap or plastic bottle caps. They need to cover the sown seeds for faster germination.
All types of greens, how to grow
Growing greens at home for some types of greens has its own characteristics. The easiest way to get a harvest of onions for a feather, dill and parsley.
To obtain large and juicy rucolla leaves, the containers should be kept with sufficient light and humidity. The topsoil should be kept moist at all times. Rucolla loves moisture, also feeding, adding nitrates. Seeds are sown to a soil depth of 11-12 cm, top up with a small layer of earth - up to 1.5 cm. In a week, you can expect the first shoots to appear. When leaves reach a height of 7 cm, they can be cut and added to salads.
Celery prefers to grow in fertile, nutritious and moist soil in moderation. Planting seeds are disinfected with a solution of potassium permanganate, soaked for a day in warm water, wrapped in a damp cloth and left for some time in a dark place. It is important not to let the fabric dry out and spray it from time to time.
The hatched seeds are ready for planting. Place the seeds on the soil layer at a distance of up to 6 cm from each other, sprinkle with a small layer of earth, put on a warm, lighted place. The optimum temperature regime for celery is 25 g. Sufficiently overgrown plants will need to be thinned out, loosened up the soil. The best varieties for home cultivation: delicacy, snow globe, apple, mushroom.
Green juicy spinach leaves are rich in provitamin A, vitamins PP, B, C, vitamin B2, mineral salts, easily assimilated iron, iodine in large quantities. With anemia, such a vitamin and mineral composition of spinach is simply irreplaceable. With its regular use, hemoglobin will increase, vision and pancreas will improve, blood vessels will be strengthened. But children and people with high acidity need to take spinach very carefully. It contains a lot of oxalic acid.
Greens at home, such as spinach, require good watering and long-term lighting. First, the seeds are soaked for 2-3 hours in warm water, then they are planted in containers to a depth of 1.5 cm. The optimum room temperature is -18-21 g. After a couple of weeks, the crops need to be fed with mineral fertilizers to form wide and lush bushes. After 1-1.5 months, fresh herbs are ready to eat. The varieties are livable on windowsills: Virofle, Mazurka, fat-leaved Victoria, Melody.
Borago and marjoram
Borago is a cucumber herb, not as popular as other spices, although it is grown easily, in frequent watering and is not pretentious to bright lighting. Contains vitamin C, carotene, smells like fresh cucumbers. Borago is sown with seeds to a planting depth of 1.5-2 cm in sufficiently fertile soil. Containers should not be placed in drafts. The place should be warm, and the soil should be of high quality.
When such conditions are created, in 2 weeks it will be possible to admire the first shoots, and after 1.5 months, cut off the first juicy leaves for salads, which, by the way, can replace cucumbers if they are not on your table in winter.
Do not cut or discard the arrows that appear on the purple-flowered grass. They have a pleasant smell and taste of honey, they can be dried, added to baked goods, desserts and even to liqueurs, home-made liqueurs.
Marjoram is an unfamiliar spice for many, it is sold in bags as a dried seasoning for adding to meat dishes, soups, snacks, salads, pates. It is quite possible to grow it at home, in flower pots. Marjoram is a part of traditional medicine recipes for the treatment of kidneys, liver, respiratory organs, helps with headaches, toothaches, and is a good sedative.
Marjoram is an unpretentious plant; it is quite easy to grow it at home.
- Drainage is laid at the bottom of the container, on top - a layer of earth up to 15 cm, then - seeds with a depth of up to 2 cm, lightly sprinkle with earth on top.
- After that, the soil can be watered, placed on window sills with moderate lighting, but drafts should not be allowed.
- The first shoots will appear in a couple of weeks.
- After another 15-20 days - the first harvest.
Plants require regular watering.
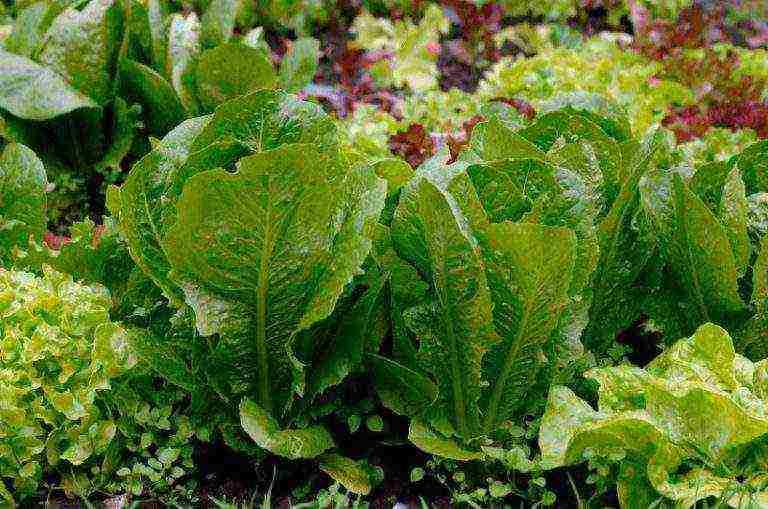
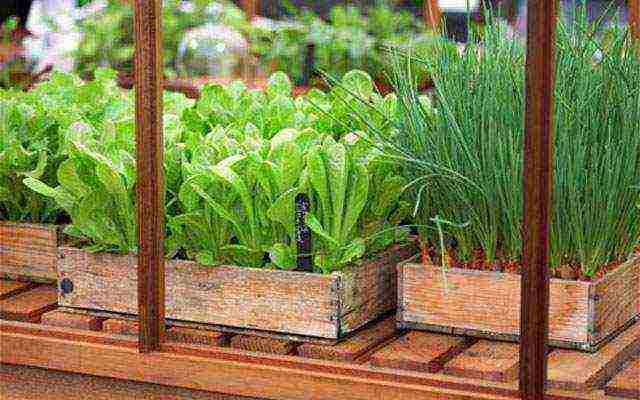
Lettuce and mustard
Lettuce is rich in vitamins K, PP, E, B, potassium, iron, iodine. Low-calorie salad, used in many diet menus to normalize blood pressure, prevent sclerosis.
Drainage is poured at the bottom of the boxes, on top - a layer of earth up to 13 cm in height, then - a small layer of the nutrient mixture. You can sow the salad tightly, watering well, covering with a film and putting it in a warm place. When germinating seeds, move the boxes to lighter windowsills. The first seedlings after the appearance of 1-2 leaves should be dived, planted. For the rapid growth of lettuce, the soil should be fertilized, fertilized in the complex. Watering 3-4 times a week for juiciness and freshness of the leaves. In about a month, the first crop will be ready for harvest.
Watercress containing carotene, sulfur, potassium salts, vitamin C. When salad is added to the diet, blood pressure and sleep are normalized. The salad is not picky about growing conditions. Grows in the shade, on windowsills facing north. Soil up to 12 cm is poured into the container, seeds are planted with a depth of 1 cm, slightly covered with the top layer of earth.
For the appearance of quick entrances, you need to water abundantly. After 2-3 weeks, the succulent leaves will be ready to eat. Lettuce grows well when applying fertilizers from mineral fertilizers, in sufficiently moist soil, the drying of which is unacceptable. Overheating of the air or insufficient watering will lead to coarsening of leaves, elongation of stems, and the formation of inflorescences. This salad is no longer good for food. The peppery, curly, ordinary, broad-leaved variety winters well on the windowsill.
Mustard greens grow well next to watercress. The seeds must first be soaked, after swelling, put on the prepared soil in boxes, sprinkle on top with a layer of up to 1.5 cm of earth, cover with foil to accelerate germination. Keep in a dark place until they appear. As soon as the first shoots appear, you need to remove the film from the plants and expose them to the light. The first harvest is in 15-25 days.
Mustard does not need to be kept at a high temperature or too much light. The best place is cool, shaded, and watering is moderate.
Green onions: growing in boxes (video)
Parsley, dill, basil and onions
Parsley with dill must first be soaked for a day to release essential oils, then deepen into the ground to 1 cm, keep the containers in a dark place until the first shoots hatch, watering the plants should be daily. Thickened seedlings should be thinned out. Feed min. fertilizers can be used after the first harvest of parsley and dill.
Mediterranean cuisine is not complete without aromatic basil. He loves light and warmth.In winter, it is worth taking care of additional lighting, as well as watering every day. You can plant seeds in flower pots. When the first shoots appear, apply complex fertilizers. To prolong the life of the plant, remove the peduncles during flowering.
What is easy to grow on a windowsill is an onion on a feather.
A can of settled water is enough for him. Scald the onion with boiling water, place in a jar so that only the roots touch the water. When green arrows appear, cut periodically. New arrows will climb again until the bulb shrivels, but the water needs to be changed regularly.
To grow green onions in containers, pour a layer of soil up to 7-8 cm, plant the bulbs, sprinkle with soil. Expose the boxes to light, preferably south-facing windows. With a lack of lighting, the flavoring and useful substances of the onion will be lost.
For forcing on a feather, it is better to plant small bulbs up to 2 cm in diameter. Plant in the ground at a distance of 2 cm from each other in half the volume of the bulb.
We grow greenery on the windowsill quickly and easily. Stock up on the right seeds in the fall. Delicious, fresh and aromatic spices will always come in handy in winter.
How to grow dill at home in winter (video)
Gallery: greens at home (15 photos)
Rate the article:
(0 votes, average: 0 out of 5)
 Useful Tips
Edible greens - an excellent and very useful food supplement that we are all used to: parsley, dill, basil, cilantro, celery and other herbs give a unique aroma and taste to our usual daily dishes. It turns out that they can be grown on a windowsill all year round, if you know some secrets, which I would like to talk about today.
When choosing dishes, it is better to pay attention to plastic containers, wooden boxes often leak. It is possible to use one long container for different types of herbs, but remember that some herbs do not go well with each other, as they require more or less watering.
In a wide dish with soil, you can plant immediately several types of greenerybut it is better if southern herbs such as marjoram, oregano or thymewill grow in a separate bowl. Parsley, dill, celery quite get along side by side in one pot.
The soil for herbs should consist of soil, peat, river sand and sawdust in equal proportions. Expanded clay or stones should be placed on the bottom of the dishes as drainage.
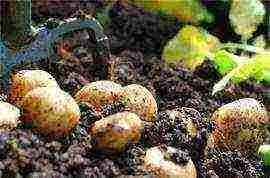
How to grow onions for herbs?
Easiest to grow on a windowsill green onions: for it you can use water, not soil... Pour settled water into a jar, place an onion previously scalded with boiling water on top. Make sure that only the roots touch the water.
After a short time, the bulb will shoot green arrowsthat should be trimmed as needed. The arrows will continue to grow until the bulb shrivels. Remember to change the water regularly.

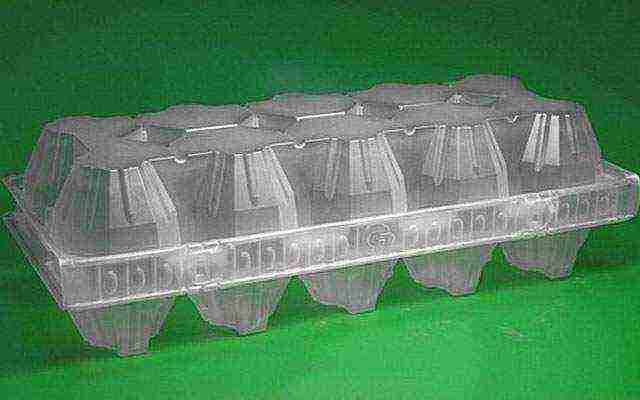
It is not at all necessary to use regular glass jars. Some housewives have adapted as containers juice packaging:
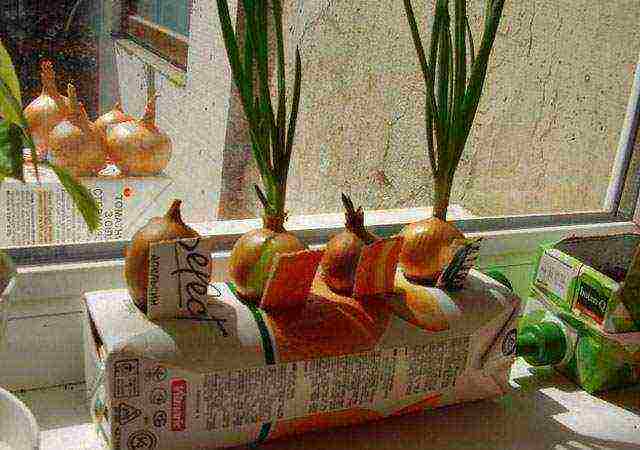
Or plastic egg packaging:
Or plastic bottle with slotted holes:
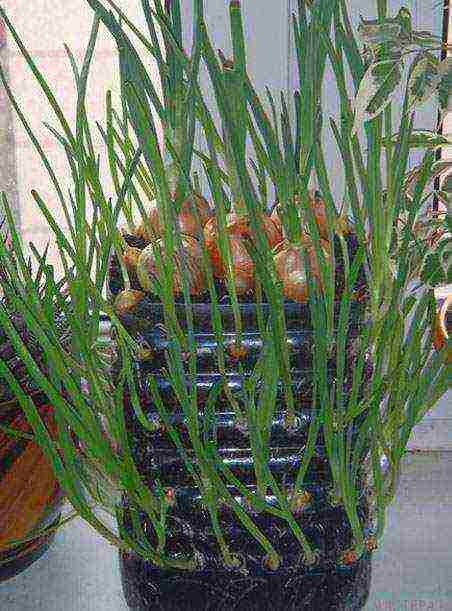
Green onions grow well in containers with soil depth from 7 centimeters and more. Onions love light, so it is better to place containers on a light south window. If you have a dark apartment, you will need to install additional lighting. In low light, ready-made bow will not have a rich taste and will not contain those beneficial substances that it should have.
Small onions with a diameter of about 2 centimeters can be used for feathering. They can be bought ready-made, or collected on your own plot in the summer. Water the soil in containers well, and then lower the bulbs into it from a distance 2 centimeters from each other so that half of the onion is in the ground.
The first onion feathers should appear pretty soon. Should water the groundso that it does not dry out.You can start the first cut of onions in 3 weeks after landing.
Greens at home: how to grow dill and parsley at home?
Dill very unpretentious and grows easily, however, in order for the herb to be ready for use, it will take about 1.5 months... For a good harvest, you need to water the grass a lot and provide it with good lighting. In winter, you may need additional daylight lamp... It is also a good idea to feed the plants with mineral fertilizers for indoor plants.

Parsley also grows well on the windowsill, but before sowing the seeds should leave in water for a day... This is necessary so that all essential oils that interfere with rapid emergence evaporate. After that, you need to sow the seeds to a depth of approximately 0.5 centimeters... Until the first shoots have emerged from the ground, leave the dish with seeds in a dark place.
Water the plants every day. So that the shoots do not interfere with the growth of each other, they need to be thinned out... After the first harvest, you should feed the parsley with mineral fertilizers.
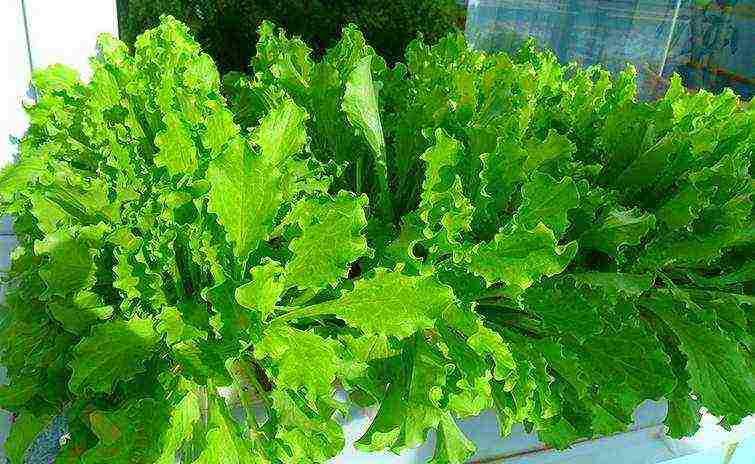
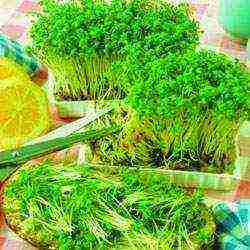
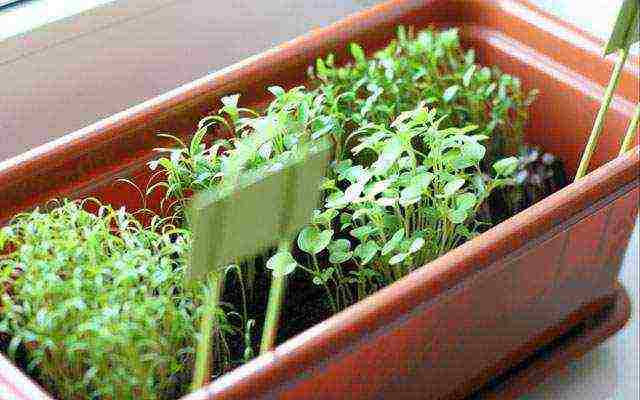
Homemade greens: how to grow salad on the windowsill?
Watercress grows very quickly - already on the 5th day after sowing shoots can be seen. This plant is very unpretentious and can grow even without soil: on wet sawdust, napkins or cloth. The crop can be harvested already 2-3 weeks after sowing.
Seeds are planted to a depth of about 0.5 centimeters rows, the distance between which is about 10 centimeters, they are immediately watered and placed in a dark place. After sprouting, you need to put the salad on the windowsill. Lettuce loves spraying, ventilated area, good watering. You also need to ensure that the soil was loose all the timeif lettuce grows in the ground.

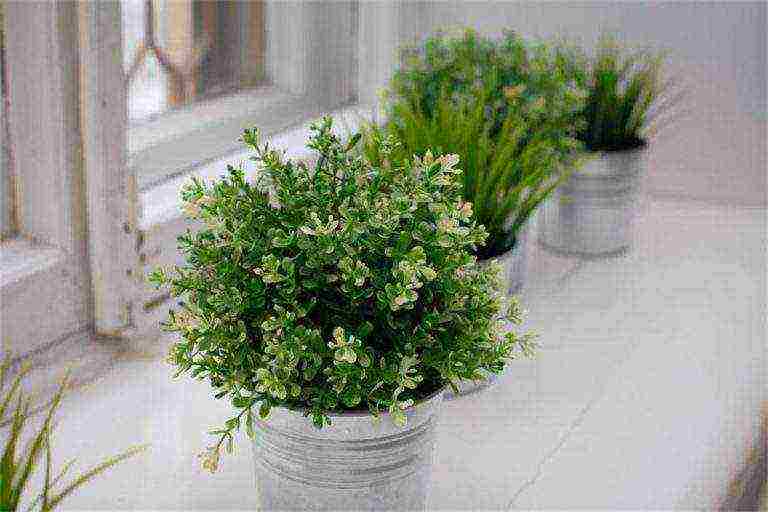
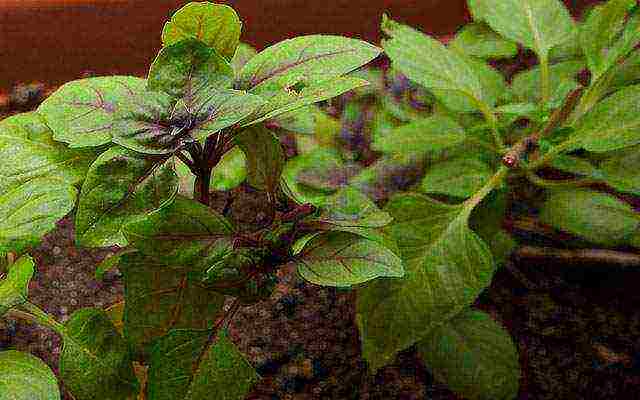
How to grow greens on a windowsill: basil
Basil Is a very aromatic herb that is widely used in Mediterranean cuisine. The plant is very thermophilic and photophilous. If basil is grown in winter, it will need additional lighting... This herb also loves moisture very much, so you need to water it every day and only in the morning.
You can sow seeds in pots for regular flowers. After seed germination, it is better to feed the plant complex fertilizers... So that the sprouts do not interfere with each other, it is better to plant them. If the basil starts to bloom, remove the peduncleto prolong the life of the plant.
Moon Tips: When growing herbs at home, remember to follow the lunar rhythms. Since we eat leaves, we should sow herbs on the growing moon so that they gain strength, and the energy goes into the growth of shoots. In order for the herbs to sprout quickly, it is better to sow them in days of Fire (Aries, Leo, Sagittarius)as well as in days of Water (Cancer, Scorpio, Pisces).
Avoid watering plants in days of Air (Gemini, Libra, Aquarius)... If the grass does not require daily watering, choose days of Waterwhen the moon is at Cancer, Scorpio or Pisces.
Good days for planting herbs at home this summer: June 10-14, June 19-22, July 9-11, July 17-20, August 3-5, August 13-16, 2013
Lucky days for harvesting herbs from the windowsill this summer: June 9-11, June 19-21, July 16-18, August 13-14, 2013
Learn more about Gardener's lunar calendar for June 2013 can be read here.