Content [show]
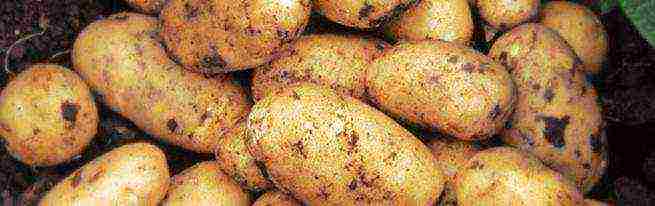
Potatoes are a relatively unpretentious vegetable crop, but many potato growers know from personal experience that there is no year after year. In one season, it is possible to harvest a rich crop of potatoes, the other season brings some disappointments.
Useful Tips
This may be due to various diseases of potatoes, bad weather conditions, lack of fertilizers in the soil, poor quality of planting material.
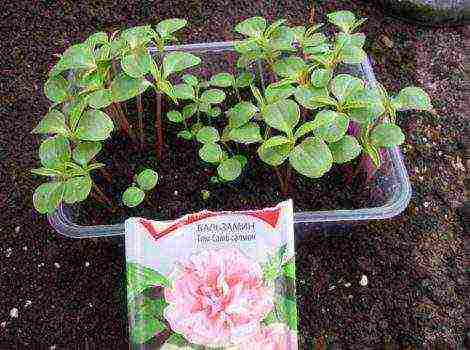
To increase the chances of a good harvest, regardless of the weather, it is recommended to plant two or three varieties of different ripeness, adding a handful of well-rotted compost to each hole. Preference should be given to varieties that are less prone to common diseases. Thus, the Dutch potato, which is resistant to various potato viruses, nematodes and cancer, is becoming more and more popular.

To increase the chances of a good harvest, regardless of the weather, it is recommended to plant two or three varieties of different ripeness
The most common Dutch potato varieties are:
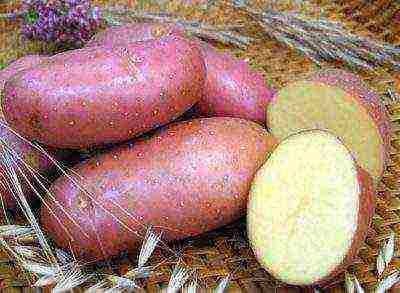
- Eba. Resistant to viral diseases, medium late variety with yellow tubers.
- Prior. An early variety resistant to nematodes and tuber damage. It is relatively resistant to viral diseases and late blight.
- Mona Lisa. The yield per bush reaches two kilograms of tubers with the addition of nitrogen fertilizers, in addition, it is the most disease-resistant variety.
- Cleopatra. The variety is early, high-yielding, grows well on sandy and clayey soil, not resistant to scab.
- Asterix. The variety provides a good harvest and has a long shelf life.
- Jarl. An early variety capable of producing a high yield on any type of soil, without additional fertilization.
- Frisia. Mid-season variety with excellent immunity to viruses.
What is special about the Dutch method of growing potatoes
Many gardeners are familiar with the Dutch method of growing strawberries, which allows them to get berries all year round. No less efficiency can be achieved by growing potatoes using Dutch technology, which has been successfully used by our potato growers in the past few years, both on farms and on private plots.
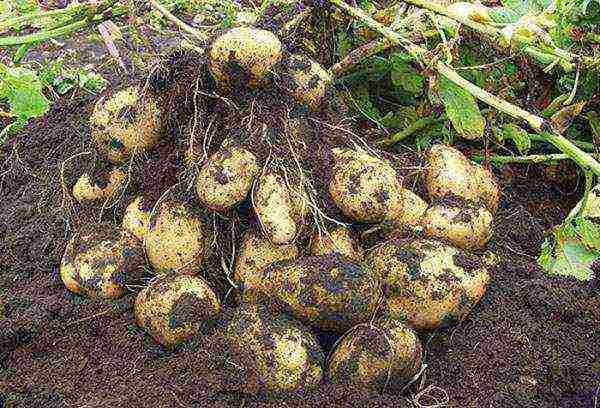
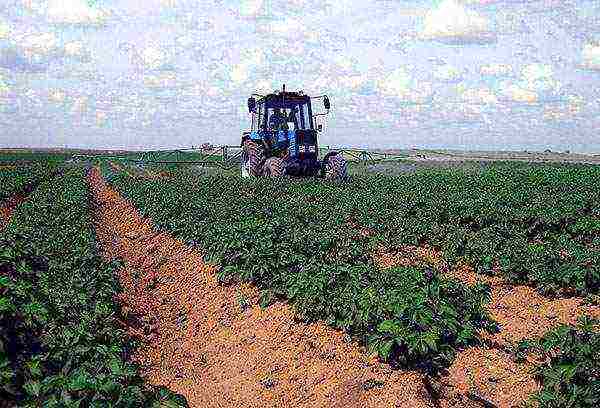
What is the essence of the Dutch method of growing potatoes? In general, this is a complex of agrotechnical techniques that are carried out with the highest quality at exactly the appointed time. The Dutch emphasize soil aeration - they loosen it well, plant potatoes in the ridges, leave wide distances between the rows. As a result, up to 2 kg of large tubers can be obtained from each plant, which are perfectly stored during the winter.

The Dutch emphasize soil aeration - they loosen it well, plant potatoes in the ridges, leave wide distances between the rows
If you want to achieve the same success in growing potatoes as the Dutch, you need to carefully follow the main rules:
- only varietal potatoes are used;
- the planting material is selected of the highest quality, not lower than the second reproduction;
- potatoes can be planted in one place only once every three years after winter cereals;
- the soil is fertilized;
- potato plantings are treated with chemicals and herbicides to destroy infectious diseases and pests;
- autumn and spring tillage is carried out at exactly the right time according to the established technology.
Even in the farms of our country, not to mention the gardens of amateurs, these rules are not always meticulously fulfilled, therefore, not everyone can achieve the same high yield as in Holland. For the sake of saving space, potato plantings are greatly thickened, in private plots, as a rule, it is not possible to observe crop rotation, and seed material is often used of poor quality.

Try Dutch potato planting
Nevertheless, try to plant potatoes using Dutch technology - even if you have fewer rows with a row spacing of 70 cm, you will be able to dig out more high-quality, large potatoes than usual.
Step-by-step instructions for growing potatoes using the Dutch method
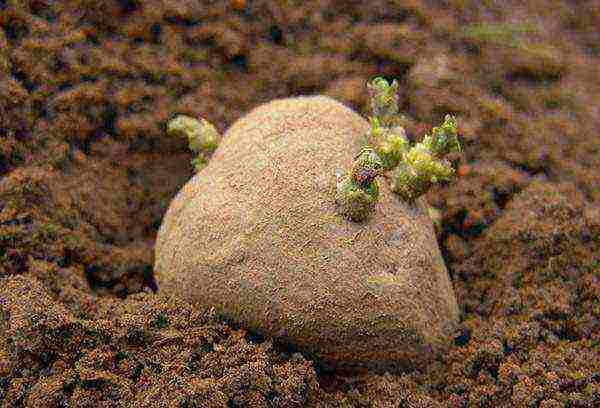
Before planting, be sure to germinate the seed: warm it up in a bright room at a temperature of +18 degrees until sprouts appear, then lower the temperature to +8 degrees and wait until the purple sprouts reach 2 cm in length.
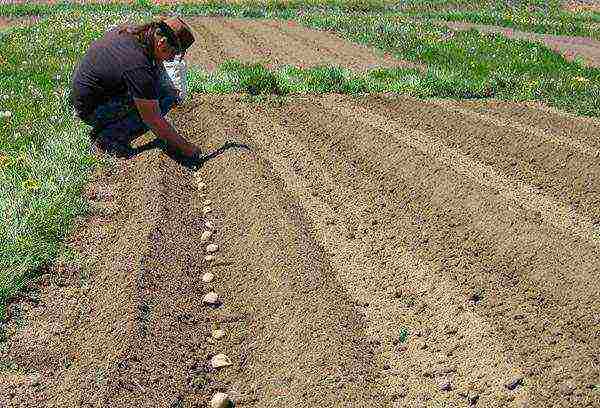
In spring plowing, add nitrogen fertilizer - urea to the soil. In well-plowed land, make ridges from north to south. The recommended planting depth for potatoes is 6 cm, from tuber to tuber should be 30 cm. There are 75 cm passages between the ridges, this distance will provide better sun illumination of the plants, and the earth will dry out faster after rains.

When plowing in spring, add nitrogen fertilizer - urea to the soil
When planting in each hole, first sprinkle a handful of wood ash and then place the cut potatoes sprouting up. If you add onion peels to the holes, it will scare away slugs and wireworms. Cover the planted potatoes with earth, forming ridges up to 10 cm to cover the tubers.
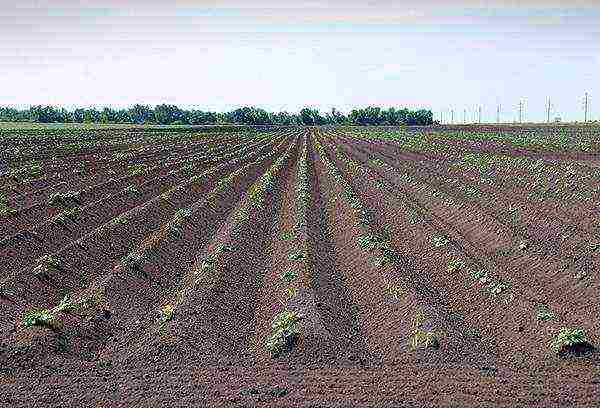
When shoots appear, you can carry out the first inter-row cultivation of potatoes in order to destroy weeds and improve conditions for the formation of tubers: cover the sprouts of potatoes on both sides with well-loosened soil from the aisles so that the height of the ridges increases to 20 cm.
Video about growing potatoes
It is necessary to water the ridges at least three times during the summer season - before the flowering of the tops, when the flowers appear, and ten days later, as the tops have faded. A few days before flowering potatoes, you can spray them with poisons against Colorado beetles.
If you are not happy with the modest harvest of potatoes on your site, try new technologies for growing potatoes, and you will certainly succeed. Many potato growers love the Dutch method!
Rate the article:
(2 votes, average: 4.5 out of 5)
Dutch potato growing technology is a method that includes pre-treatment of the soil, careful selection of seeds, planting and special care. This method is effective only if the actions are carried out sequentially and within the allotted time frame. Crop rotation, soil fertilization, prevention of diseases and pests or control of them - without these measures, a high-quality crop cannot be obtained. Planting potatoes using this technology allows you to increase the yield by 1.5-2 times and improve its quality.
Soil preparation
The Dutch method consists of several steps and begins with site selection and soil preparation for planting.
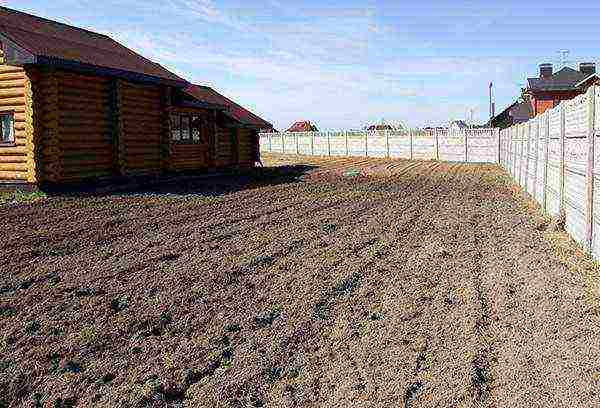
The site must be on level ground and not slope. It is important that the selected place is not located in a lowland and water does not stagnate on it after melting snow and rains. The sun should illuminate future plantings throughout the day. It is advisable that the site is not located in a place blown by winds, which quickly dry out the soil.
The soil should be light, fertile, breathable and permeable.Winter cereals are good predecessors.
In one place, potatoes are planted only once every three years.
Important!
The Dutch method is not suitable if:
- the site is located on a slope or in a flooded lowland;
- the soil is heavy, dense, clayey or wind-dried;
- the site chosen for planting has been planted with nightshade crops for several years in a row;
- nearby trees or buildings shade the area for most of the day.
Site preparation begins in the fall of the previous year. At the beginning of autumn, deep digging of the soil is carried out, which is called "autumn plowing". They plow deeply, by 25 cm. Be sure to turn the layers over, do not break the clods, do not loosen the earth, but leave it like that until spring.
This method of soil cultivation allows:
- destroy most of the larvae of pests that hibernate in the ground;
- get rid of weeds;
- rainwater and melting snow - penetrate deep into the soil;
- carry out early planting next year, because the soil warms up faster.
Digging of the site is carried out with the simultaneous application of fertilizers. Organic matter (manure and humus) and mineral fertilizers are introduced.
The Dutch method implies that potato planting in spring should begin when the soil warms up to + 10 ° C. This will allow harvesting at the end of summer.
The soil should dry out, but not quite. You can determine if it is ready for planting using the old method: take a little earth in your hand and squeeze it. The resulting lump is effortlessly thrown down from the waist. If it crumbles, the soil is ready, if not, you need to wait a few days.
You can use a folk omen: the first leaves appeared on a birch - take a shovel in your hands.
Immediately before planting the tubers, the soil is loosened. Use a technique or loosen with a pitchfork to a depth of no more than 15 cm. The pitchfork should be with frequent wide teeth.
The principle of technology: prepared the soil - immediately plant the tubers.
Seed selection
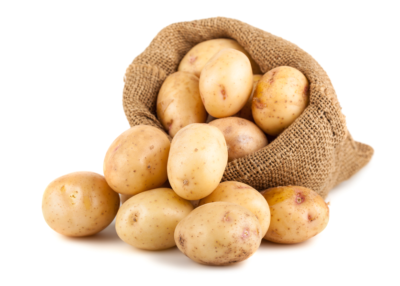
When applying the Dutch method, you need to know that only high quality potatoes are suitable for planting. It is recommended to use Dutch varieties, which are distinguished by high germination, taste and disease resistance. It is desirable that they be adapted for cultivation in the region.
Tubers must be healthy, flawless, even and medium-sized. The optimal tuber diameter is 5-6 cm.
Important!
The Dutch method is effective if only one variety of tubers are used for planting. It is impossible to plant a re-grading, because the germination of seeds will be uneven, which will lead to a decrease in yield.
The varieties must be changed once every five years. Constantly grown in one area, they lose their qualities, degenerate.
Before planting, the tubers must sprout eyes. When planted with the help of technology, they should be no more than 0.5 cm. Longer ones may break off, and germination will be delayed. If the area is small and the manual method is used, the eyes can grow up to 1 cm.
Planting seeds
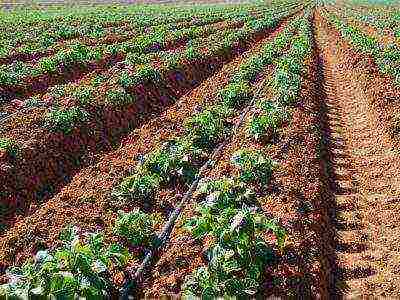
The ridges are prepared at a distance of at least 75 cm from each other. The method eliminates a small distance between the rows, as this will lead to insufficient nutrition and difficulties in care.
Furrows are made from north to south to provide good lighting throughout the day. Depth - 4-6 cm. Tubers are laid out in them at a distance of 30 cm, the peephole should look up. 1/3 cup of wood ash is added under each tuber. The plantings are covered with soil to ground level.
The Dutch method is based on such a property of potatoes as the formation of roots on any part of the trunk, located in a dark and slightly damp place. The higher the bush is covered with soil, the more tubers are formed.
During the first month, it is necessary to carry out two hilling of potatoes.
- 10-20 days after planting, when the first shoots appear. They make a mound 10 cm high, raking the earth on it from the aisles.
- The second time is 15 days later.Hilling is carried out thoroughly, the earth is poured 25 cm in height. The base of the embankment should be about 50 cm wide. The top of the mound is lightly slapped with a shovel so that the water after irrigation does not flow down the sides, but can be absorbed.
Three to four days before each hilling, all weeds are removed, and the area is shed with water.
This method is effective in that a lot of oxygen is supplied to the additional tubers that are formed on the buried part of the trunk, and the soil warms up well, which contributes to their growth.
Care
The Dutch method includes watering, trimming mounds, treating diseases and pests.
Watering is carried out three times over the summer:
- when buds begin to appear on the bushes;
- closer to the end of flowering;
- two weeks after flowering.
In hot summers without precipitation, the amount of irrigation can be increased. So that during irrigation the ground on the hills is not washed out, sprinkling is used using a nozzle with small holes.
A good method is drip irrigation, but this method justifies itself only in a region where the summer is hot, there is almost no rainfall and the potato plantations are small. The drip system is placed on the tops of the ridges after the second hilling.
If, after a heavy rain, the ridges crumbled a little, then they need to be corrected. When shedding, the tubers are exposed, they turn green in the sun and dry out. Scattering occurs only on soils that contain a little sand.
Important!
For sandy soils, the Dutch method is not suitable, due to the likelihood of frequent shedding of the ridges.
Care consists in processing plantings from pests and diseases. If it is noticed that such problems arise from year to year, then you should not wait for the first signs to appear. Prevention should be carried out. For this, biological agents belonging to the 4th hazard class can be used. If the disease begins to manifest itself or the first pest is noticed, chemical pesticides are used to prevent severe damage to the potato bushes.
Harvesting
The potatoes are dug in two stages:
- part of the potatoes that will go for seeds are dug up in early August;
- the rest of the potatoes, which are intended for eating, are harvested at the end of August.
Two weeks before harvesting, the tops of the potatoes are cut at soil level. This is necessary so that as many nutrients as possible accumulate in the tubers, which increase keeping quality and improve taste.
Before harvesting for storage, the tubers are washed with a strong stream from a hose and dried first in the sun. As soon as the moisture from the surface of the potato evaporates, it is transferred to dry under the shed.
The tubers are stored in the basement, where there is good ventilation. For storage, boxes with holes are used, which are stacked on top of each other. A distance of several centimeters must be left between them.
Brief conclusions
- The Dutch method is used on flat areas that do not have a slope. Sandy or clayey soil is not suitable for this technology.
- They use high-grade seeds, medium-sized, uniform in size, without flaws. The variety is changed every five years.
- They are planted early, as soon as the soil warms up. At the initial stage, hilling is carried out twice. The final height of the mounds is 25-30 cm.
- Watering is carried out at least three times, it is mandatory to fight diseases and pests with the help of pesticides.
- For seeds, the collection of potatoes is carried out in early August, the rest is dug out at the end of the month. Two weeks before that, the tops are cut off.
Compliance with technology and the implementation of all work in a certain time frame contributes to an increase in yield.
Foreword
For those who like to experiment on their beds, we propose to learn a new way of growing our favorite potatoes, discuss planting them using Dutch technology. What is the essence of this method, and is it really as effective as agronomists assure? Let's figure it out!
Technology features
The main feature of Dutch technology is the sufficient supply of oxygen and moisture to the plant, that is, the main emphasis is on soil aeration. However, you should not think that only by thoroughly loosening the soil, you will get an excellent result - the Dutch technique is a combination of a number of operations and conditions performed in a strictly specified time frame. And if at least one of the requirements is not satisfied, then all the work is in vain.

So, the variety of potatoes plays a huge role. Do you want to collect more than 250 kg per one hundred square meters? Do not skimp on planting material, buy only a good product of the first or second reproduction. Monitor the quality of the soil and take all the necessary measures to improve it, prevent various diseases and control pests. In addition, this tuberous plant can be planted in the same place only once every three, and preferably in four years. At the same time, the rest of the time it is most advisable to use the site for grain crops, but if you sow it with pumpkin, then do not count on a good collection of potatoes.

In order for the aeration process to take place sufficiently, the rows should be spaced from each other at a distance of at least 70 cm.With us, quite often, for the sake of saving space, this parameter is not kept, but with this method of sowing the material for planting is consumed more, and the yield is weaker, yes and the quality of the product is worse. Only if all the conditions of the Dutch technology are met, up to 2 kg of crop can be harvested from one bush.
Variety selection
Now let's say a few words about choosing the right potatoes for planting using Dutch technology. Of course, it is better to give preference to the varieties least prone to various diseases. And in order to prevent the weather, which is not controlled by us, a hindrance, several types of different ripening periods should be planted. The Mona Lisa variety has excellent resistance to viral diseases, in addition, if you carry out all the measures for feeding the soil with nitrogen fertilizers, then a yield of more than 2 kg is guaranteed.

Also worth noting are the early varieties of Jarla, Cleopatra and Prior. The first is not whimsical also to the quality of the soil, so that it can be grown in almost any area. After planting Cleopatra, make sure that she is not struck by scab, this species is not resistant to such a disease. Eba and Frisia are mid-late. Both varieties are distinguished by excellent immunity to viral diseases. But farmers who prefer the Asterix variety can boast of an excellent harvest with a long shelf life.

Optimal conditions
So, it is not recommended to start planting before the temperature outside the window reaches + 8 ° C, while it is also advisable to wait one to two weeks after reaching such a mark on the thermometer. If you listen to folk signs, then wait for the first greenery to appear on the birch, this is a sure sign that the earth has warmed up enough. But you should also not sit too long, there is another way to determine if the land is ready for planting potatoes. A handful of soil is taken and clenched tightly in a fist, and then thrown from a height of one meter (approximately from the level of the belt). If the earth crumbled from the impact, then it is quite mature, and the time for planting has come.

Another condition for a good harvest is adherence to feeding technology. It is not recommended to lay fertilizers below the level at which the planting tuber will be located. Since in this case the plant will not be able to receive the necessary nutrients immediately, but only after good rooting, and this is a wasted time and money, because the minerals will not be absorbed in full.

It will also have a beneficial effect on the cultivation of potatoes according to Dutch technology when an infertile layer of soil is just below the level of the tubers at the time of planting.In this case, the tubers will grow on the formed ridge, which means they will receive the required amount of oxygen. This will be facilitated by the fact that initially the planting material is buried shallowly, at a distance of only 6-8 centimeters from the ground surface to improve aeration.
Preparatory work
So, deciding to use the Dutch method of planting potatoes, you should prepare both the seed and the soil. Only high quality and healthy tubers 5–6 cm in diameter are selected. This size is considered optimal, since a larger potato is already a commercial one and it is impractical to use it for planting, and a small one will not be able to receive the required amount of nutrients in the first growing season, so its development will be somewhat delayed. Before burying the tubers in the ground, it is necessary that sprouts appear on them. Optimum conditions should be created; this will require a bright room. First, we warm up the room to +18 ° С, then wait until the eyes begin to germinate, after which we lower the temperature to +8 ° С.

The material, ready for planting, should have strong two-centimeter sprouts. If they are long, then planting the potatoes carefully and not breaking them is unlikely to succeed.
Within the framework of the Dutch technology, quite serious requirements are also imposed on the land plot. It must be smoothly planned and without slopes, otherwise the ridges will collapse. In addition, the soil should be well-loosened, only in this case the optimal amount of oxygen will be available to the plant's root system. Therefore, preparatory work should begin in the fall, having dug up the entire site, but in the spring the land is cultivated.

If we are talking about a large amount of work, then you cannot do without special equipment, but ordinary pitchforks are quite suitable for a home garden. It is necessary to plow to a depth of at least 30 cm; in parallel, mineral and organic substances are introduced. One hundred square meters account for five kilograms of nitrogen fertilizers, the same amount of superphosphate and 2 kg of potassium chloride. In addition, the topsoil should be 2% humus.
Planting potatoes using the Dutch method
Dutch technology techniques are quite simple. So, it is necessary to dig 6-8 cm deep beds from north to south. The distance between the rows is maintained from 70 to 90 cm, and the tubers are located after 30 cm. As a result, from 500 to 1000 plant units are placed on one hundred square meters, with each of they will receive a sufficient amount of light and the earth will dry out quickly after rain.

A little ash is pre-poured into each hole and the planting material is placed on top, sprout up. If the potatoes are too small, then they are used whole, and the larger ones are cut. By adding onion peel to the hole, you will protect the plant from slugs. There is no need to immediately form ridges, the first two weeks the potatoes are covered with an even layer of earth.

As soon as sprouts appear, the first hilling is carried out. The height of the mound is made about 10 cm and the width is 30 cm, under such a ridge, optimal conditions are created for the development of this culture. The soil allows air to pass well to the root system, which activates all biological processes. After about 14 days, they huddle again, and the height of the ridges doubles, and the width at the base reaches half a meter. At the same time, it is necessary to carry out active weed control.
Care and harvesting technique
The role of watering cannot be underestimated and it must be carried out at least four times per season, while it is necessary to moisten the soil immediately before flowering and two weeks after. During this period, tubers are formed, and they need a lot of moisture to gain mass. Sometimes, after a heavy downpour, a crust appears on the soil surface, swimming occurs, which should be eliminated.This is done very carefully so as not to damage the plant. So, if the sprouts are about to appear outward, you must first loosen the tops, and then carefully move the rake from the base to the top. During hilling, both the aisles and the ridge itself are processed, but just as carefully, otherwise its configuration can be damaged.

In addition, the Dutch method of planting varietal potatoes also implies the implementation of complex measures aimed at combating diseases and pests. But do not wait until they damage the plant, it is sprayed with chemicals in advance, for example, a few days before flowering. You should also carry out the prevention of phytophthora. If the disease struck a resident of the garden, then it must be urgently removed in order to avoid an epidemic. It is advisable to carry out regular feeding with mullein or chicken droppings, as well as mulching.
Let's move on to harvesting. Sowing and food material is taken out of the soil at different times. So, for the first, July is considered the optimal time, for the second, the end of August or, in general, the beginning of September is more suitable. Previously, in two weeks, the entire ground part of the plant is removed, and then the fruits are dug up. Why take off the tops, wouldn't it be a waste of time? Not at all! Firstly, this way, various pathogenic microbes carried by small pests like aphids will not transfer to the tubers. Secondly, the ripening process is significantly accelerated and a dense skin is formed that protects the potatoes from mechanical damage.

The most suitable period for removing the tops of seed is considered to be the time when the latter has reached a size of 30-50 mm in diameter. If you are growing a food product, you should wait until the stems begin to turn black, and only then remove them. Of course, if we are talking about farmland, then all operations are carried out using special equipment, in a small garden of a summer cottage it is wiser to use a manual method. So, for example, the aerial part of the plant is simply mowed or cut with a knife.
Rate the article:
(1 vote, average: 5 out of 5)
Many of you have grown potatoes on your site. The yield is usually quite high. But few people know that it can be increased approximately two times. This is exactly what Dutch potato technology does. For several years now, gardeners have successfully used the Dutch method of planting potatoes, which is characterized by high yields. Previously, this method was considered acceptable only for large farms, but it also became relevant in summer cottages. This article describes in detail how to grow potatoes using Dutch technology and get a good harvest.
…
What is this method?
The main essence of the technique lies in the complete rejection of traditional holes - instead of them, high rolls are formed, which protect the roots from decay and provide a continuous flow of oxygen.
Thus, the development of tubers takes place in more favorable conditions. Located on the ridges, they have direct access to the sun's rays.
The following basic principles of Dutch technology can be distinguished:
- The use of exclusively high-quality planting material purchased in specialized stores and nurseries.
- Using the principle of crop rotation - the planting site must be changed every 3 years. The ideal precursors for potatoes are cereals and legumes.
-
 Timely application of appropriate fertilizers.
 - Pest control of vegetable crops, as well as sources of viral and bacterial infection.
- Special soil treatment in the spring and autumn.
The technique does not tolerate amateur performance - all procedures must be consistent and timely. The technology is distinguished by high productivity - the yield from one bush reaches 1.5-2.5 kg... Thus, on a standard household plot, the farmer will receive about 300 kilograms of selected potatoes from a hundred square meters.
Pros and cons of the method
Positive consequences of using Dutch technology:
- Quick harvesting thanks to the use of medium early potato varieties.
- The most intensive tuber formation on each bush.
- The correct shape and more attractive appearance of the vegetable.
- Consistency of taste characteristics during storage.
The disadvantages include:
- Growing potatoes according to the Dutch method requires a lot of effort from the farmer during the entire vegetative period, special attention should be paid to preparatory work.
- The difficulty of observing the crop sowing turnover of crops in small summer cottages.
- A denser fit reduces the effectiveness of the method due to space savings.
- A gardener can make a mistake when purchasing planting material - some experience is needed to buy an elite variety.
- The summer resident's lack of the ability to clearly adhere to the timing of all the necessary manipulations.
Necessary conditions for the technique in the country
To achieve a positive result, you must follow a strict schedule of actions.
Variety selection
Dutch varieties are best suited for the method.... They are deservedly considered resistant to many diseases, as well as unstable weather conditions. A gardener should pay attention to the following types:
- Santa;
- Red Scarlett;
- Prior;
- Mona Lisa;
- Romano;
- Condor.
Russian agronomists from the northern regions are advised to give preference to domestic varieties due to climatic features.
Regardless of the variety chosen, the planting material must be properly prepared.
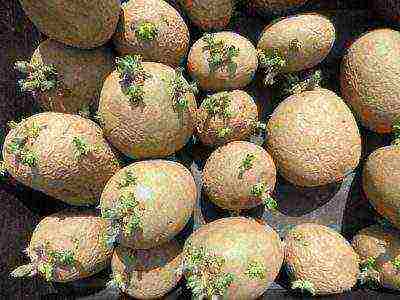 To obtain powerful shoots, potatoes should be varietal and not too large. Ideal parameters of potatoes - 5 cm in diameter with a mass of up to 50 g... Eyes, however, should be at least 5. Potatoes are germinated within a month on a thin layer of paper or cloth at a temperature not higher than +18 ° С.
It is advisable to start planting when the shoots reach 5 mm. This is the most suitable size for planting material. This rule should be strictly observed only with mechanized planting in order to prevent damage to the shoots. In the conditions of the suburban area, the length of the processes up to 2.5 cm is possible.
Land, tools and fertilizers
Soil preparation should be attended to in the autumn. The landing site should be perfectly level at a low elevation, as well as well-lit and airy. These conditions are extremely important in order to avoid destructive stagnation of moisture.
Having marked out the beds, it is worth digging up the soil to a depth of 22-27 cm, and also applying fertilizers. For these purposes, rotted manure or compost is suitable. With regard to inorganic compounds, add 20 g of potassium sulfate and 50 g of superphosphate for each square meter of land.
An additional benefit will be sowing the site with plants, which will subsequently be embedded in the soil, enriching it with nitrogen - alfalfa, mustard or rapeseed. All manipulations are conveniently carried out with a reversible plow or a cultivator with a disc.
At the very beginning of spring, the garden is plowed again, this time enriching the soil with carbomide or ammonium sulfate (40-50 g per m2). You can also add urea. Processing during this period is carried out by a milling cutter-cultivator, which crushes, loosens and levels the soil.
Ordinary forks with a depth gauge can also be used (the thickness of the tines should be 6 mm and the distance between them should be 30 mm).
It is important to minimize the time interval between soil preparation and planting of tubers so that the soil does not lose moisture and oxygen. In this case, you need to wait for the soil to warm up to + 10 ° C.
Planting material is placed sprouts upward to a depth of 6-8 cm along with ash, eggshells and onion husks.The distance between the future bushes should be about 30 cm, and between the rows themselves - 70-75 cm. Then a high ridge with a cross-sectional area of 1500 cm2 is formed... Such conditions provide maximum nutrition for the bush, the roots are aerated, and excess water flows freely between the shafts.
Planting care
 When the first stems appear, all weeds should be carefully removed and the seedlings should be sprinkled so that the shaft reaches a height of 12 cm.The optimal embankment width should be 35 cm.After about a month, the weeding procedure should be repeated, and the height of the ridges should be increased to 30 cm. For this you can use a hoe or shovel.
In the future, herbicides are used to combat weeds. Also, for this purpose, it is permissible to fill the space between the rows with peat chips or freshly cut grass.
Watering is best done by drip irrigation... If this is not possible, for the entire vegetative period it is carried out 3 times - before the appearance of buds, 7-10 days after the beginning of active flowering, and then 10 days after its end.
Processing from the Colorado potato beetle is performed strictly before the beginning of flowering of the bushes, and then repeated 3-4 more times. In order to avoid addiction, it is recommended to use a new remedy every time - "Zhukoed", "Bankol", "Corado".
Prevention of late blight should be carried out 5-6 times per season with drugs such as "Skor", "Topaz", "HOM".
Before harvesting potatoes, the shoots are harvested and burned... The tubers are left in the ground for another 1.5 weeks so that their skin becomes denser. This will allow the vegetable to last longer.
How to use this method at home?
It is no less interesting to try to apply the Dutch technology right on the balcony. To do this, you should:
- Prepare boxes, bags or buckets where potatoes will grow and place them on a warm loggia. The depth of the vessels must be at least 25 cm.
- Choose a soil - airy, but not too loose. Put the drainage on the bottom of the pot in a layer of 2-3 cm.
- A suitable substrate is turf or rotted compost.
- Sprout the tubers before planting and place them in a container with sprouts upwards in three layers (the first row is 6 cm from the bottom, then two more with the same intervals). This will significantly save space.
- The temperature regime should be stable without sudden changes (25-32 ° С), and the air humidity should not exceed 65-75%. Such parameters will contribute to the maximum division of tubers.
- Watering is required rather sparsely once every 12-15 days, which will protect the roots from rot and fungal infections.
- Plant nutrition - complex liquid mineral fertilizers once every 7 days throughout the vegetative period.
With strict adherence to the technique, it will be possible to collect 1.5 kg of small tubers from one bush and feast on homemade potatoes in an urban setting.
Thus, Dutch agricultural technology is a reliable way to increase the efficiency of potato planting. Elite seed and the effort spent on observing all the regulations will pay off in the number of seedlings and the quality of the tubers.