Content [show]
Many summer residents fell in love with asparagus cabbage: its inflorescences have an interesting delicate taste and rich chemical composition, and the low calorie content allows them to be included in the diet without fear of harming the figure. The list of advantages of the culture is headed by its unpretentiousness - growing broccoli in the open field will require minimal labor costs. Its inflorescences ripen quickly. It will be possible to enjoy them when 2 months have passed from the moment the seedlings are placed on the beds. But you should not rush to harvest cabbage bushes from the garden. If, having received the main harvest, you continue to care for broccoli, until the end of the season, new numerous formations will appear on it - small but edible and useful heads.

Preparation of planting material
Sowing seeds of asparagus cabbage can be carried out directly to the beds. But more often it is grown through seedlings. Although this method is more labor intensive, its important advantage is that valuable crops can be harvested faster. You can get viable seedlings in a greenhouse or at home by placing containers with sown broccoli on the windowsill, insulated balcony or loggia.
In order for the seedlings to be friendly and healthy, pre-planting seed preparation is carried out.
- First, they are placed in water heated to 50 ° C. It may be clean, but it is better to dissolve a little potassium permanganate in it, which will help to disinfect the seeds.
- After 15-20 minutes, they are taken out and immediately placed in a container with cold water, where they are kept for 1 minute.
- Further, broccoli seeds are treated with special biological preparations - growth stimulants and fungicides. The planting material should lie in the solution prepared according to the manufacturer's instructions for at least 12 hours.
- Then it is placed in the refrigerator for 24 hours.
- To make planting the seeds easier, they need to be dried. Then they will be well separated from the fingers.
The next stage is soil preparation. Ordinary garden soil is suitable for broccoli, but it is better to add wood ash to it (1-1.5 cups of fertilizer are stirred in 1 bucket of soil). It will provide the seedlings with the nutrients they need and help reduce soil acidity. Professionals advise using a substrate of components mixed in equal amounts for planting broccoli seeds:
- garden land;
- humus;
- peat;
- sand.
The main condition for plant health is loose soil and good drainage. With stagnant moisture, the planting can be destroyed by a black leg.
Getting seedlings
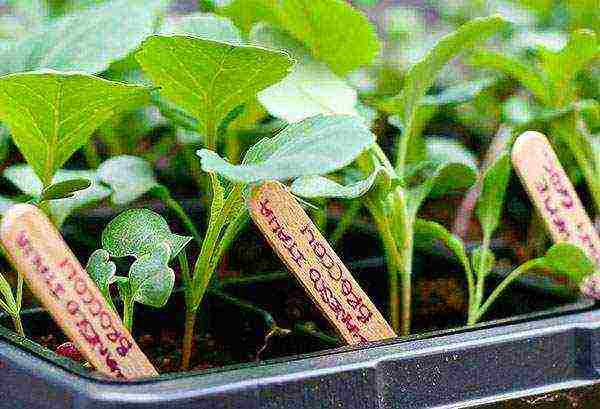
Sowing seeds of asparagus cabbage is carried out in a substrate disinfected with a solution of potassium permanganate at the end of March or in early April. At home, it is recommended to plant them in separate containers. This will protect the broccoli root system from damage when the plants are moved outdoors. In addition, in individual pots, seedlings are more powerful and develop better, because they do not have to fight with neighbors for light and nutrients. It will also be easier to care for them: there is no need for thinning and picking seedlings.If a common container is used, then 5 cm is left between the seeds in a row.
Advice
You can plant broccoli seeds that have already hatched into the ground. Use a paper towel or cloth to germinate them. Having well moistened the material with water, sprinkle seeds over it, and then cover it with a plastic bag. It will take 2-3 days, and they can be planted in a pot.
In order for broccoli seeds to germinate, the room temperature is kept between 18-20 ° C. When the seedlings hatch, it is reduced to 8-10 ° C. The seedlings need coolness only in the first week of their development; in the future, the optimum temperature for them is 15-20 ° C. They do not need special care. It is enough to put containers with broccoli seedlings in a bright place and water abundantly, preventing the soil from drying out and waterlogging. At the age of 30–38 days, young asparagus cabbage can be placed in the beds. By this time, she produces 4-5 full leaves.
Broccoli is a cold-resistant crop, its bushes can withstand up to -7 ° C. Therefore, you can plant its seeds immediately in the garden, providing them with greenhouse conditions by covering the beds with film or special material. They will help and protect young asparagus from insect pests. If you sow broccoli seeds in the first decade of April, then by mid-May the seedlings will be sufficiently developed to be placed on a permanent site. In this way, hardened seedlings adapted to outdoor conditions with a higher survival rate are obtained. The shelter is removed from the beds when the seedlings get stronger.
Another way of growing crops is practiced in the Urals - to plant broccoli seeds directly in open ground. This can be done from May to June. Shallow holes are dug at the site with an interval of 50 cm. Several seeds are placed in each, covered with a layer of soil and watered abundantly. When the seedlings hatch, they leave the strongest sprout. The first harvest of broccoli will bring in late summer or early fall, and additional mini-inflorescences can be harvested from it until October.
Landing in the ground
Broccoli is afraid of the bright sun, it is better to plant it in slightly shaded places. It will bring a bountiful harvest on fertile, humus-rich, non-acidic soils with a light porous structure. If the pH is not high enough (from 3 to 6), liming of the soil is carried out. Eggshell powder, chalk or lime will help neutralize acidity. Proper broccoli farming involves maintaining crop rotation. Do not place it in areas where cruciferous vegetables were planted last season. But it will develop well in the soil after potatoes, carrots, tomatoes, onions, pumpkins, and various legumes.
The area where you plan to plant broccoli is best prepared in the fall. It is dug up, applying fertilizers with a high content of potassium and phosphorus. Both organic and mineral compositions are suitable for culture: manure, humus, superphosphate, potassium nitrate. It is not critical if there is no way to carry out the autumn preparation of the beds. Top dressing will provide broccoli with the nutrients it needs.
You need to plant asparagus cabbage in deep holes. The soil in them should be well moistened - by 30 cm. Between adjacent holes, leave 30-40 cm of free space. The row spacing should be wide - not less than 45-60 cm. If the soil has not been enriched with fertilizers in advance, ash and humus or compost (1 handful) are thrown into each hole.
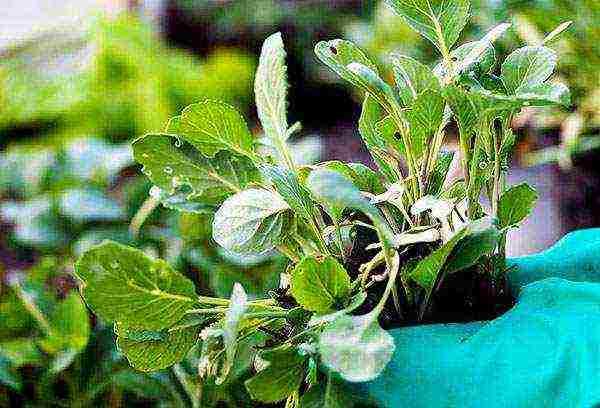
Then a seedling extracted from a pot or from a greenhouse, along with an earthen lump, is placed in it. Trying not to bare its roots, they are carefully straightened. Broccoli requires planting at a medium depth - the stem of the plant is immersed in the soil until the first leaves. It is recommended to carry out the procedure in cloudy weather and in the afternoon. Finish it with watering. To facilitate the care of the plantings, the soil under the plants is mulched.A layer of fine straw, dry grass, or wood shavings will help trap moisture, keep plantings from overheating, and stop weeds from growing.
Advice
Broccoli seedlings with a developed root system, consisting of many thin shoots, take root better and are less sick. In height, they should reach 15-20 cm.

After landing
So that the planting of broccoli does not end with the death of young plants, they must be protected from the scorching sunlight. Shelter can be made from old buckets or spruce branches. Artificial shading is left for 7-10 days until the seedlings take root. Caring for asparagus cabbage is simple. Her agricultural technology consists in procedures familiar to all summer residents. The plantings are regularly looked after:
- watered;
- feed;
- weed;
- spud;
- loosen.
The secrets of a high yield of broccoli have been revealed for a long time. Frequent watering and fertilization guarantee success in growing crops. It is better to moisturize plantings in the evening hours. At the stage of formation and development of inflorescences, the procedure is carried out every other day. If the summer is hot and dry, water the broccoli bushes daily - early morning and evening, when the heat subsides. The rest of the time, one hydration per week is sufficient. Watering the asparagus cabbage needs abundant watering, the soil should be at least 15 cm wet.
Broccoli will need a lot of nutrients for vigorous growth and abundant fruiting. It is advisable to use organic compounds for feeding: infused mullein, chicken droppings. Additional nutrition is provided for asparagus every 14 days. Such care begins from the moment her bushes take root in a new place and take on growth. When inflorescences begin to form, they switch to mineral fertilizers. Three components are stirred in 10 liters of water:
- superphosphate (40 g);
- ammonium nitrate (20 g);
- potassium sulfate (10 g).
The resulting composition is watered with plantings at the root. Then the care in the form of dressings is suspended. It is renewed after the main inflorescence is cut from the cabbage. The same mineral preparations are used for fertilization, but in a different proportion. During this period, plants need 3 times more potassium and 2 times less phosphorus and nitrogen. If you continue feeding, the lateral shoots of the asparagus cabbage will begin to grow actively and it will be possible to harvest an additional crop from it.
Advice
After each watering and fertilization, the soil under the broccoli bushes must be thoroughly loosened.
Harvesting rules
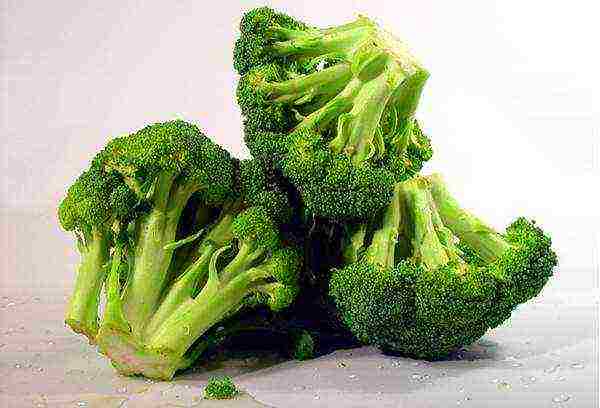
Cut off the asparagus inflorescences when they are green. It is important to closely monitor their condition, as the head quickly overripe, in just 2-3 days. If you miss the moment, it will cover with small buds, which will then turn into yellow flowers. You can no longer eat such a vegetable. First, the main stem of the broccoli is cut. By the time of maturity, its length should reach 10 cm.After its removal, an additional crop can be harvested, formed on the lateral shoots. Not only the broccoli inflorescences themselves are edible, but also the upper part of the stem.
Collecting heads is best done in the morning, as they wither under the influence of sunlight. Broccoli inflorescences that ripen early are not suitable for long-term storage. You can do with them in 2 ways: immediately cook or freeze. The crop harvested in mid-autumn can be stored for up to 3 months. It needs coolness to stay fresh. You will need to put the heads in the refrigerator or basement.
Broccoli has an interesting twist. Even after being removed from the soil, its bushes are capable of forming new ovaries. If, in the process of preparing the garden for winter, pull them out by the roots and leave them in the beds, then after 1 month it will be possible to cut off the last juicy inflorescences from them.
Asparagus has not yet gained great popularity among summer residents, but this culture deserves attention. Eating the flowers regularly is good for your health, and preparing them is quick and easy.Broccoli dishes will add variety to the diet, because there are many recipes for them. It can be boiled, fried, stewed with other vegetables, steamed, used as a filling for pies.
Caring for asparagus cabbage will not take much time. They grow it not only in the garden. At home, you can get inflorescences rich in vitamins all year round by planting seeds in wooden boxes and putting them on a balcony or loggia. Broccoli is almost not afraid of cold weather, in the open field it is rarely affected by pests, it loves damp weather. It is enough just to water and feed the plantings on time, and you can enjoy the fruits of your labors until late autumn.
Broccoli is recommended by many nutritionists. This Mediterranean culture can grow not only at home, but also in the garden, especially since it is incredibly useful - it contains many minerals and vitamins.
How to grow broccoli. Planting and grooming secrets
Features of broccoli cabbage
This culture is known primarily for its anti-cancer and dietary properties, in addition, it stimulates the process of blood formation. Broccoli is especially beneficial for those suffering from diabetes or heart disease, and because of the high fiber and folic acid content, cabbage is also recommended for pregnant women.
Broccoli cabbage - useful properties
Nutritional value and chemical composition
Note! It is believed that even a "lazy" summer resident is able to grow broccoli. The culture is easy to care for, as you yourself will see by reading the instructions and recommendations given in the article. But first, we advise you to find out what the plant is.
Broccoli is a cruciferous crop with stems that can reach 0.8-0.9 m in height. At the top of the stems, many buds are formed - they are edible. Outwardly, the culture resembles cauliflower, but compares favorably with it in that it forms several heads at once.
Growing broccoli in the garden
There are two types of broccoli, consider them.
- Asparagus... It has a large number of heads of cabbage on thin stems. Edible in this case are just the stems, which are very similar to asparagus (hence the name). Inflorescences can be both green and purple.
- Calabrian... A fairly large head of cabbage, located on a massive stem. Very similar to cauliflower, only the inflorescences are green. Although there are varieties with white inflorescences.
Types of broccoli cabbage
Broccoli Romanesco
The described culture is considered one of the most unpretentious representatives of the family. She should not be shaded because she loves light. Moreover, too small heads can form due to shading. The acidity of the soil should be between 6.7 and 7.4 pH. Potatoes, onions, pumpkins, carrots, cucumbers, legumes and cereals can act as a precursor to the plant.
Express analysis of soil acidity
Note! If cabbage grew on the site, then over the next four years other plants need to be grown there.
The process of growing broccoli, as already noted, is extremely simple. The culture can be grown even on the windowsill, although this is not what we are talking about now. Today you will learn how to grow broccoli in your vegetable garden.
Stage one. Seed preparation
Sift the dried seeds, leaving only the largest of them for planting. The seed treatment procedure consists of several stages, let's get acquainted with them.
Preparing seeds for planting
Step 1... First, immerse the seeds in water, the temperature of which is about 50 degrees, for 20 minutes, and then in cold water, but for a minute.
Step 2. Submerge the seeds in solutions that contain beneficial trace minerals. In parallel, this will serve as additional protection against various infections. First of all, prepare a solution of potassium permanganate (1 g) and boric acid (0.5 g) by mixing the components with 1 liter of water.Then insist the seeds in the resulting product for 12 hours.
Preparing a solution for soaking seeds
After that, immerse them in another solution prepared in advance (dilute 1 tablespoon of wood ash in 1 liter of water, then leave for 48 hours), and leave for another five to six hours.
Step 3. Rinse them with clean water.
Step 4. Refrigerate for 24 hours.
Step 5. Spread the seeds on a clean piece of cloth to dry out slightly. Never overdry!
Step 6. Everything, now you can plant seeds.
This can be started already in March-April. As for the March seedlings, they need to be picked and planted in a greenhouse, after which - in open soil. You can immediately plant the April one in the garden without resorting to a greenhouse.
Sprouted seedlings
To obtain a harvest throughout the season, seeds for seedlings should be sown in two or three periods, the interval between which should be 12-15 days. Thanks to this, you will be able to harvest until the onset of autumn. In addition, in May, seeds can be planted seedlessly, that is, in open soil, but subject to warm weather.
In the photo, the process of planting seedlings in the ground
Stage two. Seedling
You can grow seedlings in a greenhouse or in small boxes. For this, boxes with a height of 25 cm and dimensions of 30x50 cm are suitable.
Wooden box for seedlings
Prepare the soil for seedlings as follows: mix sand with turf and peat in equal proportions, and scatter the resulting mixture into the boxes, after placing the drainage there.
The best soil for seedlings
It is also recommended to add a little wood ash to the soil to neutralize acidity and provide all the necessary trace elements.
In the photo, ash for adding to the ground
24 hours before sowing, water the soil with a solution of potassium permanganate to avoid the development of a disease called "black leg". But in the future, it is better not to use potassium permanganate - because of it, the acidity of the soil will increase, which will not "like" broccoli.
You can also use small pots for seedlings.
Seedlings in a honeycomb box
If boxes are still used, then for planting the seeds, make furrows 1-1.5 cm deep in about 3 cm increments.The distance between plants within one furrow should be at least 2.5 cm.After planting, maintain the temperature at 20 degrees , after emergence, reduce it to 15 degrees and maintain it at this level until the very transplant. Water seedlings sparingly, once every two days. Do not overmoisten the soil, because this, again, will lead to the development of a "black leg", while a moisture deficit is dangerous for a bad harvest.
"Blackleg"
Note! If the seedlings grow poorly, you can feed them with a solution of potassium chloride, superphosphate, and nitrate (20 g each for a bucket of water). It is important that feeding is carried out only after the second leaf is formed.
We carry out top dressing after the formation of the second leaf.
Stage three. Dive
Diving, as well as transplanting, the described culture does not tolerate well. Nevertheless, many gardeners still recommend diving broccoli and, if possible, planting it in the soil along with a clod of earth. In the greenhouse, diving can be carried out 14 days after seedling formation. But due to the fact that after picking the growth of crops slows down, the procedure can be performed immediately before transplanting.
Dive broccoli seedlings
You need to dive broccoli in two cases:
- if the seedlings are too thick;
- if the seedlings can already be transplanted, but the air temperature is less than 15 degrees (arrows may form with prolonged cooling).
When diving, the stems descend along the cotyledonous leaves. After 30-40 days, the seedlings can be planted.
Stage four. Transplanting
Prepare the beds in advance.
Preparing the beds
In the fall, carefully dig them up and add humus (one bucket per m.sq.) or fertilizers listed in the second stage (30-40 g each). If the acidity of the soil is increased, then liming before digging (as an option - you can do this in early spring, a few weeks before sowing). With the onset of spring, add compost (10 l / m2) to the beds.
Compost for soil fertilization
Note! Start replanting in the afternoon, preferably in cloudy weather.
Table. Instructions for planting seedlings
|
Step 1 |
Start transplanting when the seedling height is 10-15 cm. |
|
Step 2 |
Water the soil well, then start transplanting. You should first dig up and fertilize the garden as described above. |
|
Step 3 |
Dig holes 8 cm deep with a distance of 30-60 cm. The soil should reach the level of the first leaves, but do not cover them. If we are talking about a miniature variety, then the distance between the pits can be up to 30 cm. |
|
Step 4 |
Monitor soil temperature. Apply a mulch consisting of compost, bark and leaves to keep the soil cool. Pinch off the main root a little to form a good root system afterwards. |
|
Step 5 |
After planting, thoroughly water the soil with water. |
Seedless growing method
In this case, treat the soil in the same way as for seedlings. The seeds are prepared in the same way. Plant in damp and fertilized soil. When the second or third leaf appears, thin out the shoots, after which about 40 cm should remain between the plants.
Stage five. Care features
How to care for broccoli
Water the broccoli daily or every other day, preferably in the evening. Loosen the soil after watering. In hot weather, you can create partial shading, but humidification is more beneficial, so you can place large, low tanks of water next to the beds. In addition, spraying can be carried out using a spray bottle.
Plants may well grow with less watering (even weekly), but the heads in this case will be small, and their taste will be unusual. Various feeding are also useful, one of the possible schemes is given below.
First feeding. It is carried out six to seven days after disembarkation, although it is possible immediately. Urea solution should be used as fertilizer (2 tablespoons per bucket of water - this is enough for about 15 seedlings).
Urea for feeding broccoli
Second. Should be carried out two weeks later with manure diluted with water (1: 4). The resulting mixture is poured under the root.
Third... It is carried out when inflorescences begin to form. It is necessary to use a superphosphate solution (1 tablespoon per bucket of water - this is enough for about 15 plants).
In the photo, the preparation of a urea solution for feeding broccoli
Fourth... Top dressing is applied after the central head is cut.
After each fertilization, carry out hilling and loosening.
Hilling and loosening the soil after fertilization
Although if you cannot carry out four feedings, then nothing terrible will happen, since broccoli is more demanding on moisture than fertilizers.
Stage six. Protection from pests and diseases
Broccoli is quite resistant to these negative factors, and if you followed all the recommendations below, then you have already carried out prophylaxis against a number of diseases. Alternatively, you can use natural remedies. So, if you plant between celery plants, then protect the broccoli from the earthen flea. Dill, in turn, will protect against cabbage aphids, while peppermint will protect against cabbage.
Caterpillar - cabbage
In addition, you can spray the plants with a decoction of tomato tops (3 liters of water per 1 kg).
Tomato tops decoction - cooking
To combat the cruciferous flea, use chemical preparations (for example, "Iskra"), but at least 20 days before the inflorescences are tied.
Video - Features of growing broccoli
Stage seven. Fruit picking
Harvesting Broccoli
You will be able to harvest about three months after planting the seeds, however, the fruits from one plant can be removed throughout the season, since new shoots will grow after cutting.
In the photo there are yellow broccoli sprouts, but you cannot cut them off yet
Collect only green heads.If yellow flowers are observed, it means that the fruits are overripe and unsuitable for consumption.
- Determine the moment of harvest by inflorescences: if they become loose, then the flowers will bloom the next day.
- There are more nutrients in dense fruits, even if they need to be boiled longer.
Rules for cutting broccoli
Start harvesting early in the morning when the flowers are juicy. Early fruits can be frozen or stored for several days in the refrigerator, while autumn harvest is suitable for long-term storage in the cellar.
Video - Planting broccoli in the garden
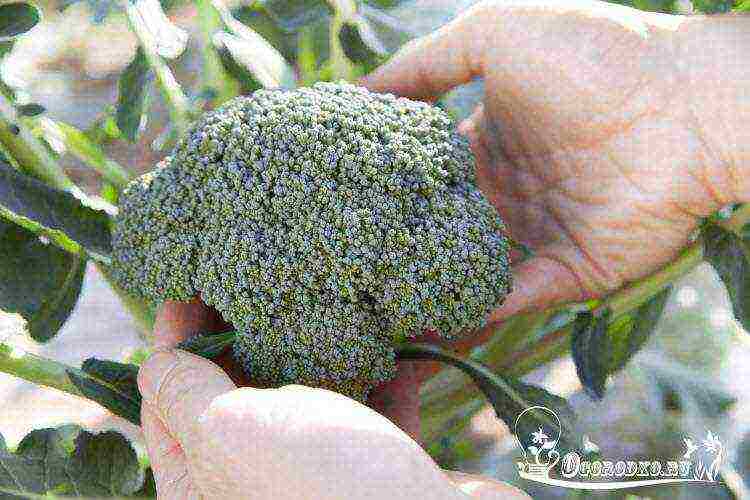
Most agronomists are sure that broccoli, the cultivation of which is not very difficult, can grow in the garden of most summer residents, the main thing is to follow the technology. However, the difficulties arising in the cultivation process do not make the vegetable popular at all. To understand the intricacies and get a good guaranteed yield, you need to know the biological characteristics of the crop, as well as agricultural techniques.

Soil for broccoli - preparing the garden
If you are going to grow cabbage in the garden, you need to take care of preparing the vegetable garden, preferably in the fall. Broccoli requires soil that is structural, fertile, fertilized, and sufficiently moist. Suitable lands are fertile and heavy, medium loam.
Since autumn, organic fertilizers are applied to the garden, 4-5 kg of manure, 5-6 kg of humus are used per square meter of future plantings, 25-30 g of superphosphate, 15 g of potassium sulfate are taken from the mineral. Nitrogen is used in small amounts or not given at all if the soil is fertile.
Broccoli cabbage is quite demanding on the presence of phosphorus in the soil, while it does not accumulate nitrates. Acidic soils are not suitable for growing broccoli, it is recommended to lime the site.
When there is no possibility of preparing the ridge in the fall, cook in the spring. As soon as the snow melts, the earth dries up a little, dig up the soil, apply the necessary fertilizing, except for nitrogen-containing ones (including manure) and leave in this state until planting. The soil will settle and it will be possible to plant seedlings.
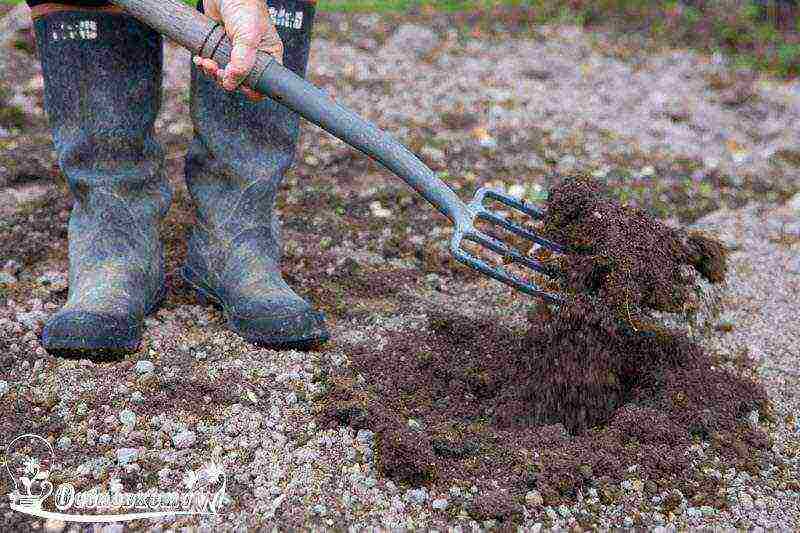 in the photo - soil preparation for planting broccoli
How to plant broccoli seeds and grow good seedlings - technology
Broccoli is grown through seedlings to get an earlier harvest, or from seed by sowing outdoors. The timing of sowing broccoli seeds for seedlings is calculated from the need and the possibility of obtaining a crop. The most valuable is the winter-spring asparagus cabbage, the harvest of which can be harvested in April-May, provided that it is grown in a greenhouse, a greenhouse.
When planning to sow seeds, consider the age of broccoli seedlings for transplanting into soil, which should not be more than 45 days, and the plants will have 5-6 true leaves. To get seedlings in February-March, sowing is done in December. When growing in winter, it is necessary to use seedling lamps in order to supplement the plants in short daylight conditions.
It is better to take soil for broccoli from the garden, not forgetting to first disinfect with a solution of potassium permanganate (3 g / l), or by calcining in the oven for two hours at a temperature of +95 ° ... + 100 ° С. Wood ash is added to the ground to neutralize excess acidity and enrich with nutrients.
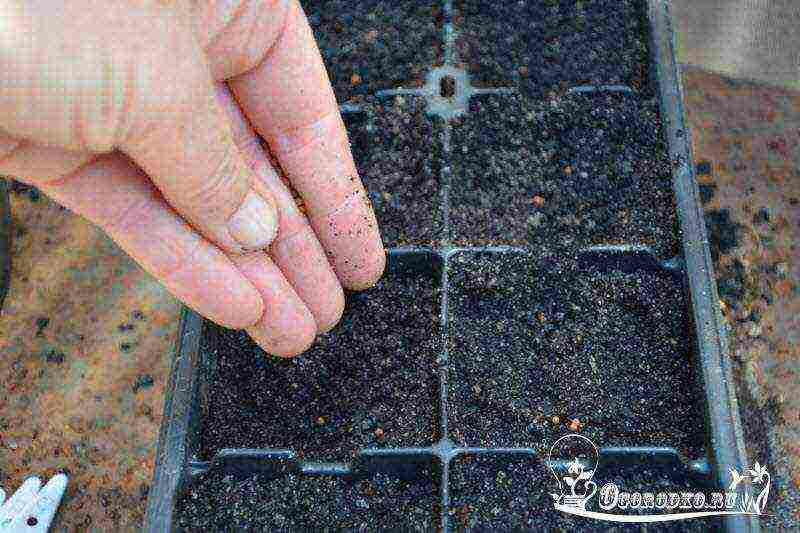 in the photo - sowing broccoli seeds
Before sowing broccoli seeds, the soil is moistened, laid out in paper, plastic cups, filling 2/3 of the volume. It is better to grow seedlings without picking, since the root system is poorly restored when damaged, the plants become weak and more susceptible to diseases.
Broccoli seeds are sealed to a depth of 1 cm, covered with earth, leaving a little space to the edge of the container. One part of the volume should remain free so that when growing and pulling seedlings it is possible to add soil mixtures.
The seed pots are placed in a convenient low container, covered with plastic wrap, bags and stored in a dark place with room temperature until shoots appear. As soon as the first loops appear, the containers are placed on the windowsill, where there is a lot of sunlight and the temperature does not exceed +22 ° C.
Unlike growing white cabbage seedlings, broccoli does not need to be lowered in temperature. The seedlings will not develop well, and a low degree may be the reason why broccoli does not tie, and has gone into color and arrow. This is the main mistake of novice gardeners and summer residents who think that broccoli needs cold. This plant is quite capricious, an increase in temperature above +25 ° C has a bad effect on growth and development.
 in the photo - broccoli seedlings
If it is too hot on the windowsill, open the windows for winter ventilation, cover the heating radiators with a thick cloth, if there is a lack of heat, create a warmer microclimate.
For the entire period of growing seedlings, it is necessary to monitor watering, do not allow the soil to dry out and excessive waterlogging. Fertilization of broccoli seedlings is performed in case of plant needs for nutrients. Usually, additional fertilizing at the seedling stage is not required, especially if ash was introduced into the soil.
Landing in open ground
Ready seedlings for planting in the ground are planted in rows, observing the distance between the plants of 30-35 cm, 0.55 m are left in the aisles. The holes are pre-watered well, then the seedling is placed and buried along the first lower leaves.
To properly care for broccoli outdoors, you should follow the cultivation techniques. Watering cabbage is carried out as needed, but at least once every 5-7 days in spring, twice a week in summer.
Cabbage is moisture-loving, take into account the weather conditions and the area of cultivation. In the Kuban, in the Astrakhan, Rostov regions, watering broccoli in the summer can be daily, as it is very hot, and in the Urals, Siberia, central Russia, the Moscow region - you need to focus on the weather and moisture in the soil, avoiding drying out.
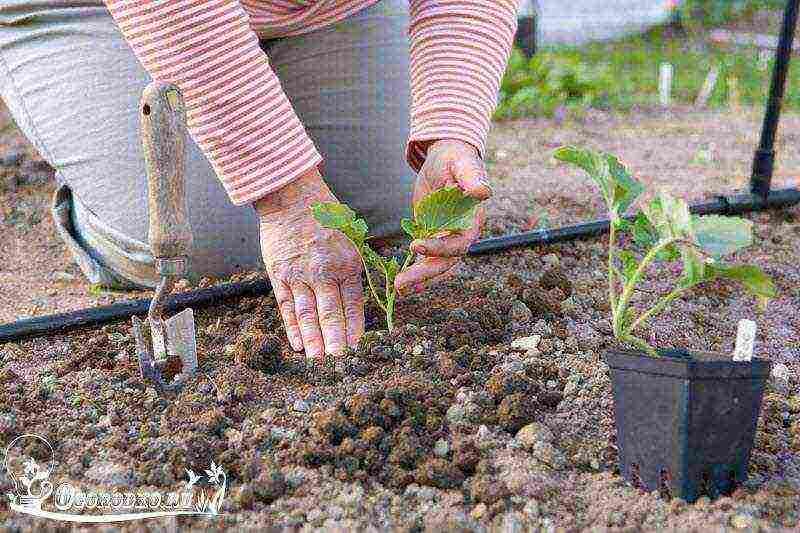 in the photo - planting broccoli seedlings in open ground
Cabbage needs loosening, the beds are kept clean. Loosen carefully, after irrigation to a shallow depth, so as not to damage the root system, about 2-3 times during the entire vegetative period.
For a good harvest, dense and large heads, the plants must be fed. The first feeding of broccoli is given when a rosette begins to form (2-3 weeks after planting in the ground), using mullein (1:30) or mineral complexes with the obligatory presence of molybdenum and boron in the composition (40 g / 10 l), which contribute to tying the head ... Fertilizer consumption per plant is 0.5 l.
The second time is fertilized, when the initial setting of a head of broccoli occurs, take 5 grams of ammonium nitrate, 30 grams of superphosphate and potassium sulfate per bucket of water. Broccoli responds well to boron feeding (1-2 grams per 10 liters).
Often gardeners break off the lower leaves of cabbage so that the head is large, and as a result, the plant loses strength and the head does not grow. That's right, removing the leaves, cabbage is stressed, vegetative ripening is disrupted, so this technique is not used on broccoli. There is no need to shade the heads of cabbage, as this is not a cauliflower cultivation.
Under good conditions, broccoli ripeness occurs 30-35 days after the seedlings are planted in the ground. If you do not know when to cut broccoli, focus on the date of transplanting seedlings and count off about a month, by this time the cabbage is ripe and ready for harvesting. It is important not to miss the collection time, which only lasts 2-3 days.
Missing the moment, you will find that the broccoli has bloomed and the cabbage has lost its presentation.It is better to remove the heads in the morning, so as not to wither. The heads of cabbage must be cut along with a part of the stem 15-18 cm long. If tightened with harvesting, the broccoli heads will become loose, and the ripening of the subsequent harvest (lateral heads) will be delayed. When the main head is cut, new shoots will grow on the stem with smaller heads.
Broccoli is the cabbage queen! It contains the greatest amount of nutrients than any other "relative". However, landowners do not deservedly deprive this crop of their attention, considering its cultivation too troublesome. Is it really?
Useful properties and biological features
Italy is considered the birthplace of this wonderful vegetable, where broccoli was grown even before our era! And only at the beginning of the VIII century of the past millennium, cabbage began its "journey" around the globe.

Broccoli is very healthy
The benefits of this vegetable crop have long been known. A large amount of vitamins (C, B, E, A), calcium, phosphorus, potassium, iron and other trace elements makes broccoli a valuable "helper" in the fight against many ailments.
The substances contained in cabbage improve cardiac activity, improve the functioning of the digestive tract, increase immunity, help restore vision, and regulate blood sugar levels. Antioxidants and amino acids slow down the aging process, and fiber helps eliminate waste and toxins. In addition, scientists recently discovered sulforaphane in broccoli, a substance that kills bacteria that cause cancer and stomach ulcers.
Unlike its white-headed "relative", broccoli does not eat leaves, but inflorescences, the harvest of which can be repeatedly removed from one plant. To do this, after cutting off the main head, it is enough to leave the plant to develop further.
New young heads of cabbage will begin to form in the axils of the lateral shoots. The main thing is to pick them on time, because broccoli tends to overripe quickly. Literally two - three days!
If the cabbage has acquired a yellow color and covered with bright flowers, then because of its bitter taste, it will no longer work to eat it.
By the way, the word broccoli, translated from Italian, means "flowering stem" and is derived from the Latin bracchium - "branch".
Growing broccoli in the form of microgreens has become a newfangled trend. Sprouts have an even richer composition than a mature crop. When using special containers, the so-called sprouts, it is possible not to use the soil and get a vitamin supplement to dishes all year round, which is extremely convenient for a city dweller.
Broccoli does not need much maintenance
It is difficult to call broccoli a finicky crop, as it grows well in all soils and in various climates. However, cool and damp weather is the optimal factor for a rich harvest. Temperature range - from 18 to 25 °.
A place where crucifers, tomatoes or beets grew is not suitable for growing cabbage. Good predecessors will be carrots, cucumbers, onions, legumes, potatoes, green manure. On heavy, fertile soil, the plant reaches a height of 70-100 centimeters. Covering the head of cabbage with leaves, as is the case with cauliflower, is not required. Youngsters endure temporary cooling down to -5 °.
The most popular varieties:
Vyarus. One of the earliest members of the family (45-50 days). It actively grows heads on additional shoots.
Tone. Dark green heads of cabbage ripen in 60-90 days. The weight of the main fruit reaches 200 grams.
Calabrese. Mid-season species. Dense, green-blue inflorescence weighing up to 400 g. Cold-resistant.
Romanesque. A very remarkable pale light green head, the brushes of which are collected in spiral cones. Harvesting - in three to four months.
Unpretentiousness and tangible benefits are strong arguments in order to start growing broccoli on your site.
The main stages of cultivation
Correct and timely preparation is the key to the success of any work. So it is with growing broccoli. Three main stages can be distinguished:
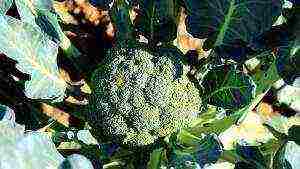
The most important thing is to choose the right variety of cabbage
The choice of the variety. The growing season for late-ripening broccoli is about 180 days, so in temperate and northern Russian latitudes, it is worth choosing early species. Mid- and late-ripening specimens are cultivated in the southern regions and are distinguished by larger and denser heads.
Location. Due to its large size and undemanding nature, the plant is mainly cultivated in the open field. The culture is photophilous, but you should not choose an overly lit area for planting. Partial shading is best, especially in the afternoon.
Growing method. Traditionally, cabbage is usually planted for seedlings, but cunning gardeners have found an opportunity not to do this, that is, to use a seedless technique. This greatly facilitates the process and saves time.
It is worth taking a closer look at both options.
Seedling method. Young animals are planted in a permanent place at the age of 30-45 days. From this, the sowing time should be calculated. For central Russia, this is March or early April. The soil mixture is prepared from turf, sand and peat (in equal proportions). It is not worth taking soil from the garden, due to the possible infection with a black leg. The seeds can be pre-soaked in a growth stimulator for two hours. Then dry it a little and place it in boxes filled with soil, deepening one centimeter.
The containers are covered with polyethylene or glass and placed in a warm place - not less than 20 °! - a place. Bright lighting is not required yet.
After the sprouts appear, for seven days the cabbage is transferred to a cool and bright room, with a temperature of about 10 °. Then they add heat during the day, and decrease it again at night. This prevents the plants from pulling out and promotes the formation of strong specimens. It is imperative to monitor the moisture content of the earthen coma and water it moderately! Diving of seedlings can be omitted. Before planting in the open ground, "babies" broccoli is gradually hardened, accustoming to the bright sun and wind.
Diving seedlings can be skipped
Seedless method. The most convenient technology for growing broccoli outdoors. The culture develops faster and healthier. Sowing time for temperate climates is the second half of April.
Pre-treatment and seeding depth are similar to the previous method. Sowing is carried out on a previously prepared site: in the fall, manure or mullein is introduced and dug deeply, in the spring the soil is loosened. The seedlings are covered with plastic bottles or non-woven material, under which they develop until three to four leaves appear. It is advisable to add ash, urea and superphosphate to each well.
The seedlings do not thicken, keeping the distance between them at 25-40 cm and 50 cm in the aisles.
Further care consists in carrying out some simple activities.
Care rules and control of pests and diseases
Taking care of broccoli includes:
- watering;
- loosening and hilling the soil;
- fertilization;
- protective measures against pests and diseases.
Like any cabbage variety, broccoli is very moisture-loving. Therefore, regular watering is extremely necessary for her. However, it is not worth flooding the site, especially for young seedlings. Excess water often causes blackleg death of plants. The procedure is best carried out in the evening by sprinkling.
While the plants are small, after "water procedures" you need to huddle them. This helps to grow additional roots, oxygenates the top layer and protects against certain pests. For example, from the cabbage fly, which lays the larvae on the ground under broccoli seedlings.
Sprinkling the trunk with soil is done several times per season, as needed.

Broccoli pests can ruin everything
If the plot set aside for growing broccoli is initially fertilized, then the crop can no longer be fed. Additional nutrient intake is acceptable in case of poor seedling formation. For these purposes, ammonium nitrate, mullein infusion, ash extract, nettle elixir and other organic and mineral compounds are used.
To get a good harvest, you should closely monitor the "health" of broccoli, periodically inspecting the bushes for the presence of pests or diseases. Ready-made insecticides can be used against the "infection", but most farmers "fight" with folk remedies.
Marigolds, dill, nasturtium or garlic planted in aisles will scare off the cruciferous flea with their smell. Crushed eggshells scattered throughout the "cabbage" area, ground hot peppers or nettle mulch will help expel slugs. Ash, tobacco dust, baking soda are all helpers in the fight against caterpillars and butterflies. Cabbage aphids are afraid of soapy water, mustard, infusion of tomato leaves.
For the prevention of diseases, it is necessary to observe crop rotation, not allowing broccoli to be grown in the same place for several years in a row. Previously, the affected soil is treated with a manganese solution or Bordeaux mixture and dug deeply.
The disadvantage of early varieties of broccoli is that it is poorly stored fresh - only 8-10 days in the refrigerator! Therefore, they try to use it without delay. Only late species can withstand two to three months of lying in the basement.
While watching the video, you will learn about growing broccoli.
Cabbage is pickled, boiled, fried, frozen or eaten raw. It perfectly retains its usefulness and color in any way of processing, which makes it a table decoration and an excellent source of vitamins.


