Content
- 1 How to get gloxinia seeds at home?
- 2 How to plant gloxinia seeds?
- 3 How to grow gloxinia from seeds?
- 4 Features of culture
- 5 Gloxinia breeding methods
- 6 Collection and timing of sowing gloxinia seeds
- 7 Step-by-step instructions for growing gloxinia from seeds
- 8 Watering rules
- 9 Top dressing
- 10 Lighting
- 11 Important points of care for gloxinia
- 12 Professional cultivation of gloxinia from seeds at home. Photo instruction
- 12.1 How to grow gloxinia from seeds?
- 12.2 How to plant gloxinia seeds?
- 12.3 When to sow gloxinia from seeds?
- 12.4 Soil for gloxinia
- 12.5 Gloxinia by seeds - possible difficulties
- 12.6 Gloxinia - care and cultivation
- 12.7 How to care for gloxinia after flowering?
- 12.8 When to transplant Gloxinia?
- 12.9 Gloxinia - dormant period
- 12.10 Gloxinia - diseases
 Gloxinia or Sinningia speciosa are very popular with flower growers. Most often, this plant is propagated vegetatively, but there is another way - to grow gloxinia from seeds at home.
Although it will take a little more effort, the result will live up to expectations. This is the only way a florist can:
- become the owner of self-created hybrids;
- to see on your windowsill the flowering of rare varietal specimens that local lovers of indoor plants do not have.
Unfortunately, not everyone has the patience and perseverance to get adult flowering plants from gloxinia seeds. Sometimes annoying mistakes in germination and care interfere with success. How to avoid them and where to start if you want to propagate this indoor culture using seeds? First you need to take care of the seed.
How to get gloxinia seeds at home?
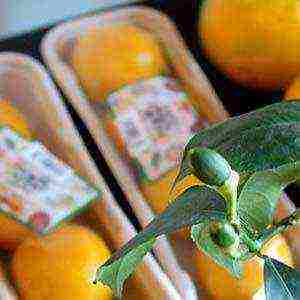
 If the seeds of varietal or hybrid plants are purchased at the store, they do not need special preparation, and they are completely ready for planting in the ground. But when the goal of the grower is to get his own copyright hybrids, you will have to go all the way: from pollination to collecting mature seeds of gloxinia.
After the pollen from one flower is transferred to the pistil of another, after a few days the corolla withers, and the future seed capsule remains on the peduncle. The development and maturation of seeds, depending on the variety and conditions of maintenance, takes from 6 to 9 weeks.
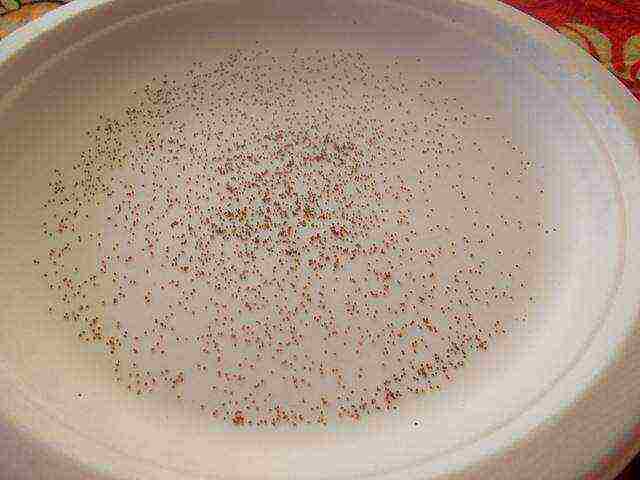
The seeds are very small. Therefore, before planting gloxinia with seeds, you need to try to collect them. As soon as signs of opening of the capsule appear, it is cut and carefully transferred to a separate dry container. This will make it easier to collect the brown, pointed-oval seeds needed for planting.
How to plant gloxinia seeds?
 Sowing is carried out on the surface of a moist loose substrate without embedding into the soil. At this stage, there is no need to make a special mixture, it is enough to add a little vermiculite and crushed charcoal to the ready-made universal peat-based soil. Gloxinia seedlings feel good in small peat tablets.
The soil for gloxinia grown from seeds at home must be sterilized using a microwave oven, oven or freezer. In the latter case, it takes at least 1-2 days to get rid of pathogens and pests.
Getting gloxinia seedlings from seeds at home can be carried out in shallow containers. During the growth period, the senses dive several times, so a layer of soil no more than 3 cm is sufficient for sowing.
When the seeds are evenly distributed over the surface of the substrate, it is additionally sprayed with a spray gun, taking care not to wash out the small seed material. Then the container is tightly covered with foil to prevent moisture evaporation, and placed in a warm, bright place for germination.
To facilitate growing from seeds and caring for gloxinia in autumn and winter, when development is hampered by a lack of light, you need to take care of additional lighting in the room greenhouse in advance.
Daylight hours, regardless of the season, should be at least 12-14 hours, and the temperature should be 20-24 ° C.
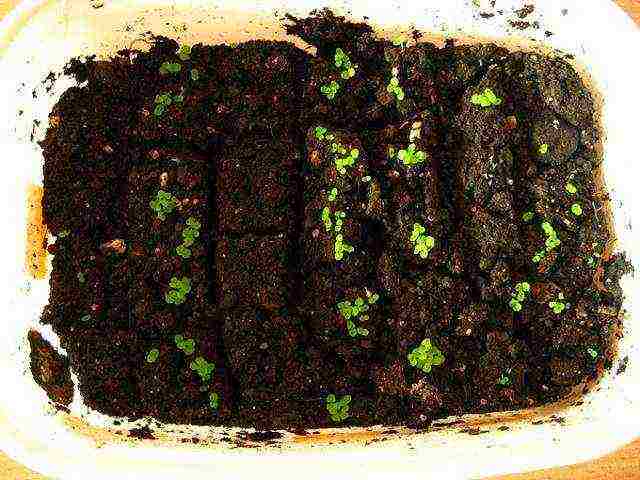
 After 7-10 days, tiny green shoots appear on the surface of the substrate, and later gloxinia from seeds at home need watering and several picks.
How to grow gloxinia from seeds?
Getting tiny seedlings of gloxinia is not as difficult as then growing from them independent plants that can bloom. Receiving enough light, heat and moisture in a greenhouse, the sprouts continue to develop until after about a month real leaves appear on them, and individual gloxinia begin to press each other.
 At this time, young specimens should be dived. This procedure, which is important for growing and caring for gloxinia, activates the growth slowed down due to the density of plantings, as a result, the plants will get stronger faster.
From sowing to planting young rosettes in separate pots, 3 to 4 picks may be required. Their number depends on the varietal characteristics of the plant, the conditions created and the density of sowing.
The gloxinia seeds obtained from the seeds are carefully removed from the old container, taking care not to damage the roots and crown of neighboring outlets. The first transplant is carried out into a fresh substrate in 10-15 pieces. And after that, the plants are again placed in the greenhouse under the lamps.
 At the stage of the second and third picking of gloxinia, it is already possible to transplant individual pots with a volume of no more than 50-100 ml. Such sockets are already strong enough to harden them, gradually accustoming them to air in the room.
Additional feeding of young gloxinia from seeds is not required, since during picks they are transferred to a nutrient substrate that meets the needs of small seedlings.
By the age of ten weeks, young bushes are transplanted into their own pots. It is better to take small containers with a diameter of 9-10 cm, in which the width is equal to the height. For constant soil moisture, you can use a simple wick passed through a drainage hole, or a room drip irrigation system.
With good care, growing gloxinia from seed gives consistently high yields. And already at the age of three months, the strongest seedlings are gaining the first buds.
Growing amazing gloxinia from seeds - video
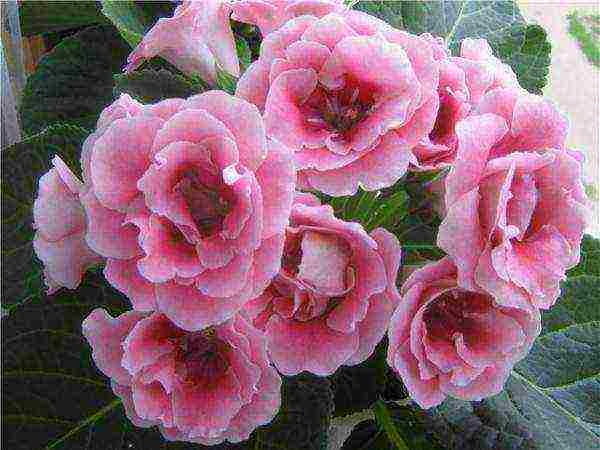
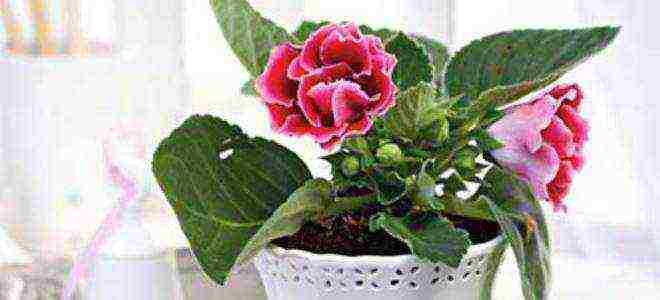
Gloxinia can often be found in flower beds. Its flowers, shaped like bells, are distinguished by a variety of shades. The short stem and the fleshy leaves bordering it, which have a velvet texture thanks to the villi, are almost invisible under the rich bouquet of large flowers.
Growing gloxinia from seeds at home
Gloxinia Blanche De Meru
Features of culture
The plant owes its unusual name to the German scientist Benjamin Peter Gloxin, who devoted his life to biology. Another name for the flower is sinningia.
In some varieties of gloxinia, the flowers are covered with bright specks inside, while in others they can be decorated with frills in contrasting colors along the edge. Flowers can be smooth or velvety, depending on the variety.
Gloxinia
Growing gloxinia in a greenhouse
Gloxinia can be grown from seed at home, which is time consuming and effortless. Despite the fact that this ornamental plant is very whimsical to the conditions of detention, it is very popular.The flower will retain its attractive appearance for many years, delight with abundant flowering and fresh velvety leaves, provided that it is properly cared for.
Gloxinia terry
Gloxinia breeding methods
Gloxinia can be grown at home using one of several propagation methods for this plant; the most common are the following:
- breeding with a leaf separated from an adult plant;
- division of tubers;
- sowing seeds.
Important! Indoor plant lovers rarely use tubers for breeding gloxinia, considering this method ineffective. Parts of the tubers must be planted in the ground, where they may not take root for a long time.
Gloxinia tuber
The easiest way to quickly grow a new gloxinia bush is to root a leaf cut from an already growing bush. You need to take a healthy leaf with a petiole, the length of which exceeds 2 cm, and place it in a container with water. When the roots begin to grow, it is necessary to transplant the leaf into the ground. Large leaves can be divided into parts. Parts of the leaf should also be placed in water until the roots form.
Reproduction of gloxinia by leaf fragments
Reproduction of gloxinia leaves
Breeding gloxinia with seeds is not an easy way. The seed of the plant is small and difficult to germinate. The sprouts that appear are very difficult to care for, they grow slowly. Seed propagation is used mainly to obtain new varieties of gloxinia. In this article, we will provide step-by-step instructions for growing a plant at home in this way.
Gloxinia - seed propagation
Gloxinia Brocada blue F1
Collection and timing of sowing gloxinia seeds
In order for the reproduction of gloxinia by seeds to become possible, it is required to make their competent collection. First, the plants are pollinated with a piece of cotton wool, which needs to touch each pistil of all gloxinia flowers that are in the house. After some time after the petals fly around, you can see the formed seed boxes in the center of the flowers. After about a week, these boxes will begin to open.
Collecting Gloxinia Seeds
Broken seed pods must be cut off. To collect the seeds, the opened box is lowered into a glass, into which sufficiently mature brown seeds will be poured. These seeds do not require any treatment before sowing. For growing gloxinia at home, you can also use purchased seeds.
Gloxinia seeds
Gloxinia seeds in granules (pelleted)
Important! It is best to plant gloxinia seeds at the end of winter. If sowing is carried out in the fall, then for the seedlings it will be necessary to organize lighting and maintain the required temperature in the room where it will grow. If this is not done, the plants will stretch out.
Step-by-step instructions for growing gloxinia from seeds
Growing gloxinia from seeds
Table. The main stages of growing gloxinia from seeds.
|
Step 1. Preparation of materials and tools |
It is required to prepare a container for seedlings with a transparent lid, soil, seeds, expanded clay for drainage and a spray bottle. |
|
Step 2. Drainage |
The bottom of the container is filled with expanded clay with a layer of one centimeter. |
|
Step 3. Preparing the soil |
For sowing gloxinia, a soil mixture containing peat is suitable. This will provide the roots with the necessary elements for better development. The soil must be poured over the drainage with a layer of three centimeters and tamped a little. |
|
Step 4. Moistening the soil |
Then you should thoroughly irrigate the soil with water using a spray bottle. |
|
Step 5. Sowing seeds |
The seeds are spread over the topsoil. In order to carry out this procedure carefully, you must arm yourself with a paper sheet bent in the middle. Sprinkle seeds on the fold. Then you should distribute small grains over the area of the container filled with earth.If granulated seeds are used for sowing, they can simply be laid out by hand. |
|
Step 6. Moistening after sowing |
After that, the soil is slightly irrigated to slightly deepen the seeds. It should be borne in mind that the grains need lighting for germination. |
|
Step 7. Backlight |
Next, you need to close the container with a lid or stretch a transparent film over it. The container with seeds is installed in a warmed place under additional lighting. Until the seeds germinate, it is undesirable to air the container. It is important to prevent moisture evaporation. |
|
Step 8. Waiting for seedlings |
After a week, the first sprouts of gloxinia will begin to appear. During this week, the soil with seeds must be irrigated with a spray bottle every 3 days. |
|
Step 9. Picking Gloxinia seedlings |
After about 30 days, the seedlings will grow so much that they become cramped. At this time, they should be transplanted into a similar container, leaving a much smaller number of seedlings. |
|
Step 10. The picking process |
The sprouts are carefully removed from the soil together with a lump of earth using a spoon and transferred to a new container. |
|
Step 11. Watering the dived plants |
Then they need to be watered a little, avoiding strong water pressure, for example, when using a spray bottle. After watering, the container with seedlings is covered with a lid. The picking of gloxinia seedlings can be carried out up to 4 times. |
|
Step 12. Transfer to pots |
When the leaves of the seedlings reach 2 cm in width, the plants will need to be transferred to separate cups and placed in a sufficiently illuminated place. Shortly before this, the seedlings need to be taught to stay without a greenhouse by opening the lid for a while. Gloxinia is transplanted into flower pots when the plants are already sufficiently prepared for this. The diameter of the pot should be about 12 cm, and the soil will fit the same as the seed was sown in. |
Watering rules
Proper care for gloxinia growing at home includes regular watering and fertilization. When plants grow vigorously, the soil needs to be watered quite often to prevent it from drying out. In this case, the formation of excess moisture on the roots should not be allowed to avoid rotting.
Gloxinia care
Important! You can determine the moment when it is necessary to water the plant again by the dried surface layer of the soil.
Water used for irrigation should be filtered in advance. Its temperature should exceed room temperature by about 2 degrees in order to reduce the likelihood of rotting tubers. The latter absorb warm water more easily.
When watering, it is highly discouraged to let water get on the flowers and leaves of the plant. To avoid this, you can pour moisture into the pallet. When the soil has absorbed enough water, the excess should be removed from the pan. During the period of rapid flowering, gloxinia needs more active irrigation.
Pallet irrigation scheme
Top dressing
The fact that gloxinia is properly cared for is indicated by a large number of buds during the flowering period. Their number can reach 20 per bush. Timely fertilization will contribute a lot to this.
During the growing season, it is recommended to feed the plant 3 times a month. For this, fertilizers are purchased for indoor plants. After approximately August 15, gloxinia begin to plunge into a resting stage. At this time, the plant needs fertilizing that contains potassium and phosphorus, but does not include nitrogen. After the completion of the rapid growth, it is not required to fertilize with gloxinia.
Complex flower dressing
Important! It is possible to determine that the plant's need for nutrients is not satisfied by its external state. The growth of gloxinia slows down, the foliage turns pale, the flowers become smaller, the duration of flowering decreases.
But an overdose of fertilizers can be harmful.Therefore, you should carefully consider the recommendations indicated on the packaging of the drug, on the amount and frequency of feeding.
Lighting
The plant needs to provide access to a light source of sufficient intensity. In this case, it is undesirable to get on the leaves and flowers of direct sunlight. This can lead to burns on the sheets and, in the future, to the death of gloxinia. Plants feel best on the windowsills of windows facing west or east. If the plant lives on the windowsill of a south-facing window, then it needs shading. Gloxinia needs a long day of light, at least 12 hours. With a lack of natural light, she needs to provide additional lighting with a phytolamp.
Growing gloxinia
Deviation from at least one of these principles of caring for gloxinia can lead to inhibition of its growth and loss of its attractive appearance. A healthy plant has a small stem and dark green leaves.
Important! The lack of lighting is determined by the pale color of plant parts and their elongation, and the excess is determined by the yellowed leaves curved at the edges and shortened flower stems.
The plant does not tolerate changes in temperature and drafts. There is no need to ventilate it. The air around the gloxinia must be sufficiently humid. To maintain the required humidity, you can place a container of water around. The ingress of moisture on the leaves and flowers must not be allowed, therefore irrigation from a spray bottle is excluded.
Gloxinia does not tolerate drafts and temperature extremes
During the growing season, it is recommended to keep the temperature in the room where gloxinia is kept at + 18 ° C. Overheating of a plant can be determined by rising leaves, and freezing, on the contrary, by dropping leaves. This also indicates insufficient watering. In the resting phase, gloxinia feels good at a temperature of about + 10 ° C.
Several varieties of gloxinia
Important points of care for gloxinia
Summing up, here are the basic rules that must be followed in order to get beautiful gloxinia from seeds at home.
- Gloxinia prefer spacious windowsills with bright enough light. But direct sunlight should be excluded.
- Watering the plant is required in a timely manner, avoiding stagnation of moisture at the roots.
- To maintain the attractive appearance of gloxinia, it is recommended to remove yellow leaves and wilted flowers from it.
Yellow leaves need to be removed
- During the period of rapid growth, the plant needs regular feeding, and in the dormant stage it must be stopped. Watering at this time also needs to be suspended.
- Illiterate care of these plants leads to the occurrence of diseases in them. Bay of roots is dangerous by their decay. Prevention of the appearance of rot of tubers includes processing the soil with the preparation "Fitosporin-M" before planting gloxinia. It can also be added for some time after planting in water for irrigation.
"Fitosporin-M"
- The delicate leaves of Gloxinia seedlings can be affected by spider mites. The twisting of leaves and the formation of a web on them signal the appearance of this pest. Then dots appear on the sheets, turning over time into brown spots. It is recommended to use insecticides to kill the tick. To do this, they need to be applied three times, pausing between treatments for four days.
Spider mite
- The summer enemy of gloxinia is thrips. These are small insects, from which gray spots appear on the flowers. To get rid of them, you need to cut off the affected flowers and buds, and treat the soil with Aktara. The treatment should be completed by spraying the foliage with insecticides.
Pests thrips
- At the end of autumn, the tubers can be removed from the pots, cleaned of soil, folded into hermetically sealed sachets, mixed with peat and peat, taken in equal parts.Store bags with gloxinia tubers at + 15 ° C.
Video - Growing gloxinia from seeds at home
 Have you decided to update your floral collection and have chosen Gloxinia? You don't have to buy an adult plant from the store to do this. Gloxinia is very easy to grow from seed at home. To do this, it is enough to choose the right gloxinia seeds, sow them, followed by picking the seedlings. After 6 months, gloxinia from seeds at home will reward its owner with abundant flowering.
Professional cultivation of gloxinia from seeds at home. Photo instruction
How is gloxinia obtained from seeds? How is a flower grown from seeds at home? How is the planting carried out, the choice of the soil mixture, the subsequent care of the crops? Professionals share their experience with photography.
In addition, experts recommend propagating gloxinia with a leaf, if you have never had to work with seeds.
How to choose gloxinia seeds? Photos of popular brands... The best varieties are imported from Germany, Holland and Great Britain. A domestic manufacturer has a good seed.
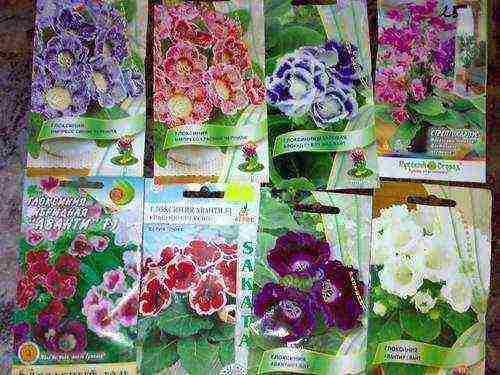
Beautiful and healthy seedlings are produced by a hybrid seed of the first (F1) and second (F2) reproduction. If flowers are pollinated from these seeds, then the next generation may not have the quality characteristics of the parents. Gloxinia seeds in the photo are very small, dusty.
To improve germination and convenience during sowing, they are treated with special nutrients (pelleted). As a result, the seed is covered with a film.
The germination capacity of gloxinia seeds, if stored correctly, do not change for 5 years. However, experts recommend planting in the first year after harvesting or packaging grain.
When to sow gloxinia from seeds? Planting time is not critical. Sowing gloxinia seeds for seedlings can be carried out both in autumn and in winter. However, in this case, the plants are provided with the required temperature regime and the length of daylight hours. Seedlings are highlighted. Otherwise, it stretches out and falls.
Grow pots... Sowing gloxinia with seeds is carried out in shallow and wide containers, which must be equipped with drainage holes. The containers should be convenient for organizing a greenhouse. You can use food grade, plastic containers with a lid.
Soil selection. Planting gloxinia seeds is carried out in the following soil mixture: take one part of coniferous soil and deciduous soil. There should be no humus in the mixture.
Planting directly... How to plant gloxinia seeds? Small expanded clay is poured onto the bottom of a pre-prepared container with drainage holes. Then a soil mixture is laid on top of the expanded clay. It is preliminarily placed in the microwave for 2 minutes. The soil should be moist, but there should not be an excess of moisture in it. For this, the earth is sprayed from a spray bottle. If properly prepared soil is squeezed in your hand, it forms a lump, which disintegrates when lightly pressed.
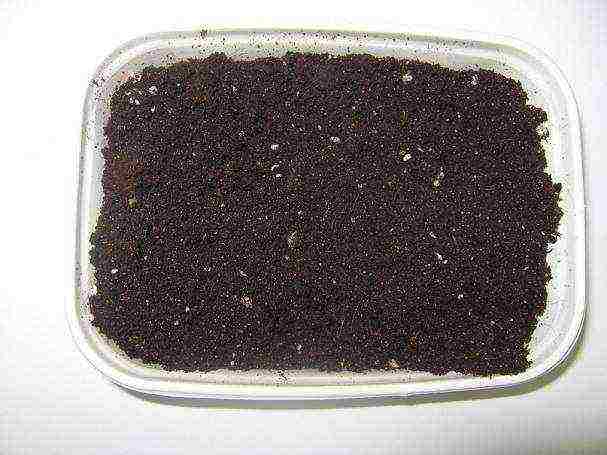
The soil should not reach the edges of the container by 4-5 cm, if the container will simply be covered with film. The earth also does not need to be compacted. Gloxinia soil should be light, nutritious and loose. It is advisable to sprinkle sifted peat on top of the soil.
How to sow gloxinia with seeds? You do not need to make grooves for this. Gloxinia seeds germinate in the light, and therefore they are not sprinkled with soil. They are simply laid on top of the ground and lightly sprayed with warm, settled water. If the seed was yeast, the nutrient film must not be allowed to dry out.
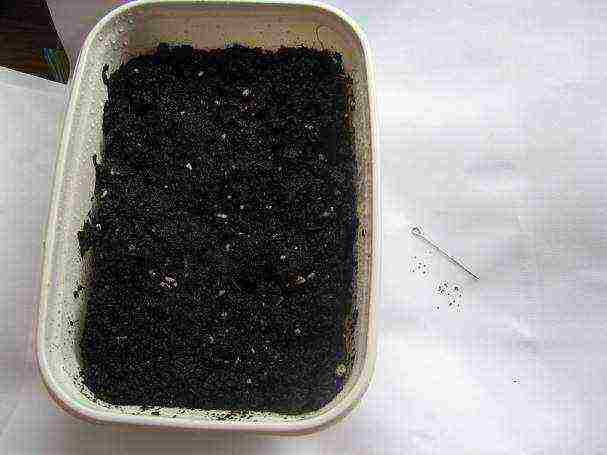
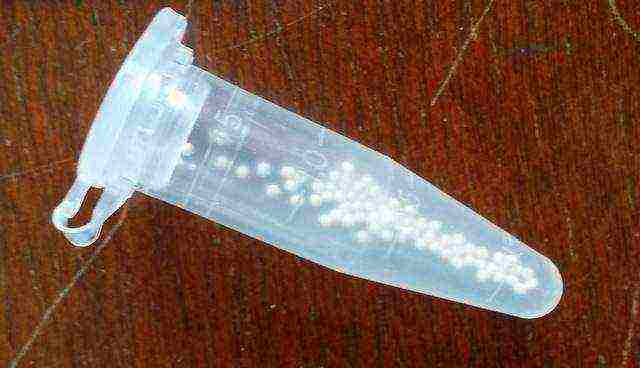
How is it convenient to do everything? To do this, the grains are laid out on an A4 sheet folded in half, and then gently moved to the ground with a needle. Spray seeds from a spray bottle at a distance of 40 cm.Otherwise, the seed will go deep into the soil and its germination will deteriorate.

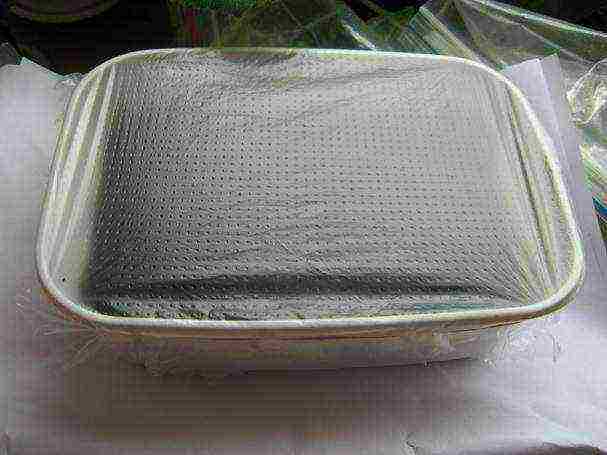
After the seeds have been evenly distributed over the soil, the container is covered with a film with small ventilation holes.
 How to grow gloxinia from seeds? Basic rules for caring for crops:
- Lighting... The container should be placed in a bright place, but not in direct sunlight. It should be diffused light. If the reproduction of gloxinia by seeds is carried out in the autumn-winter period, then the container is placed under a fluorescent lamp at a distance of up to 40 cm.The distance will depend on the power of the lamp. The more powerful it is, the further the container is placed. Seedlings need to be illuminated for 12-14 hours. Otherwise, the seeds will not germinate.
- Temperature... The container must be kept at a temperature of + 22 ... + 26 degrees. This has a positive effect on the germination rate of the seed. As soon as the first shoots appear, the temperature is reduced to + 18 ... + 20 degrees.
- Watering... Do not allow the soil to dry out. Watering is carried out as needed from a spray bottle or through a pallet. Although watering is often not needed. After all, the container with the seeds is covered with foil. It prevents excessive evaporation of moisture.
- Airing... You need to air the container with seeds 2 times a day for 10-15 minutes. This will prevent condensation from forming on the film.
The timing of germination of gloxinia from seeds... If the correct conditions for growing gloxinia from seeds were observed, the first shoots of ordinary, non-hybrid plant varieties appear on days 10-14. At low temperatures and insufficient lighting, germination takes up to 1 month. Germination of seeds of calico, tiger, double varieties occurs 14-20 days after sowing.
Seedling care... On the 2-3 day after the emergence of shoots, the film is gradually removed from the container. At the same time, the temperature in the room where the sprouts of gloxinia are located is lowered to + 18 ... + 20 degrees. Otherwise, the seedlings are pulled out.
The 1st pick is carried out 1 month after the emergence of shoots. At this time, one rosette of full-fledged leaves should appear on the plants. The first pick is carried out if the gloxinia seedlings are thickened. If the seeds were planted at a sufficient distance from each other, the first pick is skipped. Gloxinia dive into the soil of the same composition as the soil for sowing seeds. The distance between the seedlings is 2 cm.
2nd pick. It is carried out 2 months after germination. By that time, young gloxinia should have two pairs of leaves. The pick is carried out into the soil of the same composition as before at a distance of 4-5 cm. This stimulates the growth of seedlings.
3rd pick. It is performed when the plant has three pairs of leaves. The pick is carried out at a distance of 10 cm or in separate containers for each gloxinia.
For the successful cultivation of young gloxinia, the correct conditions must be observed:
- temperature + 20 degrees;
- a large amount of diffused, sunlight;
- in the hot season, spraying at night;
- watering as the top layer of the soil dries up.
If young gloxinia has received the right home care, it will bloom 5-6 months after germination. Young gloxinia in winter at home does not need rest, and therefore it continues to grow throughout the winter.
The bloom of gloxinia is very beautiful, because the plant is very popular among gardeners - experienced and beginners. Often it is propagated vegetatively, that is, by cuttings or tubers. But another way is also possible - by seeds.
How to grow gloxinia from seeds?
If you're ready to put a little more effort into growing this beautiful indoor plant, seed gloxinia will fulfill all your expectations. You will be able not only to see the rarest examples of varieties that none of your familiar flower growers have, but also to breed new hybrids on your own.First, you need to gain experience and try to simply grow gloxinia from seeds at home, avoiding common mistakes in germination and bringing the seeds to an adult flowering plant.
How to plant gloxinia seeds?
Regardless of whether you bought ready-made seed or collected it yourself, planting gloxinia with seeds consists in distributing them over the surface of the moistened soil without embedding in the ground. The seeds are very small, so you need to try to scatter them as evenly as possible. With purchased seeds, it is a little easier - they are granular, so there are no problems with sowing.
After that, you need to spray the seeds with water from a spray bottle, cover the container with polyethylene and put it in a room where the temperature is + 20-25 ° C until the first shoots appear, which hatch for 10-15 days. Until this moment, there is no need to water the plantings. As soon as the first shoots begin to appear, the gloxinia of their seeds at home needs regular ventilation so that the moisture under the film does not destroy the plants. At the same time, moderate watering of seedlings begins.
To achieve the desired results, it is recommended to carry out 4 picks of seedlings:
- the first one after the appearance of 2 true leaves (about a month after the seeds have spiked) in a container of 10-15 pieces;
- the second and third transplants are made as the seedlings grow into separate pots of 50-100 ml;
- the fourth pick falls on the 10-week age of the bushes, they are transplanted into pots 9-10 cm in diameter.
When to sow gloxinia from seeds?
If you plan to have time to grow a flower before summer, so that it blooms in July-August, sowing work should be started in January-February. In general, the time when you need to sow the seeds of gloxinia, begonias will largely depend on whether you use only natural light or use special lamps for additional lighting. In the first case, it is necessary to sow not earlier than February-March, so that the sprouts have enough light, since gloxinia is very photophilous. With additional lighting, you can sow seeds throughout the year.
Soil for gloxinia
The land for gloxinia is critical. The entire success of the event will depend on its quality and proper preparation. A ready-made universal peat soil is suitable, but you need to add a little vermiculite and fine charcoal there. You can make your own mixture of peat, turf and leafy soil with the addition of sand. It is important that the substrate is light, nutritious and breathable.
To get rid of microbes, the soil must be sterilized. You can ignite it in the oven (microwave) at high power for 10 minutes, freeze it in the freezer for at least 2 days, or pour it over with a weak solution of potassium permanganate. To prevent stagnation of moisture in the soil and improve air exchange in it, holes are made in the bottoms of containers for planting.
Gloxinia by seeds - possible difficulties
There are several reasons why gloxinia does not bloom:
- A plant grown from seeds did not have time to form a tuber. This is especially true for late planted plants. The full flowering of gloxinia is observed at the age of 6-7 months, while 6 pairs of leaves should form in it. If this moment coincides with the wintering time, you do not need to send your plants to rest, because you risk ruining them. Another likely cause of late tuber formation is over-watering.
- The plant lacks nutrients. When gloxinia is planted in poor soil, its growth and development are slowed down and flowering is delayed. An excess of nitrogen can also lead to a lack of flowering.
- The flower lacks light. For full bloom, gloxinia needs good lighting.So that the buds are laid and do not turn out to be empty flowers, it is necessary to put the pots on sunny windowsills or arrange additional artificial lighting for them.
- Pot does not fit. The container in which gloxinia is grown from seeds at home should be low and wide. Ideally, its diameter and height should be the same. In a deep and too large pot, the flower will grow a tuber for a very long time, and until the process is completed, flowering will not come.
Gloxinia - care and cultivation
At the last flower transplant, a soil for flowering plants is used, which consists of identical parts of leaf and peat soil, sand and sphagnum. There must be drainage at the bottom of the pots. Watering the plants must be extremely careful so that drops of water do not fall on the leaves. Knowing what gloxinia loves, how to care for it, already at the age of 3 months you can expect the first buds from it.
For rapid and proper development, the plant requires periodic fertilizing with complex fertilizer, while during flowering - fertilizers for flowering plants. It is extremely important for this indoor flower to have proper lighting - without direct sunlight, but at the same time bright. The optimum temperature during the growing season is 20-22 ° C.
How to care for gloxinia after flowering?
Special care is required for gloxinia after flowering, which will ensure a gradual onset of a dormant period for its tubers. So, what to do next if the gloxinia has faded:
- reduce watering with the onset of September;
- reduce the amount of light by moving it to a darker place;
- stop feeding fertilizers;
- reduce the temperature of the content to + 14 ° C.
Gradually, the leaves will turn yellow and fall off, the stem will dry out. As soon as this happens, you can cut off the ground part of the plant, and put the pot with the tuber in a room with a temperature of + 10 ° C and keep it there until spring, slightly moistening the ground once a month. So that moisture from the soil does not evaporate quickly, you can seal it on top with a layer of sand. An arc way to store the tuber is to dig it out of the ground, sprinkle it with sawdust or sand and put it in the warmest compartment of the refrigerator.
When to transplant Gloxinia?
After the end of the dormant period, you can transplant the tubers of the plant into fresh soil. Gloxinia should be transplanted after examining it for damage and removing it, followed by sprinkling the "wounds" with charcoal. It will not be superfluous to pre-soak the tubers in a steep solution of potassium permanganate. Prepared roots should be planted in damp ground to a depth of 5 cm and put the pot in the sun.
Gloxinia - dormant period
It is important that gloxinia winters correctly. Short wintering without observing all conditions invariably affects flowering. The tuber simply does not have time to prepare for the new season. For good flowering of gloxinia, rest is necessary for 4 months. An inexperienced grower may have a question as to why gloxinia does not sleep. The reason for this is the wrong conditions for wintering - non-observance of the temperature regime and the level of illumination.
Gloxinia - diseases
There are several reasons why gloxinia leaves curl:
- too dry or, on the contrary, excessively humid air in the room;
- the presence of a spider mite on the leaves;
- potassium overdose;
- a viral disease that does not respond to treatment (to prevent spread, it is better to discard the affected plant);
- the presence in the ground of larvae of mowers or earthworms brought in from the garden soil.
With all the necessary conditions initially met, planting seeds and growing gloxinia will not become overly difficult. Moreover, an adult plant is not at all capricious, and caring for it is simple and straightforward. The result of your work will be incredibly beautiful velvet flowers of different shades that will decorate the window sill and the room as a whole.