Content
- 1 Tips
- 2 Warnings
- 3 What do you need
- 3.1 # 1 Lzaza Submitted January 25, 2017 - 19:26
- 3.2 # 2 Pro-SS Submitted 25 January 2017 - 22:38
- 3.3 # 3 Lzaza Submitted 25 January 2017 - 23:45
- 3.4 # 4 Lzaza Submitted 25 January 2017 - 23:56
- 3.5 # 5 Dmitri Submitted January 26, 2017 - 00:44
- 3.6 # 6 Badvoice Submitted January 26, 2017 - 01:01
- 3.7 # 7 Lzaza Submitted 26 January 2017 - 01:18
- 3.8 # 8 Aol_WB Submitted January 26, 2017 - 01:43
Sometimes it is necessary to propagate good or rare yeast, of which there are very few left. Often this is done with alcohol and wine strains, if there is no time to wait for the appearance of the coveted packet on sale or delivery from another region. But you can also dilute the usual: dry or bakery pressed.

If you add less yeast than the amount recommended in recipes, fermentation will take much longer, and the taste of the finished drink may deteriorate due to a long stay on the lees. In addition, with too long fermentation, some yeast release harmful substances into the wort. Therefore, if the strain remains small, it is better to first dilute it separately in a nutrient medium and only then add it to the mash or wort.
In addition to sugar (acts as "food"), yeast needs acids and microelements that accelerate biochemical processes for rapid reproduction. The most important substances are nitrogen, phosphorus, potassium, calcium, iron and magnesium. At home, creating a suitable nutrient medium is easiest from malt (sprouted grains) or potato tubers.
Since potatoes are more accessible than malt and do not require preliminary preparation, and the result is the same in both cases, then we will consider a technique based on potatoes.
Ingredients for yeast propagation:
small raw potatoes - 2 pieces;
sugar - 1 heaped tablespoon;
salt - half a tablespoon;
warm water (maximum 30 ° C) - 250 ml;
yeast - how much is left (a quarter teaspoon or less).
To activate the starter culture for 3-4 liters of mash (juice):
warm water (40 ° C) - 100 ml;
sugar - 1 level tablespoon;
ready-made yeast - 2 tablespoons.
Yeast breeding technology.
1. Wash and peel raw potatoes. Grate on a fine grater.
2. Pour the resulting mass into a small saucepan. Add a heaping tablespoon of sugar and half a tablespoon of salt.
3. Add water. Stir until smooth.
4. Bring to a boil and immediately remove from heat (do not boil).
5. Cool the mixture to 25-30 ° C.
6. Pour the prepared culture medium into the jar, filling 50-70% of the volume, so that there is free space. Add the remains of the cultured yeast race. Mix.
7. Put a glove on the neck of the can or put a water seal. Remove the jar in a dark place with room temperature. After 6-12 hours, the yeast activates and begins to develop - the glove will inflate or the airlock will start to emit gas, the nutrient medium will increase in volume.

8. Depending on the type and freshness of the yeast, fermentation will end in 24-72 hours: the glove will fall off (the water seal will stop gurgling), and the foam will disappear from the surface. Pour the diluted yeast into a smaller container so that the mass takes up the entire volume and there is no contact with oxygen. Close the leaven hermetically and transfer to the refrigerator. Shelf life - up to 3 weeks.
9. To activate the multiplied yeast, remove the yeast from the refrigerator before adding it to the mash.Add 2 tablespoons of the starter culture and 1 tablespoon of sugar to a separate container with 100 ml of water heated to 30 ° C. Stir until sugar dissolves. Cover and put in a warm place for 4 hours, then add to the mash. The starter culture is enough for 3-4 liters of mash or juice.

10. The obtained yeast can be multiplied several times according to the above technology.
Back to the list
2 Methods: Growing Yeast from Bread Sourdough Growing Brewer's Yeast
Yeast is a single-celled organism vital to most bakers and brewers around the world due to its ability to convert sugar into carbon dioxide and alcohol. You can create your own bread starter with just flour, water, and regular supervision. Cultivation of brewer's yeast is more difficult due to the need for a sterile environment, but this process can be performed by experienced home brewers. Any type of yeast can be stored in the refrigerator, allowing you to recreate the perfect bread or beer many times over.
If you want to know how to prepare the yeast before baking, you need to look for how to activate the yeast.
Method 1 Growing yeast from bread leaven
-
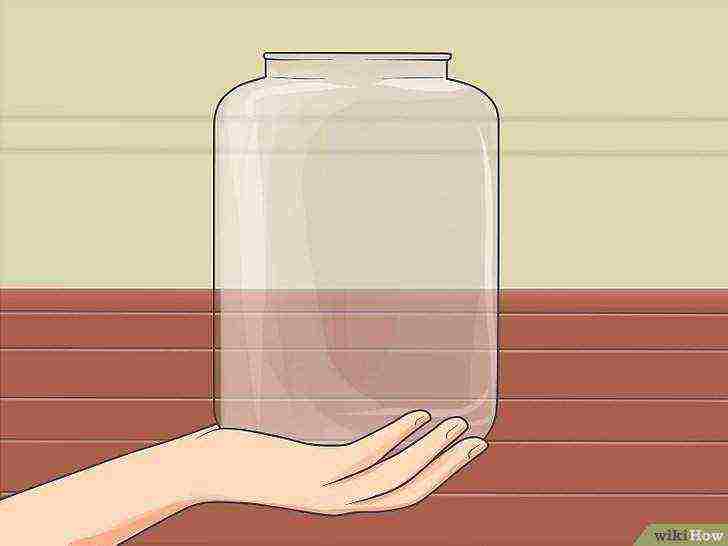
Choose a large, clean jar. Ideally, use a glass jar at least two liters in size, if the starter culture starts to grow too quickly, you will have to take it out a little, as it may turn out that the jar is small. A container made of plastic, earthenware, or a ceramic container can also be used, but the glass is easy to clean and will allow you to easily view the leavened bread. It is recommended to sterilize the jar if it is heat resistant. Wash the jar in hot soapy water and rinse well.
-
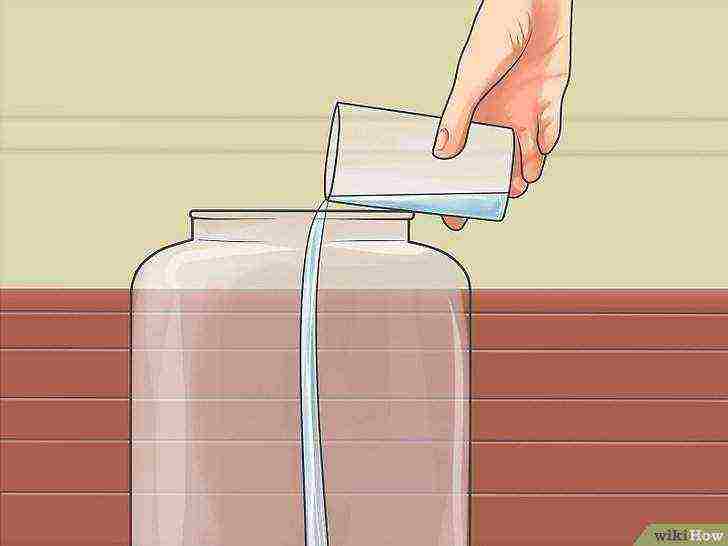 Pour in 1/2 cup (120 ml) dechlorinated water.
If your tap water contains chlorine, you can use dechlorinating tablets to purify the water, or let it sit for 24 hours. The minerals found in hard water can help yeast thrive, so distilled water is not recommended.
- If you do not have water with ideal characteristics, use any water that is safe for consumption.
-
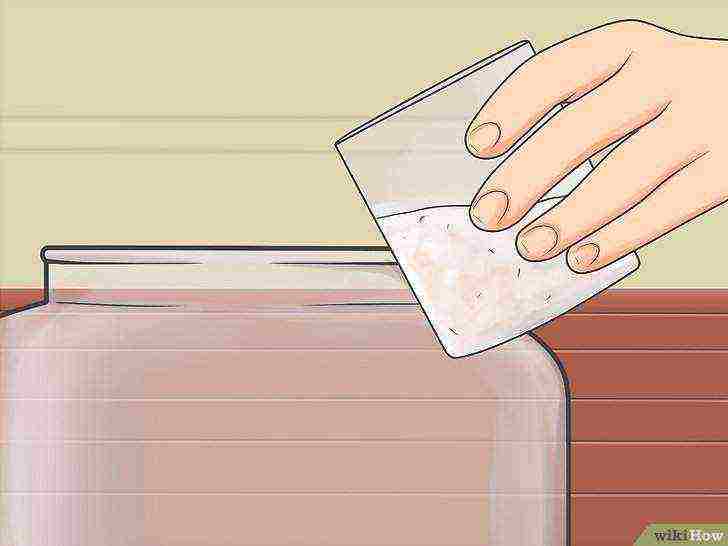 Stir in 3/4 cup (180 ml) flour.
Use unbleached flour and you can use sourdough for white bread; for dark bread, use whole grain flour. Flour contains wild shivers, microorganisms that produce carbon dioxide and other substances that promote the growth of bread and give it flavor.
- Stir vigorously, saturating the mixture with air.
- Many other sourdough flours can also be used, including brown rice flour and spelled flour.
-
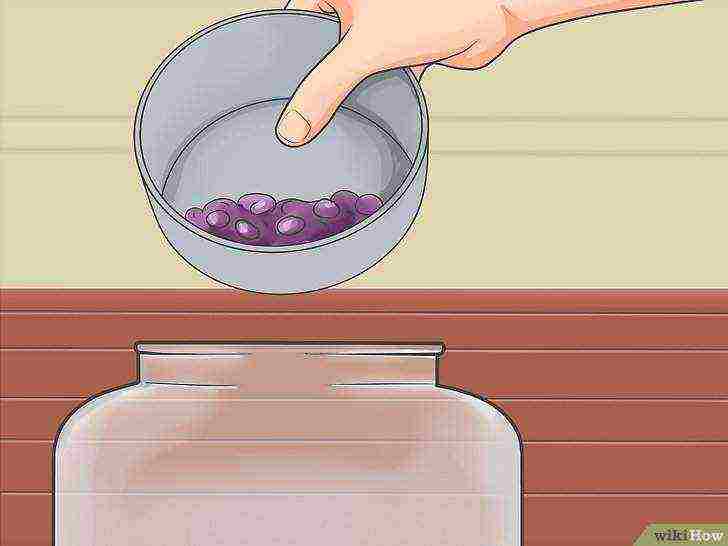 Add organic, unwashed grapes (optional).
If you use white flour instead of whole grain, your starter may not eat certain types of yeast that produce a harsh taste. ...
You can try to fix this by adding some fruit, most often a handful of grapes are added to the mixture. Use organic grapes that have been grown without pesticides or wax and add them to the mixture.
- Grapes also contain yeast, they grow well in sourdough bread. Some bakers recommend this step, but it is another matter what effect it has.
-
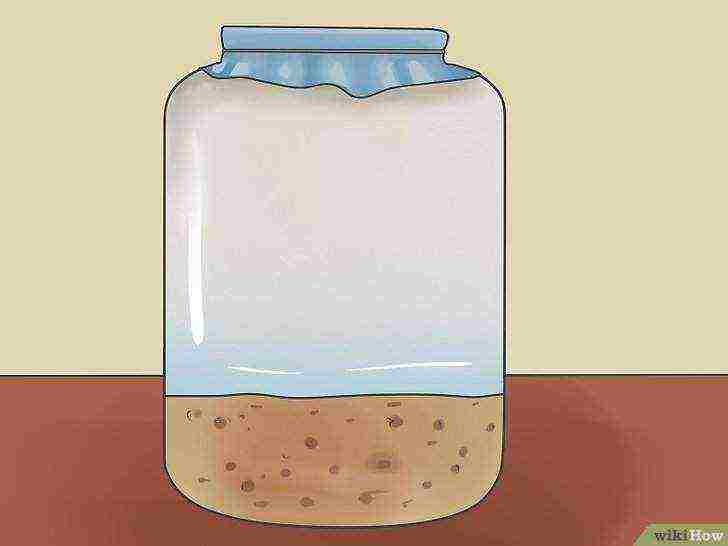
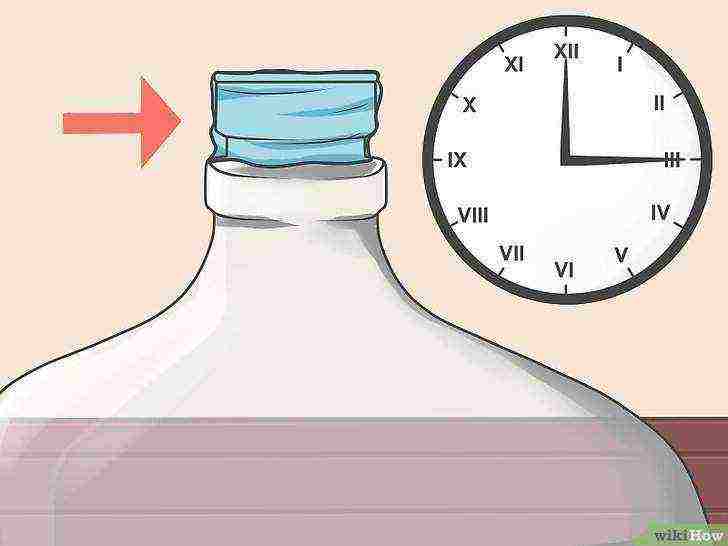
Cover, but loosely. Do not use an airtight lid, as a successful starter will produce gas and may break the lid, and the starter may need extra air. Instead, cover the jar with gauze, paper towel, or a clean napkin, or use any lid but don't close it tightly.
-
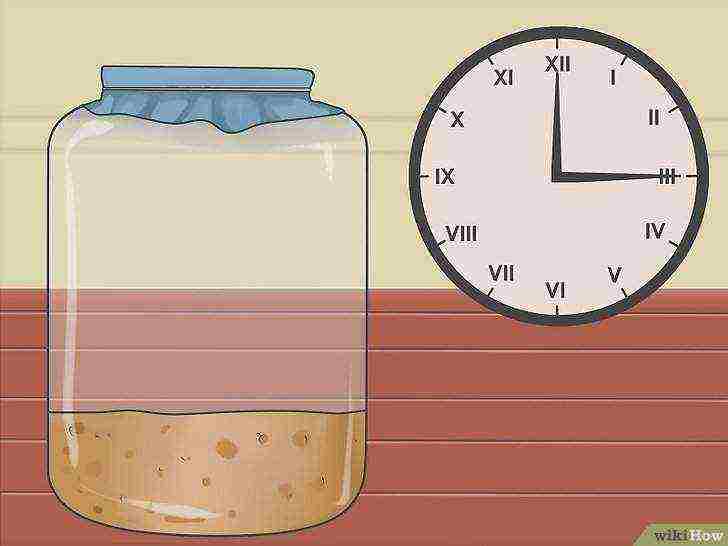 Leave in a warm place for two days.
For the best yeast activity, keep the starter in a warm room, at least 21 ºC. After two days, the mixture should become foamy and have a specific odor. Some starters take longer to start growing, but don't worry if you haven't noticed any changes.
- If your house is cold, grow yeast near the heater, but not too close to it, as it will get too hot and bake. Yeast grows in warm environments, but dies when it's too hot.
-

Add 1/2 cup (120 ml) water and 3/4 cup (180 ml) flour. Mix the water and flour in small portions gradually until they are thoroughly combined. Cover and leave for 24 hours, during which time the yeast feeds on this top dressing.
-
 Replace some of the starter culture every day with new water and flour.
Remove some of the starter every day, leaving 1/2 cup (120 ml) in the jar. This leaven is neither effective nor safe to use in recipes, throw this part away. Add enough water and flour to replace it, the exact amount is not necessary, you can use 3 parts flour and 2 parts water.
Don't try to add more than three times what's left in the jar.
-
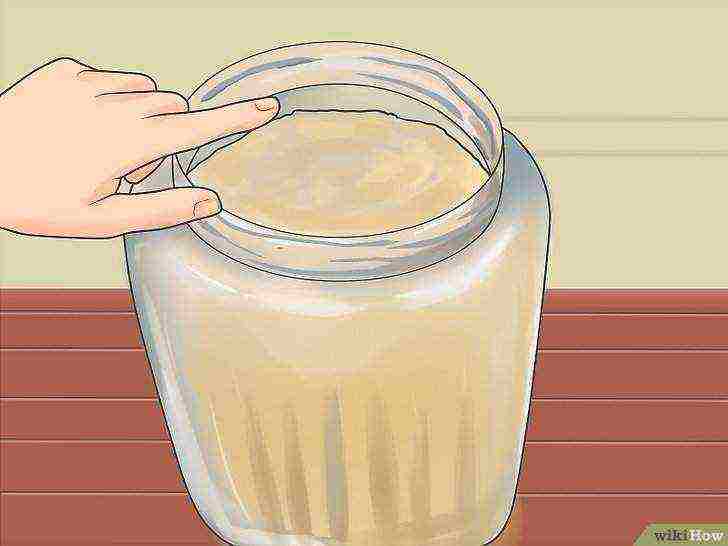 Follow this process.
First, the starter culture may give off a yellowish liquid at the top, or smell like alcohol. Luckily, this should disappear within a week as the yeast will grow and smell like bread. Once the yeast has hardened, the mixture should be sequentially expanded in half between each feed. Continue feeding for a week while the starter culture is growing so that the microorganisms can compete with other bacteria. Some starter cultures may not be ready for a month or more.
- If the mixture gives off a dark brown liquid, it is a sign that it is being removed from the food. Drain and feed more often, or larger amounts of flour and water.
-
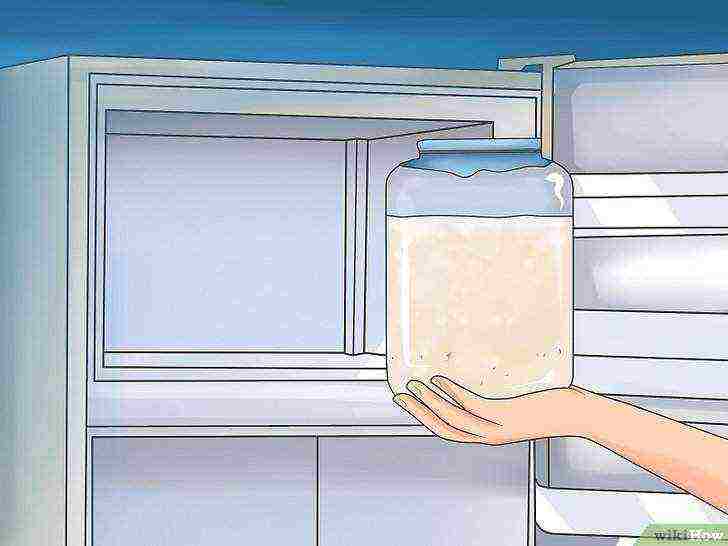 Move to refrigerator and feed less often.
When the mixture doubles in size every day for three days and does not produce any unpleasant (non-bready) aromas or liquid, cover it tightly and refrigerate. The yeast will stop or slow down and will need to be fed once a week with flour and water, discarding some if necessary to avoid overflow. As long as you remember that the sourdough needs to be fed, it can be stored indefinitely, acting as bread yeast for months or even years.
- Brown rice flour sourdough needs to be fed every few days, even in the refrigerator.
-
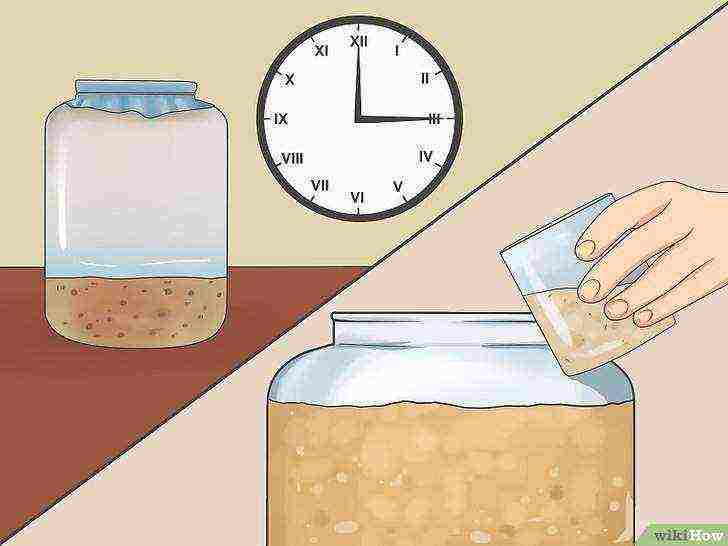 Use in bread recipes.
Before using a portion of the starter culture, activate it by keeping it at room temperature in napkins or a towel and feed it at least 3 times at intervals of 8-12 hours. Knead the dough thoroughly until the gluten activates, which will hold the dough together and roll out quite thinly. Homemade yeast tends to work slower than store-bought yeast, allowing the dough to rise from 4 to 12 hours, or even a day for more sour bread.
- Make sure you don't overheat the bread dough as this can kill the yeast. Check the temperature of the dough if you mix it with a hot mixer.
- You will also burn to add another flour sourdough, but be aware that this will add a harsh sourdough flavor. Many people make pancakes with sourdough, which is selected during the feeding process.
Method 2 Growing brewer's yeast
-
 Start with high quality brewer's yeast.
You can use commercially available liquid brewer's yeast, but the growing process is usually very difficult and time-consuming if you start growing it with available funds. Typically, home brewers grow brewer's yeast from beer lees from successful or favorite beers, or from expensive reusable beers.
- Growing your own yeast can take a lot of time and effort. This method does not require brewing beer at home, just keeping the yeast growing.
- It should be noted that bottled lees yeast differs from brewer's yeast in its initial fermentation, so the result may not be what you expect.
-
 Work in a clean place.
Air pollution can destroy yeast cultures and bacteria. Avoid damp areas and places where you prepare food. Close the windows in your yeast growing room and work in warm weather.
- Always wash your hands with antibacterial soap before touching yeast.
-

Clean and disinfect the surface. Wash your work surface or table as thoroughly as possible.Remove as many microorganisms as possible with detergents that contain alcohols. Let dry.
-
 Purchase of equipment.
The easiest way to get the equipment you need is to purchase a beer kit that can produce yeast starter. If you are purchasing equipment in parts, check what is included in the package of such equipment in the section What you need. Search pharmacies or lab equipment stores, advertisements, or online.
- Laboratory equipment orders in the United States may be verified by government agencies.
- Agar powder is available in many Asian stores. If you can't find, use unflavored gelatin, but be aware that gelatin-based starters need to be stored in cool places to avoid melting.
-
 Sterilize in suitable containers.
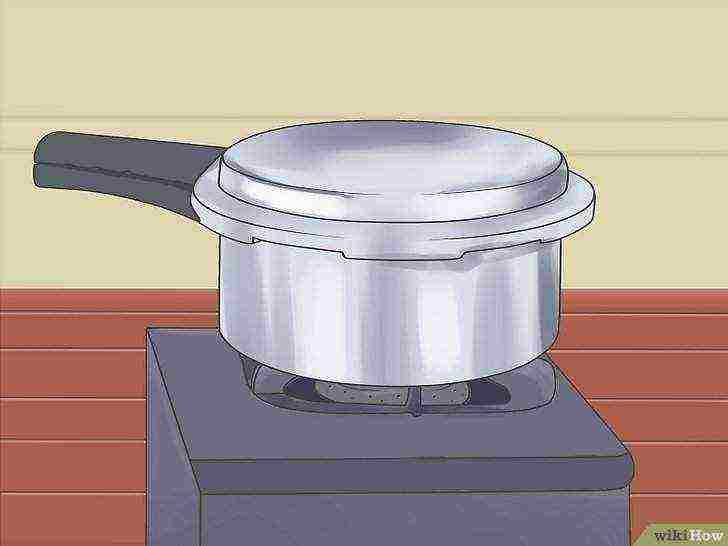
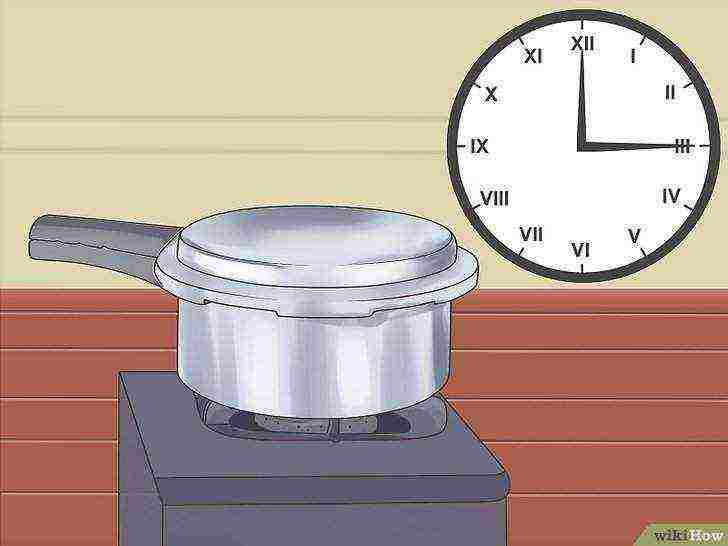
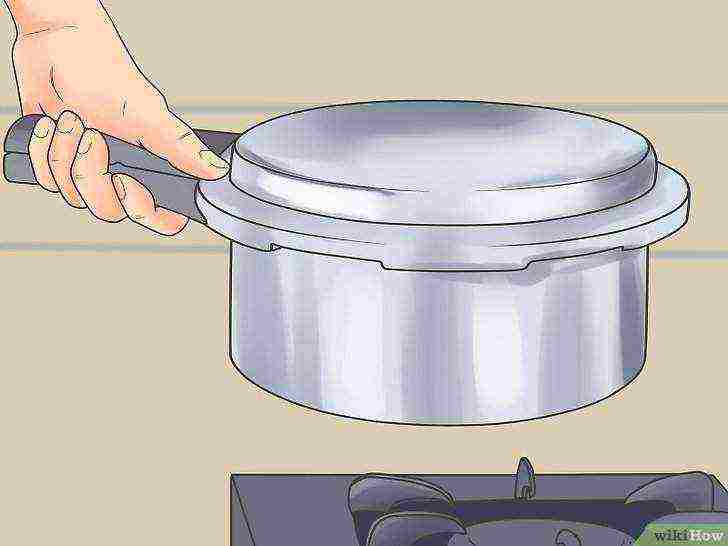
Heat refractory containers and lids in a pressure cooker for 10 minutes to kill all sources of contamination. Small deep bowls and glass containers are often used. Starter cans are often included in a brewing kit.
- If you don't have a pressure cooker, submerge the containers in water and simmer for 30 minutes. However, this is not as effective at killing all contaminating sources that are likely to interfere with the growth of yeast cultures, and the starter culture will not grow or become moldy.
- If you have sterile plastic bags to store your containers in, you can do it ahead of time.
-
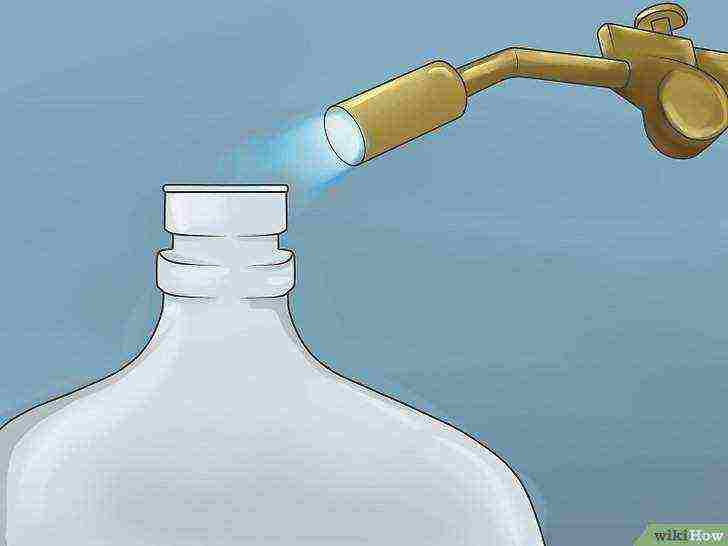
Let the containers cool, then heat them up. Because sterilization is very important for brewer's yeast culture so that other microorganisms can affect the cultivation. Use a propane torch or other high temperature tool, portable flame source (not a regular lighter), and heat the edges of the container.
-
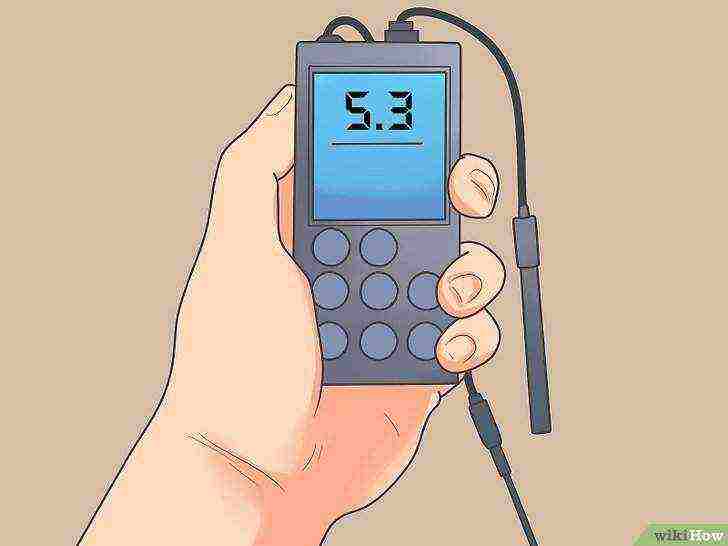 Use soft or distilled water.
If the tap water in your area is “heavy,” meaning it contains a lot of chalk and carbonate minerals, this can lead to the growth of large numbers of bacteria in the yeast. Use distilled water to make the process safe, or measure the pH of the water using only water with a result of 5.3 or close to it.
-
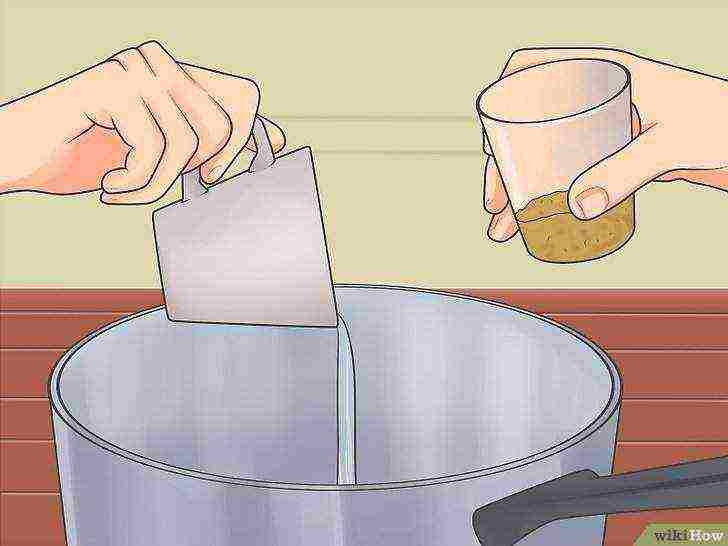 Boil 1 cup (240ml) mod and 1/4 cup dried malt extract.
Heat water in a pressure cooker to avoid boiling over, or use an airtight saucepan. Add dried malt extract and blend until dissolved. Bring to a boil and simmer for 15 minutes, watch the oven carefully so that the mixture does not boil away.
- This is called a "wort starter."
-
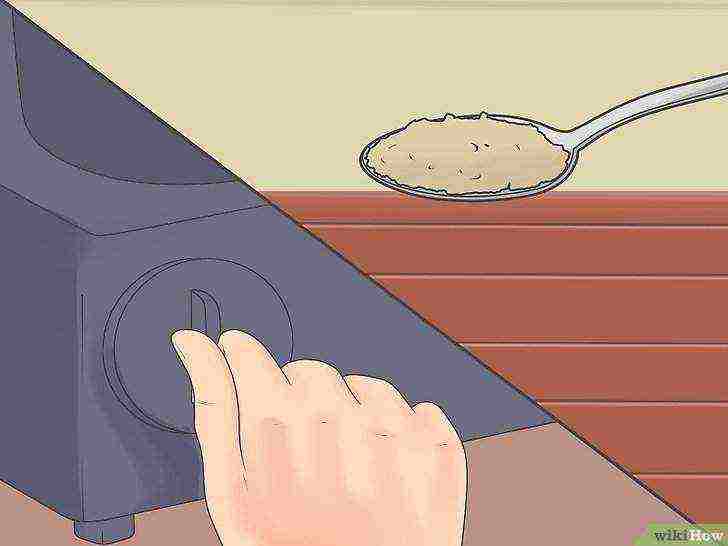 Turn off heat and mix with 1/2 teaspoon (2.5ml) agar powder until dissolved.
The starter already contains yeast cultures and nutrients, but the agar powder as a result thickens the mixture and provides a basis for yeast growth. It is worth noting that thickening will not occur at this stage.
- Only use gelatin without additives if you cannot find agar powder, after mixing, the gelatin may melt in a warm room.
-
Bring to a boil again. Boil for 15 minutes. Again, be careful not to let it boil over.
-
Remove from heat. Leave the mixture to cool to 50ºC, or near this temperature, or colder if using gelatin instead of agar. The mixture should be compacted, but not completely solidified.
-
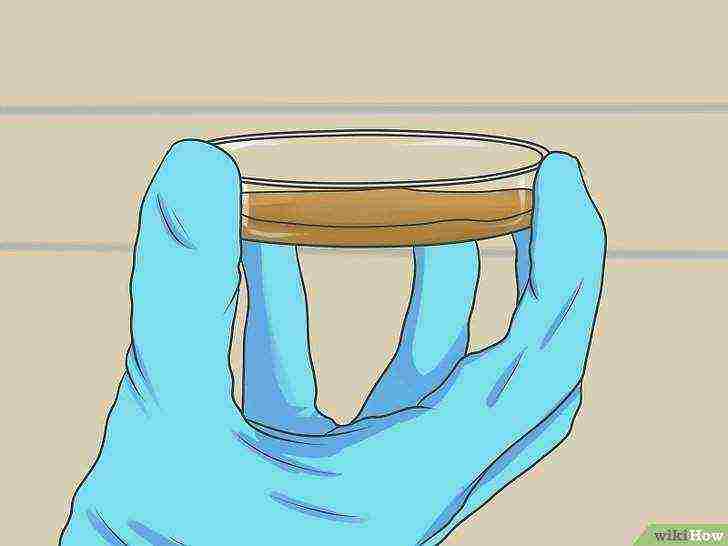
Fill each container with a small layer of the mixture. Take your sterile containers and fill each one with a small amount of boiled starter mix. Deep bowls should be 1/4 full, larger ones should be no less full.
-
Cover containers and wait. Place lids on containers or wrap in plastic wrap. Let them cool for half an hour and watch the starter culture harden from the agar powder. After you have tilted the container and the starter has not spread, then it is ready.
-
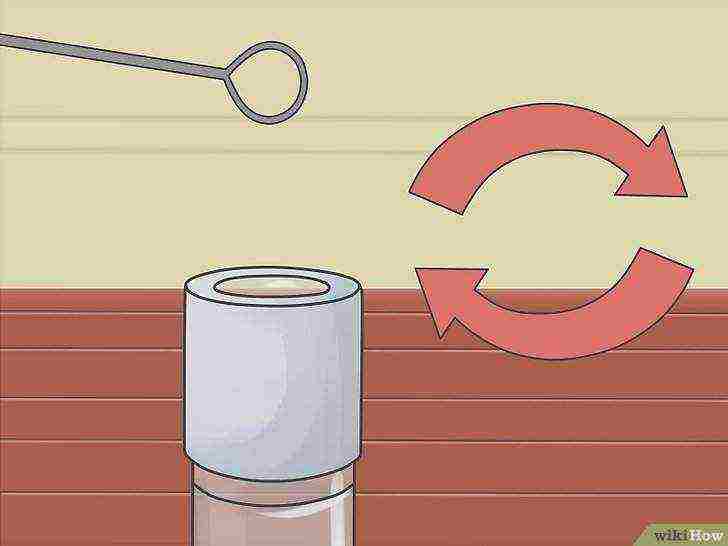
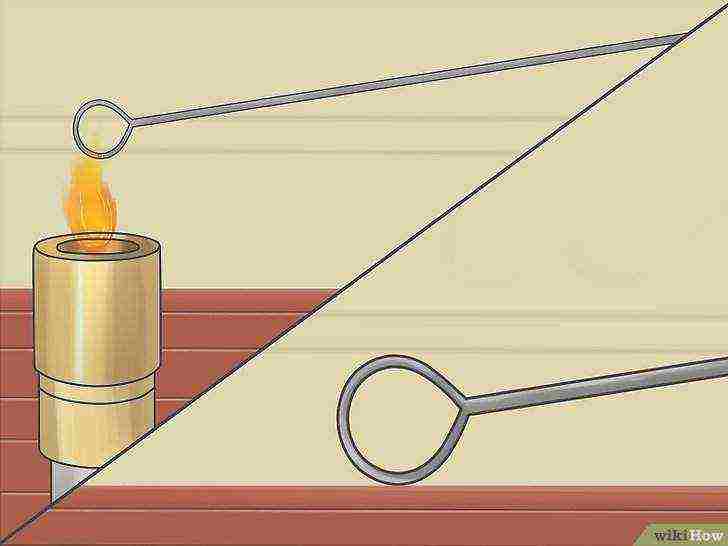 Sterilize the inoculation loop.
The inoculation loop, available at laboratory supply stores, is a miniature wire loop at the end of a rod used to transfer microorganisms such as yeast. Sterilize the end of the loop by heating it in a flame until the entire loop is orange or red from the heat. ...
Cool the loop to room temperature or slightly warmer by placing it in a shallow bowl of isopropyl alcohol, or wiping it with a cotton swab dipped in alcohol.
- If you do not cool the loop, the heat can kill the yeast.
- By cooling it in water or air, you give a chance to get on it to microorganisms that can be killed with alcohol.
-
 Draw a light outline with yeast sediment.
Do not try to put in a visible amount of yeast. All you need to do is dip the loop lightly on the top of the liquid.
-
 Gently add yeast to the surface of the starter.
Leave the lid on for such a short time that the loop can sink into one of your starter cultures. This will transfer the yeast to a bacteria-free starter. To minimize the chance of contamination, reattach the cap immediately. Turn your containers or special containers to 3/4 of the tightness position.
- The process of adding microorganisms to a plate in microbiology is called "plating".
-
Repeat sterilization before adding yeast for each container. Use the same process to add yeast to each container, but remember to heat the inoculation loop, sterilize between each transfer, then refrigerate in alcohol. Home-grown yeast has a relatively high chance of contamination, as using a few separately grown crops increases the likelihood that some of your starter cultures will eventually be used.
-
 Check the yeast in the next few days.
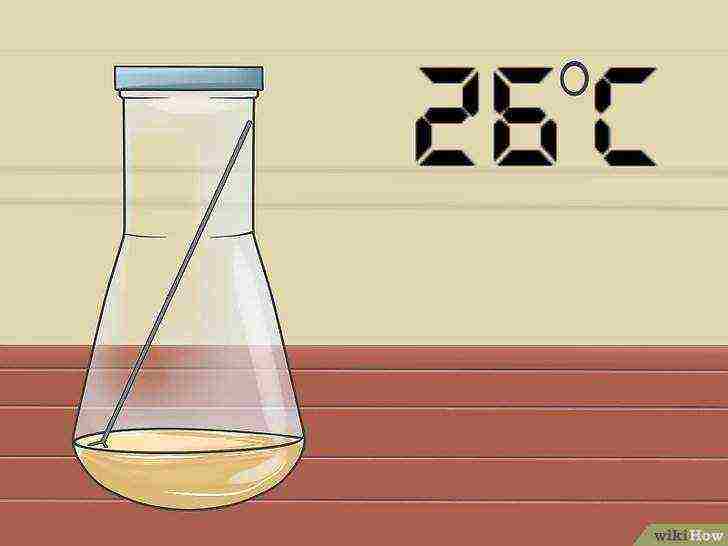
Store containers at 21-26ºC, the ideal temperature range for vigorous yeast growth. Discard any crops that grow fluff or mold balls, or don't grow any visible yeast after a few days. Successful yeast cultures will produce a milky layer on the surface and you will be able to see individual yeast clumps from points on the surface.
-
 Place the surviving starter cultures in the refrigerator.
Now, in order for successful cultures to be activated, completely wrap the containers with plastic wrap or other opaque material, as light can destroy or damage the yeast clumps. Store them in the refrigerator, ideally 1-2 ° C or slightly warmer, to slow their growth and prevent nutrients from dying.
If you want to use one of the starter cultures, remove it from the refrigerator beforehand to bring it to room temperature before using.
Tips
- You can also grow the yeast starter in a jar of fruit and water, or with potatoes, sugar, or water.
Warnings
- Leave the sourdough jar half full of sourdough and leave less of the mixture each time as it begins to grow in volume.
What do you need
Bread leaven:
- Big jar
- Lid, towel, or paper napkins
- Flour
- Water
- Refrigerator
Brewer's yeast:
- Brewer's yeast
- Propane torch or other high temperature portable flame sources
- Inocular loop
- Agar powder
- Pressure cooker
- Soft or distilled water
- Sealed flask
- Dried malt extract (or other yeast)
- Small containers.
- Isopropyl alcohol
- Opaque film
- Refrigerator
Article Information
This page has been viewed 16,667 times.
Was this helpful?
Alcohol production
Nutrient medium.The best nutrient medium for the propagation of alcoholic yeast is a malt-based medium, since it contains all the minerals necessary for their life and, moreover, nitrogen, which is part of the malt sprouts, is most easily used by yeast as a food product. Any grain malt is suitable, but rye malt is preferred.
In production conditions, uterine and inoculum yeast is propagated on wort from malt. As for the production of industrial yeast, here they are guided by the rule that the nutrient medium should contain not only all the nutrients necessary for the reproduction of yeast, but at the same time its composition should correspond as much as possible to the medium for which the yeast is prepared for fermentation. Therefore, despite the fact that malt-based medium is the best for nourishing alcoholic yeast, it is used to propagate production yeast, which is used only for fermenting wort from cereals. Wort from potatoes, sugar beets, molasses or Jerusalem artichoke is fermented with industrial yeast, multiplied on wort prepared from the same raw material with the addition of missing nutrients.
In the scientific and technical literature, various recipes and technologies for preparing a nutrient medium are given. We will cite just a few of them, focusing on the preparation of a breeding medium for the propagation of yeast from malt and a mixture of malt and flour, as the most versatile.
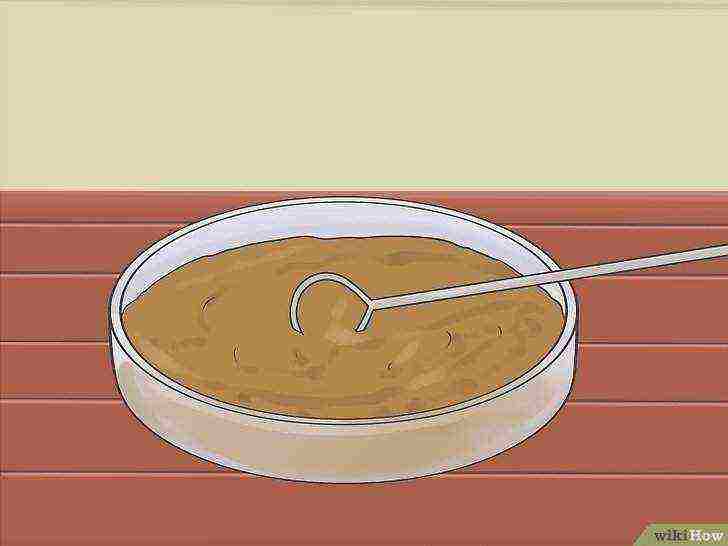
Malt-based yeast wort. Freshly chopped (or dry in the form of flour) malt is mixed with slightly warmed (up to 30-35 ° C) water until the consistency of sour cream is reached (approximately 0.5 kg of freshly prepared or 0.3-0.4 kg of malt flour per 1 , 0-1.2 liters of water). The temperature of the dough slowly rises to 60-62 ° C, at which the malt is saccharified due to the enzymes present in it. The duration of saccharification is 2 hours. By
|
Table 17. Amount of nutrients introduced per wort Id, g,. |
L yeast |
|||
|
Type of raw material |
Lactic acid droshky |
Sulfuric acid yeast |
||
|
Ammonium sulfate |
Superphosphate |
Ammonium sulfate |
Superphosphate |
|
|
Rye |
||||
|
Barley or oats |
||||
|
Corn |
||||
|
Potato |
||||
|
Dissolved minerals are added to the yeast wort before adding and nep) yeast. |
After the specified time, the temperature of the mass is raised to the boiling point, at which the mass is sterilized for 20 minutes. A milder sterilization regime is also used: temperature 75-80 ° C, duration 20-30 minutes.
A yeast wort based on flour and malt. About 120-130 g of flour (rye is recommended) and the same amount of dry malt in the form of flour or 180-200 g of freshly grown chopped malt are used to prepare 1 liter of yeast wort for multiplying industrial yeast. Flour is mixed with 0.3-0.4 liters, malt - 0.6-0.5 liters of water. The technology is carried out as follows. The malt and flour are mixed separately with slightly warmed (30-35 ° C) water until a smooth, creamy consistency is obtained. After that, in order to deysterize the starch, the mixture of flour and water is heated to 80-90 ° C, kept at this temperature for 1 hour, j is cooled to such a temperature that after adding the previously prepared mixture of malt with water to the paste, the temperature of the mass is 60-62 ° C. The duration of saccharification is 1.5-2 hours. After saccharification, the mass is sterilized at 80-90 ° C for 30-40 minutes and cooled.
A nutrient medium for the propagation of industrial yeast, intended for fermenting wort from other raw materials, is prepared from a part of the wort intended for fermentation, adding to each 1 liter of yeast wort the following і amount of malt: potato - 60 g, corn - 100, from chicory or Jerusalem artichoke - 80, beet 40-50 g, from molasses or sugar - 50-60 g. The technology for making yeast wort from these materials is generally identical and | consists in uniform stirring malt with weaning from the main mash, heating the mass to 57-60 ° C and saccharifying malt starch at this temperature for 25-30 minutes, sterilizing it at 85 ° C for 20 minutes, cooling.In the absence of malt, it is necessary to add urea to the wort and
Orthophosphoric acid in the amount of 0.05—0.07% of each of the mass of raw materials Spent! for making yeast wort,
The nutrient medium for the propagation of yeast for the fermentation of starch-containing raw materials is prepared without malt, at weaning from the old wort, adding minerals to it (see Table 17).
A nutrient medium for the propagation of yeast that is used to ferment wort from mixed raw materials, for example, from sugar beets, molasses and potatoes, is prepared by weaning from the most nutrient-rich wort, in this example
- from potatoes.
Acidification (souring) of the nutrient medium. In the nutrient medium prepared in this way, it is necessary to create conditions under which the development of pathogenic microorganisms is impossible, and the development of alcoholic yeast will occur under optimal conditions. In industrial conditions, two technologies are used: sulfuric acid using sulfuric acid, and the yeast obtained by this technology are called sulphate, and lactic acid, using lactic acid, and the yeast obtained by this technology is called lactic acid. (Note that at the beginning of this) century, in the technology of industrial production of alcohol in Russia and Europe, for acidification of the yeast bed, along with lactic acid, hydrofluoric acid (HF) was widely used, and sulfuric acid was used for these purposes only sporadically).
In both cases, the culture medium prepared as described above is cooled to 50-52 ° C and at this temperature either sulfuric acid or a pure culture of lactic acid bacteria, which produces lactic acid, is introduced into it. Since it is believed that lactic acid yeast yields alcohol of a higher quality than sulfuric acid yeast, we will describe the method of acidification of the medium using lactic acid in sufficient detail.
Nutrient: medium with lactic acid. The use of lactic acid bacteria for acidification of the nutrient medium is based on the fact that the product of their vital activity is lactic acid
- not talcum powder inhibits the development of pathogenic microorganisms, but at the same time enhances the growth of yeast. In the conditions of modern industrial production, the culture medium sterilized, as described earlier, is cooled to a temperature of 50-52 ° C and acidified by adding to it a pure culture of lactic acid bacteria. A temperature of 50-52 ° C is optimal for the life of lactic acid bacteria, therefore its maintenance is extremely important.
Typically, the duration of acidification is 18-24 hours at temperatures of 50-52 ° C, while a concentration of
Lactic acid about 10 g / l of nutrient medium. Under favorable temperature conditions, acidification of the nutrient medium can be carried out for much longer, since lactic acid bacteria themselves are destroyed by a sufficient concentration of the product of their own vital activity - lactic acid. Before the introduction of the culture of pure lactic acid bacteria into the technology of alcohol production, the souring of the nutrient medium was carried out in various ways, among which there were quite complex ones. One of the simplest methods was to lubricate the walls of the yeast propagation vessel with sour milk. Later it was found that lactic acid bacteria of milk sour at room temperature are not identical to lactic acid bacteria necessary for distilling production, and that the latter in a fairly pure form can be obtained in milk that has sour at 50 ° C.
If you add seed yeast to the nutrient medium with vital lactic acid bacteria and then multiply industrial yeast into the wort, then the lactic acid bacteria will continue their vital activity in the wort, which is inappropriate.In order to destroy lactic acid bacteria, the acidified nutrient medium is sterilized at 75-80 ° C for 10-20 minutes. The culture medium sterilized in this way is rapidly cooled to the required temperature and the seed yeast is introduced into it.
Culture medium with hydrofluoric (HF) and sulfuric (H2SO4) acids. The use of these acids for the acidification of the wort greatly simplifies the technology, shortens its duration and increases the alcohol yield, since sugars are not consumed for the reproduction of lactic acid bacteria and the formation of lactic acid.
Nutrient medium with hydrofluoric acid. I. Efron showed that lactic acid during the propagation of yeast can be replaced by an insignificant amount of hydrofluoric acid, which is a strong poison for pathogenic microorganisms. In this case, yeast propagation is carried out as follows. From the wort prepared for fermentation, take the amount necessary for yeast reproduction, cool to a temperature of 27-28 ° C, then add diluted hydrofluoric acid to it at the rate of 2.3-2.5 g of 100% acid per 10 liters of yeast wort ... After the wort has cooled to 22-23 ° C, seed yeast is added to it in the amount of 1 liter of seed yeast per 10 liters of yeast wort (note that here we are talking about industrial technology, where the volume of yeast wort is many hundreds of liters, due to which reproduction yeast in it is accompanied by a significant increase in temperature). After 10 - ^ 12 hours, the production yeast is ready to be added to the main wort.
Note that the introduction of hydrofluoric acid into the main wort also leads to an increase in the yield of alcohol and an increase in its quality. However, it is added to the main wort in such a way that its concentration in it, after adding yeast wort, which already contains hydrofluoric acid, is 2 times lower than in yeast wort. Instead of hydrofluoric acid, ammonium fluoride or aluminum fluoride can be used: the latter is taken from 0.15-0.3 g per 10 liters of wort.
Sulfuric acid culture medium. The acid is added to the yeast wort after saccharification and sterilization when it reaches a temperature of 50-55 ° C. It is recommended that the acidity of the yeast wort is from: molasses - 1.2-1.4 °; potatoes - 0.9-1.2; flour, malt or their mixture - 0.7-0.9 °. In the conditions of industrial production of alcohol, the required amount of acid in each specific case is determined by titration, which, if the appropriate chemicals are present, can also be carried out in domestic conditions. In their absence, the specified acidity of the yeast wort is roughly provided by the addition of wort k_l from: molasses - 2.4-2.5 ml; potatoes - 1.3-1.5; malt, flour or their mixture - 1.0-1.2 ml of acid. The volume of acid with 100% H2SO4 is indicated. The acid is added as follows. The measured amount of acid is diluted with 5-6 times the volume of water in glassware, pouring the acid into the water, after which the diluted acid is poured into the wort cooled to 50-55 ° C. After cooling the acidified yeast wort to a temperature of 28-30 ° C, yeast is introduced into it for their reproduction.
Yeast propagation process. Usually yeast propagation is carried out at 28-30 ° C. In industrial conditions, where yeast propagation is carried out in relatively large containers, the initial breeding temperature is 15-20 ° C. In the process of yeast reproduction, it spontaneously increases to 28-30 ° C, which is maintained during the reproduction process. Duration of reproduction at this temperature is usually 15-20 hours. At the same time, about 4-5% of sugars remain unprocessed, and the proportion of alcohol is 8-10% by volume. This proportion of alcohol is necessary for the reason that a part of the multiplied yeast (about 1/10 of the volume) will be used as seed in the next production cycle of production yeast, and the resulting alcohol is a preservative. If the propagating yeast is not supposed to select seedlings, then reproduction can be stopped 8-10 hours after the addition of seedlings.
Rice. 13. Designs of fermentation dowels. The arrows indicate the direction of movement of carbon dioxide.
Yeast to the nutrient medium ”In this case, the proportion of alcohol will be 4-5 vol.%.
In domestic conditions, it is possible to use wort, for example, from sugar, which does not contain the nutrients necessary for the propagation of yeast, and there are no malt or other materials containing nutrients for yeast. In this case, a sufficient amount of yeast should be added to the wort immediately. The required amount can be estimated as follows. It is known that under the conditions of industrial production of alcohol, for example, from molasses containing 17-18% sugars, at the end of fermentation, 100 liters of mature brew contain 1.5-2 kg of yeast in terms of compressed yeast 75% moisture, that is, such as go to retail. This means that 75-100 g of pressed yeast per 1 kg of sugar is enough for fast and high-quality fermentation of the wort, in which yeast will not multiply. This amount of yeast in excess is sufficient to ferment wort from any other material that contains the necessary food for yeast to multiply. In any case, the quality of the alcohol will be higher when the yeast multiplies during fermentation. This is possible if the wort contains all the nutrients necessary for their vital activity.
In old Russian distilleries that did not use superheated steam, potatoes were boiled either by boiling them in water or by steam with a temperature not exceeding 100 ° C. Moreover, in digesters ...
The purification of alcohol by distillation and rectification is a hot purification method. It is based on the physical phenomena of evaporation and condensation. Along with these cleaning methods, starting from the XVI - XVII ...
Dorosh A.K., Lisenko B. C In Russian before the beginning of the XX century. there was no word "moonshine" in the above sense. The term appeared in the southern and southeastern provinces of Russia, on ...
# 1 Lzaza Submitted January 25, 2017 - 19:26
- Moscow city
- Hobbies: Brewer
- Your experience: Beginner
23.01.2017
Well, comrades, I am almost ready to master the basics of microbiology) Chemical utensils have been purchased, the box for conducting experiments is ready.
tomorrow or the day after tomorrow I will collect the lager yeast from the fermenter into a test tube and on the weekend I will start sowing. I did not lay out all the dishes in the frame, but there seems to be everything.
maybe someone will not appreciate my impulse for breeding yeast, but I'm like this and I'm interested in it) don't judge strictly my equipment, I think that for the beginning it will do)
in the first photo there is an ordinary lamp for illumination of the workspace, in the second one the UV lamp is turned on.
compressor connected to 0.023 micron filter (filter inside)
24.01.2017
since the hydrometer readings showed that the lager had fermented, I decided to collect the S-23 yeast today, pre-boiled a test tube with a stopper and held it under a UV lamp for 20 minutes, then the test tube went into the refrigerator. the operation of filling the test tube was carried out with gloves in the box. everything was pre-sprinkled with 70% alcohol.
- Demid, Pro-SS, Grigoriy163 and 2 others like this
# 2 Pro-SS Submitted 25 January 2017 - 22:38
- ADMIN
- Posts: 3 581
- CityStavropol Territory
- Hobbies: Brewer
- Your experience: Advanced
Everything is fine! They wrote to you about the surfaces, and by the way, sanpin also writes about this, ceramic tiles are smooth, oil paint, plastic, those are the smoothest even surfaces. The child had to take chipboard, not very expensive, but it would be better for you. But I understand that you are still at the development stage, I think that from window profiles and sandwich panels + glass will be the most correct decision for you.
I realized that you were inspired by this whole thing, but I just don't understand why you are going to sow with yeast from the tank and find strong crops? Maybe it is better to buy liquid yeast to propagate them in this way, or take a pure culture from our Russian yeast producers?
# 3 Lzaza Submitted 25 January 2017 - 23:45
- Moscow city
- Hobbies: Brewer
- Your experience: Beginner
I'll do it, just now I want to work out the process itself)
25.01.2017
Wort boiling to create a breeding ground and yeast propagation
For breeding yeast, I need 5 liters of wort (with a margin) with a density of 1.040. I rubbed 0.9 kg of Pale according to the simplest scheme - 64 degrees 1 hour and 78 degrees
5 minutes. Boiled for 1 hour and in 50 minutes added 7 grams of Norten Brewer, because it is recommended to breed in hopped wort. IBU in the region of 20 worked out. + hops are antiseptic in themselves
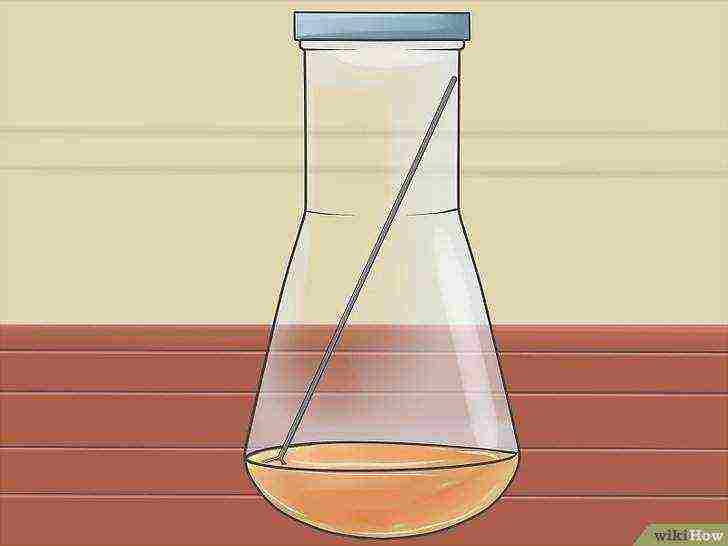
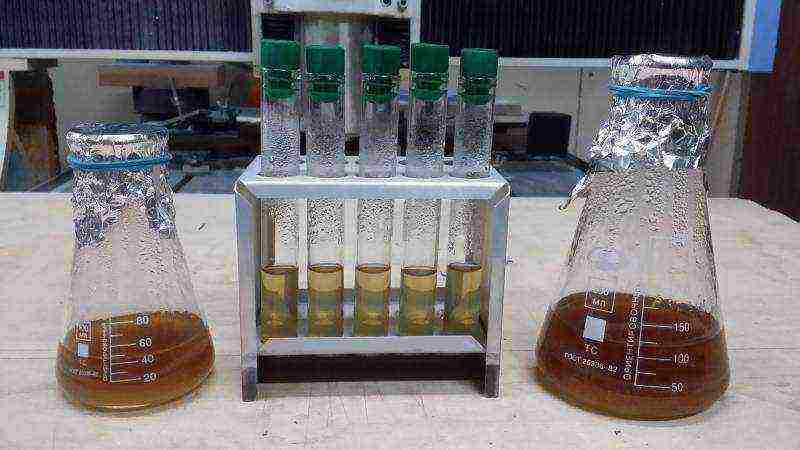
While I was boiling the wort, I washed two flasks for the 1st and 2nd overflows and five test tubes. I put them on foil, pre-treated with 70% alcohol. Washed by starsan
two liter bottles, one for the wort to reproduce the culture medium, the other for the final starter.
Ready wort with a density of 1.040
poured into flasks and bottles
Next, it was necessary to dilute the wort for test tubes to a density of 1.020, which I did with boiled water
and then 10 ml with a pipette, 5 ml was sent to each tube,
at this stage, I did not bother with disinfection especially strongly, i.e. use a box, gloves and a UV lamp, because it will still boil.
Next, I had to do double boiling in a water bath with intermediate cooling for test tubes and flasks (I forgot how it is called correctly)
I also sent the corks into the pot there, this is not in the photo. Boiled for 10 minutes.
- Demid, Pro-SS, Grigoriy163 and 3 others like this
# 4 Lzaza Submitted January 25, 2017 - 23:56
- Moscow city
- Hobbies: Brewer
- Your experience: Beginner
One liter bottle went to the refrigerator from it I will make a nutrient medium (probably tomorrow, if I have the strength)
The second is still in the freezer - it is for the final starter, after defrosting I will boil it again, or rather the wort from it.
I put alcohol foil on the flasks, secured it with an elastic band and also sent it to the refrigerator, they will be needed at stages 1 and 2 of reproduction.
He cooled the test tubes and closed them with corks and also in the cold. At this stage, I did everything with gloves treated with 70% alcohol.
that's all for today.
- MASIV, Demid, Pro-SS and 2 others like this
# 5 Dmitri Submitted January 26, 2017 - 00:44
- CityViimsi
- Hobbies: Brewer
- Your experience: Beginner
Super! Dream. Also busy looking for specials. utensils
# 6 Badvoice Submitted January 26, 2017 - 01:01
- CitySpb
- Hobbies: Brewer
- Your experience: Beginner
You have a lot of free time and space in your apartment 🙂
2x BeerZavodik + brew maker 2 in 1 20 l
# 7 Lzaza Submitted 26 January 2017 - 01:18
- Moscow city
- Hobbies: Brewer
- Your experience: Beginner
I do all this at work and after work)
# 8 Aol_WB Submitted January 26, 2017 - 01:43
- Moscow city
- Hobbies: Brewer
- Your experience: Advanced
Next, I had to do double boiling in a water bath with intermediate cooling for test tubes and flasks (I forgot what it is called correctly)
Apparently, tyndalisation is meant ... Only, boiling should be at least 3 and between them 24 hours at a temperature of 25-37 Celsius.
It seems to me that the "Muravyov autoclave" will be easier. The only thing is that midisarts are too expensive.
FAQ - quick answers to typical questions
FAQ - quick answers to typical questions FAQ - quick answers to typical questions FAQ - quick answers to typical questions FAQ - quick answers to typical questions