Content
- 1 Soil preparation and containers
- 2 All types of greens, how to grow
- 3 Borago and marjoram
- 4 Lettuce and mustard
- 5 Green onions: growing in boxes (video)
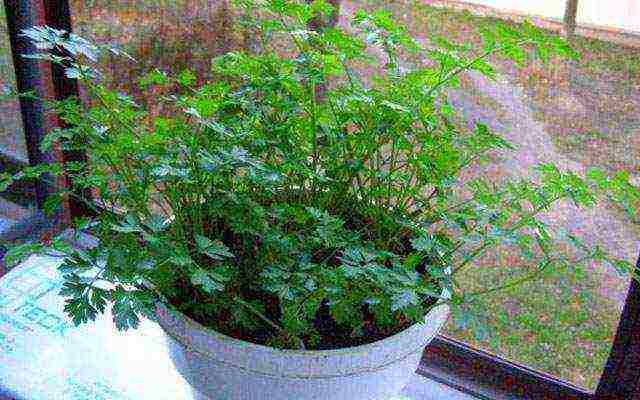
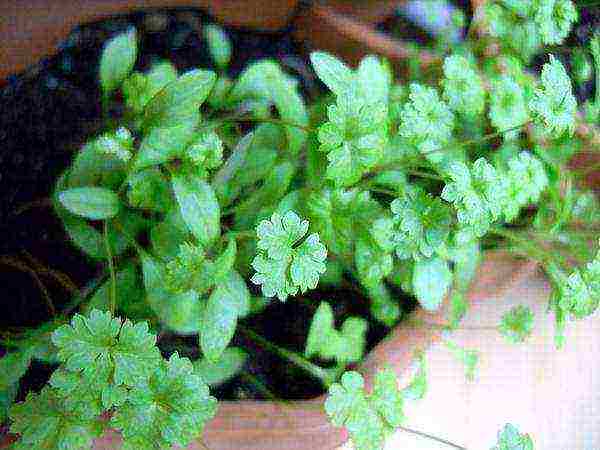
- 6 Parsley, dill, basil and onion
- 7 How to grow dill at home in winter (video)
- 8 Gallery: greens at home (15 photos)
- 9 How to grow onions for herbs?
- 10 Greens at home: how to grow dill and parsley at home?
- 11 Homemade greens: how to grow salad on the windowsill?
- 12 How to grow greens on a windowsill: basil
- 13 1. Green onions
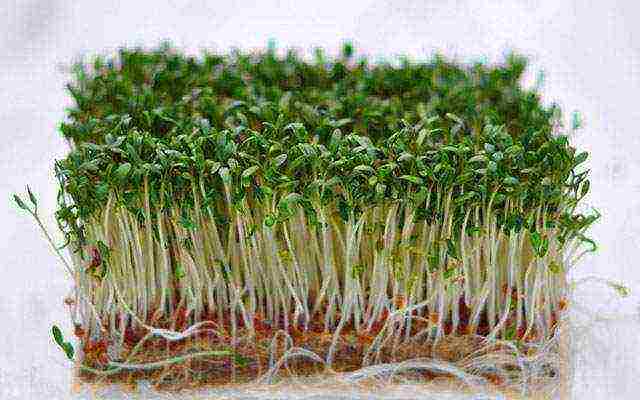
- 14 2. Watercress
- 15 3. Lettuce
- 16 4. Parsley
- 17 5. Chive bow
- 18 Let's summarize
- 19 What do you need to grow greens at home?
- 20 What can be grown in winter?
- 21 Watercress
- 22 Onion
- 23 Parsley
- 24 Dill
- 25 Spinach
- 26 Borago, or cucumber herb
- 27 Leaf salad
- 28 Arugula
 Many housewives have large windowsills and are thinking about how to grow greens at home. In fact, there is nothing complicated, many types of green plants do not require special care, feeding and additional lighting. Greens can be grown all year round. It is tasty and healthy, especially during the period of vitamin deficiency. Indispensable food additives can be grown.
Juicy spicy herbs are indispensable for activating metabolic processes in the body, has an expectorant, disinfectant, diuretic effect.But first things first.
Soil preparation and containers
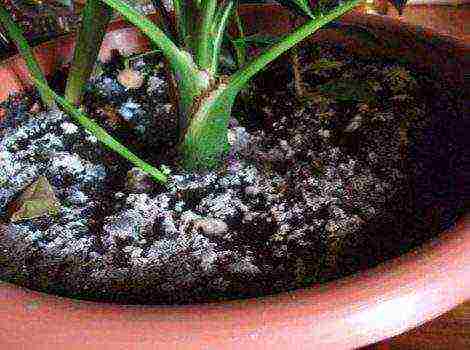
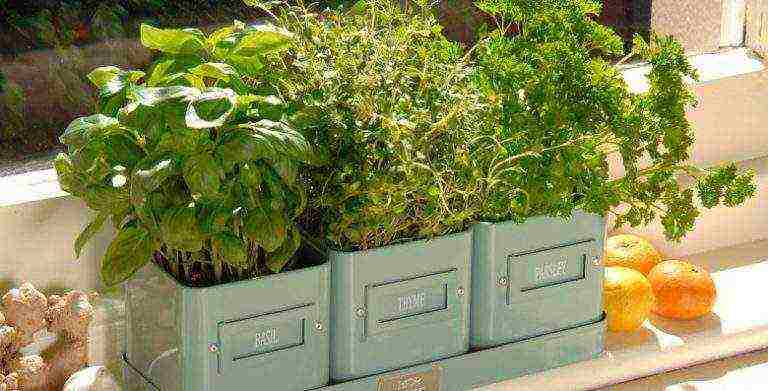
It is better to grow greens in plastic containers, wooden boxes are not practical, heavy and often leak. Several varieties of herbs can be planted in one long container at once, but taking into account their combination with each other, irrigation conditions. For example, dill, parsley and celery will get along in one container, but marjoram, thyme and oregano need a separate space.
The most optimal composition of the earth (soil) is peat, earth, river sand and sawdust, taken in equal proportions. For drainage, it is advisable to put pebbles or expanded clay on the bottom of each vessel with a layer of up to 5 cm. To create the required moisture level, you will need a piece of plastic wrap or plastic bottle caps. They need to cover the sown seeds for faster germination.
All types of greens, how to grow
Growing greens at home for some types of greens has its own characteristics. The easiest way to get a harvest of onions for a feather, dill and parsley.
To obtain large and juicy rucolla leaves, the containers should be kept with sufficient light and humidity. The topsoil must be kept moist at all times. Rucolla loves moisture, also fertilizing, the introduction of nitrates. Seeds are sown to a soil depth of 11-12 cm, top up with a small layer of earth - up to 1.5 cm. In a week, you can expect the first shoots to appear. When leaves reach a height of 7 cm, they can be cut and added to salads.

Celery prefers to grow in fertile, nutritious and moist soil in moderation. Planting seeds are disinfected with a solution of potassium permanganate, soaked for a day in warm water, wrapped in a damp cloth and left for some time in a dark place. It is important not to let the fabric dry out and spray it from time to time.
The hatched seeds are ready for planting. Place the seeds on the soil layer at a distance of up to 6 cm from each other, sprinkle with a small layer of earth, put in a warm, lighted place. The optimum temperature regime for celery is 25 g. Sufficiently overgrown plants will need to be thinned out, loosened up the soil. The best varieties for home cultivation: delicacy, snow globe, apple, mushroom.
Green juicy spinach leaves are rich in provitamin A, vitamins PP, B, C, vitamin B2, mineral salts, easily assimilated iron, iodine in large quantities. With anemia, such a vitamin and mineral composition of spinach is simply irreplaceable. With its regular use, hemoglobin will increase, vision and pancreas will improve, blood vessels will become stronger. But children and people with high acidity need to take spinach very carefully. It contains a lot of oxalic acid.
Greens at home, such as spinach, require good watering and long-term lighting. First, the seeds are soaked for 2-3 hours in warm water, then they are planted in containers to a depth of 1.5 cm. The optimum room temperature is -18-21 g. After a couple of weeks, the crops need to be fed with mineral fertilizers to form wide and lush bushes. After 1-1.5 months, fresh herbs are ready to eat. The varieties are livable on windowsills: Virofle, Mazurka, fat-leaved Victoria, Melody.
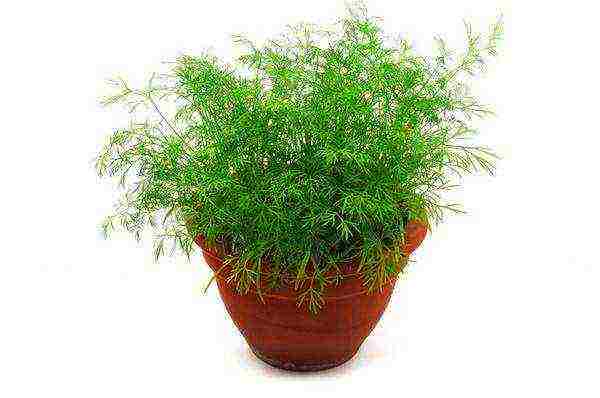
Borago and marjoram
Borago is a cucumber herb, not as popular as other spices, although it is grown easily, in frequent watering and is not pretentious to bright lighting. Contains vitamin C, carotene, smells like fresh cucumbers. Borago is sown with seeds to a planting depth of up to 1.5-2 cm in a sufficiently fertile soil. Containers should not be placed in drafts. The place should be warm, and the soil should be of high quality.
When such conditions are created, in 2 weeks it will be possible to admire the first shoots, and after 1.5 months, cut off the first juicy leaves for salads, which, by the way, can replace cucumbers if they are not on your table in winter.
Do not cut or discard the arrows that appear on the purple-flowered grass. They have a pleasant smell and taste of honey, they can be dried, added to baked goods, desserts and even to liqueurs, home-made liqueurs.
Marjoram is an unfamiliar spice for many, it is sold in bags as a dried seasoning for adding to meat dishes, soups, snacks, salads, pates. It is quite possible to grow it at home, in flower pots. Marjoram is a part of traditional medicine recipes for the treatment of kidneys, liver, respiratory organs, helps with headaches, toothaches, and is a good sedative.
Marjoram is an unpretentious plant; it is quite easy to grow it at home.
- Drainage is laid on the bottom of the container, on top - a layer of earth up to 15 cm, then - seeds with a depth of up to 2 cm, lightly sprinkle with earth on top.
- After that, the soil can be watered, put on windowsills with moderate lighting, but no drafts can appear.
- The first shoots will appear in a couple of weeks.
- After another 15-20 days - the first harvest.
Plants require regular watering.
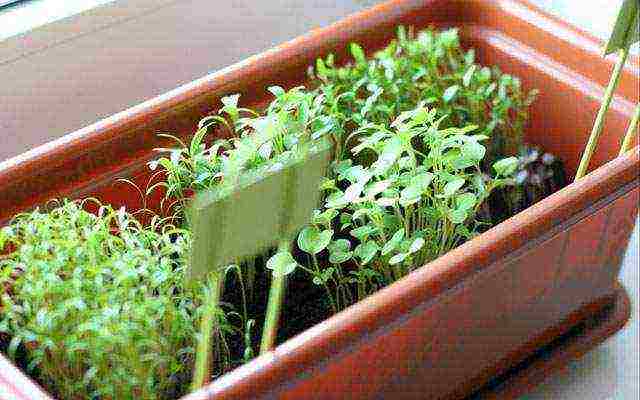
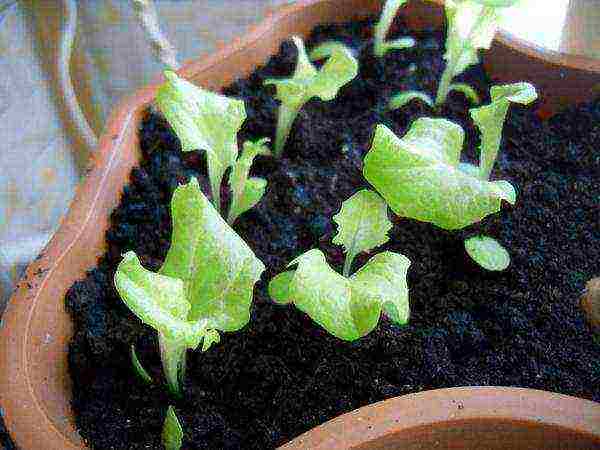
Lettuce and mustard
Lettuce is rich in vitamins K, PP, E, B, potassium, iron, iodine. Low-calorie salad, used in many diet menus to normalize blood pressure, prevent sclerosis.
Drainage is poured at the bottom of the boxes, on top - a layer of earth up to 13 cm in height, then - a small layer of the nutrient mixture. You can sow the salad tightly, watered well, covered with foil and put in a warm place. When germinating seeds, move the boxes to lighter windowsills. The first seedlings after the appearance of 1-2 leaves should be dived, planted. For the rapid growth of lettuce, the soil should be fertilized, fertilized in the complex. Watering 3-4 times a week for juiciness and freshness of the leaves. In about a month, the first crop will be ready for harvest.

Watercress containing carotene, sulfur, potassium salts, vitamin C. When salad is added to the diet, blood pressure and sleep are normalized. The salad is not picky about growing conditions. Grows in the shade, on windowsills facing north. Soil up to 12 cm is poured into the container, seeds are planted with a depth of 1 cm, slightly covered with the top layer of earth.
For the appearance of quick entrances, you need to water abundantly. After 2-3 weeks, the succulent leaves will be ready to eat. Lettuce grows well when applying fertilizers from mineral fertilizers, in sufficiently moist soil, the drying of which is unacceptable.Overheating of the air or insufficient watering will lead to coarsening of the leaves, stretching of the stems, and the formation of inflorescences. Such a salad is no longer suitable for food. The peppery, curly, ordinary, broad-leaved variety winters well on the windowsill.
Mustard greens grow well next to watercress. Seeds must first be soaked, after swelling, put on the prepared soil in boxes, sprinkle on top with a layer of up to 1.5 cm of earth, cover with foil to accelerate germination. Keep in a dark place until they appear. As soon as the first shoots appear, you need to remove the film from the plants and expose them to the light. The first harvest is in 15-25 days.
Mustard does not need to be kept at a high temperature or too much light. The best place is cool, shaded, and watering is moderate.
Green onions: growing in boxes (video)
Parsley, dill, basil and onion
Parsley with dill must first be soaked for a day to release essential oils, then deepen into the ground to 1 cm, keep the containers in a dark place until the first shoots hatch, watering the plants should be daily. Thickened seedlings should be thinned out. Feed min. fertilizers can be used after the first harvest of parsley and dill.
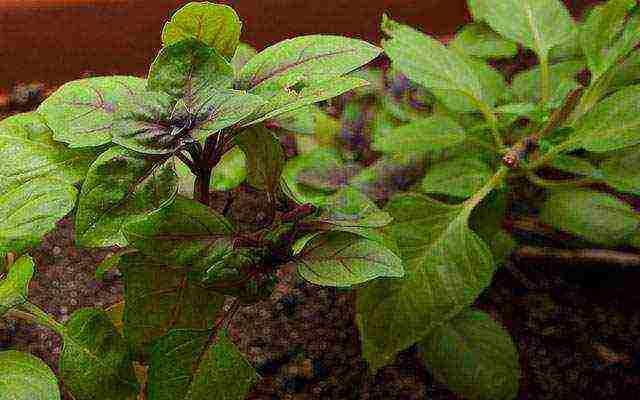
Mediterranean cuisine is not complete without aromatic basil. He loves light and warmth. In winter, it is worth taking care of additional lighting, as well as daily watering. You can plant seeds in flower pots. When the first shoots appear, apply complex fertilizers. To prolong the life of the plant, remove the peduncles during flowering.
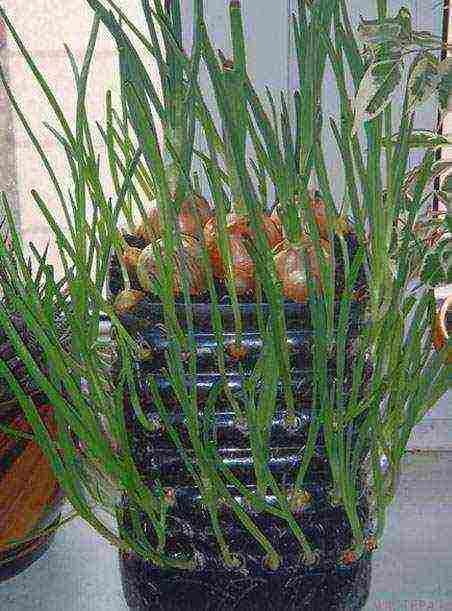
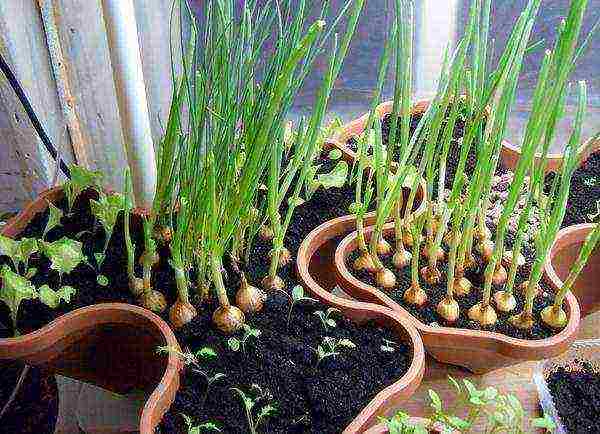
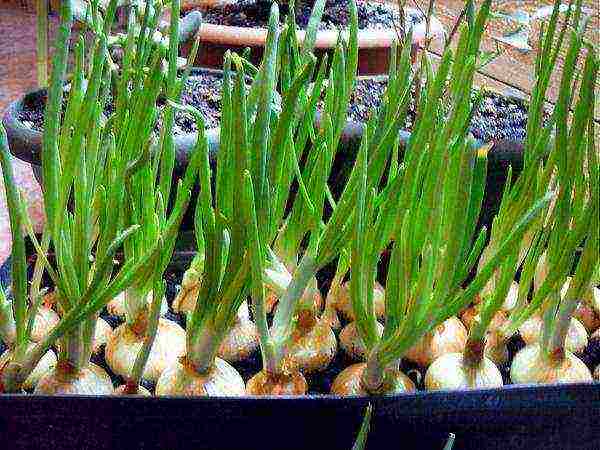
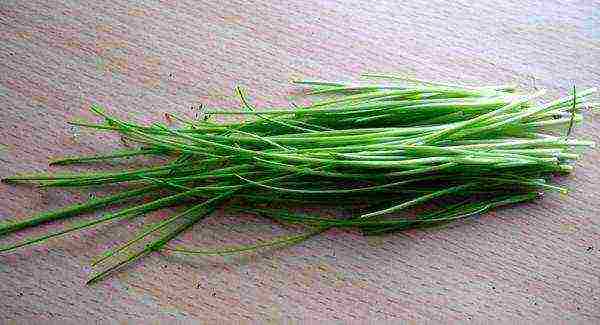
What is easy to grow on a windowsill is an onion on a feather.
A can of settled water is enough for him. Scald the onion with boiling water, place in a jar so that only the roots touch the water. When green arrows appear, cut periodically. New arrows will climb again until the bulb shrivels, but the water needs to be changed regularly.
To grow green onions in containers, pour a layer of soil up to 7-8 cm, plant the bulbs, sprinkle with soil. Expose the boxes to light, preferably south-facing windows. With a lack of lighting, onion flavoring and beneficial substances will be lost.
For forcing on a feather, it is better to plant small bulbs up to 2 cm in diameter. Plant in the ground at a distance of 2 cm from each other in half the volume of the bulb.
We grow greenery on the windowsill quickly and easily. Stock up on the right seeds in the fall. Delicious, fresh and aromatic spices will always come in handy in winter.
How to grow dill at home in winter (video)
Gallery: greens at home (15 photos)
 Useful Tips
Edible greens - an excellent and very useful food supplement that we are all used to: parsley, dill, basil, cilantro, celery and other herbs give a unique aroma and taste to our usual daily dishes. It turns out that they can be grown on a windowsill all year round, if you know some secrets, which I would like to talk about today.
When choosing dishes, it is better to pay attention to plastic containers, wooden boxes often leak. It is possible to use one long container for different types of herbs, but remember that some herbs do not go well with each other, as they require more or less watering.
In a wide dish with soil, you can plant immediately several types of greenerybut it is better if southern herbs such as marjoram, oregano or thymewill grow in a separate bowl. Parsley, dill, celery quite get along side by side in one pot.
The soil for herbs should consist of soil, peat, river sand and sawdust in equal proportions. Expanded clay or stones should be placed on the bottom of the dishes as drainage.
How to grow onions for herbs?
Easiest to grow on a windowsill green onions: for it you can use water, not soil... Pour settled water into a jar, place an onion previously scalded with boiling water on top. Make sure that only the roots touch the water.
After a short time, the bulb will shoot green arrowswhich should be trimmed as needed. The arrows will continue to grow until the bulb shrivels. Remember to change the water regularly.
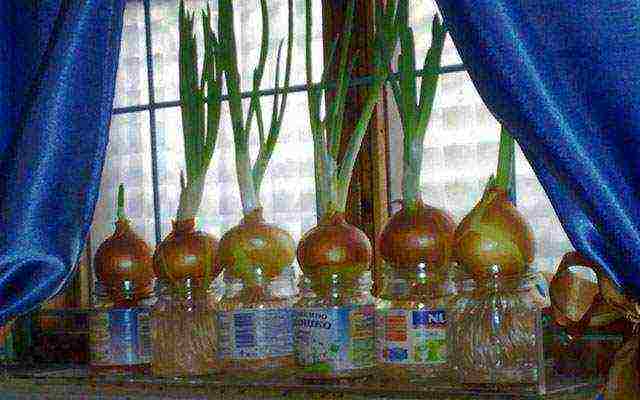
It is not at all necessary to use regular glass jars. Some housewives have adapted as containers juice packaging:

Or plastic egg packaging:

Or plastic bottle with slotted holes:
Green onions grow well in containers with soil depth from 7 centimeters and more. Onions love light, so it is better to place containers on a light south window. If you have a dark apartment, you will need to install additional lighting. In low light, ready-made bow will not have a rich taste and will not contain those beneficial substances that it should have.
Small onions with a diameter of about 2 centimeters can be used for feathering. They can be bought ready-made, or collected on your own plot in the summer. Water the soil in containers well, and then lower the bulbs into it from a distance 2 centimeters from each other so that half of the onion is in the ground.
The first onion feathers should appear pretty soon. Should water the groundso that it does not dry out. You can start the first cut of onions in 3 weeks after landing.
Greens at home: how to grow dill and parsley at home?
Dill very unpretentious and grows easily, however, in order for the herb to be ready for use, it will take about 1.5 months... For a good harvest, you need to water the grass a lot and provide it with good lighting. In winter, you may need additional daylight lamp... It is also a good idea to feed the plants with mineral fertilizers for indoor plants.

Parsley also grows well on the windowsill, but before sowing the seeds should leave in water for a day... This is necessary so that all essential oils that interfere with rapid germination evaporate. After that, you need to sow the seeds to a depth of approximately 0.5 centimeters... Until the first shoots have emerged from the ground, leave the dish with seeds in a dark place.
You need to water the plants every day. So that the shoots do not interfere with the growth of each other, they need to be thinned out... After the first harvest, you should feed the parsley with mineral fertilizers.
Homemade greens: how to grow salad on the windowsill?
Watercress grows very quickly - already on the 5th day after sowing shoots can be seen. This plant is very unpretentious and can grow even without soil: on wet sawdust, napkins or cloth. The crop can be harvested already 2-3 weeks after sowing.
Seeds are planted to a depth of about 0.5 centimeters rows, the distance between which is about 10 centimeters, they are immediately watered and placed in a dark place. After sprouting, you need to put the salad on the windowsill. Lettuce loves spraying, ventilated area, good watering. You also need to ensure that the soil was loose all the timeif lettuce grows in the ground.
How to grow greens on a windowsill: basil
Basil Is a very aromatic herb that is widely used in Mediterranean cuisine. The plant is very thermophilic and photophilous. If basil is grown in winter, it will need additional lighting... This herb also loves moisture very much, so you need to water it every day and only in the morning.
You can sow seeds in pots for regular flowers. After seed germination, it is better to feed the plant complex fertilizers... So that the sprouts do not interfere with each other, it is better to plant them. If the basil starts to bloom, remove the peduncleto prolong the life of the plant.
Moon Tips: When growing herbs at home, remember to follow the lunar rhythms. Since we eat leaves, we should sow herbs necessarily on the growing moon so that they gain strength, and the energy goes into the growth of shoots. In order for the herbs to sprout quickly, it is better to sow them in days of Fire (Aries, Leo, Sagittarius)as well as in days of Water (Cancer, Scorpio, Pisces).
Avoid watering plants in days of Air (Gemini, Libra, Aquarius)... If the grass does not require daily watering, choose days of Waterwhen the moon is at Cancer, Scorpio or Pisces.

Good days for planting herbs at home this summer: June 10-14, June 19-22, July 9-11, July 17-20, August 3-5, August 13-16, 2013
Lucky days for harvesting herbs from the windowsill this summer: June 9-11, June 19-21, July 16-18, August 13-14, 2013
Learn more about Gardener's lunar calendar for June 2013 can be read here.
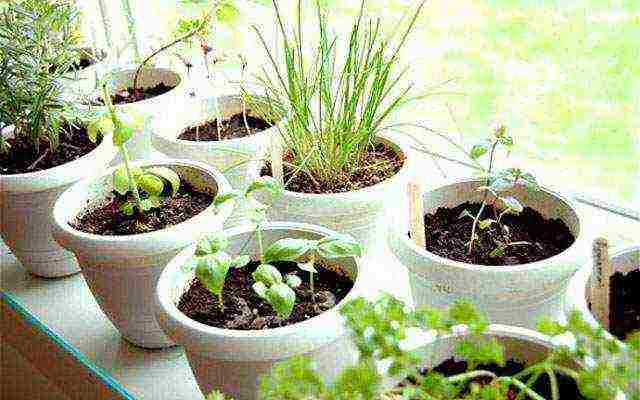
Home mini-gardens
on windowsills are now very popular. We talked about the most important rules that allow you to grow almost any vegetables in such conditions in the article
"10 secrets of the home garden"
... And this time I propose to discuss the best crops for home "beds" - those that do not require special worries, but at the same time they invariably delight with the harvest in the shortest possible time. I present my list and look forward to your comments.
Home garden. Photo by the author
1. Green onions
Topping my "hit parade", of course, green onions. Probably, at least once in his life, everyone grew it on the windowsill, even if only in childhood - out of curiosity. This is an ideal plant for a home garden: fast growing, unpretentious, useful.
As planting material you can use both onion sets (large fraction - samples) and ordinary onion turnips. I've tried both; from the seed (or small turnip), the yield, of course, is less - the bulb is depleted faster. But the feather - for my taste - is softer and more tender. In addition, the small onion takes up less space when planting. A large onion produces more greenery, its feather is usually larger, and it takes longer to harvest.
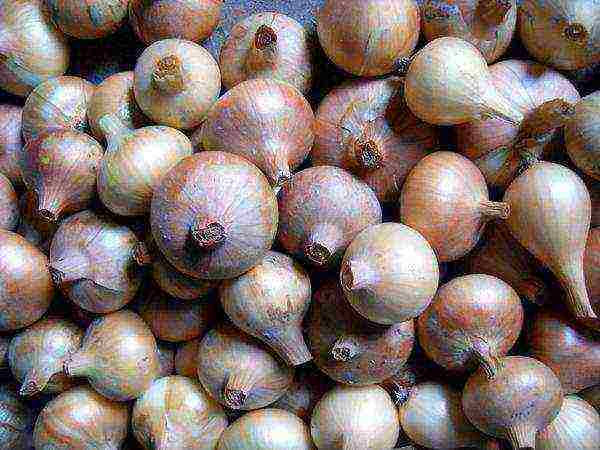
Small bulbs can also be used as planting material. Photo by the author If you do not have enough of your own turnip onions to use it for forcing, you can specially buy it in the autumn of samples - in supermarkets and specialized country shops they sell it at the end of the season with good discounts. I would not recommend purchasing such planting material for a turnip, but for distillation - just right.
You can plant onions for distillation in small containers with water or nutrient solution (so that the onion does not fall into the water, but only touches it) or into the ground. I personally like the second option more: the bulbs on the water often begin to rot, exuding a specific aroma; with unpaved I have never had such an incident.
In the soil for planting, I certainly add a hydrogel soaked in a solution of Gumi (this biological product strengthens plants, additionally nourishes them, and increases resistance to diseases). In room conditions, the soil substrate dries out quickly, and the hydrogel prevents the bulbs from suffering from moisture deficiency.
To always be with the harvest, it is best to plant an onion regularly - every 10-14 days... Then, by the time the crop is fully harvested from the first "bed", the greens will ripen on the next - and so on until spring.
A box with green onions. Photo by the author I use small plastic boxes for planting. I pour expanded clay at the bottom (there are no holes for the drain of excess moisture in the boxes, so drainage is necessary), on top - soil with hydrogel up to about half of the box. Having slightly compacted the mixture, I plant the bulbs in it close to each other, without burying them in the soil. I water it abundantly - that's all.
Since I plant usually already sprouted bulbs, the harvest does not have to wait long. I do not carry out any specific procedures (pruning, soaking, etc.), which are often recommended to be performed when forcing onions on a feather, - I do not see a special need, and there is always not enough time. But if you, friends, have such an experience, and you see the benefits of such processing, be sure to share your opinion in the comments - the recommendations of practitioners are always invaluable!
You can also read our publications:
- How to grow delicious onions on a windowsill - secrets and subtleties
- A vegetable garden on the windowsill: we grow onions, garlic and carrots for greens
- Forcing onions in special boxes: the experience of Yulia Minyaeva
- Growing green onions in a plastic bottle
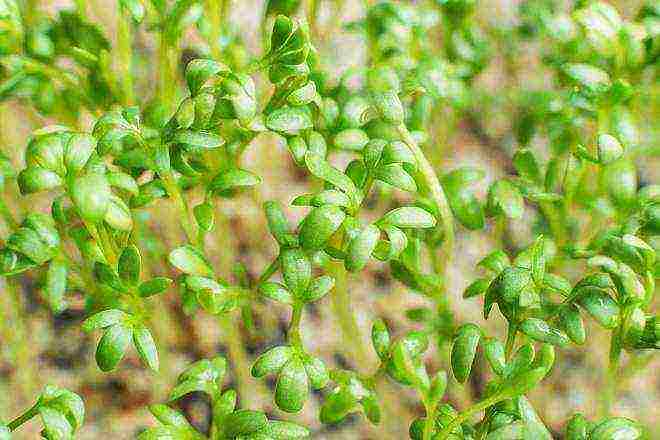
2. Watercress
I will say right away: I myself have grown this plant only once - I was not impressed by its gastronomic properties. Personally, I liked mustard leaf more - it is also a very undemanding cruciferous plant. But taste, as you know, is a purely individual thing, and I still take the liberty of recommending watercress as one of the best crops for home gardens. Why?
- Firstly, he - like the bow - is extremely unassuming. Those who do not have the ability or desire to spend time on laborious care of the "beds" on the windowsill will certainly appreciate it, I suppose.
- Secondly, it is very early ripening: already in 2-3 weeks after the emergence of shoots (and they will not be long in coming) you will be pleased with young vitamin greens.
- Thirdlynature has endowed watercress with many beneficial properties: regular consumption of this culture helps to normalize blood pressure, improve digestion and sleep. It was used as a remedy for scurvy, and anemia and vitamin deficiencies were treated with juice.
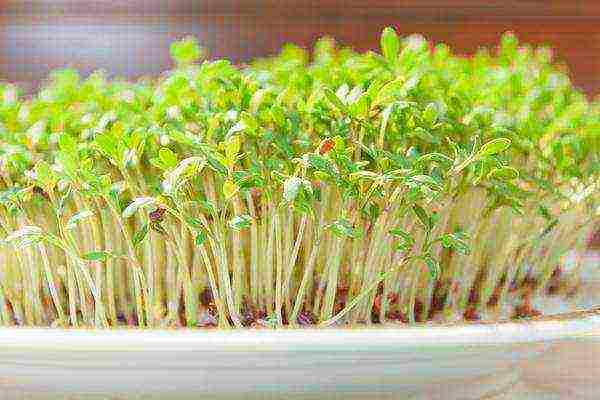
Watercress - Harvest in Two Weeks If you have children, try sowing watercress with them - at least for the sake of experiment. This plant is one of those with which it is worth starting the introduction to gardening, because failure is almost impossible!
Watercress grows successfully on windowsills even in winter - it is very cold-resistant (the ideal temperature for it is from +15 to +18 degrees) and is not picky about light. The only thing he needs is regular moistening of the soil and air, since this plant does not like drought. To keep the greens on the table constantly, it is recommended to sow the next portion of watercress every 7-10 days.
I recommend reading more about growing watercress in the article How to quickly and easily grow watercress on a windowsill.
3. Lettuce
As a big salad lover, I could not, of course, ignore it. This culture is a little more demanding than green onions and watercress, but for the juicy greens it is worth the effort. What do you need to consider?
- Firstly, lettuce at home needs additional lighting - this is a light-loving culture. Lack of lighting will lead to early peduncle formation. The problem is partially solved by the choice of varieties. Lollo Rossa and Lollo Bionda (my favorites) have shown themselves well; recommend for home gardens also varieties New Year, Vitamin, Emerald lace.
- Secondly, lettuce reacts painfully to drought and heat: the leaves become coarse and bitter, flower stalks form quickly.
- Thirdly, lettuce shoots need to be thinned. It is recommended to do this twice: a week after the emergence of seedlings at a distance of 1-2 cm between seedlings, and in the phase of 2-3 true leaves - at a distance of 4-5 cm.If you thicken the crops, the plants will elongate, weaken, and you are most likely to harvest , you will not see.
Young lettuce plants. Photo by the author From growing head lettuce at home, it is better to refuse until there is enough experience: they are more demanding and need more careful care than their leafy counterparts, and their growing season, as a rule, is longer. To be honest, I did not even try to grow lettuce at home to the standard sizes that it reaches in the garden - tender young leaves were enough for me. But, if space permits, and there are conditions suitable for a salad, it is quite possible to get large outlets.
4. Parsley
You can get parsley greens at home in two ways: sowing seeds in the ground and forcing from prepared roots. The second method, although it requires some preliminary preparation, is generally simpler. Even if you have not prepared planting material since autumn, you can look for high-quality root crops for distillation in the vegetable departments of stores.
For our purposes, absolutely healthy parsley roots of medium size (30-60 g in weight) without signs of wilting are suitable. They must have an apical bud - heavily trimmed plants will not produce greenery.
Having well moistened the soil in a box or flower pot, we plant root crops, covering their tops with soil. Too long can be cut (sprinkled with charcoal cut to avoid rot) or planted obliquely. The latter option is considered even more preferable than the regular fit.
Parsley from seeds at home. Photo by the author If you grow parsley from seeds, you need to take into account two nuances: the plant is photophilous, and its seeds germinate rather slowly. When sowing, the containers with parsley were not very well located relative to the light source, and the seedlings immediately began to stretch out. And it was possible to accelerate germination thanks to the preliminary soaking of the seeds in a solution of Gumi (I will certainly tell you more about this wonderful preparation somehow).
Parsley is not afraid of cold weather, so it feels great on the windowsill. The plant also does not impose special requirements for moisture - we water it as needed, depending on the conditions in the room. I already traditionally add hydrogel for all such plantings, so I usually don't have any problems with watering my home garden.
Read more about growing this plant at home in the article How to grow parsley on a windowsill.
5. Chive bow
This crop will require a little preliminary preparation: in order to get a harvest all winter, it is necessary to prepare planting material for forcing... Small curtains of chives are dug up and, having cut off the feather, are planted in boxes or pots, which are stored in the basement or on the balcony.
In winter, they are brought into a warm room as needed and placed closer to the light. The feather grows quickly on chives; it can be plucked from the bush selectively or cut off completely. I love the taste - it is softer and softer than regular green onions, so (given the ease of growing) I have no hesitation in putting chives on my list of the best crops for home gardening.
As my experience has shown, at home, a crop from one plant can be obtained twice, after which it is depleted, even with good care and feeding. Therefore, it is wise to prepare several containers of planting material in order to grow greens throughout the winter. Well, in early spring, chives are one of the first to sprout in the garden.
Chives greens - a crop from a home garden. Photo by the author It is advisable to take planting material for forcing from those plantings that you intend to thin out or completely remove - the plants used for forcing are no longer restored, and after the final harvest they are removed.
An important nuance: chives are very sensitive to moisture - with a lack of moisture, the feather coarsens and begins to noticeably bitter, flower stalks form quickly. I set up an experiment: I planted the same cuttings in the same containers; one - in a regular soil, the second - in a mixture of soil with hydrogel. Differences in the growth and development of plants, visible, as they say, with the naked eye, confirmed the assumption about the benefits of using a hydrogel in this case as well.
Let's sum up
Here's a list. I tried to grow radishes, and dill, and cilantro at home; in childhood, she planted beans and peas. I drove out the greens of beets and carrots, tried to preserve the basil transplanted from the garden ... In a word, there were many different experiments, and these crops were among my favorites.
Decisive when choosing there were factors such as ease of cultivation and undemanding conditions. I will repeat what I have already said more than once: almost any garden culture can be grown at home, but not everyone has the opportunity for this.Therefore, the best plants for a home garden are those that anyone can easily grow.
Let me remind you: A vegetable garden on a balcony or windowsill: the peculiarities of home gardening is the topic of another lesson in our Academy of the gardener. The recommendations of the specialists of the Agrofirm Search, together with whom we organized this project, will help beginners quickly master the wisdom of gardening, and experienced gardeners - to systematize and deepen their knowledge.
What do you grow on the windowsills? What do you agree with in my story, and what could you argue with based on your own experience? Share your opinion in the comments, tell us about your favorite plants!
Growing greens yourself at home is quite simple. Follow our advice - and fragrant freshly cut greens will be on your table all year round.
Many types of greenery do not require special care, additional lighting and feeding. So why not use the free space on the windowsill wisely?
What do you need to grow greens at home?
You will need pots, bowls, plastic cups, crates, or any kind of plastic containers. The main thing is that they have holes for draining excess water. At the bottom of the container, it is advisable to pour a small layer of drainage (5 cm is enough).
A plastic wrap or a cap made from a plastic bottle is also very useful. They will help create the necessary moisture level so that the seeds germinate faster.
Plus, you need good quality seeds and fertile soil to grow greenery. A mixture of compost, peat and turf is best.
What can be grown in winter?
If you create a special environment for the plants (for example, use the hydroponics method), then at home you can grow anything you want: not only greens, but also tomatoes, cucumbers, beets, turnips, beans, purslane. But it is better for a beginner to go the simpler way - to start by growing unpretentious and popular green crops.
Watercress
This plant prefers shaded areas, so for growing, choose a windowsill that is located on the north or northeast side. In a container with fertile soil, sow seeds to a depth of 0.7-1 cm and water well. Shoots should appear in a week, and after another 1-2 weeks you can enjoy the first freshly cut leaves.
To consistently harvest watercress, sowing needs to be repeated every 10-12 days.
Onion

You probably know that if the bulb is simply placed in a glass of water, green feathers will soon grow out of it. But you cannot harvest a large harvest from one onion head, so it is better to plant several bulbs in the soil at once.
Cut off the top of them to speed up germination, and plant them close to each other (the distance between them should be no more than 1 cm). Moisten the soil periodically with warm water and make sure that the plant gets enough light.
In the same way, you can grow garlic for a feather at home.
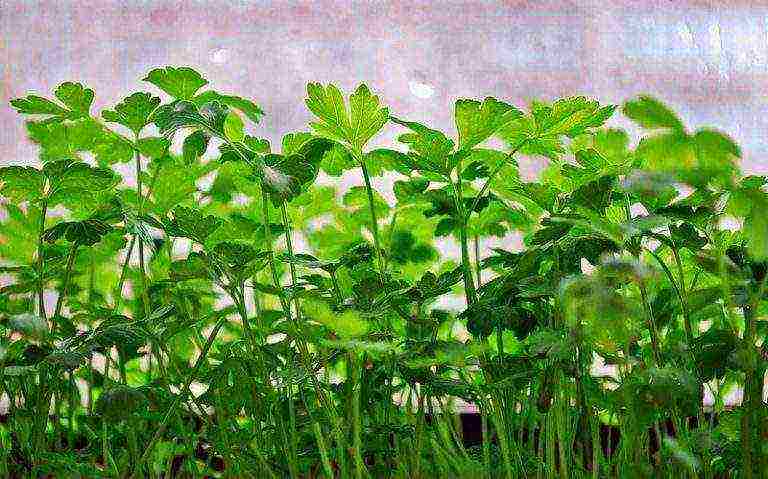
Parsley

Parsley seeds are first soaked, germinated and only then sown in fertile soil. After the first shoots appear, the seedlings are thinned out, leaving the strongest plants at a distance of 3-4 cm from each other.
If you create favorable conditions (parsley is very fond of light) and do not forget to water it, the harvest can be obtained in 1.5-2 months. But keep in mind that only half of the leaves need to be plucked from the plant. Otherwise, it will not be able to recover.
Dill

It's easy to grow these greens. Sow dill seeds in pots with other plants on your windowsill and lightly dust the crops with soil. After 3-4 weeks you will be able to harvest the first harvest of fragrant and very healthy greens.
Spinach
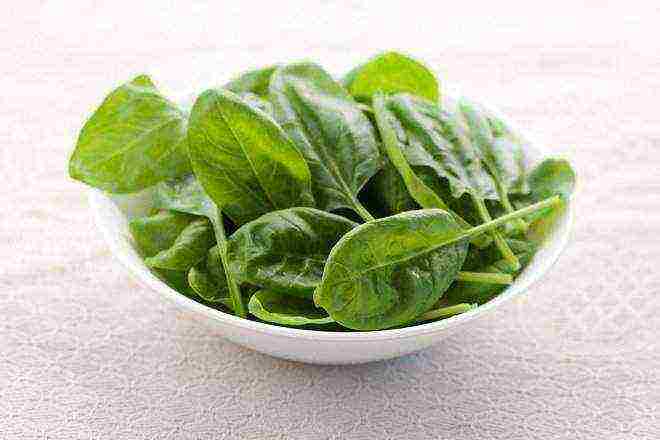
Spinach is recommended to be grown on the south or west side. The seeds are pre-soaked, dried and sown in January-February, almost without burying them in the soil.The most favorable temperature for growing is 16-18 ° C.
Spinach needs moderate watering, good lighting and fresh air. In such conditions, the harvest will be obtained after 1-1.5 months.
Borago, or cucumber herb

The leaves of this unpretentious culture smell like a cucumber. Sow borago seeds to a depth of 2 cm, water - and in 8-10 days, shoots will appear. The plant is undemanding to lighting, you can place it in any corner of the house.
Leaf salad
Sow the seeds into the container in a row method, moisten the soil with a spray bottle and stretch the plastic wrap. Spray crops daily and add water from a watering can to the container if necessary. When shoots appear, remove the polyethylene and thin out the plants.
Lettuce seedlings grow best with good lighting and adequate watering.
Arugula
This unpretentious plant has an amazing spicy taste and bright aroma, which makes salads with the addition of arugula very unusual.
Growing arugula on a windowsill is pretty easy. On loose and well-moistened soil, spread the seeds in rows at a distance of 3 cm from each other. Sprinkle them with a thin layer of dry earth, then use a spray bottle to spray with warm water.
Cover the container with crops with plastic wrap and place in a warm, but not dark place.
If the arugula does not grow well, use additional lighting, especially if the weather is cloudy throughout the day.
Air and water the plant daily. When shoots appear (usually 5-7 days after sowing), remove the polyethylene. Now care for arugula will consist only in regular watering (at least every other day).
As you can see, growing greens on a windowsill is quite simple. Even in autumn, stock up on the seeds of these useful plants - and in the cold season you can enjoy their amazing taste.