Content
- 1 Description of beans
- 2 How to choose the right variety of beans for your home?
- 3 Preparation of planting material and land
- 4 Planting stages
- 5 Care and watering
- 6 Harvesting the first harvest
- 7 Warnings
- 8 What do you need
- 9 Origin and distribution of beans
- 10 Briefly about the biology of beans
- 11 Growing beans
- 12 Bean care
- 13 Timing of watering beans
- 14 Summer Bean Feeding
- 15 Bean garter
- 16 Protecting beans from disease
- 17 Measures to combat fungal diseases of beans
- 18 Protecting beans from pests
- 19 Harvesting beans
- 20 Bean varieties for growing in the country
Beans are known to every inhabitant of our vast country, but not everyone knows about their varieties and growing rules. Cultivating this kind of culture at home is a snap. Beans are rich in various vitamins and microelements by their composition. With all this, in terms of care, it is an unpretentious plant. So, how to plant beans correctly, and what care features are there?
Description of beans
The plant belongs to the legume family, which unites about 97 species. His homeland is considered

Lat. Phaséolus
Latin America and India. Beans are widespread in England, France, Brazil, Germany, etc. In Russia, it appeared in the 16th century. An interesting fact - initially this plant was grown only for decorative purposes, and after several centuries, it began to be cultivated as a vegetable crop.
This is a truly unique plant, since its fruits contain a huge amount of useful elements that are so necessary for the human body.
There are a lot of species of this plant: mainly common beans were common in our country. Beans can be:
- curly;
- half-crumpled;
- bush.
In the first case, the length of the plant can reach five meters or more, in the second - up to 1.5 meters, and in the third, the height can vary from 20 - 70 cm. In Russia, bush varieties are more preferred.
During the flowering period, the plant can become a decoration for a vegetable garden, a garden plot or a local area. It has rather large leaves, and the flowers are irregular butterflies, collected in inflorescences of 2 - 6 per brush. The length of the pod depends on the variety, it can vary from 5 - 25 cm.Their color can be different:
- White;
- Red;
- Purple;
- Black.
In addition, beans are subdivided depending on the structure of the valves:
- Sugar or asparagus;
- Semi-sugar;
- Peeling varieties.
An interesting fact: the plant is thermophilic, because its seeds germinate only at a soil temperature of about 10 degrees, in this regard, the culture is sown at the same time as cucumbers.
How to choose the right variety of beans for your home?

Bean pods
Is there a difference between a greenhouse and a glazed loggia? The answer is no. We choose a place for location along the walls so that our plant does not shade others.
Above, we figured out that there are several types of this plant: climbing, semi-climbing and bush. The latter species is the fastest ripening, which is important for some regions of our country. Curly plants will have to be tied to a trellis (a lattice that serves as a support for plants), and bush plants can be tied to sticks up to 60 cm high and this will be quite enough.
It is better to refuse hulling varieties of beans right away, they are not suitable for growing in greenhouses.
For a loggia, sugar or asparagus beans are ideal. The most popular of these are the following varieties:
- "Caramel";
- The Oil King;
- "Sachs 615".
First grade: in 2 months, the bush can give pods of a pleasant sugar taste.It should be noted that this variety is resistant to all diseases.
The second can be harvested in less than 2 months. The pods are tubular in shape and can reach a length of 25 cm. The taste is delicate. They can be used both fresh and harvested for future use.
The last variety has a length of no more than 40 cm. As in the second case, it has tubular pods up to 12 cm. They contain a huge amount of nutrients and sugar.
Preparation of planting material and land
The fruit of the bean has a hard shell; it grows rather poorly from dry seeds.

Bean seedlings on the windowsill
Immediately before sowing, it is not recommended to soak them, because they will simply rot in the cold soil.
Professionals proceed as follows: the seeds are placed in a small container and poured with a weak solution of potassium permanganate. The temperature of the solution should be at least 70 degrees. After this procedure, the seeds should be sown immediately. Pour the rest of the hot solution into the ground.
Or you can do it differently: dilute a weak pink solution of potassium permanganate in water, its temperature should be approximately 60 degrees. Pour the soil with this solution and sow the beans immediately.
If you are going to grow beans at home, it is important that the balcony or loggia is glazed. As a rule, they begin to sow it in late spring. If you do not have a balcony, but you still want to enjoy delicious fruits, do not despair. Containers or seed boxes can also be placed on the windowsill in the room, but in this case the seeds are sown in mid-March.
The soil for this plant should be loose, fertile and rich in various trace elements.
It does not tolerate acidic soil, it must be slightly alkaline, therefore, a deoxidizer should be added before sowing seeds. For this, you can use chalk, dolomite or ash.
Planting stages
Remember that the planting site must be well lit, otherwise the plant will not grow in the shade. And this means only one thing: if you are going to grow beans in a room, then it will need additional lighting.
Stage 1

First shoots
Seeds can be planted in the ground immediately (as described above) or previously germinated. If you prefer the second method, then the scheme is very simple:
- We take the required amount of seeds and wrap them in cheesecloth;
- We collect a little warm water in a small container and dip the seeds into it;
- As it evaporates, add water to the container.
It is important to know that all specimens must be carefully examined for defects before planting.
Damaged seeds are sifted out immediately. Only in this way will you protect your plant from pests, and they can ruin the harvest even on a loggia or in an apartment.
Stage 2
Particular attention should be paid to the choice of a box or container for planting a plant. For bush varieties, we choose a container with a volume of at least 2 liters, and for climbing varieties - at least 35 liters.
Once you have acquired the correct box, you should tackle the soil. For the selected varieties, we use the following composition: 2 parts of soil and one part of humus.
Stage 3 Disembarkation
There is no difficulty in this. It is enough just to adhere to some rules and recommendations:
Before planting the seeds, even if you have soaked them beforehand, you should dip them in hot water or pour it over the soil.
Seeds are planted at a distance of 10 cm from each other, while two grains can be placed in one hole at once.
The optimal time for planting is late spring. After 5 - 7 days, the beans will give their first shoots, after 6 weeks - the plant will bloom, and in a few weeks it will give the first harvest.
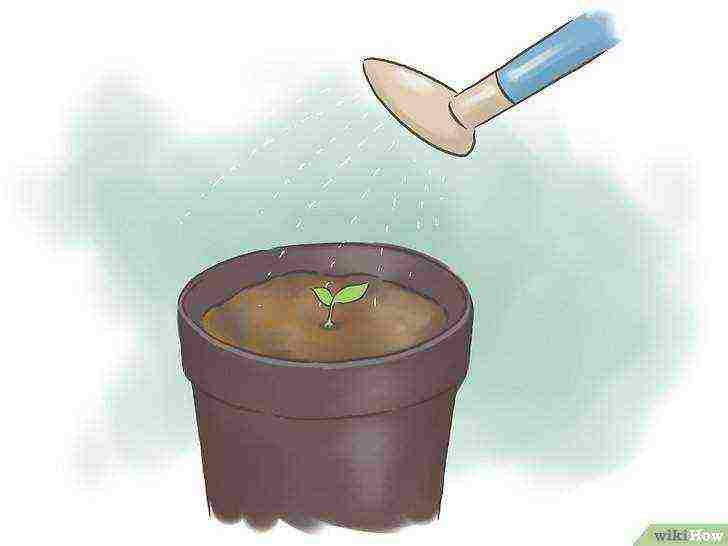
Care and watering

Sprouting beans
In order for our plant to give a good harvest, it is necessary to carry out proper watering.
Absolutely the entire legume family loves water, especially the plant needs it when the pods appear.Watering should be carried out as it dries, it should be moderate.
Water should not get on the leaves, otherwise the plant can get sick with a fungal disease.
Watering is best done in the morning. It is stopped after the appearance of the second pair of leaves, and resumed from the beginning of flowering of the plant.
On cloudy and cold days, beans need extra lighting. After the first shoots have appeared in the container, you need to stick a stick to which in the future they should be tied.
The plant does not need special fertilizers, but they will not be superfluous either. For this, you should choose a mixture containing potassium and phosphorus. Fertilizer should be applied no more than once every 2 weeks.
Important! Even at home, the plant can be affected by a spider mite or caryopsis.
The latter can fall into the ground during planting, and then settle inside the fruit. If this still happened to your plant, then it is important to treat it with special biological products.
Harvesting the first harvest
The pods, as soon as they are ripe, are immediately removed and used. In this case, several pieces can be left for the next planting, but they must fully mature. Growing this crop at home cannot be called large-scale, but, for example, 8 planted bushes will be enough to harvest after 2 months.
Cool weather can shift the timing of fruiting somewhat. If you decide on curly varieties, then it will be enough to plant about 5 bushes on the loggia.
While watching the video, you will learn about growing beans.
Beans, of course, are useful, because they are rich in useful vitamins and minerals, and they also contain vegetable protein, which is similar in composition to meat. It is unpretentious in care, the main thing is that you must strictly follow all the rules and recommendations and you will achieve a rich harvest.
Legumes
Part 1 Preparation
-

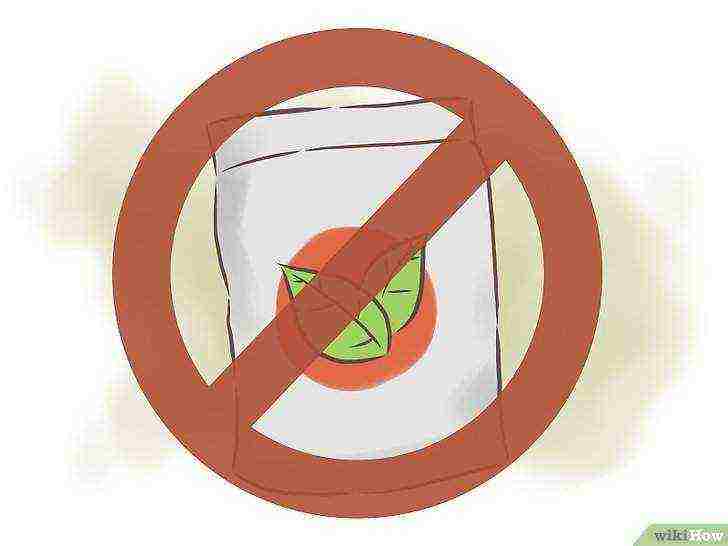
Use seeds instead of seedlings. Most bean varieties do not survive the transplanting process, so you should plan to sow the seeds directly rather than plant the plants.
-
 Choose a suitable location.
Beans need full sun to grow well, so you should plan to grow them in an area that receives at least six hours of direct sunlight a day, if not more.
- If possible, find a place where the soil is naturally loose. Loose soil drains water more efficiently, and this is critical if you want to grow healthy beans. If you notice water settling or water accumulating in a given area when it rains, consider choosing a different location.
- Practice crop rotation year after year. Do not plant beans in soil where other legumes have been growing in the past three years.
-
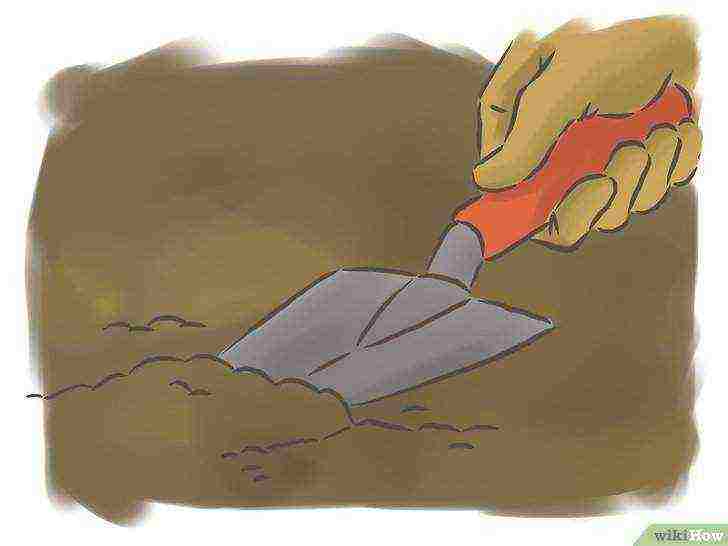 Improve the soil.
The soil should be light and loose enough to allow water to drain. If the soil is too heavy, then you need to change it with enough organic material to equalize the soil. Soil pH should be close to neutral.
- Good soil includes manure and compost. Any of these options will help reduce the overall density of the soil, as well as provide many nutrients for the plant as it begins to grow.
- Improve the soil by mixing these additional components with a shovel or small rake a few weeks before planting.
- The pH of the soil should be between 6.0 - 7.0.
- Also, consider mixing a powdered modifier into the soil. It is a naturally occurring, healthy bacterium that facilitates nitrogen absorption in beans during their earliest and most critical growth stages.
-
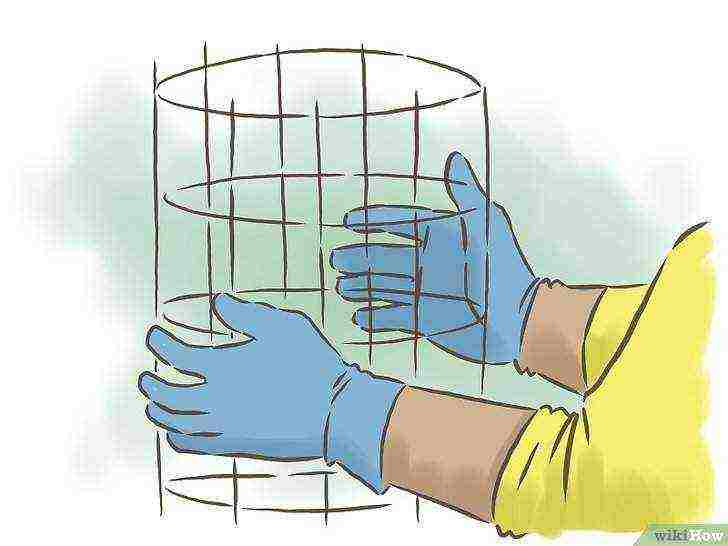
Install a support if necessary. While many popular bean varieties are bush beans, there are several curly bean varieties. Climbing beans grow vertically, so you will need to secure stakes or supports in the growing area if you want these varieties to produce maximum yield.
Part 2 Landing
-
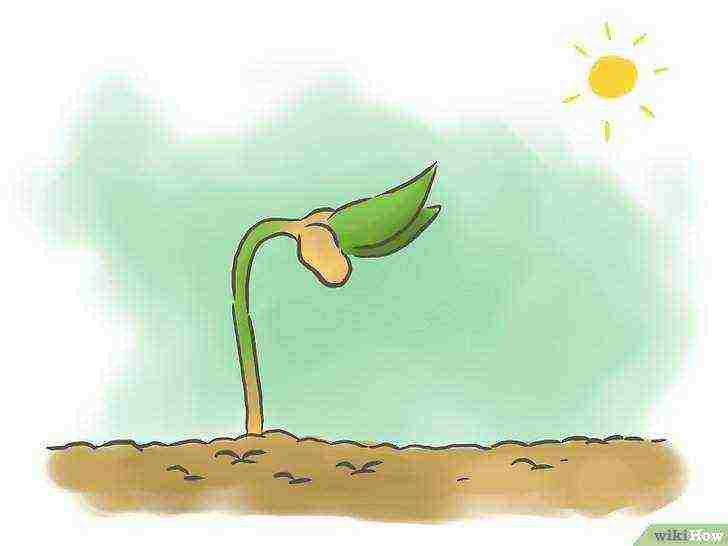
 Wait for the last frost to pass.
Beans require adequate heat and moisture to grow well. Plant it in the spring as soon as you feel that the last frost has already passed.
- Soil temperature should be 20 -27 ⁰С. If at all possible, do not let the soil temperature drop below 16 ° C.
- Ideally, the air temperature should be between 18 and 27 ° C during most of the growing season.
- If frost does strike unexpectedly after sprouting the beans, cover the seedlings with a little mesh cloth or canvas to help protect them from frost.
-
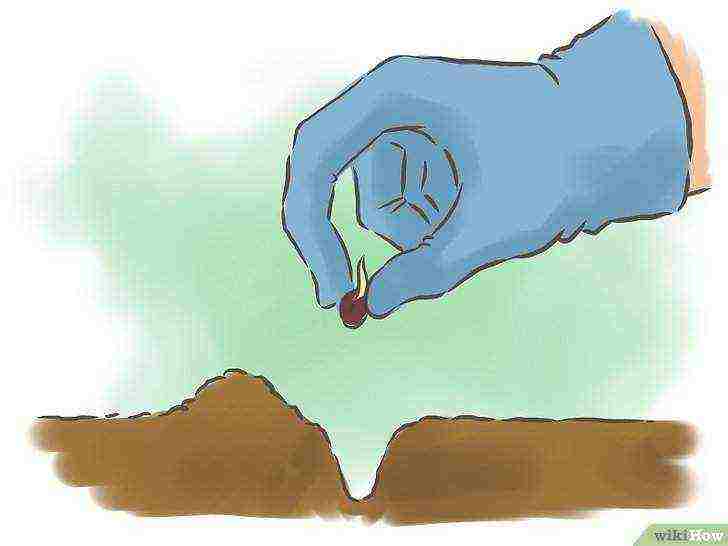 Plant the seeds deep enough.
Bean seeds should be planted 2.5 to 4 cm deep.
- Many gardeners prefer to plant seeds 2.5-5 cm apart initially. After the seedlings reach a height of about 8 cm, thin them to a more suitable distance, removing the weakest seedlings if possible and keeping the strongest ones.
-
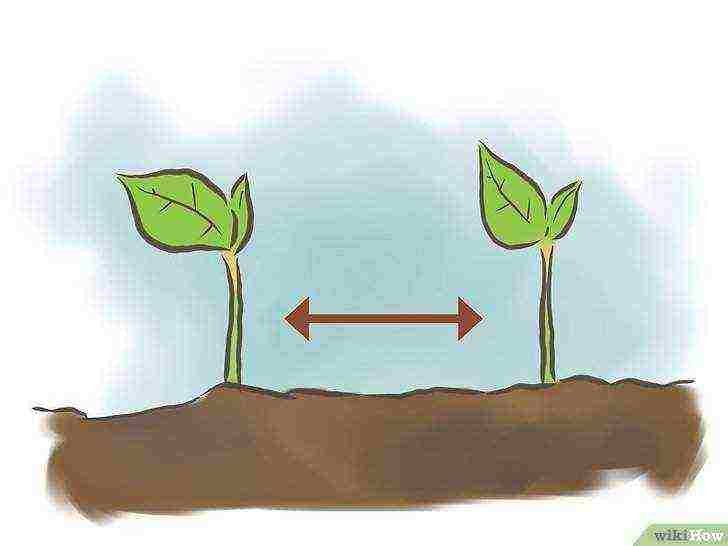 Give the seeds enough space.
For most varieties, you will need to plant individual bean seeds 8 to 10 cm apart.
- In particular, climbing varieties grow well at a distance of 10 cm from each other, while compact bushes grow well if they are located at a distance of 20 cm from each other.
- The seeds should germinate within 10-14 days.
Part 3 Growing in a container
-
 Choose a large pot.
While container gardens do not provide the most beneficial conditions for beans, these plants can grow in containers when properly cared for. For each bean plant, you will need a 30 cm pot.
- If you choose to grow beans in containers, you should choose a bushy variety instead of a climbing variety. The bush variety tends to be better in more confined spaces.
- The main reason why beans are not usually grown in containers is simple - the harvest from one medium plant is not enough for one person. You will typically need to plant six to ten plants if you want to provide yourself with enough beans for regular use. However, you should only plant one beans per pot, so you need six to ten separate pots if you plan to grow enough beans for yourself.
-
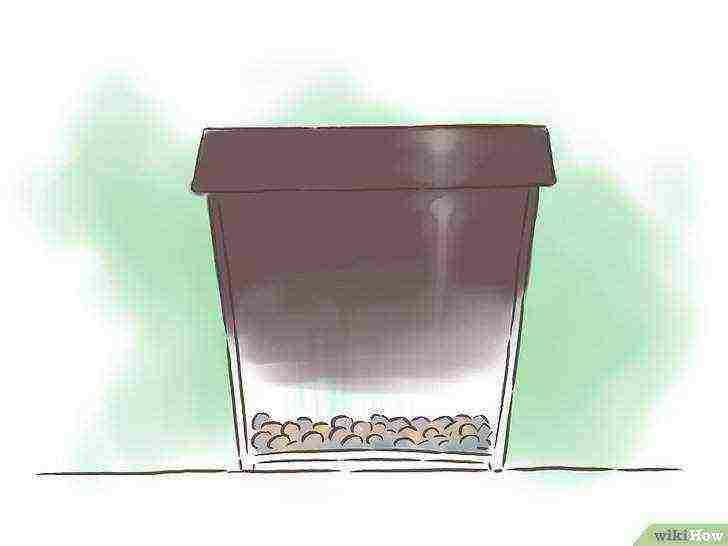
Add gravel to the container. Before adding soil to the container, you will need to spread out a layer of gravel at the bottom to improve drainage. Otherwise, alas, beans can quickly become waterlogged in pots.
-
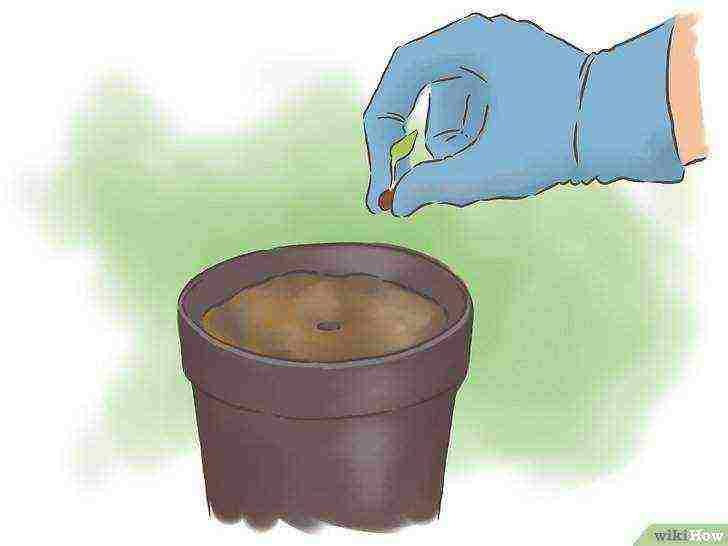
Plant the seeds deep enough. As in the open field, bean seeds should be planted 2.5 to 4 cm deep. Plant the seeds in the middle of the pot.
Part 4 Daily and Long Term Care
-
 Water only when the soil is dry.
The soil should not be too damp, as the roots of the plant are easily damaged by waterlogging. Therefore, you should water the plants if the area is completely dry.
- Instead of watering the soil in an attempt to keep it constantly moist, you should only water it when it is completely dry, at least 3 cm. You can test this by gently pressing your finger into the soil and feeling the moisture.
-
 Avoid high nitrogen fertilizers.
While nitrogen-based fertilizers will make bean plants full of life and leafy, these fertilizers do more harm than good as they encourage the plant to direct its energy to the leaves rather than the fruit. Large doses of nitrogen will produce an impressively leafy plant that has very few beans.
- When the plant begins to grow, the beans actually produce their own nitrogen within the roots. A fertilizer with a high nitrogen level will inevitably feed the plant too much nitrogen.
- If the plants are suffering and need additional nutrition, use a small amount of organic fertilizers that do not contain a lot of nitrogen.
-
 Be careful when removing weeds.
The roots of the plant are quite shallow, so when you pull up the weeds, you need to do it so carefully that you don't accidentally disturb or damage the roots of the beans.
- Never cut the weeds around the beans with a hoe or shovel. Instead, you have to pull out the weeds by hand.
- You can also remove weeds by spreading a 2.5-5 cm layer of mulch around the plant after it has germinated. In addition, mulch has the added benefit of maintaining adequate levels of heat and moisture, and protects the pods from rotting as soon as they touch the ground.
-
 Watch out for pests and diseases.
Some garden pests target beans, and the plant is also vulnerable to several different diseases. If you run into problems, you may need to apply an appropriate pesticide or fungicide.
- Beetles, slugs, scoops and leafhoppers will appear when leaves appear on the plants. They can be easily removed if you check the plants regularly and collect the insects as soon as you see them. Although, if that's not an option, look for a pesticide that targets these insects specifically.
- Aphids can also attack a plant, but they cannot be removed manually. Treat the plant with an appropriate pesticide as soon as you notice aphids, as these pests can spread the bean mosaic virus.
- Legume rust is a reddish-brown fungus that can show up as spots on the leaves of beans and should be treated with a fungicide as soon as you notice the first signs of rust.
- Also, the plant can attack powdery mildew. It looks like a fine white powder. You should treat the plants with the fungicide as soon as possible and reduce the amount of watering. Wet conditions are good for mold, so plants should only be watered into the soil, not over the leaves.
- If squirrels, deer, or rabbits become pests, you can protect the beans with a fence or net.
Part 5 Harvesting and storage
-
 Collect all the beans at the end of the season.
Bush varieties must be harvested once at the end of the growing season. Climbing varieties can be harvested several times during the season, but the highest yield will usually be at the end of the season.
- Depending on the variety you choose, the beans should be ready for harvest in 90-150 days.
- Climbing varieties produce crops on a regular basis for one to two months.
- Sufficiently ripe bean pods will feel dry to the touch and the beans inside the pods will be very tight.
- Check the beans from one pod before harvesting the other pods. You can check if the beans are done by gently biting one. If the teeth leave a dent in the beans, the rest should be allowed to dry for a longer period of time before being harvested and half-licked.
-
 Pull the plants up early if necessary.
If cold temperatures or other unfavorable conditions threaten the crop, you can remove the beans earlier and let them dry afterwards.
- In high humidity, it is difficult to dry the beans on the plant. In this case, you will need to finish drying the beans indoors.
- Pluck the plants and hang them upside down for a few days or weeks, until the pods are dry and the inside of the beans is firm. Most of the foliage must die off before plucking the plants.
- Keep the beans in a warm room with plenty of circulating air when drying them.
-
 Break the pods apart.
After you have plucked the pods from the plant, you will need to open them and pull out the beans hidden inside. If you've allowed the plants to ripen properly, the beans should already be firm and dry.
- You can half-sheathe a small crop by hand, but if you have a large crop, you can batch half-shell the beans. Place the pods in a pillowcase or similar bag. Step carefully on the pods through the pillowcase to open them. When done, sift the pieces to sort the beans and leave the broken pods aside.
-
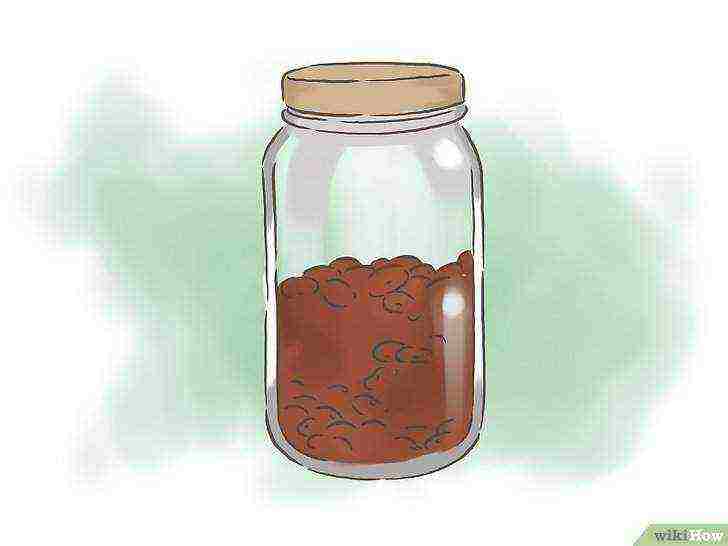 Store beans in a dark place.
Place the harvested beans in a jar and store in a dry, dark place until use.
- Dried beans can be stored for up to one year under the right conditions.
- Store beans in airtight jars or bags.
Warnings
- Raw beans and their sprouts are poisonous. Beans should only be eaten after soaking and cooking in boiling water for at least 10 minutes.
What do you need
- Bean seeds
- Manure or compost
- Powdered modifier
- Support (optional)
- Shovel
- 30 cm container (optional)
- Gravel (optional)
- Watering can
- Pesticide or fungicide (if needed)
- Guardrail or mesh (if necessary)
Article Information
This page has been viewed 23,730 times.
Was this helpful?
In terms of nutritional value, beans are a strategic crop and are among the top ten healthiest vegetables. The amino acid and protein composition of beans is close to the proteins of meat and fish and can replace them in extreme conditions. Bean proteins are absorbed by the body by 75%, being a building and energy material for it. One of the few crops that is not used raw, but when cooked and preserved, retains up to 70% of vitamins and 80% of minerals that make up the beans. With such a high nutritional potential, beans are used not only as a food crop, but also in official and traditional medicine, helping to cure a large list of diseases.
Common beans (Phaseolus vulgaris)
Origin and distribution of beans
The first mentions of this wonderful culture date back to years before the new era. More accurate information dates back to 5000 BC. The place of origin is called South and Central America. In Russia, beans appeared around the 16th century, first as an ornamental flower culture, and from the 18th century. has firmly taken its place in the kitchen as a vegetable crop, delighting housewives and chefs with an endless variety of nutritious dishes with great taste.
Briefly about the biology of beans
Beans (Phaseolus) in the plant system belongs to the family legumes (Fabaceae). Contains about 90 species, among which the type is accepted Common beans (Phaseolus vulgaris). Under natural conditions, it grows in warm zones of Europe and Asia. Outdoors, it is cultivated in the southern and adjacent regions of the European and warm regions of the Asian part of Russia.
Common beans are an annual herb with a tap-branching root, from 0.5 to 3.0 m in height, bushy or climbing form.
Bean stems are branched, covered with sparse hairs. Leaves are intensely green in different shades, trifoliate long-petiolate. Flowers are located in the axils of the leaves.
Bean flowers are irregular moth flowers, 2-6 in a sparse raceme. The color of sepals: white, cream, pink, lilac, purple, violet, gives plants an elegant look and is often used simultaneously as a food and ornamental crop in suburban and house plots.
The fruit of the bean is a bivalve bean (not a pod). The seeds are in the form of beans, separated from each other by incomplete septa.
Bean fruit is straight or curved, 5-20 cm long and 1.0-2.0 cm wide, contains from 3 to 8 beans-seeds of different colors and sizes inside. In appearance, the bob resembles a boat. It is translated from Greek as "boat, boat". Beans and young legume blades are used for food.
Green beans
Growing beans
Environmental requirements
Beans are short-day plants with a light period of no more than 12 hours with good light intensity. To get a good harvest of beans, you can find out the data on the length of daylight hours at the nearest weather station or in the local calendar.
In conditions of a short day, the crop passes to fruiting faster and forms a high yield. In regions with long daylight hours and a suitable climate for beans, early beans are sown in the second half of summer (July) or the lighting is artificially shortened by covering the beds with frames with an opaque cover material after a 12 hour period and opening them on the second day at sunrise.
It should be noted that a strict requirement for the length of the day is made by beans only at the beginning of the growing season, later it grows and bears fruit normally even under conditions of prolonged lighting. Some modern varieties of beans, bred for temperate and northern latitudes by Russian breeders, are neutral to the length of daylight hours and grow and form yields with equal success under short and long light.
Planting beans in open ground
The southern culture does not tolerate cold weather, therefore, sowing is carried out when the soil in the upper 10 cm layer warms up to +12 .. + 14ºС and the threat of return spring frosts has passed. Tentatively, sowing of bush beans is started during the period of mass flowering of chestnuts, and curly beans - 7-10 days later. In the south, beans can be re-planted after harvesting early vegetables.
Usually beans are planted, depending on the variety, in several doses with an 8-12 day break. This allows you to extend the harvest period.
Since the intensity of light is important for beans, the planting site is chosen away from tall trees in order to avoid shading, and without drafts. A light breeze will not hurt.
Beans are a self-pollinated crop, so different varieties with different ripening periods can be sown on the same bed.
Common beans (Phaseolus vulgaris)
Precursors for beans
Like other legumes, beans themselves are good predecessors, especially on depleted soils, saturating them with nitrogen. Beans improve the physical properties of the soil by deeply penetrating their branched root system. The beans are returned to the culture circulation to their original place after 4-5 years and they are not planted after the legumes. The best crops for which beans will go next year (predecessors) are carrots, beets, onions, cucumbers, early cabbage, early and medium tomatoes, peppers, eggplants, and potatoes.
Soil preparation for beans
For the normal development of the culture, a neutral soil (pH = 6-7) is necessary, permeable, fertile, light in physical composition. Beans cannot stand long-term moisture and high nitrogen content in the soil. In the right quantities, beans extract nitrogen from the air. If the soil is clayey, heavy, add rippers - humus, mature compost, sand, and other loosening mulch. Application rates are per sq. m 8-12 kg of humus or 4-8 kg of mature compost. With borderline acidity of the soil, dolomite flour 40-50 g / sq. m. From mineral fertilizers for autumn digging, use ammofosku 30-40 g sq. m. m. You can use ammophos or kemira in the same doses. Any complex fertilizer is suitable, the container of which is marked (for autumn or autumn application). Beans respond well to alkaline fertilizers, so from autumn you can apply 100 g / sq. m of ash for digging or in the spring when preparing the soil for sowing beans.
Sowing beans
Beans remain viable for up to 700 years (according to literary sources). Homemade or purchased beans will always be viable. If you select a full-fledged one, then the seedlings are friendly, and the seedlings are strong and highly viable.
The most common planting pattern for bush beans is ordinary. The beans are placed to a depth of 5-6 cm every 20-25 cm.Between the rows, they leave 30-40 cm, depending on the variety. Climbing varieties, due to the formation of a large aboveground mass, are less often: 3 sometimes 4 holes per meter with a distance between rows of at least 50 cm. Seedlings appear on the 6th - 10th day. Several beans are placed in the hole and 2-3 sprouts are left after shoots. Seedlings can be planted. After planting, the beds are compacted and watered. To accelerate the emergence of seedlings, planting can be covered with lutrasil or film.
Green Bean Pods
Bean care
Beans do not like high humidity, but they need an increased amount of air. Therefore, the soil under the beans must be constantly loose and free of weeds. The first loosening is carried out when the beans reach 6-7 cm in height, the second, simultaneously with hilling, is performed after 12-14 days. The third loosening is carried out before closing the rows.
If the bushes or curly shoots have grown strongly, you can cut out part of the leaves, thin out the planting. In some thickened plantings, individual bushes are removed from the garden. This is the peculiarity of beans. She needs a sufficient amount of nitrogen, oxygen, argon, hydrogen, carbon dioxide and other gases for the normal functioning of the roots and leaves in order to provide food for the forming fruits of this culture.
If the bushes are growing rapidly and branching little, their tops must be pinched. This technique will promote branching, which means an increase in yield, and accelerate its ripening. They usually pinch 3-5 cm, depending on the speed of growth and the size of the bush.
Timing of watering beans
After germination and until the phase of 4-5 leaves, the beans are watered so that the soil is moist. From 4-5 leaves and before the beginning of budding, watering is practically stopped. By about 2-3 decades of June, beans enter the budding phase. During this period, she needs an increased amount of water. Watering is carried out once a week. But if the soil surface is wet, watering is delayed for 1-2 days. In the phase of mass flowering, the watering rate and frequency are increased by almost 1.5-2.0 times. As the shoulder blades grow during the transition to maturation, watering is again reduced and gradually stopped. Watering is carried out with warm, settled water. Changes in soil temperature during irrigation with cold water (from a well, artesian) negatively affect the formation of the crop.
Summer Bean Feeding
Beans are fed 2-3 times during the growing season.
The first feeding is carried out when the first pair of true leaves is formed. Usually, phosphorus or phosphorus-potassium fertilizers are applied at 30 and 15-20 g / sq. m.
The second is performed during the period of mass budding - the beginning of flowering. At this stage, beans need an increased amount of potassium, better than chloride at 15-20 g / sq. m, for faster delivery of nutrients to the organs of the plant. You can replace potash fertilizers with wood ash (glass per sq. M).
The third top dressing during the ripening period of fruits is carried out, if necessary, again with phosphorus-potassium fertilizers at a dose of 25-35 and 15-20 g / sq., Respectively. m area. You cannot feed beans with nitrogen. An intensified growth of biomass will begin to the detriment of the formation of the crop.
Bean garter
Bean garters are required only for curly asparagus varieties. They are used for food in technical ripeness in the form of whole beans-shoulder blades and in biological - when beans-beans are fully ripe. Delicate, with a sweetish flavor, they are used in many dishes. They are grown on trellises, stretching in rows of wire, thick twine or a special coarse mesh. Some vegetable growers, in order not to bother with the posts, simply drive in 1.5-2.0 m stakes near the bush or carry out a nest planting around the central stake, directing curly stems of 3 - 5 bushes to it along the twine.
Protecting beans from disease
The main diseases of beans are fungal, bacterial rot and viral diseases.
Mosaic
There are no effective drugs to fight viral diseases.Diseased plants are destroyed. A viral disease is distinguished from others by the dwarfism of the plant, mosaic coloring in the form of inclusions in the main color of the leaf (mosaic), wrinkling of the leaves, sometimes swelling in the form of bubbles. Mosaic-resistant varieties of Robusta and Corbetta are recommended for cultivation in personal plots and summer cottages.
White and gray bean rot
White rot affects the stems and beans of the beans. The main signs are the appearance of a white mycelium, which is accompanied by whitening and softening of diseased tissues. Unlike white, the manifestation of gray rot begins with a grayish bloom, which gradually envelops the stems and leaves, causing decay. The end result of the disease is plant death.
Anthracnose
The source of anthracnose damage is imperfect mushrooms of various types. External manifestation begins with the leaves, on which there are rounded, and on the stems - elongated light brown spots. The fruits rot, and the seeds in them become carriers of infection.
Root rot
Root rot affects seedlings, in which the tip of the main root dries up, and in adult plants, growth stops, the leaves turn yellow and fall off. Flowers and ovaries also fall off.
Powdery mildew
Like other legumes, beans are affected by powdery mildew. On the affected leaves, the mycelium of the fungus appears as a white powdery bloom or resembles a cloth sprinkled with flour. Over time, the affected organs, including the stems, turn yellow and dry out.
Common beans (Phaseolus vulgaris)
Measures to combat fungal diseases of beans
The success of the fight against fungal diseases depends on the quality of preventive work related to:
- with the cleaning of post-harvest residues and tops on garden beds,
- sowing with healthy, necessarily disinfected seeds,
- timely implementation of all agrotechnical techniques when caring for a crop,
- use varieties that are resistant to rot, including Turchanka, Rant, Triumph Sugar 764, Viola and others.
On planting beans, when growing a small amount in open or closed ground, the use of chemicals is not recommended.
If an unexpected outbreak of the disease immediately engulfed a large number of plants, then copper-containing preparations can be used. Sprinkle the bean plants 1-2 times before flowering with a 10-day break with 1% Bordeaux liquid. After flowering, spraying can be repeated, if necessary, only for late varieties, since the waiting period after treatment with Bordeaux liquid is 25-30 days.
Of other drugs, biofungicides are good at resisting fungal diseases. These biological preparations are developed on the basis of living beneficial microorganisms. They do not harm humans, animals, beneficial insects. They need to spray the plants systematically every 10-12 days. 1-2-3 sprays may not be effective, as can increasing the concentration of the spray solution. The waiting time for these drugs is 1 to 3-5 days. All required output data are written in the recommendations, on the label or other accompanying document.
Of biofungicides, bipreparations are recommended:
- Fitosporin - treats seeds, soil and plants. Treatments begin when the plants reach 10-15 cm in height. Repeat after 12-20 days if there was no rain.
- Mikosan is effective in the initial stages of the disease. At a later date, it is better to switch to other biological products.
- Gamair, Alirin-B, which successfully protect beans from rot, anthracnose, powdery mildew.
- Bactophyte successfully destroys powdery mildew.
- Trichodermin destroys up to 60 soil fungal pathogens. Used in the fight against root rot.
- An aqueous solution of colloidal sulfur is used against powdery mildew and anthracnose.
The article lists the most common diseases and the drugs used for plant protection.Almost every year, scientists offer new, more effective and sparing chemical and biological products, lists of which are printed in special magazines and on the Internet.
Common beans (Phaseolus vulgaris)
Protecting beans from pests
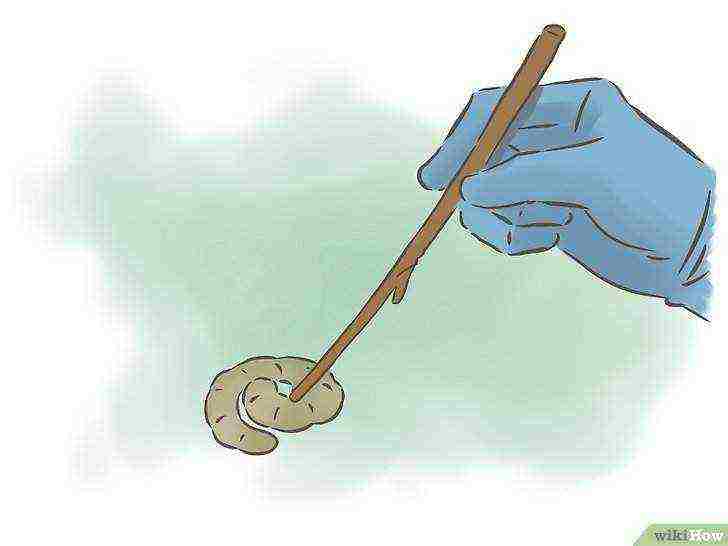
The most common pest of green plants is aphids, which are at the same time a carrier of fungal diseases, thrips, spider mites, pea moth, and ripe beans are actively devoured by bruchus (pea weevil) and pea weevils. Beans are damaged by slugs and a number of pests from the polyphagous group.
Slugs can be collected and physically destroyed by placing pieces of cardboard, rags, burlap and other covering material waste in the aisles. There they hide for the night and from the scorching rays of the sun. You can dust the soil around the plants with lime or ash. This technique will scare away slugs.
The fight against aphids on beans is carried out with the same preparations as on other crops. Use infusions of onion peel, celandine, walnut leaves, tomato tops, green or laundry soap (not bleaching), tobacco infusions, celandine.
Against thrips, a powdery biological product Boverin is used, from which, according to the recommendations, a working solution is prepared and the plants are sprayed. The treatments are repeated after 7-10 days at least 3 times. The most effective treatments are at high humidity, when the revitalization and germination of fungal spores is accelerated. In dry weather, the plants are pre-watered.
Thrips and mites are effectively destroyed with a kerosene solution (2-5 ml per 10 liters of water). Stir the working solution thoroughly and spray on the plants.
Against other pests (aphids, cobweb mites, pea moths, whiteflies), biological products Gaupsin, Bicol, Boverin, Verticillin, etc. are used. They are effective against thrips, ticks, whiteflies. The best is Gaupsin. It is effective at the same time against fungal diseases and pests during the growing season. It can be used almost until the biological ripeness of the crop.
Caryopsis (bean, pea weevil) directly damage the beans. The grains die at subzero temperatures. For the safety of the food product, the grain is placed in linen bags soaked in salt water and dried. You can also put a head of garlic there. Store in a refrigerator until frost, and in winter in an unheated room with a negative temperature. Other ways to preserve grain include:
Place the grain in the freezer. At -12 ° C, adult beetles and pest eggs die within an hour.
Hold the grain in the oven at + 90 ° C for several minutes. Pests die. In the future, store the grain in glass jars with ground-in lids (not plastic) in a cold room.
Harvesting beans
Bean blades for food are harvested 2 weeks after flowering. Young shoulder blades are cut with scissors in the morning every 2-3 days. Store in the refrigerator. Shelf life is no more than 2 weeks. Sauces, soups, side dishes for meat and other dishes are prepared.
Beans are harvested at full biological ripeness. Dry bushes are cut, and the root is left in the soil. When decomposing, it will enrich the soil with nitrogen and other nutrients.
Cut bean bushes are tied into loose bushes and hung in a draft for drying. After 10-12 days, the grain is husked and stored using the methods described above.
Common beans (Phaseolus vulgaris)
Bean varieties for growing in the country
When growing beans in the open field, it is necessary to select the varieties as follows. so that they are suitable for the climatic conditions of the area.
According to the ripening period, beans, like other vegetable crops, are divided into early, medium and late. Early varieties of beans form a biological harvest within 65-75 days from germination, medium - 75-90-100 and later - 100 or more days. In private households, it is best to grow early and middle beans with a growing season of no more than 75 days.
By taste, beans are divided into several groups.:
- grain (shelling), for permanent use and conservation,
- asparagus (sugar), for fresh summer use and preservation of shoulder blades,
- semi-sugar.
In hulling varieties, a waxy layer forms on the bean valves; in sugar (asparagus) varieties, it is absent. Typical for many sugar varieties and the absence of hard fibers on the valves of the shoulder blade, which makes it especially tender. In semi-sugar beetles, the wax layer is formed late or is clearly underdeveloped.
Considering that beans are a self-fertile culture, different varieties of bush and climbing can be planted nearby.
Grain bean varieties
In the Siberian regions, in the Far East and in central Russia, the recommended peeling varieties are Early ripening, North Star, Martin.
Of the sugar varieties, varieties are more in demand Green pod 517, Sugar triumph 764.
Semi-sugar varieties - Moscow White, Gribovskaya-92.
In the middle lane, beans of medium ripeness are not grown, since they do not have time to ripen. Only early and early maturing varieties are suitable for this region. Of the medium, only varieties with a short growing season, belonging to the mid-season, can be used for growing.
In the southern regions, all varieties of beans are grown in the open field.
The recommended peeling grades are Sugar triumph, Sugar -116, Sachs, Dialog, Firefly, Antoshka, Jubilee-287 and others. Young shoulder blades and mature grains of biological ripeness are used for food.
Of the climbing varieties, the most famous and used in decorative and vegetable plantings are varieties Lambada, Winner, Gerda, Golden nectar, Mauritanian, Turk, Fatima and others.
A good harvest of varieties can be grown from medium ones in the country.
- Gribovskaya-92 bush variety, forms a harvest of biological ripeness in 90 days.
- The mistress's dream, mid-season with wide yellow bean pods and white grain.
- Ballad average ripening period. The bean pods are green and the grain is beige with purple dots.
- Ruby mid-season variety. Interesting in cherry-colored grain.
Among the early and medium hulling or grain varieties, others are popular, zoned for the climatic conditions of the region. Barbara, Lilac, Generous, Light, Ufa, Fantasy, Welt, Martin and others.
Sugar (vegetable) beans
Sugar (asparagus) beans are also called vegetable beans. They differ from grain by the absence of a parchment layer inside the bean blade. These varieties are used for food together with a green tender spatula. It has the ability to remove excess moisture from the body and is often included in the dietary menu. The early varieties of this group can be grown in all regions that meet the requirements of the crop.
Early varieties: Melody, precocious, curly. Each stem forms up to 9 flat shoulder blades. Butter king - early ripening delicacy, curly. The shoulder blades are yellow. For mushroom lovers, we recommend the climbing variety Ad Rem. Its fruits have a pleasant mushroom flavor, which is preserved and enhanced in hot dishes (soups, sauces).
Of other early-maturing vegetable growers, they use the varieties Triumph Sugar, Dialog, Sugar-116, Vestochka.
Average: Crane, grows in the form of a compact 50 cm bush. The shoulder blades are green. Forms a high yield.
Common beans (Phaseolus vulgaris)
The purple queen forms up to 15 cm long shoulder blades of a dark purple color. The variety is highly resistant to viral diseases. Always high-yielding.
Semi-sugar beans
Of the semi-sugar varieties, the early-ripening Secunda variety is popular with vegetable growers. Rant is a high-yielding variety that is resistant to anthracnose and other rot. An early ripening variety Indiana, forming two harvests per season in the south. Planting varieties Nastena, Antoshka and others are often found.
Considering that about 300 varieties of beans of different types and groups have been bred, the listed varieties constitute a small part. Any vegetable grower can choose the variety he likes from the catalog, grow and independently select seeds for subsequent plantings.
Growing beans at home is possible with minimal effort. The culture is unpretentious to care, gives large and stable yields.
Planting unforgiven beans in open ground in central Russia is ineffective. Seedlings are rare and weak, the waiting time for the harvest increases.
To grow a viable crop, pre-germinate the seeds at home:
- prepare flat enamel or plastic dishes or use rolls of cellophane and toilet paper;
- Pour the beans with warm water t + 70 ° C, add 3-4 potassium permanganate granules, leave for 20 minutes;
- buy a substrate rich in microelements in a garden store, place the seeds 3-5 cm deep, or wrap them in a pre-moistened strip of toilet paper, and then in a diaper 30-40 cm long and 7-8 cm wide;
- moisten the beans regularly, but in moderation, try not to water, but spray water from a spray bottle;
- feed the planting once every 2 weeks: dissolve 1 teaspoon of potassium fertilizers in 3 liters of water and gently spill the soil.
The sprouts appear in 5-7 days, the seedlings are ready for planting in the garden in 2-3 weeks. Growing at home is also possible. Beans grow well in wooden boxes on the windowsill and bear fruit within 50-60 days after planting.
The plant is thermophilic. Plant in open ground in mid or late May at a constant outdoor temperature of at least + 12 ° C.
Features of caring for beans in the open field:
- choose a place protected from the wind for the culture, but not in the shade, do not plant beans in the same area for 2 years in a row;
- the plant grows well near tomatoes, carrots and beets;
- water young plants sparingly, 1-2 times a week; during flowering, double watering;
- loosen the area when the plant grows to 7–10 cm; thin out the beans at the same time so that there is 30 cm between plantings.
For climbing varieties, install a support - wooden pegs 1–1.2 meters high. When the plant is 1.5–2 m long, pinch off the top shoots to speed up maturation. The timing of the harvest depends on the variety. Signs of maturity: the lower leaves turn yellow, the pods harden and peel off easily.
Beans are nutritious, delicious food. It will take a minimum of time and effort to grow it. Use sprouted sprouts for making salads or planting in the ground.