Content
- 1 Features of growing dill
- 2 When to plant dill: planting dates
- 3 How to plant dill in open ground: preparation and planting
- 4 How to care for dill after planting
- 5 When to harvest and how to store
- 6 When should you plant?
- 7 Choosing a landing site
- 8 Soil preparation
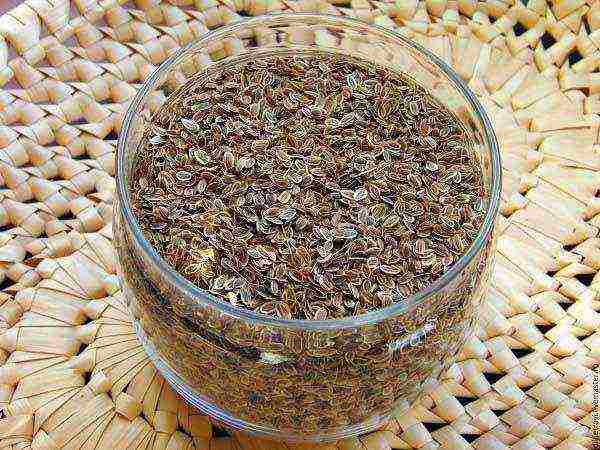
- 9 Preparing seeds for planting
- 10 How to plant?
- 11 Follow-up care
- 12 Collection and storage
- 13 Conclusion
- 14 How to grow dill outdoors
- 15 Sowing dates and soil preparation
- 16 Growing dill outdoors
- 17 Useful properties of dill
- 18 The timing of planting dill in the open field in spring and autumn
- 19 What soil does dill like?
- 20 Proper preparation of the garden for planting seeds
- 21 Do I need to soak dill before planting
- 22 Fast seeding and good germination patterns
Thanks to its spicy aroma, dill has become a regular regular in any garden. However, despite the general unpretentiousness, planting a culture often ends in failure. What is the reason for this phenomenon, and what you need to know in order to properly grow dill on your site in spring, summer and autumn?
Features of growing dill
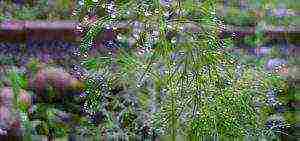
The ideal temperature for the growth of dill is + 15- + 20 C. Due to this property, it is better to grow a plant to obtain fragrant leaves in spring and autumn. In summer, however, they are usually planted exclusively to obtain umbrellas.
Gardeners who want to harvest spicy greens in the summer have one thing to consider. When daylight hours lasts 10-14 hours, dill actively forms new leaves, and as soon as the day begins to last 15 hours, the culture instantly releases a peduncle. Therefore, in late spring and early summer, early varieties that ripen quickly are undesirable to plant.
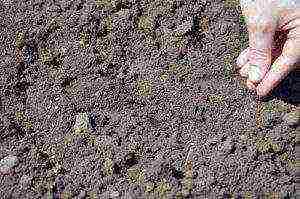
Before winter, dill is sown when the soil is not frozen yet. For sowing, rows 3.5 cm deep are made in the garden bed. To achieve good germination, the seeding rate of planting material is increased by 25%.
When to plant dill: planting dates
The optimal planting time depends on the purpose for which the fragrant greens are grown. So, in spring and autumn, dill is planted to get greenery, and in summer - umbrellas.
Dill planting dates for each season are as follows:
- In the spring planting the plant is carried out immediately after the temperature rises to + 2- + 5 C, and the soil at the selected place has finally thawed. Depending on the geographic location of the region, planting dates vary from mid-March to mid-May.
- Summer you can plant greens at any time. To constantly have fresh greens, the plant is planted 3-4 times every 15-20 days.
- In autumn the crop is sown in October-November. Before winter, a plant is sown in order to speed up the appearance of leaves in spring: the first harvest of winter dill can be harvested 2 weeks earlier than spring dill.
Video: planting dill for the winter
How to plant dill in open ground: preparation and planting
Even novice gardeners who recently acquired their own plot know that before planting dill seeds in the ground, you need to study the features and requirements of a cultivated plant. What is worth knowing?
Video: sowing dill in open ground
How to choose a place for planting and prepare a garden
For planting dill, it is better to choose a sunny bed or a bed in partial shade. Plant a crop not in the shade: due to the lack of sunlight, the bushes grow thin and lose their original color.Since aromatic greenery prefers to grow on loose soils and does not tolerate waterlogging poorly, sow a crop in places where it is often stagnant water or wherever they approach the surface groundwater is not allowed.
The plant prefers to grow on neutral soils... Dill growing in acidic soil turns red, and in alkaline soil it turns yellow. In both cases, the plant develops slowly, resulting in delayed harvest of spicy greens.
Better neighbors and predecessors for dill are cucumbers, tomatoes, cabbage and other vegetables, under which a lot of fertilizers were applied. To prevent plants from competing with each other for nutrients and moisture, greens and vegetables should be placed at a short distance from each other. The only plants incompatible with dill are celery and carrots.
What soil is needed and how to prepare it
Dill loves to grow in loose, nutrient-rich soils. The soil for planting a spicy crop is prepared in the fall: rotted manure or compost is introduced, and then the site is carefully dug up. Substance consumption per 1 sq. area - 5-6 kg. If there is no organic matter, the bed is fertilized with purchased mineral mixtures such as "Kemira Universal", "Solution".
Important! Heavy soil is not suitable for planting a plant: due to poor air permeability, dill is sick and grows slowly.
How to prepare seeds
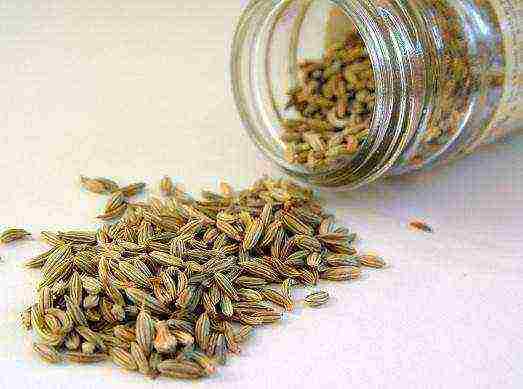
Due to the content of essential oils, dill seeds have a low germination rate. To improve this indicator, the planting material is poured into a container, filled with warm water (50 degrees) for two days. As it cools, the water is changed every 8 hours.

After two days, the seeds are removed from the water, laid out on gauze and covered with a damp cloth. The bookmark is placed on a plate and left at room temperature for 4 days. As soon as the seeds sprout, the planting material is slightly dried.
If dill seeds are not properly prepared, the first seedlings will appear in 2-3 weeks. Planting material that has been soaked emerges 4-6 days after laying. Moreover, such treatment disinfects the planting material from diseases characteristic of the culture.
Direct landing
Planting dill with seeds in open ground is as follows:

- In the prepared place, rows are made with a wooden peg or plank with a depth of 2 cm at a distance of 20 cm from each other.
- Then the depressions are moderately watered and the seeds are sown according to the seasonal seeding rate, which is 1 g / m2 in spring and 2 g / m2 in autumn.
- The sown rows are covered with dry soil. When dill is sown before winter, the rows are not watered before sowing.
Besides the usual private schemes, for planting dill is used carpet scheme. To decorate the site with a lush green blanket, the planting material is evenly scattered over the surface and covered with a rake. The planting site is watered abundantly.
By the way! Dill can be successful grow all year round at home on the windowsill.
Video: how and when to sow dill
How to care for dill after planting
In order for the plant to sprout and please with a generous harvest, dill must be provided with comfortable conditions. What manipulations does the care of fragrant bushes consist of?
Watering
Dill is a moisture-loving plant, so the soil in the garden must be kept moist at all times. However, it is not worth watering the greens too often and abundantly: staying in swampy soil, the plants grow slowly and get sick. Moreover, due to excess water, the concentration of oils contained in greens is greatly reduced, which makes them less aromatic.
The plant also cannot grow for a long time in drought: development stops, the leaves become stiff and stretch with nitrates. To create a comfortable environment, the plantings are watered 1-2 times a week. On the hottest days, dill is irrigated by sprinkling.
Top dressing
Fertilizers are not applied for dill varieties with a short ripening period, since the greens are quite enough nutrients that were introduced during the preparation of the garden. If the bushes grow slowly, at the age of 2-3 true leaves they are fed urea or nitrophobic, based on the calculation of 10-15 g per sq.m. beds.
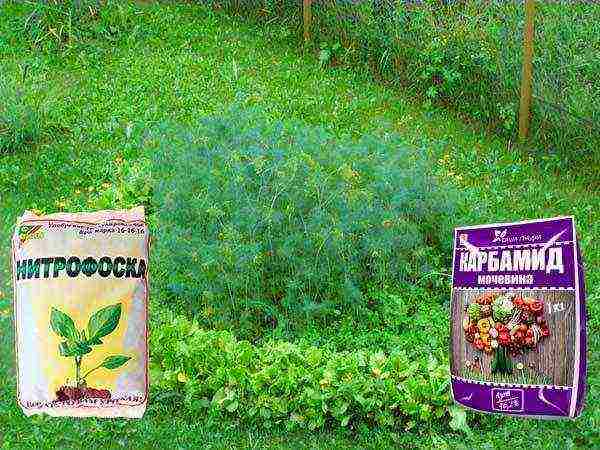
Mid-ripening and late-ripening species of dill are fed twice. First once under the plants that have formed 2-3 leaves, make nitrophosphate, urea in the same amount as for early species. Second once the plants are fed 20-25 days after the first feeding: by 3-4 sq.m. area contribute 15 g potassium salt, 20 g urea... Fertilizers are applied directly under the root, trying not to get on the leaves. After feeding, dill is watered abundantly.
Important! Nitrogen is introduced under the plant only in case of urgent need, since the leaves of the plant are capable of accumulating nitrates.
Weeding and loosening
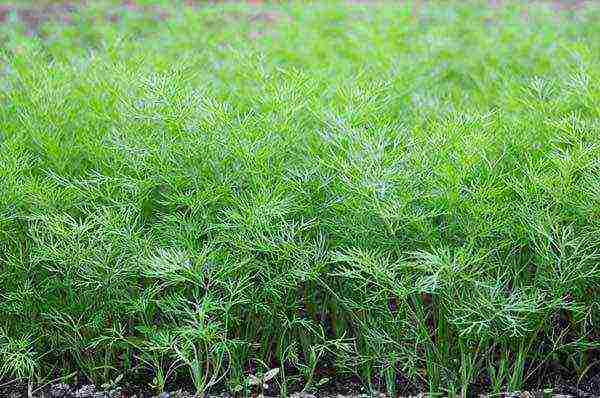
In order for the nutrients to get into the greens, and not wasted on the growth of weeds, as soon as the need arises, the dill garden must be weeded. In addition, weeds compact the soil and retain water in it, which adversely affects the development of the plant. Since fragrant greenery prefers to grow on air-permeable soils, after watering or rain, the rows are loosened. The first loosening is carried out to a depth of 5-7 cm shortly after germination. In the future, the earth is loosened to a depth of 8-12 cm. If the seedlings have sprouted very densely, they are thinned out.
Shelter in the heat
Like most greens, dill doesn't really like the heat. Due to high temperatures, the soil dries out quickly, and the plant stops growing, the leaves become lethargic. So that the greens do not lose their structure and organoleptic qualities, a small canopy is installed over the garden bed.
Dill pests and diseases
The most popular diseases are false mealy dew and phimosis... The first disease manifests itself on the leaves with a white bloom, the second - with black spots on the stem and leaves. Excessive watering makes dill sick root rot, bacteriosis, curly and curly leaves.
Since dill cannot be treated with chemicals, it is better to take care of prevention in advance. To protect the plantings from infection with fungal diseases, it is recommended to disinfect the seeds, observe crop rotation, monitor the cleanliness of the beds, periodically removing weeds and diseased plants.
If the plants nevertheless become infected with the fungus, the plantings are sprayed with biological products Fitosporin, Trichodermin, Mikosan-V. Since these products are made up of beneficial bacteria, the sprayed greens can be used for cooking as soon as a couple of days after processing. How to process greens and after how long it can be consumed is indicated on the back of the drug packaging.
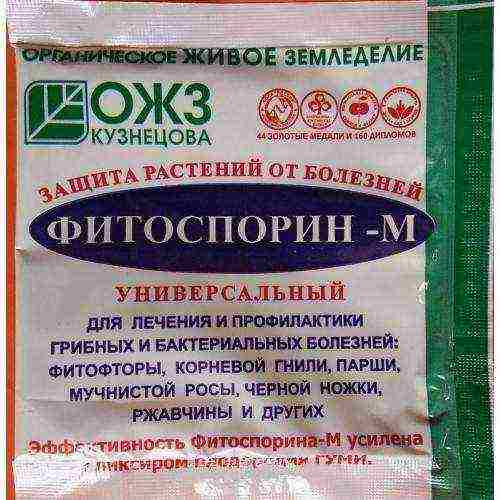
As for insects and pests, dill is most susceptible to attack. aphids, umbrella and earthen fleas. As soon as aphids have been seen on the plants, the plants are watered abundantly, directing a stream of water to the affected areas (for example, with manganese) or dusting them with ash or powdered sugar. The bushes and the soil around them are cultivated from flea beetles.Fitosporin ".
When to harvest and how to store
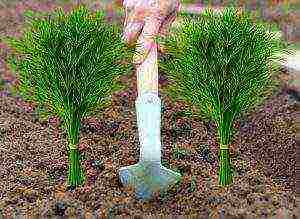
Dill can be harvested 30-40 days after germination. The most useful greens are bushes, the height of which is 5 cm. Depending on the needs and preferences, gardeners collect greens, cutting off only individual leaves or the entire stem.
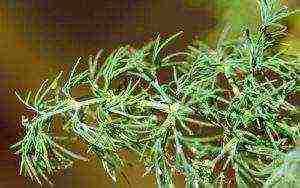
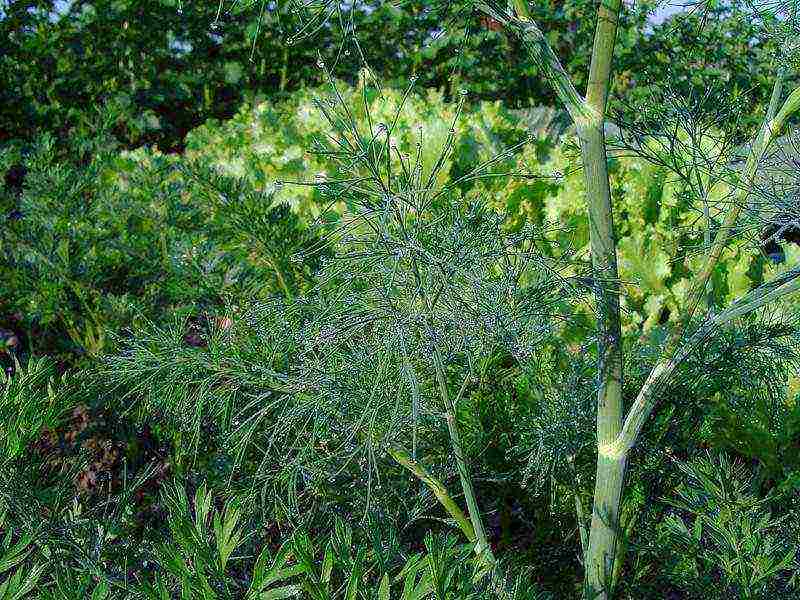
Harvesting the spice after the beginning of flowering is undesirable, since the leaves by this time become tough and not tasty. Leaving the plant in the garden after throwing out the arrow is advisable only if you plan to harvest canned vegetables for the winter.
As for the time of day, it is better to harvest dill in the early morning, after the plant has dried from the dew.Harvesting spice during the day is not recommended: under the influence of hot sunlight, delicate leaves fade.
Greens are folded in bags or containers and placed in the refrigerator. In this form, dill is stored for a week. To prepare fragrant leaves for the winter, they are dried or frozen. After the sun has dried the previously washed greens, they are placed in jars or bags and stored in a dark place.
Planting dill in open ground is one of the simplest garden manipulations. If you fulfill all the requirements of the culture, the plant will quickly rise and give an excellent harvest. And if you also prepare greens for the winter, you can enjoy the unsurpassed aroma of dill all year round.
Video: the secrets of growing dill
With the onset of the spring season, before many novice gardeners, the question begins to arise as to when to start planting dill in open ground with seeds, what is needed for this, and what conditions should be observed. Given this fact, today we will talk in detail about how to plant and grow dill from seeds in the open field, in the conditions of the CIS countries.
When should you plant?
The season in which dill seeds are planted in open ground directly depends on what you want to get.
So, planting dill in the spring and autumn will allow you to get as much greens as possible from one plant for eating, while planting in the summer will focus on the development of the so-called umbrella in dill, which is convenient to use for obtaining seeds, pickling cucumbers, and also used in the manufacture of traditional medicine.
If you need to get as much greens as possible, you need to plant dill in open ground in spring and autumn, adhering to the following points:
- In spring, you can plant dill seeds in the ground when the ambient temperature is fixed at + 2-5 ° C. Also, when planting, it is necessary to ensure that the soil is completely thawed. For reliability, the place where it is planned to plant dill seeds 5-7 days before planting should be spilled with 1 bucket of hot water. In general, planting starts from mid-March to mid-May, depending on your region of residence;
- Autumn open field planting occurs around October-November, and the colder the climate and early winter in your region, the earlier you should plant seeds. Autumn planting of dill is called "podzimney", and is characterized by the fact that in this case the dill leaves ripen much faster. It is also important to note the fact that it is possible to harvest dill planted in autumn 2 weeks earlier than from its spring counterparts, which is extremely pleasing to many gardeners;
- Summer planting of dill in open ground is carried out at any time of the summer period. Many gardeners, in order to obtain the largest possible yield, practice frequent planting of dill, up to 3-4 times, with an interval of 15-20 days.
Choosing a landing site
Dill is unpretentious to growing conditions, but the best growth rates are noted precisely when it is grown in sunny areas, or in partial shade conditions. Dill will grow in the shade, but it is undesirable to plant it there, since without enough sunlight, its bushes will be pale and stunted.
Moreover, dill does not like waterlogged soil, which means that it should be planted in places where groundwater is not observed near the surface of the earth, and excess moisture does not accumulate. Forget about planting dill along the banks of water bodies, your crop will simply rot in this case.
As for the soil, dill loves loose soil with a neutral chemical composition. If this requirement is not met, dill can change its physical properties, for example, when planting seeds in acidic soil, dill will turn red, and if planted in soil with an increased alkaline environment, it will turn yellow.
Such changes will also affect the taste of dill, making it tasteless at best, and at worst, add excessive bitterness to it. Also, when dill is planted in acidic and alkaline soils, a slowed down development of the plant is observed, up to the fact that the bushes remain underdeveloped.
When planting dill next to other crops, avoid placing it next to celery and carrots. Planting seeds with these plants will not allow the dill to develop normally, and in some cases, the seeds will not even germinate.
In other cases, dill seeds are compatible with all vegetable and berry crops growing in our latitudes, but they feel best with plants of the following types:
- Cucumbers;
- Tomatoes;
- Potatoes;
- Cabbage;
- Sorrel;
- Gooseberry.
Soil preparation
Dill loves loose soils with an abundance of nutrients. You can purchase this kind of soil from a specialist gardening store, or you can prepare it yourself.
To prepare soil at home, adhere to strict adherence to the following points:
- Choose on your site a suitable place for future planting of dill seeds, in accordance with the above requirements.
- The soil in the chosen place should be prepared in the fall, so that during the winter period it is settled, and its composition is maximally enriched with nutrients.
- The selected place in the autumn period is dug to a depth of 15 cm, after which rotted manure or compost is introduced, at the rate of 5-6 kg per 1 square meter. After applying manure or compost, the soil is carefully dug up and lightly tamped.
- If you do not have organic fertilizers at hand, or you are not an adherent of them, the dug soil can be fertilized with industrial mixtures "Kemira Universal" and "Solution", which can be purchased at any flower shop.
It is worth noting that it is also not recommended to plant dill in heavy soil, since it does not transmit oxygen well, against which the seeds germinate longer, and the root system develops more slowly. As a result, the plant does not reach its maximum size.
Preparing seeds for planting
Growing dill from seeds is also associated with one difficulty, such as the abundant content of essential oils in the seeds, which delay the germination of seeds, and if the seeds are old (more than 2-3 years old), they may not germinate at all.
In order to avoid such problems, and bring seed germination closer to 100%, just follow the points below:
- Take a plastic container, pour warm water (50 ° C) into it, and place the selected seeds there for 2 days.
- The water should be kept within the specified thermal range by changing it every 8 hours.
- After 2 days, the seeds are taken out of the water, laid out on cheesecloth, and a similar, but already wet cheesecloth is applied on top. Then the seeds are placed in a damp gauze on an open container and left at room temperature.
- After about 4 days, the seeds sprout, after which they should be removed and left outdoors for a couple of hours.
- Start planting seeds!
How to plant?

Sowing dill seeds outdoors is a fairly simple task that even a child can handle.
Despite this, from the point of view of a professional gardener, sowing seeds should be carried out in accordance with the following points:
- Take a narrow wooden peg or a regular stick.
- Go to the dill planting site harvested from last fall.
- Depending on the size of the place and the amount of harvest, draw rows 2 cm deep with a peg or a stick, and at a distance of 20 cm from each other.
- The depressions are sprinkled with water sparingly, without turning into mud.
- Seeds are placed in moistened beds, and covered with dry soil.
In addition, gardeners practice the so-called "carpet" planting of seeds.
This method is produced by randomly scattering dill seeds over a selected area (which may not be prepared in advance), followed by raking it, and moderate watering.
This method is suitable for decorating a garden or vegetable garden, since dill does not harm other crops at all. When it comes to growing for food, we recommend sticking with the traditional method of planting.
It is worth noting that when planting dill seeds in the fall, you do not need to water the beds, even if they are dry.
Follow-up care
Subsequent care for germinating seeds can be limited to only regular, but moderate watering, but this is the case if you grow more dill for beauty and filling empty space in the garden.
If you grow dill for food, try to satisfy its simple requirements, indicated below:
- Pay attention to watering. Despite the fact that dill does not tolerate excessive moisture well, it requires regular, but small watering, such that the top layer of the earth is always slightly moist, but no more. In general, dill is watered about 1-2 times a week, and in the case of an extremely hot summer, the bushes are thoroughly sprayed on in the evening. It is not necessary to water the dill during the heat of the day, as this can cause overheating of the roots.
- Now it's worth talking about feeding. So, if you grow dill with a short ripening period, fertilizers are not required for it. In all other cases, and especially if you notice a lag in the growth and development of your dill bushes, as soon as they have 2-3 true leaves, add urea or nitrophosphate to the soil, in a dosage of 10-15 grams per 1 square meter of the garden. If you have a long-maturing variety, it makes sense to feed it twice. The second feeding is carried out in a similar way, but after 20-25 days, and fertilizers are replaced with potash salt (15 grams per 1 square meter), or urea (20 grams per 1 square meter).
- In order to avoid hardening of the soil after watering and rain, it should be loosened. Loosening takes place in the immediate vicinity of the dill bushes and in their aisles. The first loosening occurs at a depth of 7 cm, and the subsequent loosening at a depth of 12 cm. Loosen extremely carefully so as not to damage the root system (do not loosen the dill bushes under the trunk).
- It is highly advisable to cover the dill with a canopy in the hottest summer months. To do this, you can install several pegs around the perimeter of the dill beds and tighten them with an awning. It is important to note that such a shelter should be used only in the hottest daytime hours; in other cases, the dill should receive the sunlight it needs;
- Take care of the health of your dill. If aphids are found on dill, treat it with ash or powdered sugar. If dill is hit by fleas, Fitosporin will help you. If dill has been infected with a fungus, "Fitosporin", "Trichodermin" and "Mikosan-B" will come to your aid. These funds are created on the basis of organic components, therefore, after processing, dill can be eaten after 3-4 days. Remember, it is forbidden to treat dill with chemical fertilizers and pesticides, as they accumulate in its structure and are poorly excreted, which is guaranteed to lead to your poisoning or other side effects!
Collection and storage
Touching on the topic of growing dill, one cannot fail to mention the rules for its collection and storage, which are described in detail below:
- Dill is harvested 30-40 days after germination.
- The most valuable part of dill is its leaves. You can collect as separate leaves without tearing off the stem, or it is banal to pluck the entire bush.
- You should not delay the assembly of dill, if you overexpose it in the garden and let it bloom, the dill will lose its taste, become tough and tasteless.
- After throwing the arrow out with dill, the plant is removed.It makes sense to keep the dill thrown out of the arrow only in those cases when you plan to use it as a seasoning for the preparation of canned vegetables and pickles.
- Dill should be harvested early in the morning, since it is in this case that it will have the most beautiful and fresh look.
- Next, the dill is placed in plastic bags and placed in the refrigerator. You can also put the dill in a glass of water and leave it in the refrigerator as well. In these cases, the dill is stored for a week.
- For long-term preservation of green dill, it is frozen in a plastic bag.
- For drying, dill bushes are washed and laid out in the sun until it dries, after which they are crushed and placed in dry cloth bags, hung in a dark and dry place, and stored like this all winter.
Conclusion
Today we talked in detail about how to grow dill from seeds in the open field, and found out that growing this crop in this way is a simple and effective exercise. Based on this, it should be stated that sowing dill in open ground is a great way to get fresh and high-quality greens for the whole year, in some cases to decorate your land, and for beginners, to gain valuable experience without any extra effort!
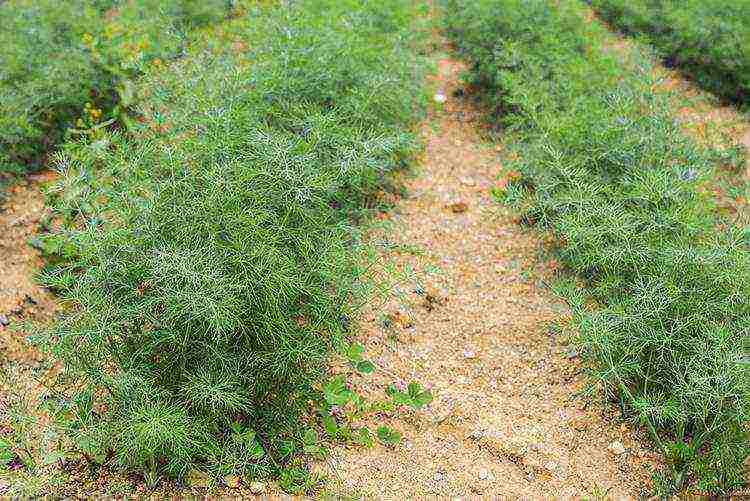
 Dill can be found in any garden. A spicy fragrant herb with a lot of useful properties can grow by self-sowing on the plantation, like a weed. But most often the gardener chooses varieties and hybrids, determines the place of sowing the culture. Planting and caring for dill in the open field has features. To get a lot of fragrant greenery, you should know the plant's agricultural technology.
How to grow dill outdoors
 Any plant is only a decoration for the garden if it develops healthy and well. It depends on the type of soil, the nature of watering and feeding the dill. Based on knowledge about the culture, a sowing site is selected. So, for dill you need:
- neutral light soil;
- sunny or slightly shaded sowing site;
- deep arable layer;
- moderate watering without stagnant water;
- timely balanced feeding.
At the same time, dill develops poorly and turns red on acidic soil and turns yellow on alkaline soil. For the health of dill, it is necessary to have a good humus layer of the soil. Top dressing with organic and mineral fertilizers when growing dill in the open field will help you get a lot of vitamin greens.
Sowing dates and soil preparation
 Sowing dill seeds for greens and seeds can be winter and early spring. To get greens and umbrellas for pickling, you can sow seeds throughout the season until mid-August. In the future, a cold-resistant culture, falling under short frosts, does not die, but loses the decorativeness of the foliage, it becomes red and dry.
Do not place dill on the soil after liming and adding dolomite flour. When sowing seeds, it is impossible to sprinkle the bed with ash against pests in the future. The acidic swampy soil is detrimental to dill.
Dill soil is prepared in a place open to the sun with deep digging. At the same time, a bucket of humus or compost, two tablespoons of superphosphate and a spoonful of potassium sulfate should be added to each square of the earth. Ash for sowing is not applied. With a high standing groundwater, the bed is raised higher. Any plant other than celery can be a precursor to dill.
Seeds germinate at a soil temperature of 5-7 degrees, while withstanding a short drop in temperature. Preliminary preparation of seeds for fast sprouting consists in the destruction of the casing layer. How to plant dill with seeds in open ground depends on the season. So, podzimny sowing is done with seeds without preliminary processing. Do not accelerate seedlings when sowing early. In this case, the biological calendar of the plant, laid down by nature, suggests the optimal time for germination.
If sowing is carried out later, when return frosts are impossible, seedlings can be obtained earlier. For this, the seeds are pre-germinated for 4 days. In a warm place in a linen cloth, the seeds will sprout, and seedlings will appear in a week. You can pre-hold the seed in growth stimulants, ash extraction. When soaking the seeds, water is changed 2 times a day.
If you grow dill seedlings, then the development of plants will accelerate. Seedlings are planted in the evening and shaded for several days. The plant survival rate is good.
 Sowing must be carried out to a depth of 2 cm along the grooves previously spilled with a hot solution of potassium permanganate. The distance between the seeds is 5 cm, between the grooves is 20. You can plant dill with seeds in open ground as a compacting crop among other vegetables, leaving enough room for its development. To obtain greens throughout the season, sowing of dill is done in two weeks. Another way would be to use varieties of different ripening periods, sowing bush two-year hybrids.
Growing dill outdoors
 In order for dill to develop well, it needs nitrogen fertilizers. But spicy greens accumulate nitrate compounds, which makes them less healthy. Therefore, it will be best to feed the plant with nettle infusion fermented for five days. This is a good nitrogen supplement and aphids do not tolerate it. You can immediately protect the plant and feed it. You cannot use insecticides on dill.
To scare away and remove aphid colonies on a vegetable garden, you can use spraying with a solution of alcoholic liquid. If you use 2 tablespoons of Troy per 10 liters of water, spraying will drive the pest away. Alcohol should only be unrefined ethyl, with fusel odor or odorant. Aphids will fall, it needs to be covered with earth.
Another way to prevent the main pest of dill greens is to sow several bushes of thyme, the smell of which will scare away aphids. In addition, you can use liquid fertilizing with organic fertilizers, saltpeter. But it should be borne in mind that fungal diseases, rot, develop on damp, nitrogen-saturated soils. It is necessary to maintain a balance, do not overfeed, do not flood the plant, after each watering, loosen the soil, delivering oxygen to the lower layers.
How to grow dill outdoors if there are changes in the color of the openwork foliage. If the twigs become yellow, you need to feed the plant with saltpeter, watering at the root. Red lower leaves signal phosphorus deficiency. The bush wilted, despite watering, you need to remove the diseased plant and determine the cause. Often this is due to root rot with improper care. It is no longer possible to save such a plant; measures must be taken so that the infection does not spread to neighboring bushes.
Useful properties of dill
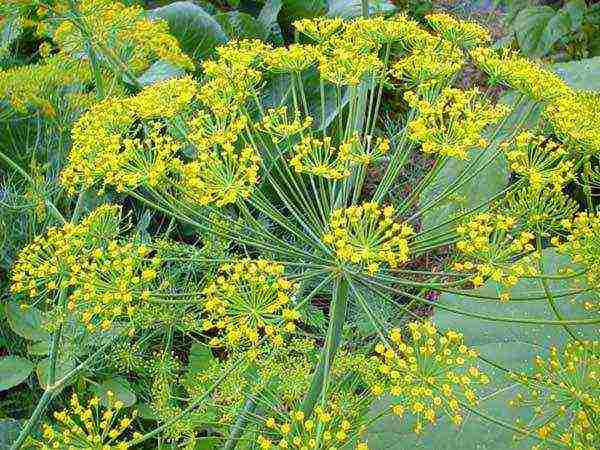
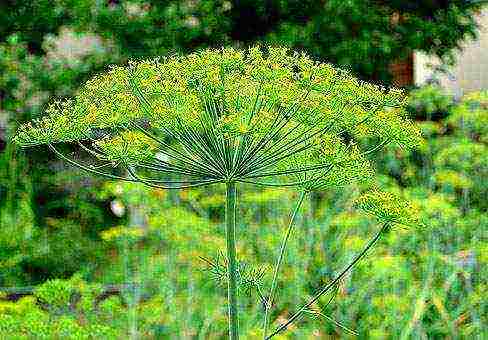
 You can use greens as they grow. The herb acquires the greatest aroma during the formation of the inflorescence, before its disclosure. At this time, fragrant greens are harvested for winter use. The substances contained in this spicy greens have a beneficial effect on the body in small quantities. In addition to cooking, where dill is indispensable, it is used for medicinal purposes:
- reduces blood pressure in hypertensive patients;
- improves the digestive tract;
- has an analgesic effect;
- improves the functioning of the genitourinary system;
- improves lactation.
Dill oil and seeds are used with special properties in use as medicines. However, you can not abuse fresh herbs, you can lead your body to a reduced tone and drowsiness.
The result of planting dill before winter - video
Dill is a very unpretentious crop that can be quickly grown everywhere in the open field. The scope of its application is very wide. The plant can be used both in cooking and in medicine.But even for such non-capricious greens, there are certain planting rules that allow you to enjoy the fragrant seasoning for a long time. Further in the article, we will talk about how to plant, water and germinate dill correctly.
The timing of planting dill in the open field in spring and autumn
Dill is able to withstand light frosts, so it can be planted as early as April... But how long in this case to wait for the first shoots? The first shoots begin to appear when the air temperature reaches + 3 ° C. Low temperatures inhibit the plant and slow down growth. It is best to wait until the air warms up.
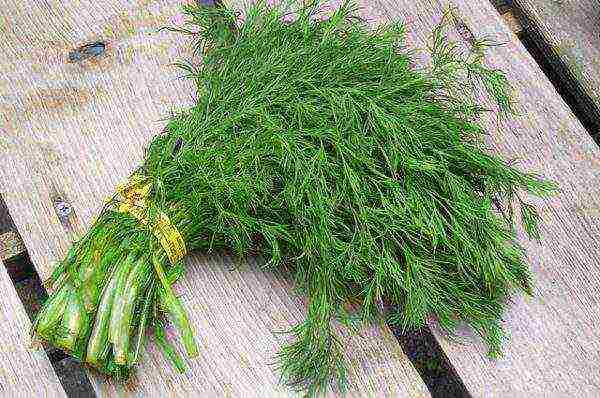 A bunch of dill on the table close up
To get an early harvest, the seeds are sown at the very beginning of April, when the snow is just melting. To be able to use greens as long as possible, do not sow the entire garden at once. The seed is planted at intervals of a couple of weeks.
According to the lunar calendar, the best landing days in 2018 would be:
| March | 8-11, 20-24 |
| April | 7-11, 22-23, 25-26 |
| May | 8-11, 20-25 |
| June | 5-9, 19-25 |
What kind of soil does dill like
Greens grow remarkably in fertile soils rich in organic fertilizers. Before planting the plant, it is recommended to add a small amount of humus or fertilize the soil with a solution of mullein, bird droppings. Of chemical fertilizers, it is good to add the following:
- saltpeter;
- superphosphate;
- potassium group.
The plant does not tolerate acidic soil, therefore it will not be possible to get a crop. If there is no other choice, then all measures must be taken to reduce acidity.
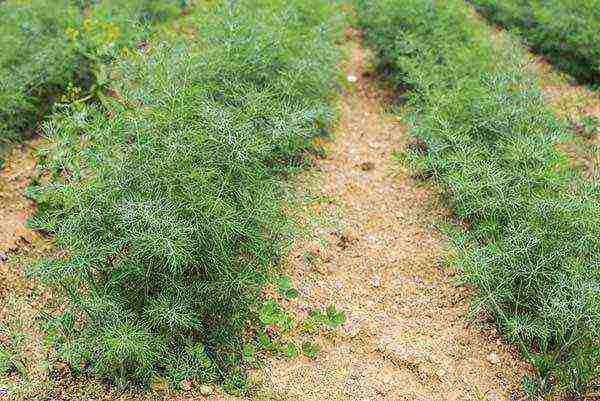
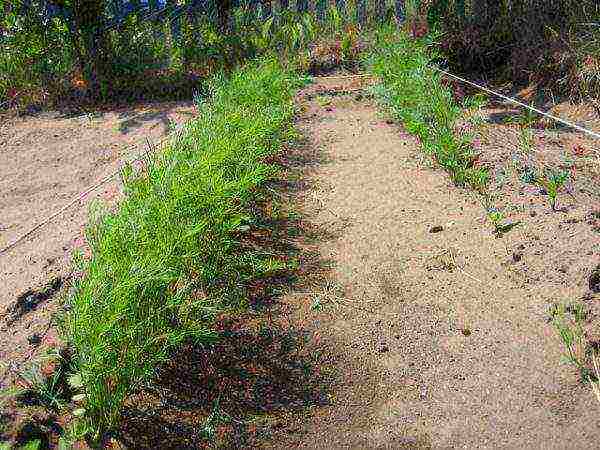 Dill bed in the garden
Where is the best place to grow greens? She loves sunny beds with lots of sunshine. However, direct hit of rays on it is undesirable, since appetizing greens can spoil its appearance with burns.... It is also advisable to avoid drafts. But the plant is not demanding about its neighbors: it can get along well next to any crops.
Summer residents say that many of them grow dill right in the beds with potatoes, onions and carrots. True, in this case it is necessary to ensure that the landings do not create wilderness for each other.
Proper preparation of the garden for planting seeds
The preparation of the garden must begin in the fall.... This will make it possible to start sowing seeds in early spring, and, accordingly, to get an early harvest. The earth must be dug to a depth of 20 cm. In this case, both humus and mineral fertilizers should be applied. After these procedures, it remains only to level the soil well, make grooves in it and sow seeds.
Do I need to soak dill before planting
Seeds need preliminary preparation only if they are not planned to be sown before winter. Preparatory activities should begin a week before the intended sowing. The first step is to put the seeds in cheesecloth and moisten well. The gauze should not dry out; it should be constantly moistened. Thus, the seeds are kept for about a week.
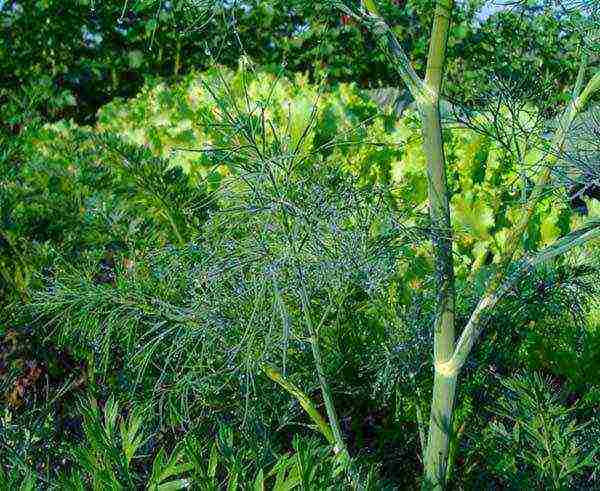
 Dill bloom close up
When soaking seeds, store them in a warm room with a temperature of at least 20 degrees.
Directly before sowing, you need to dry the seeds for half an hour. After that, you can sow them on the garden bed. Shoots should appear after a couple of weeks.
If sowing is done before winter, then you do not need to soak the seeds. In the spring, they will have enough moisture in the soil and they will rise excellently.
Fast seeding and good germination patterns
Before sowing seeds, you need to prepare grooves a couple of centimeters deep. The distance between them is left 20 centimeters. It is recommended to make the gaps between the seeds equal to 5 centimeters.
You can use greens as a compacting crop and plant them alongside other vegetables in your garden beds. In this case, it is necessary to provide for a sufficient distance for the development of both the dill itself and the crops adjacent to it.
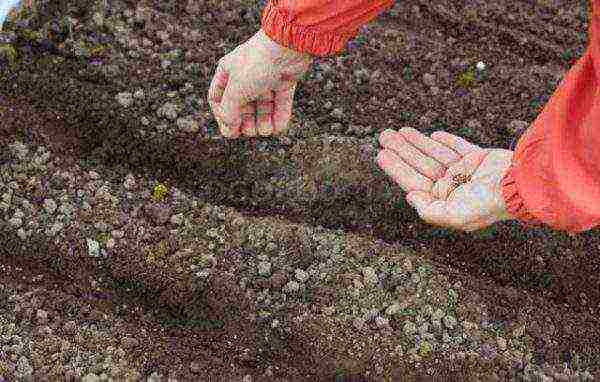 Planting dill seeds
Some summer residents use the zigzag method of sowing this plant in the beds and claim that it is much more convenient to care for it in this way. It is worth noting that this is a purely personal matter, everyone draws conclusions based only on personal experience and preferences.
Leaving is not a big deal. However, even this unpretentious culture has its own pests. The main one is aphid. To combat it, it is good to use alcohol, a solution of which is sprayed on the garden bed. For 10 liters, you need 2 tablespoons of unrefined ethyl alcohol. In addition, the pest does not tolerate growing near thyme bushes. You can plant it just nearby and not worry that the greens rich in vitamins will infect the aphids.
After the emergence of seedlings, you must carefully monitor the color of the dill foliage. At the first changes, you should take a closer look and take measures to eliminate the defect.
After all, this fact testifies, first of all, to the lack of any trace element in the soil. Yellowness can be eliminated by applying saltpeter under the root, and red leaves are eliminated by applying phosphorus fertilizers.
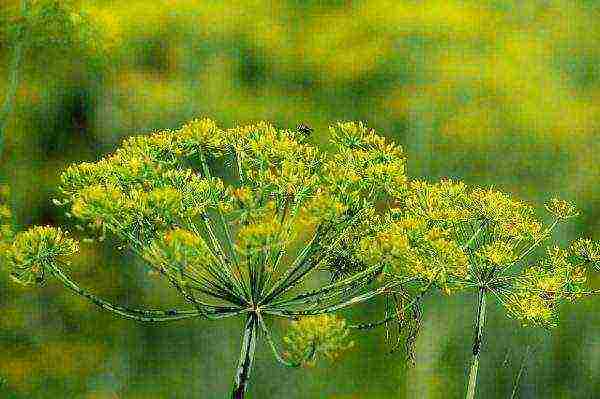
Dill is the most common and unpretentious spice grown everywhere. The crop can be harvested almost all year round (as it grows). However, the leaves have the greatest aroma precisely at the time when inflorescences begin to form.
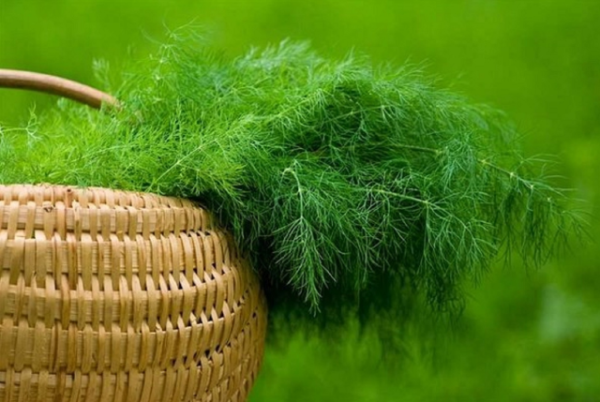 Harvested dill in a basket
Now there are many varieties of dill on the market, which differ not only in appearance and taste, but also in the characteristics of agricultural technology: some varieties are easier to grow, some need to be soaked before planting, some will take a very long time to germinate.These crops have different ripening periods., which makes it possible to plan in advance the timing of the harvest and adjust them to fit your needs.
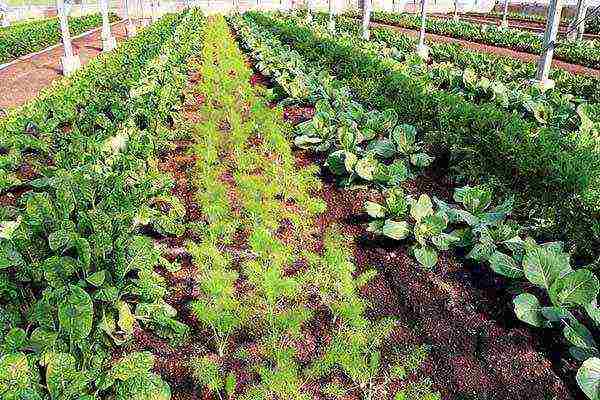
It is not necessary to set aside a separate bed for dill: it is possible to grow it together with other crops (for example, potatoes, tomatoes, carrots). This is very important for owners of small summer cottages who want to use their territory with maximum benefit.