Content
- 1 Breeding methods in the Moscow region
- 2 Types and features
- 3 The choice of planting material
- 4 Preparation of planting material
- 5 Soil preparation and planting
- 6 Top dressing
- 7 How to water
- 8 Neighborhood with other cultures
- 9 Pests and diseases
- 10 Preparing for winter
- 11 Daylilies: cultivation features
- 12 Daylilies: outdoor care
- 13 Reproduction of daylilies
- 14 Pests and diseases and methods of dealing with them
- 15 Possible growing problems
Daylily belongs to the Asphodel family, subfamily Daylily. Most species have short-term flowering. Each flower fades in a day.
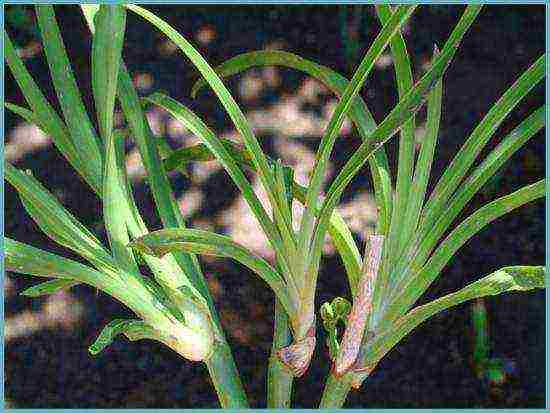
Rhizomes are cord-like, fleshy, often forming stolons. Leaves are double-row, wide, straight or arched.
The flowers are large, funnel-shaped, six-partite with a small tube. Form inflorescences from 2 to 10 pieces. 1-3 flowers bloom at the same time from each inflorescence. Some species bloom at night. Flowering in an adult plant is 25-28 days.
Peduncles are conventionally divided into several groups:
- low - up to 30 cm,
- medium - 30-60 cm,
- semi-high - 60-90 cm,
- high - above 90 cm.
The fruit is a triangular capsule with a small amount of black shiny seeds.
Breeding methods in the Moscow region
Daylilies can be propagated by dividing the mother bush or by seeds.
By dividing the bush, 3-4 year olds are propagated. This is done in early spring or autumn. The bush is dug up and divided into several parts with a well-formed root system, that is, with one central thick root and several adventitious roots. You can also divide the bush without digging it up. Just cut off a piece with a sharp shovel and dust both sides of the cut with ash.
The seed propagation method is used only by specialists for breeding a variety or a hybrid of daylily. Because in this way the seeds do not preserve the specific characteristics of the variety.
Types and features
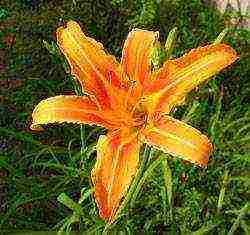
The classification of daylilies is very diverse. They are divided into types according to the shape of the flower:
- arachnids (they are also spiders),
- terry,
- indefinite form.
By the height of an adult bush:
- undersized,
- medium-sized,
- tall.
By flowering from time of day:
- daytime (blooms in the morning, fades in the evening),
- night (night bloom and the next morning),
- extended flowering (blooms at any time and blooms for about 16 hours).
By flowering from the season:
- very early (May - June),
- early (June - July),
- medium (July - August),
- late (August - September).
By growing season from time of year:
- evergreen (growing season lasts all year round),
- sleeping (for the winter, the ground part dies off and growth stops),
- semi-evergreen (in winter, the ground part dies off, but growth does not stop).
The choice of planting material
You can purchase planting material in any garden and flower shop or on the sites of plant nurseries. You need to pay attention to the height of the bush, the timing of flowering and growing season.All this information should be indicated on the packaging of the selected copy. Also, the packaging must indicate the country of origin, the date of entry into the country, the batch number and the date of packaging.
Particular attention should be paid to the appearance of the root system. She must be powerful and well developed. The main root is fleshy, elastic and free from damage, growths, mold or rot. The secondary roots are also elastic and well developed.
Popular varieties of daylilies:
- Terry: Susan Pritchard, Quanso, Night Ambers, Paprika Flame, Explodid Pumpkin, Rosuit, Happy Bully, Longfields Maxim.
- Evergreens: Alice Stokes, Kalito Jack.
- Semi-evergreens: Paizis Penata, Tuscavilla Tigress, Elizabeth Salter.
- Sleepers: Macbeth, Pardon Mee, Frans Halls, Enchantted Forest.
- Spiders: Ruby Spyder, Free Willin, Ketchin Raise, Prairie Blue Eyes, Cherry Swisler, Heavenlyn Angel Eyes, Heavenlyn Flight of Angels.
- Dwarf: Gamma Quadrant, Lacey Dolly.
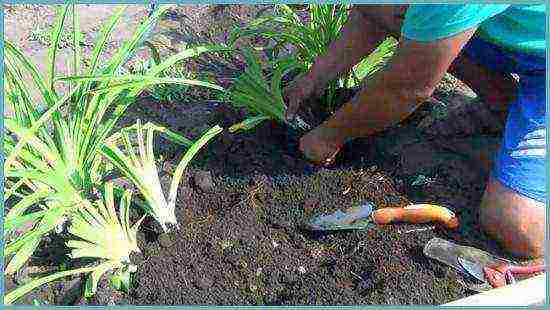
Preparation of planting material
Before planting the daylily, you need to examine it well. Remove dried, rotten and damaged roots. Powder the wounds with ash. If the plant was stored without soil, you need to place it in water with the addition of growth stimulants. Soak for about 10-12 hours.
Soil preparation and planting
Daylilies are unpretentious plants. They grow and bloom equally well in sunny places, in partial shade and even in the shade. They are also not picky about the composition of the soil, but they do not like stagnant moisture.
Before planting, clear the soil from weeds, loosen it. You can add mineral fertilizers, but not necessary. Dig a hole 40-60 cm deep, depending on the height of the bush. Calculate the width from the volume of the bush, approximately 30-50 cm. Loosen the bottom of the hole. Pour sand in a pile, place a daylily on it and straighten the roots. Sprinkle it with earth, without adding any fertilizers, gradually compacting it.
To deepen the root collar by 1-2 cm. Then water the plant abundantly. You can transplant from spring to autumn, but best of all in early spring, in April - May. Perhaps in early autumn, late August - early September. No special care required. You just need to water, fertilize and loosen the soil.
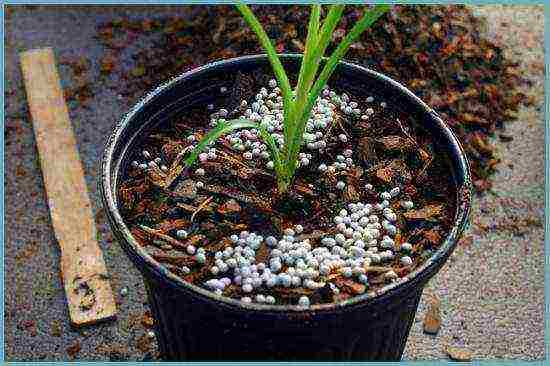
Top dressing
In the first year, daylilies are fertilized several times. In the spring, with an interval of a month, with complex mineral fertilizers, from August - with potassium-phosphorus fertilizers. In subsequent years, in the spring - with potash nitrate, from May to August - with complex mineral fertilizer, and from August - with phosphorus-potassium fertilizer.
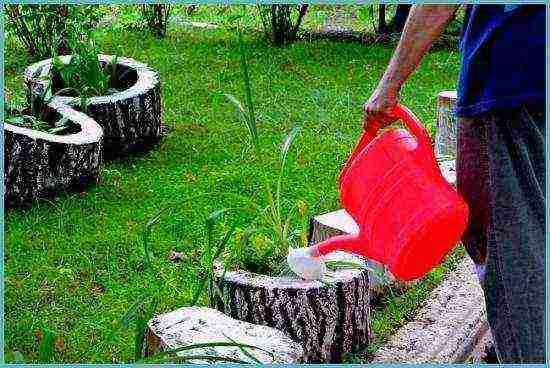
How to water
The daylily is not picky about watering. In the first month of planting, you need to water more often so that the bush takes root. Then watered 1-2 times a week. More often in dry weather. Watering is always carried out in the evening, under the root, with warmed up settled water.
Neighborhood with other cultures
Daylilies go well with hosts, with small shrubs and trees with a sparse crown. All garden crops are suitable for the neighborhood with them.
Pests and diseases
Diseases:
- soft rot of the root collar,
- hay root rot,
- fungal diseases that cause striped leaves,
- iris leaf spot,
- cercosporosis,
- spring sickness
- rust.
Pests:
- thrips,
- daylily gall midge,
- aphid,
- spider mite,
- grass bug,
- root mite,
- slugs,
- snails,
- bear,
- Khrushch,
- bronze,
- kravchik beetle,
- wireworm,
- nutcracker,
- darkling beetle,
- scoops,
- nematodes.
Preparing for winter
Dormant species of daylilies tolerate severe frosts very well. Evergreen and semi-evergreen varieties should be covered for the winter with spruce branches, straw or wood chips.
Did you like the article? Share with your friends!
Each flower of this plant lives only one day. But, despite this, most flower growers consider it their duty to plant it, since they cannot imagine a flower garden without a daylily or daylily. This is due to the huge variety of varieties, rich color palette and amazing vitality of the flower.Planting and caring for daylilies in the open field is not difficult, but they have their own characteristics.
Daylilies: cultivation features

This flower does not create any special problems for flower growers. It easily adapts to different conditions. That's just a real lush and long-term flowering, for which beautiful days are appreciated, without proper care of a grower. Correct and timely planting is one of the essential elements of good daylily care.
Landing in open ground
The future fate of the flower depends on whether the flower is planted correctly: whether it will simply fight for life or, prospering in good conditions, will become an adornment of the flower garden and give abundant flowering.
How and when to plant?
Planting timing depends on whether you are planting a newly acquired plant or deciding to divide an old bush. Daylily can be planted from spring to late summer, and in southern regions in September, taking into account the time required for the plant to take root. But the division is best done in the spring. At the same time, it is better to plant beautiful days in regions with cold winters. Over the summer, the plant will get stronger and will not suffer even in severe frosts.
How to plant a beautiful day?
- The hole is dug so that the entire root system is located, and there is still a little space left on the sides. The depth of the pit is about 30 cm, and the diameter is at least 50 cm, taking into account that the bush grows over time.
- The soil for planting is prepared from a mixture of sand, peat and humus with the addition of st. tablespoons of ash and a pinch of potassium-phosphorus fertilizer. You should not get carried away with nitrogen, it provokes the growth of the vegetative mass to the detriment of flowering.
- An earthen mound is poured in the center of the hole and the plant is placed, well spreading the roots. They should not be horizontal, but go slightly at an angle in depth.
- A white stripe at the base of the leaves will tell you about the planting level in the same place. The flower should be located in approximately the same way in the new place. The root collar should not be buried more than 2-3 cm, but there should be no bare roots either.
- Cover the roots with soil. It must be carefully compacted, avoiding the presence of air in the soil - this will cause the roots to die off. Little by little water the backfilled soil. When the plant is fully planted, abundant watering is required.
Site and soil preparation
Daylily is a long-lasting flower. Some specimens live up to 15 years without a transplant. Therefore, the place must be chosen deliberately so as not to disturb the plant with a transplant once again.

Be sure to take into account the requirements that the krasodnya makes for successful growth and flowering:
- sunny area, an exception is made only for dark-colored varieties in the southern regions - the flowers fade from the bright sun, so they need shade at midday;
- loose fertile soil that retains moisture well, but without stagnant water;
- neutral or slightly acidic soil reaction;
- the absence of a number of trees and shrubs with which you will have to compete for moisture.
The soil must be prepared in advance. Heavy soil - improve by adding sand and compost, and too light - adding clay for moisture capacity, sod-podzolic soil and compost. The earth is dug onto the bayonet of a shovel, carefully choosing the roots of weeds. If necessary, adjust the acidity of the soil.
Landing nuances
Before planting, the plant must be prepared. Cut off the leaves, leaving 10-15 cm above the root collar. Remove dead roots by sprinkling crushed charcoal on the slices. Roots are soaked in a weak solution of complex fertilizer with the addition of a root formation stimulator: heteroauxin is used in spring and autumn, and root is used in summer. Soaking time - up to 24 hours. Soaking should be done in the shade at a temperature of 15 to 23 degrees.

After planting, the soil under the plants is mulched to avoid moisture loss. In hot weather, planted plants need daily watering.
Daylilies: outdoor care
High-quality care and compliance with all the rules of agricultural technology will help maintain plant health and ensure long-term lush flowering.
Temperature regime
Despite the love for sunlight, this plant does not like too much heat. In strong heat, sprinkling with small drops can be carried out to make the plants more comfortable. Daylily is considered a frost-resistant flower, but winter shelter is desirable for it. It is especially important for evergreen and semi-evergreen varieties. Mulching the soil will keep it loose, stabilize the temperature, creating better conditions for the development and flowering of the daylily.
Watering the plant
This is a very important event, since krasodnev is a large water-loaf and grows well in the presence of moisture in the root zone. Due to the biological characteristics of the root system, this plant can withstand a long dry period. But regular watering will increase the number of buds and the size of the flower. The lack of moisture in the soil is evidenced by pale foliage and dropping of buds. Therefore, in the absence of rain, daylilies should be watered regularly, soaking the entire root layer of soil. The plant does not like watering from above - spots appear on the flowers from water. It is best to water the daylilies at the root with non-cold water. It is very good if it is possible to organize drip irrigation. Helps to retain moisture in the lower soil layers by mulching. Most often, daylilies are mulched with half-matured needles or crushed crushed bark.

To avoid burns on the flowers, daylilies are watered early in the morning or late in the evening.
Top dressing and fertilization
In the first year after transplantation, Krasnodar does not need it. Starting from the second year, the plant is fed regularly. The first feeding is carried out in early spring with a complex mineral fertilizer in dry or liquid form. Dry fertilizer is embedded in the soil when loosening. The second feeding with complex fertilizer is done when the buds are extended. The third feeding is carried out one month after the mass flowering with phosphorus and potash fertilizers. They will help your plants better prepare for winter.
Daylilies respond well to foliar feeding. They can be made with solutions of mineral fertilizers, but at a lower concentration. They are made in cloudy calm weather in the early morning or late evening. Krasodnev loves liquid fertilizing with organic matter: infusions of rotted grass, manure or chicken droppings. But they can only be carried out until August, since an excess of nitrogen in the second half of the growing season will not allow the plants to prepare well for winter.
Pruning

In the spring of daylilies, old leaves are cut off at the edges of the curtain, this rejuvenates the bushes. After flowering, all peduncles are cut off. Before freezing, it is advisable to cut off all old leaves, leaving only the young ones that have recently grown.
Transfer
Daylilies tend to grow rapidly. Lush bloom is observed for the first 5-7 years. In the future, the flowers become smaller, and there are fewer of them. So, it's time to transplant the plant, after dividing the curtain into parts.
In the spring, the krasodnev is transplanted as soon as the young leaves grow to a height of about 10 cm. The delenka is dug in from all sides, washed well with water and carefully divided into parts by hand. This is usually easy to do. Sometimes, for separation, you have to use a sharp knife, with which the bushes are neatly divided. Separation points should be treated with a fungicide to prevent possible diseases.
Summer transplantation is possible, but not very desirable, especially in hot weather - this is a strong stress for the plants. Planting daylilies in the fall is possible no later than 1.5 months before the onset of frost, so that young bushes have time to take root. The transplanting procedure is the same as when planting a new plant.
Autumn care, preparation for winter
The roots of most daylilies are not afraid of frosts down to -25 degrees, which cannot be said about the aboveground part. It freezes out at the first frost. It is necessary to prepare plants for winter in advance. To do this, at the end of summer, potash and phosphorus fertilizers are applied, which increase frost resistance. Many growers prune old leaves on daylilies even before the onset of frost. But you can leave them on the plant. The process of photosynthesis, and therefore the accumulation of nutrients in the roots, will continue until they dry out. Dried leaves will additionally shelter the plant from cold weather. You just need to remove them in time with the onset of spring. Will help to winter safely and mulching the bushes with dry peat, sawdust, chopped straw. This procedure must be carried out after the final establishment of cold weather so that the bushes do not come out. Many evergreen and semi-evergreen varieties need additional cover with spruce branches.
Reproduction of daylilies
There are many ways to reproduce:
- dividing the bush;
- seeds;
- air layering.
The first method has already been described in detail. Additionally, it can be noted that when dividing a bush, parts are always obtained that are different in quality. Peripheral delenki have stronger roots and are more likely to take in and bloom. Parts from the middle take root worse. They need to remove dead roots and prune live ones to stimulate the regrowth of new ones. These delenki require more attention when leaving, feeding and watering.
When propagating by seeds, it must be remembered that new plants will not repeat the maternal traits. Seed propagation is used to obtain new hybrids. But, if your plant is pollinated and seeds have set, then you can try to sow them. Who knows, perhaps you will become the owner of an original beautifully flowering plant.
How to propagate beautiful days with seeds?
To prevent the seeds from scattering from the cracked box, it is tied with gauze or wrapped in paper. Fully ripe seeds are dried for 2 weeks and stored in a tight-fitting container on the bottom shelf of the refrigerator so that they do not dry out.
The algorithm for seed reproduction of daylilies is as follows:
- before sowing, the seeds are soaked for 2-3 days in water, which is changed daily;
- sow in containers with nutrient soil to a depth of 0.5-1 cm with a distance of 2 cm between seeds;
- you can sow seeds on the beds after the onset of heat, the distance between the seeds is 5 cm, between the rows - 20 cm;
- when 4 leaves appear in seedlings grown in the room, they can be sorted out to the garden bed;
- daylilies will bloom in the second or third year.
After the end of flowering, small rosettes of leaves appear on the peduncles of many varieties of krasodnev, which are successfully used for reproduction.
They do it as follows:
- allow the outlet to develop well without cutting off the peduncle;
- for reproduction, cut it off, leaving 4 cm of the peduncle above and below;
- if there are no roots on the outlet, root it in water;
- in case of appearance of roots, plant it, having previously dipped it into the root;
- if there are at least 2 months left before frost, sockets can be planted on the beds, they must be mulched for the winter;
- when winter is just around the corner, you will have to plant outlets in pots with light soil, sprinkled with a centimeter layer of sand and keep them on the windowsill; look after, fertilize and supplement them, as well as houseplants;
- in the spring, plants are planted in the ground.
With any method of planting, the rosettes are not buried, it is enough for the stem nodule with roots to be immersed in the soil. The leaves at the rosettes are cut to a height of 8 cm.
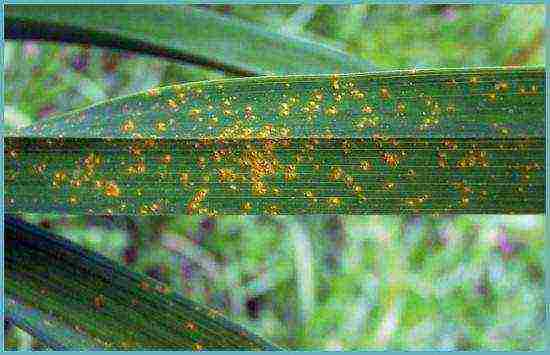
Pests and diseases and methods of dealing with them
Daylilies are quite viable plants, they do not bring much trouble to flower growers, but they also have their own diseases and insect pests.

Table: diseases and pests of daylilies.
| Root collar rot | Leaves turn yellow and die off, the neck softens, a smell appears | They wash the dug plant, remove the decayed parts, disinfect it in a dark solution of potassium permanganate for 20 minutes, dry it in the shade before transplanting |
| Striped leaves | Yellow streaks along the central vein and reddish-brown specks on the leaves | The affected leaves are removed, the plants are treated with a foundation with a concentration of 0.2% |
| Rust | Slow growth, no flowering, leaf pustules filled with yellow-orange powder | All infected leaves are removed, as well as healthy ones nearby are treated with fungicides, changing preparations |
| Viruses | Plants look sick and have specks or streaks on the leaves | The plant cannot be cured; in case of a confirmed disease, the plant is destroyed |
| Daylily mosquito | Larvae in buds | Tear off the affected buds |
| Thrips | Ugly shapeless flowers, infected leaves | Cut off the peduncles and remove the affected leaves, treatment with systemic insecticides |
Sometimes daylilies can have problems that are not related to diseases or pests.
Possible growing problems
They can be as follows.
- Fragility of peduncles - excessive watering and excess nitrogen in the soil are to blame.
- The spots on the petals of dark and red colors are traces of sunburn or heavy rain.
- The flower does not fully unfold - a temporary phenomenon, it passes on its own.
- Lack of flowering - planting too deep, too much nitrogen, insufficient lighting.
Daylily is a highly decorative and unpretentious plant. It is able to thank the grower for good care with long and lush flowering.
HEMEROCALLIS -the name comes from the Greek words 'hemera' - day and 'kallos' - beauty. This is because each flower usually blooms for one day. It is also called krasodnev, but we are more familiar with the name daylily.Daylily is a herbaceous rhizome perennials. The adventitious roots are filamentous, often fleshy, thickened. Basal leaves are two-row, broadly linear, whole-edged, straight or arcuate curved. Peduncles, there may be several, usually rise above the leaves. The fruit is a triangular capsule with a few, black, shiny seeds (based on materials from the Encyclopedia of Garden Ornamental Plants).
Daylilies are the old-timers of our gardens. We love them for their unpretentiousness and amazing vitality. Among gardeners, there is an opinion that the daylily is the flower of a lazy gardener. In my opinion, this statement is true for old varieties that can grow and bloom profusely for years without our participation. In recent years, the daylily is "at the height of fashion." This happened due to the fact that we were able to buy new modern varieties in foreign nurseries. As you know, the Americans are the legislators of the "daylily fashion". Every year they present their novelties to our court: the size of the flowers is getting larger, the patterns on the petals are getting more intricate, and the ruffles and frills are getting richer. Such handsome men require appropriate attention and attitude. Give them a little care, and they will definitely reward you with a gorgeous view and abundant flowering. I want to share with you the simple methods of daylily farming that I have been successfully using in my garden for many years. I hope my experience will be useful to you.
SELECTING A LANDING AREA
In the wild in the Far East in the countries of East Asia, daylilies grow on forest edges, among shrubs. Apparently from here there was a statement that daylilies will grow well in partial shade. Daylily is a very plastic plant. It will, of course, grow and bloom in partial shade, but only in the sun will it bloom abundantly. This statement is especially true for modern hybrid varieties with large flowers and abundant corrugated border. Only in the sun can these modern daylily varieties be able to fully show their beauty.However, daylilies of a dark color are best planted in a light diffused partial shade so that its flowers do not fade in the bright sun. And almost white varieties are best planted in the sun itself. As you know, white daylilies do not exist. There are always subtle shades of pink, yellow, melon or lavender. So when planting in the sun, these shades almost fade, and the daylily becomes white.
Ordinary garden soils are fine for growing daylilies. They are undemanding to acidity, and slightly acidic soil will be ideal for them.
LANDING
The best time to plant a new daylily is spring. In the Moscow region, depending on weather conditions, this is the end of April - beginning of May. The second suitable time for planting is late August - early September. At a later date, the likelihood of the death of the plant in winter is possible, because it will not have time to take root. It takes about a month to root the daylily. When planting daylilies in the fall for successful wintering, you need to hedge yourself and make a hillock with earth or leaf humus - pour a mound 10-15 cm high on the base of the plant.In this case, it is better not to use peat - it is too moisture-consuming, freezes quickly, and thaws for a long time in spring.
If necessary, daylilies can be transplanted between these periods, even flowering bushes. To do this, it is better to choose cloudy weather and, after transplanting, shade the plant for a while.
The planting hole for each daylily is prepared carefully, because the daylily can grow in one place for many years and the signal for dividing the bush is a decrease in its decorative effect and a decrease in the number of flowers. This often occurs on aging bushes that are more than 5 years old.
So, if you have nutritious garden soils on your site, then to plant a daylily, it is enough to dig a hole of such a size that the roots of the plant can freely fit in it. On heavy soils, we make the planting hole twice as large as the root system and fill it with pre-prepared soil.
The soils on my site are medium loamy. Since I do not have enough leaf humus and compost, to improve their mechanical composition, I mix loam with peat and sand in a ratio of 3: 2: 1. At the same time, I buy horse peat, neutralized "Agrobalt - N" in briquettes. I do not advise buying peat in bulk from a car, it often turns out to be sour. My husband prepares potting soil in an old concrete mixer that was left idle after building a house.
At the bottom of the planting pit, we form a mound and place a daylily on it, carefully spreading the roots in different directions. Be sure to add a couple of handfuls of ash to the planting mixture. We begin to cover with earth, while squeezing the roots from all sides with our hands, but do not fill the entire hole at once. We spill it with water, add earth, compact the soil again. Make sure that the root collar is not buried. Daylilies are planted to a depth of about 2-2.5 cm. With a deeper planting, the plant will develop poorly and bloom. Provided that daylilies were planted in rich and nutritious soil, young plants do not need feeding in the first year. Considering that daylilies grow with age (especially quickly for the first 5-7 years), they are planted at a distance of 60-70 cm. Only with this planting, each bush will be freely placed in the flower garden. Temporarily, other perennials or annuals can be planted between daylilies.
CARE
Watering.Daylilies do not like surface watering. A powerful root system allows the daylily to get moisture from the depths and not be afraid of surface drying out of the soil. The best conditions for growing a daylily can be considered as those when the topsoil at the level of development of the rosette of leaves is dry, and at a depth of 20-30 cm, where the suction roots are located, it is wet.It is believed that water droplets falling on the daylily flower cause damage and staining of the petals. I water my garden, including daylilies, and even roses, by sprinkling all night. I turn off the sprinkler early in the morning and by the time the flower opens, all the petals have time to dry out. I did not notice any damage to the petals of daylilies from such watering. It seems to me that if the variety is prone to the appearance of spots on the petals, then in any case they will. Daylilies are very fond of water. Watering should be appropriate for the weather and soil composition of your garden. And do not forget to loosen after the soil dries up.
Top dressing.There are no uniform recommendations for feeding daylilies. They respond very well to various kinds of feeding, but in the case of daylilies, underfeeding is better than overfeeding. Apply fertilizer wisely. Watch your daylilies: how they grow, how they bloom, and you will understand what your pet needs. For myself, I have developed a simple scheme for feeding daylilies, which I have been successfully using in my garden for several years.
In late spring, during a period of intensive growth, I fertilize daylilies with a full complex mineral fertilizer. It is convenient to use Kemiru Universal (now it is called Fertika). In a dry form, I sprinkle the fertilizer between the bushes, then embed it in the ground. You need to scatter the fertilizer very carefully so that the granules in no case fall into the leaf outlet. It is not recommended to scatter fertilizers on dry ground. Daylilies need to be watered first. I also spill the plants abundantly after feeding.
During the budding period, I do foliar feeding. After all, as you know, liquid top dressing on leaves is several times more effective than root dressing. Foliar dressing can be done only in the morning or in the evening. For these purposes, I use a concentrated liquid humated fertilizer with macro- and microelements. You can use infusions of chicken manure, mullein, nettle, horsetail, or any fermented herb. In principle, you can skip this top dressing, but how you want to please your favorites. Yes, and it's not difficult: go and spray. Only it is necessary to spray correctly. Plants absorb nutrients through the pores on the leaves (stomata). Most of them are located on the underside of the sheet. Therefore, the sprayer should be directed exactly there.
I do not feed daylilies during the flowering period.
After flowering in late August, early September, when daylilies have a short period of rest, it is time for the main feeding of daylilies with phosphorus-potassium fertilizers, which stimulate the formation of flower buds for the next year and the formation of more shoots. During this period, you can also use Kemira Osenne with a low nitrogen content.
When feeding daylilies, you should not get carried away with fertilizers with a high nitrogen content. Otherwise, the plant will quickly begin to gain vegetative mass to the detriment of flowering. There is information that an excess of nitrogen fertilizers especially negatively affects the flowering of varieties of red and purple colors. Hence, we conclude that manure is contraindicated for daylilies. But wood ash will never harm daylilies (just do not use ash on alkaline soils). I add it when planting, and in the spring I scatter the ash in flower beds right over the snow - and the snow melts faster and the plants benefit. As stated above, I do not fertilize newly planted plants until they have taken root. The first feeding, depending on the season, can be done no earlier than a month later.
Recently, many gardeners use mulch from tree bark (pine and larch) to suppress weed growth, reduce moisture loss, prevent soil overheating, and also for design purposes.In this case, when feeding the mulch, it is necessary to move it away from the bush and make sure that the granules fall into the depths of the soil, and not on the mulch. It should also be remembered that when decomposing, mulch absorbs nutrients from the soil, especially nitrogen. Therefore, when feeding mulched plantings, the amount of nitrogen must be increased. In early spring, the plants need to be freed from mulch so that the earth warms up well, and in the month of May, it can be returned to its original place.
Pruning.
Based on my personal experience, I can say that the timing of pruning does not in any way affect the quality of wintering of daylilies. In any case, they will hibernate without problems with good snow cover. I have not pruned the daylilies in the fall before. I left these works for the spring period. But now the number of daylilies has increased significantly, and monoculture in the garden is ideal conditions for outbreaks of diseases and an increase in the number of pests. That is why, at the moment, I am considering this issue from the point of view of disease prevention, because Leaf Streak (striped leaves) is one of the most common daylily fungal diseases in our gardens. The spores of the fungus, as well as pests, hibernate in the dried leaves and at the base of the bush, and if you have not removed the infected leaves in the fall, then there is a possibility of infection of the daylily in the spring. This is why I now prefer autumn pruning. The most important thing is not to cut too short and too early, otherwise the daylilies will grow again, which is undesirable due to the approaching winter. Usually at the end of October, after the first frost, I cut the leaves of daylilies to a height of 10-15 cm from ground level. Shorter pruning (at ground level) should not be done.
If you nevertheless decided to postpone pruning for the spring, then at least remove the peduncles, dried and damaged leaves, leaves with signs of disease.
In the spring - inspect the plantings, remove the soggy foliage, do preventive treatment. More details can be found in the note "SPRING WORKS IN FLOWER BOOKS WITH DAYLAYS".
REPRODUCTION METHODS
There are several methods for breeding daylilies.
Seed reproduction. When growing plants from seeds, varietal characteristics are not preserved. Therefore, seed propagation is used only in breeding work to develop new varieties.
Vegetative reproduction.
For the reproduction of varietal daylilies, a vegetative method is used (dividing the bush), in which all the characteristics of the mother plant are preserved.
The division of the bushes can be carried out at the same time as the planting. Let me remind you: in early spring, when the leaves of the daylily will grow about 10 cm, as well as in late August - early September.
To divide the bush, you need to dig it up, shake it off the ground and rinse it under a strong stream of water. This is done in order to get a good look at the roots and their condition. Now that all the roots are cleared of the ground, you can start dividing. When dividing in autumn, to make it convenient to work, the leaves can be shortened. If the daylily bush is loose, then the plant can be divided by hand, gently pulling on a separate fan of the bush. Try to preserve the roots as much as possible. When working with dense bushes, you can use a knife. Some gardeners share the bushes with a shovel without digging them out of the ground. In my opinion, this method is quite traumatic and entails the loss of a certain amount of planting material. In this way, I usually divide older varieties of mature shrubs that have a high growth rate. After removing the cut off part of the bush from the ground, I sprinkle the cuts with crushed charcoal, and cover the resulting hole with earth.
Before planting, it is necessary to cut out the dead, rotten parts of the roots; shorten long roots to stimulate the formation of new ones. The cut points must be treated with a fungicide, or sprinkled with crushed coal, or dried fresh cut in the sun for several hours.
Propagation by air layers... This method of propagation retains all the varietal characteristics of the mother plant. At the end of the flowering season, small rosettes of leaves appear on the peduncles of some varieties of daylilies from dormant buds in the leaf axil - air layers.
If you decide to use them for grafting, then you need to give the flower stem to ripen properly (the stage of natural drying of the stem). The longer the rosette is on the stem, the better it will develop in the future. The resulting socket must be separated with a piece of the stem. Leave about 3-4 cm of the stem above and below the place where the rosette is attached. The leaves on the handle should be shortened by about one third. Sometimes it happens that the rosette has not yet had time to form the roots. Then put it in a container of water and wait for the fatty white roots to appear. I plant the prepared cuttings next to the mother plant, I do not deeply deepen it. At first, I periodically spray and water it regularly. Several times I do watering with Kornevin. You can put a cut plastic bottle on top of the handle with the neck up. The plug must be unscrewed for ventilation. For the winter, cuttings must be mulched with earth or leaf humus. Such cuttings can bloom for 2-3 years.
There are other breeding methods such as: the method of propagation by cutting off the central shoot, the method of vertical dissection using stimulants and growth hormones. I don't use these methods and, unfortunately, I can't tell you anything about them. And be sure to read about the method of meristem reproduction in the article "Meristem reproduction - myths and reality."
Many believe that daylilies still have one single drawback. The faded flowers remain hanging on the branches like rags, especially if it rains. Such a picture spoils the appearance of the flower garden. Every morning, walking around my garden, I also clean the flower stalks. Unfortunately, there are no perfect plants and constant maintenance is necessary to maintain the perfect beauty of flower beds. Although, this drawback can be viewed from the other side. What if it's a virtue? After all, every day we can see new flowers, not frayed by the winds and not beaten by the rains. After flowering flower shoots must be cut off.
If you want your daylilies to look healthy, well-groomed, and delight you with abundant flowering, give them a little of your precious time. Using these simple agricultural techniques, you will certainly achieve good results.
I wish you success, Olga Gorskaya
go to the catalog of daylilies, buy daylilies go to the catalog of irises, buy irises
go to the phlox catalog, buy phlox
 The popularity of the daylily grows every day. After all, no amateur florist can resist the beauty and wondrous aroma of this excellent flower. It is not at all necessary to be a professional in this matter, you can plant the varieties of daylilies in open ground yourself, and then start breeding and growing them.
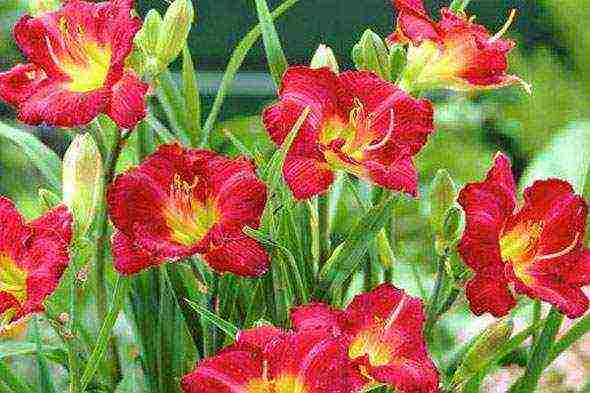
Daylilies are unpretentious plants and with proper planting they will grow in any climatic conditions. But in order for the bushes to look healthy and well-groomed, and the flowers to bloom profusely, it is necessary to fully take proper care.
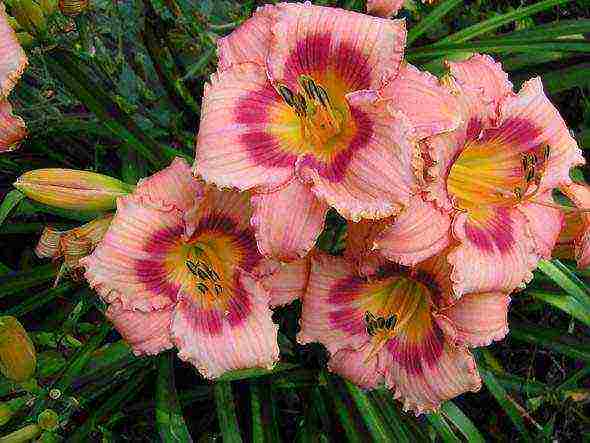
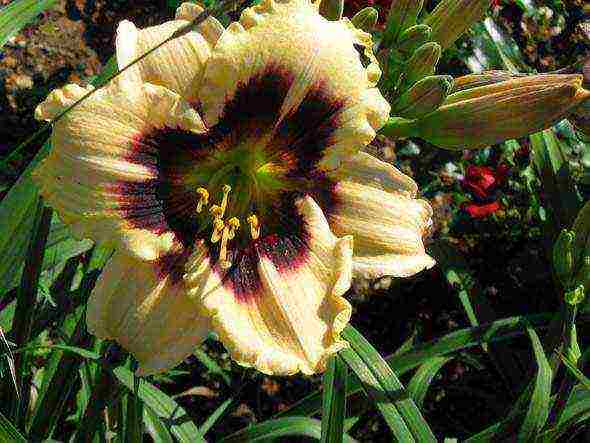
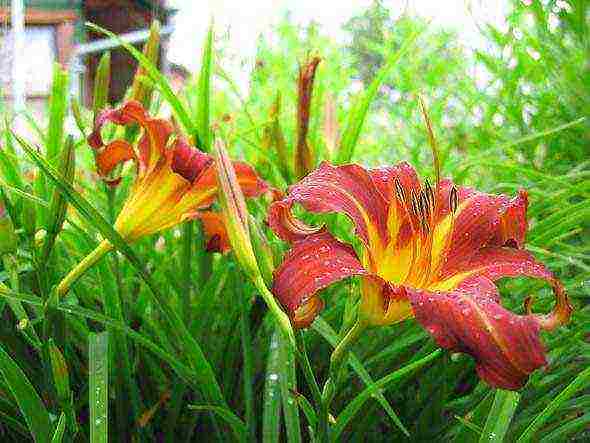
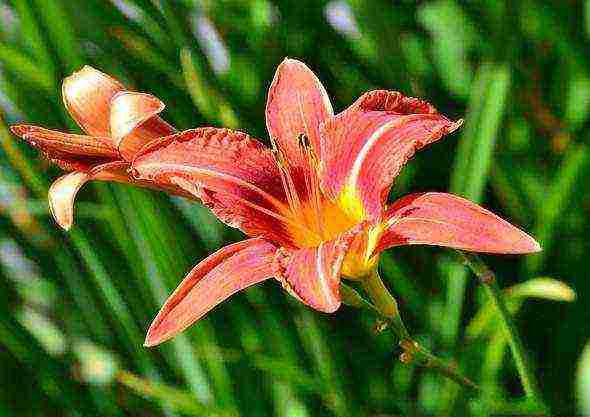
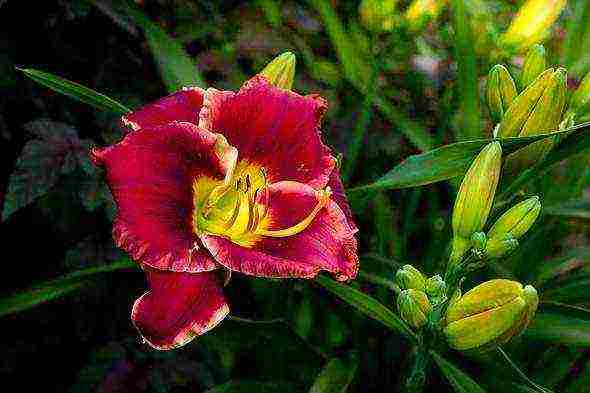
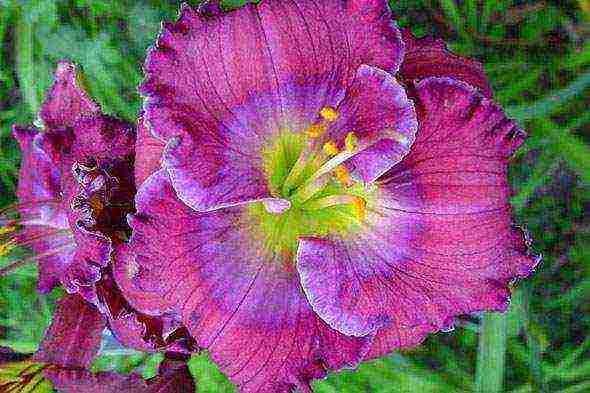
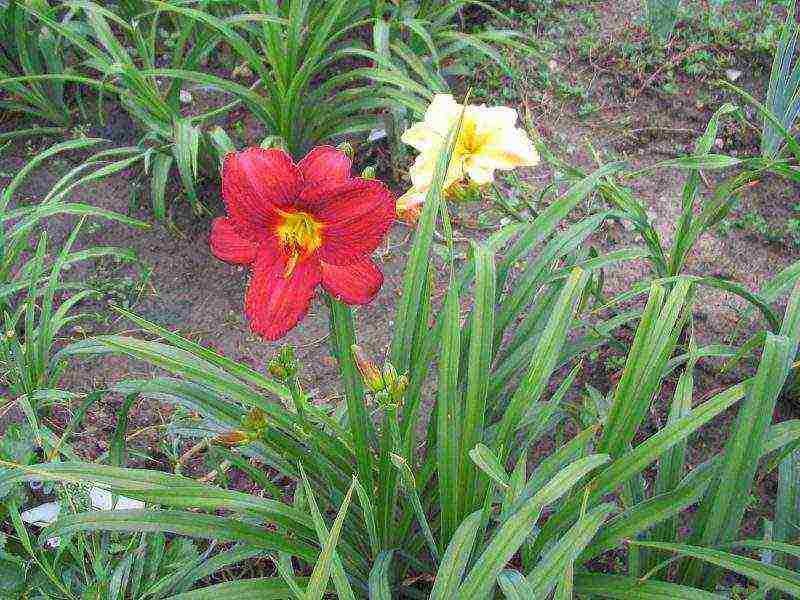
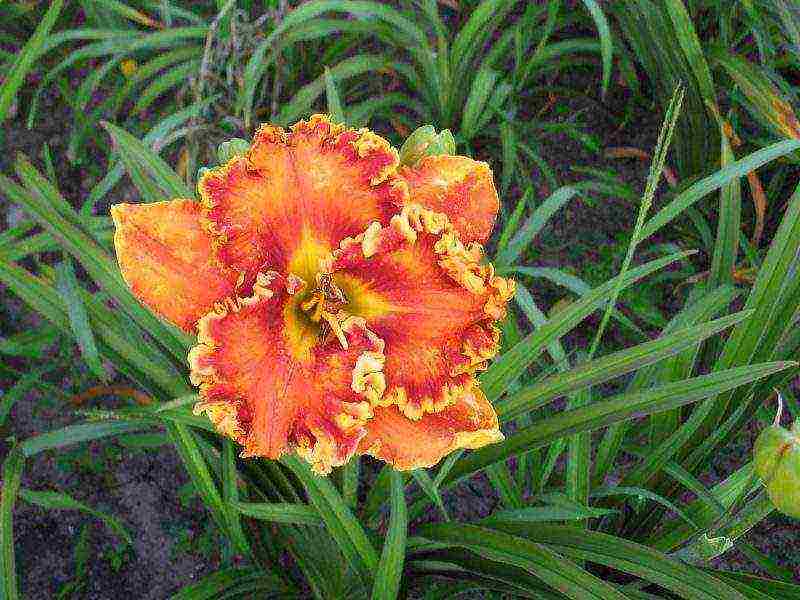
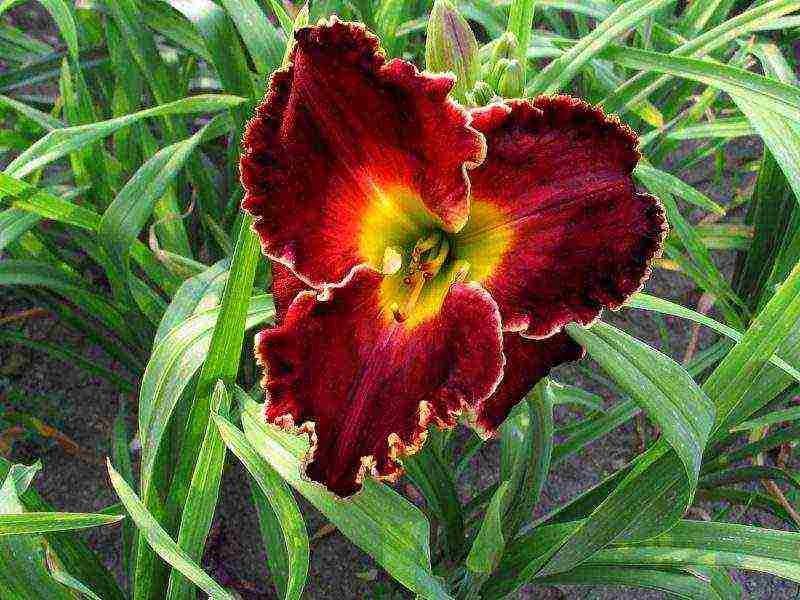
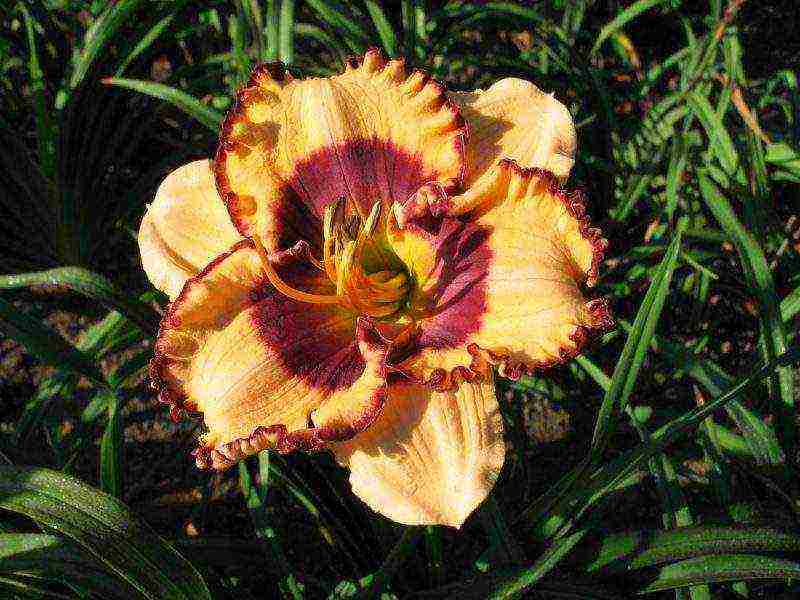
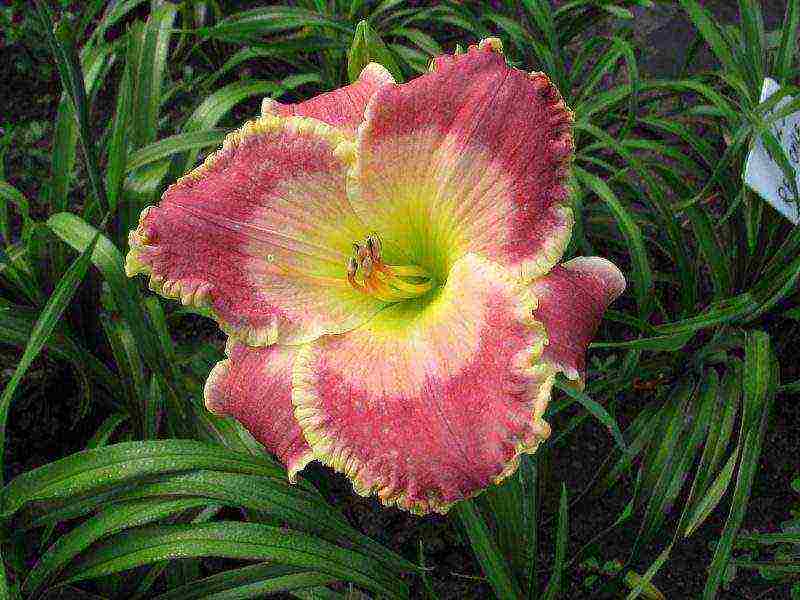
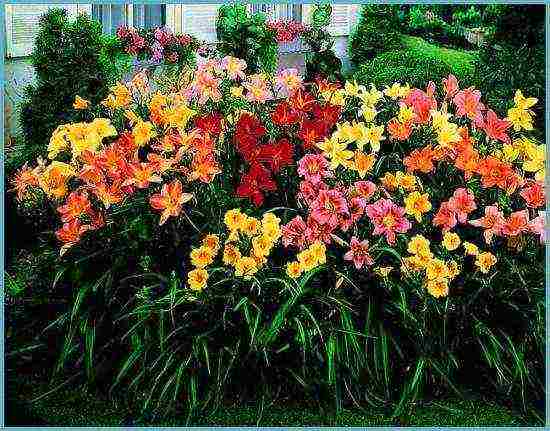
Daylilies are very diverse in color and shape.
Varieties and varieties of daylilies
World breeders are working tirelessly to improve the varieties of daylily, bringing out more and more new varieties. Today there are more than 70,000 of them. Most of the new varieties that come to our area are of American origin, although there are domestic species that are in no way inferior to them.

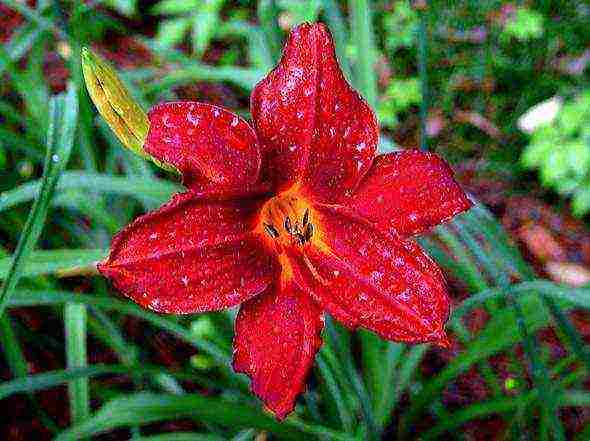
Daylily red
Daylilies are classified according to several parameters:
- type of growing season (dormant, evergreen and semi-green);
- a set of chromosomes (diploid and tetraploid);
- odor (fragrant and odorless);
- shape (terry, spider-like, indefinite shape and all the rest);
- color (divided into 11 groups from almost white to almost black, since there are no pure white and pure black colors yet);
- flowering time (very early, early, medium early, medium, medium late, late, very late and re-flowering).
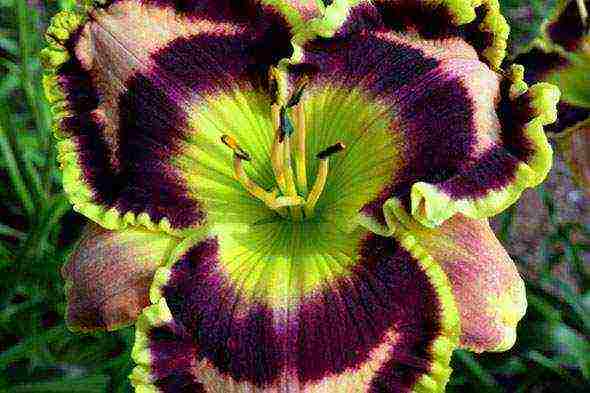
The best varieties of daylilies - photo
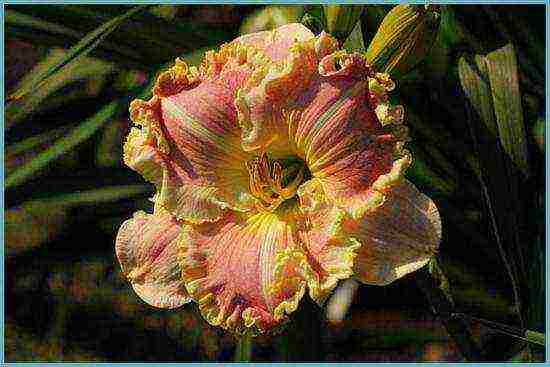
Chang Dinesti (Chang Dynasty Stamile, 2008) is a coral pink flower with an orange wavy border. This is the so-called chameleon: depending on weather conditions, it can change color from completely red to pink-orange. Differs in abundant flowering - over 50 buds are formed on each peduncle.
Chang Dinesti variety
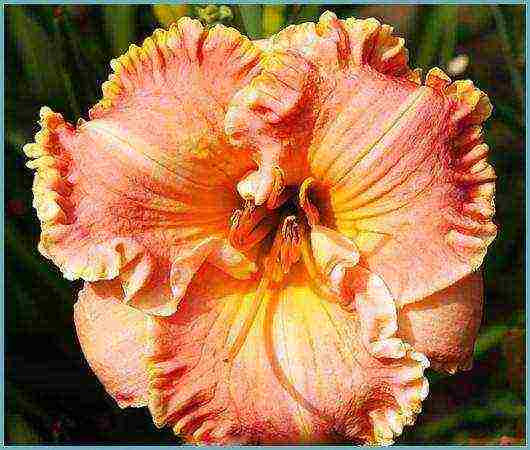
Paula Dusk (Polar Dusk. Stamile, 2011) - a flawless pink flower with a luxurious creamy yellow border in the form of ruffles and folds. Another pleasant characteristic of it is the diamond coating - a shine on the surface of the petals, as from a scattering of small diamonds.
Paul Dask's grade
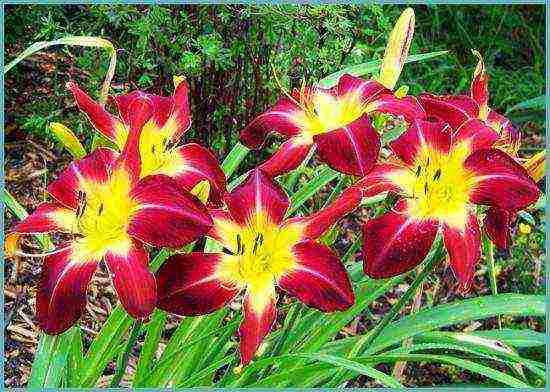
Robin lee (Robin Lee. Hansen, 2010) - pink-red flower with a slightly corrugated white edge. Despite its impressive size, it creates the impression of transparency and weightlessness due to its graceful shape and harmonious combination of the main color with the border.

Robin Lee variety
How to plant correctly
No matter how unpretentious the plant may be, it is necessary to create appropriate conditions for its life. First of all, you need to decide on the landing site. All varieties of daylilies in one way or another prefer sunlight. Flowers with a light color (yellow, orange, white, etc.) like to grow in direct sunlight, but daylilies with darker flowers (purple, purple, red) are best planted in partial shade, as they will quickly fade in the sun and wither.
The ideal soil for growing daylilies is organic-rich loam; other important things are also suitable, so that they are not depleted, and their acidity corresponds to the normal range (6-6.5 pH).
Varieties with dark flowers are best planted in partial shade.
Before planting, you need to carefully examine the seedling, if necessary, cut off the dead roots. Next, you should soak the root system of the daylily in a growth stimulator. It can be prepared independently from willow branches by infusing them in water for 2 days. The plant is placed in the resulting infusion for 4 hours.
Daylily planting in the open field is carried out as follows:
- dig a spacious planting hole with a depth of 40-45 cm;
- throwing a handful of organic fertilizer;
- inside the hole they make a small hill, compacted to make a slide;
- they plant the daylily on a hill, like on a hat, gently straighten the roots and cover them with earth.
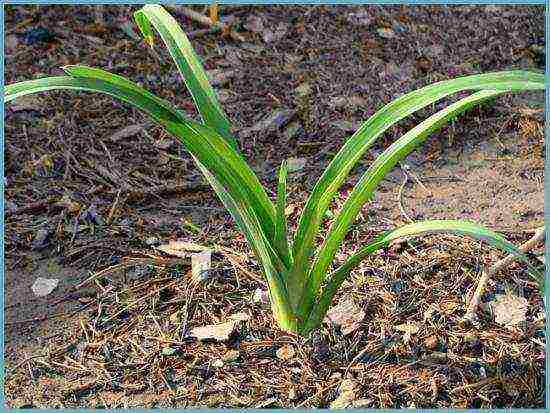
Young daylily bush
Attention! The distance between the seedlings is made at least 40 cm, otherwise they will drown out each other during growth.
Appropriate daylily care
After planting, the plants need watering and care. There are no strictly defined rules. Experienced flower growers, based on their practice, recommend adhering to some simple rules when growing a daylily.
- The planted crops are watered daily for 7 days. Adult daylilies will moisturize only during prolonged droughts, and with exceptionally warm water, which is poured under the root.
- To prolong flowering, wilted flowers and faded stems are regularly cut.
- The root neck of the daylily is deepened strictly by 2 cm, otherwise the flowers may not appear at all and will have to be transplanted.
- After watering, the soil must be loosened.
Watering the daylily
Top dressing and fertilization of the daylily
Of course, daylilies need to be fertilized, but before that it is necessary to study the composition of the soil on the site and, based on the result, apply certain fertilizers.
The basic rule is that fertilizers are applied no earlier than 14 days after rooting.Basically, for young plants, 2-3 feeding per season will be enough, but for older plants (5-6 years old) and even abundantly flowering, 4-5 doses will be needed.
- In early spring, a full range of mineral fertilizers is applied, for example, one of the most common NPK 16:16:16 (1 tablespoon of granules per 10 liters of water).
- In April-May, in order to promote the intensity of growth, they focus on complex fertilizers with a large amount of nitrogen (nitroammophosphate, ammophos, diammonium phosphate).
- In summer, during flowering, you can feed daylilies with organic matter: a solution from mullein, chicken droppings or fermented grass.
- At the end of flowering, before the onset of new growth (at the beginning of autumn), fertilization is carried out with nitroammophos or sulfate with ash, depending on the climatic zone. This feeding helps to increase the size of flowers, as well as their number in the new season.
Daylily needs to be fertilized several times during the growing season.
Reproduction of daylilies
There are several ways to breed daylilies, each with their own advantages and disadvantages.
Dividing the bush
The easiest and most common way to get young daylilies, which in all respects will be identical to the mother's. If necessary, the bush can be divided throughout the growing season. As a rule, separation begins when the plant reaches 3-4 years of age. Another signal for transplanting is the chopping of flowers. The optimal time for dividing is the first half of summer - the beginning of autumn, then the plant will have time to get stronger before the onset of frost.
Dividing the daylily bush
Seed reproduction
It is used only for breeding activities, since in everyday life daylilies planted with this method are not able to maintain their specific characteristics.
Reproduction by offspring
Subject to all transplantation norms, it allows you to increase the number of plants from one manufacturer, while maintaining all species characteristics. But before you plant the outlets in open ground, you should plant them in pots and put them in a warm place for several weeks.
Daylily propagation by offspring
Important! If there are still 6-7 weeks left before frost, plant the sprouts in the fall, and if they did not have time to take root, then in the spring (in mid-May).
Diseases and pests of daylilies
Compared to other neighbors in the flower garden, daylilies rarely get sick, and pests do not hunt for these magnificent flowers so much, but nevertheless, such troubles sometimes happen.
Daylilies are affected mainly by root rot, fungal and viral diseases, spotting, rust and fusarium. To prevent these diseases, plants are treated with fungicides. But if trouble still happened, the bushes are dug up, the rhizomes are placed in a solution of potassium permanganate, dried, and then planted in a new place.
Daylily rust
Daylilies are attacked by several types of insects. The most common of them:
- thrips. They arise in early spring from the ground and suck sap and nutrients from the stems and buds of the plant. To destroy them, the affected bushes are burned, and the soil in the flowerbed is treated with insecticides;
- lily midges. They live in buds, so in order to get rid of them, it is enough to cut off the peduncle;
- spider mites, slugs, aphids and bugs. Control methods are the same as in cases of damage to other plants.
Daylily: combination with other plants
Despite their greatness and variety of colors, daylilies harmoniously fit into almost all color compositions, the main thing is to choose plants for them that will ideally match their color, shape or texture.
A mono composition will be brighter and richer if daylilies of pastel shades are combined with monochromatic gravilates, and bright lilac or crimson with geraniums, monards, bells and cuffs.
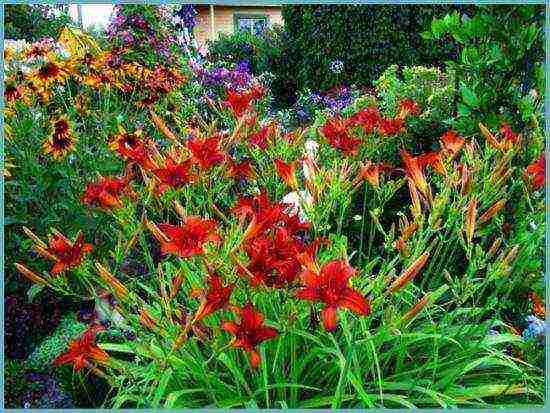
Daylily in the flowerbed
Daylilies are also perfect for Thunberg's barberry, geykher and tenacious, as well as shrubs - elderberry, mock-orange, privet, if they are evenly distributed over the mixborder.
Phlox are ideal neighbors of daylilies, since they bloom almost simultaneously, and even in color they are ideally combined with each other. For example, lilac phlox will complement lavender daylilies.
Daylily in landscape design - photo
Thanks to such a variety of colors, daylilies are actively used in garden design.
Before filling the flower beds with flowers, you should carefully consider, and even better, draw up a detailed plan of the flower garden, taking into account all the nuances. In this case, it is necessary to take into account: the frequency of flowering, the height of the selected varieties of daylilies, their color, as well as harmony with the general background.
Daylily in landscape design
The cultivation of a daylily is a delicate matter that requires special attention, but the effort and effort spent are soon justified by the unearthly beauty and amazing aroma of this graceful flower.
Unpretentious daylily: video
Varieties of daylilies: photo