Content [show]
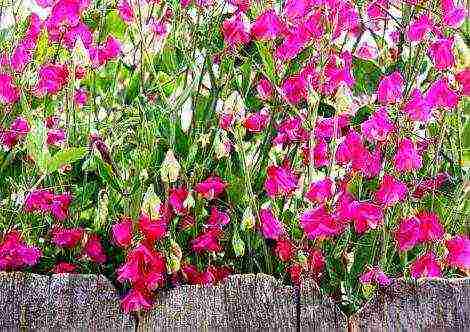
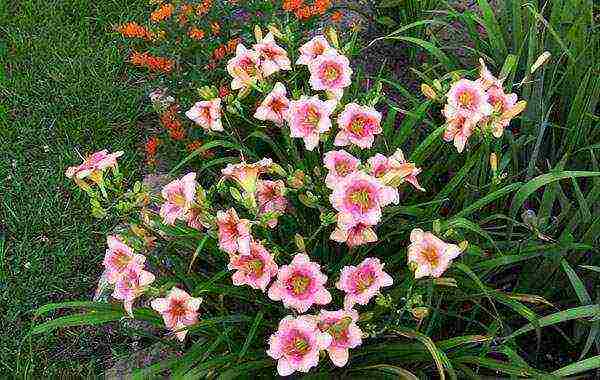
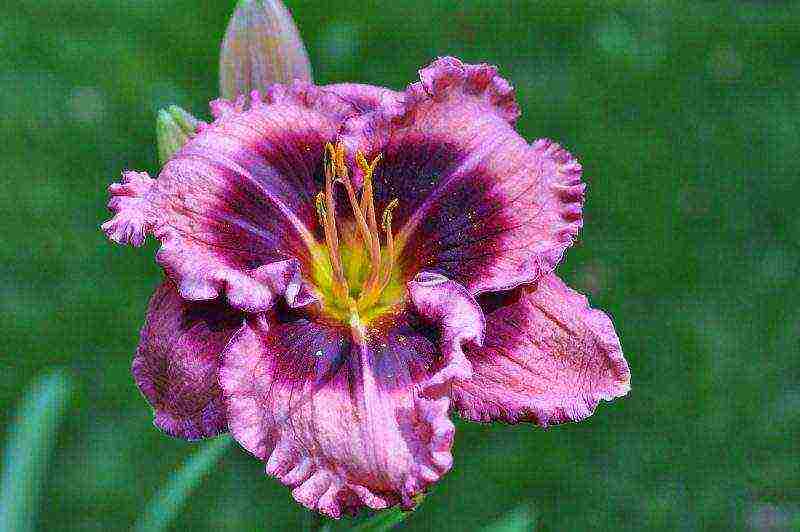
 Daylily (or krasodnev) is a herbaceous rhizomatous perennial of the subfamily Daylily family of the Ksantorreyevye family. Not only the cultivated species and varieties of daylily are beautiful, but also the “savages” growing in nature. In addition, daylilies are so unpretentious that growers call them the plant of a lazy gardener, but this is only true for older varieties. In recent years, the daylily, thanks to American and Australian breeders, has been at the height of fashion: the new varieties, although more capricious than the previous ones, are so incredibly beautiful that it is not at all a pity for the time and effort spent on them.
Daylilies: planting in open ground
Choosing a site for planting and preparing the soil
 Since daylilies are perennial crops, planting sites must be selected and prepared with great care. The size of an adult daylily bush can reach 50-70 cm in girth, so the plant will need a lot of space in the flower bed. The depth of the pit for planting a culture must reach at least 30 cm. A certain amount of peat-and-sludge mixture must first be poured into such a hole, then a little potassium-phosphorus fertilizer can be added, after which the flower can be immersed in the hole. When planting, the plant should be buried to the level of the root collar. The remaining space in the pit is sprinkled with garden soil, compacted a little and watered thoroughly. It should be noted that daylilies are very fond of water, so to slow down the process of evaporation of moisture from the soil, the ground around the flower stems must be mulched. Peat or compost is well suited for mulching.
The composition of the soil for growing daylilies is not so important; ordinary garden soil is quite suitable for such a culture. If the soil is not very nutritious, it can be fertilized with compost and minerals. Excessively heavy and dense soils can be slightly diluted with sand so that moisture does not stagnate in them. Daylilies can also grow on sand alone, but will require frequent watering, since water in such a case will quickly evaporate from the soil.
When planting daylilies, it is important to pay attention to how much and how long the flowerbed is illuminated by the sun's rays.In the wild, daylilies most often grow under trees and among tall shrubs, which means that the culture does not like the scorching sun and prefers partial shade. In the Ural climate, it is better to plant daylilies in well-lit areas, since, with excessive shading, the flowers will not receive enough heat.
Planting a daylily
 In the Urals, the daylily is planted from May to August. Plants planted later may not have time to take root until the first frost and will die. On average, it takes a month for a daylily to take root. Before planting the daylily, the planting material purchased in advance should be immersed for a while in water with growth stimulants diluted in it ("Humat", "Epin", "Zircon" and others). The roots of the seedlings will swell and revive, and then you will immediately see which of the roots should be carefully removed. Cut the rest of the roots to a length of 20-30 cm. When replanting rooted cuttings or mature plants, rotten root shoots should also be cut off. It is also advisable to cut the leaves on the stems to 15 cm in length - such events will contribute to the development of new roots and the growth of green mass. By the way, daylilies belong to those crops that are preserved for a long time in the excavated form. A flower dug from the ground can lie in a dry and dark place for 2-3 weeks, during which time you can find and prepare a suitable place for the plant in the flowerbed.
Dig a separate hole up to 30 cm deep for each bush or cut. Do not forget that you are planting a daylily for a long time, and the bush that has grown over time to 50-70 cm in diameter should not be cramped. Pour a mixture of sand, peat and humus into each hole, add ash with superphosphate or potassium-phosphorus fertilizer, lower the roots into the hole, distribute them over a mound so that there are no voids under the roots, fill the hole with soil, but not completely. Then, holding the plant with one hand, squeeze the soil around it well, water abundantly, filling the hole with water to the brim (if the water is quickly absorbed, it means that you have compacted the soil poorly, so pour dry earth on top and compact it again), and only now pour soil to the edges of the hole. It is very important that the root neck of the daylily is at a depth of no more than 2-3 cm, otherwise growth retardation and the risk of plant decay are likely. If you did everything correctly, then the moisture received during planting should be enough for the plant to root.
Daylily transplant
Daylilies grow in one place for up to 5 years, but age affects the quality of flowering. As soon as you notice that your already middle-aged luxurious daylily has begun to lose its former beauty, the flowers on its peduncle have become smaller, and they themselves are smaller, then it's time to plant the bush. Dig in the bush along its outer border and carefully remove it along with the clod of earth, being careful not to damage the roots. Place the roots under a strong jet of water to wash away the soil, then gently fan them apart. With a certain skill, you can do without knives or pruners, but if you still had to cut the roots somewhere, treat the wounded places with a fungicide. Planting and replanting plants is best in cloudy weather, and if you had to wait for it, dig in the delenki and daylily bushes in the sand so that new roots do not grow immediately, and you may not remember them for two weeks. Before planting, shorten the roots by removing the rotten and dead ones, trim the leaves to 15-20 cm in the shape of an inverted "V" and plant the cut in the place that you defined for it as described above.
Daylily - outdoor care
 Daylilies are a lot of fun, but they require very little attention. For example, they do not need to be watered frequently. Watering is necessary for daylilies only during prolonged drought, but then you need to pour water abundantly under the root in order to deeply saturate the soil with water, the time for watering is evening.The amount of dressings depends on the quality of the soil in the garden, so decide for yourself how many times you have to fertilize the soil around the daylilies, which is better to underfeed than to overdo it with fertilizers, but two dressings are required. The first feeding with complex mineral fertilizers is carried out in the spring, when the leaves begin to grow: dry granules are scattered between the bushes, then they are "covered" with a rake, and the ground is well watered. The second obligatory feeding is carried out in August, one month after the peak of flowering of daylilies, in a short period of rest, in order to ensure the quality and quantity of buds of the next year, which are laid during this period. The best fertilizer is Kemira-plus. And remember: after fertilizing, water the plants well.
Mulching of the soil is of particular importance. This is done so that the earth does not compact over the root collars. The center of the bush is mulched with coarse river sand with a layer of up to 3 cm. The soil between the bushes is mulched with peat or compost, if the soil is poor, if the planting is located on rich soils, then it is better to mulch with needles or tree bark. This is done in order to protect plants from temperature fluctuations, preserve moisture in the soil and prevent the appearance of weeds. The mulch layer should be 6-7 cm. If for some reason you do not want to mulch the area with daylilies, do not forget to loosen the soil after watering, destroy weeds and remove wilted flowers.
Daylily propagation
 In August it is time to replant the daylilies while dividing the bushes. This is a vegetative way of reproduction of daylilies, which we have already discussed in detail. In addition to dividing the bush, the reproduction of daylilies occurs by seeds, but this species does not retain varietal characteristics, therefore it is used only by breeders to develop new varieties. There is another way to reproduce the daylily - without digging up the main bush, but it is only suitable for varieties that form loose bushes. At 3-4 years of age, the daylily is separated from the daughter outlet formed by it, which has already formed roots: a sharp shovel is placed vertically in the place of the intended cut and a part of the bush is separated by a sharp push of the foot, then the cut from the mother bush is cut from the bottom, taken out of the ground and transferred to transfer to another place. Cuts and damaged roots are treated with ash or crushed coal. This should be done in the spring, when the leaves are just beginning to grow, or in the fall after cutting the leaves from the daylilies.
Daylily - pests and diseases
 Daylilies rarely get sick and are affected by pests, however, problems sometimes arise. The most dangerous pests for daylilies are thrips, lily mosquitoes, water voles and slugs. As for diseases, the daylily is most often sick with fusarium, rust and root rot.
Thrips They penetrate into plants from the ground at a temperature of 10-12 ºC and begin their destructive life activity for plants: they suck out juice from leaves, stems and petals, from which the flowers are deformed even in the buds. If you find thrips, dig up the plant and destroy it along with them - burn it. As a preventive measure, treat the land around daylilies with insecticides in spring and autumn and do not leave plant debris, which may contain pests, in the beds for the winter.
Lily mosquito lays the larvae in the buds of plants, and the larvae, growing up, feed on flowers and deform them. But this is not a mass phenomenon, so it is enough to simply remove the damaged flowers.
Water voles love to feast on not only the roots of daylilies. The trouble is that once every three to four years there is a peak in the increase in the number of rodents, and then they eat the roots of young apple trees, bulbs of lilies and tulips, and the roots of daylilies. You cannot get rid of them, but you need to fight with the usual methods of fighting rodents.
Slug you will have to pick it up by hand or use the tips listed in THIS article.
Root rot manifests itself in the spring, when the already grown young leaves suddenly stop growing, turn yellow and are easily pulled out of the ground. You need to dig up the plant, cut out all areas affected by rot, rinse the rhizome in a pink solution of potassium permanganate, treat the wounds with a fungicide, dry the rhizome for two days and transplant to another place. Don't expect it to bloom for two years. In the area where the diseased plant grew, do not plant daylilies for at least a year.
Rust manifests itself in daylilies only if patrinia grows somewhere nearby - do not place them in the neighborhood, and you will not have trouble. For prevention, carefully treat daylilies with fungicides.
Fusarium... Affected plants have a depressed appearance, the leaves turn yellow and die prematurely, the roots look like dust. The disease is fungal, destroyed at an early stage by fungicides. If the infection is in full force, the plant will have to be burned, the soil where it grew, and the neighboring plants must be sprayed with foundation. As a preventive measure, sterilize garden tools, add phytosporin-M to irrigation water, loosen the topsoil after watering.
WHERE TO BUY Daylily Seeds
The Scientific and Production Association "Sady Rossii" has been introducing the latest achievements in the selection of vegetable, fruit, berry and ornamental crops into the wide practice of amateur gardening for 30 years. In the work of the association, the most modern technologies are used, a unique laboratory for microclonal reproduction of plants has been created. The main tasks of NPO Sady Rossii is to provide gardeners with high-quality planting material for popular varieties and novelties of world selection. Delivery of planting material (seeds, onions, seedlings) is carried out by Russian post.
We are waiting for you for shopping: NPO "Sady Rossii"
 Among flower growers, daylilies are rightfully considered one of the most unpretentious and grateful perennials. If the garden is decorated with daylilies, planting and caring for them in the open field will clearly not be a burden to the owner of the site.
Plants that love the sun feel good in partial shade, the main thing is that the plants are actively illuminated for at least 6 hours. Daylilies do not impose special requirements on the composition of the soil and can grow and bloom for many years in one place, forming dense lush clumps.
Still, how do you create the best growing conditions for these spectacular flowers? When to plant daylilies outdoors, in spring or fall? How to care for plants at different times of the year?
Place for planting daylilies in the ground in spring
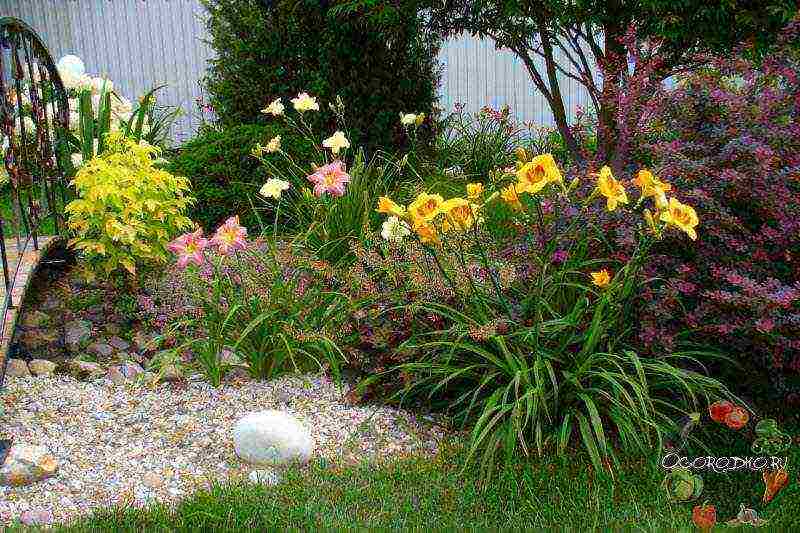
 When choosing a site for a daylily, you need to take into account that plants love the sun, are not afraid of the wind and thrive where other decorative perennials will feel oppressed. At the same time, daylilies need freedom for free growth. They do not like when there are large plants, shrubs and trees nearby, which become a kind of competitors for flowers for a place in the sun.
Experienced flower growers advise planting light varieties of daylilies in more illuminated places, and for purple, red, multicolored varieties that have an important color saturation, look for areas with little shading.
To simplify the care of daylilies after planting them in open ground, places are chosen for plants that are not flooded in spring. In summer, the powerful rhizomes of plants should not suffer from the close occurrence of groundwater.
The best time to plant daylilies on the site
 Daylilies are a kind of centenarians. The most beautiful flowers, forming curtains decorated with multi-colored corollas, they can grow up to one and a half decades without transplanting. This should be taken into account when choosing a place for plants in the garden, and also know that the maximum flowering will be only 5-7 years.Then peduncles among dense foliage appear less often, and the flowers on them are much smaller than before. Therefore, every few years the plants are transplanted, dividing adult perennials.
An unpretentious culture easily tolerates this procedure from early spring to autumn. But planting daylilies in the ground in the spring always goes without complications, the cuttings quickly take root and grow, blooming in the same season.
Spring weather is changeable, and if there is a danger of frost, it is better to postpone the planting. The planting material acquired or obtained after dividing its own plants can be stored for about a month by digging the root system of the plant into sand, peat-sandy substrate, or shifting it with a damp cloth. At the same time, the leaf plates of daylilies are cut in half or a third to reduce the plant's need for moisture.
If the summer is not hot, and for daylilies, when planting in the ground, like in spring, you can really create comfortable conditions, nothing prevents you from decorating the garden until autumn. But with an autumn planting, there is a risk that the plants will not have time to root well, and the next year, if they survive, they will be very weakened.
How to plant daylilies in spring
 Before transferring the seedlings to the garden, they need to be prepared for planting:
- Daylily strips are examined, damaged, dry or rotten roots are removed.
- The sections are treated with charcoal or activated charcoal crushed to a powder consistency.
- If this has not been done before, the foliage is cut 10-15 cm above the base of the leaf plates.
Often, the planting material bought in the store has dried up by the time the daylily is planted in the open ground, and the care of such a plant begins with a 4-hour soaking of the root system in a growth stimulator.
The place has been chosen, the planting material is waiting for it to be transferred to the ground. It remains only to prepare the soil suitable for daylilies and start planting. Ornamental perennials prefer a loose, light substrate with a neutral or slightly acidic reaction.
 Before planting daylilies in the spring, the soil at their future place of residence must be dug up onto a full bayonet of a shovel. Next, make a planting hole sufficient to accommodate the rhizomes. For more convenience:
- a cone from a loosened substrate is poured at the bottom;
- a plant is placed on top of the ground;
- rhizomes are carefully laid out on the soil;
- sprinkle the underground part of the daylily with soil so that the root collar does not sink more than a couple of centimeters.
 After planting is complete, the soil around is tamped a little, and the daylily is watered.
To reduce the evaporation of moisture, the soil under the plants can be mulched using any available means, for example, rotted bark or needles, straw or specialized material.
Daylily care after planting in open ground
 Regular plant maintenance after planting consists of watering, loosening the soil and removing weeds.
In the warm season, actively growing and flowering perennials require a lot of water. If daylilies are thirsty, this can be seen by faded foliage, refusal to form, or dropping buds. Perennials respond excellently to additional humidification in summer. Therefore, daylilies can be planted near water bodies or use very shallow sprinkling;
- In hot weather, daylilies are watered abundantly, so that the soil under them is 20-30 cm wet, that is, to the depth of the root system.
- If the summer is not hot, you can reduce the frequency of watering, but you need to monitor the standing of the foliage.
The best time to water daylilies is early morning or evening, when there is no risk of sunburn on the flowers.
With proper planting and care, the flowers of daylilies, as in the photo, appear in the same summer. In the first year, the plants are not additionally fed. The introduction of complex fertilizers for flowering ornamental crops begins next spring.When choosing a product, it is better to give preference to formulations with a moderate nitrogen content, causing foliage to proliferate to the detriment of flowering. During the summer, perennials are fed twice, and closer to autumn, the plants receive potassium-phosphorus fertilizers for better preparation for winter.
Plants are hardy, but may suffer when there is too little snow on the site. Therefore, in snowless winters, it is better to cover daylilies with spruce branches, needles, straw and other materials at hand. As soon as the massive melting of the snow begins, the daylilies are released, otherwise pret develops on the root collars of the plants.
It is seen about the cultivation of daylilies in the country

Beautiful daylilies, planting and care in the open field for which are very simple, feel great in almost any soil, but not swampy. What to feed, when to replant, how to propagate, what to do in autumn and spring, you can also learn from the article if you read the text in full. Do not miss all the tricks of the florists ...
Conditions for growing daylily - illumination, soil quality
Due to the unpretentiousness and ease in growing and caring for the daylily, "flowers of joy" have settled in the gardens of the whole world, and adorn gardens in Europe, Asia, America and even northern countries. The duration of flowering and the beauty of daylilies will depend on how accurately the planting and care recommendations are followed.
Daylilies love the sun; a site lit all day is suitable for them. It is the lack of sun that explains why the daylily in the garden stopped blooming. Light shading is allowed when growing varieties with dark colored petals - in direct sunlight, they can lose their color brightness.
The underground part of the daylily is represented by stolons - thickened rhizomes, in which moisture and nutrients accumulate during periods of drought. Novice gardeners believe that thanks to them, the daylily may not receive watering after planting and during the season, but this is not the case - the plant needs moisture for normal growth. For planting the daylily, moisture-absorbing soil is chosen; loam with the addition of compost, peat and leafy earth will be ideal in this regard.
Heavy soils, prone to stagnation of water, are not suitable for daylilies, since in them the stolons begin to suffocate from lack of air and rot. To get beautifully flowering daylilies, planting and care in open ground should be carried out on fertile, moderately loose soils and, if clay prevails in the soil, it must be diluted with coarse river sand or vermiculite.
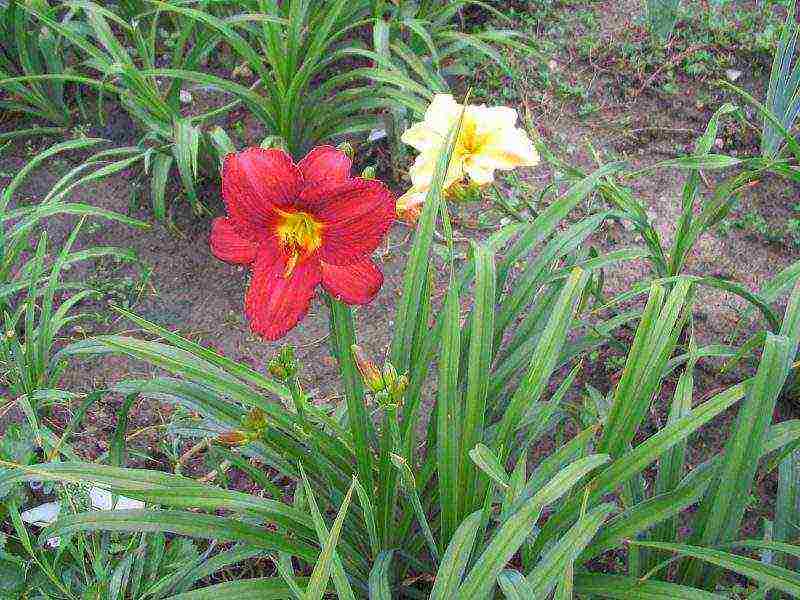
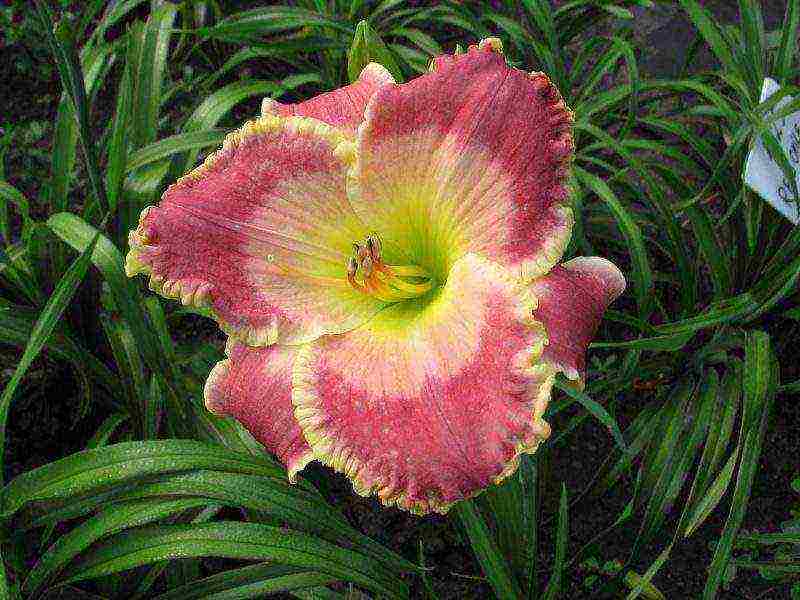
Daylilies in the garden - pictured
Important(!) The hybrid daylily makes special demands on the quality of the soil - it blooms when grown on fertile garden soil with a high content of decayed organic matter.
Daylilies are resistant to winds and drafts, and they tolerate lower temperatures well, so when choosing a place for these plants, you should not waste time creating screens and natural shelters from cold air currents.
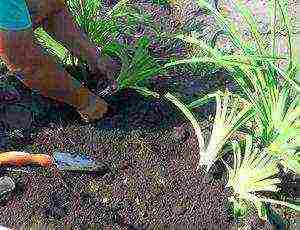
Daylilies - planting in open ground, technology, selection of seedlings, terms and schemes
To get a healthy and beautifully blooming daylily, planting should be carried out in early spring, immediately after the soil thaws or closer to the end of summer, when the plants have faded, it is during these periods that the stolons contain the maximum amount of nutrients, which will contribute to better rooting of the daylily. Experienced gardeners note that the best result is obtained with the autumn planting of plants - at this time, the buds are clearly visible on the roots, from which the leaves and flower stalks of the daylily will grow.
With them, it is much easier to divide the bush into several parts without damaging the growth points. To reduce the risk of plant loss in winter, it is important to choose the right timing for autumn planting.
The daylily will take about 45 days to root, so planting in the fall should be carried out 1.5 months before the soil freezes - in September or late August, depending on the region. So, in the Urals and Siberia, an earlier planting of daylilies is recommended, a little later in the Moscow region, the Leningrad region, central Russia, and in the south, including in the Kuban, a later planting is performed.
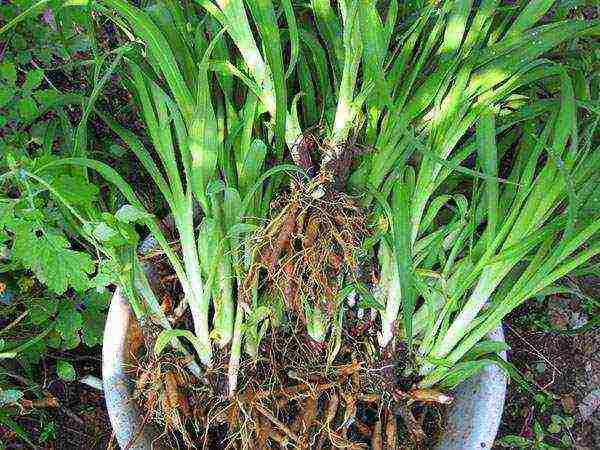
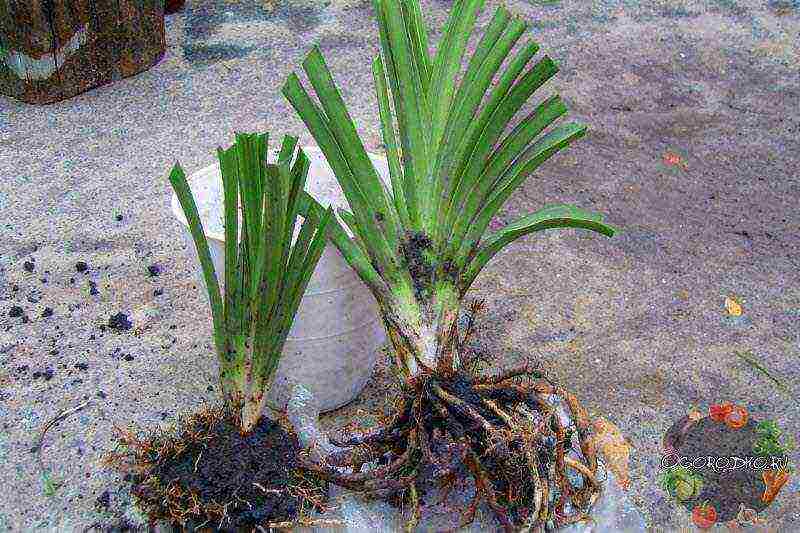 preparation for planting daylilies - in the photo
When planting in spring, there is no risk of "loss" of plants, it also has significant disadvantages - young daylilies in the first year may not bloom. This happens especially often when the bush is divided incorrectly, if few buds are left on the divide. If you do not know when to transplant the daylily in spring, it is worth noting that - before the active growth of leaves begins, that is, in April or early May, depending on the region.
In order for daylilies, planting and care in the open ground of which have their own characteristics, to grow well, the soil must be dug up to a depth of 30 cm, and the roots of weeds must be carefully removed. Planting holes need to be made wider and deeper than the size of the root system of the seedlings. The optimal planting pattern for the daylily is 40 cm between plants in a row, 70 cm between rows.
At the bottom of the pits, a mound is poured from the garden fertile soil with the addition of a tablespoon of complex fertilizer for flowers in granules (nitrophoska, azophoska, nitroammofoska and the like). You can replace such a nutrient mixture with rotted manure with the addition of 100 g of wood ash. Before planting, daylily seedlings should be soaked in a solution of a growth and root formation stimulator for 5-6 hours, for this they use:
- Succinic acid 2 g / 1 l of water
- Gibbersib 1 g / 1 l of water
- Heteroauxin 1 tablet / 5 l of water
After soaking, the stolons and roots are examined, the damaged parts are cut off, the wounds are powdered with crushed coal. After that, daylilies are planted in prepared holes. The roots are spread over the mounds, covered with garden soil so that the growth bud is at a depth of 1-2 cm. The planted plants are watered, and then add the earth to the places where the soil has settled. Further care for the daylily consists of watering and feeding.
Daylily care all year round
For daylilies to bloom, planting and care in the open field must follow each other without the slightest interruption. It is recommended to reduce watering for about 1.5 months, until the flowers form a full-fledged root system. Daylilies at this stage do not need a lot of moisture, since they extract it from the stolons, and a large amount of water in the soil provokes rotting of the root system. When leaving and watering, do not allow water to get on the leaves, as they can rot at the base.
With proper preparation of the soil and planting pit, feeding daylilies in the first year is not needed, in subsequent years the plant is fed three times per season. What nutrients does the daylily require, how to feed it at different periods:
- After the emergence of seedlings with nitrogen and phosphorus fertilizers - urea (15 g / 1 sq. M.) And superphosphate (20 g / 1 sq. M.)
- During the formation of buds with potassium fertilizers - potassium sulfate (15 g / 1 sq. M.) Or wood ash (1 glass / 1 sq. M.)
- In autumn - compost from leaves (leafy soil) and humus (up to 3 kg / 1 sq. M.)
Since it is necessary to care for the daylily not only by watering and fertilizing, gardeners will have to take care of the absence of weeds and maintaining the normal level of moisture in the soil by mulching the plantings. Daylilies feel good if all summer to keep the beds with them under mulch from needles with the addition of peat. With the onset of cold weather in late October or November, the mulch layer is increased to 30 cm, and in early spring, immediately after the snow melts, it is removed.
For a culture such as daylilies, planting and care in the open field, carried out according to all the rules, is the only way to achieve lush flowering, a little more trouble, and the garden will be painted with hundreds of bright flashes.
Each flower of this plant lives only one day. But, despite this, most flower growers consider it their duty to plant it, since they cannot imagine a flower garden without a daylily or daylily. This is due to the huge variety of varieties, rich color palette and amazing vitality of the flower.Planting and caring for daylilies in the open field is not difficult, but they have their own characteristics.
Daylilies: cultivation features

This flower does not create any special problems for flower growers. It adapts easily to different conditions. That's just a real lush and long-term flowering, for which beautiful days are appreciated, without proper care of a grower. Correct and timely planting is one of the essential elements of good daylily care.
Landing in open ground
The future fate of the flower depends on whether the flower is planted correctly: whether it will simply fight for life or, prospering in good conditions, will become an adornment of the flower garden and give abundant flowering.
How and when to plant?
Planting timing depends on whether you are planting a newly acquired plant or deciding to divide an old bush. Daylily can be planted from spring to late summer, and in southern regions in September, taking into account the time required for the plant to take root. But the division is best done in the spring. At the same time, it is better to plant beautiful days in regions with cold winters. Over the summer, the plant will get stronger and will not suffer even in severe frosts.
How to plant a beautiful day?
- The hole is dug so that the entire root system is located, and there is still a little space left on the sides. The depth of the pit is about 30 cm, and the diameter is at least 50 cm, taking into account that the bush grows over time.
- The soil for planting is prepared from a mixture of sand, peat and humus with the addition of st. tablespoons of ash and a pinch of potassium-phosphorus fertilizer. You should not get carried away with nitrogen, it provokes the growth of the vegetative mass to the detriment of flowering.
- An earthen mound is poured in the center of the hole and the plant is placed, well spreading the roots. They should not be horizontal, but go slightly at an angle in depth.
- A white stripe at the base of the leaves will tell you about the planting level in the same place. The flower should be located in approximately the same way in the new place. The root collar should not be buried more than 2-3 cm, but there should be no bare roots either.
- Cover the roots with soil. It must be carefully compacted, avoiding the presence of air in the soil - this will cause the roots to die off. Little by little water the backfilled soil. When the plant is fully planted, abundant watering is required.
Site and soil preparation
Daylily is a long-lasting flower. Some specimens live without transplanting for up to 15 years. Therefore, the place must be chosen deliberately so as not to disturb the plant with a transplant once again.
Be sure to take into account the requirements that the krasodnya makes for successful growth and flowering:
- sunny area, an exception is made only for dark-colored varieties in the southern regions - the flowers fade from the bright sun, so they need shade at midday;
- loose fertile soil that retains moisture well, but without stagnant water;
- neutral or slightly acidic soil reaction;
- the absence of a number of trees and shrubs with which you will have to compete for moisture.
The soil must be prepared in advance. Heavy soil - improve by adding sand and compost, and too light - adding clay for moisture capacity, sod-podzolic soil and compost. The earth is dug onto the bayonet of a shovel, carefully choosing the roots of weeds. If necessary, adjust the acidity of the soil.
Landing nuances
Before planting, the plant must be prepared. Cut off the leaves, leaving 10-15 cm above the root collar. Remove dead roots by sprinkling crushed charcoal on the slices. The roots are soaked in a weak solution of complex fertilizer with the addition of a root formation stimulant: heteroauxin is used in spring and autumn, and root is used in summer. Soaking time - up to 24 hours. Soaking should be done in the shade at a temperature of 15 to 23 degrees.

After planting, the soil under the plants is mulched to avoid moisture loss. In hot weather, planted plants need daily watering.
Daylilies: outdoor care
High-quality care and adherence to all rules of agricultural technology will help maintain plant health and ensure long-term lush flowering.
Temperature regime
Despite the love for sunlight, this plant does not like too much heat. In strong heat, sprinkling with small drops can be carried out to make the plants more comfortable. Daylily is considered a frost-resistant flower, but winter shelter is desirable for it. It is especially important for evergreen and semi-evergreen varieties. Mulching the soil will keep it loose, stabilize the temperature, creating the best conditions for the development and flowering of the daylily.
Watering the plant
This is a very important event, since krasodnev is a large water-loaf and grows well in the presence of moisture in the root zone. Due to the biological characteristics of the root system, this plant can withstand a long dry period. But regular watering will increase the number of buds and the size of the flower. The lack of moisture in the soil is evidenced by pale foliage and dropping of buds. Therefore, in the absence of rain, daylilies should be watered regularly, soaking the entire root layer of soil. The plant does not like watering from above - spots appear on the flowers from water. It is best to water the daylilies at the root with non-cold water. It is very good if it is possible to organize drip irrigation. Helps to retain moisture in the lower soil layers by mulching. Most often, daylilies are mulched with half-matured needles or crushed crushed bark.

To avoid burns on the flowers, daylilies are watered early in the morning or late in the evening.
Top dressing and fertilization
In the first year after transplantation, Krasnodar does not need it. Starting from the second year, the plant is fed regularly. The first feeding is carried out in early spring with a complex mineral fertilizer in dry or liquid form. Dry fertilizer is embedded in the soil when loosening. The second feeding with complex fertilizer is done when the buds are extended. The third feeding is carried out one month after the mass flowering with phosphorus and potash fertilizers. They will help your plants better prepare for winter.

Daylilies respond well to foliar feeding. They can be made with solutions of mineral fertilizers, but at a lower concentration. They are made in cloudy calm weather in the early morning or late evening. Krasodnev loves liquid fertilizing with organic matter: infusions of rotted grass, manure or chicken droppings. But they can only be carried out until August, since an excess of nitrogen in the second half of the growing season will not allow the plants to prepare well for winter.
Pruning

In the spring of daylilies, old leaves are cut off at the edges of the curtain, this rejuvenates the bushes. After flowering, all peduncles are cut off. Before freezing, it is advisable to cut off all old leaves, leaving only the young ones that have recently grown.
Transfer
Daylilies tend to grow rapidly. Lush bloom is observed for the first 5-7 years. In the future, the flowers become smaller, and there are fewer of them. So, it's time to transplant the plant, after dividing the curtain into parts.
In the spring, the krasodnev is transplanted as soon as the young leaves grow to a height of about 10 cm. The delenka is dug in from all sides, washed well with water and carefully divided into parts by hand. This is usually easy to do. Sometimes, for separation, you have to use a sharp knife, with which the bushes are neatly divided. Separation points should be treated with a fungicide to prevent possible diseases.
Summer transplantation is possible, but not very desirable, especially in hot weather - this is a strong stress for the plants. Planting daylilies in the fall is possible no later than 1.5 months before the onset of frost, so that young bushes have time to take root. The transplanting procedure is the same as when planting a new plant.
Autumn care, preparation for winter

The roots of most daylilies are not afraid of frosts down to -25 degrees, which cannot be said about the aboveground part. It freezes out at the first frost. It is necessary to prepare plants for winter in advance. To do this, at the end of summer, potash and phosphorus fertilizers are applied, which increase frost resistance. Many growers prune old leaves on daylilies even before the onset of frost. But you can leave them on the plant. The process of photosynthesis, and therefore the accumulation of nutrients in the roots, will continue until they dry out. Dried leaves will additionally shelter the plant from the cold. You just need to remove them in time with the onset of spring. Will help to winter safely and mulching the bushes with dry peat, sawdust, chopped straw. This procedure must be carried out after the final establishment of cold weather so that the bushes do not come out. Many evergreen and semi-evergreen varieties need additional cover with spruce branches.
Reproduction of daylilies
There are many ways to reproduce:
- dividing the bush;
- seeds;
- air layering.
The first method has already been described in detail. Additionally, it can be noted that when dividing a bush, parts are always obtained that are different in quality. Peripheral delenki have stronger roots and are more likely to take in and bloom. Parts from the middle take root worse. They need to remove dead roots and prune live ones to stimulate the regrowth of new ones. These delenki require more attention when leaving, feeding and watering.

When propagating by seeds, it must be remembered that new plants will not repeat the maternal traits. Seed propagation is used to obtain new hybrids. But, if your plant is pollinated and seeds have set, then you can try to sow them. Who knows, perhaps you will become the owner of the original beautifully flowering plant.
How to propagate beautiful days with seeds?
To prevent the seeds from scattering from the cracked box, it is tied with gauze or wrapped in paper. Fully ripe seeds are dried for 2 weeks and stored in a tight-fitting container on the bottom shelf of the refrigerator so that they do not dry out.
The algorithm for seed reproduction of daylilies is as follows:
- before sowing, the seeds are soaked for 2-3 days in water, which is changed daily;
- sow in containers with nutrient soil to a depth of 0.5-1 cm with a distance of 2 cm between seeds;
- you can sow seeds in the beds after the onset of heat, the distance between the seeds is 5 cm, between the rows - 20 cm;
- when 4 leaves appear in seedlings grown in the room, they can be sorted out to the garden bed;
- daylilies will bloom in the second or third year.
After the end of flowering, small rosettes of leaves appear on the peduncles of many varieties of krasodnev, which are successfully used for reproduction.
They do it as follows:
- allow the outlet to develop well without cutting off the peduncle;
- for reproduction, cut it off, leaving 4 cm of the peduncle above and below;
- if there are no roots on the outlet, root it in water;
- in case of appearance of roots, plant it, having previously dipped it into the root;
- if there are at least 2 months left before frost, sockets can be planted on the beds, they must be mulched for the winter;
- when winter is just around the corner, you will have to plant outlets in pots with light soil, sprinkled with a centimeter layer of sand and keep them on the windowsill; look after, fertilize and supplement them, as well as houseplants;
- in the spring, plants are planted in the ground.
With any method of planting, the rosettes are not buried, it is enough for the stem knot with roots to be immersed in the soil. The leaves at the rosettes are cut to a height of 8 cm.
Pests and diseases and methods of dealing with them
Daylilies are quite viable plants, they do not bring much trouble to flower growers, but they also have their own diseases and insect pests.

Table: diseases and pests of daylilies.
| Root collar rot | Leaves turn yellow and die off, the neck softens, a smell appears | They wash the dug plant, remove the decayed parts, disinfect it in a dark solution of potassium permanganate for 20 minutes, dry it in the shade before transplanting |
| Striped leaves | Yellow streaks along the central vein and reddish-brown specks on the leaves | The affected leaves are removed, the plants are treated with a foundation with a concentration of 0.2% |
| Rust | Slow growth, no flowering, leaf pustules filled with yellow-orange powder | All infected leaves are removed, as well as healthy ones nearby are treated with fungicides, changing preparations |
| Viruses | Plants look sick and have specks or streaks on the leaves | The plant cannot be cured; in case of a confirmed disease, the plant is destroyed |
| Daylily mosquito | Larvae in buds | Tear off the affected buds |
| Thrips | Ugly shapeless flowers, infected leaves | Cut off the peduncles and remove the affected leaves, treatment with systemic insecticides |
Sometimes daylilies can have problems that are not related to diseases or pests.
Possible growing problems
They can be as follows.
- Fragility of peduncles - excessive watering and excess nitrogen in the soil are to blame.
- The spots on the petals of dark and red colors are traces of sunburn or heavy rain.
- The flower does not fully unfold - a temporary phenomenon, it passes on its own.
- Lack of flowering - planting too deep, too much nitrogen, insufficient lighting.
Daylily is a highly decorative and unpretentious plant. It is able to thank the grower for good care with long and lush flowering.