Content
- 1 Why is disinfection carried out?
- 2 Traditional methods
- 3 Disinfection with special means
- 4 An important point: reducing the acidity of the soil
- 5 Frequent mistakes
- 6 Why is soil disinfection needed?
- 7 Freezing the soil
- 8 Exposure to high temperatures
- 9 Professional disinfectants
- 10 Potassium permanganate
- 11 Alternative natural ways
- 12 Means for normalizing soil acidity
- 13 Attention to possible errors
- 14 How to cultivate the land before planting
- 15 Preparing the land for seedlings
- 16 Processing potatoes before planting - landscaping, germination, disinfection
- 17 Methods for disinfecting soil in a greenhouse
- 18 Prevention of soil diseases
- 19 Where to plant tomatoes
- 20 Tomato growing technology
- 21 Growing tomato seedlings
- 22 Planting tomato seeds in the soil
- 23 Planting tomato seedlings in the ground
- 24 Tomato care: watering, feeding
- 25 Tomato shaping and pinching
- 26 Octopus tomatoes or tomato trees
- 27 Harvesting tomato fruits
- 28 Collecting tomato seeds
- 29 Tomatoes in the fight against pests and diseases
- 30 How to prepare the soil for seedlings yourself
- 31 Anti-primer
- 32 Time and method of soil preparation and disinfection
- 33 Rules for disinfecting land for growing seedlings
- 34 Preparations for soil cultivation and seedlings
- 35 Shop soil
- 36 The secret inside
- 37 Seed preparation
- 38 Conclusion
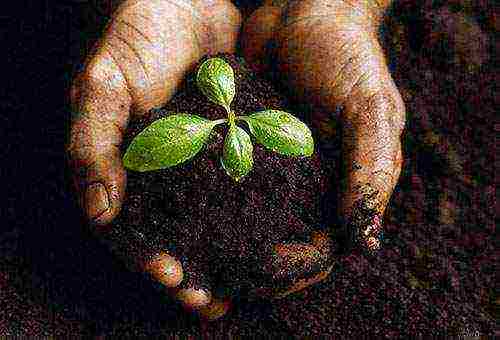
Disinfection of the soil is a very important point, this is the only way to grow healthy and strong seedlings. Processing the soil before planting seedlings allows you to destroy pathogenic bacteria, insect eggs, fungal spores, nematodes, and protects against blackleg (a frequent disease of young plants).
Why is disinfection carried out?
Every year more and more pathogenic microorganisms accumulate in the soil and its yield is deteriorating. Therefore, it is optimal to carry out a complete soil replacement every year. However, new soil, even purchased from a store, may contain various pests. What to do in this case?
If it is not possible to change the soil, it must be cleaned of organic residues and thoroughly disinfected. It should be noted that disinfection is recommended despite the replacement of the ground. This approach will help you avoid unpleasant surprises in the future.
Traditional methods
Folk methods of soil disinfection are more environmentally friendly than chemical ones. However, they take a lot of time and do not always give a positive result. So, there are two ways to disinfect the soil.
Method number 1 - freezing.
This is the easiest way to disinfect the soil. The earth is wrapped in a cloth bag and taken outside in frost for 5 days. Then it is placed in heat for 1 week, so that weed seeds and parasite eggs "wake up". They destroy pests by repeated exposure to cold.
Freezing the soil is best done at an air temperature of -15 degrees, you can use a freezer. For best results, repeat the procedure 2-3 times. This treatment method is not recommended for soil with biohumus. In addition, low temperatures will not get rid of late blight.
Method number 2 - heat treatment.
Most soil pests do not survive in high temperatures. The soil can be thermally processed in 2 ways.
- Calcination. The earth is poured with boiling water, mixed and spread on a baking sheet in a layer of 5 cm. Then the oven is heated to 90 degrees and the soil is ignited for half an hour.
- Steaming. This is a more gentle method of disinfection. A bucket of water is put on the fire, a grate with earth is placed on top, which is previously wrapped in a cloth bag. Steam the soil for at least 90 minutes.
Heat treatment must be carried out exactly according to the instructions, exceeding the temperature regime or the duration of the procedure will lead to a deterioration in the quality of the soil. In addition, the land treated in this way, immediately before planting seedlings, should be populated with useful microflora.
The disadvantage of this method is that it makes the soil completely sterile and unsuitable for cultivation. Requires additional bacterial fertilization.
Advice
To make the earth looser, after processing, sprinkle it on a paper surface and let it fill with air.
Disinfection with special means
You can also disinfect the land with the help of chemicals: fungicides, insecticides or ordinary manganese.
- Fungicide treatment
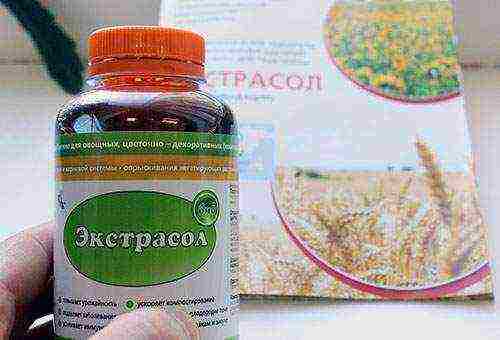
This group of drugs consists of beneficial bacterial cultures that suppress diseases and increase plant immunity. Most often, "Fitosporin" is used; for treatment, 15 ml of the product is diluted in 10 liters of water. You can also use other drugs - "Planriz", "Barrier", "Extrasol", "Glyokladin", etc. Before use, you should carefully study the instructions.
- Disinfection with insecticides
Popular drugs "Aktara", "Inta-Vir", "Thunder", "Iskra". Insecticides have been used successfully to kill soil pests. Before disinfection, the soil is loosened and moistened, the dry preparation is mixed with the soil before watering.
Soil processing before planting seedlings is carried out in advance, no later than a month before the proposed work.
It is important to remember that any chemical treatment requires strict adherence to the instructions, the recommended concentration and consumption must be observed.
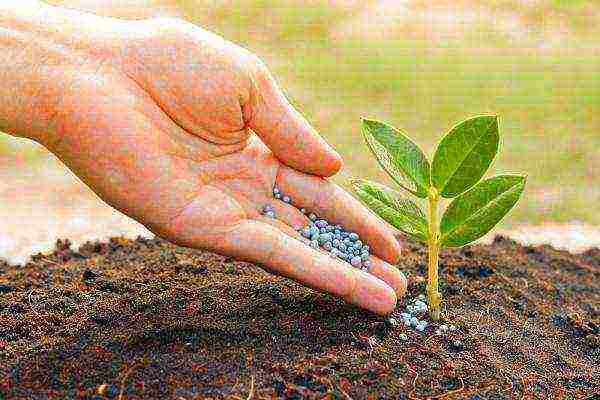
- Disinfection with potassium permanganate
Manganese does an excellent job of disinfecting a small amount of soil. For processing, 3-5 g of crystals are diluted with 10 liters of water, and then the soil is watered at the rate of 30-50 ml per 1 square meter.
Disinfect the ground with potassium permanganate 2 weeks before planting seedlings.
Advice
Potassium permanganate is a strong oxidizing agent; therefore, it is not recommended to treat soddy-podzolic acidic soils with it. This method is best suited for disinfecting chernozem and soddy-calcareous soil.
An important point: reducing the acidity of the soil
Simultaneously with the disinfection of the soil, it is very important to even out its acid-base balance. If the soil has an acidic reaction, then, even if sterile, it is susceptible to diseases such as keela and gray leg. To normalize the acidity level of the earth to the norm of 6.5-7, the following means are used:
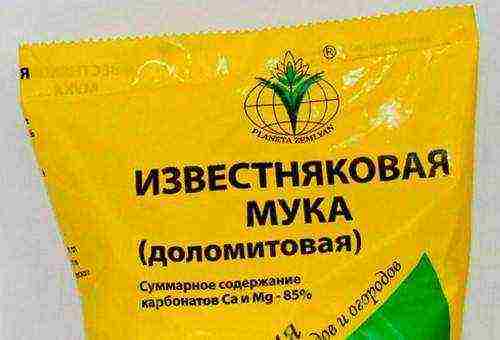
- dolomite flour;
- slaked lime;
- ash;
- a piece of chalk;
- hydrogel;
- perlite, vermiculite;
- humus tablets.
Advice
Do not forget to deacidify the soil before planting seedlings, otherwise diseases can develop very quickly even in sterile soil.
Frequent mistakes
Despite the disinfection of the soil, plants can get sick, grow poorly and die. What's the matter? Consider the 10 most common mistakes made when growing seedlings.
- Poor quality seed. It is important to choose only high-quality seeds, otherwise they may simply not sprout or the plants will grow weak.
- Wrong choice of containers. The container may not be suitable for seedlings if it is too tight, large, poorly drained, or loose.
- Lack of seed treatment. A significant part of diseases are transmitted not only with the soil, but also with the seeds of plants.
- Failure to comply with the terms of cultivation. If you neglect the recommended terms for growing seedlings, then the plants will grow weak and simply will not take root during transplantation.
- Planting seeds too deep. With excessive depth, only a few seeds will germinate. The optimum depth should not exceed 2 seed diameters.
- Thickened sowing. The seeds must be spaced a sufficient distance from each other, otherwise the seedlings will not have enough room for normal development.
- Watering after sowing. It is necessary to water the soil before sowing. If you do this later, the seeds will go deeper into the ground and germinate worse.
- Violation of temperature, lighting, watering and other growing conditions. It is important to remember that young seedlings are especially sensitive to temperature extremes, excessive dryness of the soil or excessive watering. It is also important to provide sufficient light, otherwise the seedlings will quickly stretch out.
- Late pick. In order for the aerial part to develop evenly, the plant must be dived as soon as the second true leaf appears.
- Overgrown seedlings. Such seedlings are more difficult to take root and may break during transplantation.
Disinfection of the earth is not for the lazy. But if you let the cultivation of seedlings go by chance and do not take elementary measures, you can ruin all the work. To prevent this from happening, the summer cottage season must be opened in advance, and it should begin with soil cultivation for seedlings.
There are many ways to disinfect the earth; you can steam it, harden it, freeze it or treat it with a chemical agent. However, they all have their own nuances and disadvantages. Therefore, in order to grow strong and healthy seedlings, you need to carefully study all the information and correctly apply it in practice.
Growing various useful crops on the site is a laborious labor that includes many different processes and is carried out in stages. And if you are ready to spend your energy, time to get a bountiful harvest from pure and healthy products, then you must initially act correctly. Disinfection of the soil before planting seedlings is an important point that should not be overlooked. For what it is necessary and how to properly disinfect the soil for seedlings - we will consider in detail in this article.
Why is soil disinfection needed?
Proper soil preparation before planting seedlings is a necessary safety measure. The processing methods listed below make the soil sterile and help:
- remove pathogenic microflora, bacteria, for example, causing such a plant defect as black leg;
- neutralize fungal spores;
- remove dangerous nematodes;
- destroy eggs and pupae of insect pests.
Important! Keep in mind that it makes no sense to do soil cultivation for seedlings and then fill it in non-sterile containers. One of the most popular ways to disinfect the seed containers themselves is to rinse with a weakly concentrated chlorine bleach solution.
Freezing the soil
This method has long been used by practical gardeners who, year after year, strive to diversify the vegetation on their site and get a better harvest.
The essence of this method of disinfecting soil for seedlings is extremely simple:
- Take a cloth bag of the right size.
- Wrap the soil in it.
- Take it outside for 5-7 days when the temperature is still below freezing.
- Place the frozen soil in a warm place for the same time. At this stage, all pests and weed seeds "wake up".
- Once again, take the earth out into the cold, also for a week.
Important! It is better if the temperature when freezing the soil is about 15 degrees below zero.
Helpful hints:
- If you have a large freezer at home, simplify your task by using this household appliance. Moreover, you can clearly adjust the desired temperature for the time you need.
- If time allows, repeat this procedure at least 2 times.
- Please note that this method does not get rid of late blight.
Important! The freezing method cannot be used to disinfect the soil for growing seedlings, if it is vermicompost.
Exposure to high temperatures

In practice, it has long been proven that many pathogenic microorganisms die at both critically low and high temperatures. That is why it is advisable to use all kinds of heat treatment variations to disinfect the soil for seedlings. Which option should you give preference to? - There is plenty to choose from. Therefore, the selection of a specific technique is at your discretion.
Important! As you continue to farm, try to change tactics and try different options every year. In this case, you can empirically determine which method is best suited for your site in your climatic conditions.
Steaming
Hot steam can kill many pests, including their eggs and larvae, and fungal spores.
For the procedure, you will need about 1.5 hours of your time:
- Arm yourself with a colander. Cover it with a clean cloth and cover with soil.
- Place a saucepan on the stove and bring the water to a boil.
- Hang a colander on top, just firmly so that it is safe.
- Cover the ground with a lid.
- Leave everything as it is for 90 minutes.
You can replace the pot with a large bucket and the colander with a wire rack and cloth bag. It all depends on how much land you need to cultivate.
Important! The same method can be used to sterilize seedling containers. After disinfection, it is advisable to saturate the soil itself with air and additionally strengthen it with minerals.
Calcination
A less laborious and safer way of sterilization is heat treatment with a high temperature for microorganisms, processing the earth before seedlings in the oven. It doesn't matter if it is gas or electric.
Procedure order:
- Take a metal baking sheet.
- Cover it with moist soil. The layer thickness should be no more than 5 cm.
- Set the temperature to 70-90C.
- Leave the soil to bake for half an hour.
Important! Please note that you need to carefully monitor the temperature regime. Increasing the indicated values is unacceptable, as this will lead to such adverse consequences:
- nitrogen is mineralized;
- useful microflora will die;
- the soil will become barren.
Combined method
This implies the use of technology, in which the effect of calcination and steaming is obtained at the same time. Relatively recently, experienced gardeners came to him, practicing various options for disinfecting the ground for seedlings.
Here's what to do:
- Pour the right amount of soil into a culinary sleeve or wrap it in foil.
- Leave in the oven preheated to 90C.
- After processing, sprinkle on a flat surface with a layer of about 10 cm, leave in this form for oxygenation.
Important! If you are using a cooking sleeve, be sure to punch a few holes with a toothpick so that the bag does not break during cooking.
Professional disinfectants
In any gardening store, you will find several variations of preparations for disinfecting soil for seedlings. These can be fungicides, insecticides. They all have their own distinctive properties and characteristics.
Fungicides
Such preparations include in their composition a set of beneficial bacteria that suppress pathogenic microorganisms and increase the immunity of seedlings.
Popular means for disinfecting soil for seedlings:
- Fitosporin.
- Planriz.
- "Barrier".
- Extrasol.
- "Glyocladin".
As a rule, all these funds are used according to the same principle: it is necessary to dilute the drug in the specified proportion and spill the soil with a ready-made solution.
Important! Be sure to read the instructions for the selected drug before purchasing and using it.
Insecticides
Insecticides have a directed action - the destruction of soil pests. When using, be sure to:
- Loosen the soil for seedlings.
- Mix dry preparation with soil.
- Moisten her.
What kind of drug to choose - check with the seller, as funds are selected for specific crops.
Important! Such cultivation of the land before seedling is carried out no later than 1 month before planting.
Potassium permanganate
Potassium permanganate is an affordable disinfectant. If you have it in your home first-aid kit or managed to buy it, it is quite possible to use it for the processing of chernozem or sod-carbonate land.
Important! Give preference to another method if the soil for seedlings is acidic, sod-podzolic.
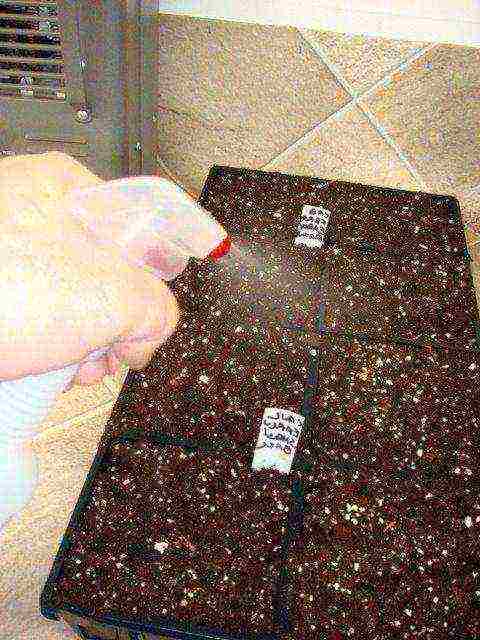
How to disinfect the ground for seedlings with potassium permanganate:
- Dissolve 3-5 g of powder in 10 liters of water.
- Water the soil, taking into account the following consumption: 30-50 ml of solution per 1 m2 of land.
Important! This drug is best used 2 weeks before planting seedlings.
Alternative natural ways
 If the use of chemicals or laborious heat treatment procedures are not suitable for you, then you can think about disinfecting the soil for seedlings with proven folk remedies.
Their effectiveness may not always meet your expectations, but they can still slightly improve the properties of the soil.
Here's what you can use:
- Coniferous concentrate solution. 2-4 st. spoons of the product are diluted with 10 liters of water.
- Tobacco dust solution. To prepare 40 g of dry powder, dilute with 1 liter of water and leave for 2 days, after which another 1 liter of water is added, and the solution is ready for use.
- Infusion of garlic. 170 g of mashed garlic is mixed with 1 liter of water and infused for 5 days. Then, for processing, 6 ml of the infusion is diluted in 1 liter of water.
- Infusion of onions. Mix 2 cups tightly packed with onion peels with 2 liters of boiled water. Incubate for 2 days. When applied, the concentrate is diluted with water in a 1: 2 or 1: 3 ratio.
Means for normalizing soil acidity
Adjusting the acidity of the soil before planting seedlings will help prevent diseases such as gray leg, keela, and generally make the land more conducive to growing crops.
Here's what you can apply:
- dolomite flour;
- slaked lime;
- ash
- a piece of chalk
- perlite
- hydrogel;
- vermiculite;
- humus tablets.
Important! The optimum level of soil acidity is 6.5-7 pH.
Attention to possible errors
Even if you very correctly and thoroughly disinfected the soil for seedlings, it can develop poorly, hurt and even die.
To prevent this from happening, pay special attention to the following points:
- seed quality;
- container volume for seedlings;
- seed treatment before planting;
- growing time;
- seed burial height;
- correct watering schedule;
- thinning of seedlings;
- stability of temperature, lighting and humidity in the room where the seedlings are located;
Growing seedlings is a very responsible process, since the efficiency of plant development and the quality of the crop depend on the correctness of your actions. Therefore, do not neglect the prevention and disinfection of the soil from pests, so that the seedlings will please you, and then you do not have to spend a lot of time and energy on additional processing of plants from pests and treatment of young crops.
How to cultivate the land before planting
Similar articles
Preparing the soil in the garden
, That is, remove the side shoots in the leaf axils at the initial stage of development 3-4 cm, leaving a "foam" of 0.5 cm. This ensures that the stepson is not formed at this place.
How to prepare the soil for transplanting indoor plants
Seedlings of medium and tall varieties
Preparing the land for seedlings
When picking, pinch the central root of the tomato. After 1-2 weeks, as soon as the seedlings grow, it is necessary to add earth and water with a daily ash solution (1 tablespoon per 1 liter of water).In the next 1-2 weeks, if possible, add one more soil and water the seedlings. As a result, the plant has an additional root system and the plant itself becomes stronger. It is advisable to water tomato seedlings once a week with a warm weak solution of potassium permanganate, and the next week with a daily ash infusion. So that the seedlings do not stretch and develop normally, it is advisable to give backlight with fluorescent lamps, in the loop phase for 2-3 days around the clock, and then 16 hours a day. In March, when there are more sunny days, you can reduce the backlight to a minimum.
For normal development, tomato plants require an air temperature of at least 15 ° C. A prolonged decrease in temperature below 10 ° C leads to the fall of flowers and a delay in fruit ripening. At an air temperature of 30 ° C, plant growth slows down, and at 35 ° C it stops completely. When growing tomatoes in greenhouses or greenhouses in the daytime, it is necessary to create a through air movement. This lowers the temperature in the greenhouse and helps pollination. Although tomatoes are drought-resistant plants, they have a high water requirement. In dry weather, during budding and growth of ovaries, plants need abundant watering, otherwise, with a lack of moisture in the soil, flowers and ovaries will fall off, and during the period of fruit formation, apical rot will develop.
One of the most popular, simple and effective ways of dealing with all kinds of pests and diseases, it is usually used when other means of disinfecting the land have not brought the desired results or it is necessary that the soil for the greenhouse be disinfected in a short time. Remember that processing chemicals can be hazardous if they come into contact with skin or mucous membranes, so protective measures must be taken when handling them.
Crop rotation plays a significant role in the final result. Potatoes severely deplete the soil and grown in the same field for several years in a row, even with the use of advanced agronomic techniques, will not give significant results. In addition, such a field from year to year becomes more infected with fungal, viral diseases, which leads to a shortage of crops. Potatoes cannot be grown after crops related to nightshade - peppers, tomatoes, eggplants.
It should be remembered that good seeds are a prerequisite for a good harvest.
I plant potatoes in grooves 5-8 cm deep. Such a shallow planting depth contributes to the rapid rooting and germination of tubers in a well-heated layer of soil. Late varieties can be planted a little deeper.
Landscaping prevents the evaporation of moisture from the seed, which has a beneficial effect with frequent spring moisture shortages in the soil. At the same time, the maternal tuber plays the role of an insurance fund in the water supply of the potato plant in the first periods of its growth, when the weak, not yet developed root system cannot provide the plant with moisture during the daytime. At night, potatoes (this distinguishes them from other crops) are able to consume water from the air with the help of their leaves.
Soil disinfection Gardeners and indoor plant lovers should not forget about the need to thoroughly cultivate the soil before planting seedlings, replanting garden plants or flowers in order to avoid contamination of plants with infectious diseases, reduce the likelihood of pests entering the soil and suppress the growth of weeds.
Processing potatoes before planting - landscaping, germination, disinfection
At the end of August or at the beginning of September, it is advisable to pinch the tops of the plants, which will give timely ripening of the remaining fruits.
Greening tubers
(Reach 0.8-1.5 m), it is advisable to plant obliquely, that is, dig a trench to a length of 2/3 of the stem, remove leaves from the stem at the same distance, lay the plant in a trench and fill it with fertile soil, leaving 1 / 3 stems with 3-5 leaves. With this planting, the plants give a powerful additional root system, which will have a beneficial effect on the future harvest. Planted tomato seedlings should be watered abundantly with a weak solution of manganese (2 g per 10 l of water). You can mulch the ground with peat or humus. After a week, you need to give the first top dressing: a matchbox of ammonium nitrate or urea in a bucket of water. In the ground, seedlings must be planted at a distance of 40-60 cm from each other, depending on the variety of tomato. Stunted - 40 cm, medium and tall - 60 cm from each other.
Tomato seedlings are planted in the ground depending on weather conditions;
Germination
At the same time, tomatoes do not like soils with a close location of groundwater. This causes stretching of the plants and strong proliferation of leaves. High humidity, rainy long weather create conditions for plant diseases with brown spot and late blight, and complicates fertilization. It is not recommended to grow tomatoes after potatoes, peppers, eggplants, since these crops belong to the same family and have common diseases.
Disinfection of tubers
Most pathogens can be successfully treated with bleach. It is applied in the fall, when the harvest is already harvested, because it slows down the growth of plants. Lime is introduced into the ground at the rate of 150 g per 1 m2, after which it is covered with a rake. An alternative can be a solution of bleach - 400 g per 10 liters of water. This solution is first treated with all plant residues on the ground after harvesting, and then the greenhouse itself from the inside and outside.
Useful:
Germinated potatoes that have undergone stratisfaction sprout faster, bloom faster, and ripen faster.
To enrich the soil with nitrogen in the same place, I sow legumes (peas, beans, beans) in parallel, which are able to assimilate free nitrogen from the air. After planting with a hoe, I close up the rows, immediately forming a ridge with a height of 7-10 cm. Ridges in the form of ridges in a cold, damp spring are better warmed up and ventilated. And with heavy rains, the shallow bedding of the tubers prevents them from getting wet.
Planting potatoes - technology
Landscaping can also be carried out in spring, at the same time as germination. Germination before planting is a highly effective agronomic technique that accelerates the emergence of seedlings, promotes the rapid development of plants and the formation of a crop.
So, how to prepare the land so that its “inhabitants” will no longer pose a threat to seedlings? Let's start with the simplest and most effective method - steaming the soil in a water bath.
Care
Before planting any plants, a plot of land must be freed from the rhizomes of perennial weeds: dandelion, sow thistle, wheatgrass. If planting is done in late summer or autumn, then you first need to weed it. You can also use modern herbicides. For this purpose, the preparations "Roundup", "Ground" are suitable. You should carefully read the instructions for the preparation and treat the weeds in strict accordance with it. After a few days, the plants will begin to turn yellow and die, the weeds will completely die in 10-14 days. Then you need to fill the soil with a ready-made complete mineral fertilizer or scatter humus, ash, lime over the surface, depending on the characteristics of the soil. Only after this can the site be dug up. Using this agricultural technique, the gardener greatly facilitates the rooting of young plants. Further actions depend on what kind of crop is planned to be planted on the site.When planting strawberries, a single, double planting is planned; for garden shrubs, trees and perennial flowers, planting holes need to be dug, and filled with humus, peat and mineral fertilizer. Before planting the plants, the wells can be shed with a strong solution of potassium permanganate to carry out disinfection. This treatment kills thrips, nematodes and other pests.
There are liana-like varieties of tomatoes, the height of which reaches 5-6 m, they are planted in the ground after 1-1.5 m, pinned, but not pinched. When the height of the greenhouse is reached, the plant is passed along the trellis. Thanks to careful care, the plants develop effectively, fruiting can continue until the end of September, and if the weather is favorable, until mid-October.
Fertilizer
Tomatoes need: systematic loosening, feeding, watering. During budding, it is advisable to spray the plants with substances that stimulate fruit setting or a solution of boric acid and baking soda. For 1 liter of water - 1 hour spoon of soda and 1/4 hour spoon of boric acid. Before flowering, give abundant watering with warm water at the rate of 3-4 liters per bush, and a weak solution of potassium permanganate (1 liter per bush). At the same time, it is necessary to bring wood ash under each bush, loosen the earth and water abundantly. 3 weeks after planting, spray the plant with a solution of copper sulfate (20 g per 10 l of water). For better adhesion to the leaves, you can add 2 tablespoons of washing powder per 10 liters of water to the solution.
When to plant potatoes
Open - no later than May 20-25;
In the climatic conditions of the Non-Black Earth Region, it is recommended to grow tomatoes from seedlings. To obtain an early harvest (June 10-20), the seeds of medium-sized and tall tomatoes of the middle and late ripening period are sown in mid-February, but no later than March 1, and low-growing early ripening varieties - no later than March 15-20. According to popular beliefs, it is advisable to sow the seeds of all plants 2 days before the new moon or 2 days after the new moon.
A drug such as "Karbofos" successfully eliminates nematode larvae, spider mites, keel and black leg pathogens. Copper sulfate also copes with them, 1 tsp. which must be diluted with 10 liters of water. Before processing, the soil is dug up, and then sprayed and dug up again so that the cultivated land is at the bottom.
Planting potatoes - methods - under cardboard, mulch, double rows
Large tubers intended for planting must be cut 10 or more days before planting. The resulting cork cut surface does not rot in the ground, and a fresh cut is an excellent environment for the development of rot.
Leaving like that. 5-7 days after planting, or necessarily after rain, I harrow the ridges with a rake, destroying threadlike weed seedlings. At the same time, soil aeration is improved. After a week, I repeat the operation. Until the potatoes sprout, it is done quickly and efficiently.
Tubers prepared for planting are laid out in a thin layer in boxes of 10-12 kg and placed for 5-7 days in a warm (18-20 ° C) room to awaken the kidneys. Then they are transferred to a bright cool (10-12 ° C) place. At this temperature, germination of sprouts slows down, daylight prevents them from stretching, while the tubers are intensively planted. Every 7-10 days, they are gently agitated for better illumination. At the same time, sick, weak, who are clearly visible during landscaping and germination are rejected.
To do this, we need a capacious colander and a saucepan, selected in such a way that it does not fall into it. Pour such an amount of water into the pan so that it reaches the bottom of the colander, but does not protrude through its holes. Then we collect a full colander of soil, put it on a saucepan, cover it with a lid on top. The soil should be steamed for one to two hours over low heat.This method does not destroy minerals and trace elements, but at the same time destroys fungus, bacteria, larvae, and insect eggs. After this procedure, it is recommended to "populate" the soil with beneficial microorganisms. For this, the "Baikal" tool or the like is the best fit.
You can find ready-made soil for indoor flowers on sale, but, unfortunately, it is not always of sufficient quality, so it is better to prepare the ground yourself. The best way to treat soil for transplanting indoor plants is to freeze it. For this, a nutrient mixture is being prepared in the fall: humus, sawdust, microelements are added to the soil: chalk, ash, gypsum; ready-made mineral fertilizer for flowers. After that, the soil is mixed and left in buckets or bags in the cold for freezing. Another way is to warm up the earth in the oven, but it is not popular enough, because during the roasting process a specific, not very pleasant smell spreads around the apartment.Before transplanting the plants, the prepared soil in pots should be spilled with a solution of potassium permanganate or copper sulfate. For this, 3 g is taken for 5 liters of boiling water. potassium permanganate or copper sulfate and the soil is spilled abundantly. After that, you need to cool the soil to room temperature and you can transplant the plants.
Tomato fruits are harvested every 3-4 days as they ripen, but there are varieties that ripen together at the same time. Since tomatoes have a peculiarity of ripening, being plucked from a bush, you can collect fruits of any color. Green fruits can be stored for up to two months at a temperature of + 4 ... + 8 ° С. For ripening, tomatoes are placed in wooden boxes in 2-3 layers. For early ripening, it is necessary to put 2-3 red tomatoes in a box with green fruits, since ripe fruits emit ethylene gas, which accelerates the ripening of green fruits. But if it is necessary to preserve the fruits longer, then the red ones should not be put in the box. Another way of ripening: a tomato bush with green fruits is dug out, the earth is not shaken off from the roots and the whole plant is transferred to the room, from + 1 ... + 5C. The plant is suspended with its roots up. Fruits smaller than a walnut are removed from the bush, and larger ones are left. Tomatoes will begin to ripen by the end of November - early December. In this way, you can extend the life of the fresh tomato.
The second treatment in the same concentration with copper sulfate - 2 weeks after the first. As soon as the tomatoes bloom, foliar feeding is necessary (50 g of superphosphate per 10 liters of water). Crush superphosphate, add hot water and mix several times during the day. Spray with settled solution. Throughout the growing season, tomatoes are watered abundantly with warm water; with an interval of 2-3 weeks they feed (under the root) a 3-day infusion of mullein with ash. When loosening, the tomato bushes spud. In order for the peduncles to be pollinated in time, it is necessary to apply active ventilation in the greenhouse. Tomatoes are in great need of a draft. Even in cool weather, when the air temperature drops to (+ 8 ... + 10) ° С, it is necessary to put on slightly open the vents. In calm weather, pollination is carried out by tapping on the backwater. Shedding of flowers is noticed on days of stable cloudy weather. This indicates their inability to pollinate due to high humidity, at this time it is advisable to spray the plant with a weak solution of boric acid.
- Closed from May 1 to May 25 (preferably in the first half).
Methods for disinfecting soil in a greenhouse
The soil for tomato seedlings must be prepared in the fall and stored outside in plastic bags or boxes. With this storage, the ground freezes and all bacteria that infect plants die. A mixture of sifted compost, humus and forest land is prepared in a 1: 1: 1 ratio.Add 2 glasses of ash, 60 g (3 tablespoons) of superphosphate, 20 g (1 tablespoon) of potassium sulfate to a bucket of the mixture. Forest soil can be replaced with purchased land.
Many diseases are carried by the plants themselves, that is, planted over several seasons in the same place of culture, will contribute to the spread of pathogens inherent in this species. To prevent this from happening - stick to the crop rotation, that is, alternate the types of vegetables in the beds. Use only healthy planting material, high-quality fertilizers. At the end of the season, you should not neglect the cleaning of the greenhouse from plant debris, cleaning it. It is much easier to carry out disease prevention than to take drastic measures later. Don't forget to watch the video on how to make a smart greenhouse.
Thermal way
There are several methods of soil treatment: biological, thermal (heating and steaming) and chemical. The most gentle of them is biological, because it allows you to destroy all harmful microorganisms and spores, as well as enrich with useful substances. However, this method is also the longest - the soil for greenhouses must be disinfected for at least 4 years.
Greening for seed tubers is beneficial in that the resulting solanine is an antiseptic substance.
Chemical disinfection method
In rainy, damp weather, along with weeding, I continue to build up the ridges. In dry, hot weather, I leave them as they are. In my opinion, groove landing has a number of advantages over the square-nesting method. Firstly, less effort is spent on hilling - the earth is shoveled only from two sides - there is no need to revolve around each bush. Secondly, when watering, the space between the rows is easily filled with water.
Before planting, to prevent diseases, we treat the seed material with a solution of potassium permanganate. Convenient, fast processing in a galvanized trough. We immerse the box with germinated tubers in a solution of potassium permanganate (1 g per bucket of water) and incubate for 30-40 minutes. You can use a solution of copper sulfate together with zinc sulfate (10 g each per bucket of water) or boric acid (50 g per bucket).
The next way to disinfect the soil before planting seeds for seedlings is to treat it with a weak solution of manganese. The process is very simple. In a liter jar, half a gram of dry potassium permanganate should be diluted, and the soil should be treated with the resulting solution.
Prevention of soil diseases
Where to start preparing for sowing seeds for seedlings? With the preparation of the potting mix, of course! Gardeners who are too lazy to make land suitable for seedlings with their own hands often face the fact that the seeds simply do not germinate in the purchased substrate. This is immediately blamed on "unscrupulous" manufacturers, but often the reason lies not in the substrate itself, but in its illiterate use. Many people believe that if you plant seeds in the most enriched soil, then everything will sprout as best as possible, but this judgment is fundamentally wrong. In this material, we will tell you how to properly prepare the ground for seedlings so that it grows strong and healthy in it.
For seeds, it is advisable to take fruits from the first two lower brushes, in shape they should correspond to this variety. If the fruit is not typical for this variety, then such a tomato is not suitable for seeds - there was a cross-pollination. It is necessary to remove the fruits for seeds when they are mature or brown and keep them at home until they are soft. In a convenient small dish, seeds are released from cut tomato slices, a little water is added and kept for 1-2 days until the pulp floats up. The fermented mixture is drained, the seeds are thoroughly washed with clean water. Floated ones are thrown away, and those that remain at the bottom of the dishes are evenly scattered on paper and dried. The dried seeds are placed in bags marked with the year and variety.It is advisable to sow them one year after collection. When sowing the next year, the germination of seeds is lower, the tomato yield decreases and more often there are plants with barren flowers.
Where to plant tomatoes
If cloudy weather lasts longer, spraying is carried out twice with an interval of 3 days. The gardener should know that at high temperatures (above + 30 ° C), high humidity (above 70%), dry air and soil, the flowers of plants are not pollinated and fall off. The emerging double flowers must be urgently cut off (viral disease), since they produce gnarled fruits and retard the growth of other fruits. When growing tall tomatoes, a plant support is required. The best way - trellises - pull the wire every 30-40 cm. In this case, you can tie up the stem and brush with fruits, which sometimes reaches 2-3 kg.
Preparing the soil for planting a tomato
In spring frosts, the planted seedlings are covered with a film, spunbond or other covering material.
Tomato growing technology
Before sowing, tomato seeds must be kept in a weak solution of potassium permanganate for 30 minutes, then rinsed with clean running water. After that, it is advisable to treat the seeds with microelements. To do this, add 1 tablespoon of ash to a half-liter jar, on the tip of a knife of copper sulfate and the same amount of boric acid, dilute with hot water. Having filtered the ash solution, lower the seeds and soak them in this solution for 3 hours. In any solution, seeds are immersed in gauze bags. Then the seeds in the same gauze bags are wrapped in a soft cloth and placed in a glass jar, covered with a plastic lid and placed in the refrigerator. They keep in the refrigerator at a temperature of (0.-1) ° С for about a day, and then 5 hours in a dark place near the heat. And when hardening seeds in the refrigerator, and when warming up, it is necessary to ensure that they are moist.
Tomatoes are annual plants from the nightshade family. Tomato fruits are tasty and healthy. They contain malic and citric acid, sugar, aromatic substances, vitamins C, A and provitamin D. The content of nutrients in fruits largely depends on the variety, place of cultivation, agricultural technology, weather conditions and other factors.
Growing tomato seedlings
The technology used for biological disinfection is as follows: the soil for the greenhouse must be laid in a compost heap, alternating with manure. The height of such a heap can reach 1.5 meters. It should be borne in mind that any soil has its own acidity, and if it is increased, then lime is added to the compost heap at the rate of 4 kg per 1 m3. An important condition: regular weeding is necessary, otherwise you will get a mix of weed seeds instead of clean soil. If the pathogens of keel or white rot were present in the soil, then disinfection should be extended for another year, that is, disinfection will last 5 years.
Soil for tomato seedlings
Of the main nutrients, potatoes consume the most potassium.
Processing tomato seeds before sowing
Of the fertilizers, besides wood ash, I give preference to poultry droppings. I bring it in advance to the site intended for planting potatoes. In addition, I carry out root feeding with bird droppings in the spring. Scattered between the beds, it also contributes to the fight against weeds, which "burn" upon contact with it, and the ridges poured on the furrows prevent the contact of fertilizer with seedlings. After rain or watering the aisle with poured bird droppings, I deeply "poke through", mixing it well with the ground.
Planting tomato seeds in the soil
Please note: to dissolve copper sulfate, only wooden, glass, enameled dishes are used. Galvanized or metal can not be used. If there is no suitable container, you can use a hole in the ground slightly larger than standard boxes, lined with oilcloth or plastic wrap.
Pickling tomato seedlings
The next way how you can prepare the ground for
General information
Planting tomato seedlings in the ground
Tomato plants have the ability to kill pathogenic bacteria and some insect pests. Therefore, it is useful to use a decoction of tomato tops for spraying other crops.
- It is very important to form the bush correctly. Tall plants formed into one stem are better illuminated and ventilated. To do this, you need to carry out
- Low-growing varieties of tomatoes are planted
Sprouted seeds are sown in boxes to a depth of 0.5 cm, covered with glass or polyethylene and placed near a heating radiator. Shoots appear on the 3rd day. However, it should be taken into account that the seeds of hybrid varieties with small seeds, as well as varieties of foreign selection, germinate only for 7-10 days. In addition, dry and long-stored seeds have a lazy germination capacity. Therefore, it is not recommended to throw away the soaked seeds ahead of time. During seed germination, the temperature should be maintained at + 18 ... +25 ° С, and after the mass emergence of seedlings in the first 3-4 days, + 13 ... + 15 ° С during the day and + 10 ... + 12 ° С at night. In the future, the temperature should be + 15 ... + 17 ° C on cloudy days, + 20 ... + 25 ° C on sunny days, and + 8 ... + 12 ° C at night. To do this, at night it is necessary to open the sash of the window, and put a cardboard fence on the side of the radiator. Seedlings are rarely watered, but abundantly.To obtain a good harvest of tomatoes, sunny sheltered areas, well-heated humus loose soils, rich in nutrients and moisture, are required. Tomatoes are suitable for neutral or slightly acidic soils. Plants die on acidic soils.It so happens that you need to process a not too large volume of soil - for planting seedlings or sowing seeds, then you can use the thermal disinfection method. Although, if weather conditions permit and there is time, it is also suitable for processing the soil throughout the greenhouse, and heating and drying will occur naturally - from the sun. This method not only allows you to effectively disinfect the soil, but also contributes to an increase in fertility. Disinfection consists in calcining or spilling with boiling water, after which the earth is allowed to dry completely.Rotten manure can be used to fertilize the potato field. Fresh manure causes a strong development of microorganisms, which themselves absorb a significant part of the ammonia nitrogen not only of the manure itself, but also of the soil, which often leads to a lack of nitrogen.Potatoes are planted when the soil temperature reaches 7-8 ° C; at a lower temperature, the sprouts develop at the expense of the mother plant, without forming roots. Sometimes black paper, film, roofing material are used to better warm the soil: the earth heated under such materials cools more slowly at night, this contributes to the formation of roots.
Tomato care: watering, feeding
Immediately after bathing, potatoes are dusted with wood ash, which adheres well to wet tubers. You can pour ash directly into the wells. Wood ash is known to contain potassium, which regulates the water regime of growing plants. If the level of potassium in the leaves decreases, the plant withers faster, the formation of tubers slows down, and, consequently, the yield decreases, as well as keeping quality; when peeled, they quickly darken.
Seedlings, this is a treatment with insecticides and fungicides. In order to destroy the larvae and eggs of insects, you can use a solution of "Aktara" or "Actellika", and to destroy bacteria and fungus, we will use "Fundazol" or the drug "Fuselad-super". This method is the most effective, but also the most unsafe. Most of these drugs pose a direct threat to the health of animals and humans, so you should be extremely careful in the dosage and use of the solution. Another obvious plus of this method is its long-term effect.The fact is that when watering plants, they will also absorb chemicals, therefore they will be inedible for pests.
To understand the general principle according to which it is determined which land will be the best for growing seedlings of a particular crop, you need to know one simple rule. The soil mixture should correspond as much as possible to the composition of the one where the plant will grow in the future. But this does not mean at all that you should use the land from your garden for this. The best option for most crops is topsoil from acacia trees. If acacias do not grow near your house, then you can use a purchased mixture, but before that it should be processed, because it may contain pathogenic microorganisms. For these purposes, the soil can be treated with fungicides or steamed in a water bath. The cultivation of the land for seedlings is one of the key points, because pathogenic bacteria can "doze" in the soil. In addition, the soil can contain both larvae and eggs of insect pests, which are not averse to snacking on your young plants. If for each type of seedlings it is necessary to choose its own soil composition, then the methods of its processing are always the same, we will talk about this further.
Tomato shaping and pinching
For 10 liters of water, take 4 kg of tops and boil for 30 minutes over low heat. After settling, the broth is filtered and 40 g of laundry soap is added. 1-2 liters of broth is diluted with 10 liters of water. Tomato broth is effective against leaf-eating pests and their larvae. Infusion of tomato tops is effective against soil bacteriosis. In May, early June, when there are sharp changes in temperature in the atmosphere (during the day (+ 15 ... + 20) ° С, at night up to 0 ° С), the root system of some plants dies. At this time, watering with infusion of tomato tops is necessary. Put 1-2 kg of tomato tops in a bucket of warm water. Insist 3-5 days in a warm place or in the sun. After straining, dilute 1/3 of a bucket of water, pour directly under the roots or when planting a plant in a hole. In addition, the tomato gets along well with some plants with mutual benefit. It can be planted in aisles with cabbage, then the cabbage does not attack the cabbage. Tomato fruits become larger, their yield increases. Planting a tomato between the rows of strawberries increases the yield of berries and lengthens the fruiting. We wish you great success!PinchingStraight, since they themselves do not particularly stretch and, as experience has shown, reaches 0.3-0.4 m in height.
When the first leaves appear, tomato seedlings dive. Prepared soil is poured into prepared peat pots or other containers (at least 10-15 cm deep) about 2/3 of the container, then watered with a weak manganese solution, holes are made and plants are planted. The soil around the plant is gently squeezed.
Octopus tomatoes or tomato trees
The first cultivation of the soil for planting a tomato is carried out in the fall to a depth of at least 20-25 cm with the introduction of organic fertilizers. You can also apply mineral fertilizers, such as superphosphate - 40-50 g, potassium salt - 20-25 g per 1m2. During the spring preparation of the soil for planting a tomato, bird droppings are introduced - 1 kg, wood ash - 1-2 kg and ammonium sulfate - 20-25 g per 1 m2. It is advisable to dig up the soil 2-3 times before planting, preferably with a pitchfork. Will not damage plants and the introduction of humus. It is not recommended to apply fresh manure during the spring preparation of the soil, since when planting tomato plants in an area fertilized with fresh manure, the tops grow strongly, and the formation and growth of fruits is delayed.
Harvesting tomato fruits
The damp earth is laid out on iron sheets and heated, if the heating takes place at a low temperature - up to 70 degrees, then additional treatment with boiling water will be required.You can do otherwise: for an hour, steam the soil at 1000C - this will kill not only insects, but also nematodes, which are considered very tenacious.
Collecting tomato seeds
The direction of the planted rows has a significant impact on the yield. The rows planted in the north-south, north-west or south-east directions are more evenly illuminated by the sun throughout the day than, for example, the rows in the west-east direction, therefore they increase the yield and starchiness. A potato plant requires a lot of moisture, especially from the beginning of flowering, when the period of intensive growth of tubers begins.
Tomatoes in the fight against pests and diseases
By adhering to these simple care measures when planting, you can get a very early harvest, and by the time of mass harvest, a significant increase.
Tomato leaf decoction
Potassium in wood ash is easily soluble, and there will be little benefit from ash left in rain and snow. It is stored in a place inaccessible to moisture.
I select seed tubers for planting from good productive bushes, with large, even tubers two weeks before the main harvest. There are two main methods of potato processing - gardening and sprouting. The first one is carried out immediately after selection for seeds. The second before planting is in the spring. But even between these basic operations, during storage, the seed tubers need special care. There are also other techniques for processing potatoes before planting.
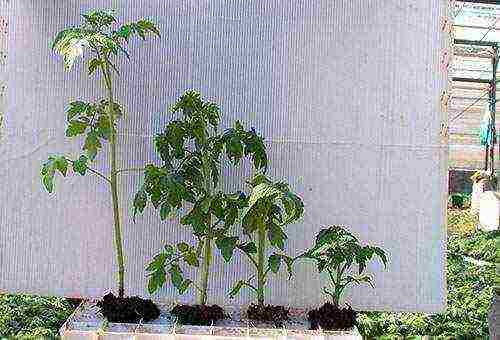
A good harvest of vegetables directly depends on the quality of the seedlings. If the plants are stunted, do not expect a good result. In order for the seedlings to grow well, you need to prepare a suitable soil for it. We will talk further about how to prepare and disinfect the soil for seedlings.
How to prepare the soil for seedlings yourself
Growing seedlings is a very troublesome business. These plants are more capricious and need special privileges than those that grow outdoors. Growing seedlings of good quality requires an ideal soil in which all the nutrients and trace elements are collected. For each plant, the acidity must be correctly selected. In no case should there be pests and insects in the soil. Here are the basic requirements that land must meet:
- Good moisture and air permeability. The soil should be soft, loose and light. This will allow oxygen to penetrate unhindered to the root system.
- The soil must be balanced and fertile. In addition to organic compounds, the earth must also contain all micro and macro elements. Do not forget that all components must be contained in certain proportions.
- The soil must meet certain acidity requirements. The normal indicator is in the range from 6.0 to 7.0. If it is insufficient or higher than the norm, then in the future the seedlings can pick up various diseases.
The main rule when preparing the soil yourself is to observe the measure in everything.
Anti-primer
During the preparation of soil for seedlings, you need to know what in no case should be in the ground:
- Infections. The soil for planting should not contain spores of fungi, microbes, insects and their larvae.
- Harmful and toxic elements. The seedling soil should not contain waste from hazardous industries, garbage, heavy metals.
- Substances that, when mixed with each other, begin to actively decompose.
When preparing the earth on your own, you should not mix clay into it. It greatly degrades the condition and quality of the soil. In this case, it becomes unsuitable for growing strong and healthy seedlings.
Time and method of soil preparation and disinfection
Preparation of land for seedlings begins in the fall. It is better if the soil freezes well over the winter. Before planting, the land is warmed up and cultivated. Today, there are many ways to prepare the land.This instruction should become a handbook for the gardener: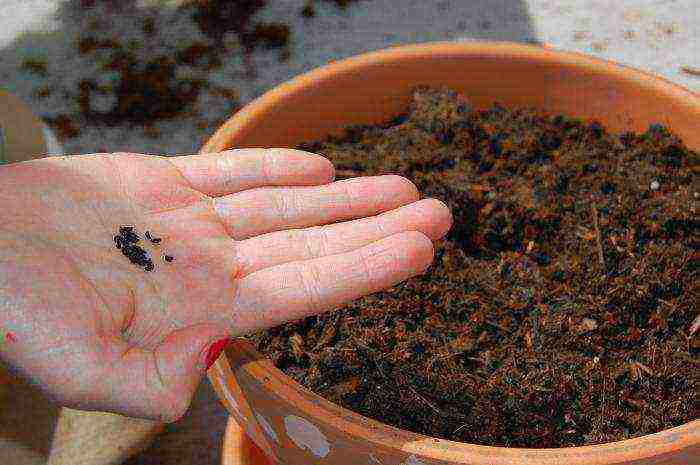
- The earth is sifted. Remove all insects, larvae and debris.
- The next step is soil disinfection. This must be done without fail. This makes it easy to get rid of all germs and spores.
- To obtain high-quality seedlings, add a glass of ground eggshell to a bucket of soil.
- To make the earth loose and airy, add crushed foam, pumice or rice hulls.
From the entire instruction, it is necessary to dwell in more detail on such an important issue as how to disinfect the ground for seedlings.
Rules for disinfecting land for growing seedlings
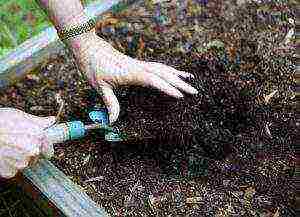
The most common problems with growing seedlings arise precisely because of the soil. So that no pathogenic microbes remain in it, it is subjected to special processing. There are several ways to disinfect the soil for seedlings. Let's consider each of them separately:
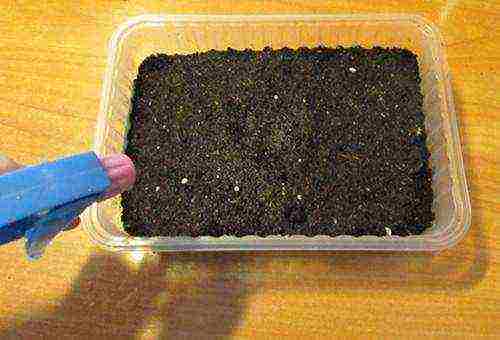
Method 1. Calcining. The earth is sent to the oven and kept for about 15–20 minutes at a temperature of 90–100 degrees. So that the soil is evenly calcined, it is laid out on a baking sheet with a layer of no more than 5 cm.Do not increase the temperature to more than 100 degrees. The soil will deteriorate and will not be suitable for growing plants.
Method 2. Steaming. This procedure is applied one month before land use. It is placed in a saucepan, tightly closed with a lid, and sent to be steamed in a water bath. Withstand the soil for two hours.
Method 3. Freezing. This method is used for soil that was collected in the fall. The land is taken to the balcony and kept there all winter. A month before planting the seeds, it is taken out and thawed at room temperature.
Method 4. Cultivation of the land with potassium permanganate. This method is considered the most effective, simple and effective. The earth is watered with a fresh hot solution of potassium permanganate and allowed to dry. The composition is prepared in the following proportion: 1 teaspoon of potassium permanganate per 1 liter of water.
Method 5. Disinfection of the soil can be carried out using special preparations. They can be purchased from shops that specialize in gardening supplies.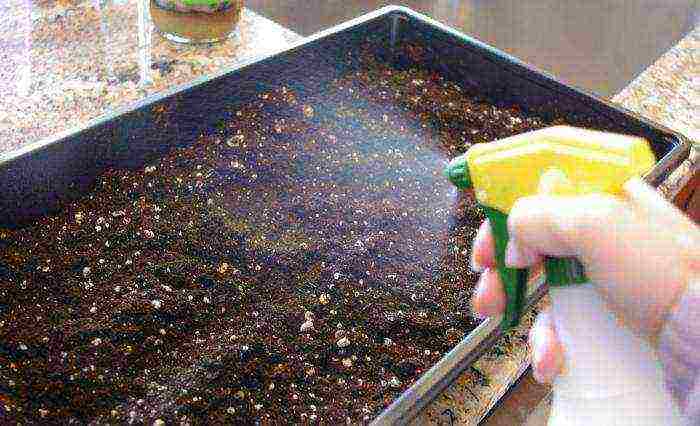
Which way to choose is up to you. In general, each of them is effective and time-tested. Having figured out how to disinfect the earth, you need to consider in detail the last method.
Preparations for cultivation of land and seedlings
The presented preparations are suitable for treating soil and plants:
- Colloidal sulfur. The substance has a fungicidal effect. Sulfur is used only in the morning or evening hours, since its toxicity can manifest itself at high temperatures. The preparation is suitable for disinfecting not only soil, but also plants with signs of diseases. Colloidal sulfur is suitable for combating powdery mildew, ascochitis, scab and other diseases.
- Copper sulfate. Another agent with fungicidal properties. It dissolves well in water. Suitable for spraying plants. Copper sulfate can be used to disinfect the soil at home and at their summer cottage.
- Combined fungicides. These are the best preparations for working with broad spectrum seedlings. The cultivation of land and plants with such means increases their resistance to diseases and infections.
 All these preparations will help disinfect the soil if you suddenly decide to prepare it yourself. Doing this on your own is quite troublesome, so you can buy ready-made soil in the store.
Shop soil
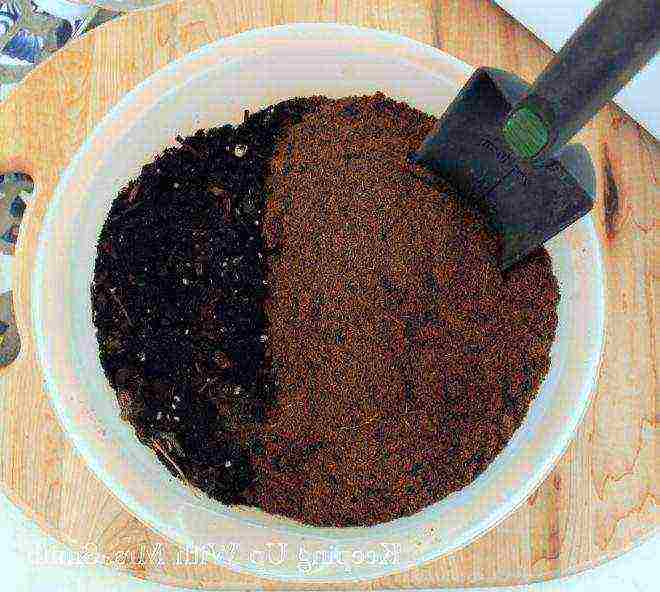
The most popular is the garden and vegetable garden soil for growing seedlings. You can buy it at every specialty store. Seedlings are very fond of such ready-made mixtures and grows in them just fine. In their composition, everything is balanced, and each component is added in a scientifically based proportion. Also in the finished soil there are additives that stimulate the growth of seedlings.It is worth conducting a detailed analysis and looking inside the "Garden and Vegetable Garden" soil package.
The secret inside
In fact, there are no secrets in the finished soil. It contains the following ingredients:
- Peat. It is highly sterile and has good moisture retention.
- Mineral supplements that stimulate the growth of seedlings.
- Humic substances. Promotes root growth. Gives plants strength and stability.
- Sand. Helps the soil not dry out and settle.
- Agroperlite. This substance helps oxygenate the root system.
- Chernozem. The main and main component of the finished mixture. Land completely cultivated from debris and impurities, as well as from all pathogens.
These are at first glance simple additives that the ready-made soil "Garden and Vegetable Garden" contains. Before buying soil, you should pay attention to the following points:
- The bag should not contain large and dry lumps of earth. This is considered the main indicator of soil quality.
- After opening, it is worth assessing the appearance of the earth. There should be no dust in it. Moderate soil moisture is allowed.
Having selected the soil and prepared it for planting, you can start processing the seeds.
Seed preparation
Having figured out the question of how to disinfect the soil for seedlings, it is worth approaching the problem of seed preparation. Everything is much simpler here. It consists of the following:
- Visual inspection of seeds. It is necessary to select all the bad copies.
- Rinse the planting material and dry thoroughly.
- The next step is to decontaminate the seeds. This is done with a weak solution of potassium permanganate. The seeds are soaked in it for 15–20 minutes.
- For better germination, planting material is soaked in hot water for a day before planting.
Having figured out the question of how and with what to treat seeds, soil, plants from bacteria and diseases, you can expect a good result.
Conclusion
Having figured out the main question - how to disinfect the soil for seedlings - novice gardeners can start this procedure in practice. In fact, there is nothing difficult about it. A little diligence and perseverance will help to grow good and beautiful seedlings in the future. Disinfection of soil and seeds today is a mandatory procedure. Strong and healthy plants will take root faster outdoors.