Content
- 1 Description of stevia herb
- 2 Growing from seeds at home
- 3 Landing in open ground
- 4 Summer care
- 5 Reproduction
- 6 Wintering (at home)
- 7 Benefits of stevia
- 8 How to prepare stevia for the winter
- 9 Stevia recipes
- 10 Growing stevia at home - detailed instructions
- 11 How to grow stevia from seeds and prepare an extract, syrup from it
- 11.1 How to Purchase Stevia Seeds
- 11.2 How to grow stevia at home
- 11.3 Stevia seed selection
- 11.4 Choosing a land for planting
- 11.5 Things to Remember Before Planting Stevia
- 11.6 How to properly grow stevia seedlings from seeds
- 11.7 Preparing seeds for planting
- 11.8 Care of young stevia seedlings
- 11.9 Secrets of seedling care
- 11.10 How to plant stevia outdoors
- 11.11 How to prune stevia
- 11.12 How to grow stevia in the open field in the country
- 11.13 How to root stevia cuttings
- 11.14 How to prepare stevia herb at home
- 11.15 How to make stevia (extract, syrup)
- 11.16 Tea
- 11.17 Stevia extract with vodka
- 11.18 Stevia syrup
- 12 Stevia - a guide to growing at home from seed
- 13 Growing stevia at home and in the country: planting and care
- 13.1 Growing stevia honey at home
- 13.2 How to Purchase Stevia Seeds
- 13.3 Stevia herb: plant hardiness
- 13.4 How to sow stevia seeds
- 13.5 Stevia seed selection
- 13.6 What land to use for sowing stevia
- 13.7 Seedling honey grass
- 13.8 When to plant seedlings of plants in open ground
- 13.9 Transplant of stevia from open ground
- 13.10 Outdoor Stevia Seedling Care
- 13.11 Top dressing of stevia honey
- 13.12 Drop off location
- 13.13 Pruning adult plants
- 13.14 Rooting stevia cuttings
- 13.15 Harvesting stevia honey
- 13.16 Drying stevia
- 13.17 Stevia extract recipes
- 13.18 Homemade stevia syrup
- 14 Stevia: growing and care
- 15 What is Stevia
- 16 Growing conditions
- 17 Growing stevia
- 18 Seedling care
- 19 Open ground transplant
- 20 Stevia care
- 21 Beneficial features
Stevia - a guide to growing at home from seed
5
(100%) voted
2
Stevia is one of the best natural sugar substitutes. No wonder 80% of the volume of its consumption falls on the country of long-livers - Japan. Today I will tell you how to grow stevia from seeds at home. This is especially true for residents of remote cities who find it difficult to purchase it in stores.
I want to warn you that the process of growing stevia is not easy. Honey grass is very whimsical and requires a lot of effort to grow successfully. Therefore, think ten times whether you need such labor costs. If yes, then read on with confidence - soon you will learn a lot of interesting and useful things.
Natural habitat of stevia
The homeland of the sweet herb is Paraguay. This country is in South America, so the main conditions for growing stevia are heat, sun and sand.
The optimum temperature is 23-28 degrees Celsius. Protection from strong winds and drafts is required.
Priming - sand or a mixture of sand with humus with a slightly acidic medium (pH 5.5-6). The ground should be loose and very light. Worst of all, stevia tolerates peat and calcareous soils.
Since there are no cold winters in South America, stevia cannot stand the cold. Therefore, it is grown either at home in a pot on a windowsill, or as an annual plant on the ground.
Preparing to grow stevia from seed
There are two main steps that, if done correctly, will ensure a good chance of grass germination.
- Soil preparation. To create a soil similar to the natural stevia soil, you need to mix sand, black soil and humus. You can buy them in garden centers, or you can get them yourself in the forest. To get humus, peel off the top layer of foliage. The soft layer to the hard soil layer is the humus. It is better to buy black soil and sand in the store. You need to mix the components - 2 parts of sand, one part of humus and 1% of black soil. By the way, on the Internet I saw ready-made soil mixtures specifically for growing honey grass.
- Stevia seeds... Seeds can be bought, and with long-term cultivation of grass, you can harvest it yourself as a crop and a nice bonus. When collecting, pay attention to the windage of the seeds. Raise the seed half a meter above the ground and drop it. If it falls quickly, the seed is suitable for growing. Slowly flying grain is a barren flower. They are unsuitable for further use.
How to grow stevia from seed at home
- The right time for seedlings is March - April. Even if you grow herbs at home, it is important to respect the seasons. If additional lighting is used, you can plant the stevia a month earlier.
- The growing container can be any. Beginners are advised not to start large boxes, but to limit themselves to a plastic cup.
- The thickness of the soil should be 10 cm.
- Pre-soak the seeds in warm water for 30 minutes. Then dry it a little.
- How to plant stevia seeds - Make many small depressions in the soil, 5 millimeters each, and place 1-2 grains there. Cover with soil. Spray a little water from the top with a spray bottle.
- The stevia plant is very fond of warmth and light. Therefore, cover the seedlings with a plastic or glass lid, and place in a very bright place. Ideally, it should be placed under a fluorescent lamp. But you can not put in direct sunlight.
- When the seedlings sprout, they need to thin out and remove the lid.
- Monitor soil moisture. It should be slightly damp. If you can, do bottom watering.
- When the grass reaches 5 cm, transplant it into seedling soil. It differs in the following - instead of one part of sand, you need to add one part of sod land. Plant the shoots at the depth of the first leaves.
- Once a week, you need to feed the stevia with mineral fertilizer.
- When the grass reaches 10-12 centimeters, cut off the top a little. Then it will start branching.
- The seedling period of stevia is 8 weeks.
- After that, you can plant it in a permanent habitat - in a flower pot. Don't forget to make the bottom drainage layer out of pebbles. Enough 3 centimeters. Next is the seedling soil.
Long-term stevia cultivation at home, care
If stevia is grown for a long time, it can be propagated using cuttings. It is much more effective and easier than using seeds. To do this, in an adult grass from 2 months old, cut off the shoot with leaves. The best time is May.
Plant him 4 centimeters deep. Water well and cover with a can or plastic wrap, creating a greenhouse. When warm and well-watered, the cuttings germinate within 10 days.
Remember that honey grass needs good light. But it can die from the direct rays of the sun. It also needs to be watered once or twice a week.
You can feed the plant with fertilizers twice a month.
How to grow stevia in the open field in the country

Prepare the seedlings as described above.
- It is necessary to plant stevia on the ground at an average daily temperature of 15-20 degrees. This is usually May or June.
- Dig up the soil and remove all weeds. Sweet grass is very difficult to tolerate being close to other plants.
- You need to plant seedlings to a depth of 6 centimeters. The distance between plants is about 30 centimeters. Add 300 grams of humus to each hole. After planting, pour a liter of warm water, and sprinkle with dry soil no higher than a third of the plant's height.
- Cover the grass planting area with agrofibre for 2 weeks.
When growing honey grass on the ground, it is important to remember about its cold intolerance. Therefore, for the winter, the roots will need to be dug up and stored until the next planting. This method of growing stevia is more effective than every year and from seeds, since every year the roots will grow stronger and give more and more yield.
Roots survive overwintering in a box with soil, at a temperature of 4 to 8 degrees, and at a humidity of about 80. Usually such conditions in a cellar or basement.
Harvesting
At the beginning of flowering, at 16 weeks after planting, the long-awaited harvest can already be harvested. This is usually the summer season. The stem of the stevia is cut at a height of 5 centimeters from the ground. The grass is tied in bunches and dried.
If the herb was grown for seed, the grains are harvested in September.
At the end of September, the roots can be dug up for storage if growing outdoors.
If you grow stevia at home, the leaves can be torn off all the time.
Drying the grass takes no more than 12 hours. And you can grind the leaves with a coffee grinder.
Read about the rules for using stevia and its sweetness in this article.
Stevia (Stevia rebaudiana) or nettle-leaved stevia, sweet biennial, honey grass is a herbaceous perennial shrub of the Asteraceae family (Asteraceae). South and Central America is considered her homeland.
Stevia was first discovered in Paraguay in 1887 by the South American naturalist Antonio Bertoni. After which she became famous in Europe. Stevia was brought to Russia by academician N.I. Vavilov from an expedition to Latin America.
Stevia is used in traditional medicine. Nowadays, this plant is widely known as a dietary supplement for weight loss and sugar substitute for diabetics. The plant contains rebaudiosides and stevioside, the sweetness of which is 300 times higher than the sugar from sugar beets and cane.
Stevia is a fairly affordable plant. It can be grown at home or on your backyard.
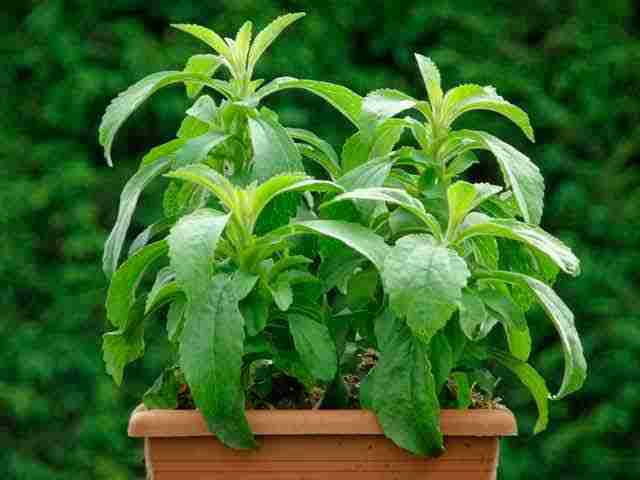
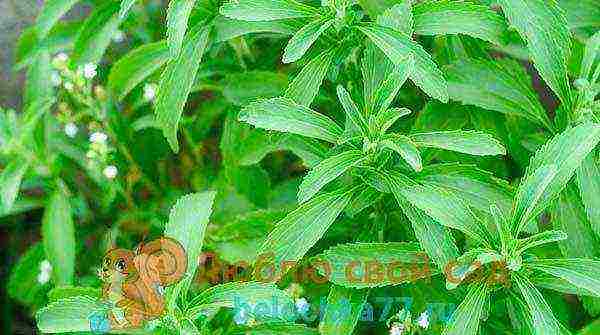
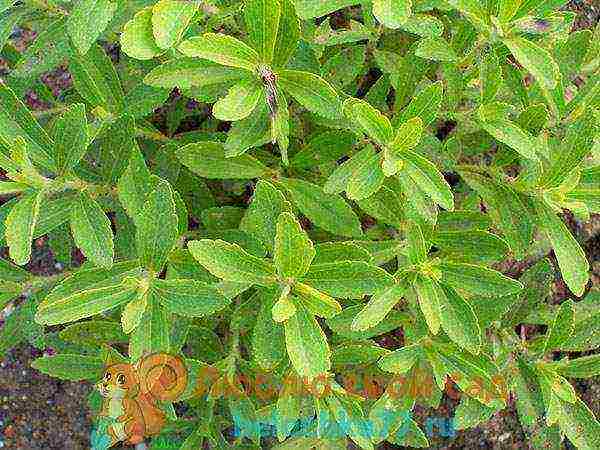
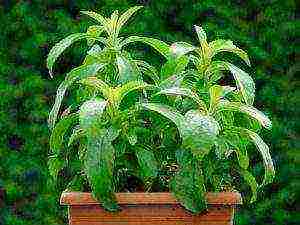
Description of stevia herb
This herbaceous, abundantly branching dwarf shrub reaches a height of 0.8-1 meters. The leaves are paired. Their length is 2-3 centimeters. The root system is developed. Stevia blooms with small white flowers.
There are more than 250 known species of stevia, and every year scientists discover new ones, but only Stevia rebaudiana has the sweetest taste.
Stevia contains over 100 phytochemicals. It is rich in stevioside, terpenes and flavonoids. The stevioside in the leaves is 10-18 times the sweetness of regular sugar.
1 leaf or 1/4 teaspoon of crushed leaves replaces 1 teaspoon of sugar.
Stevia also contains such sweet diterpene glycosides as: dulcoside A, rebaudioside A-E, steviolbioside.
It contains:
- trace elements, fiber, essential oils, polysaccharides, antioxidants (quercetin, rutin).
- minerals such as calcium, phosphorus, copper, zinc, magnesium, potassium, chromium and selenium.
- vitamins: groups B, A, C, E, P, D.
Growing from seeds at home
If you follow the rules for growing stevia, it is not difficult to grow it in home plants. In order for the plant to take root and turn into a bush that gives the required amount of leaves, one must not forget about some of the intricacies of growing honey grass.
Conditions for growing stevia
Stevia is a subtropical plant that grows at a temperature of + 24-25 degrees in a semi-humid climate. For the growth and lush flowering of honey grass requires 140 millimeters of rainfall per year. It grows on loamy and sandy loam, acidic, moist, but not flooded soils. Saline soils and lowlands are not suitable for growing stevia.
Seed preparation
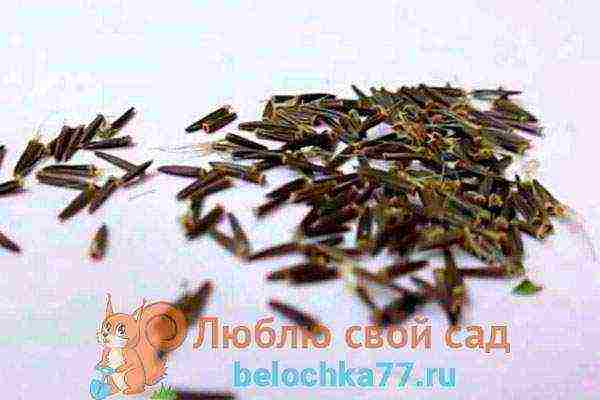
To test seeds for germination, they are dipped one by one into a glass of water. All seeds that have settled to the bottom are suitable for sowing, floating on the surface are thrown away.
The tested seeds are soaked in warm water. Then they are dried on paper, after which you can start sowing.
Soil preparation

For this, plastic containers or cups are used. A mixture of 2 parts of garden soil, 1 part of rotted humus and 1 part of sand is poured into the container. It is better not to use peat for planting stevia. The soil mixture is mixed, calcined in the oven at a temperature of +100 degrees, or spilled with a hot solution of potassium permanganate. After the water has drained off, you can start sowing.
Sowing
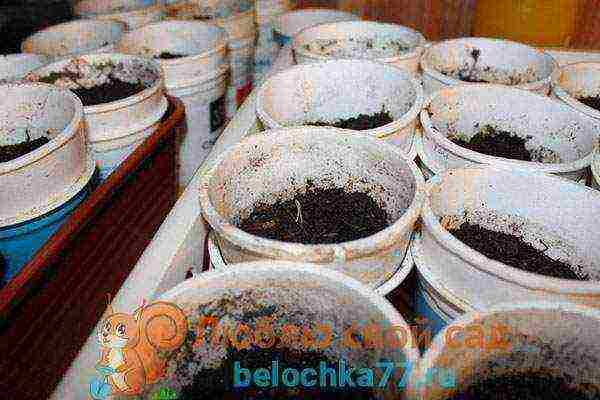
Sowing is carried out in late March - early April. Seeds are sown superficially or 2 seeds are laid out in each hole and lightly sprinkled with soil. The substrate is moistened with a spray bottle. The containers are covered with glass or foil and put away in a warm place.
Seedling care

A phytolamp is placed next to the container with the sown seeds, this contributes to the rapid germination of seeds. Condensation accumulated on glass or film is removed daily.
Seeds germinate very quickly, after 1-2 weeks the first shoots appear. After germination of seedlings, daylight hours should be at least 15 hours, and the air temperature should be + 24-25 degrees.
The soil with seedlings is moistened as it dries through the pallet. When 3-4 leaves appear on the seedlings, the plants are planted in peat pots.
The seedlings are ready for transplanting in 8-10 weeks. For home cultivation, stevia is transplanted into a large pot, the volume of which is 2 liters. The bottom is covered with a two-centimeter drainage layer (fine gravel, pebbles, vermiculite).
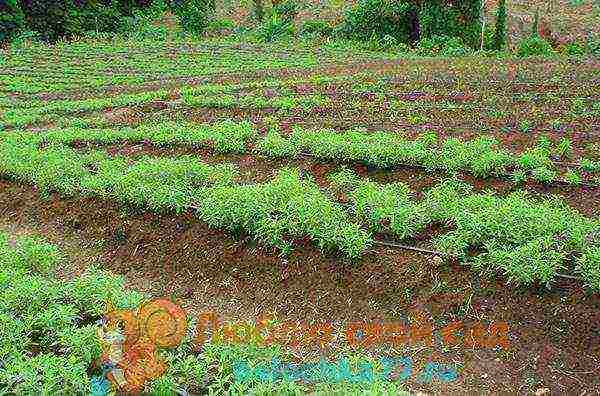
Most of the time, stevia is grown in the open field, so the grown seedlings are transplanted to the beds at the end of May.
Landing in open ground

It is better to replant seedlings in the evening or in cloudy weather. Planting is carried out in May or June, after the spring frosts have passed and the air warms up to +15 degrees at night.
- The landing site should be bright, protected from drafts and wind.
- The southern or western slope with light, loamy or sandy loamy soil with neutral acidity is best suited.
- In clay areas, river sand and humus are added, and in sandy areas, clay and humus are introduced.
For the convenience of transplanting into open ground, the plants remain in peat pots. Planting is done at a distance of 40 centimeters from each other and 50 centimeters between rows.
Each bush is deepened by 10-15 centimeters together with a pot and sprinkled with earth. After planting, each plant is watered abundantly and covered with a cut plastic bottle or film, non-woven fabric for a week.
Planting stevia in open ground: video
Summer care
Stevia care consists of maintaining moisture, loosening, weeding, feeding and pruning.
Watering should be regular. The soil is moistened as it dries. For better preservation of moisture, the soil around the plants is covered with a layer of organic mulch (sawdust, straw, needles). For watering, you need to take settled or boiled water. Weeding and loosening of the soil (in the absence of mulch) is carried out after each watering.
As a top dressing of stevia, complex mineral and organic fertilizers are used (mullein infusion or rotted humus). Top dressing is alternated and carried out every 2 weeks.
The only ailment that can harm stevia is the black leg.It infects plants at the seedling stage. To avoid disease, the soil must be disinfected during planting, in addition, drainage must not be forgotten. Watering should be frequent but moderate.
Grown plants need pruning. When the planted plant reaches 20 centimeters in height (about 4 months after sowing the seeds), the central stem is trimmed in the middle of the internode at a height of 5 centimeters from the top. Short shoots should be shortened by 1/3 of the length, and long ones by 2 times. At least 3 leaves should remain on the stems below. Places of cuts are lubricated with garden varnish.
The plants should rest after each pruning. They are cleaned in a dark place, and when grown in the garden, they are covered with a dark bag. There she stands for 3-4 days, then the plant is opened for 2-4 hours, and after 1-1.5 weeks it is returned to the light. If this is not done, young stevia leaves will burn in bright light.
Further pruning is done every six months. This procedure promotes tillering of the plant and the growth of new leaves.
Reproduction

Stevia is propagated by seeds and cuttings.
The properties of the mother plant when growing stevia from seeds may not be transferred, which affects the sweetness of the leaves. To preserve the characteristics of stevia, you first need to grow seedlings. We must not forget to check the seeds for germination, otherwise a smaller part of them will germinate during sowing. In addition, the temperature and humidity of the air must be observed.
The most reliable way to propagate honey grass is considered to be plant cuttings.
Every 3-4 years, the bushes are renewed by pruning cuttings. Cuttings 5-15 centimeters long are cut from the tops of the shoots. A few upper leaves should remain on them.
For planting, sod land, sand, rotted humus and pots or boxes are taken. Cuttings are planted in the ground and covered with film or glass.
Also, cut cuttings can be placed in a container with sweetened water (you need to change it every 3 days) and cover with a dark film.
At an air temperature of + 24-25 degrees and high humidity, rooting occurs in 3-3.5 weeks. Rooted seedlings are transplanted into open ground, at night air temperatures not lower than +15 degrees. Stevia also grows well at home as a potted houseplant. In the northern regions, it can be grown at home.
Wintering (at home)
In September, the stevia should be trimmed, dug up and placed in a box of wet sand. The bushes are sprinkled on top with a layer of sand and sent to storage in the basement. Also, honey grass can be planted in a pot and placed in a heated loggia, on a balcony, windowsill or in a greenhouse.
The west or east side is best for her. In winter, it must be illuminated with a phytolamp.
Benefits of stevia
Compared to other sugar substitutes, stevia is the safest. It is less toxic and tastes good. It has no side effects and is well tolerated. In addition, this plant can be grown independently at home or in the garden.
Stevia is useful for reduced immunity, blood diseases, diseases of the female and male genitalia, thyroid dysfunction, obesity of alimentary genesis, oral diseases, gastrointestinal diseases, liver and biliary tract diseases, diabetes mellitus, hypertension, atherosclerosis, pancreatitis, dyspancreatism, dysfunction nervous system, skin diseases, including children's diathesis.
Stevia has antiviral, antifungal, antimicrobial, anti-yeast, antibacterial, cardiotonic, hypotensive, hypoglycemic, vasodilator, diuretic, wound healing and tonic effect.
It normalizes high blood pressure, lowers blood sugar, reduces cravings for fatty foods, and helps to lose weight.
Drinks with stevia normalize the digestive tract, improve immunity, help with diathesis, allergic skin rashes.
- When added to a mouthwash, stevia can help improve oral health.
- The antibacterial properties of the plant are used to treat skin diseases, small wounds.
- Stevia infusion helps to strengthen hair, smooth out wrinkles, and gives freshness to the face.
Stevia has practically no contraindications. In large quantities, it cannot be used by people suffering from diabetes mellitus, people with thyroid dysfunction and young children.
How to prepare stevia for the winter
Leaves are harvested at the beginning of flowering (3-4 months after sowing). Leaves curling inward are the first to be removed. The stems are cut at a distance of 5-6 centimeters from the ground. The harvested leaves can be used fresh (refrigerated) or dried in a glass jar or paper bag. Leaves are dried in a ventilated, dark place or in an electric dryer.
Harvested leaves are stored for up to 2 years. You can make a powder from them by grinding them in a mortar and store it in a glass jar in a dark place.
Stevia recipes
Stevia is a very useful herb with a minimum of contraindications. It is widely used in cooking, in the preparation of various dishes and drinks. It not only replaces sugar, but also has a beneficial effect on the body for various diseases.
Healing infusion
To prepare the infusion, a thermos is taken, 20 grams of dry leaves are poured and poured with a glass of boiling water. It is insisted for 12 hours. The resulting infusion is poured into a sterilized container. The remaining leaves are poured over again with half a glass of boiling water. Insisted for 8 hours. The infusions are combined and used instead of sugar. It is stored in the refrigerator for 7 days.
The infusion is used as a food additive. It helps with obesity, diseases of the gastrointestinal tract, liver, kidneys, thyroid gland. It is also effective in the form of compresses for wounds, rinsing for gingivitis, stomatitis and sore throat.
A soaked towel in a hot infusion is used as a steam mask and helps to get rid of wrinkles, gives freshness to the face. The infusion is rubbed into the scalp to strengthen the hair.
Syrup
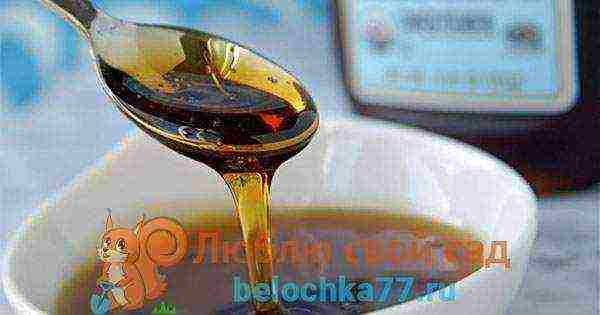
The prepared infusion is boiled down to a syrup. It is added to many dishes as a substitute for sugar. The syrup is an excellent antiseptic. Stored in the refrigerator for 1 year.
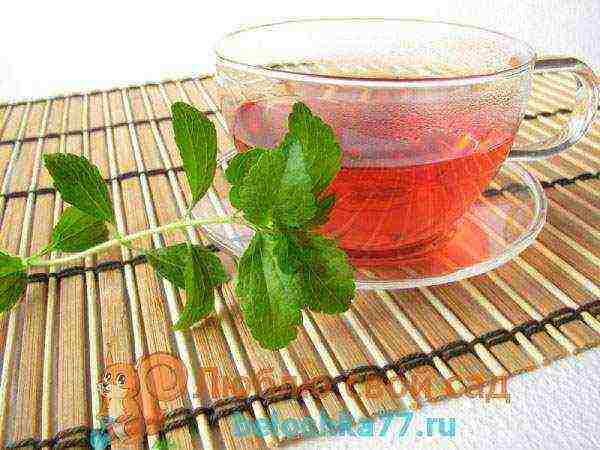
Infusion of stevia and lemon balm
6 grams of stevia powder and 20 grams of lemon balm, poured with 200 milliliters of boiling water and infused for half an hour. The strained infusion is taken in a tablespoon 5 times a day in case of heart rhythm disturbance.
Infusion of stevia and St. John's wort
10 grams of stevia powder and 30 grams of St. John's wort are poured with 200 milliliters of boiling water and infused for 2 hours. The filtered infusion is divided into 3 doses and is taken 3 times a day 20 minutes before meals for atherosclerosis, diabetes mellitus.
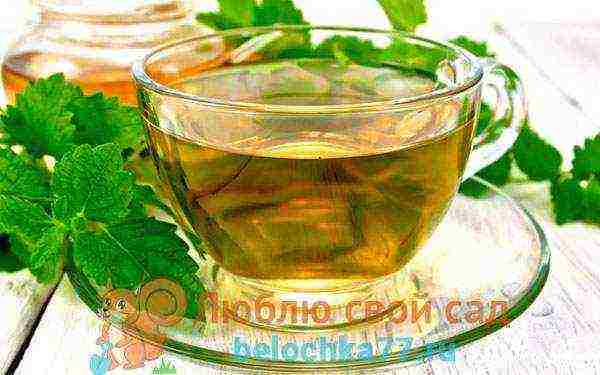
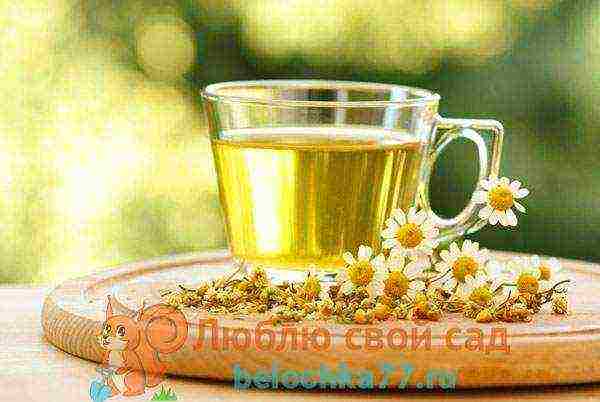
Tea
Pour a teaspoon of dry leaves and 1/2 teaspoon of green tea with 200 milliliters of boiling water and leave for 5 minutes. Strain, add mint leaf and lemon slice. This tea strengthens the immune system, has a tonic effect.
Infusion of stevia and chamomile
1 teaspoon of stevia and 1 tablespoon of chamomile is poured with 1 cup of boiling water. It cools down to 35 degrees, is filtered and used as a syringe for thrush and vaginal dysbiosis. You need to douche every day, in the morning for 10 days.
The consumption of sugar and meat products during this period should be reduced to a minimum. For the best effect, you can additionally drink stevia tea.
Stevia extract
20 grams of dry stevia leaves are poured with 200 milliliters of alcohol and left for 24 hours in a warm place. It is filtered and used as a general tonic.
Sores, boils, burns, injured areas should be sprinkled with dry stevia powder or chopped fresh leaves for 30 minutes, then rinsed with warm water.
Lemon balm, mint, or lemon can be added to stevia drinks to eliminate the herbaceous aftertaste.
Useful properties of stevia: video
Stevia is grown at home and allows you to always have a natural sweetener on hand. A huge number of tasty and healthy dishes and drinks can be prepared from this plant. Stevia is recognized as a safe sugar substitute in many countries around the world. This plant has a positive effect on the body and helps to fight many diseases.
Growing stevia at home - detailed instructions
Stevia or honey herb. From her and breathes magic and mystery.
However, this is a completely natural and far from rare inhabitant of many garden plots and even balconies, pots or flower beds.
She is not only able to decorate the garden with her presence, but also has a lot of useful properties.
Growing stevia at home and outdoors
What is Stevia
Stevia is a whole genus of perennials from the Astrov family, which unites more than 250 species of all kinds of shrubs and herbs. Their homeland is the plains and mountainous regions of America.
The most popular type of stevia is honey, which is cultivated in summer cottages. This plant was first studied by the botanist Stevus in the 16th century, after which it was named.
The fact that stevia honey is used as food by the aborigines was established at one time by the scientist Antonio Bertoni during his expedition to Paraguay.
He noticed that the Indians called this plant "Guarani" and prepared delicious and sweet drinks from it.
Stevia is a natural sugar substitute
The fact is that stevia is a natural substitute for sugar: a couple of leaves of the herb are enough to sweeten a cup of tea.
Its leaves contain a substance that in the twentieth century was called "stevioside" - it is hundreds of times sweeter than ordinary sugar.
By the way, stevioside is recognized as the sweetest natural product in the whole world.
Honey stevia is a semi-shrub up to 80 cm high, abundantly branching, with small paired leaves and a developed root system.
It blooms with small white flowers. It is now widely used in food preparation in Asian countries and South America.
The most popular type of stevia is honey stevia
Growing conditions
Stevia respects warmth and sunlight, so it should grow in a well-lit place where there is protection from drafts and gusts of wind, and the ideal air temperature for it should be at least 22 degrees. It is also worth remembering that you cannot plant stevia in lowlands, where water can accumulate - its excess for the plant is destructive.
Stevia is relatively not picky about the soil - it can grow everywhere, as long as the soil is not too salty. The ideal soil for her is light sandy loam and sandy substrates with the addition of organic fertilizers.
Stevia respects warmth and sunshine
Stevia respects compost and humus, but you should be careful with peat, as it grows poorly on it.
Legumes are good predecessors for her. The soil pH should be in the range of 5.5-6. If only clay soil is present in the garden, then sod, humus and coarse sand should be added to it so that it becomes loose and light - such as Stevia loves.
Growing stevia
Stevia seeds
Growing stevia from seeds is not an easy task. This is a very moody plant. Most seeds end up unsuitable for growing.
The seedling period for stevia lasts about 2 months, so they start sowing seeds in April.
- Prepare boxes and soil for seeding.
Preparing the soil and container for planting
- Make small dimples on the surface of the ground and place 2-3 seeds in each.
Planting seeds
- Lightly sprinkle the seed dimples with soil - the layer should be no more than 3 cm.
Sprinkle with earth
- Moisten the soil surface with water using a spray bottle and cover with foil or glass.
How to create a greenhouse effect
- Put the box with future seedlings under a UV lamp. The first days do not turn it off, even at night.
- Provide an air temperature of at least 25 degrees in the room with boxes.
- The first shoots will appear in 1-2 weeks. After that, immediately remove the cover from the seedlings.
- After 3 weeks, reduce the operating time of the UV lamp to 15 hours per day.
- When the seedlings have strong leaves, it is thinned out, removing frail plants.
The first sprouts of stevia
Stevia can also be grown from cuttings. This method is much simpler than the previous one, but it will require a mother plant of at least 2 months. Cut off the cuttings-tops of the shoots with a length of about 10 cm should be in May-June.
Before rooting, the lower leaves are removed from it, then they are dug into the ground to a depth of 6 cm, sprayed with water and covered with a jar or film. At first, the cutting and the soil around it are sprayed several times a day with a spray bottle.
Rooting takes place within 10 days.
Growing stevia from seeds
- Growing stevia seedlings
Seedling care
While the plants are very small, they are watered very carefully, while controlling the humidity - the soil should not be soggy.
Ideally, if you manage to organize bottom watering, that is, put the box with seedlings in the water for a while.
There should be no drafts on the windowsill where the seedlings are standing, and it is also important to remove the rest of the houseplants - stevia does not like neighbors.
When small stevia grow up and stretch up to 12 cm, their tops are shortened by 3-4 cm
When small stevia grow up and stretch up to 12 cm, their tops are shortened by 3-4 cm - thanks to this procedure, the plants will begin to branch well.
If you plan to grow stevia in an apartment, then at the end of the seedling period, the bushes need to be transplanted into separate pots with a diameter of at least 10 cm.
Growing stevia in pots
Transplant to open ground
Moving stevia to the street is one of the most crucial moments. Wrong actions can ruin all your work. Before the plants finally move to the street, it is important to harden them.
To do this, the seedlings are first dived into separate pots and then put them outside for several hours every day. The weather at this time should be warm and sunny. Each time, young stevia stays on the street longer and longer.
Planting stevia in the ground is done when the risk of frost is minimal.
Landing in the ground is carried out when the risk of frost is minimal, and the air temperature during the day is kept at least 18 degrees. The procedure is best done in the evening.
- We dig the site for stevia well, remove the weeds.
Digging up a site for stevia
- We dig holes up to 8 cm deep at a distance of at least 40 cm from each other.
- We apply organic fertilizers to the pits (about 0.5 kg of humus).
- We take out the seedling from the pot along with a lump of earth and lower it into the hole, sprinkle it with soil and tamp it.
Planting stevia outdoors
- Water or spray the soil a little from a spray bottle.
Transplanting stevia into open ground
For the first time, until the plants take root, they are covered with a film. Since the roots of stevia are located close to the surface, the soil around the plant is mulched so that they do not dry out.
- How to properly plant stevia in the ground
Stevia care
Stevia is a lady with character. So that she does not die, it is important to provide her with good growing conditions.
How to grow stevia from seeds and prepare an extract, syrup from it
Today's article is dedicated to all those who would like to see a healthy and sweet plant at home or in the country.
It is quite possible to grow stevia at home, it will take a little patience and accuracy, which will help you get your own natural sweetener at home.
Also, from this herb, you can prepare many healing and irreplaceable decoctions and syrups, the recipes for which I will present at the end of the article.
How to Purchase Stevia Seeds
Stevia is an exotic and thermophilic plant, but you should not pay attention to prejudices, because it will get along well in the Russian climate.
In the northern countries, where the plant comes from, the planting of annual stevia is increasingly practiced. You can order this sweet herb only in proven online stores.
The price of one packet of stevia seeds is about 50 rubles.
It is almost impossible to immediately grow stevia in an open area due to its low frost resistance. At the first cold weather, this tropical plant will die. To prevent such situations, it must be grown in the house, and later transferred with grown seedlings to open ground.
How to grow stevia at home
Stevia seedlings are very popular with gardeners; this planting method is considered more reliable. However, growing this plant with seeds is also quite realistic, you just need to know some of its features.
Stevia seed selection
After purchasing seeds, first of all, it is worth checking for empty seeds in the package. The fact is that in a temperate climate, 70% of the seeds are empty and completely unsuitable for growing.
It is quite simple to check if the seed is full: throw each one at a distance of 50-60 cm from the floor and watch how they fall - full seeds will fall faster, empty ones - smoothly dive to the ground.
The first ones should be selected for planting.
Choosing a land for planting
Stevia is a capricious plant, so it may not like ordinary garden soil. In order to create ideal conditions for germination, add humus or compost to the black soil in a ratio of 3: 1.
If you think the soil is too clayey, add some sand. You can also use purchased soil - sweet grass will willingly grow in it.
Ideal stevia soil formulations:
- 2 parts of sand + 1 part of 2-3-year-old humus;
- Humus + land from coniferous forest + sand (1: 1: 1);
- Black earth + sand (5: 1);
Things to Remember Before Planting Stevia
- The air temperature for home cultivation should be at least 22 degrees Celsius, ideally 25 ° C;
- You need to find a place with good lighting, the plant is very fond of the sun's rays;
- It is worth sowing sweet leafweed around the end of January - beginning of February: in this case, we sow seeds in a container, covering it with polyethylene, and when the plant begins to sprout first shoots, you can begin to harden the plants.
How to properly grow stevia seedlings from seeds
Preparing seeds for planting
- Soak the selected stevia seeds for a short while in warm water and dry thoroughly, spread on cheesecloth or paper.
- After the seeds have dried, distribute them evenly over the surface of the prepared soil.
Attention! Do not press the seeds into the ground, just scatter them carefully over the soil surface.
After that, we remove the container with seeds under glass, jar or film, thereby creating a greenhouse effect. With a good combination of circumstances, the first shoots will appear in 5-7 days.
Care of young stevia seedlings
After the first millimeters of melt appear on the surface of the earth, it is necessary to start tempering them: remove the glass and remove the container or any other container in a warm, dry and windless place.
Periodically spray young shoots with water at room temperature.
In the phase of 2-3 true leaves, the seedlings can be dived into the greenhouse or left to grow in the house. In the latter option, a wide pot is required for planting seedlings (the stevia root system grows in breadth).
Secrets of seedling care
Stevia is a capricious plant in terms of care. While the seeds have just sprouted, and before planting in open ground, it is still far away, it is necessary to keep the plants in the right conditions.
- in a mini-greenhouse: when the stevia seedlings have spiked, they should be covered with foil or glass, maintaining constant humidity and a temperature of 22-25 degrees Celsius;
- Stevia is also whimsical in watering: the plant requires not dry, but not waterlogged soil. To do this, spray the sprouts with water several times a day, constantly monitoring the state of the earth (stevia can disappear in the mud);
- We regularly "feed" the stevia: for this we spray the plant once every two weeks, alternating mineral and organic fertilizers
How to plant stevia outdoors
The best time to transplant stevia into open ground is late March - early April (the plant grows ideally with an 8 hour daylight).
When Stevia reaches 20 cm in height, the plant can be planted outdoors in the country. Before planting, you need to carry out the formation of seedlings. To do this, you will need a few secrets.
How to prune stevia
We cut (form) the plant:
- It is better to choose a warm time for pruning: the end of May-beginning of June will be the most suitable.
- We cut off only the tops of the plants.
- Pruning is carried out when the seedlings have lived in the open air for several months, so we will allow new, lateral leaves to appear, which can later be used for rooting.
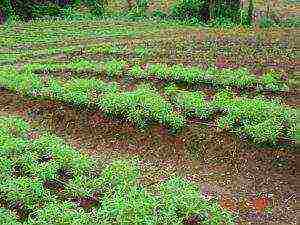
How to grow stevia in the open field in the country
After completing all the previous points, and making sure that the stevia is quite healthy and will survive in the garden soil, it can be planted.
- We choose a day with cloudy weather and high humidity for planting.
- For stevia, select a separate area with direct sunlight and pre-season the soil with compost or sand.
- We plant seedlings: we deepen them by about 8 cm.
- Water the soil with warm water.
- We huddle the plant by about 13 stems.
- Cover the plant with foil for about a week.
Caring for stevia is considered easy: we regularly loosen the soil and "feed" the plant every 10-12 days.
Attention! With the arrival of winter, when the temperature is already slightly below +10 ° C, the stevia must be removed to the greenhouse or transferred home until warming.
How to root stevia cuttings
Do not rush to throw away unnecessary cuttings after pruning young plants - in the future, they will facilitate the process of stevia propagation.
To root stevia cuttings, you must:
- We put the cuttings in a jar with slightly sweetened water;
- Cover the jar with an opaque, preferably black cloth;
- We put the cardboard stand on the jar so that the leaves do not sink into the water;
- We change the water every 3 days, and spray the cuttings with fertilizer;
- After two weeks, we transplant the cuttings into the soil.
After planting the cuttings, cover them with foil for at least a week. We take care of stevia cuttings in the same way as for seedlings obtained from seeds: we regularly spray with fertilizer and try not to overmoisten or dry out the soil (Stevia may simply die).
These were the general rules for growing any kind of stevia. As for honey grass, this type is distinguished by the ability to prepare it.
How to prepare stevia herb at home
It is necessary to harvest honey stevia at the beginning and at the end of summer.
For this:
- Cut off the stem of honey stevia 15 cm from the ground;
- We break off the leaves;
- We dry them in any convenient way: in the oven or in the sun (usually it takes 6-9 hours to dry);
- Grind (optional) and remove before use.
How to make stevia (extract, syrup)
There are not so many ways to prepare decoctions and syrups from honey stevia - this plant appeared in our country relatively recently. Here are some of the most popular stevia recipes.
Tea
Most often, sweet herb is consumed with tea.
- To do this, add the crushed leaves of the plant to the tea leaves in a 1: 1 ratio, if desired, you can add a little mint or cinnamon.
Stevia extract with vodka
- To prepare the extract, you must mix whole or crushed stevia leaves with vodka in a ratio of 1:10.
- Let it brew for 24 hours and strain through a sieve.
- Add water to the finished extract to taste.
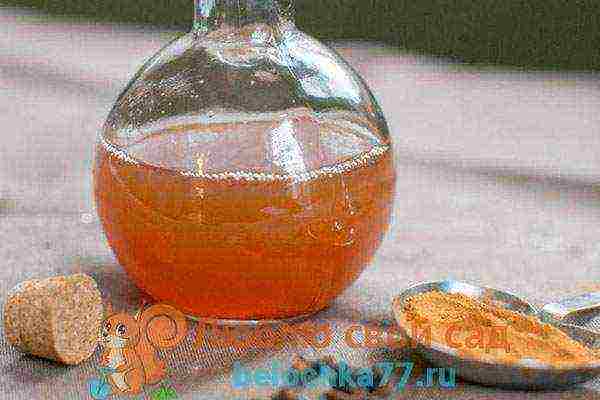
Stevia syrup
To prepare the syrup, an infusion is needed. To prepare it you need:
- Pour 20 g of honey herb into a pre-prepared gauze bag, after which we insist it on boiling water in a thermos for 12 hours.
- We drain the infusion.
- Next, we re-insist the leaves in half a glass of boiling water for 8 hours.
- Let's combine both liquids.
Bring the finished infusion to thickening in a water bath. After a drop of such syrup does not spread over the plate, you can remove the liquid from the heat.
The prepared liquid enhances immunity and serves as an antibacterial agent. The resulting syrup is 100 times sweeter than sugar. Stevia syrup should be consumed with tea or simply with water (4-5 drops per glass of liquid).
Now you are convinced that growing such a capricious plant like stevia is not difficult at all! It is enough just to know some of the features of its cultivation. But the result will pay off a hundredfold: you will get an excellent replacement for ordinary lemon balm or mint, as well as an excellent sugar substitute.
Remember that Stevia will always come in handy: in the spring it will help get rid of vitamin deficiency, in the summer it will have an antibacterial effect, and in the winter it will not let you get sick and will give you pleasant memories of hot, aromatic tea.
Stevia - a guide to growing at home from seed
Stevia - a guide to growing at home from seed5 (100%) sold 1
Stevia is one of the best natural sugar substitutes.
No wonder 80% of the volume of its consumption falls on the country of long-livers - Japan. Today I will tell you how to grow stevia from seeds at home.
This is especially true for residents of remote cities who find it difficult to purchase it in stores.
I want to warn you that the process of growing stevia is not easy. Honey grass is very whimsical and requires a lot of effort to grow successfully.
Therefore, think ten times whether you need such labor costs.
If yes, then read on with confidence - soon you will learn a lot of interesting and useful things.
Natural habitat of stevia
The homeland of the sweet herb is Paraguay. This country is in South America, so the main conditions for growing stevia are heat, sun and sand.
The optimum temperature is 23-28 degrees Celsius. Protection from strong winds and drafts is required.
Priming - sand or a mixture of sand with humus with a slightly acidic medium (pH 5.5-6). The ground should be loose and very light. Worst of all, stevia tolerates peat and calcareous soils.
Since there are no cold winters in South America, stevia cannot stand the cold. Therefore, it is grown either at home in a pot on a windowsill, or as an annual plant on the ground.
Preparing to grow stevia from seed
There are two main steps that, if done correctly, will ensure a good chance of grass germination.
- Soil preparation. To create a soil similar to the natural stevia soil, you need to mix sand, black soil and humus. You can buy them in garden centers, or you can get them yourself in the forest. To get humus, peel off the top layer of foliage. The soft layer to the hard soil layer is the humus. It is better to buy black soil and sand in the store. You need to mix the components - 2 parts of sand, one part of humus and 1% of black soil. By the way, on the Internet I saw ready-made soil mixtures specifically for growing honey grass.
- Stevia seeds... Seeds can be bought, and with long-term cultivation of grass, you can harvest it yourself as a crop and a nice bonus. When collecting, pay attention to the windage of the seeds. Raise the seed half a meter above the ground and drop it. If it falls quickly, the seed is suitable for growing. Slowly flying grain is a barren flower. They are unsuitable for further use.
How to grow stevia from seed at home
- The right time for seedlings is March - April.Even if you grow herbs at home, it is important to respect the seasons. If additional lighting is used, you can plant the stevia a month earlier.
- The growing container can be any. Beginners are advised not to start large boxes, but to limit themselves to a plastic cup.
- The thickness of the soil should be 10 cm.
- Pre-soak the seeds in warm water for 30 minutes. Then dry it a little.
- How to plant stevia seeds - make many small depressions in the soil, 5 millimeters each, and place 1-2 grains there. Cover with soil. Spray a little water on top from a spray bottle.
- The stevia plant is very fond of warmth and light. Therefore, cover the seedlings with a plastic or glass lid, and put them in a very bright place. Ideally, it should be placed under a fluorescent lamp. But you can not put in direct sunlight.
- When the seedlings sprout, they need to thin out and remove the lid.
- Monitor soil moisture. It should be slightly damp. If you can, do bottom watering.
- When the grass reaches 5 cm, transplant it into seedling soil. It differs in the following - instead of one part of sand, you need to add one part of sod land. Plant the shoots at the depth of the first leaves.
- Once a week, you need to feed the stevia with mineral fertilizer.
- When the grass reaches 10-12 centimeters, cut off the top a little. Then it will start branching.
- The seedling period of stevia is 8 weeks.
- After that, you can plant it in a permanent habitat - in a flower pot. Don't forget to make the bottom drainage layer out of pebbles. Enough 3 centimeters. Next is the seedling soil.
Long-term stevia cultivation at home, care
If stevia is grown for a long time, it can be propagated using cuttings. It is much more effective and easier than using seeds. To do this, in an adult grass from 2 months old, cut off the shoot with leaves. The best time is May.
Plant him 4 centimeters deep. Water well and cover with a can or plastic wrap, creating a greenhouse. When warm and well-watered, the cuttings germinate within 10 days.
Remember that honey grass needs good light. But it can die from the direct rays of the sun. It also needs to be watered once or twice a week.
You can feed the plant with fertilizers twice a month.
How to grow stevia in the open field in the country
Prepare the seedlings as described above.
- It is necessary to plant stevia on the ground at an average daily temperature of 15-20 degrees. This is usually May or June.
- Dig up the soil and remove all weeds. Sweet grass is very difficult to tolerate being close to other plants.
- You need to plant seedlings to a depth of 6 centimeters. The distance between plants is about 30 centimeters. Add 300 grams of humus to each hole. After planting, pour a liter of warm water, and sprinkle with dry soil no higher than a third of the plant's height.
- Cover the grass planting site with agrofibre for 2 weeks.
When growing honey grass on the ground, it is important to remember about its cold intolerance.
Therefore, for the winter, the roots will need to be dug up and stored until the next planting.
This method of growing stevia is more effective than every year and from seeds, since every year the roots will get stronger and give more and more yield.
Roots survive overwintering in a box with soil, at a temperature of 4 to 8 degrees, and at a humidity of about 80. Usually such conditions in the cellar or basement.
Harvesting
At the beginning of flowering, at 16 weeks after planting, you can already harvest the long-awaited harvest. This is usually the summer season. The stem of the stevia is cut at a height of 5 centimeters from the ground. The grass is tied in bunches and dried.
If the herb was grown for seed, the grains are harvested in September.
At the end of September, the roots can be dug up for storage if growing outdoors.
If you grow stevia at home, the leaves can be torn off all the time.
Drying the grass takes no more than 12 hours. And you can grind the leaves using a coffee grinder.
Read about the rules for using stevia and its sweetness in this article.
Growing stevia at home and in the country: planting and care
Good day! The topic of sweets and sugar substitutes is one of the most popular among people with diabetes and overweight.
There is a lot of conflicting information on this subject, but the undisputed leaders among sugar substitutes are natural ones.
Today we will again talk about stevia, but already about growing from seeds at home, how to purchase seeds and grow it in the country and at home, planting and care, and in the end we will learn how to make syrup.
I hope the material will be useful not only for avid gardeners, but also for everyone who is engaged in home floriculture. Try growing your own stevia and we'll help you!
Growing stevia honey at home
Today's article is dedicated to all those who prefer to see not only beautiful, but also useful plants at home or in the country. Is it possible to grow stevia at home so that this famous inhabitant of the southern latitudes delights us with its juicy sweet leaves?
Of course, many gardeners have long cultivated this herb, known for its taste and healing properties, on their windowsills and summer cottages.
How to Purchase Stevia Seeds
Since we will grow stevia directly from seeds, it is worth finding out in advance where to get them.
This plant belongs to the family of Asteraceae or Asteraceae, and, despite the prevailing opinion that only a small percentage of seeds germinate, stevia is cultivated very successfully in northern countries, but more often as an annual plant.
Small stevia seeds - only 0.5 mm wide and 4 mm long - are easy to purchase online and receive by mail.
On specialized sites, you can find different packaging and, accordingly, you can find a wide range of prices for this plant. The minimum number of seeds in one package is 7-10 pieces with a guarantee of a high percentage of germination.
Today, the questions of where and how to buy stevia seeds are no longer there - we order an exotic plant and receive it by mail!
Stevia herb: plant hardiness
But to grow stevia outdoors, there are a few important things to keep in mind.
The frost resistance of this herb is considered low and not suitable for our latitudes, which is why growing it in the country is fraught with certain difficulties.
How to sow stevia seeds
Most often, it is recommended to purchase already grown stevia seedlings, especially if there is no experience in growing plants from seeds - this method is considered more reliable.
But if you want to try your hand, then it's time to find out what you should pay special attention to when planting this herb with seeds.
Stevia seed selection
To sow stevia with the maximum percentage of germination, we select the material using the windage method, that is, we simply release each seed and watch how it falls.
- If it is fast and straight down, the seed is good.
- If it spins and turns over, it is better not to plant it, it will most likely not germinate.
What land to use for sowing stevia
The soil for the successful cultivation of stevia should consist of black soil and humus in a ratio of 3: 1.
- If it seems that the soil is too clayey, add sand.
- Loam with compost is ideal.
- You can also purchase ready-made soil, since the surface roots of stevia are very sensitive to various foreign inclusions.
Before planting (we produce it in mid-March), moisten the seeds with warm water and lay them out on a clean cloth or paper until they are completely dry.
Due to their small size, it is not worth covering, that is, covering the seeds after planting with soil. Simply put the stevia on the surface of wet soil, sprinkle with water and cover with plastic wrap, a cut from a plastic bottle or a glass jar of a suitable diameter.
From time to time we moisten the soil by spraying and keep it in a well-lit place in a warm place - the temperature should not fall below 22-25 ° С. In such favorable conditions, seeds germinate within 5-7 days.
We finish sowing stevia no later than mid-May.
Seedling honey grass
When the first shoots appear under the film or can, we pay attention so that weeds are not among them. It will be easy to distinguish them from stevia seedlings: the latter grow very slowly and are very small in size.
If all the seeds have sprung up and it seems that they grow too often, we dive them through one. We transplant young plants into separate dishes with the same soil composition so that they take root well.
If we do not plan to grow stevia in the open field, we plant the sprouts immediately in a wide, shallow pot, since the root system of this grass, as we remember, is superficial and grows in breadth.
The resulting seedlings are best dived at the age of 2 months either in a greenhouse or in pots - it is more convenient for many to monitor the microclimate of the plant.
Just remember that in this case, the pot must be prepared in advance and designed for an adult plant.
We also cover the planted seedlings with a jar or plastic bottle to create an optimal level of heat and humidity.
When to plant seedlings of plants in open ground
Landing in open ground is allowed no earlier than mid or even the end of June, so that the soil temperature is 10-15 ° C, no less.
In addition, two weeks before the intended planting, stevia seedlings must be hardened. To do this, we open the one and a half-month-old plants and expose them to the open air, first for a couple of hours, gradually increasing the "airing" time.
After the seedlings get used to being outside the shelter throughout the day, we transplant them into open ground. With this preparation, it will not be so difficult to grow stevia in the country, despite its low frost resistance.
Transplant of stevia from open ground
At the end of August and the beginning of September, the plants will need to be dug up and transplanted into a pot and taken to a greenhouse or brought into the house, since the minimum temperature at which the plant does not die is 4 ° C of heat.
If there are plans to preserve live grass during the winter and return it to open ground at the beginning of summer, you should not risk it - we remove the stevia from drafts and frosts much earlier.
We monitor the PH indicator: it should be neutral. If the soil is too acidic or, conversely, alkaline, we continue to keep stevia in pots even outdoors, without planting it in the ground.
Outdoor Stevia Seedling Care
Stevia seedlings are very whimsical and capricious in home care. She does not like dry soil, but does not tolerate waterlogging, her roots immediately begin to rot.
While the seedlings are quite small, we have just dived them and we are still far from planting in open ground, we arrange a mini-greenhouse for them. It should be humid and very warm under glass or film. If it is not possible to determine the temperature inside, it is better to use a special thermometer.
- Optimum for the successful cultivation of honey stevia are 25-26 ° C.
We keep the pots on the sunniest and warmest windowsills, regularly, 2-3 times a day, spraying the soil with warm water. Watering should be done only pointwise and occasionally, so as not to overmoisten the seedlings.
Top dressing of stevia honey
After a month, the stevia can be transferred to the greenhouse. There we try to keep young plants in the same microclimate - warm and humid. At the same time, it's time to start feeding.
To grow stevia in a greenhouse or at home, we spray the plants once every two weeks, alternating organic and mineral fertilizers. We breed them according to the instructions.
Drop off location
While young plants are growing stronger, we prepare a place on the site, if there is a desire and opportunity to grow honey stevia in the open field.
The place should be selected taking into account all the needs of the plant - in no case low-lying, so that moisture does not accumulate, it should be well lit throughout the day. There should be no other plants nearby, we fix a separate area for the stevia.
Pruning adult plants
When the shoots in the greenhouse or at home on the windowsill reach 20 cm, and after planting 2 months have already passed, we trim the tops.
The best time to do this is from mid-May to early June.
Thus, we will contribute to the appearance of lateral shoots that create a shrub in several branches, which can be used for food in the fall.
We cut off the shoot in such a way that a part of it with a couple of internodes remains on the adult plant.
Rooting stevia cuttings
We are not in a hurry to throw away the remaining cuttings, because with their help the reproduction of stevia is faster and more reliable than by planting seeds.
Stevia cuttings are rooted as follows:
- put them in a jar with slightly sweetened water (1 tsp sugar per 1 liter);
- cover the container with an opaque material, preferably black. Roots appear faster in the dark;
- so that the stalk is stable, we fix it in a cardboard stand placed on the jar so that the leaves do not sink into the water;
- every 3 days we change the sweet solution, and for the early appearance of roots we spray the leaves with it.
With this home care, it will be possible to transplant stevia into the soil in two weeks.
We keep the newly planted plant under a film or glass, and open it not earlier than a week later. To take root stevia will need high air and soil humidity.
Agrotechnics of stevia involves transplanting it into open ground after at least two months from the moment of seed germination.
In the air, we continue to regularly spray and water the pre-hardened plant to achieve maximum sweetness with the leaves, because stevia grown in the country, and not at home, will be the sweetest.
Now that we have figured out what planting and caring for this plant is, we will find out what stevia harvesting can be.
Harvesting of honey stevia
Stevia is known to be an excellent natural sugar substitute that does not cause an increase in blood glucose levels. As a result, it can be used by both types of diabetics.
In addition, honey grass is several hundred times sweeter than regular sugar, so not much is needed to sweeten drinks and food.
There are several ways to harvest stevia.
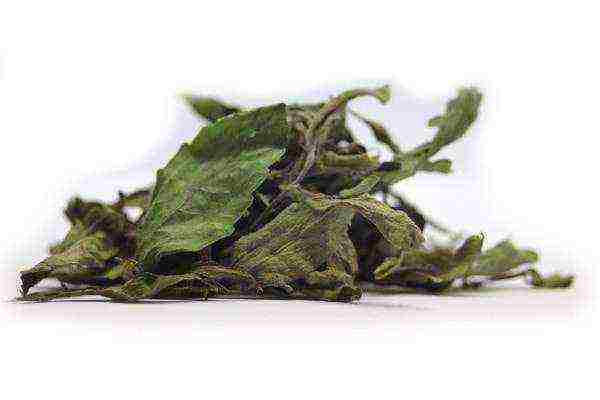
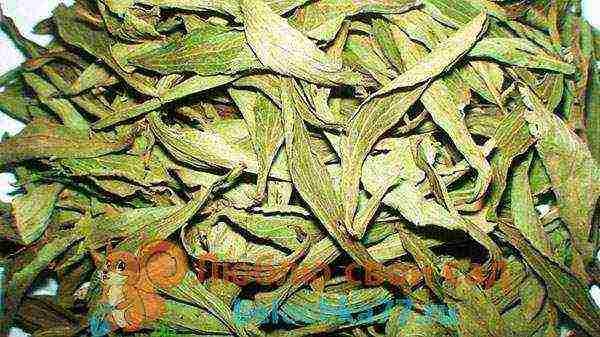
Drying stevia
Drying and chopping leaves is one of the easiest harvesting methods.
- When the time comes to harvest, we cut off the stems with a pruner and remove the leaves from them.
- We dry them in any convenient way - in the sun, in the oven with low heat, or in a drying cabinet.
The main thing is not to overexpose them at high temperatures for more than 12 hours, so that the sweetness does not disappear.
Grind the dried leaves in a regular coffee grinder or blender bowl, pour into a jar and store for at least a few years.
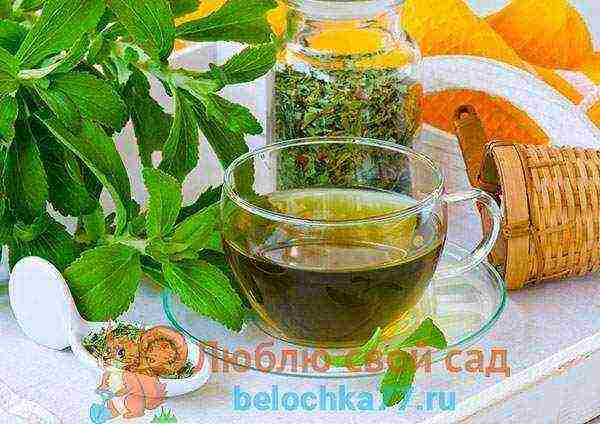
How to use dried stevia
- If necessary, add them to the drink, brew them and use them as herbal tea.
- And for baking or other stevia-based dessert, pour 80-100 g of chopped leaf into a linen bag and brew 1 liter of boiling water. In 10-12 hours we will have a sweet broth.
- If you need to add stevia to porridge, batter or dairy products, you don't even need to brew it, but simply grind it to a fine powder. We put it right like this.
But in addition to simply drying the leaves, stevia can be prepared for the winter in several more ways - by boiling a syrup or extract.
Stevia extract recipes
You can make an extract from stevia leaves at home with both alcohol and water. The difference will be in the sweetness - in the first case, it will be even more noticeable.
We stock up on dry leaves and vodka or other strong alcohol, such as whiskey or brandy.
- Fill the dried stevia leaves with alcohol in a ratio of 1:10 and leave for 24 hours.
- Then we filter it and we can use it directly, diluting it with clean water, or we can heat the resulting liquid, but not bring it to a boil, this will help reduce the alcohol content.
We make an aqueous extract in a similar way.
- Fill the leaves with water in a ratio of 1: 5 and begin to evaporate over very low heat.
- We hold this for 15 minutes, then filter and resume heating until the volume of liquid decreases 5 times.
Homemade stevia syrup
Homemade stevia syrup is made in the same way.
- We keep the aqueous extract on fire until it thickens to the desired consistency.
We seal the resulting stevia syrup in a sterile jar and use it as needed, adding it to baked goods or drinks.
Now you know if you can grow stevia at home, how best to do it, and what its wonderful honey leaves can be useful for!
Since this plant is a real storehouse of useful substances, you should not be afraid of failure and postpone planting - we are trying to organize "sugar plantations" on our windowsill right now!
With warmth and care, endocrinologist Dilyara Lebedeva
Stevia: growing and care

Almost every summer resident on the site has a cozy place for healthy herbs. Mint, lemon balm, catnip are the usual inhabitants of the gardens of the middle lane.
However, more and more often among the regulars of the green "plantation" you can find an unusual herb with bright green paired leaves and small white flowers - stevia.
This amazing representative of the Aster family arrived in the culture of our latitudes from Paraguay (South America) and quickly became a favorite of gardeners.
Interest in stevia is quite justified: it is the best natural sweetener, the substance it contains, stevioside, is hundreds of times more sweet than sugar! For this, the people call this overseas plant - sweet or honey herb. Useful leaves can be purchased at the pharmacy, but how can purchased raw materials compare with stevia greens from your own garden? Moreover, growing it yourself is not difficult at all.
Landing dates
In mid-latitudes, thermophilic stevia is grown only through seedlings. Sowing is carried out in late March - early April.
At home, seedlings grow and develop for 60–70 days.
Strengthened bushes are planted in open ground when the threat of recurrent frosts is minimal: in late May - early June.
Growing seedlings
The first thing to do before sowing is to check the seeds for germination, there may be a lot of "dummies" among them.
The quality of the material is determined by windage: each seed is thrown onto the floor from a height of 50-60 cm and the flight is observed. Those specimens that fall exactly are selected for sowing, and those that gracefully plan - for discard.
Selected seeds are soaked in warm water for 30 minutes and dried until flowable.
The substrate for stevia is prepared from turf, humus and sand (1: 1: 0.3), after which it is sifted and sterilized in any convenient way, usually calcined in a preheated oven. The sowing technology is as follows:
- The prepared soil mixture is poured into a box, crushed with hands and carefully leveled.
- Stevia seeds are laid out on the surface of the substrate, without deepening.
- Crops are sprayed with warm water from a spray bottle.
- The box is covered with glass (foil) and left in a warm place (+25 ° C).
Read more Thyme: open field cultivation from seeds
The first timid sprouts will appear in 5-7 days. When the bulk of the seeds germinates, the glass (film) is removed and the box with the crops is transferred to a warm, light windowsill. Seedlings are regularly watered and sprayed with water at room temperature.
It is very important to protect fragile plants from drafts and sudden temperature changes.When the seedlings form 2-4 true leaves, they are dived into separate glasses or transplanted into a spacious container.
The grown bushes are systematically watered and fed with complex fertilizer every 7-10 days.
Planting seedlings to a permanent place
A native of warm countries, stevia will grow best in a sunny area, sheltered from the wind.
The soil is preferable loose, slightly acidic, generously filled with humus or compost, but the content of peat or lime in the composition is unacceptable.
Shortly before planting, the site is dug up, the roots of the weeds are selected from the ground and the soil surface is carefully leveled with a garden rake.
Seedlings are planted in the evening or in damp, cloudy weather. The bushes are transferred with a lump of earth into shallow (6–8 cm) holes, covered with earth and watered with warm, settled water.
At the end of the procedure, it is recommended to spud the plant stems with dry soil by about a third.
To make the adaptation of seedlings painless, for the first 2-3 weeks, the garden bed is covered with a film or non-woven material.
Basic care
stevia cannot be called troublesome, but you shouldn't ignore the sweet herb either:
- The key to the well-being of culture is timely and competent watering. The procedure is carried out 1-2 times a week, of course, adjusted for the weather. Drought, even a short one, is very difficult for stevia, so the soil under the plants must be constantly moist.
- Sweet grass is fed every 10-15 days: under each bush poured 4-5 liters of complex or EM fertilizer, prepared according to the instructions. The culture is also responsive to the introduction of organic matter - twice a planting season is fertilized with fermented infusion of fresh mullein (1:10).
- The soil under the bushes must be periodically loosened and weeded to remove weeds that impede their growth.
Read more Kinza: planting and care in the open field
Diseases and pests
You will not have to worry about the health of stevia: in the middle latitudes, parasites and diseases practically do not threaten it.
The only ailment that can cause serious damage to plantings is a black leg that affects plants at the seedling stage. To avoid contamination, do not neglect soil disinfection.
In addition to calcining in the oven, the prepared substrate for disinfection can be steamed in a water bath, scalded with boiling water, or spilled with a weak solution of potassium permanganate.
Harvesting
Harvesting sweet grass begins at the beginning of flowering, which occurs 16-18 weeks after sowing, that is, in July. Harvesting can be done until mid-September.
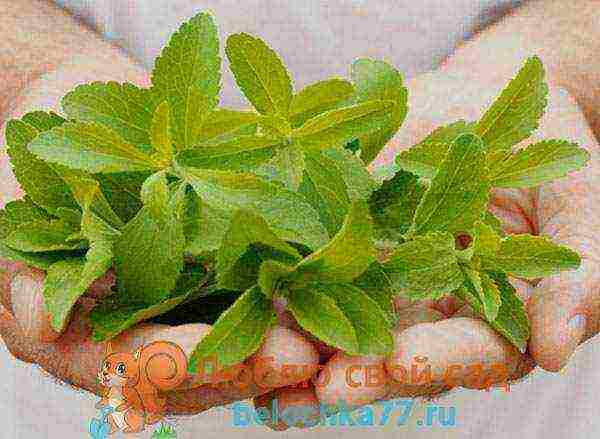
Plants are cut at a height of 5-10 cm from the soil surface, tied in small bunches and hung to dry under a canopy or in a well-ventilated utility room.
Some gardeners prefer to dry the stevia in bulk: the leaves are torn off and laid out in a single layer on paper.
In late August - early September, sweet grass seeds ripen, which will be useful to you in the next season. The signal for the collection of seed is the blackened peduncle of the plant. The main thing is not to miss the moment, otherwise the ripe seeds will scatter.
Fresh stevia is added to tea to add sweetness or used to decorate desserts.
Powdered dried leaves are not only a natural, but also a very economical substitute for sugar. Only 2 tablespoons of powdered raw materials can replace a whole glass of "white death".
In addition, alcoholic tinctures and syrups are prepared from stevia for the winter, which are used in cooking as sweeteners.
Wintering features
Like many overseas crops, stevia does not winter in the open field of the middle strip, as a result of which many summer residents grow it as an annual.
But! Since sweet grass develops extremely slowly in the first year of life, it is advisable to keep the bushes and continue growing them next year.
After cutting the greens, rhizomes are dug out with a large lump of earth, placed in boxes and sprinkled with a layer of moist earth so that only "hemp" remains above the surface. Store stevia rhizomes in a cool cellar or on the bottom shelf of the refrigerator.
A couple of bushes can be planted in pots and "settled" on a home windowsill, covered with halves of plastic bottles and providing them with high-quality lighting and regular watering.
After a short period of dormancy, the stevia will begin to vegetate again, and in January will give you a new crop of sweet leaves. On the eve of spring, plants that have wintered at home will serve as mother plants for cutting cuttings. The remaining rhizomes are planted in open ground with the onset of heat.
Read more Stevia: benefits and harms
Stevia or honey herb. From her and breathes magic and mystery. However, this is a completely natural and far from rare inhabitant of many garden plots and even balconies, pots or flower beds. She is not only able to decorate the garden with her presence, but also has a lot of useful properties.
Growing stevia at home and outdoors
What is Stevia
Stevia is a whole genus of perennials from the Astrov family, which unites more than 250 species of all kinds of shrubs and herbs. Their homeland is the plains and mountainous regions of America. The most popular type of stevia is honey, which is cultivated in summer cottages. This plant was first studied by the botanist Stevus in the 16th century, after which it was named. The fact that stevia honey is used as food by the aborigines was established at one time by the scientist Antonio Bertoni during his expedition to Paraguay. He noticed that the Indians called this plant "Guarani" and prepared delicious and sweet drinks from it.
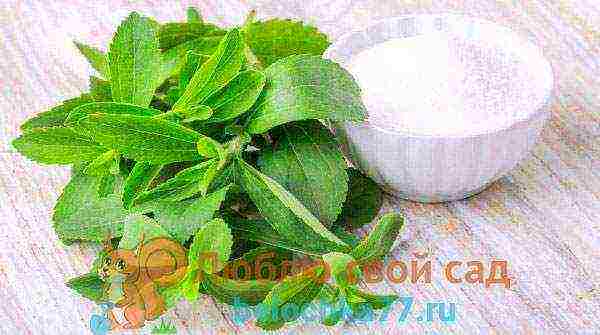
Stevia is a natural sugar substitute
The fact is that stevia is a natural substitute for sugar: a couple of leaves of the herb are enough to sweeten a cup of tea. Its leaves contain a substance that in the twentieth century was called "stevioside" - it is hundreds of times sweeter than ordinary sugar. By the way, stevioside is recognized as the sweetest natural product in the whole world.
Honey stevia is a semi-shrub up to 80 cm high, abundantly branching, with small paired leaves and a developed root system. It blooms with small white flowers. It is now widely used in food preparation in Asian countries and South America.
The most popular type of stevia is honey stevia
Growing conditions
Stevia respects warmth and sunlight, so it should grow in a well-lit place where there is protection from drafts and gusts of wind, and the ideal air temperature for it should be at least 22 degrees. It is also worth remembering that you should not plant stevia in lowlands, where water can accumulate - its excess for the plant is destructive.
Stevia is relatively not picky about the soil - it can grow everywhere, as long as the soil is not too salty. The ideal soil for her is light sandy loam and sandy substrates with the addition of organic fertilizers.
Stevia respects warmth and sunshine
Stevia respects compost and humus, but you should be careful with peat, as it grows poorly on it.
Legumes are good predecessors for her. The soil pH should be in the range of 5.5-6. If only clay soil is present in the garden, then sod, humus and coarse sand should be added to it so that it becomes loose and light - such as Stevia loves.
Growing stevia
Stevia seeds
Growing stevia from seeds is not an easy task. This is a very moody plant. Most seeds end up unsuitable for growing. The seedling period for stevia lasts about 2 months, so they start sowing seeds in April.
- Prepare boxes and soil for seeding.
Preparing the soil and container for planting
- Make small dimples on the surface of the ground and place 2-3 seeds in each.
Planting seeds
- Lightly sprinkle the seed dimples with soil - the layer should be no more than 3 cm.
Sprinkle with earth
- Moisten the soil surface with water using a spray bottle and cover with foil or glass.
How to create a greenhouse effect
- Put the box with future seedlings under a UV lamp. The first days do not turn it off, even at night.
- Provide an air temperature of at least 25 degrees in the room with boxes.
- The first shoots will appear in 1-2 weeks. After that, immediately remove the cover from the seedlings.
- After 3 weeks, reduce the operating time of the UV lamp to 15 hours per day.
- When the seedlings have strong leaves, it is thinned out, removing frail plants.
The first sprouts of stevia
Stevia can also be grown from cuttings. This method is much simpler than the previous one, but it will require a mother plant of at least 2 months. Cut off the cuttings-tops of the shoots with a length of about 10 cm should be in May-June. Before rooting, the lower leaves are removed from it, then they are dug into the ground to a depth of 6 cm, sprayed with water and covered with a jar or film. At first, the cutting and the soil around it are sprayed several times a day with a spray bottle. Rooting takes place within 10 days.
Growing stevia from seeds
Video - Growing stevia seedlings
Seedling care
While the plants are very small, they are watered very carefully, while controlling the humidity - the soil should not be soggy. Ideally, if you manage to organize bottom watering, that is, put the box with seedlings in the water for a while.
There should be no drafts on the windowsill where the seedlings are standing, and it is also important to remove the rest of the houseplants - stevia does not like neighbors.
When small stevia grow up and stretch up to 12 cm, their tops are shortened by 3-4 cm
When small stevia grow up and stretch up to 12 cm, their tops are shortened by 3-4 cm - thanks to this procedure, the plants will begin to branch well.
If you plan to grow stevia in an apartment, then at the end of the seedling period, the bushes need to be transplanted into separate pots with a diameter of at least 10 cm.
Growing stevia in pots
Transplant to open ground
Moving stevia to the street is one of the most crucial moments. Wrong actions can ruin all your work. Before the plants finally move to the street, it is important to harden them. To do this, the seedlings are first dived into separate pots and then put them outside for several hours every day. The weather at this time should be warm and sunny. Each time, young stevia stays on the street longer.
Planting stevia in the ground is done when the risk of frost is minimal.
Landing in the ground is carried out when the risk of frost is minimal, and the air temperature during the day is at least 18 degrees. The procedure is best done in the evening.
- We dig the site for stevia well, remove the weeds.
Digging up a site for stevia
- We dig holes up to 8 cm deep at a distance of at least 40 cm from each other.
- We apply organic fertilizers to the pits (about 0.5 kg of humus).
- We take out the seedling from the pot along with a lump of earth and lower it into the hole, sprinkle it with soil and tamp it.
Planting stevia outdoors
- Water or spray the soil a little from a spray bottle.
Transplanting stevia into open ground
For the first time, until the plants take root, they are covered with a film. Since the roots of stevia are located close to the surface, the soil around the plant is mulched so that they do not dry out.
Video - How to properly plant stevia in the ground
Stevia care
Stevia is a lady with character. So that she does not die, it is important to provide her with good growing conditions.
| Watering | No more than 3-4 times a week, depending on the weather. At the same time, it is important to ensure that the plant is not overflowed, but also does not suffer from a lack of water. At home, it is better to water stevia with boiled water. |
| Weeding | A very important factor, as stevia does not like neighbors.All weeds around the plants are carefully removed |
| Priming | After each watering or rain, it is necessary to loosen |
| Top dressing | It is carried out 2 times a month with nitrogen-containing fertilizers. Humus or compost is applied in the fall |
| Pruning | If stevia grows in an apartment, then it is important to prune it every six months so that the crown branches well. Outdoor plants are pinched as needed. It is important to periodically cut off some of the leaves so that the bushes are constantly updated. To increase the yield, all flowers of the stevia are removed |
| Wintering | The plant hibernates very poorly in the Russian climate, more often it simply dies, so for the winter it is best to dig it up and bring it into the house. In some regions, at your own peril and risk, stevia can be left on the street, covered with foil |
With all the desire in Russia, honey grass is very rarely able to grow to its full height - the climate is too cold. You can harvest the crop 4 months after sowing the seeds. Usually this is the beginning of autumn - at this time the plant prepares for wintering and begins to intensively store stevioside in the leaves.
You can harvest the crop 4 months after sowing the seeds.
Harvesting is quite simple - the stems of the plant are cut off and all the leaves are cut off from them, which are then dried in the sun or under a UV lamp.
It is important to know that stevia leaves cannot be dried for more than 12 hours, otherwise they will not be so sweet.
Secrets of growing stevia
Dried leaves keep well in closed containers for a long time.
Dried stevia leaves keep well in closed containers for a long time
Beneficial features
Honey herb has many beneficial properties, is widely used in medicine and is approved by the Ministry of Health.
Only 4 tablespoons of dried leaves of this plant can replace 1 cup of sugar.
- It is the best natural low-calorie sugar substitute for diabetics and people with metabolic disorders.
Stevia is the best natural low-calorie sugar substitute
- Stevia is used in dietetics and cosmetology.
- Honey grass is also used for the prevention and treatment of diseases of the cardiovascular system, gastrointestinal tract, to strengthen the immune system.
- If you drink tea from the leaves of honey grass regularly, then the level of cholesterol in the blood decreases.
- The leaves of this plant contain a large number of vitamins and minerals.
- It is good to rinse the mouth with a decoction of stevia with gingivitis.
- It is a natural antiseptic and is good for sore throats.
- The plant speeds up wound healing and helps get rid of abscesses.
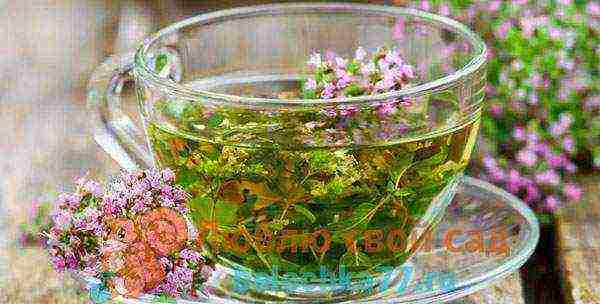
- Stevia is added to pastries and salads, and aromatic teas are prepared from it.
Aromatic teas are prepared with the addition of stevia