Content
- 1 The subtleties of growing
- 2 The correct choice of planting material and preparation
- 3 Preparation of the necessary inventory
- 4 Sowing
- 5 Sprout care
- 6 Tips from experienced gardeners for successful cultivation
- 7 Choosing a variety of dill for the windowsill
- 8 Growing dill from seeds at home
- 9 Care features
- 10 Lighting conditions for growing dill from seeds

It is convenient when there is always fresh greens at hand - the dishes cooked with them become more aromatic and tastier, therefore, prudent housewives can often find dill on the windowsill. At home, this unpretentious plant feels no worse than in the garden, and with good care it gives a lot of lush greenery.
Choosing the right dill variety is the first step to a good harvest
It would seem that even inexperienced gardeners should not have any questions about how to grow dill at home: after all, you just need to sow seeds in a pot of soil and do not forget to water the seedlings, removing the weeds. But in fact, instead of the expected dense thickets of fragrant dill, thin pale blades of grass, practically without aroma, sway sadly in the pot. What's the secret? How to plant dill at home and get greens that are no worse than those that are sold on the market all year round?
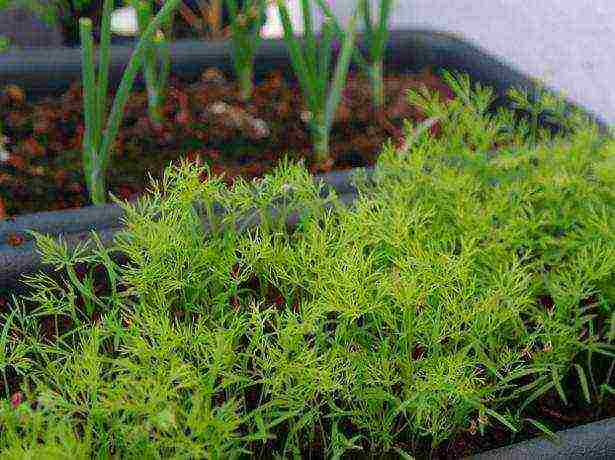
For the purpose of growing dill at home, gardeners most often choose the early ripening variety Gribovsky
To grow dill at home, you will need:
- seeds of a fruitful unpretentious variety of dill;
- soil for indoor plants;
- fertile garden land;
- suitable containers (pots, containers);
- fluorescent lamps;
- complex mineral fertilizers.
Video about growing aromatic dill
For the purpose of growing dill at home, gardeners most often choose the early ripening variety Gribovsky. This variety of dill is not picky about care, resistant to temperature extremes, high yield and disease resistance. Its greenery has a strong aroma. In order for Gribovsky dill to give a good harvest at home, it is enough to sow it in fertile soil and prevent weeds from appearing.
The following varieties are also suitable for growing on a windowsill: early-ripening Grenadier, mid-ripening Richelieu with bluish-green fragrant leaves, late-ripening Kibray with beautiful wide leaves. Gardeners are also cultivated at home and southern varieties, which have a more spicy taste, but are more finicky.

And late bush varieties do not have time to ripen in the beds over the summer.
Since there is no special variety of dill intended for growing on the windowsill, when choosing a seed, the main attention should be paid to the ripening time. It is important not to be mistaken here: although early varieties give green mass in a very short time, they quickly stretch into flower stalks and are worse leafy than late-ripening varieties. And late bush varieties (Gourmet, Salute, Russian size) do not have time to ripen in the beds over the summer, but they are great for growing at home. Such dill on the window forms dense, well-leafy bushes, from the sinuses of which new shoots are formed.
Instructions on how to grow dill on a windowsill
In the garden, dill can grow on almost any soil, but successful cultivation of dill at home is possible only in a fertile soil mixture, which must be prepared in advance.To do this, in the fall, you should prepare loose garden soil and mix it before sowing with purchased neutral soil for indoor plants. Select a container for crops of a sufficient size so that the dill is not crowded, and do not forget about the drainage layer at the bottom of the container.
Since dill seeds germinate for a long time due to the high oil content, they must be soaked for 20 hours before sowing in warm water through which oxygen is continuously passing (for example, using a compressor from an aquarium). Another option is to simply place the seeds in warm water for two days and change it to fresh water every six hours.

For best results, you can make grooves a centimeter deep in the ground, spill them with water and lay the prepared seeds on the bottom.
You can sow seeds directly on the surface of the moistened earth, without grooves and pits, sprinkling the top with peat mixed with humus. Sufficient seeding rate - 0.3 g per 1 square decimeter of soil. For best results, you can make a centimeter deep groove in the ground, spill them with water and place the prepared seeds on the bottom. From above, dill seeds are sprinkled with dry earth from the edges of the grooves, so that a dense crust does not form on the soil surface, which prevents the emergence of seedlings. Cover the container with crops with cellophane and put it in a dark place with a temperature of about +20 degrees for a week.
After cutting, the stems and leaves of dill do not regrow: in order to continuously cut fresh greens, sow seeds on the vacating area of your micro-vegetable garden every three weeks.
Growing dill on the windowsill - the secrets of success
Growing dill at home, first of all, you need to remember that this plant is very fond of light. Place the crops on a light windowsill, and in winter, provide additional lighting for the dill by installing fluorescent lamps at a height of 50 cm above the plants. On the windowsill, it is enough to turn on the lamps in the morning for about five hours, but if the boxes with dill are in the back of the room, the lighting should last at least fifteen hours.
Video about growing dill on a windowsill
Dill care rules at home:
- dill must be watered regularly, especially paying attention to watering during seed germination and when young shoots appear;
- once every two weeks, it is recommended to feed the plantings with complex mineral fertilizer;
- it is best to grow dill at a temperature of +18 degrees, but even on a glazed balcony when the temperature drops to +8 degrees, the plants will feel quite comfortable;
- if the temperature in the room is higher than +20 degrees, you need to increase the illumination, otherwise the dill bushes will turn out to be elongated, sluggish and light;
- in the first week, as the shoots seem, it is advisable to lower the temperature in the room at night by opening the window, or to carry out the crops to the glazed balcony so that the dill does not stretch out.

Dill needs to be watered regularly, especially paying attention to watering during seed germination
Growing at home can be more or less hassle depending on what time of year you plant the dill. The easiest way to grow dill on a window is from March to August, since planting and without additional lighting form lush greenery, provided there is fertile land and a light windowsill. In the autumn-winter period, without additional illumination, the plants will stretch and fall, which means that you will have to pay more attention to them, and the costs of growing will increase due to the consumed electricity.
Rate the article:
(19 votes, average: 4.2 out of 5)
Starting a new interesting business of growing greens in a room, but not having an idea of the intricacies of the process, you, of course, will get some results. Although it is not a fact that they will be positive, because dill has certain properties and requires initial knowledge in the field of agricultural technology and thoughtful preparation.
Dill on the windowsill
The subtleties of growing
You can plant dill and grow it in an apartment all year round. The intensity of care depends on when the seeds were sown. Dill planted in autumn or winter will require more effort and time than greens sown in summer.
Photo of growing dill on the windowsill
On the sunny side in good soil, dill, planted in spring and summer, does not need additional lighting and usually grows in dense, branchy bushes. Good growth of dill seedlings provides a long daylight hours, therefore, in winter or in cloudy weather, an additional source of light will be required.
Growing dill
The correct choice of planting material and preparation
Choosing the type of dill seeds requires the right approach to obtain a rich harvest. The seeds do not differ in any way visually, they only have different ripening periods. Therefore, the varieties are divided into early, middle and late.
For home cultivation, experienced gardeners choose the undemanding, persistent and productive variety Gribovsky, which gives fragrant greens. Seeds only need to be planted in fertile soil and weeds are weeded in time.
Dill Gribovsky
A good vegetable garden on the windowsill can be created with seeds of the late-ripening Kibray variety, with an early Grenadier and a mid-season species called Richelieu. Southern varieties with a spicy taste and aroma also take root well on windowsills, but are more picky about the conditions. Late-ripening varieties are chosen for growing on the windowsill by experienced gardeners.
Dill Richelieu
Inexperienced novice farmers have many questions about growing dill at home. Can't you just stick seeds in the ground, water the seedlings regularly and weed the weeds in the pot? True, instead of thickets of fragrant greenery, you can observe the harvest in the form of rare colorless and tasteless blades.
What rules must be followed when planting dill at home so that the greens turn out no worse than on the market?
How to grow dill
Preparation of the necessary inventory
Planting begins with the mandatory preparation of seeds. They are soaked in warm water for at least five hours, then the water is drained and the seeds are poured with an average solution of potassium permanganate for two to three hours. This must be done to decontaminate the seed.
Planting dill includes proper seed preparation
Soaking seeds in potassium permanganate
During soaking, containers are prepared, which can be simple pots for indoor flowers or boxes made of wooden boards especially for this case. The container capacity depends on the planned harvest volumes, but if you are not guided by this indicator, try first planting greens in a one or two liter pot, in the bottom of which there are drainage holes for excess water drainage. Containers must be placed on pallets.
Plastic containers for dill
Box with pallet
Sometimes seeds for seedlings are planted first in small peat pots, and from them greens are planted in permanent containers. The choice of a permanent container must be approached competently, so that the pots harmoniously fit into the decor of the residential interior and do not spoil the room with their nondescript appearance.
Peat pots
A small layer of drainage is poured into the prepared pots, which is suitable for ordinary expanded clay, crushed stone or pebbles. The next small layer is not too fine sand. The top layer is a nutritious fertile soil in the form of a ready-made soil mixture intended specifically for this crop, or a mixture of ordinary turf, humus and peat.
Vermicompost is an essential ingredient in the soil in which dill will grow.
Biohumus
Now you can start sowing and growing fresh herbs right in your own room.
Sowing
Seeds that have sunk to the bottom when soaked can be planted in the ground. Sunken seeds are sown after preliminary drying on a cloth or cotton wool.
There is no special rule for geometric sowing of dill, you can sow greens in a pot in rows, bunches or in any other order. After sowing the seeds, an additional thin layer of soil is poured on top, not more than two centimeters.Then the surface of the soil is slightly moistened, and the pot is covered with polyethylene. The greenhouse effect can be obtained using cling film, this is a very convenient way.
Sowing dill
Planted dill pots or boxes should be on the warmest and most well-lit windowsill so that the average temperature is plus eighteen degrees Celsius. The containers are kept in the light and warm until the first sprouts of the dill appear. If you followed all the recommendations correctly, the crops will sprout within a week, maximum ten days after sowing.
Dill grows in pots
Sprout care
As it turned out, growing the first green seedlings is not a difficult process at all. Labor and time costs begin during the further cultivation of thick, fragrant dill.
Dill needs to be looked after
The film must be removed from the containers as soon as all the sprouts have risen. Care during the warmer months consists of good lighting, regular watering and spraying of the dill. You also need to remember to turn the seedling pots once a day so that the plants do not lean to the side, but stretch upward.
Winter cultivation consists of the same steps as in the summer months, it is only necessary to provide the dill with good lighting during the short daylight hours. With a lack of light, it is impossible to get fluffy bushes, since the sprouts begin to stretch prohibitively upward in search of sunlight. As additional lighting, a regular lamp installed half a meter above the pots of greenery is suitable. Morning illumination of dill on the windowsill is up to six hours a day, and for sprouts in the back of the room, you need to turn on the lamp for at least fifteen hours.
Dill requires a lot of light
The optimal mode for green crops is a temperature of seventeen to nineteen degrees above zero, although dill will tolerate small deviations in one direction or another without loss. Regular watering should be moderate, and it is recommended to fertilize the soil with mineral fertilizer twice a month.
Dill on the windowsill in 3 days
So, growing dill at home turns out to be more difficult in the autumn-winter period, when the plants do not have enough sunlight. But at any time of the year, you can get fresh greens if you devote time and sufficient attention to growing them.
Video - Home Tricks. Dill on the windowsill
Tips from experienced gardeners for successful cultivation
To quickly grow high-quality shaggy bunches of dill, you need to know some secrets of sprout care:
- we must not forget about regular watering, especially during seed germination;
Watering is carried out as the soil dries, in small portions
- feeding with complex minerals should be applied no more than twice a month;
So that, as the bushes grow, they do not experience a deficiency of nutrients, they feed dill on the windowsill twice a month
- the room temperature must be maintained at a level above eighteen degrees Celsius, although the dill growing on the balcony tolerates well even plus eight;
- at temperatures above plus twenty, you need to add lighting in the room so that the sprouts do not become lethargic, pale, do not stretch upward and do not lose their unique rich taste;
- after the emergence of all shoots, you need to lower the temperature at night, for which you need to take out containers with dill on the loggia or put them near an open window.
All recommendations should not make you think that it is quite problematic to cope with growing dill at home without having experience in this matter. But this is not at all the case, because dill is easy to plant on the windowsill, since the plants have enough fertile soil and good lighting from the window.
14–20 days after the first sowing, the next batch of seeds is sown
Remember to protect the dill crate from pets
Vegetable garden on the window
The beneficial properties of dill and its piquant aroma make this greens indispensable in the preparation of various dishes.In addition, calcium, phosphorus, vitamins and potassium salts in dill greens are essential components of masks to improve the color and refresh the skin of the face.
Thus, in order to obtain vitamins all year round, you just need to properly organize the planting of dill and other garden greens, which are not particularly demanding on the conditions, on your windowsill. If you are a beginner gardener and have no experience in this interesting business, we recommend planting dill in the warm spring and summer months.
Video - How to grow dill at home in winter
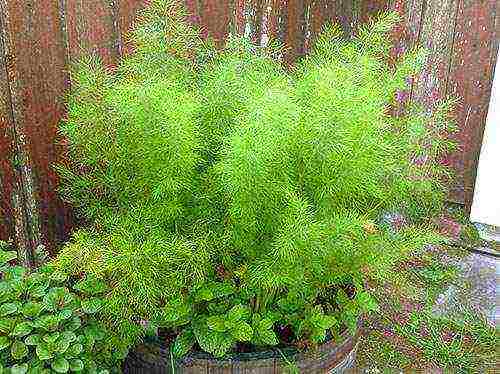 Psychologists point out that the sight of green houseplants helps to survive the winter time. If dill and other spicy herbs are grown on the windowsill, the benefits of such plantings will be many times greater, because the plants will not only remind you of summer, but also replenish the diet with vitamin greens.
Despite its unpretentiousness in the garden, in the conditions of an apartment, dill requires more attention, but in response to proper care it will certainly please with fragrant foliage and a long growing season. How to grow dill at home? What are the features of sowing and caring for this crop, and what can prevent you from getting a bountiful harvest of greenery on the windowsill?
Choosing a variety of dill for the windowsill
 If, when sowing parsley or celery, the appearance of a peduncle should be expected only the next year, then when growing dill from seeds in a dry warm microclimate of a room, the plant can bloom, practically without forming foliage. Therefore, the productivity of the garden on the windowsill primarily depends on the choice of the variety for sowing.
Today there are several dozen worthy varieties that have proven themselves in the open field. For a pot culture, plants that give green mass as long and abundantly as possible are suitable.
Examples of such varieties include:
- Asparagus bouquet.
- Superdukat.
- Beam.
- Abundant.
- Kibray.
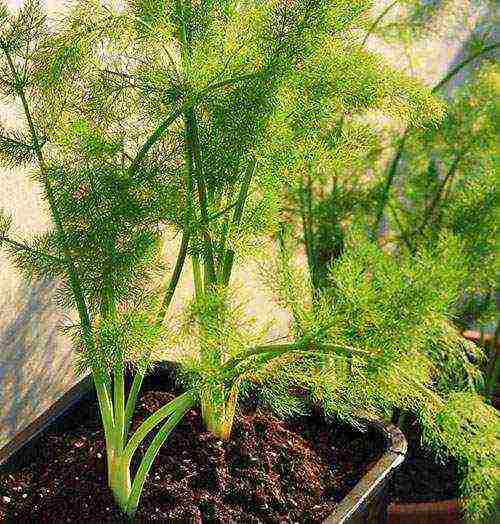
Dill plants forming a dense green bush on the windowsill feel good.
If necessary, actively growing shoots can be pinched to cause branching and the appearance of new foliage.
Growing dill from seeds at home
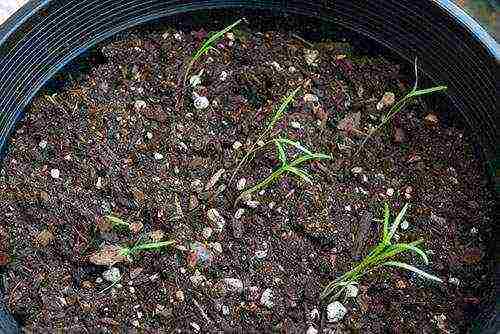 Like other umbrella crops, dill is characterized by tight germination. This is due to the essential oils that protect the seed, but also slow down its pecking. How to grow dill at home and bring greenery closer?
If you do not take special measures, it will take at least two weeks to wait for the emergence of seedlings, even with regular watering, and in order to speed up the biological process, the seeds are soaked before sowing. To do this, use warm water or a solution of biostimulants, and in the latter case, after a daily stay in a solution of Kornevin or Ribav-Extra, the sprouts appear already on the 3-4th day, and the germination capacity increases to 100%.
What containers are suitable for growing dill from seeds? A wide container or pot with drainage holes is prepared for sowing dill. The capacity is selected so that several plants planted at intervals of 7-10 cm are not too crowded. The drainage layer, 1.5–2.5 cm thick, is made of fine expanded clay or stone chips.
 The soil for growing dill at home should be loose, retain moisture well, not acidic and fertile. A ready-made soil mixture for vegetable crops or seedlings is quite suitable, or you can get soil by mixing garden soil, peat, sand and humus in equal proportions. Sowing is carried out in moist soil to a depth of about a centimeter. To initially avoid excessive seedling density, the seeds are sealed at intervals of 2–3 cm, sprinkling with a layer of peat on top and carefully compacting the soil.
As shoots appear, they are additionally thinned out so that the plants do not interfere with each other and do not stretch out due to lack of space, nutrition and light.
Care features
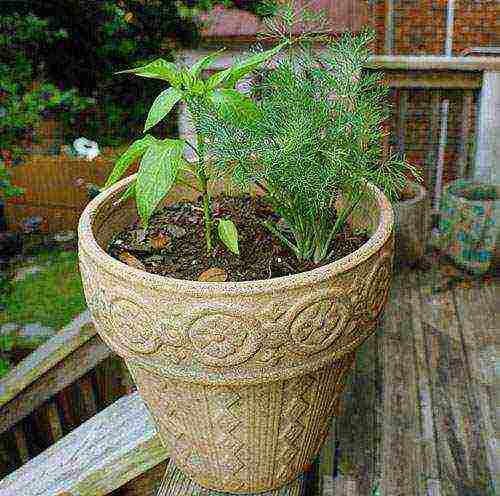 However, such a measure is clearly not enough.Even a south-facing room is less illuminated than a garden bed, and the air is sometimes drier and warmer than the ideal crop temperature range of 16-22 ° C. Therefore, it is more difficult to grow dill on the windowsill than in the open field.
Although the culture is cold-resistant, dill bushes grown at home will not lose their ability to grow even when the temperature drops to +8 ° C. But, once in a hot room, with a lack of watering, the plants refuse to form leaves and quickly release flower stalks. Dill reacts well to moisture, but here it is important to remember: "the higher the temperature, the more often and more abundantly watering."
- If it is cool enough on the windowsill, excess moisture can cause root decay and plant death.
- In hot weather or when the heating is on, the absence of moisture is quickly recognized by sluggish discolored shoots.
- At temperatures above +25 ° C, dill on the windowsill should be regularly sprayed, this will help the plant to cope with increased dryness and heat.
Watering is carried out as the soil dries, in small portions, preventing the formation of a dense crust on the soil.
 So that, as the bushes grow, they do not experience a deficiency of nutrients, they feed the dill on the windowsill twice a month. To do this, you can use complex additives with a low nitrogen content so that this element does not accumulate in the greens entering the table.
Lighting conditions for growing dill from seeds
 Green crops in the apartment are assigned the brightest places, while taking care that the direct rays of the sun do not fall on the pots.
If the sowing of dill even at home takes place from March to August, the plants create lush bushes on well-lit windowsills and do not require additional lighting.
But most often dill is grown at home in the winter. And here you can not do without artificial lighting of landings. It is best to hang a special phytolamp at a height of 50-60 cm from the home plantation, giving the spectrum necessary for the plants. If this is not possible, white fluorescent lamps will do. Taking into account the illumination, daylight hours for dill on the windowsill should last up to 13-15 hours. Such a measure is especially important at the stage of emergence, until the plants have risen and matured.
By receiving the required amount of light, the bushes will not lean against the window pane, stretch out and look weakened.
How to grow dill on a windowsill so that the supply of greens to the table is uninterrupted? Unlike parsley, which for a long time releases new leaves instead of collected ones, dill practically does not form greens after cutting. Therefore, 14–20 days after the first sowing, the next batch of seeds is sown. In this case, on the windowsill there will always be dill ready to harvest with marketable greens of approximately 10 centimeters in length.
How to grow dill at home in winter - video
Dill and parsley are the most favorite and familiar herbs on our table. If you want to always have fresh herbs on hand, be sure of its quality and just have a pleasant hobby, then we suggest creating your own mini-home garden.
In this resource, you will find 3 step-by-step instructions on how to grow dill and parsley on a windowsill.
How to grow dill at home
Dill is an annual plant, so you won't be able to quickly get a harvest by planting roots or bulbs.
- It takes 5-8 weeks to grow dill from seed at home.
But you can plant it in an apartment at any time of the year. True, from October to early spring, dill requires additional lighting with fluorescent lamps. The best time to grow dill on the windowsill is from March to August. At this time, it is easier to care for the plant, and you do not need to create additional lighting for this.
What we need:
- A pot or container 15-20 cm deep with drainage holes at the bottom.
- Soil for indoor plants and preferably garden soil.
- Spray water.
- Fluorescent lamps (if you grow dill in the winter).
- Seeds.
Which varieties are more suitable for growing dill at home: early ripening, mid-ripening or late-ripening?
- If you want to quickly get greens or umbrellas and seeds for conservation, then choose the early varieties Gribovsky or Grenadier. They will give a crop quickly, but, unfortunately, it will not turn out to be rich (4-6 leaves), and soon after the leaves appear, the early ripe dill will begin to bloom.
- Mid-season varieties (Richelieu, Umbrella, Kibray) will produce greens about 10 days later, but there will be more (6-10 leaves).
- Late-ripening bush varieties of dill (Alligator, Russian Gigant, Buyan) yield a harvest later, but the richest in leaves (more than 10). Perhaps this option is most suitable for obtaining fresh greens.
Step 1. Seed preparation
In order for the seeds to germinate faster and better, they must first be soaked in warm water for 24-48 hours, changing the water every 12 hours. Then the seeds that remain on the surface of the water must be selected and thrown away, since, most likely, they are not suitable for planting. All other seeds that have fallen to the bottom must be removed with a sieve or spilled through cheesecloth and dried on it.
Step 2. Preparing the soil
While the seeds are soaking, you can start preparing the soil. To get started, fill the bottom of the pot or container with a 2–3 cm thick expanded clay drainage layer. As soil for dill, a mixture of garden soil (it is better to prepare it in the fall) and soil for indoor flowers is suitable. If you do not have the opportunity to purchase good garden land, season the purchased soil with vermicompost in a ratio of 1: 4. Another suitable option is a mixture of vermicompost with cocoa fiber in a 1: 2 ratio. Keep in mind that the better and looser the soil, the more likely you are to get a good result.
Step 3. Sowing seeds
Now you need to irrigate the ground with water from a spray, dig small grooves in it with a depth of 1-1.5 cm, sow seeds in them, then lightly sprinkle them with earth from the edges of the grooves and again moisten the ground with water from a spray bottle.
- It is important that the grooves are shallow and the seeds are not sprinkled too tightly.
Now it remains to cover the pot with plastic wrap or a bag and leave to germinate for a week in a dark place where the air temperature does not exceed 18-20 degrees. When shoots appear, pull out the extra shoots so that there is an interval of 3 cm between the remaining shoots, and then place the pot on the windowsill.
Step 4. Create additional lighting
Dill is a plant native to the sunny Mediterranean and cannot grow without light. Moreover, light for him is much more important than heat. When growing dill at home from March to August, the seed pot can simply be placed on a well-lit windowsill.
- The dill should get enough sunlight for at least 6 hours a day. On cloudy days, it is advisable to supplement the plants with lamps. If the air temperature in the room where your mini-garden grows exceeds 20 degrees, it is also advisable to highlight it.
To grow dill on a windowsill in winter, you need to provide it with additional lighting with white-spectrum fluorescent lamps, setting them at a height of 50 cm above the crops.
- In winter, artificial lighting of plants with fluorescent lamps should last at least 12 hours a day.
Step 5. Taking care of the harvest
Well, that's all, it remains only to provide the plant with proper care and wait 30-40 days before harvesting the first harvest. Here are some rules and tips that will come in handy during this period:
- In summer, dill should be watered often, preventing the soil from drying out, and in winter - moderately, waiting for the soil to dry out after the last watering.
- To make the dill juicy, spray it with water every day.
- For watering, use only settled water at room temperature, otherwise the dill will get sick and turn yellow. In winter, you can use the water melted from the snow.
- The ideal temperature for growing dill on the windowsill is + 15- + 18 degrees. Minimum allowable: +8 degrees.Maximum allowable: +25 degrees.
- If the soil in which you planted the dill was not of good quality, it is recommended to feed it with Agrolife fertilizers (1 r. / Month, 1 tsp. In the top layer of the earth) or Vermicompost (sprinkle in the aisle or around the stems once every two months at the rate of 2-3 tbsp. l per pot).
- Since the leaves and stems of dill do not grow back after cutting, in order to regularly get a harvest, you need to plant seeds every three weeks.
Below is a video instruction on how to grow dill on a windowsill in winter.
How to grow parsley on a windowsill
So, we figured out the dill, it's time for instructions on how to grow parsley on the windowsill. In many ways, the rules for their sowing and care are similar, but still different, since parsley, although it sprouts later, is less demanding on light and soil quality than dill.
In addition, there are two ways to grow parsley at home:
- By sowing seeds.
- By sowing root crops.
Growing parsley from seeds
First you need to select the seeds. What varieties to choose? To grow parsley on the windowsill, home gardeners most often choose early-maturing varieties that yield 10-14 days earlier than others.
We recommend planting the following early varieties:
- Curly parsley: Moscaruse and Astra.
- Flat parsley: Irinka, Italian hero, Laika, Russian feast, Plain.
Step 1. Wrap the seeds in damp gauze, leave them to germinate for 2-3 days in a warm place, and then squeeze the gauze and dry the seeds. If desired, after squeezing the gauze, you can put it in the freezer (at a temperature not lower than zero) for a month, then the seeds will germinate faster.
Step 2. Prepare the soil according to Step 2 of the instructions above and moisten it well.
Step 3. Then start planting: "dig" grooves 0.5-1 cm deep, sow the seeds (quite often), sprinkle them with earth from the edges of the grooves and moisten the ground with water from the spray.
Step 4. Next, you need to leave the crops warm (at a temperature of 19-20 degrees) until the first shoots appear, that is, for about 14-20 days. At this time, you need to water the sowing every other day in moderation. It is not necessary to cover the container with plastic at this stage.
- Water the parsley with settled or boiled water.
Step 5. When the first shoots appear, pull out the extra shoots so that an interval of about 4-5 cm remains between the remaining ones.
Parsley shoots
Step 6. Now that young shoots have appeared, watering can be increased slightly, but not to allow the soil to dry out or, conversely, overflow. However, when growing parsley on a windowsill in winter, water it sparingly, waiting for the soil to dry out.
- Ideally, at this stage, the temperature should be lowered to + 15– + 18 degrees, for example, by opening a window. At night, the window can be opened completely in order to lower the temperature to the optimal 10-12 degrees Celsius.
- If the land was purchased, then the plants can be periodically fertilized with complex mineral fertilizers or solutions 1 time in one to two months according to the instructions.
- In summer, parsley can be grown on the balcony until the air temperature drops to 0 degrees.
Step 7. From early spring and in summer, parsley growing on the windowsill has enough sunlight (at least 4 hours a day), and in winter it needs to be illuminated with a fluorescent lamp. The lamps can be installed at a height of 50-60 cm, and they should shine for at least 8 hours a day.
Step 8. The first crop can be harvested 2 months after the first shoots appear. You need to cut off the branches not at the root, but leaving 5-centimeter petioles.
Parsley cut
When the parsley is old enough, you can cut it off. It is believed that the optimal "maturity" is twigs 10-12 cm high. Disadvantages of this method: a lot of trouble. In addition, the first harvest will only take place in 1.5 months. But such parsley will grow for more than a year!
How to plant parsley with root vegetables
Why growing parsley on a windowsill from root crops is better than the first method? First of all, the fact that you do not need to wait 2 weeks before the germination of the first shoots.
To do this, you need to prepare a container with a depth of 15-20 cm and soil according to Step 2 from the first instruction. Then you just need to transplant the parsley rather tightly into the moist soil, and so that only the heads remain visible. And finally, pour with settled water. It is advisable in the first days after transplanting parsley from the garden to keep it cool on the glazed balcony, and when shoots appear, transfer the mini-garden to the windowsill.
- The best time for forcing garden parsley in a pot is at the end of October, but you can also at other times. The ideal size for root crops is 5 cm in length and 2-4 cm in thickness.
- If you don't have your own parsley garden, you can buy root vegetables at the store.
- Water the parsley in moderation, waiting for the soil to dry.
- When the parsley starts to grow actively, water it more often and abundantly.
We suggest looking at a visual instruction on how to grow parsley on a windowsill (root) in the next video.
(Rate the material! Already voted: Average rating: out of 5)
Read also:
- How to grow green onions at home
- How to grow basil on a windowsill
- Indoor flowers and plants for the kitchen - choose unpretentious, useful and beautiful
- How to get rid of midges in flowers
- 8 questions and answers about honey storage


