Content
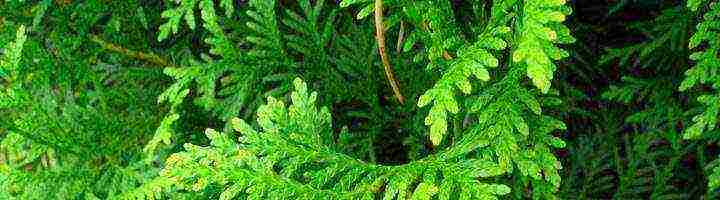
 Thuja is a representative of the cypress family. With the help of this evergreen plant, you can decorate any personal plot, adjoining territory, garden, hedge or green corridor.
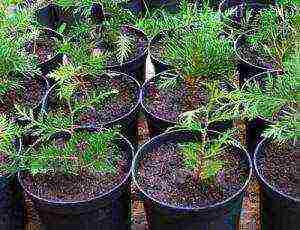
One of the ways to get an unusual thuja on your site is to cut a plant. This is convenient and effective, since the varietal qualities of the plant are preserved and full-fledged trees are obtained in 2-3 years. At home, it is quite possible to propagate thuja..
How to grow thuja from a twig?
To carry out spring cuttings of thuja, it is necessary to choose the most beautiful branches of a plant that is not yet stiff, which is no more than 3 years old. In the question of how to propagate thuja, you need to focus on the quality of the selected branches. It is better to cut off half-meter greens with a small piece of tree bark at the end. It is necessary to carry out such an event in cloudy weather in the morning by hand, tearing off the desired stalk with a sharp downward movement.
At the end of the plucked shoot, a "tree heel" should be left, which is a piece of bark as a basis for new roots. You need to know one more condition: if the stalk is removed from the tops of the axial shoots of a thuja, then a branchy tree will grow, and if the stalk belongs to the lateral branches of the bush, a creeping plant will turn out.
It is best to carry out cuttings in the spring on the assumption that it is during this period of the year that all processes in wildlife are carried out faster, the movement of juices is activated in the shoots of thuja and the cut cutting will give the first roots faster.
Thuja propagation by cuttings in spring it is held at the end of March or at the beginning of April. If this period of the year is missed, then thuja cuttings can also be done in June.
Cutting thuja cuttings in the spring, when the first wave of growth occurs, the germination of twigs-cuttings captures the entire development cycle of the plant. However, in this case, there is a danger that the branches planted for germination will fall under spring frosts. This can be avoided by installing a box with cuttings in a home mini-greenhouse and covering it with foil.
Summer pruning of cuttings affects the second growth wave. In this case, sufficient watering of the substrate is necessary, in which the twig gives the roots. You need to closely monitor soil moisture and watering frequency. Future seedlings can seriously suffer from the summer heat. At this time, the plant is periodically sprayed with a spray bottle 2 times a day - in the morning and in the evening.
Thuja propagation occurs using a substrate or ordinary water. This means that a plucked stalk can take root equally well both in a glass of ordinary water and in the soil prepared for it.
How to grow thuja in water?
 In this case, the long tail of the "woody heel" is trimmed at the newly cut thuja stalk and the lower green shoots of the shoot are cleaned so that about 5 cm of a clean stem remains. Then the root of the cutting is necessary put into water with 2 cm Kornevin powder. You cannot put more than 3 cuttings in one container so that they do not suffocate.
It is imperative to make sure that the branch does not start to rot. To do this, do not dip the green part of the sprout into the water. This home-grown cuttings in water should take place in a bright, cool, but not cold place.
You need to change the water in a timely manner. It must not be allowed to become cloudy.... During the change of water, the stalk is taken out of the container and its root part is wrapped with a damp cloth. A couple of manganese crystals must be added to clean water for disinfection.
As soon as the cutting takes root, it can be planted in the area. First, you need to prepare a place for him in the ground.
Growing in a substrate
A cut thuja stalk is also easy to grow in a substrate. This method of reproduction of thuja is considered more reliable, since in this case the sprout is saturated with useful substances. Stages of planting in the substrate:
 We put a twig in water with Kornevin powder for a day.
- We take a box with holes at the bottom and put drainage on its bottom, for example, crushed stone or expanded clay.
- We put clean sand on top, which we pre-treat with boiling water or garden soil mixed with sand.
- We saturate the sand with a weak solution of manganese.
- As soon as the sand has cooled down, the cutting is immersed there by about 1.5 cm at an angle of 45 degrees and covered with a substrate. If there are several cuttings, then we plant them at a distance of 3-5 cm from each other.
- We install the box in a place where the air temperature does not fall below 17 degrees and does not exceed 23 degrees. The light should be diffused.
The cutting should be sprayed daily with room temperature water from a spray bottle. So the water will not wash away the "woody heel" of the cutting. After two months, the thuja sprout should finally take root. If buds begin to appear on the handlethen this is a good sign. Do not immediately plant the sprout in open ground. First you need to harden the plant. The box should sometimes be taken out into the street, so that the plant gets used to the environmental conditions.
During spring reproduction of thuja, already in September, a rooted sprout is planted in a temporary place where it should spend a couple of three years. This is the so-called school for a young plant. The soil should be filled with peat and deciduous humus, and the site should be in light shade. If necessary, scatter 1 bucket of peat per 1 m2 of land.
Planting and caring for a young plant
 Do not rush to plant the sprouted thuja from the school in the place prepared for it. It is necessary to think over all the nuances of the future existence of the plant... It should grow in place, well-warmed by the sun, which the sun's rays will especially visit in the first half of the day, and in the second half shade will reign from the neighboring trees.
In the thuja hole, you need to put a mixture of manure, compost and garden soil. The roots of the plant should not be broken, and the root collar should be above the ground. After transplanting, water the plant abundantly and put sawdust or pine bark on top. This will protect the root system. It is necessary to ensure that the mulch does not cover the lower branches of the thuja and its fragile trunk - they can rot.
Young growth should:
 water regularly with a bucket of water once a week;
- spray with clean water from a spray bottle, which helps to moisten the branches of the thuja and wash off dusty deposits from them;
- feed;
- weed;
- cover with spruce branches or fallen leaves for the winter;
- clear from the shelter in the spring and continue to care for the thuja in the same mode.
- prune with pruning shears in the spring, removing all dry branches and shortening the shoots, shaping the plant so that it does not turn into a shapeless bush of needles.
Thuja propagation by cuttings is a very interesting and reverent process. A gorgeous growing tree will be a reward for all the efforts made during the entire period of growing the cuttings. This plant will perfectly fit into any landscape design..
> 
Foreword
If a thuja grows in your garden, the reproduction of which, at first glance, seems to be a difficult process, then you probably asked yourself the question: how does thuja reproduce. For experienced gardeners, propagating this plant by cuttings is not difficult, but will it be so easy for beginners to handle?
Breeding features
Thuja is an unpretentious and frost-resistant plant. It is often used for landscaping garden plots or country houses. However, thuja is an expensive pleasure, so it is easier to breed them yourself. In addition, following simple guidelines, thuja can be grown even without being an experienced gardener.
This plant can be propagated in two ways:
- With the help of seeds;
- Using twigs or cuttings.
The first method, which includes seeds, is very painstaking and time-consuming. It will take two to six years. In addition, it is believed that thuja grown from cuttings are more hardy. If you have a decorative type of thuja, you should also not propagate it by seeds. It is best to choose propagation by branches.
Thuja propagation by cuttings
For those who want to grow a similar plant in themselves, there is a very simple and affordable option - the cultivation of thuja cuttings. Reproduction of thuja in this way should take place in the fall. When preparing to breed a plant, you have probably read many articles on how to propagate thuja by cuttings, and you know that the shoot must be healthy and strong. Do not choose branches that are too young or too old. Pay attention to the ones that grow in the middle of the tree.
Such processes are usually already sufficiently strong, but not yet stiff for reproduction. Tear off some 50 cm long shoots. There should be some bark left at the end of the shoot.
Experienced gardeners who know how to grow thuja from cuttings have named this plant "heel". The longer the heel, the better the shoot will be rooted. In order to pluck a branch with such a "heel", they usually use a knife or simply pluck a branch with a sharp downward movement. We remove all unnecessary twigs and leaves. It is necessary to prepare a pot of peat and leafy soil in advance (in a ratio of 1 to 1). The cutting itself is deepened two centimeters into the ground at an angle of 60 degrees. The area around the planted cutting should be sprinkled with sand and lightly pressed with your finger.
Care must be taken that the remaining leaves do not touch the peat. We water and on top of the cutting we make a greenhouse from a film or a simple can. The higher the transparency of the jar, the better. After that, the pot with the appendage should be set aside in a bright and warm place. Humidity should be no higher than 70% at an air temperature of 23 degrees, otherwise the stalk may rot. It is better to spray the cutting itself with water, and not water it under the root.
As soon as new shoots began to appear on the cuttings, this means that it is completely rooted.
However, it is too early to plant such a thuja in the garden. Start opening the greenhouse more often and letting the thuja get some air. Increase the airing time by minimizing greenhouse time. As soon as the thuja gets used to the coolness, you can safely plant it in the garden.
How to grow thuja from a twig?
When deciding how to dilute thuja, you can find several alternative methods. On the Internet, you can find a lot of information on the question that sounds like this: "How to grow a thuja from a branch?" The "instructions" are based on the same actions as when transplanting with cuttings. However, as elsewhere, there are some nuances. If you are interested in how to grow a thuja from a branch, then the cut of the branch itself must first be treated with a root formation stimulator. This will help the root system develop and establish itself in the new soil.
A pallet with sand should be treated with a 3% solution of potassium permanganate. The twigs themselves should be placed in the holes made in advance at an angle of 45 degrees. Several branches can be grown in one pallet at once. For this, the distance between them should be from 3 to 5 cm.
When replanting with branches, make sure that no direct sunlight falls on the pallet with branches.

Moistening can be done using the same technology as when propagating by cuttings.It will be necessary to plant the rooted branches in the spring or you can keep them in greenhouse conditions until summer. This will make it more likely that your thujas will quickly get used to the new conditions and will survive the first winter more calmly.
Tips for Beginners
- If you choose to propagate thuja by cuttings, then for better growth and adaptation to the soil, new cuttings or branches can be placed in Kornev's solution 12 hours before planting. This will accelerate their growth and "babies" will appear much earlier. Remember to remove weeds from your pallets and greenhouses, otherwise all the power of the earth will go to extraneous plants.

- It is best to cut the cuttings themselves in cloudy weather early in the morning. The ideal growth of cuttings and branches for propagation is 4-8 years. If your thuja is sick, but reproduction is in any case necessary, then the cut of the cutting can be treated with a solution of heteroauxin. If the shoots sit in the ground for a long time and do not give shoots, and it is already cold outside, then do not forget to insulate the shoots with sawdust, leaves or spruce branches.
- Choose the method that suits you, multiply your thuja and enjoy the beautiful plant.
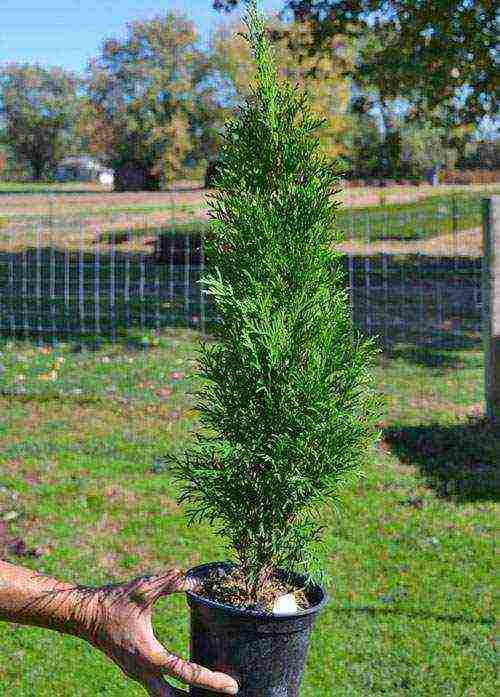
Of the numerous conifers, the cypress family, in particular, thuja is in greatest demand among gardeners and summer residents - this unpretentious, evergreen tree pleases the eye in winter and summer, serves as an excellent decoration for any site. Thuja are planted along fences, paths, they decorate resting corners with them, since thujas smell pleasant and fresh, and trees that stand out with phytoncides purify the air around them.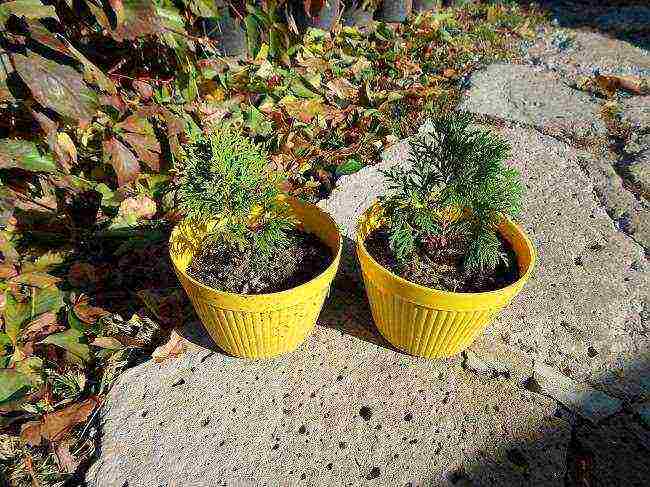
Thuja is also interesting for site owners in that it can be propagated and grown at home without spending too much effort and money on it: purchasing seedlings in stores is not cheap pleasure.
Growing thuja seeds  This is what thuja seeds look like
If it is impossible to provide oneself with the required number of cuttings, they resort to seed propagation of the tree.
This process is painstaking, long-lasting (from 3-5 years), but it allows you to grow a sufficient number of planting material to embody all conceived ideas, and the remaining copies can be donated to relatives or friends.
You need to start with harvesting fresh seeds, they will ensure good germination.
The period of harvesting seeds falls on the end of summer - beginning of autumn. Cones with seeds must have time to be collected before they begin to open, and spread them in a dry room until they are completely dry.
The seeds will be ready in 2-3 days, they will easily begin to spill out of the cones, small, brown or reddish.
After receiving the seeds, it is best to sow them in the near future; with prolonged storage in warm rooms, they lose the percentage of germination.
Autumn (sub-winter) sowing 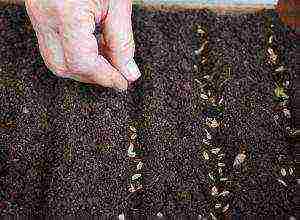 We make grooves at a distance of 5-6 cm from each other
With this method of reproduction, crops will undergo natural stratification, which will provide stronger seedlings, its active growth. This will require:
- Suitable wooden box fill with prepared soil, consisting of 1 part of sod land, 2 parts of peat, 0.5 part of fine-grained sand.
- Level and compact the soil.
- In-depth make grooves at a distance of 5–6 cm, slightly widening them for sowing convenience.
- Spread the seeds evenly over the rows, sprinkle with a layer of soil 1 cm thick.
- Pour gently with a spray bottle, being careful not to wash the seeds.
Place the box in a convenient place outside, best of all under a spreading tree, so that the sun dries out the ground less in the box. And in the spring, the branches of the tree will protect the seedlings from direct sunlight. Moderate watering is required as the soil dries up; you cannot fill in the seeds, otherwise they will begin to rot.
Winter sowing can be carried out directly into the ground by preparing a small bed in partial shade, because the bright direct sun for young seedlings will be destructive.Care should be taken to prevent pets from entering the garden by enclosing it or covering it with non-woven material.
Spring sowing
If the sowing of thuja seeds was planned for the spring, they must be subjected to hardening (stratification) so that the seedlings are strong and fully developed. Required:
- Before the onset of cold weather, bury the seeds wrapped in a cloth shallowly into the ground, cover with a layer of fallen leaves.
- To prevent the seeds from freezing, make sure that they are covered with snow, or additionally insulate.
- With the onset of spring, after the snow has melted, remove the seeds from the ground, transfer to a suitable container, sprinkle with wet sand, place in the refrigerator before sowing.
By the end of March - beginning of April, when the ground warms up, you can plan to sow seeds in the ground. Sowing is done shallow, the distance between the rows is 10-15 cm. The sown seeds are sprinkled with a very thin layer of earth and carefully watered.
Further care is to regularly moisten the soil, destroy weeds, and shade the seedlings from the sun.
 You can plant each seed in a separate pot so that future sprouts grow and develop individually for a whole year, until the next transplant:
- Purchase in advance a special soil for conifers.
- Prepare pots or cups, pour a layer of drainage on the bottom, add soil on top, compact it, spill it with a solution of potassium permanganate.
- Place the seeds soaked a day before sowing and hatching in pots, pour warm water on top.
- Put the cups in a warm place, cover with foil on top.
- After the sprouts appear, take the cups to a bright, cool place. If the pubescent roots are on the surface, they must be sprinkled with sand and moistened with a spray bottle.
In the summer-autumn period, pots with young sprouts can be taken out into the street, placed under a tree.
Seedling care in boxes
- In the first year, the seedlings grow by only 7 cm, special care is not required for it, the main requirements are watering, spraying, adding earth, top dressing.
- The next year, in the spring, they begin to pick the seedlings into separate pots or cups with soil for conifers. After the seedlings take root, they can be placed on the street, finding a shaded place, regularly watering and inspecting the seedlings in order to identify diseased specimens in time. In winter, the cups are carried away to the shelter.
- In the third year, the seedlings must again be transplanted into larger pots., since May, they can be safely taken out into the street, and in the fall - they can be planted in a prepared permanent place, leaving the root collar at soil level.
Thuja propagation by cuttings
This type of reproduction makes it possible to preserve the varietal characteristics of plants.
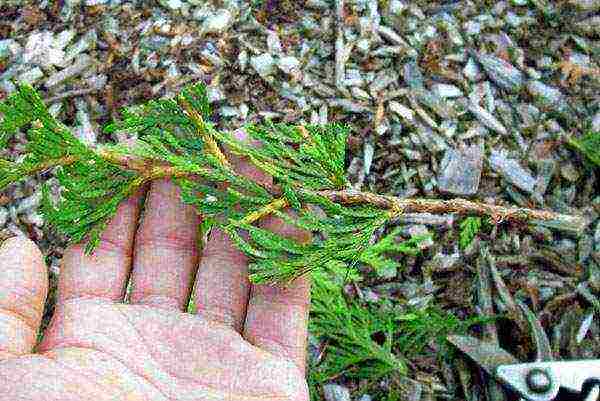
 Thuja cuttings need to be torn off with the heel
For cuttings, you can use the end of April, until the buds are completely swollen, or mid - end of June, when the growth of the shoots ends. Lignified branches 30–40 cm long are taken from young healthy thuja, 2-3 years old. It is necessary to tear off the cuttings so that together with them a piece of bark ("heel") departs from the mother tree.
Remove the needles from the lower edges of the broken off branches by 8-10 cm, soak in one of the root formation stimulants (follow the instructions).
During this time, prepare a bed with suitable soil:
- peat;
- river sand;
- sod land.
The components are taken in the same amount, mixed. The soil is brought into the garden bed, mixed with the garden soil, spilled with a solution of potassium permanganate. The cuttings are deepened by 2-3 cm, water to compact the earth around the cutting. Further watering is replaced by spraying, so the required humidity is created.
Growing thuja from a twig
This breeding method is almost no different from planting cuttings.Branches 25–35 cm high are cut from the healthy tree you like with its middle part with sharp scissors, the larger the branch, the better it will take root. The cut is processed with "Kornevin" or "Heteroauxin", all the lower leaves are removed.
Further:
- A hole is being prepared in a secluded, semi-shaded, moist place, the soil is well loosened, organic fertilizer is added, and spilled with water.
- After the soil is saturated with water, a branch of thuja is stuck in, the earth around it is slightly compacted.
- The planted twig is covered with a jar or a transparent plastic bottle, the edges are sprinkled with earth, and once again, a little water is poured from a watering can.
The jar or bottle will need to be removed periodically for airing, but not earlier than 2 weeks after planting.
Rules for caring for thuja sprouts from cuttings and twigs
After rooting of cuttings and twigs, they need regular watering (but not waterlogging), regular spraying of needles, 2-3 times top dressing with complex fertilizers, constant removal of weeds, and frequent surface loosening of the soil.
Before the onset of cold weather, insulate the ground around the trunks with bark, dry leaves, sawdust or spruce branches, and wrap the upper part of young trees with foil.
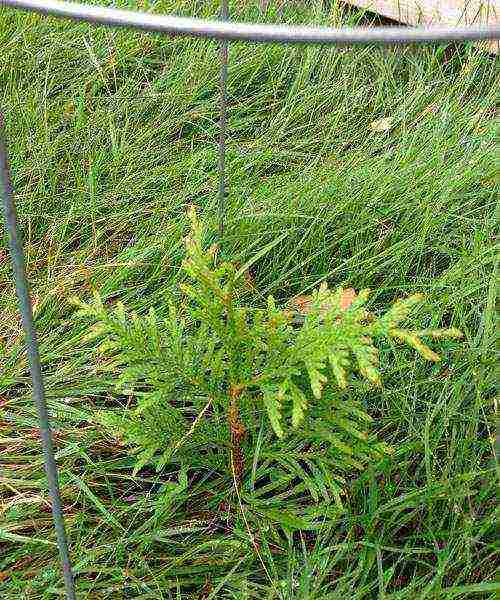
September next year is the time to replant the grown trees to a permanent place.
It is important not to bury the trees, leave the root collar at the soil level, a deeper planting will lead to the death of the plant.
Tips for growing and caring for thuja 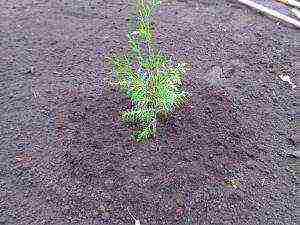 Tui is afraid of direct sunlight and drafts.
Conical, pyramidal, egg-shaped, spherical - thuja will be a wonderful decoration for any garden if you provide them with proper care.
The landing site must be chosen such that:
- direct sunlight fell on the trees in the mornings or evenings, the hit of the daytime sun will dehydrate the needles, the plant will lose its beauty;
- thuja does not tolerate strong winds and drafts; if it is planted in such a place, it will be difficult for it to endure winters;
- a thick shadow will affect the density of the crown, it will be rare and unattractive;
- thujas love moist soil, but prolonged late spring flooding will destroy them.
- only a year after planting, when the tree is strong and well-rooted, you can start feeding it.
To preserve the correct shape, the trees need a decorative haircut: from the age of two, the branches are cut with a sharp pruner, which go beyond the shape of the design idea. Experienced gardeners find it best to prune lightly but often.
 Popular coniferous crops in nature are more often propagated by seeds or vegetatively. But in nurseries and among gardeners, thuja propagation by cuttings in spring is more common, allowing:
- save time and effort for germinating seed and bringing it to the state of a strong viable seedling;
- preserve all the varietal characteristics of the parent plant, which would have been necessarily lost with the seed method.
If a summer resident is engaged in self-cultivation of seedlings for the first time, it is important for him to know how thuja reproduces.
Preparation of thuja cuttings for reproduction in spring
 Harvesting cuttings from conifers, their adaptation and planting have significant differences from the technology of working with deciduous species that is well known to many.
The optimal time for harvesting planting material is the end of March and all of April. Shrubs that have awakened from winter dormancy begin to grow, therefore, pieces of shoots cut from them receive a natural stimulus for growth and root formation.
In spring, for reproduction of thuja, cuttings from strong, well-developed shrubs are cut off tops at least 10–12 cm long. The diameter of the future seedling should not be less than 5–8 mm. One-year-old shoots of lateral branches taken as cuttings form roots much faster and more readily than those cut from the top.
How to proceed further? How to propagate thuja by cuttings at home? In this case, it is enough to immerse the planting material of many deciduous crops in a container with water. After a while, the cutting will develop roots, with which it will go into the ground for further growth. In conifers, the process of root formation is somewhat difficult, so the cuttings need a little help:
- Fresh cuttings at the base are cut obliquely.
- Close to the cut, carefully pry up and remove the bark.
- Above the shoot, several thin longitudinal cuts are made.
- The needles are removed, leaving only at the ends of the shoots.
 You need to perform these operations fairly quickly so that the cuttings do not fade.
Thanks to the incisions made, it will be easier for the future roots to overcome the bark, and removing the needles will help to avoid decay after planting.
In this form, pieces of shoots are placed in a solution of a root formation stimulator. In a jar of water, cuttings for propagation of thuja should stay from 12 to 24 hours. During this time, the seaming of the roots awakens, which increases the likelihood and accelerates the rooting.
Rooting and planting thuja cuttings for propagation
 While the planting material is waiting for its turn, containers and soil are prepared for planting. Containers should have drainage holes to drain excess moisture. It is convenient to take washed and disinfected sand mixed with peat as a substrate for thuja propagation by cuttings. You can neutralize harmful microflora and insect larvae using:
- abundant watering with a solution of potassium permanganate or phytosporin;
- boiling water abundantly spilled on the soil layer;
- by calcining in the oven.
The cuttings are planted at a distance of at least three centimeters from each other. When planting in multiple rows, leave 8-10 cm between rows. The same distance should be to the edge of the container or pot.
The tightness is dangerous for seedlings, the roots of which risk intertwining and breaking off during transplantation into open ground.
Shallow, up to 15 mm holes are made at an inclination of 45 degrees. When all the cuttings of the thuja for its reproduction in the spring have found their place, the soil around them is slightly compacted, and then the plantings are watered.
Thuja seedlings care for vegetative propagation
Until strong roots form on the cuttings of the thuja, they need protection from the weather:
- direct sunlight;
- wind;
- rain;
- probable frosts in the spring.
 The best hiding place for the first two months is a small greenhouse or greenhouse. During this time, the seedlings are provided with daily watering, which is extremely necessary in dry, sunny, warm weather.
On especially hot days, it is useful to spray rooted cuttings for thuja propagation with warm water, using the smallest sprinkling. The film on the greenhouse is changed to a thin fabric or non-woven material.
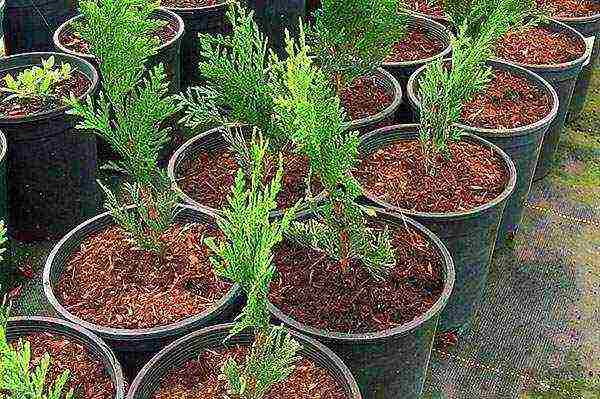
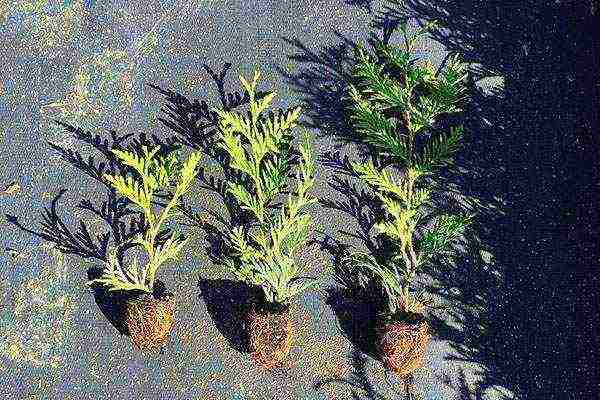
Over the summer, properly planted and well-cared plants develop their own roots. Therefore, young thuja can be safely transferred to a place where shrubs will fully form in 2-3 years, or to separate pots for growing in a container.
 The roots of ornamental conifers are rather fragile. You need to work with them carefully, trying not to damage. It is more convenient if, during transplantation, the seedling retains a small earthen clod, which will protect the rhizomes and accelerate acclimatization.
A video about thuja propagation by cuttings at home will help beginners understand the intricacies of the process and avoid mistakes that will delay the appearance of new evergreen shrubs on the site for a year. After transplanting into the ground, thuja receive the same care as their adult counterparts. But it is necessary to monitor the cleanliness of the soil under the plants especially carefully, otherwise the weeds can "strangle" small shrubs.
Wick rooting of thuja cuttings - video