Content
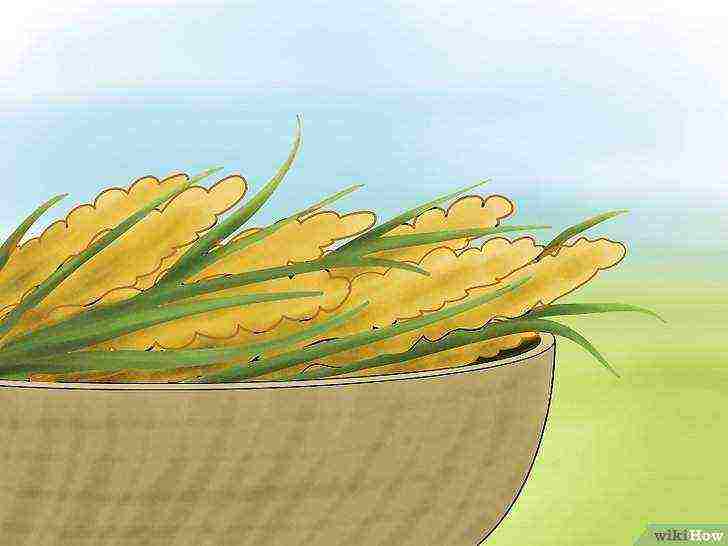
Many gardeners and gardeners do not know how to answer the question of which plant the millet is harvested from. We used to call this culture millet; not only porridge, but also flour, kvass, and beer are obtained from grain. For pet food, processed products such as flour, straw and husk are used.
The main characteristics of the plant
At the moment, millet is one of the main cereal crops in our country. This drought-resistant cereal grows well even with a short daylight hours, therefore it is grown in several climatic zones of Russia. In the southern part of the country, millet is used as a catch crop and is sown after the grain harvest.
Growing millet is also possible in dry areas, this crop forms a crop even at high temperatures. According to experts, the yield of the grain in question, even under adverse weather conditions, will be at least 1 ton per hectare. With the correct cultivation technology, at least 1.1 tons of grain can be obtained from each hectare of usable area.
Place of culture in crop rotation
It is advisable to sow millet on the site after winter crops, as well as legumes and perennial grasses. It is highly undesirable to grow this plant after corn, because these two crops during the growing season can be damaged by such a pest as a stem moth. As a precursor, millet can be used for virtually all garden plants.
How to cultivate the soil
The main tasks of soil processing are considered to be the protection of the site from weeds, the accumulation, as well as the retention of moisture. The land for millet can be cultivated depending on its condition:
- Conventional fall plowing is used after later predecessors such as beets or sunflowers. In this case, the depth of soil cultivation is within 20 centimeters.
- Improved fall plowing is used in areas after early horticultural crops. The purpose of such treatment is the destruction of sow thistle and other weeds. First, they pass through the site with a cultivator, removing the topsoil to a depth of 6 centimeters. After about two weeks, the area is traversed with a flat cutter, after the same time the soil is plowed to a depth of 20 centimeters.
- Semi-steam winter treatment is considered the best option for early predecessors. This requires light-textured soils and wet weather. The main method of cultivation is considered to be plowing areas with leveling the earth with harrows. In the autumn, two cultivations are made to destroy weeds.
- Zero tillage is desirable to carry out on loose, free after weedy soils. After harvesting the predecessor, the soil is plowed to a depth of 7 centimeters. In the spring, two-time cultivation takes place in order to destroy the germinating weeds.It is not recommended to plow the fields in spring, as this activity leads to the evaporation of moisture.
How to fertilize
Field efficiency and crop yield depend on the fertilizer applied. For every centner of grain you will need:
- 1 kilogram of calcium;
- 1.5 kilograms of phosphorus fertilizers;
- 3.2 kilograms of potassium;
- 3 kilograms of nitrogen;
The intensive development of millet is particularly well influenced by nitrogenous and phosphorus fertilizers. These components do not cause fatty shoots, allowing the formation of a good grain yield. During tillering of plants, it is recommended to apply additional fertilizing in the form of granules of ammonium nitrate.
Fertilizers with a high phosphorus content are embedded in the soil at the initial stage of the growing season (these components contribute to the development of the root system of plants). Boron, iron and manganese should be added from additional trace elements. The use of beets and potatoes as a precursor will help to reduce the amount of nutrient introduced.
Sowing millet
At the preparatory stage of work, the seed is spread in a thin layer and dried in open areas for 5-7 days. After that, the surface of the grain is treated for diseases with special chemicals (Fenoram, Formalin or Baytan). These substances are applied to the seed in the doses described in the instructions on the package. After treatment in the solution, the drowned seeds are collected. Exposure to moisture accelerates germination.
Sowing of millet is carried out in the soil warmed up to 12-15 degrees during the period when the danger of the return of spring frosts has passed. On weed-free areas, it is recommended to use the usual or narrow-row sowing method; in weedy fields or in arid regions, millet is sown in a wide-row one-line or two-line method, observing the distance between rows within 45 centimeters. Sowing rates depend on the method chosen, in general, for each hectare of usable area, 2.5 to 3.5 million viable seeds are used. The grains are embedded to a depth of 5 centimeters in wet areas or 10 centimeters on lightly textured soils.
Care
The initial maintenance procedure is the rolling of the area with rollers, which makes it possible to improve the contact of the sown grains with the soil and increases the germination of the seed. A similar procedure is recommended for dry regions. In areas with high soil moisture, such measures will be unnecessary.
The second type of work for the care of millet crops is the harrowing of the site with mesh tooth harrows. This procedure destroys the hard soil crust and destroys weeds. During such procedures, the depth of the harrow tooth should be less than the depth of millet planting. Harrowing is also carried out during the tillering period of the crop, when the harrow's teeth cannot undermine the plant's root system. The harrowing process is carried out across the rows of crops.
Harvest
High-quality millet harvesting is complicated by strong shedding and uncooked ripening of the crop. Millet is harvested by separate combining when ripening at least 80% of the harvest. First, millet is mowed into rolls with reapers and left in this state until the grain is fully ripe. Threshing of crops is carried out at 14% moisture content of seeds by special combines. After that, millet is transported to the current, dried and cleaned of harmful impurities.
2 methods: Growing millet at home Growing millet as a crop
Millet is a tall cereal crop that has been cultivated for nutrition for at least 3 thousand years. In many Western countries, it is most common among bird breeders, as a special food, or for farmers who have discovered the beneficial qualities of this crop as a fast growing crop during a drought or a viable, drought tolerant plant. A rich variety of millet is available and easy to grow. If you find a section that interests you, find out more about this handy plant.
Method 1 Growing millet at home
-
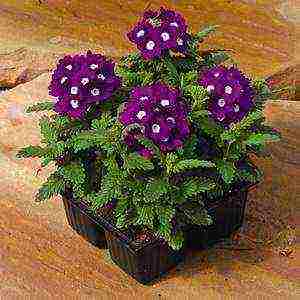
 A variety of millet is at your service.
The grains or twigs with millet grains are often sold as bird feed, but they come in many varieties and can also grow like a weed. While bird owners have reported success in planting these seeds, or even that they may sprout by accident, as a weed, seeds or seedlings purchased from the nursery are likely to be of the exact variety. This will give you an idea of what to expect and what problems you might encounter while growing a given variety.
- Ornamental millet varieties such as Purple Majestic or Italian millet are recommended for small garden plots due to their attractive appearance. They still produce edible seeds that attract birds and other wild animals. Cite error Template: namespace detect showall
$2 Millet does not reach its maximum height in cold climates.
-
- If you are growing food or feed millet for birds, use organic grains and do not fertilize with pesticides.
-
 Seeds are planted in greenhouses in early spring or outdoors in late spring.
For best results, especially with ornamental millet, start planting grains in greenhouses about 6-8 weeks before the last frost of the year.
In addition, start planting seeds in an open area when the frost ends and the soil temperature rises above 10ºC, but be aware that the plant may not have enough time to mature and produce seeds by the end of the growing season.
-
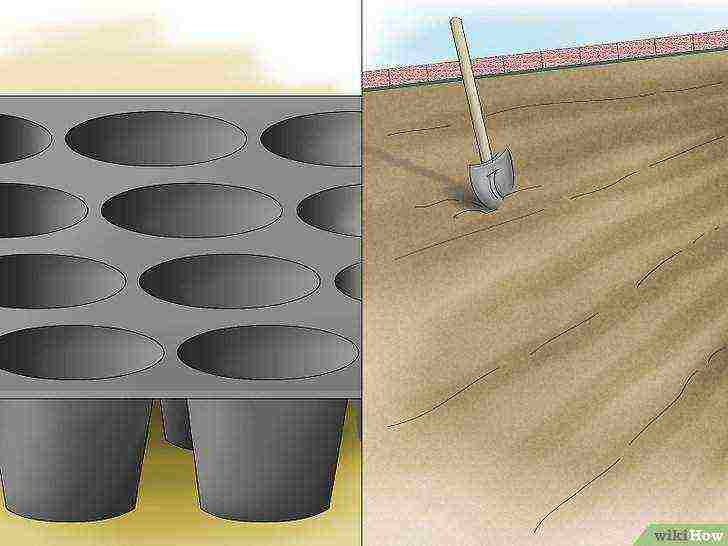
 Prepare the soil.
You can buy seeds starting with soil, or mix the soil with an equal amount of compost.
Growing in your garden soil without fertilization can be ineffective, but you can try growing millet in any soil that absorbs moisture quickly. Mix perlite or sand into the soil if the soil is lumpy or damp after watering.
-
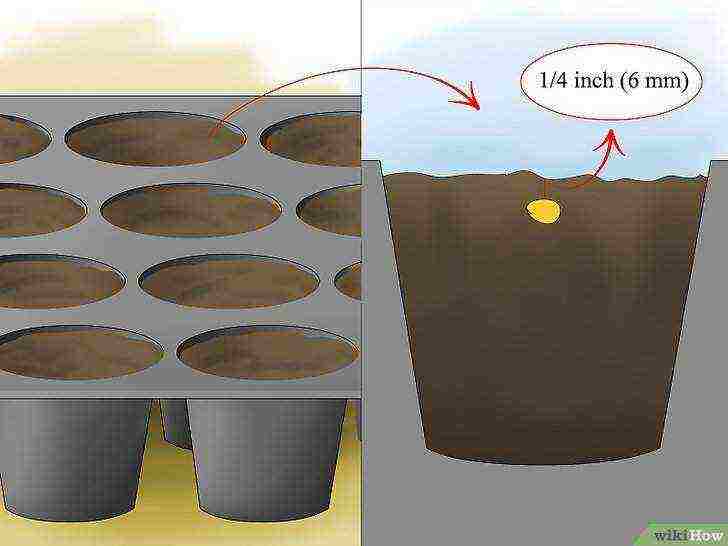 Plant the grains shallow in the ground.
The seeds do not need to be buried deeply, no deeper than 6 mm from the surface.
It is best to sow seeds 5-7.5 cm apart. If you don't have enough space, you can plant them close together, and discharge the smallest seedlings as soon as the seeds germinate.
-
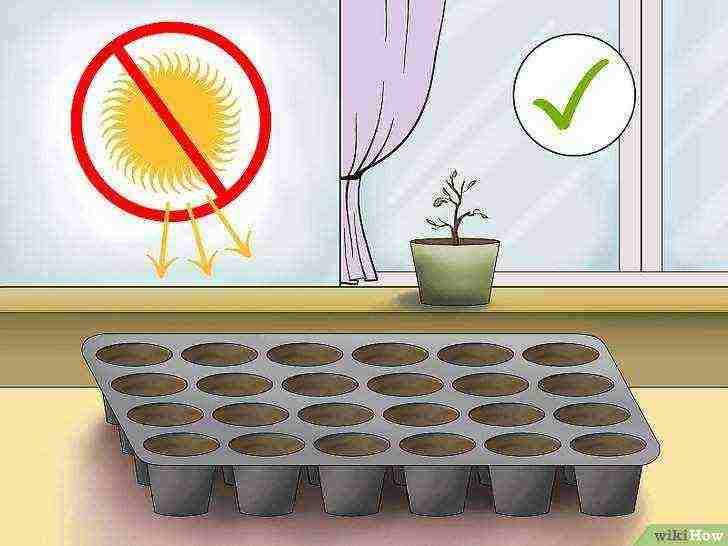 Keep seeds in a warm room with indirect sunlight.
The seedlings should germinate within a few days. Many millet varieties are adapted to warm climates and thrive best when exposed to bright, indirect sunlight for more than half the day and temperatures around (25 ° C). If you purchased millet with a different instruction, follow it instead of this one.
If the millet you purchased came with other instructions, follow them instead.
-
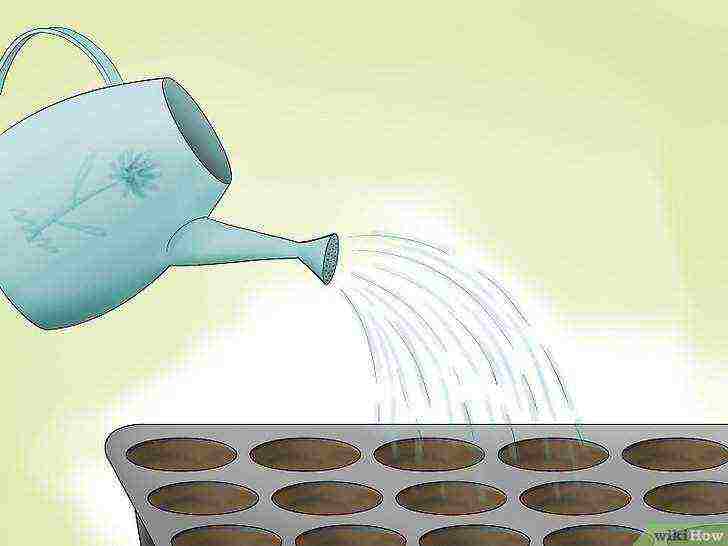 Know when to water your seeds.
Water immediately after planting to aid their growth.
Then water whenever the soil is dry or semi-dry, do not water if it is wet. Make sure the water drains well. Millet will not grow well if the seeds are soaked in water.
-
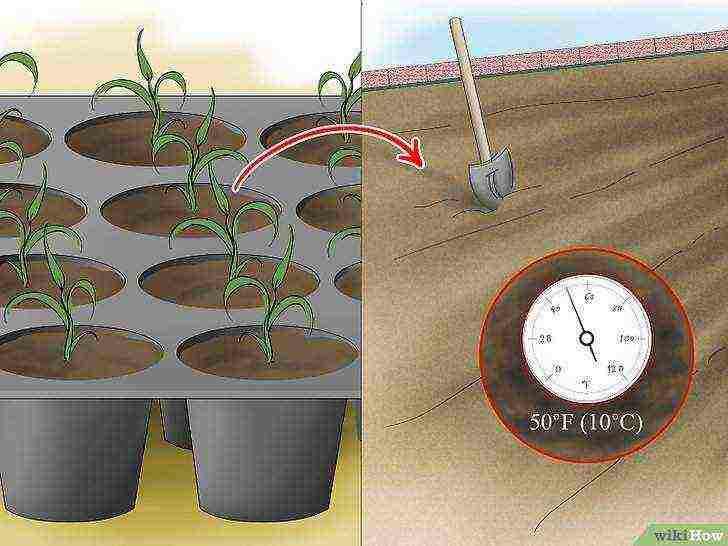 Move the seedlings to an area with direct sunlight as soon as it gets warmer.
As soon as the last frost has passed and the soil warms up above 10 ° C, dig for each seedling, trying to keep the roots intact. Transplant them into outdoor pots or directly into your garden using the same soil as before. Try to plant the seedlings as deep as they were before, do not bury the stem that was previously above the soil level. Keep millet out in the sun, unless there are signs of wilting or burning.
- The recommended pot size or plant spacing varies greatly depending on the type of millet.
- If the weather is hot or the seedlings are still small, consider keeping them outdoors in shade and wind protection for one or two weeks before moving them into an area of open sun. This will allow them to gradually adapt to external conditions.
-
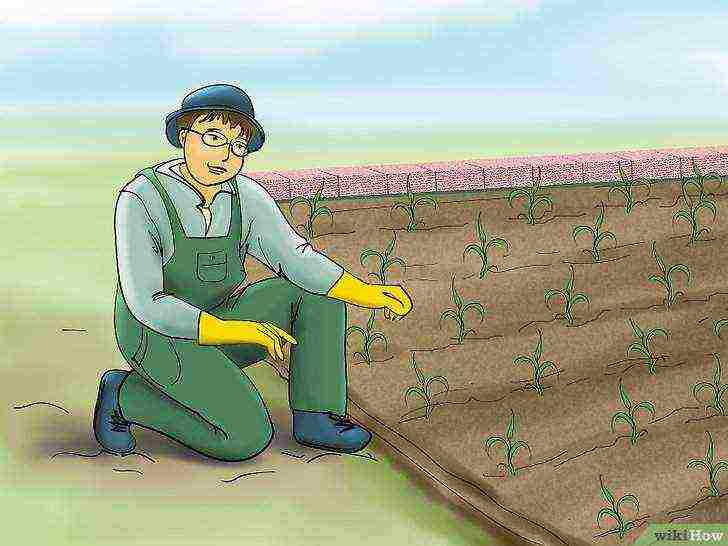 Groom as needed.
Since there are thousands of species and varieties of millet, it is impractical to give specific advice for each. In general, millet is a plant that dries out the soil a lot, and try not to dry out the soil.
Millet cannot withstand severe frosts, both as seeds and as mature plants, and most species germinate in warm weather.
If your plant gets sick or a part of the plant has died, contact a botanist or nursery nursery so they can identify the specific millet species and offer specific care.
- If your millet is rotting or mucus is visible at the base or roots, reduce watering.
- If your millet dries out or capsizes, it may be a short-rooted millet variety. Add compost to the soil to help absorb moisture and strengthen the plant.
-
 Collect the seeds before they ripen.
If you want to harvest seeds to feed your pets or plant again next year, you need to harvest them before birds and other wild animals do. The time it takes for millet to ripen varies by cultivar and climate, so as soon as the plant is blooming, watch out for the seed pods. These pods appear among the bushy tops of the plant, and eventually open up. Open the pod periodically to see if the seeds are brown or black. If they are, it's time to collect the pods. Collect them individually or cut off the entire stem.
- Note that millet is a one-year plant, meaning the plant dies after maturing.
-
 Learn to use seeds.
The seed pods can be left in a paper bag to dry for one or two weeks. Shake the pouch to separate the seeds from the chaff, then store them in a dry, dark place to plant next year. Also, feed small amounts of ornamental bird seeds, fresh or dried, as a treat. If you have enough millet seeds, you can make porridge.
- Millet and other treats should make up no more than 10% of your bird's diet.
Method 2 Growing millet as a crop
-
 Choose from a wide variety of millet to suit your needs.
Millet is the common name for an annual grain crop grown during the warmer months, so there are many varieties and hybrid varieties of millet to choose from.
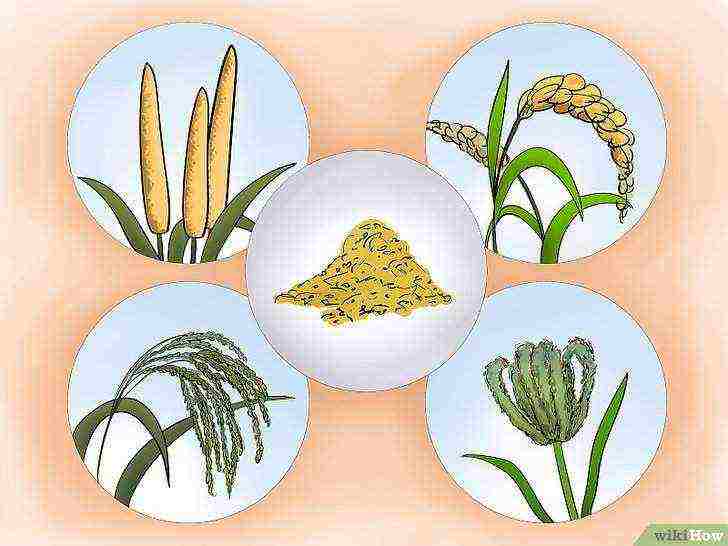
Some farmers grow millet as a forage crop or to attract wildlife. However, farmers in India, Africa or China harvest grain to sell for human consumption. Be sure to choose the type of grain for your application that is best suited to the local climate and soil. Below are the most common varieties of millet, but note that each species has many subtypes with different characteristics:
- Millet is most commonly used in poultry feed in the southwestern United States, or for human nutrition in India and Africa.
- Bristle grass grows reliably in semi-arid conditions, and grows in a short time, which allows it to be planted later than other crops.
- Common millet is another hardy millet variety that grows in a short time. Grown in the central states of America such as Colorado, Nebraska, and South Dakota.
- Finger millet is grown in high terrain or hills than other crops and is preferred by farmers due to its low cost and shelf life.
-
 Plant millet during the warmer months.
Millet is sensitive to cold weather, it needs to be planted in the soil to a depth of 2.5 cm at temperatures above 18ºC to be sure that it will germinate. This is usually three to four weeks after planting corn, and one to two weeks after planting sorghum in your area.
- Most varieties of millet mature in 60-70 days, some have a shorter ripening period in warm climates.
-
 Prepare the seedbed.
Clear the field of weeds and prepare the soil, depending on its type. Plow the land to make it loose. If the soil has a high clay content, or is subject to erosion, you will have a better chance on unplowed land, or on virgin land (leaving the land to "rest" after the last years of the harvest). For a limited amount of plowing, it is recommended to sow later, as these beds will be warmed up by the sun less
- You can plant some varieties on unplowed land, however, you probably won't get the maximum yield if you don't use nitrogen fertilizers.
-
 Plant the seeds at a shallow depth.
To a standard depth of 1.25-2.5 cm. Seeds are rarely strong enough to reach the ground when planted deeper.
You can plant small seeds 2 cm deep.
- Some small seed varieties can be sown with a sieve. The seeds can also be sown by hand in furrows, which are then covered with soil.
-
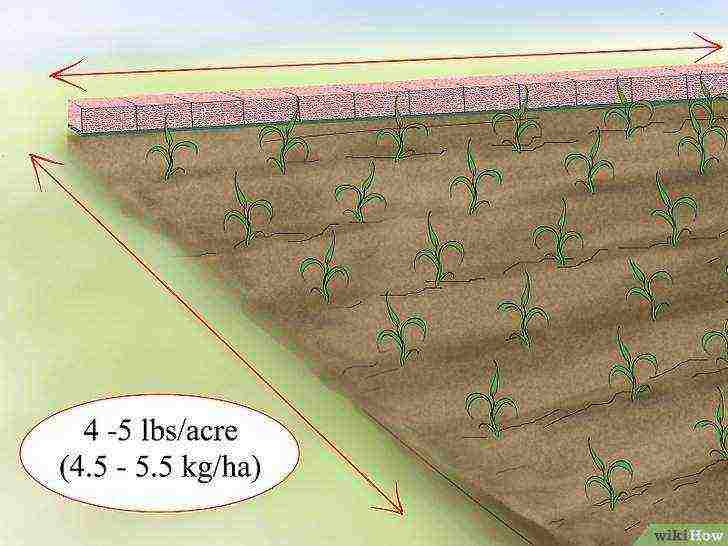 Provide distance according to variety and local conditions.
Soil type, climate, millet variety all affect planting density, so we recommend looking for local reviews. As a rule, millet can produce quality forage when sown at 4-5 kg / ha, but if it is irrigated, the sowing reaches up to 20-30 kg / ha.
Plant farther apart if you are growing it for food rather than forage.
-
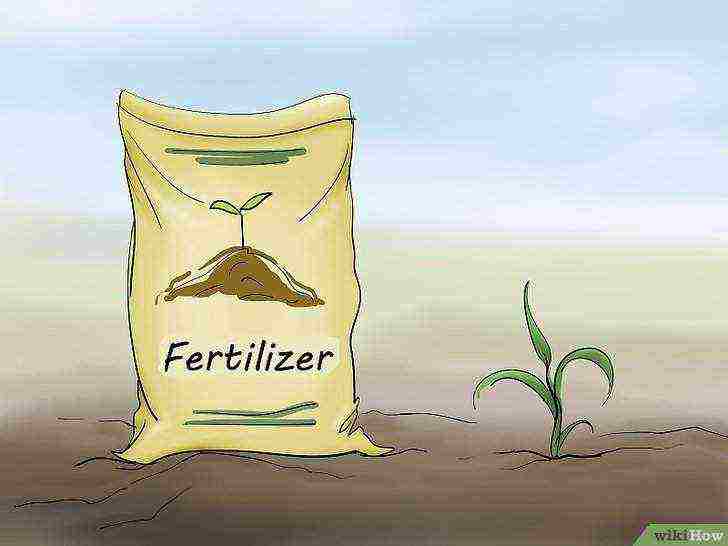 Fertilize.
Many varieties of millet can grow in unfertilized soil or even unplowed soil, but fertilization is recommended to increase crop yields. Apply 45-56 kg / ha of nitrogen after planting, and the next 45-56 kg / ha after 3-4 weeks. Some soils may require the use of potassium, phosphate, magnesium, sulfur.
If you can't find a recommended application of these minerals for your millet, you can follow the sorghum fertilization recommendations instead.
If you cannot find recommended levels of these minerals for your millet, you may follow guidelines for sorghum instead.
- Application of fertilizer can harm millet if the fertilizer is not pure phosphorus.
-
 Mow millet and leave in the field in haystacks.
Bristles and possibly other varieties of millet deteriorate if they are not mown in time. Mow them in rows to leave the mowed plants until late fall or winter to dry well before rolling the bales.
-

Make sure all weeds and substances are millet-safe. Millet is a type of crop and can be killed by herbicides applied to other plants. Other herbicides and insecticides may not be safe for use on forage crops, food crops, or both. The specific diseases and insect pests that can harm millet vary widely from region to region and may be ready for crop rotation and seed treatment. Check with local farmers or your regional agriculture office.
-
 Harvest before migratory birds appear.
Keep a close eye on grain development and bird activity, as the harvest time can be shortened between grain ripening and the arrival of a large hundred birds. Harvesting methods vary depending on the millet variety and intended use, but remember to root-cut for more grain.
- Millet seeds should be stored at less than 13% moisture.
Tips
- Millet seeds are often seen in poultry feed mixtures, often varieties of red and white millet.
- As with any crop, specific advice for your variety and growing conditions will be more important than any other general advice.
Warnings
- Fertilizer can become hazardous to small or young plants. You can add it at your own risk, use less than half of the recommended amount.
- Hybrid plants produce seeds that have different or conflicting qualities compared to the original plant.To ensure a good harvest every year, purchase new hybrid seeds.
What do you need
- The soil
- Soil that absorbs moisture well
- Millet
- Area of open sun or partial shade
Article Information
This page has been viewed 11,754 times.
Was this helpful?
4 methods: Soaking and germinating the seeds Planting the seeds Collecting the wheatgrass Juicing the wheatgrass
Wheatgrass is packed with essential vitamins and nutrients that keep your body and mind healthy. A small amount of wheatgrass juice every morning is considered a very healthy way to start the day, but it can be very expensive. If you want to make wheatgrass a part of your diet, try growing them at home rather than buying them as juice. In this article, you will find information on how to grow wheatgrass from seeds and use them when ripe.
Method 1 Soaking and germinating seeds
-
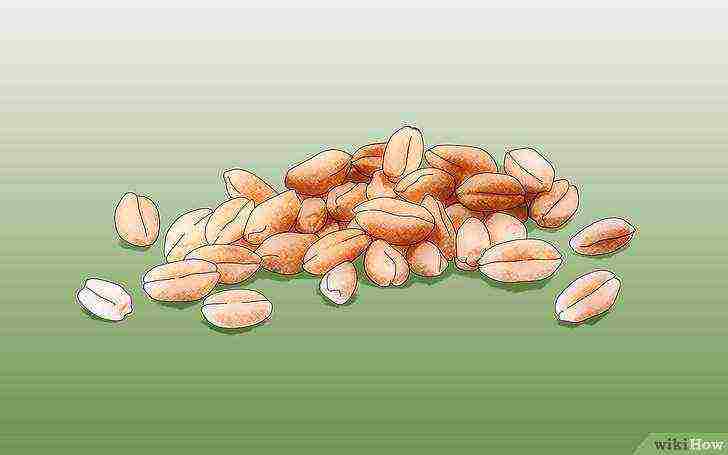
Purchase Wheatgrass Seeds. They are also called hard winter wheat seeds. Buy a pack of seeds online or at a health food store. Look for organic seeds from a reputable grower to be sure they haven't been treated with pesticides and will grow into healthy, vibrant grass.
-
 Prepare the seeds for soaking.
Before proceeding with soaking and germination, the seeds must be measured and washed.
- Measure out enough seeds to spread in a thin layer on the tray you use to grow your herb. For a 40 x 40 cm tray, you will need about two cups of seeds.
- Rinse the seeds in cool, clean water using a very small colander or strainer. Drain the water thoroughly and place the seeds in a bowl.
-
 Soak the seeds.
Soaking initiates germination. By the end of the process, the seeds should have germinated small roots.
- Pour the seeds in a bowl with cold, preferably filtered, water. The amount of water should be three times the number of seeds. Cover the bowl with a lid or plastic wrap and place on the counter for 10 hours or overnight.
- Drain the water from the seeds and pour in even colder, filtered water; again, the amount of water should be about three times the amount of seeds. Let it soak for another 10 hours.
- Repeat the process one more time for a total of three water changes.
- By the end of the last soak, the seeds should have germinated roots. This means they are ready to land. Drain and set aside the seeds while you prepare to plant.
Method 2 Planting seeds
-
 Prepare a seed tray.
Line the tray with paper towels to prevent sprout roots from sprouting through the holes in the bottom of the tray. Line the bottom of the tray with a 5 cm layer of organic compost or soil.
- If possible, use paper towels that have not been treated with chemicals or dyes. Recycled, chemical-free paper towels are available at health food stores.
- Use pre-moistened compost or soil that is free of pesticides and other chemicals. To get the most out of your wheatgrass, it's important to use organic soil.
-
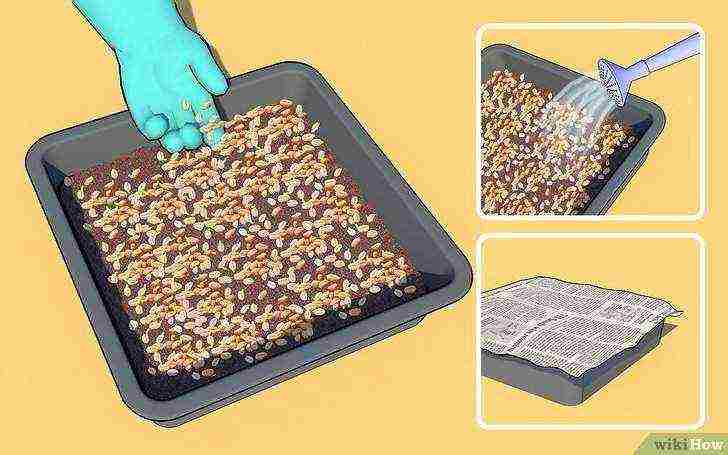 Plant the seeds.
Spread the seeds evenly over the entire surface of the compost or soil. Squeeze the seeds lightly into the soil, but do not bury them completely.
- It's okay if the seeds touch, the main thing is that they do not concentrate in any one place. They need space to grow.
- Water the tray lightly and make sure all seeds get moisture.
- Cover the tray with a few dampened newspaper to protect the seedlings.
-
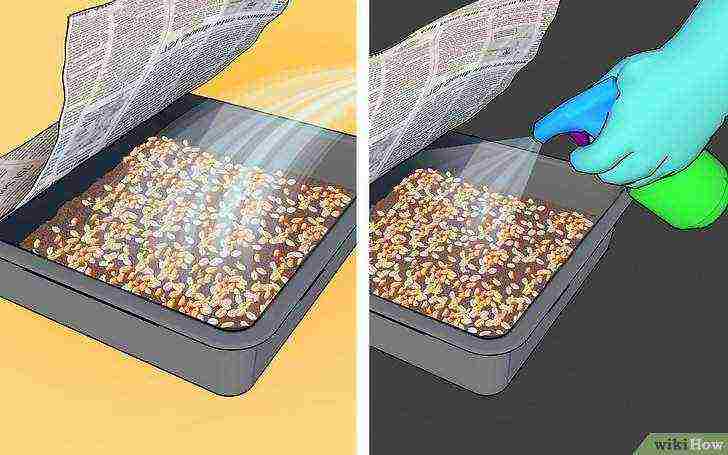 Maintain moisture.
The seeds should not dry out for the first few days after planting.
- Pick up newspapers and water the tray thoroughly in the morning. The soil should be moist, but not saturated with water through and through.
- Before going to bed, lightly dampen the seedlings with a spray bottle to prevent the seeds from drying out overnight. Spray moisture on newspapers as well.
- Remove the newspapers after 4 days. Continue to water the sprouted grass once a day.
-
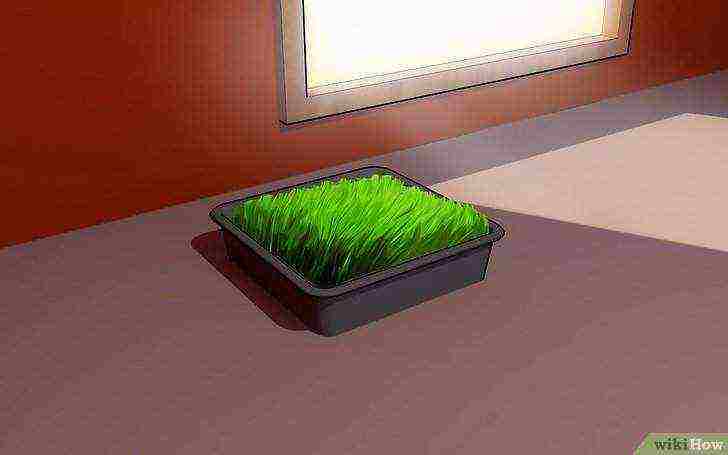
Keep the grass in partial sunlight. Direct sunlight can damage it, so place the tray in a shady place.
Method 3 Harvesting Wheatgrass
-
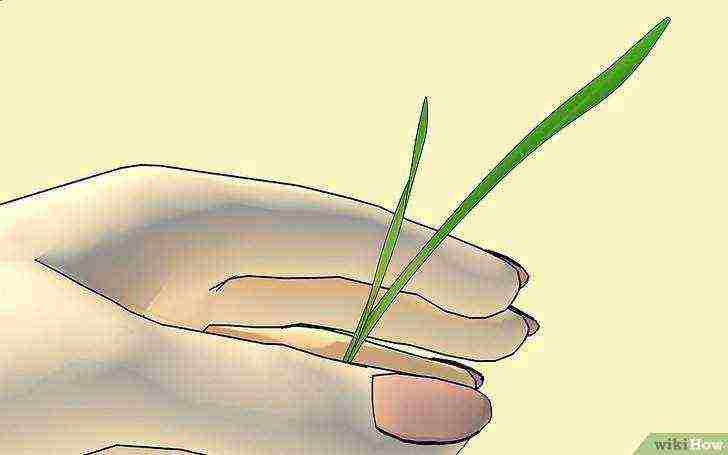 Wait for the wheatgrass to separate.
As soon as the shoots ripen, the second one begins to grow from the first blade of grass. This means the grass can be harvested.
- The grass should be about 15 cm high.
- As a rule, harvest can be done on the 9-10th day of growth.
-
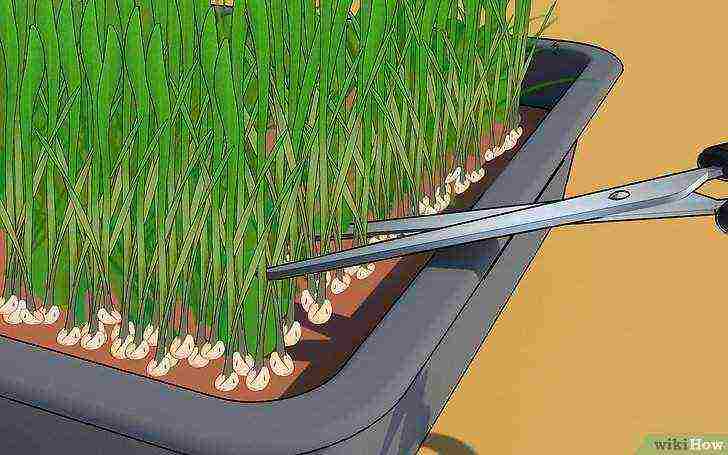 Cut off the wheat germ above the root.
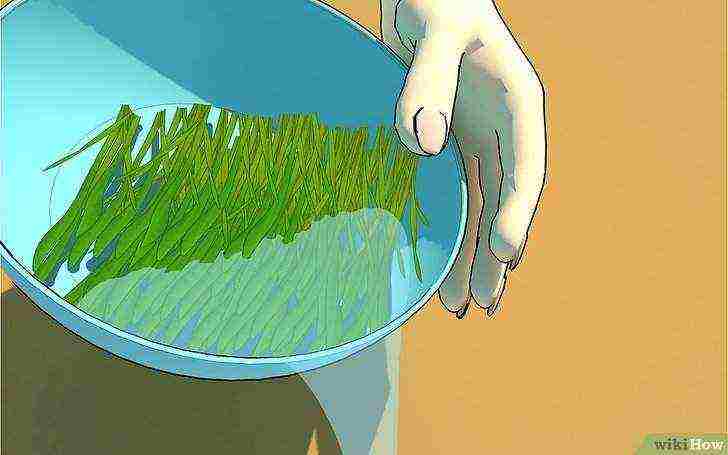
Cut the grass just above the root with scissors and place in a bowl. Juice can be squeezed out of the collected grass.
- The harvested wheatgrass can be stored in the refrigerator for about a week, but it is best to harvest it immediately before consumption, as then it not only has very good taste, but also the greatest health benefits.
- Keep watering the wheatgrass for another crop. Collect the grass as soon as it is ripe.
- Sometimes a third crop may sprout, but it is usually not as tender and sweet as the first. Empty the tray and prepare it for the next batch of seedlings.
-
 Start the process again.
It takes a lot of grass to squeeze the juice out of wheatgrass. If you plan on making wheatgrass juice part of your daily diet, you will need more than one tray of seedlings.
- Time to grow and harvest so that you have a new batch of soaked seeds coming up while the previous one starts to grow. If you already have two or three batches at different stages of growth, then you have enough wheatgrass to enjoy juice every day.
- Wheatgrass has a beautiful, bright green color and will add natural beauty to your kitchen. Try growing wheatgrass in a decorative tray surrounded by other plants to enjoy beauty and health at the same time.
Method 4 Making juice from wheatgrass
-
Rinse the wheat germ. Since you've grown wheatgrass from organic seeds in organic soil, they won't need to be over-cleaned. Rinse lightly to remove debris and dust that may have gotten on them from the air.
-
 Place the wheat germ in the juicer.
Wheatgrass juicers are designed to make the most of this fibrous plant.
- Do not use conventional juicers, as the grass can clog and break them.
- If you don't have a juicer, you can use a blender. After grinding the wheat germ thoroughly, strain it with a sieve.
-

Enjoy wheatgrass juice. You will need some juice to experience the powerful combination of vitamins and minerals.
Tips
- Wheatgrass is believed to detoxify the body.
- If the wheatgrass tray becomes moldy, use a fan to improve air circulation in the room. Harvest by cutting the grass above the mold level; it is not tainted.
Article Information
Categories: Doors and Windows
In other languages:
English: Grow Wheatgrass at Home, Deutsch: Weizengras selber anpflanzen, Italiano: Coltivare Erba di Grano a Casa, Português: Cultivar Grama de Trigo em Casa, Español: cultivar pasto de trigo en casa, Français: cultiver de l'herbe de blé à la maison, Bahasa Indonesia: Menanam Rumput Gandum di Rumah, العربية: زراعة عشبة القمح في المنزل, 日本語: ウ ィ ー ト グ ラ ス を 家庭 で 栽培 すบ้าน, Tiếng Việt: Trồng cỏ lúa mì tại nhà
- Edit
- Write a letter of thanks to the authors
This page has been viewed 147,845 times.
Was this helpful?
There are so many reasons why wheatgrass juice is called the nectar of the Gods ...
Perhaps you have already heard about the benefits of sprouted wheat more than once, haven't you?
But how to properly grow wheat germ at home?
It’s quite simple.
Today I invite you to get acquainted with our online guide - how to germinate wheat at home ... This post will tell you everything "inside and out" ...
Honestly, I had to sprout sprouts more than once.However, all the time we did not always manage to do it correctly, especially at first. They began to grow moldy with us and everything disappeared.
Therefore, I suggest that you, together with me, try to properly germinate wheat for consumption.
If you are new to healthy eating and are not entirely familiar with the health benefits of wheatgrass and their juice, be sure to pay attention to our article - 50 Reasons to Drink Wheatgrass Juice Every Day ...
In short, one thing can be said ... These mega beneficial wheatgrass can even prevent colon and stomach cancers.
In general, the history of sprouting and eating wheat began a long time ago, after one of the simplest experiments. It all began in the 1930s as a result of the experiments of the agrochemist Charles Schnabel, who fed sick chickens with wheat seedlings.
After eating wheat grass, the birds recovered. Moreover, Schnabel noted that they began to lay more eggs than their initially healthy neighbors. Impressed by the experiment, Charles Schnabel introduced wheatgrass into his family's diet.
When the experiment was repeated the next year, the result was reproduced, Schnabel noted a doubled egg production in chickens that consumed wheat germ as an addition to food.
After much research, wheat germ has been credited with a wide variety of properties, including protection against cancer and aging, as well as treatment for tuberculosis.
How to germinate wheat at home correctly
In general, you need to start by choosing a grain of wheat. You can order wheat grains in any online store.
But I made everything easier ...
Just took a house in the village. If you don't have this option, go to the nearest farmers' market and buy them.
Be sure to make sure that they are not pickled from rodents. This is often done by farmers to preserve their crops throughout the winter.
Step # 1: pre-germinate the sprouts
So, we have already selected a grain of wheat ...
Pure, home grown and pesticide free. This is the type of wheat I recommend for sprouting for maximum health benefits. It is these grains that will give you a little sweetness and a pleasant taste.
This wheatgrass juice of yours will contain many vitamins and minerals that will improve your health.
So, let's begin …
- Pre-germination is important to achieve a good harvest.
- Pick up a glass of wheat seeds. Or just fill the bottom in your planting mold with a single thicker layer.
- Rinse the seeds in clean water, strain, and then soak the seeds in filtered water in any container.
- Soak for 8-10 hours.
- After 8-10 hours, drain the water and then soak them again as in step 2 above and soak them in the water for another 8 hours.
- After the second soak for 8-10 hours, drain the water.
- Check the grains. They should put out small roots.
These sprouted seeds can even be eaten. Many adherents of a healthy diet eat them like that.
But, if you need a super healthy juice, move on to step two ...
Step # 2: Prepare the Wheatgrass Planting Tray
- If your tray has holes in the bottom of the tray, cover the bottom with a paper towel to prevent wheat roots from sprouting through the bottom.
- Fill the tray with pre-moistened soil or compost in a small layer. Make sure your soil is free of artificial fertilizers or chemicals. Always use organic supplements.
Step # 3: planting wheat grains
- Spread the sprouted kernels evenly and tightly in a single layer on damp soil in the tray. Squeeze the seeds gently into the soil or stir a little.
- Place the tray out of direct sunlight or just closer to daylight. It could be somewhere near a window and good ventilation. Remember, wheatgrass doesn't like hot, direct sunlight.
Step # 4: watering and tracking the sprouts
Young shoots should be watered at least twice a day to keep them slightly moist. If the soil becomes dry, young shoots can die. And of course, they don't like overflows either.
Therefore, we suggest that you use a simple spray (sprinkler) if you are afraid to overflow.
When the shoots become higher than 2 - 3 cm, it will take about five days for this, reduce the number of watering to once a day, for example, in the morning. But always make sure that the soil does not dry out. Once again, avoid over-watering.
Mold growth can sometimes occur. This is especially true in humid and hot climates.
But don't be discouraged, there are some good solutions:
- Try soaking your seeds overnight instead of just 8-10 hours as suggested above. This will allow the grains to absorb more moisture, they will grow even more, which will allow them to germinate better and reduce germination time.
- Arrange the seeds in the tray tightly, but in one layer. Try to prevent them from overlapping so that there is enough air for each sprout to breathe. This will definitely reduce mold.
- Do not over-spray the wheatgrass, use a spray bottle as we mentioned above.
- Finally, you can even try the following procedure. After your sprouts have taken root, substitute another tray or some form without holes for the wheatgrass, a tray with holes, so to speak, as a reservoir. Thus, instead of watering from above, the shoots will take the right amount of water for them. But this can also be mistaken.
But we failed several times, all the time the sprouts died from mold. But we still want to achieve the result we need and try all the same this elixir of youth and health.
Step # 5: collecting grown sprouts at home
When the wheat germ grows up to 15 - 20t cm, they are ready for harvest. Use scissors and cut the greens just above the grains.
If there is mold, avoid it and cut a little higher. You should cut off enough greens to make about 30 ml of juice to provide you with energy throughout the day.
Note:
You can keep watering the cut greens for a second or even a third crop, although they won't grow as high. But you get extra grams of the healthiest juice.
Otherwise, empty the tray and get a fresh, fresh crop.
Step # 6: Juice Wheatgrass and Enjoy
To make wheatgrass juice, you need a special juicer. You can refer to our guide to choosing the right juicer for the whole family and your healthy diet.
I can warn you right away that centrifugal juicers will not allow you to get juice from wheatgrass. It can even clog it up a lot, as they are highly fibrous.
Experts do not recommend taking more than one serving per day (that's about 30 grams). Wheatgrass juice is so powerful that it can help you cure the worst diseases.
How to grow wheat at home video
If you do not understand everything, I suggest you watch an interesting video. This is a very informative and enjoyable video to watch, made by the "gummy fox", as she calls herself ... 🙂 Cool? ...
Watch her YouTube channel ...
Finally
Now that you have a real plan of action, you can easily repeat these steps. As you can see, sprouting wheat at home is not difficult at all. This is not rocket science.
And if you are also a flower lover, for example, then sprouting wheat for food, I think, will not be difficult for you.
If you are not yet ripe for wheat germination, take a look at our list of benefits again in the article I wrote about at the beginning. Yes, science does not stand still and soon we can learn a lot more about the juice from wheatgrass.
There is even evidence that 30 ml. wheatgrass juice the content of vitamins and minerals are equivalent 1 kg of fresh vegetables! Super! ...
How do you germinate wheatgrass and what else do you know about the benefits of this juice? Drop me a line in the comments below! I always love reading other people's stories.
If the article became useful to you, share it with others.