Content
- 1 How to germinate wheat at home correctly
- 2 Finally
- 3 What can be germinated
- 4 Sprouting wheat at home
- 5 How to germinate wheat to eat at home
- 6 Special germinators for seeds
- 7 Content:
- 8 How to germinate wheat at home for food?
- 9 Two ways to germinate wheat at home
- 10 I did everything right, but the grains did not sprout, what is the reason?
- 11 How to germinate wheat at home for food and how much to eat?
- 12 5+ recipes based on sprouts
- 13 Choosing wheat
- 14 Preparing grains for germination
- 15 Eat Whole Wheat
- 16 We use greens
- 17 Some helpful tips
- 18 Video: how to germinate grains
There are so many reasons why wheatgrass juice is called the nectar of the Gods ...
Perhaps you have already heard about the benefits of sprouted wheat more than once, haven't you?
But how to properly grow wheatgrass at home?
It’s quite simple.
Today I invite you to get acquainted with our online guide - how to germinate wheat at home ... This post will tell you everything "inside and out" ...
Honestly, I had to sprout sprouts more than once. However, all the time we did not always manage to do it correctly, especially at first. They began to grow moldy with us and everything disappeared.
Therefore, I suggest that you, together with me, try to properly germinate wheat for consumption.
If you are new to healthy eating and are not entirely familiar with the health benefits of wheatgrass and their juice, be sure to pay attention to our article - 50 Reasons to Drink Wheatgrass Juice Every Day ...
In short, one thing can be said ... These mega beneficial wheatgrass can even prevent colon and stomach cancers.
In general, the history of sprouting and eating wheat began a long time ago, after one of the simplest experiments. It all began in the 1930s as a result of the experiments of the agrochemist Charles Schnabel, who fed sick chickens with wheat seedlings.
After eating wheat grass, the birds recovered. Moreover, Schnabel noted that they began to lay more eggs than their initially healthy neighbors. Impressed by the experiment, Charles Schnabel introduced wheatgrass into his family's diet.
When the experiment was repeated the next year, the result was reproduced, Schnabel noted a doubled egg production in chickens that consumed wheat germ as an addition to food.
After much research, wheat germ has been credited with a wide variety of properties, including protection against cancer and aging, as well as treatment for tuberculosis.
How to germinate wheat at home correctly
In general, you need to start by choosing a grain of wheat. You can order wheat grains in any online store.
But I made everything easier ...
Just took a house in the village. If you don't have this option, go to the nearest farmers' market and buy them.
Be sure to make sure that they are not pickled from rodents.This is often done by farmers to preserve their crops throughout the winter.
Step # 1: pre-germinate the sprouts
So, we have already selected a grain of wheat ...
Pure, home grown and pesticide free. This is the type of wheat I recommend for sprouting for maximum health benefits. It is these grains that will give you a little sweetness and a pleasant taste.
This wheatgrass juice of yours will contain many vitamins and minerals that will improve your health.
So, let's begin …
- Pre-germination is important to achieve a good harvest.
- Pick up a glass of wheat seeds. Or just fill the bottom in your planting mold with one thicker layer.
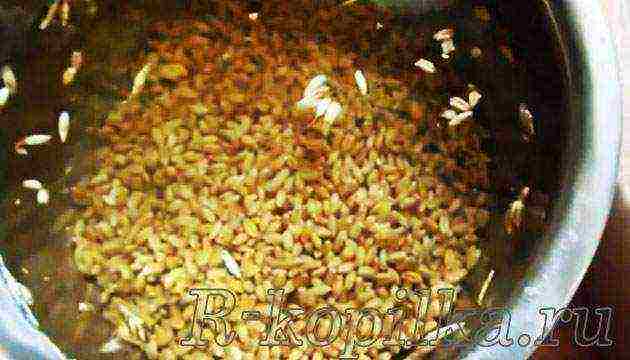
- Rinse the seeds in clean water, strain, and then soak the seeds in filtered water in any container.
- Soak for 8-10 hours.
- After 8-10 hours, drain the water and then soak them again as in step 2 above and soak them in the water for another 8 hours.
- After the second soak for 8-10 hours, drain the water.
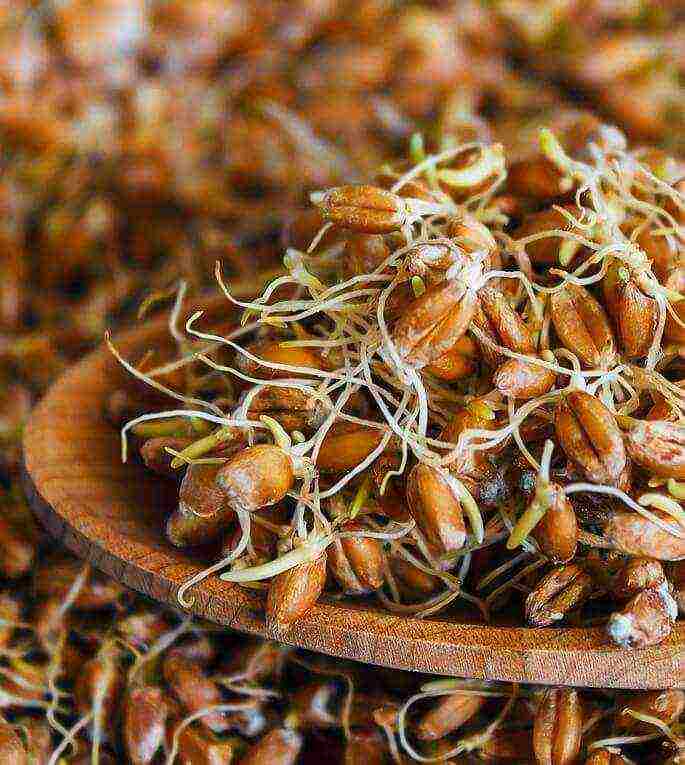
- Check the grains. They should put out small roots.
These sprouted seeds can even be eaten. Many adherents of a healthy diet eat them like that.
But, if you need a super healthy juice, move on to step two ...
Step # 2: Prepare the Wheatgrass Planting Tray
- If your tray has holes in the bottom of the tray, cover the bottom with a paper towel to prevent wheat roots from sprouting through the bottom.
- Fill the tray with pre-moistened soil or compost in a small layer. Make sure your soil is free of artificial fertilizers or chemicals. Always use organic supplements.
Step # 3: planting wheat grains
- Spread the sprouted kernels evenly and tightly in a single layer on damp soil in the tray. Squeeze the seeds gently into the soil or stir a little.
- Place the tray out of direct sunlight or just closer to daylight. It could be somewhere near a window and good ventilation. Remember, wheatgrass doesn't like hot, direct sunlight.
Step # 4: watering and tracking the sprouts
Young shoots should be watered at least twice a day to keep them slightly moist. If the soil becomes dry, young shoots can die. And of course, they don't like overflows either.
Therefore, we suggest that you use a simple spray (sprinkler) if you are afraid to overflow.
When the shoots become higher than 2 - 3 cm, it will take about five days for this, reduce the number of watering to once a day, for example, in the morning. But always make sure that the soil does not dry out. Once again, avoid over-watering.
Mold growth can sometimes occur. This is especially true in humid and hot climates.
But don't be discouraged, there are some good solutions:
- Try soaking your seeds overnight instead of just 8-10 hours as suggested above. This will allow the grains to absorb more moisture, they will grow even more, which will allow them to germinate better and reduce germination time.
- Arrange the seeds in the tray tightly, but in one layer. Try to prevent them from overlapping so that there is enough air for each sprout to breathe. This will definitely reduce mold.
- Do not over-spray the wheatgrass; use a spray bottle as we mentioned above.
- Finally, you can even try the following procedure. After your sprouts have taken root, substitute another tray or some form without holes for the wheatgrass, a tray with holes, so to speak, as a reservoir. Thus, instead of watering from above, the shoots will take the right amount of water for them. But this can also be mistaken.
But we failed several times, all the time the sprouts died from mold. But we still want to achieve the result we need and try all the same this elixir of youth and health.
Step # 5: collecting grown sprouts at home
When the wheat germ grows up to 15 - 20t cm, they are ready for harvest. Use scissors and cut the greens just above the grains.
If there is mold, avoid it and cut a little higher. You should cut off enough greens to make about 30 ml of juice to provide you with energy throughout the day.
Note:
You can keep watering the cut greens for a second or even a third crop, although they won't grow as high. But you get extra grams of the healthiest juice.
Otherwise, empty the tray and get a fresh, fresh crop.
Step # 6: Juice Wheatgrass and Enjoy
To make wheatgrass juice, you need a special juicer. You can refer to our guide to choosing the right juicer for the whole family and your healthy diet.
I can warn you right away that centrifugal juicers will not allow you to get juice from wheatgrass. It can even clog it up a lot, as they are highly fibrous.
Experts do not recommend taking more than one serving per day (that's about 30 grams). Wheatgrass juice is so powerful that it can help you cure the worst diseases.
How to grow wheat at home video
If you do not understand everything, I suggest you watch an interesting video. This is a very informative and enjoyable video to watch, made by the "gummy fox", as she calls herself ... 🙂 Cool? ...
Watch her YouTube channel ...
Finally
Now that you have a real plan of action, you can easily repeat these steps. As you can see, sprouting wheat at home is not difficult at all. This is not rocket science.
And if you are also a flower lover, for example, then sprouting wheat for food, I think, will not be difficult for you.
If you are not yet ripe for wheat germination, take a look at our list of benefits again in the article I wrote about at the beginning. Yes, science does not stand still and soon we can learn a lot more about the juice from wheatgrass.
There is even evidence that 30 ml. wheatgrass juice the content of vitamins and minerals are equivalent 1 kg of fresh vegetables! Super! ...
How do you germinate wheatgrass and what else do you know about the benefits of this juice? Drop me a line in the comments below! I always love reading other people's stories.
If the article became useful to you, share it with others.
Dear readers, do you know how to germinate wheat for eating at home? Of course, it is very convenient to use special devices for this purpose. But if they are not available, then it is quite possible to get by with simple "manual" methods. Sprouting wheat at home (by the way, not only this plant, but also many others) is a rewarding activity, because it makes it possible to enrich our diet with a large set of biologically important substances.
In this article, you will find out which seeds can be germinated and which ones are not suitable for this. What are the 10 ways to germinate wheat at home and which germinators should be used.

What can be germinated
Wheat confidently holds the lead among all the seedlings used for food. But when choosing how to germinate wheat at home, do not forget about other healthy seeds. You can use the same techniques for them. The most important thing is to choose exactly the beneficial rudiments that can bring maximum benefit. This rather large list includes:
- legumes (soybeans, peas, lentils and others);
- corn;
- millet;
- barley;
- rye;
- oats;
- pumpkin;
- buckwheat;
- sunflower;
- milk thistle;
- linen;
- sesame;
- almond;
- radish;
- Clover;
- alfalfa;
- fenugreek;
- cabbage;
- mustard;
- watercress.
Both wheat and all other seeds, when germinated, become very valuable for our health. What are their benefits, I recommend reading in the article “Seedling properties«.
It is not recommended to germinate for food:
- cucumber;
- zucchini;
- watermelon;
- pepper;
- squash;
- chokeberry;
- potato;
- tomato;
- eggplant.
Sprouting wheat at home
Useful Tips
Regardless of which method you choose, you must follow the general rules:
- To germinate wheat for eating at home, you need to purchase only environmentally friendly raw materials. Those seeds that are intended for sowing can be treated with pesticides.
- First, the grains are washed well under running water. Then they are poured with water to remove all emerging specimens from the total mass. They are "empty" and not similar, so they are not suitable for germination. If the proportion of floating seeds is more than 2%, then the entire volume of grain is not suitable for germination for food.
- For soaking and germination, it is recommended to take glass, enamel (without damage) or ceramic dishes.
- Soaked seeds are supposed to be washed with clean water 2-3 times a day. If the raw material is soaked in melt, silver or flint water, then one rinsing can be limited.
- The water left after soaking is not suitable for drinking or cooking, as it contains harmful decomposition products.
- Grains that have not sprouted within the allotted time cannot be used for food. They are thrown away. Slightly hatched seeds can be left to re-germinate.
- Store seedlings at a low positive temperature (from 2 to 8 ° C) in a sealed container. The shelf life is maximum 4-5 days. At the same time, the grain is washed daily, the only exception is milk thistle and flax. By the way, the last seeds make a very tasty porridge (you can read about its benefits here).
How to germinate wheat to eat at home
Method 1
Put a small amount of washed grains on a plate. Cover the top with gauze or cotton cloth soaked in water. Leave the plate with seeds in a warm place. If the fabric dries up, it should be moistened again.
The first white roots will appear in a day. The wheat must be rinsed once more and then it can be used for cooking.
Method 2
The washed grains are poured into a flat-bottomed container. Pour in warm water so that the water does not completely cover the topmost seeds. Put a paper napkin on top and put it in a warm place. Such wheat germination at home also gives finished products in a day. The grains are washed and used for food.
Method 3
It is convenient to use for germinating small, disposable portions. The buds of the selected plants are placed in cheesecloth or poured into a tea strainer. Then such a "container" is dipped into a glass of warm water. For the next portion, a day later, the water in the glass is changed to fresh. Sprouted wheat is eaten immediately without leaving it for storage.
Method 4
You can germinate wheat at home using a technique similar to the previous one. The seeds are also tied in a gauze bag. Just do not dip it into a glass, but regularly spray it from a spray bottle. In this case, the bag with the embryos must be suspended.
Method 5
Cover the bottom of a large flat plate with filter paper or napkins. Pour the washed seeds in a not very thick layer and add a little water. Then cover the plate with a lid. It is important that it is loosely attached to the seeds and that they have free access to air. After 1-2 days, the grains are ready to eat.
Method 6
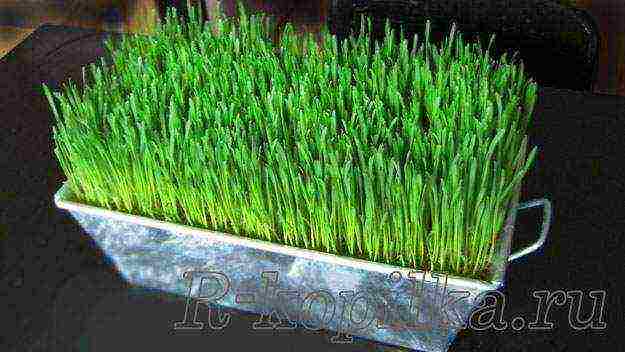
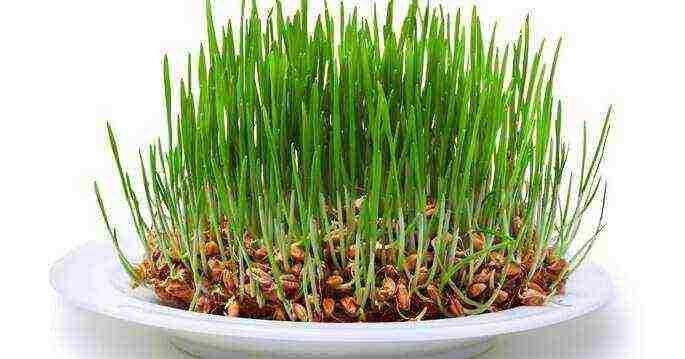
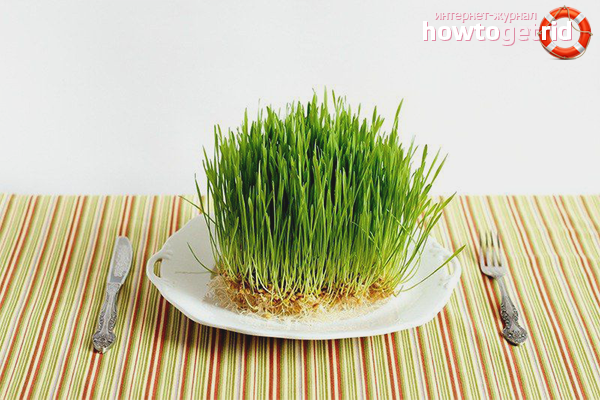
Not only small sprouts are suitable for food, but also green sprouts (sprouts). They are high in chlorophyll, which is very beneficial for our body. How to sprout wheat at home to get sprouts? To do this, you should use the technique shown in the video, as well as the two following methods.
Method 7
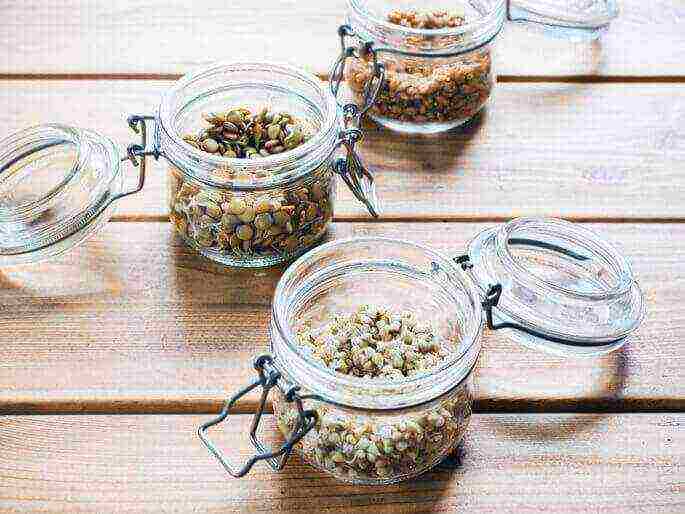
The washed wheat (or other selected grains) are placed in a glass jar. Their volume should take up 1/3 of the capacity. Pour the contents for 10-12 hours with warm water. Then the liquid is drained and the seeds are washed.They are put back into the jar, the neck is tied with gauze and the jar is turned upside down on a plate.
A spoon should be placed under the bottom of the container, which is now the neck closed with a cloth. Excess moisture will drain from the jar, and the seeds will receive the necessary oxygen. The product will be ready for use in 4-5 days.
Method 8
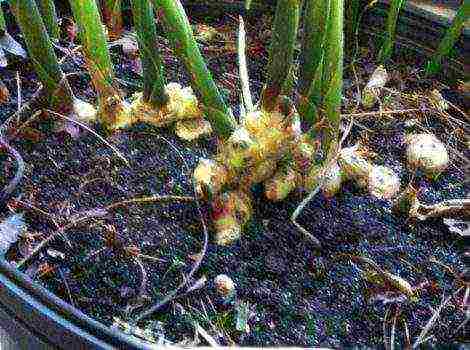
Sometimes the question arises of how to germinate wheat at home for food using soil, and whether it can be done at all. Of course. This is a proven method for producing mature green shoots.
For this, the seeds are pre-soaked in warm water for 10-12 hours. Soil about 1 cm thick is poured into a flat container. Moisten it as well as possible so that the consistency of sour cream is obtained.
After soaking, the seeds are poured into an even thin layer on the surface of the soil. You do not need to press them into the soil. The top of the container is closed with a lid or polyethylene, in which a small (about 0.5 cm) hole is made. Such a greenhouse is placed in a warm place.
When green leaves appear, remove the lid and put the container in the sun. If wheat develops too lush root system, then this means that you are either insufficiently moisturizing the substrate, or overheating the greenhouse. With this method of germination, sprouts are ready for use in 7-14 days. The green shoots will already have a height of 6 to 20 cm.
Method 9
There is a way that is different from the usual wheat germination at home. This option applies exclusively to legumes - peas, beans, beans. They can be germinated under pressure. To do this, you must have cylindrical stainless steel dishes. In the bottom and in the walls there should be holes 5 mm in diameter at a distance of 3-5 cm from each other. After soaking, the beans are placed in this dish.
The container with seeds is placed in another one - larger and without perforations. Place small objects (spoons or pebbles) under the first dish to create a space for air and excess water. Cover everything from above with a lid. It must be remembered that legumes are washed longer and more thoroughly during germination than seeds of other plants.
Three days later, a load is placed on top in such a way that it crushes the lid and the beans are under oppression. After another day or two, the seedlings can be used for food, after removing the peel from the cotyledons.
Some legumes - soy and peas, are kept in boiling water for several minutes before use, as they contain harmful compounds. Under the influence of boiling water, these substances are destroyed.
Method 10
It is used to prepare nuts, particularly almonds. The shells are removed from the nuts and soaked for a period of 12 to 24 hours. The almonds will swell but will not sprout. This is enough for the biochemical reactions in the rudiments to be triggered. In this state, the nuts can already be eaten and made into yoghurts, almond milk, salads and other dishes.
Special germinators for seeds
All of the above methods can be called manual. But it is much more convenient to germinate wheat at home if you use special devices. They are also called "smart germinators". They greatly facilitate the process of obtaining sprouts and greens. The seeds in them will never rot or dry out. For someone who leads a healthy lifestyle and prefers only healthy natural products, such a unit is simply necessary on the farm.
Read also:
What are the benefits and dangerous properties of kiwi
What are the best sprouts? I took the time to look at various devices and reviews on the Internet. As a result, my choice settled on three options. They differ in size, price, and equipment. If you want to get sprouted seeds easily and in sufficient quantity, then take a closer look at them by clicking on the links:
Hydroponic germinator for seeds, nuts and grains.Includes a compressor that is powered by electricity. It can also be used for pre-sowing seed germination (note for gardeners!). For the price, the cheapest of the three.
The question of how to germinate wheat on their own at home has been of interest to adherents of proper nutrition for a long time - it is quite difficult to purchase high-quality sprouts in a supermarket.
This is due to the shortness of storage and the ability of the finished product to deteriorate quickly.
In addition, shoots bought in a store often taste rancid - oils and fats in their composition under the influence of oxygen deteriorate as quickly as fermented milk products.
Plus the warm environment in which the grains germinate is an ideal breeding ground for Salmonella and other bacteria.
In this article, we will find out how to get "live food" on your own, what is needed for this and how it is useful.
Content:
- How to germinate wheat at home for food?
- Two ways to grow healthy shoots yourself
- I did everything right, but the grains did not sprout, what is the reason?
- When and in what quantities are there sprouts?
- 5+ recipes based on sprouts

Sprouted wheat grains, of course, are not a panacea for all diseases, but at the same time, food is not healthier and more natural to find.
When a wheat seed hatches after a long hibernation, its metabolic processes wake up along with it, in part of the sprout, the amount of macro and microelements, vitamins and antioxidants increases, which it gives to the young shoot.
All this can and should be used for our health.
Wheat contains dietary fiber, omega-3 fatty acids, and a lot of proteins.
Sprouts have a low glycemic index and the important quality is not to affect blood sugar levels.
In addition, they are an ideal tool for enhancing immunity, losing weight, preventing the development of diabetes mellitus, cleansing the body of toxins and toxins.
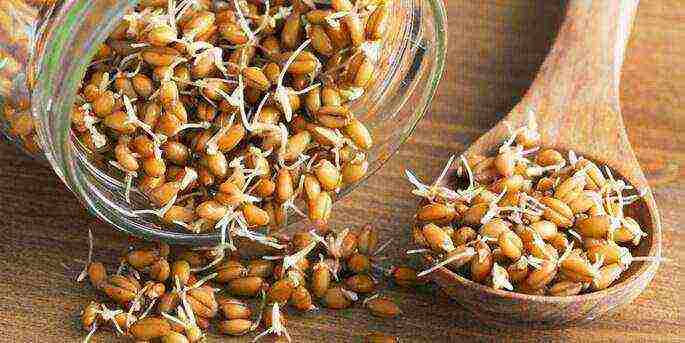
 Sprouted wheat grains are considered the most lively food
How to germinate wheat at home for food?
Germinating grains, as you already understood, is better and safer on your own.
The maximum length of fresh shoots should not exceed 0.5-1 cm - the longer they are, the less nutrients they contain.
All the more stunted and fragile are the greens, which lack soil, and the nutritional reserves of the seed itself are depleted.
What you need:
- Quality raw materials that can be purchased at health food stores - wheat for sprouting, as a rule, contains the appropriate labeling; or farm grains in case you are completely sure of the supplier
- Glass bowl (metal and plastic dishes are not suitable for our purposes)
- Colander
- Gauze
- Water
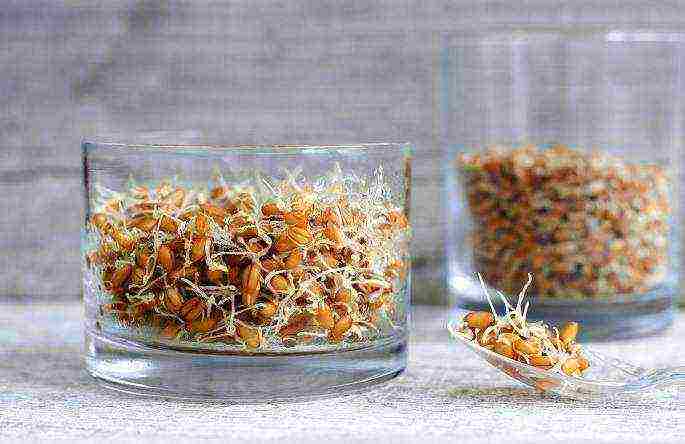 Sprouted wheat is very healthy
And, of course, the conditions: room temperature from 22 to 24 degrees, a dark place with indirect sunlight plus humidity.
In order for it to be sufficient, the seeds must be washed with water in the morning and in the evening three times.
So sprouts, as the grains are also called, will not grow moldy and will receive enough nutrition and fluid.
For sprouts, wheat is soaked for two days, for shoots - for eight.
At the same time, before soaking, it is important to carefully select the raw materials: to discard the grains floating in the water, broken, damaged, moldy and undeveloped.
Such wheat will not only fail to germinate, but may also be unhealthy. We leave beautiful smooth yellowish kernels.
 Germinating them yourself, observing all the rules, is as easy as shelling pears
Two ways to germinate wheat at home
First
- Pour the grains into a bowl to a height of 1-2 cm. Fill them with bottled or boiled water at room temperature.
- We cover with several layers of gauze or a light towel - this will prevent direct light rays from entering the container.
- We leave for a day.
- The next day, we look at what happened to the grains - we remove and discard all that have surfaced.
- Cover it thoroughly, fill it with water again, cover it with a cloth and leave it for another day. The water should only cover the future seedlings, but not form a puddle.
- Now we start to wait. We wash the wheat every 12 hours, change the water and gauze when it is saturated with moisture. It is important to ensure that the sprouts do not begin to hatch through the fabric.
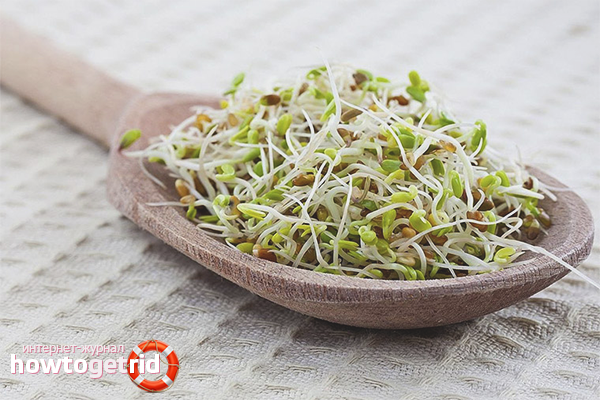
- When you see seedlings 1–2 mm long, we can assume that the mission is completed.
- We wash the grains again and send them to the refrigerator. Now you can eat them 1-3 tablespoons a day.
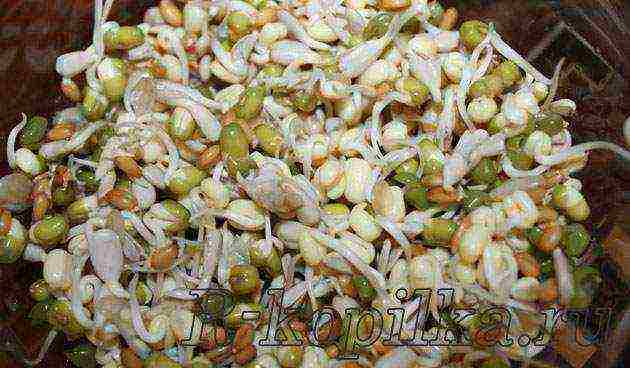
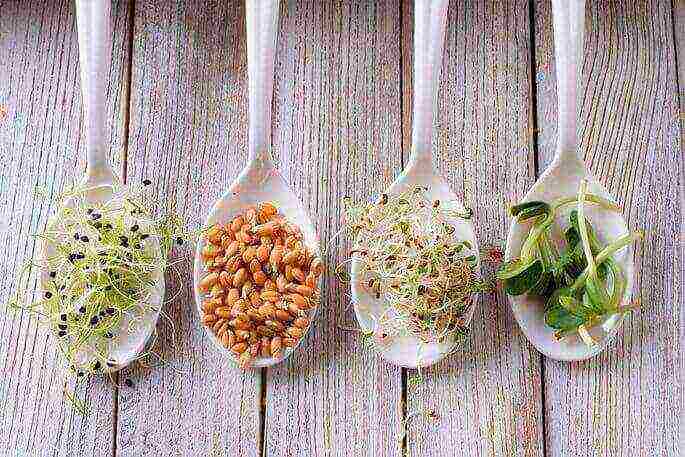 Not only wheat is suitable for germination, but also buckwheat, mung bean and other grain crops
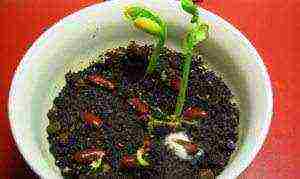
Tip: if the sprouts have exceeded 5 mm, they can be transplanted separately into the ground and grown further. They are perfect for making vitamin juices and feeding pets.
Second
We repeat all actions from the previous method to the third point.
- We wash the grains thoroughly.
- Put wet cotton into the container, cover with wet gauze.
- Top up with a layer of wheat about one and a half centimeters thick.
- Cover the top with the edges of the gauze.
- When the fabric dries, add some clean water.
- We wash the raw materials every 12 hours.
- In a couple of days, vitamin shoots up to two mm long should germinate.
- We select and discard non-sprouted grains.
 The sprouts can later be transplanted into soil and used to make vitamin juice
I did everything right, but the grains did not sprout, what is the reason?
There are at least three reasons:
- Excessive moisture: the environment should be moist, but not wet. It is recommended to drain the excess water after washing, otherwise the grains will not germinate, but burst from swelling.
- The grains became dry and did not hatch - exactly the opposite, you did not have a sufficiently humid environment. Once the gauze is dry, add a little water to maintain the correct fluid balance.
- The grain layer is too thick. If it exceeds 1.5-2 cm, the lower rows will begin to overheat and suffocate.
- If the sprouts have not hatched within three days, the raw material will have to be thrown away, it is no longer suitable for food.
How to germinate wheat at home for food and how much to eat?
One to three tablespoons a day is sufficient.
There is such a product that must be thoroughly washed during the main meal, the grains must be thoroughly chewed.
They can be slightly seasoned with oil or added to fresh vegetable salads.
Can also be mixed with legumes, cereals, soups, honey and dried fruits. Such a product should not be stored in the refrigerator for more than two days.
 You can eat grains on your own, as part of sandwiches, salads and cereals
It is even easier to prepare a nutritious vitamin cocktail based on them: grind in a blender, add vegetables, fruits or juice.
To avoid excessive gas formation, it is better not to mix sprouted wheat with dairy products.
Tip: Remember that wheat sprouts are contraindicated for people who are gluten intolerant. Also, do not include them in the diet of children under 12 years of age who suffer from chronic gastrointestinal diseases, stomach ulcers and during the postoperative recovery period.
5+ recipes based on sprouts
Sprouted Wheat Bread
To prepare it, you will need a classic yeast-free sourdough, the recipe for which can be found here.
As well as:
- Wheat flour - 300 g
- Sprouted wheat - 8 tbsp l.
- Bread leaven - 2 tbsp l.
- Water - 60 ml
- Sunflower oil - 1 tbsp l.
- Sugar - 1 tsp
- Salt - 0.5 tsp.
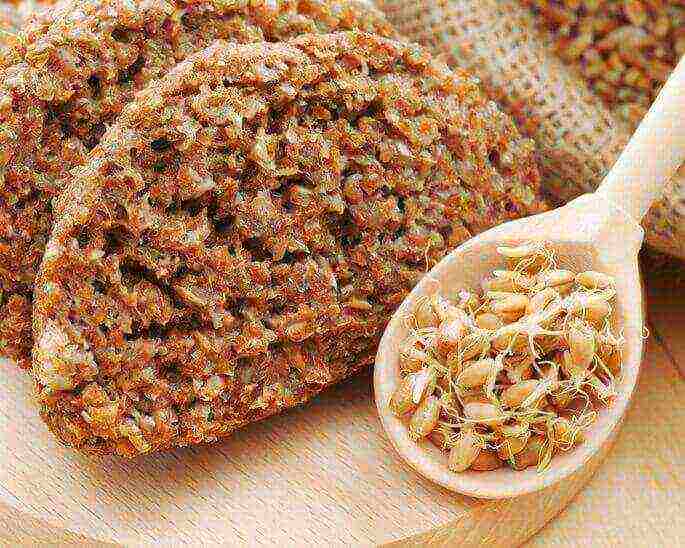 Diet yeast-free bread
We pass the wheat through a meat grinder and mix it with sourdough, water, oil, salt and sugar.
Grease the baking dish with vegetable oil, put the mixture in it.
We cover it on top with parchment and send it to a warm place for 8 hours. During this time, the dough should increase by one and a half times.
We bake for an hour at a temperature of 180 degrees.
Sprout cookies
You will need:
- 50 g dried apricots
- 50 g prunes
- 50 g raisins
- 2 cups wheat germ
- 2 tbsp. l. poppy
 Sprouted Wheat Cookies
We pass the grain through a blender or a meat grinder, we do the same with dried fruits.
Mix all ingredients and form round cookies. If desired, roll in sesame seeds and dry in the oven for 7 minutes.
Porridge with sprouts
Such a dish will be an ideal balanced breakfast for those who are on a diet and for those who systematically adhere to the principles of proper nutrition.
You will need:
- 1 glass of wheat
- 1 orange
- A pinch of dry ground ginger
- 1 tsp. honey and butter
 Perfect breakfast porridge
Pour the grains with water and leave for an hour, rinse thoroughly and cook over low heat until soft. Add the rest of the components.
Carrot Salad Brush
You will need:
- Half a cup of sprouted grains
- 1 carrot
- 2 bunches of lettuce
- 2 tbsp. l. olive oil
- 1 tsp. mustard and honey
 Carrot salad
We tear the salad into pieces with our hands, rub the carrots on a coarse grater. Mix with sprouts and season with a mixture of mustard, butter and honey.
Tip: by the way, wheat germ is far from a new advertised product. It was actively used in food by the ancient Chinese, Egyptians, and our ancestors brewed beer, jelly and porridge on its basis. A new wave of popularity hit the sprouts in the 30s thanks to the hippie culture and the fashion for vegetarianism.
Vitamin mix
You will need:
- 1 apple
- 1 pepper
- 1 cucumber
- 1 tomato
- 1 avocado
- Juice of half a lemon
- Half a bunch of arugula
- Olive oil and dry ground ginger to taste
 The components of such a salad are easily interchangeable.
Chop the vegetables, tear the salad with our hands and season with lemon juice, ginger and olive oil. Add wheat germ.
Vegetable smoothie
You will need:
- 1 bell pepper
- 1 celery root
- 50 g wheat germ
- 20 g chopped parsley
- 1 tsp flax seed
 Vitamin smoothie
We interrupt all the ingredients in a blender, pre-grind the flax seeds in a coffee grinder. Dilute the drink with water to the desired consistency.
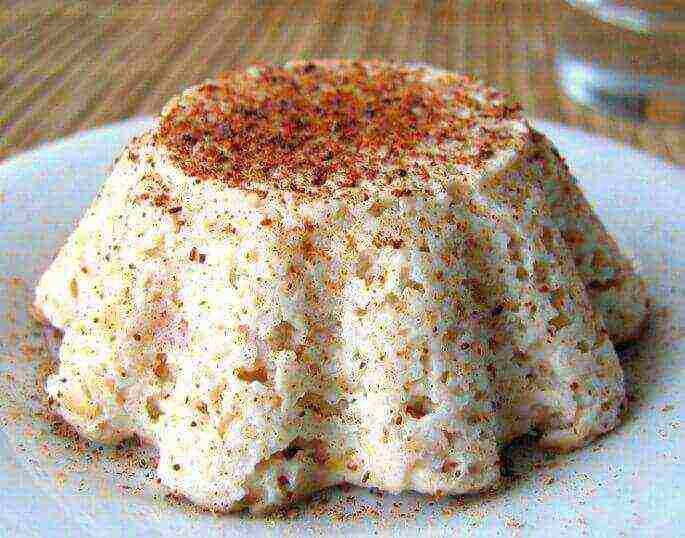
Curd dessert
Sprouted wheat grains can be added not only to cereals, smoothies and salads, but also to prepare a nutritious dessert with them, which will not be deposited on the sides and will enrich the body with a complex of vitamins.
You will need:
- 1 apple
- 100 g of cottage cheese
- 20 g wheat germ
- 1 tbsp. l. honey
- 0.5 tsp cinnamon
 Curd dessert
Peel the apple and rub it on a coarse grater. Grind the curd with a fork or a sieve.
Grind the sprouted grains in a blender. We mix all the ingredients, put them in a mold and send them to the refrigerator for several hours. Sprinkle with ground cinnamon before serving.
As you can see, proper nutrition can be not only healthy, but also delicious.
You will find a few more ways to germinate wheat at home for food in this video:
Nowadays, healthy eating is no longer a fashionable feature. More and more people are thinking about what gets on their plate every day. One of the areas of healthy food is the use of sprouted grains, namely wheat. But not everyone knows how to do it correctly. Instead of a nutritious and healthy mass, you get a smelly unappetizing dough.
How to germinate wheat at home? In principle, not so difficult. Observing several important conditions, you can significantly diversify your diet and get natural useful elements directly from the windowsill, without leaving your home.
First, you need to decide in which phase the sprouted grain will be used. There are two options: whole or just greens. The principle of initial germination in both cases is the same, but the timing and methods of use are different.
Choosing wheat
After you have decided on the method of consumption, you need to choose the grain. You can buy it:
- On the market. The cheapest purchase. You can carefully examine the wheat, smell it.Does not guarantee that the grains have not undergone pre-planting chemical treatment. Where and how they were kept is also unknown. But there is no need to buy a large batch at once. You can buy a small handful and see what happens.
- In the shop. It turns out to be much more expensive. But then there will be 100% confidence that the grains are unprocessed and can be safely eaten. By the way, it also comes across with small debris and chopped seeds, which are no longer suitable for germination. Choose wheat in transparent bags so that the contents are clearly visible.
- In the Internet. We do not recommend it. Buying a pig in a poke for a lot of money. There is a great risk of getting an absolutely substandard mixture of incomprehensible production. However, if there are good recommendations from friends who have already tried such a purchase, then this option is also chosen.
In general, the devotees of a healthy diet do not save on this very diet. Therefore, they buy in stores. Or they have already enlisted support in personal subsidiary plots that plant wheat for themselves. It's cheaper and safer this way.
how to grow basil on a windowsill
Preparing grains for germination
Yes, preliminary preparation is always needed. You can't just stuff wheat into the soil and wait for a miracle. We'll have to tinker a little. The first step is to sort out the grains. Visible debris, chipped and damaged seeds are removed. Then they are placed in a shallow wide container and filled with plain clean water. Floated grains are removed, such wheat is unlikely to germinate.
Then the water with particles of small debris (it will definitely be) is carefully drained over the edge, and fresh is poured. Repeat until the liquid becomes clear. Now you can put the wheat in a sieve or colander.
Next, you will have to disinfect the seeds, if they are purchased on the market. When buying in a store, you can skip this item. To do this, induce a weak solution of potassium permanganate and pour wheat into it for 12-14 minutes. After being drained, washed thoroughly with clean water.
The preparation of seeds is finished by soaking. Without any growth stimulants, wheat is poured with the most ordinary clean settled water so that the liquid level is 2 cm higher. They are placed for 7-8 hours in a warm, dark place. After this time, the seeds are ready for germination.
If the air temperature is too high at this time, then you will have to change the water 2 times and rinse the seeds. Otherwise, there is a high probability of acidification. Then all works will go to dust, you cannot eat sour wheat.
how to grow rosemary at home
Eat whole wheat
After all the procedures, the prepared seeds are poured into containers in an even thin layer. They can be glass, plastic, ceramic, enameled. Not aluminum or cardboard. You don't need to put anything on the bottom, just make a few holes to drain excess liquid.

The resulting structure, together with the grains, is slightly moistened from a spray bottle, then covered with any available material. This can be white paper, multiple layers of newspaper, cotton cloth, or plain gauze. The shelter is also lightly sprayed with water. Now all this must be put in a warm and bright place.
Typically, wheat begins to germinate within a day. Hard varieties wake up a little longer, but no more than 2 days. If nothing has happened by this time, then something was done wrong or low-quality seeds were found.
During the day, you must periodically open the container and sniff the contents. The smell should be specific, but pleasant. If a faint sour aroma or moldy smell appears, then immediately rinse the grains with clean water to avoid spoilage or poisoning.
When done correctly, tiny sprouts appear within 20-24 hours. Upon reaching a length of no more than 2 mm, they can be safely eaten along with grains. For example, eat it whole or add to cereals.
As soon as the seedlings become more than 3 mm, they can no longer be eaten.But you shouldn't throw it away either. Let's move on to the next step.
how to grow arugula on a windowsill
We use greens
What if you didn't have time to eat all the sprouted grains? There are two options here. You can keep them in the refrigerator, but no more than a day. Or sow them to get equally nutritious greens, rich in nutrients and vitamins.
To do this, you can use soil, sawdust, or just a few layers of paper. At the bottom of the sowing container, soil or sawdust is poured with a layer of at least 1 cm. Or loose paper is laid. This can be toilet towels or kitchen towels. Smooth paper or newsprint will not work.
Now we need to thoroughly moisten the whole thing. Only without fanaticism, grains should not float in water. Sprouted wheat is spread in a thin layer on a substrate. If sawdust or soil are used, then sprinkle them on top with a layer of no more than 0.5 cm.In the case of paper, the wheat is not sprinkled on top with anything.
Now you need to cover the entire structure with plastic wrap, transparent plastic or glass. Then put it in a warm and dark place. Once a day, planting must be ventilated. Seedlings usually appear on the third day. As soon as the first loops of the sprouts come out, you need to remove the shelter and rearrange the container with wheat in a bright place.
Then the seedlings begin to grow rapidly. And after 8-9 days you can cut the first greens. Do it with scissors. After cutting, the seedlings are carefully moistened again and left to grow. In a few days they will grow up and you can take them again for your needs.
Typically, such young greens are used to prepare salads, as part of smoothies, or as a sprinkle for main dishes.
You can cut the greens growing in the soil up to 4 times. On sawdust - 3 times. On paper - no more than 2 times. No, wheat continues to grow further, but it no longer carries any nutritional and vitamin value.
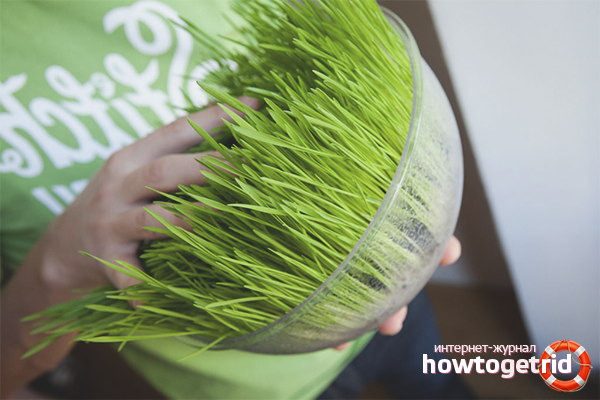
The most optimal length of sprouts for eating is 12-14 cm. If it is less, then it will not have time to collect the required proportion of vitamins. If it outgrows more, it will quickly coarse and you will have to chew it for a long time and diligently.
how to grow spinach on a windowsill
Some helpful tips
- Never ask the seller about the expiration date of wheat if you intend to buy it on the market. He can say whatever he wants. Until the harvest is over this morning and the wheat is the freshest. They are guided by color and smell. The grains practically do not smell, they are dark beige or golden in color. Everything else is from the evil one.
- In order to consume sprouted grains every day, and not greens, you will have to use the streaming method. In order not to get confused in an endless number of containers and not to miss the overgrowth, they simply sign each vessel. The date and time of the bookmark is sufficient.
- How much wheat to germinate? The recommended daily dosage for one person is 2 tbsp. l. From this volume and count. You can eat more, it does not bring harm. Less is also possible, but impractical, since the benefits are too small.
- There are recommendations to germinate wheat directly in a glass jar, sprinkling it with a sufficiently thick layer. We do not recommend doing this. Because the bottom layer of grains will suffocate from lack of oxygen. And the rate of germination of layers will be very different.
- For the same reason, seeds should not be poured into containers in more than two layers. It is better to put two pots, but to scatter the wheat thinly, than to separate the already sprouted grains from the ones that have not yet hatched.
- Some sources claim that if a cloudy film appears on the surface of the liquid when the grains are soaked, then this is a sign of pesticide treatment. This is only partly true. A cloudy film can also appear if the water itself is of poor quality with impurities of chlorine or is hard. Poorly washed wheat also causes turbidity.
- Another recommendation is to sprout wheat in the refrigerator. This will help prevent spoilage and mold.Doubtful advice. Firstly, the period of germination in the refrigerator is almost three times longer than in a warm place. Secondly, if you do not rinse the grains, they will become moldy and deteriorate even in the most sophisticated refrigerator.
- The benefits of juice from green sprouts or sprouted grains are great. Just don't abuse it. Only 30 g of liquid (milk) per person is enough per day.
- Periodically, it is required to spray the wheat planting on the greens with settled water. If you just cut off the seedlings and do not moisten them, then they will slow down their growth and soon dry out.
How to germinate wheat at home? It's not difficult at all. A wide container, clean water and grains are all you need to get valuable vitamin greens or tasty healthy grains.
how to germinate oats at home
Video: how to germinate grains