Content [show]
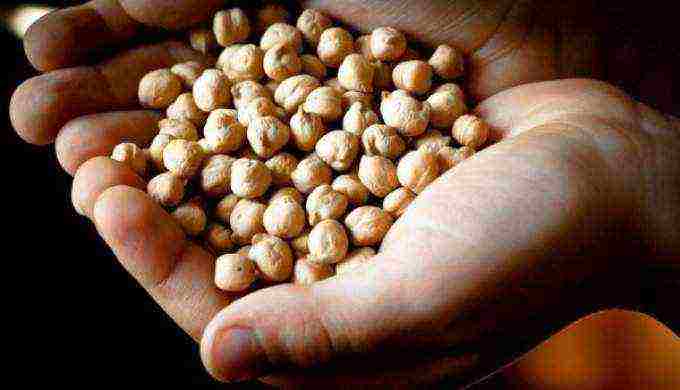
In addition to the beloved peas and beans, which many legume lovers grow from year to year, in your summer cottage you can easily grow such an annual legume plant as chickpeas (or chickpeas) without much effort.
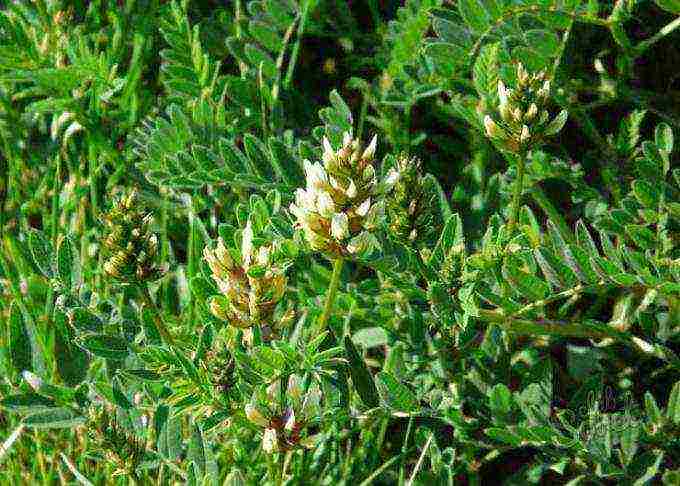
Chickpeas in the country
Planting material
Recently, in the fields of our and neighboring regions, this legume crop has begun to appear more and more often, therefore it is best to use planting material, collecting grains in the fall from single plants left after harvesting fields. In the spring, you can dig (but not pull out) and transplant young plants to the site, usually there are always several grains that have strayed from the rest during sowing and have ascended right on the side of the road.
As a last resort, you can take for planting and chickpea grain, which is sold in the store. The germination capacity of such seeds may be somewhat lower, but you can also get a good harvest from them.

You will never be left without a harvest of chickpeas. What is the difficulty of growing chickpeas? It may seem strange, but there are practically no difficulties. Chickpea is a drought-resistant and very hardy plant that requires elementary care - weeding from weeds, loosening row spacings and watering every 1-2 weeks. Fertilizers during the season under chickpeas can be omitted.
Even with dense planting, the plants grow powerful, with a strong trunk and numerous branches, on each of which a future harvest will be tied.
It's worth not thinking, it's worth a try!
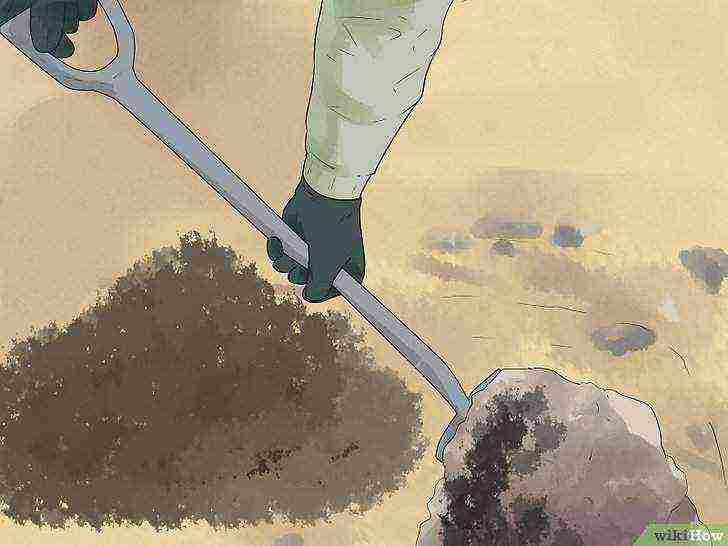
Land preparation
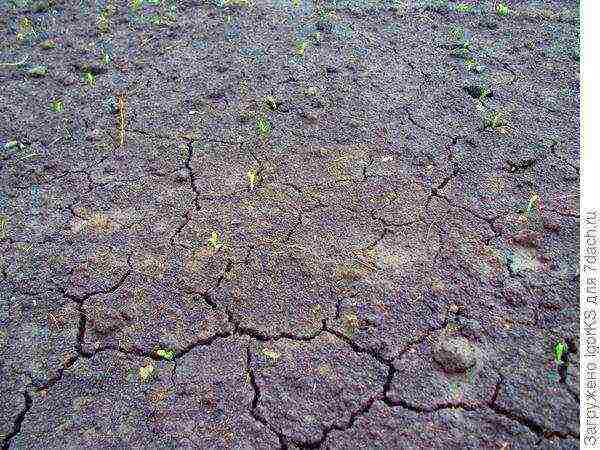
So where do you start? First of all, since the fall, we choose and allocate a place for future planting. For legumes, I identified a well-sunlit area occupied by watermelons and melons last year.
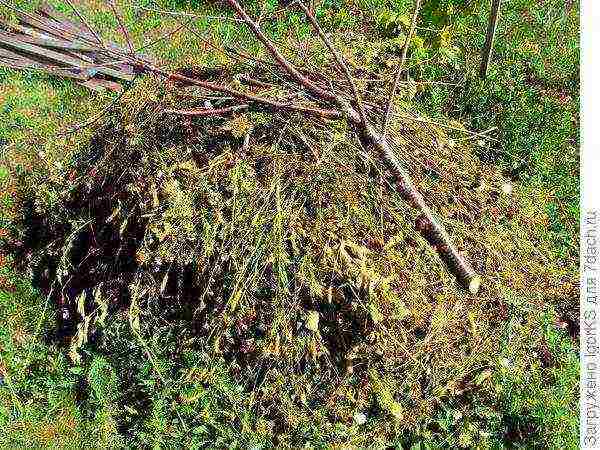
We burn the grass collected at the dacha and cut branches of trees and shrubs in a common heap, and distribute the ash evenly over the surface, after which we water it abundantly. At the moment, that's all, we are waiting for spring.
Future fertilization
In the last week of April - early May, we begin to prepare the land for sowing seeds. You can plow the ground with a walk-behind tractor or dig it up with a shovel, as in my case. For myself, I already habitually distribute the allotments: one part will be sown with chickpeas, the second - we wave, and the third - with peanuts. A plot of 2.5x1.5 m is allocated under the chickpea.
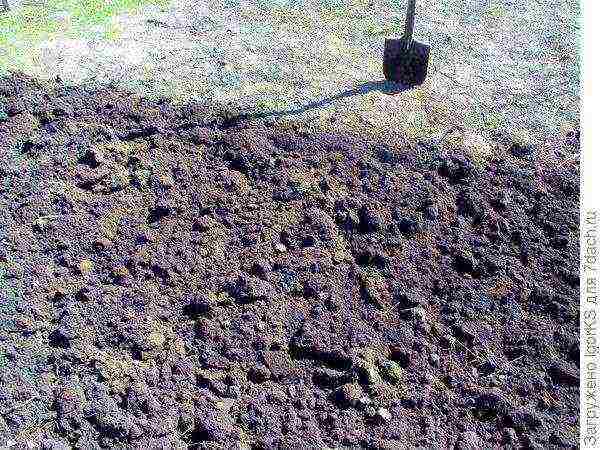
We'll have to try to dig up the plot. Then we carefully harrow the earth, without leaving particularly large lumps.
Planting seeds
We make parallel grooves in the ground 5-7 cm deep. Leave a distance of 25-30 cm between the grooves.
We sow chickpea grains into the grooves at a distance of about 10 cm from each other. When planting seeds from your own harvest obtained earlier, you do not need to worry about their germination. If the grains are purchased at the store, you can sow chickpeas more often, if necessary, thinning the seedlings later.
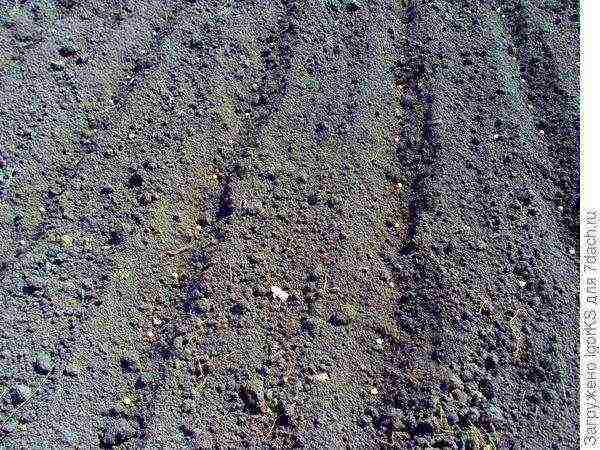
Sowing the grains Fill the seeds with earth, level the garden bed and water the plot. I water it evenly, from left to right - until, when approaching one edge of the site, on the opposite side, the water no longer has time to be absorbed. In this case, you do not need to soak the seeds before planting.
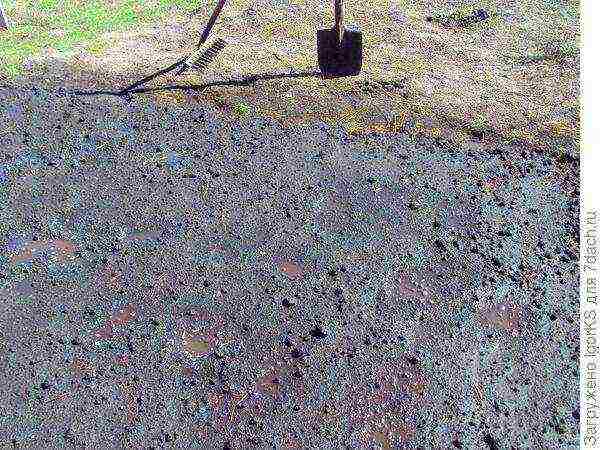
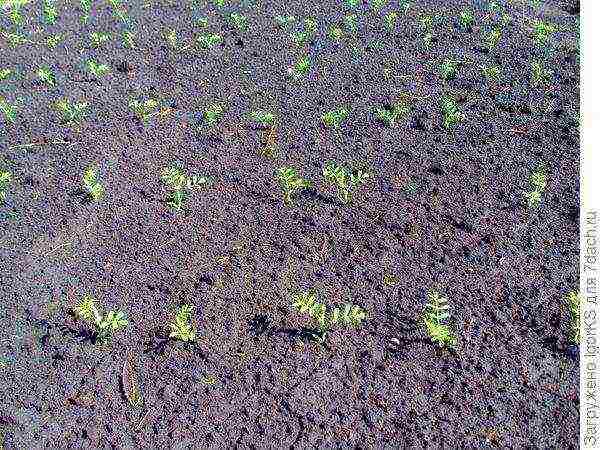
Water the garden abundantly After about 10 days, soft green shoots of germinated seeds appear from the ground.
Towards the warmth
Plant development
Chickpeas always come up together and practically without lunges. And a week later, "the kids fledge." At this time, we water the plants.
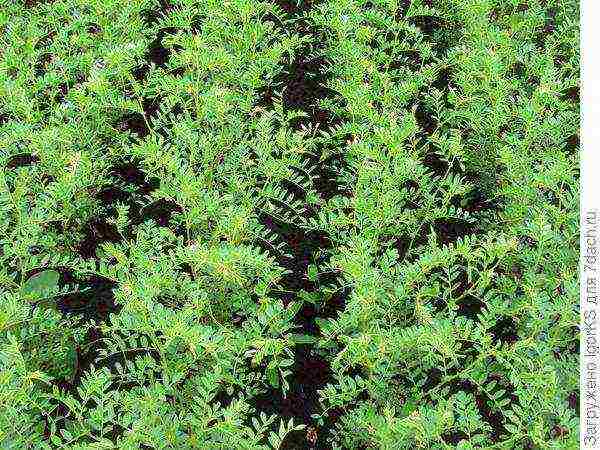
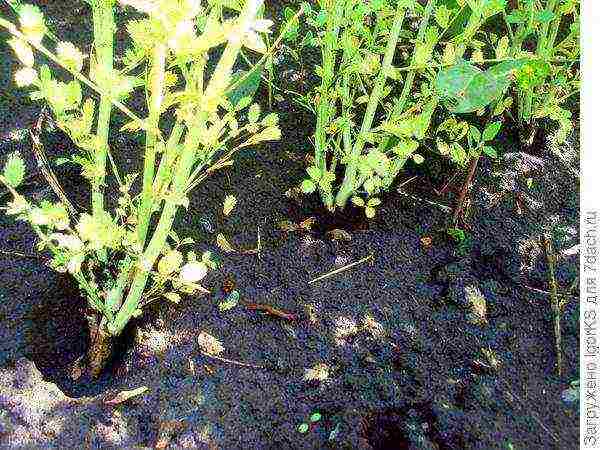
The first swallows - leaves The chickpea develops very well and quickly. But the weeds do not lag behind, so we remove them from the garden in a timely manner.
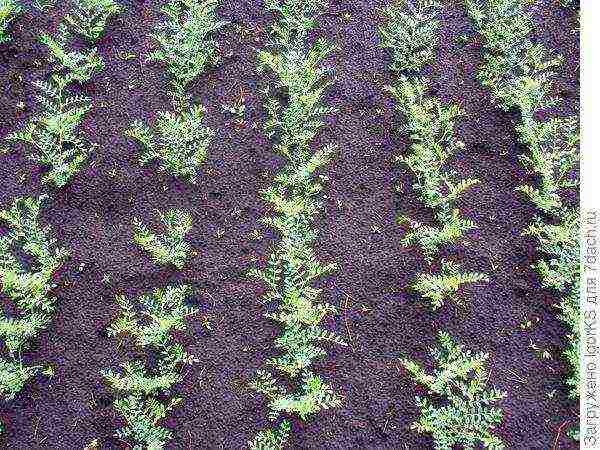
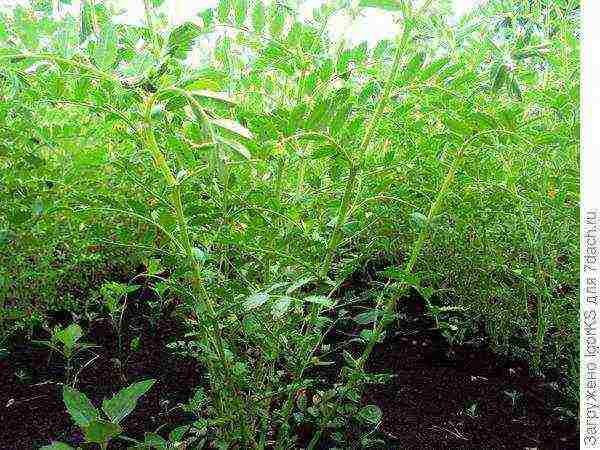
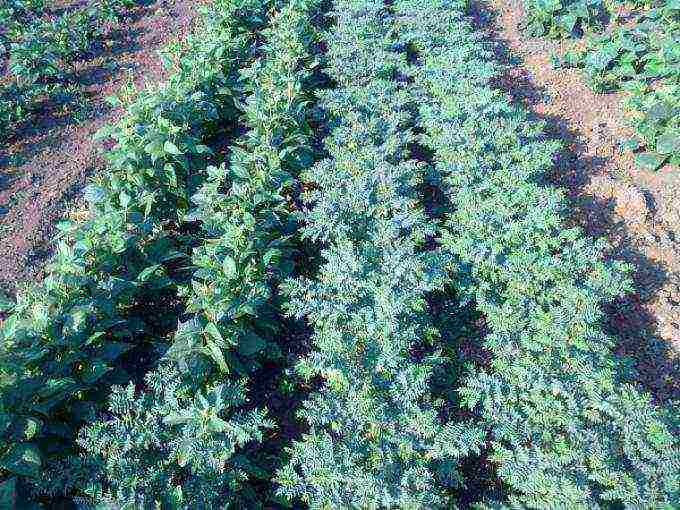
Slender rows A month later, the plantation is already pleasing to the eye. It is clear that we will not be left without a harvest. For your information: another legume crop - mung bean - at this time is still in "babies", the developmental lag is very significant.

Masha are still very young
Bloom
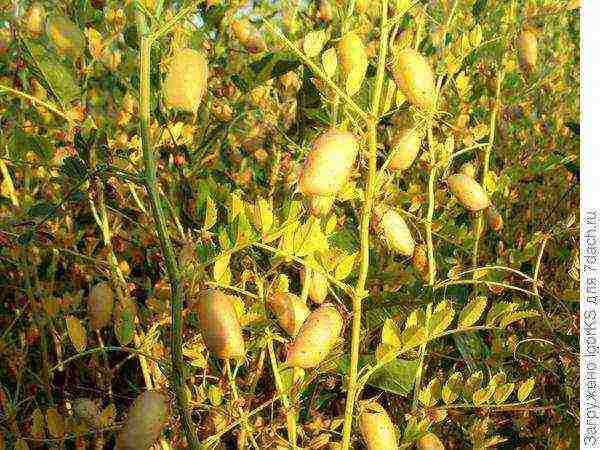
Towards the end of June, chickpeas are already well developed and begin to bloom. And the neighbors begin to look over the fence and ask you different, but constantly repeated questions.
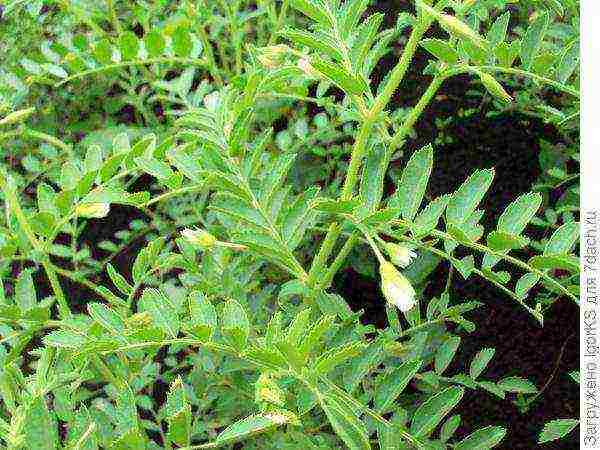
Flowering time Despite the appearance of flowers, chickpeas continue to grow rapidly, because now, at a height of 40 cm, it has not yet grown even half of the maximum possible plant height.
Real family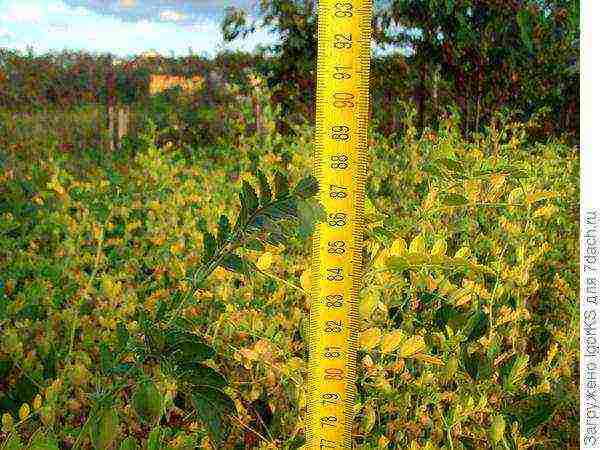
Plant height in August 2017 The first flowers appear on peanuts planted nearby.
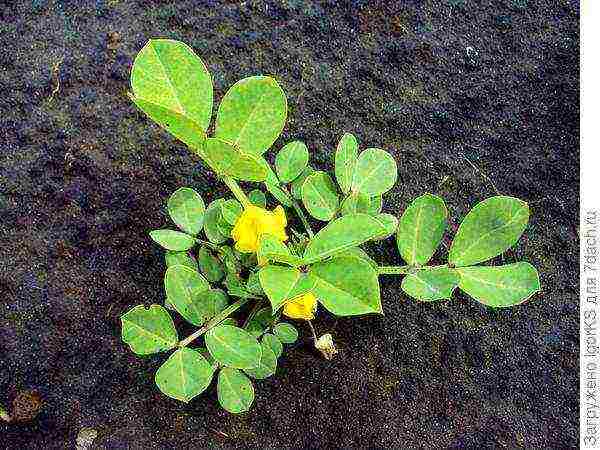
Blooming peanuts look like a chicken As the rows of chickpeas gradually close, all the plants are covered with small white flowers.
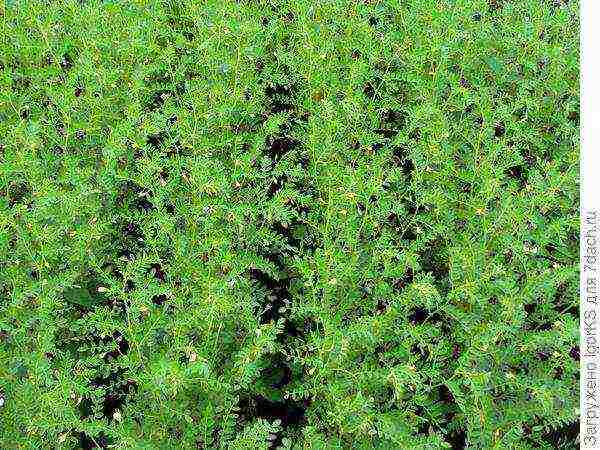
Blooming Chickpea Carpet The dense planting allows the plants to cling to each other, so they do not break or fall on the ground under any circumstances.
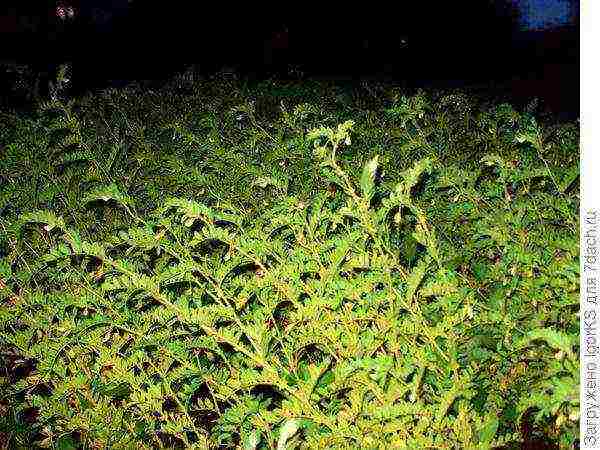
During bad weather Even after a two-day hurricane with gusts of wind up to 25 m / s (90 km / h), which took place this summer in the Samara region, the plants only slightly loosened and soon stood upright again.
After a hurricane It is also worth noting that weeds no longer cause any particular inconvenience to adult plants. I even got the opinion that they practically stop growing under the chickpeas over time, with the exception of the bindweed. The bindweed, in order not to unravel its endless intricacies, is enough to pull it out of the ground or tear it off the root.
Fruit formation
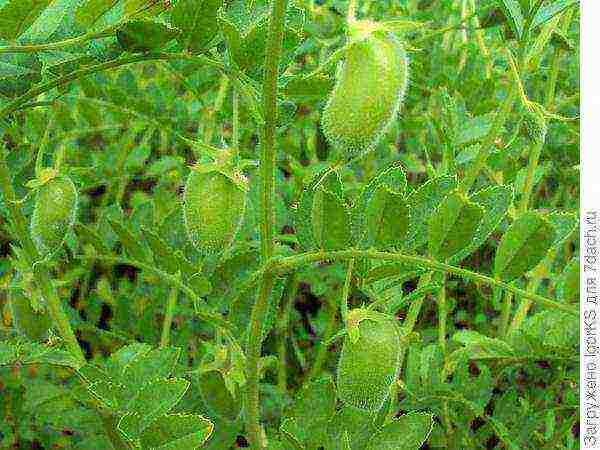
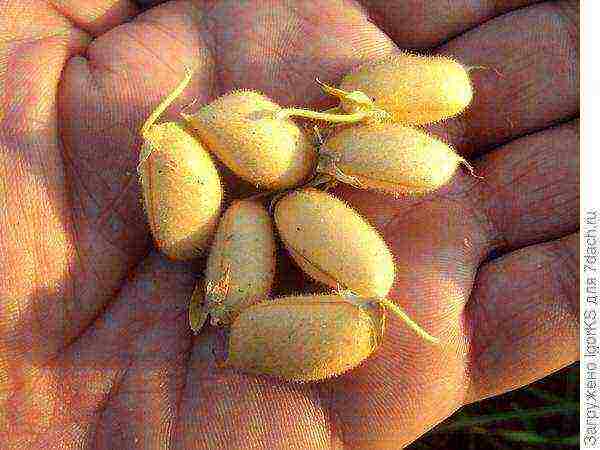
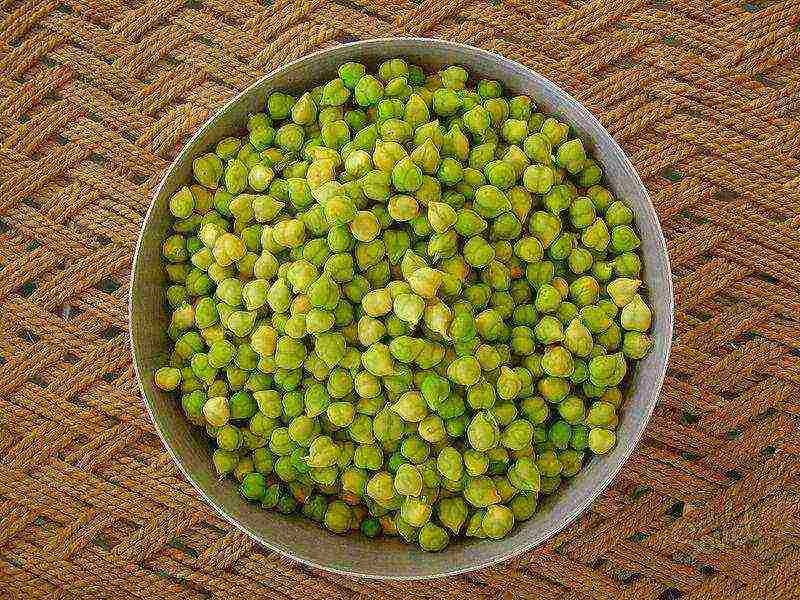
Two weeks after flowering, the plants have already formed short pods of light green color, covered with tiny hairs.
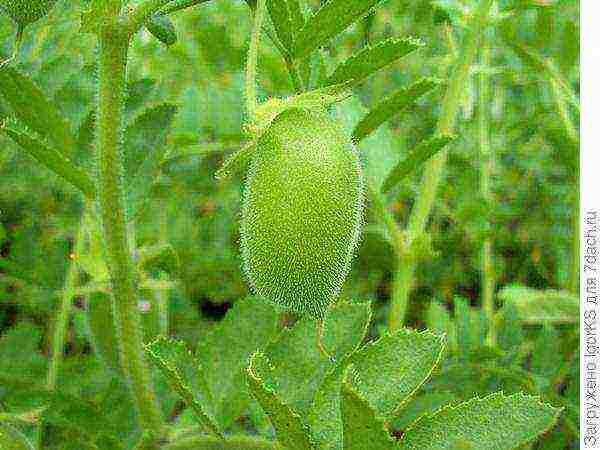
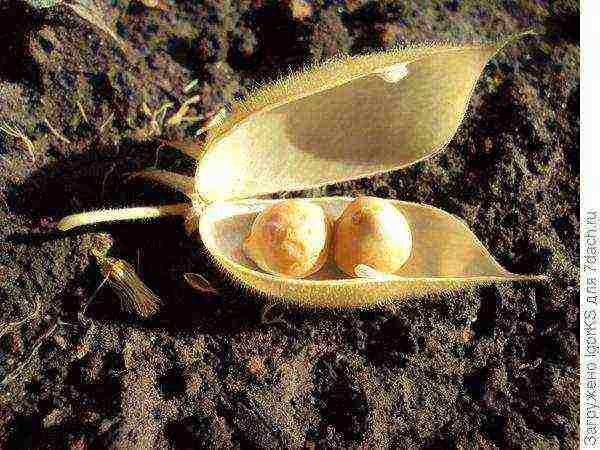
Chickpea pod Flowering and fruit ovary of chickpeas with constant watering can continue in September, until the onset of cold weather, gradually moving to the tips of the branches.
Pods, inside which 1-2 peas develop (3 - very rarely), are formed in abundant quantities within a month, after which they begin to ripen.
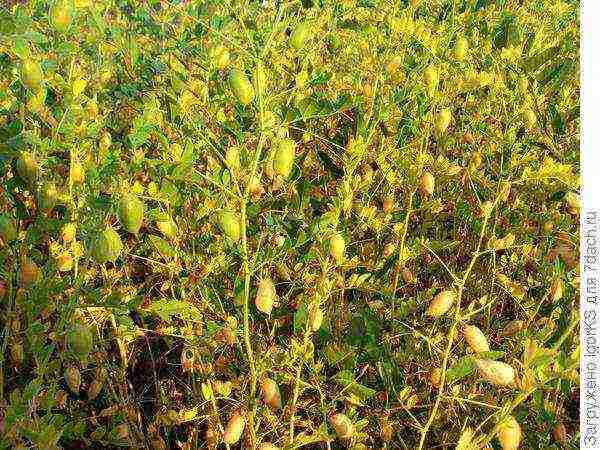
August - ripening time The plants can simultaneously see both ripe and still green beans, as well as ongoing flowering.
Mass ripeness
Harvesting
Ripe pods become light in color and tough.
Ripe chickpea pods In addition, ripeness can be identified by sound. If you shake the pod, you can hear a rumble: in a ripe pod, the grains are in a free state and roll over.
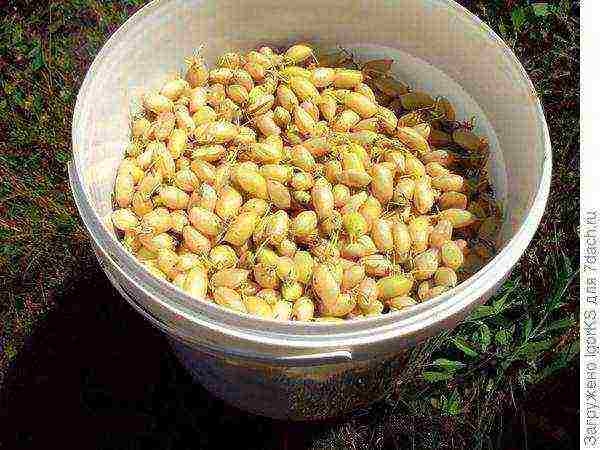
The first harvest in a 10-liter bucket The chickpeas are usually harvested from the bottom of the plant, so the main harvest takes place in several stages - 3-4 times. But even then it will be possible to collect the ripening small amount of the remaining pods.
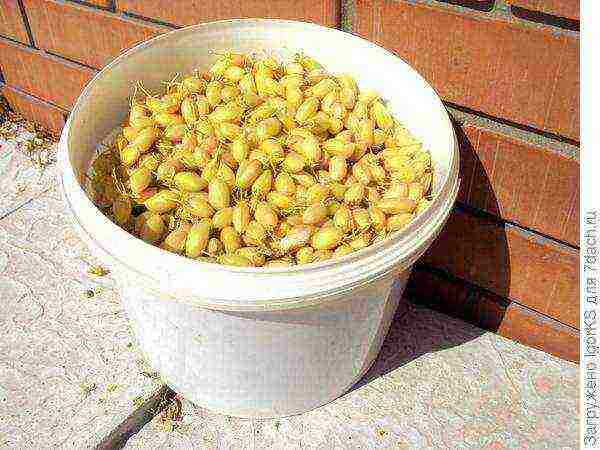
Second harvest, 10 liter bucket In August, during the beginning of the harvest, the leaves of the plants gradually lighten and fall off, remaining green only at the tops of the branches, where the pods are still growing, flowering and ovary, the most recent of which are usually empty.

Soon the end of the season After harvesting, we extract the grains from the pods, dry them if necessary. Ripe chickpeas are stored perfectly, and the harvested harvest will be enough for you both for preparing a variety of tasty and healthy dishes, and for sowing next year.
Ripe chickpeas in a pod In the next article I will tell you how to grow mung beans in the country.
4 methods: Planting seeds Transplanting seedlings General care Harvesting
Chickpeas have a long growing season, requiring up to 100 days to reach the harvest season from the sowing date. However, the plants themselves are fairly easy to care for, as long as you protect the shallow root system and avoid over-watering.
Method 1 Planting seeds
-
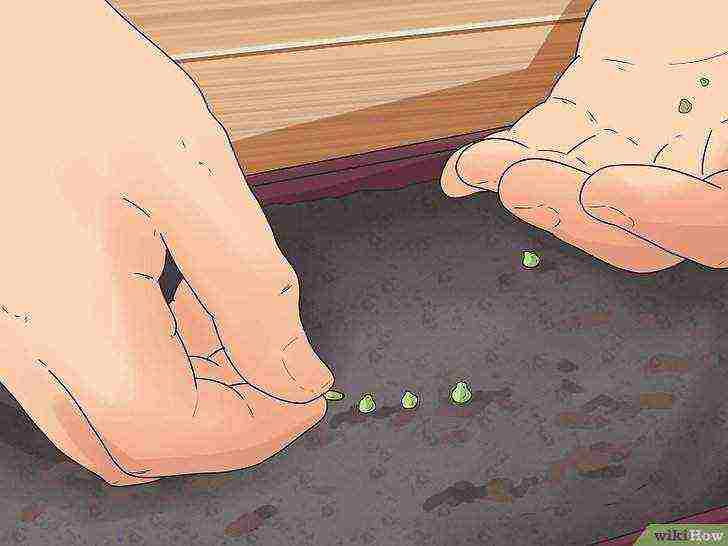 Sow seeds indoors.
Sow the seeds about four weeks before the date of the last expected frost. Since chickpea seeds are somewhat fragile, you should sow them indoors instead of planting them in cold ground.
- If you intend to plant chickpea seeds outdoors, wait one to two weeks before the last expected frost and cover the area at night with light mulch or a discarded leaf to help isolate the seeds.
- Chickpeas have a long growing season that takes 90 to 100 days until they are ready to be harvested. Therefore, you must plant it as early as possible.
-
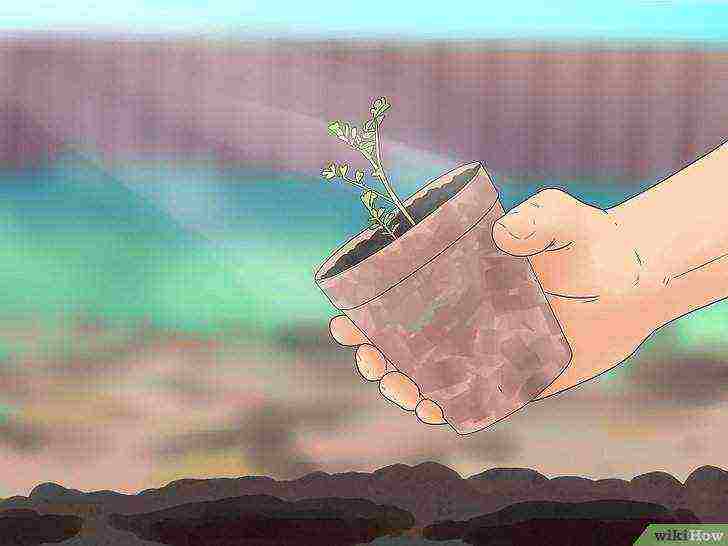
 Use biodegradable pots.
Chickpea seedlings are not transplanted, so you should use paper or peat seedling pots that can be planted directly in the ground instead of plastic or ceramic containers.
- Seedling pots can be purchased online and at most horticultural centers.
-
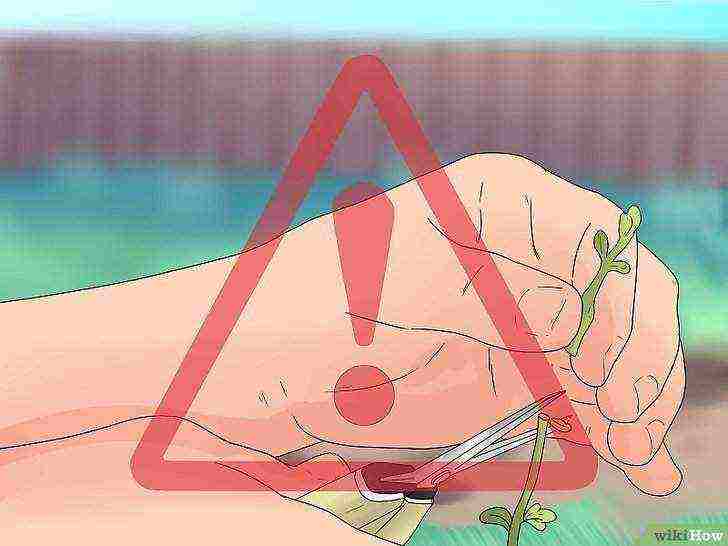
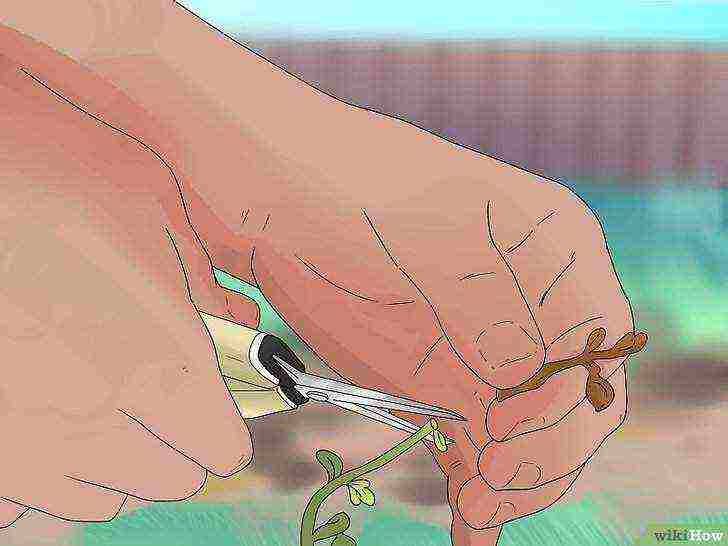
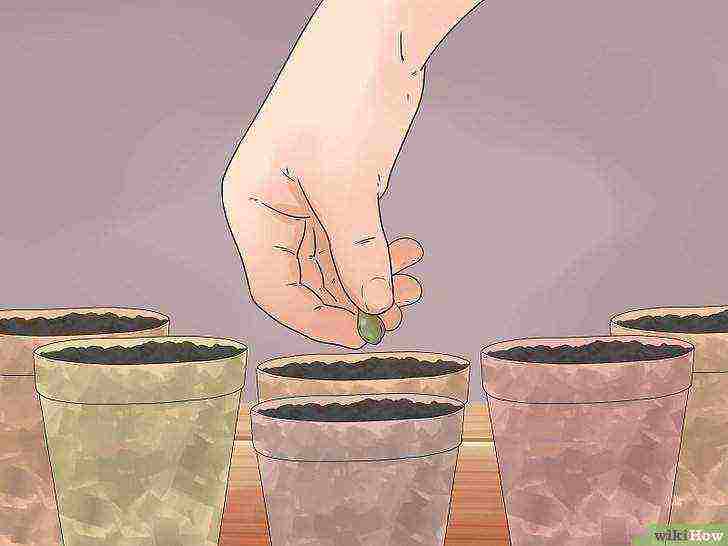 Plant 1-2 seeds per pot.
Fill seedling pots with soil, then plant one seed in each pot, placing it 2.5-5 cm deep.
- Planting one seed per pot is recommended, but up to two seeds can be planted. However, when the seedlings are germinating, you should thin them out to one per pot. If you do not need to thin out the seedlings, cut the weaker seedlings at soil level using sharp scissors. Do not dig it up, as this approach can break the roots.
- Germination usually takes about two weeks.
-
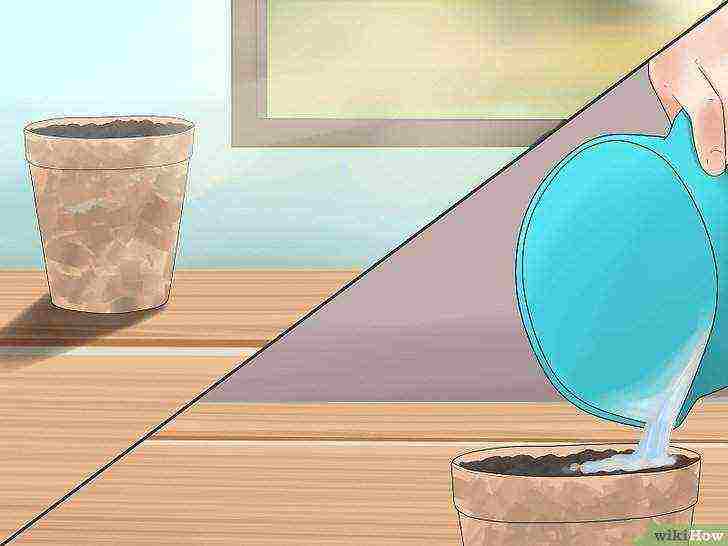 Provide the seeds with sun and water.
Place the seedling pots next to a window that gets plenty of direct sunlight, and keep the soil surface evenly moist until the seedlings germinate.
- Do not soak seeds before sowing. You should also avoid watering abundantly after sowing the seeds, as they can cause the seeds to split. The soil surface should be slightly damp, but not more.
Method 2 Transplanting seedlings
-
 Choose the right location.
Chickpeas do well in full sun, so you should choose an area that gets at least six hours of direct sunlight. Ideally, the bed should be loose with well-drained soil and organic matter already added.
- You can grow chickpeas in partial shade, but this will significantly reduce the yield.
- Do not plant chickpeas in areas where green fertilizers have grown or in soils that are high in nitrogen. Nitrogen will cause larger and thicker leaves to grow, but the plant's overall yield will decrease if nitrogen levels are too high.
- Avoid heavy clay soils or especially shady areas.
-
 Prepare the soil.
To improve the condition of the soil and prepare it for the plants, grind several handfuls of rotted compost a day or week before replanting the seedlings.
- Also consider mixing with a fertilizer rich in potassium and phosphorus to encourage higher yields.
- If the soil is too heavy, mix it with agricultural sand, fine gravel, or soil conditioner to make it less dense and to improve drainage. Try not to mix with moss, as they tend to absorb too much water.
-
 Replant when frost passes.
Chickpea seedlings are considered “frost-hardy,” but they still grow best when transplanted outdoors after a frost threat. The seedlings should also be about 10-12.7 cm high at the time of transplanting.
- Plants will grow best when daytime temperatures are between 21-27 ° C and when temperatures are above 18 ° C at night.
-
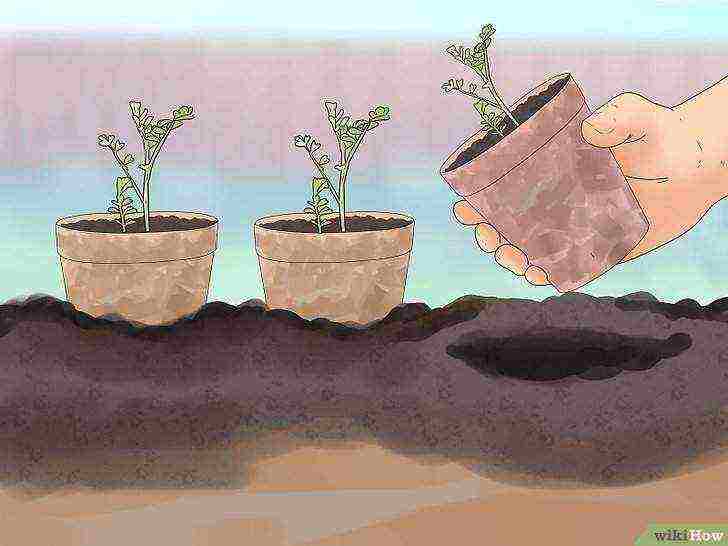 Keep seedlings close.
Plant the seedlings 12.7-15.25 cm apart. The pits should be as deep as the seedling pots.
- As they grow, the plants will start to cluster on top of each other. However, a bit of crowding is actually a good thing, as the plants help support each other when they intersect.
- When planting chickpeas in rows, place the rows 46-61 cm apart.
-
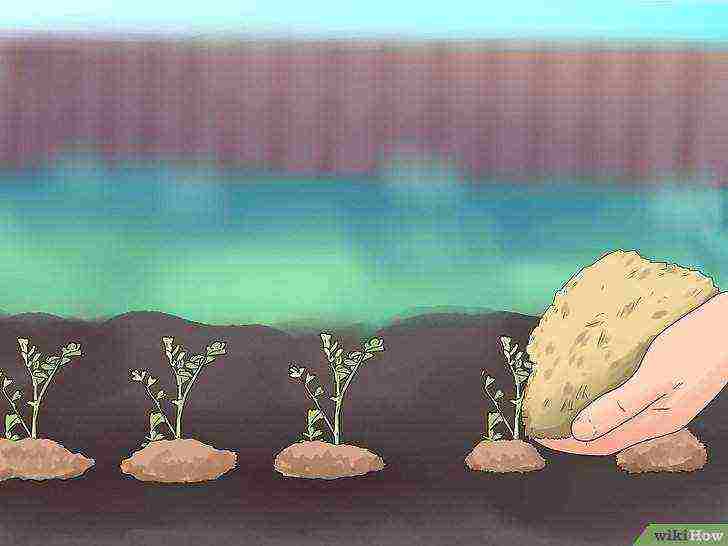
 Bury the entire seedling pot.
As noted, each hole you dug should be large enough to fit a whole seedling pot. Place the seedling pot in the hole and lightly cover the edges with extra soil.
- Do not try to remove seedlings from pots. This can shock the delicate root system and the plants will die.
Method 3 General care
-
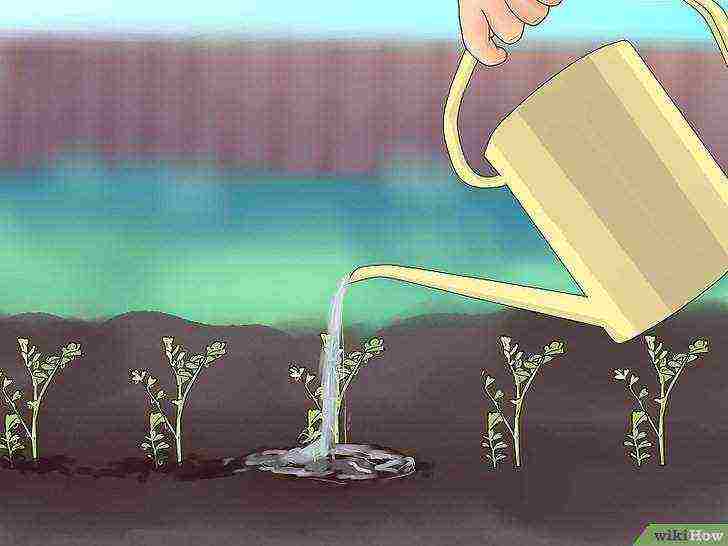 Water regularly.
Regular rain is usually sufficient, but if the season is dry, water the chickpeas twice a week during the flower and pod formation stages.
- Avoid overhead watering. Water can get on flowers and pods, causing them to break prematurely. Dousing the plant with water can also promote mold growth. When you water the chickpeas, water them directly at soil level.
- After the pods are ripe, the plant begins to die off by itself, reduce the watering of the plant. After that, water every week or two, that should be enough. This aids in the drying process that the plant must go through before harvesting.
-
 Mulch as needed.
Once the weather is warm, you should add a thin layer of mulch around the stems. This will keep enough moisture in the soil, which is especially important if your plants are growing in full sun.
- Mulch can also help prevent the growth of weeds in the garden bed.
-
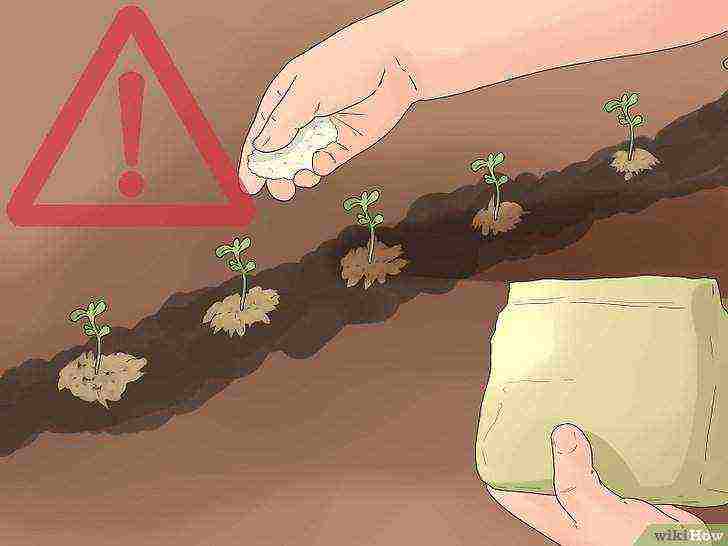 Fertilize with care.
You can add some rotted compost or similar organic matter to the soil around the chickpeas mid-season. However, as before, you should avoid adding nitrogen rich fertilizers.
- Chickpeas work with microorganisms in the soil to produce their own nitrogen, so they get all the nitrogen they need. Any excess nitrogen will result in thicker leaves and may reduce potential yield.
-
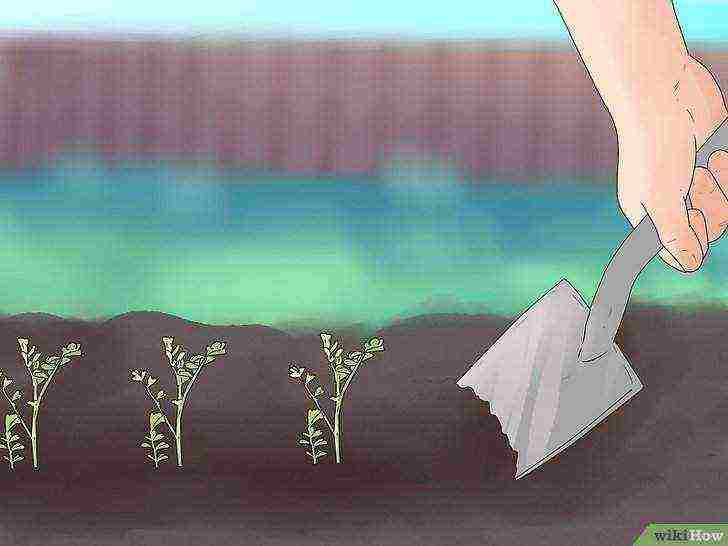
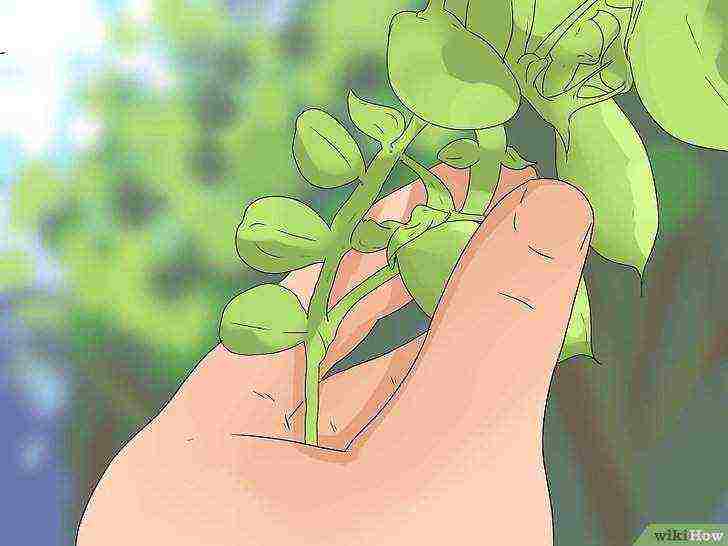
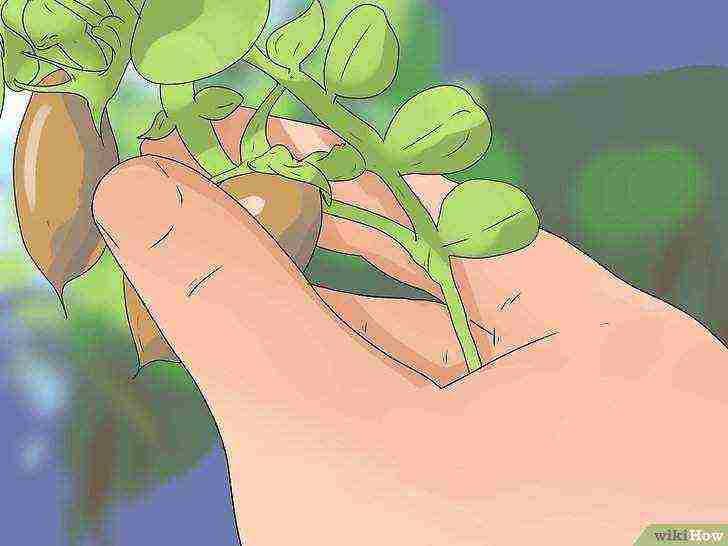
 Handle chickpeas with care.
When removing weeds or adding anything to the soil, you need to work carefully so as not to disturb the plant's root system. The chickpea root system is quite shallow, so if you work too close to the base of the plant, it can damage its roots.
- You should also avoid handling plants when they are wet, as this can lead to the rapid spread of fungal spores.
-
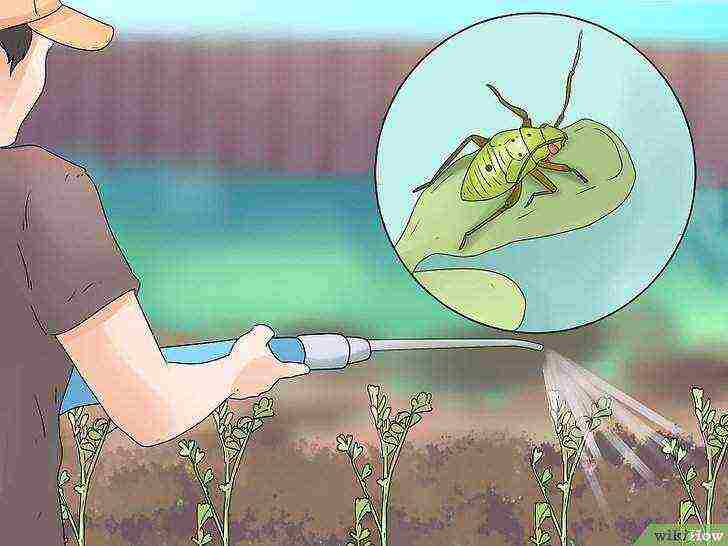 Deal with pests when you see them.
Chickpeas are vulnerable to attacks from a variety of different pests. However, you must avoid pretreating the plant for pests, and you have to wait until you find the pests before taking action against them.
- Adult aphids, leafhoppers, and ticks can be controlled with a strong hose stream or insecticidal soap.
- If you spot adult pests, look for eggs and crush them with your fingers. Alternatively, simply cut off the leaves and eggs.
- For particularly bad infestations, try natural and safe food pesticides that contain pyrethrins.
- Also, the garden should be free of debris to reduce the number of pests.
-
 Watch for signs of illness.
These plants are also vulnerable to several different diseases, including rot, mosaic, and anthracnose. Plant disease-resistant plant varieties whenever possible.
- To avoid spreading the disease, beds should be cleared of debris and avoid contact with plants when they are wet.
- Remove infected plants and discard them to prevent the spread of the disease. Burn them or put them in the trash can, but do not use them for compost.
Method 4 Harvesting
-
 Harvest fresh crops.
If you want to eat fresh peas, you can pull out the pods while they are still green and unripe. Eat fresh chickpeas like young beans.
- The pods reach a length of 2.5-5 cm, and each pod contains only one or three beans.
-
 Dry the crop.
The more popular way to harvest chickpeas is to harvest them when they are dry. To do this, you will need to harvest the entire plant once the leaves are dry and brown. Place the plant on a flat, warm surface and let the pods air dry in a naturally warm, well-ventilated area. Collect the seeds when the pods are cracked.
- Mature seeds will be very hard. When bitten, a barely noticeable dent should remain.
- If the weather becomes humid, move the harvested plant or pods indoors to finish drying. Otherwise, mold can develop on the pods and destroy the chickpeas inside.
- Also note that mice and other rodents can threaten your crops if you allow the plants to dry outdoors.
-
 Store chickpeas properly.
Fresh, unpeeled chickpeas can be stored in the refrigerator for up to one week. Dried, shelled chickpeas should be stored in a cool, dry place and can be left there for up to one year.
- Store dried chickpeas in an airtight container if you intend to store them for more than a few days.
- Chickpeas can also be frozen, canned, or sprouted.
What do you need
- Chickpea seeds
- Biodegradable Seedling Pots
- Planting soil
- Spatula or small shovel
- Spray bottle
- garden hose
- Over-matured compost
- Mulch
- Natural pesticides (if needed)
Article Information
This page has been viewed 7,121 times.
Was this helpful?
In our area, chickpeas (it is also called Turkish or lamb peas) are not a curiosity for a long time. It is grown in dachas and personal plots. The unpretentious legume plant fell in love with gardeners, and its hearty and very healthy fruits were enjoyed by both adults and children.
In order to get a high quality harvest, it is necessary to prepare chickpea seeds for planting. Planting material is sorted, large seeds are selected from the total amount. A few hours before sowing, they are treated with a special bacterial preparation - nitragin.
For planting chickpeas, choose the most weed-free land plot with drained soil - you should not expect a good yield of chickpeas grown on contaminated soil. Land preparation consists of deep digging and removal of weed residues from the predecessor crop. Acidic soil must be limed before sowing.
The optimal sowing time for chickpeas is April-May. As soon as the soil warms up to a temperature of + 6-7 ° C, you can start sowing. The depth of placement of seeds in planting rows depends on the degree of soil moisture: the drier the soil, the deeper the seeds are embedded - about 14-15 cm deep. If the soil is moist enough, the seeds are placed to a depth of 7-9 cm. Simultaneously with the seeds, you can apply phosphorus fertilizer.
Chickpeas are sown mainly in a row method, the optimal distance between shoots in a row is 7-10 cm, while the interval between rows should be at least 35-45 cm. After sowing, the rows are lightly tamped. When seeding seeds to the same depth, the sprouts germinate at the same time. Timely sowing significantly increases crop yield. It is recommended to plant onions, tomatoes, carrots, potatoes next to chickpeas. 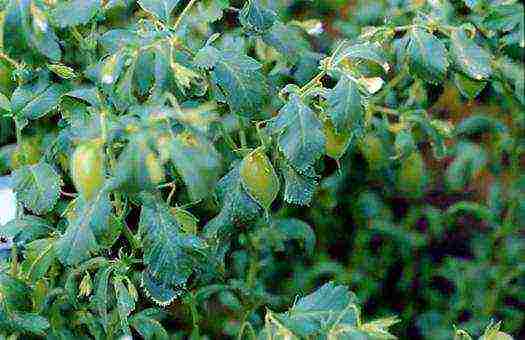 The first shoots of chickpea are fed with nitrogen fertilizers. In areas where chickpeas are sown, the use of soil herbicides is highly undesirable. The best way to control weeds is through quality and timely weeding. Water the chickpeas as needed, although in general it is not as picky about moisture as other legumes. Pamper your planting with periodic, moderate irrigation.
Chickpeas, depending on the variety, ripen from 80 to 120 days after planting. Timely harvesting is very important - autumn rains can lead to spoilage of chickpea fruits.The harvested beans are carefully poured onto a canvas and dried in the fresh air in sunny weather.
Following these recommendations, even novice summer residents will be able to plant chickpeas and grow a wonderful harvest.
There are many vegetable and cereal crops, the history of cultivation and processing of which goes back millennia. One of these crops is chickpeas, or chickpeas. Now it is difficult even to determine how long ago people realized how useful and nutritious chickpeas are. Historians suggest that this leguminous culture was already known in the 5th millennium BC. NS. They began to cultivate it in the Middle East, from there the chickpea got to Greece and Rome.
Chickpeas or chickpeas
What is the reason for the popularity of this culture?
What are the benefits of chickpeas?
Let's try to figure out for what properties the chickpea was so prized in ancient times and continues to be valued now.
Eating chickpeas in food, a person receives a wide range of vitamins, minerals and nutrients.
- Among them, almost all vitamins of group B, vitamins C, P, A and E.
- Pea beans are also high in methionine. This amino acid normalizes cholesterol levels and improves liver function.
- Another important element in the composition of legumes is selenium, which prolongs youth, increases brain activity and prevents cancer.
- Of the minerals, chickpeas contain large quantities of calcium, phosphorus, potassium, manganese, magnesium and iron.
Not many cultures have such a set of nutrients. In addition, the calorie content of chickpeas is very high and amounts to about 360 kcal per 100 grams of product.
It is unlikely that in ancient times people knew the details of the chemical composition of chickpea, but its useful and even medicinal properties have been known for a long time.
The benefits of chickpeas lie in the ability to strengthen the cardiovascular system, stimulate digestion and normalize blood sugar levels, which is very important for diabetics. Regular consumption of peas can reduce the risk of stroke.
Pea fruits contain insoluble and soluble fiber. The benefit of the latter is that, dissolving, they form a gel-like substance in the intestine that is capable of removing toxins, cholesterol and bile.
The medicinal properties of peas have long been used for the prevention and treatment of eye and skin diseases.
Chickpeas are recommended to be regularly consumed by pregnant women and nursing mothers. Due to its high percentage of iron, it tends to stimulate the production of large amounts of hemoglobin.
Regular consumption of this legume helps to normalize the immune system and increase the body's production of energy.
Chickpeas contain over eighty nutrients
In addition, chickpea beans contain lysine, which is responsible for tissue regeneration and helps to increase muscle mass. It is this amino acid that has made chickpea dishes very popular among vegetarians. After all, chickpeas in their composition are quite capable of replacing meat. Chickpeas are also popular among raw foodists. It is consumed without heat treatment after prolonged soaking.
Chickpeas can also be steeped for a long time for germination. The benefits of eating sprouted beans are not only in cleansing the body, but also in increasing its protective properties.
Growing features
You can buy ready-to-eat chickpeas in the store, or you can try growing them in your garden. In appearance, chickpeas (pictured) resembles ordinary peas, but growing it has some peculiarities.
The most suitable for this thermophilic culture is the tropical and subtropical climate. However, recently there have appeared varieties adapted for cultivation in our latitudes: Stepnoy, Vysokosly, etc.
The chickpea is a very viable crop.Crops of this plant are able to withstand frosts down to -5 degrees. Drought also does not have a strong impact on the development of plants, so even in very dry summers, you can count on a good harvest.
Chickpeas have amazing soil enrichment properties, which is why industrial cultivation is usually carried out in impoverished fields. By planting chickpeas, you can also improve the condition of the soil in your area.
In addition, the cultivation of chickpeas promotes the accumulation of moisture in the soil.
A very important difference from other crops - chickpeas compete very poorly with weeds at all stages of growth. If you do not regularly weed the crops, after a fairly short time the weeds will simply clog the pea crops.
Chickpeas are very demanding on growing conditions
In addition, this plant is very susceptible to the influence of herbicides, therefore, a plot should be allocated for growing a crop that has not been treated with chemicals for at least 2 years.
Given these properties of the plant, planting of the crop should be carried out in areas with the least amount of perennial weeds. The area allotted for the cultivation of chickpeas must be prepared in advance.
- It is allowed to grow chickpeas as a compactor for crops such as potatoes, cabbage, carrots.
- Planting is done in a row method. The distance between plants in a row should be up to 10 cm, and the distance between rows should be up to 30 cm.
- Planting depth depends on soil moisture. In a sufficiently moist soil, seeds are planted to a depth of 7-8 cm, in a drier soil - 12-15 cm.
- Planting can be carried out in April, when the temperature of the upper soil layer rises to +5.
- Seeds are planted in well-fluffed moist soil.
- The bed is dug to the depth of the shovel, breaking all the lumps and picking out the roots of the weeds.
- The beans ripen in 80-120 days. Usually, the collection is carried out from completely dried plants.
It is very important to harvest on time so that the autumn rains do not spoil it. The harvested beans are peeled from the pods and dried in a ventilated area.
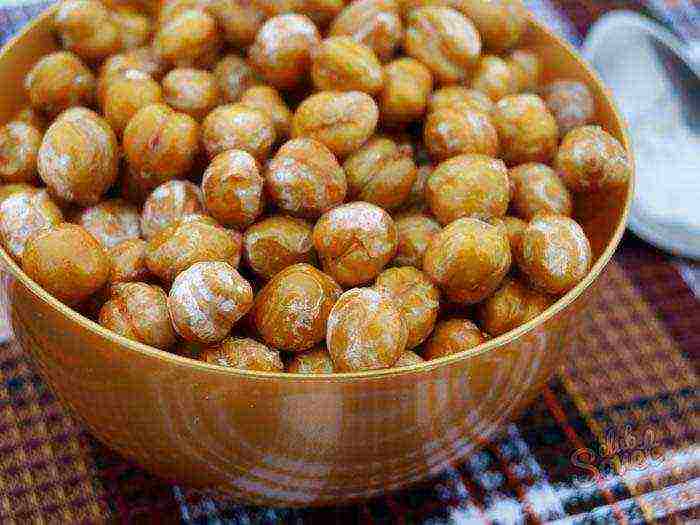
The dried chickpeas are ready to eat.
Chickpea in cooking
Although the Asian pea is a legume, its differences from its closest relative, the common pea, are very significant. Chickpeas have a buttery texture and a nutty flavor. The nutritional properties of chickpeas are much higher than not only peas, but also other legumes.
Chickpeas - food of the poor and pharaohs
The taste properties of peas make it perfect to combine with meat, rice, herbs, olive oil and garlic.
Cooking chickpeas has its own characteristics. The beans need to be pre-soaked in water for 6-12 hours. To soak one glass of chickpeas, fill it with 3-4 glasses of warm water. If you plan on making mashed potatoes, add half a teaspoon of baking soda per glass of beans to the water. The baking soda will help soften the outer shell of the bean faster. Before cooking, the liquid is drained, the soaked beans are poured with cold water and cooked over low heat for 1-2 hours. It should be remembered that salt inhibits the process of boiling peas, so it is advisable to add it 20-30 minutes before the end of cooking.
In cooking, chickpeas are usually used as a side dish; they can also be added to soup, porridge, various salads and stews (pictured).
Chickpeas are also used to make flour, from which tortillas and baked goods are made. Lamb peas canned in syrup are a very tasty and original dessert. And in some countries, even an alcoholic drink is produced from this legume. But the most popular chickpea dish is hummus. Hummus is a traditional Jewish dish made from beans. The hummus recipe has been known for thousands of years.Chickpea puree not only has wonderful taste, a properly prepared dish can be stored for a month without losing its taste and retaining all the useful properties.
It is necessary to store pea beans in a closed glass container, as it is very susceptible to high humidity.
Wonderful taste and undeniable health benefits - these qualities are the reason for the centuries-old popularity of chickpeas.
Was this article helpful?
Rate the article: