Content [show]
Read about caring for a cactus at home: lighting, temperature, soil. We consider in detail how to properly water a cactus in spring, summer, autumn and winter (frequency, methods, water for irrigation).
We also describe what fertilizer is needed for cacti, how to transplant, propagate and grow from seeds at home.
Lighting and temperature for a cactus at home
Caring for a cactus at home is quite simple, as the plants themselves are hardy and unpretentious, but knowledge, skills and attentiveness are still required from us.
Lighting and temperature
Light for cacti is very important for development and growth. They like a lot of sunlight (light-loving), so it is better to place them on the south window, if there is none, then on the west or east.
If the cactus grows on the north side, then it needs additional lighting. An insufficient amount of light manifests itself in a thinning of the apex.
- There are no shade-loving plant species, there are only some shade-tolerant ones.
Summer
Bright sun rays in summer rarely harm the flower; only forest species (ripsalis, etc.) recommend shading.
It is useful to ventilate and expose cacti to fresh air (balcony, veranda), but at the same time protect from dust, rain and wind. Cover them with plastic wrap in rainy weather.
By gradually increasing the airing time, the plants adapt to the outdoors and after 2-3 weeks they can be kept outdoors around the clock, until the end of summer.
Nighttime temperature drops strengthen the skin of the cactus, endow it with shiny thorns, allow them to winter more easily, increase disease resistance and improve flowering. Drafts are the main danger.
Winter
In winter, cacti are difficult to tolerate dry air with high temperatures. Place the flower on the windowsill farther from the battery and closer to the glass (no touching!).
- The optimum temperature for cacti will be 16-24 ° С.It is better for cacti to winter at 10-15 ° С and without drafts. Epiphytic species need a warmer place.
Most species of such genera have more chances to bloom during a warm winter: Aporocactus, Gymnocalycium, Melocactus, Notocactus, Parodia and Rhipsalis.
The rest of the species need a cold wintering (8-13 ° C) for flowering. In room conditions, it is difficult to achieve such a temperature, because heating radiators are located next to the windowsill.
Therefore, flower growers either take the plants out to a cool balcony, loggia, or protect them from a heat source using partitions made of thick cardboard, foam and other materials at hand.
IMPORTANT: The cactus does not like frequent rearrangements. Do not turn it the other side to the light (put a mark on the pot so as not to be mistaken), for a more even growth - it is absolutely impossible to do this during budding and the beginning of flowering!
SEE ALSO:
1. HOW IMPORTANT IS THE CORRECT LIGHTING FOR PLANTS?
2. WHAT LAMPS IS BETTER FOR LIGHTING HOME FLOWERS?
3. WHAT TEMPERATURE REGIME WILL BE OPTIMAL IN HOME CONDITIONS?
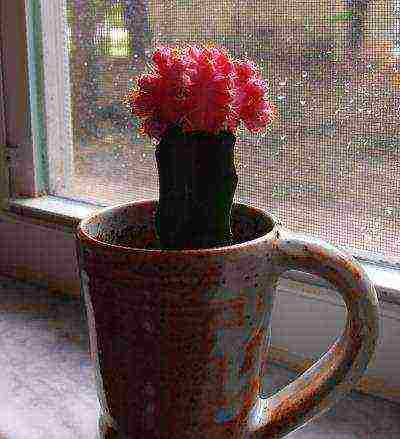 Such a lonely and such a beautiful cactus ...
How to properly water a cactus at home?
Many growers think about how to water a cactus at home and do the right thing, because watering plays a very important role in the life of a plant.
For watering cacti, it is recommended to use only soft water. You can water them from above into a pot or into a pan - both methods are correct.
Next, we will tell you in detail about watering the plant at home in all seasons.
How often should a cactus be watered? (winter spring Summer Autumn)
Winter
From November to early March, cacti have a dormant period. At this time, the need for moisture is minimal. In order for the cactus to bloom, you need a low temperature and poor watering.
Large and old specimens are watered once every 4 weeks, and small ones more often - once every 14-20 days with a small amount of water (literally one or two tablespoon). You can spray cacti with warm water once a month - before budding and flowering and water once a month.
During the period of budding and the beginning of flowering, epiphytic cacti and prickly pears can be watered, and cereus are only sprayed with warm water. Waterlogging leads to the fact that "babies" grow from buds instead of flowers.
- Many flower growers recommend not watering cacti at all in winter and get excellent results of flowering and further development.
The editors of the "Holiday of Flowers" magazine remind you that you need to remember the specific features. If in doubt, water your cacti in the winter using the gentle regimen described above.
Spring
As the temperature rises and the amount of light increases, cacti "come to life" and the need for water gradually increases.
Watering cacti in the spring is recommended to start after the beginning of growth (young green skin at the top): March - once every 12-16 days, April - once every 8-12 days, May - once every 5-7 days.
Spray about once every 14-20 days. The terms are approximate for central Russia, the principle is the same: the warmer and lighter, the more often.
Summer
In summer, cacti are watered most often, as the maximum growth and intensive development of the plant occurs.
How often should a cactus be watered in summer?
Most species recommend watering in the morning every day or every other day with a little water. An exception is cloudy weather; watering is not required on such a day.
Autumn
In the fall, the cactus is gradually prepared for a dormant period and subsequent flowering. They are watered less and less along with a decrease in temperature: September - once every 5-7 days, October - once every 10-14 days.
From November to March (dormant period), once every 25-30 days, a small amount.
General rule: watering cacti is better less and less than more and more.
WE RECOMMEND TO FIND OUT:
1. IRRIGATION OF ROOM PLANTS FROM "A" to "Z" - OVERVIEW!
2. WHAT IS THE BEST WAY TO WATER HOME FLOWERS?
3. WHAT WATER DO HOUSE PLANTS NEED AND HOW TO PREPARE IT?
4.HOW TO WATER ROOM FLOWERS DURING VACATION?
Top dressing and fertilizers
The use of fertilizers for cacti is covered in different ways in the literature and is accompanied by long disputes. We can say for sure that cacti need a small amount of nitrogen and an excess of it leads to improper plant development.
Therefore, organic fertilizers are not recommended for use, except for small doses for rapidly growing and epiphytic species.
Cacti need calcium and phosphorus, and potassium during the flowering period. Therefore, it is better to use a special fertilizer for cacti and succulents.
Fertilizer "Cactus" with a balanced composition of micro- and macroelements is quite popular. Release form - 0.5 liter bottle.
Universal feeding period: from April to early September every two weeks.
ATTENTION!
- The growth and flowering period of cacti often does not coincide, so do not feed in winter when the plant is blooming. For such species, you can slightly increase the watering.
- Do not apply fertilizer to cacti after or before transplanting.
REFRESH YOUR KNOWLEDGE:
1. WHAT ARE THE TYPES OF FERTILIZERS AND HOW TO USE THEM?
2. WHAT HOME AND NATURAL FERTILIZERS ARE THE MOST EFFECTIVE?
3. HOW CORRECTLY TO FEED ROOM PLANTS?
 Different types of cacti
Transplanting a cactus at home + soil
It is best to replant the cactus from late March to late May. Young plants are transplanted every year, and adults (from 4 years old) every 2-3 years before the start of active vegetation (March).
Transplant plan
- Do not water the flower 3-4 days before transplanting for the convenience of separating the soil from the roots.
- At the bottom of the pot, be sure to use a drainage layer (2-4 cm) - stagnant water is contraindicated for cacti (especially for epiphytes). Fill the holes with shards, pour fine gravel, expanded clay, charcoal or coarse sand on top.
- Depending on the depth of the pot and the length of the roots, a 2-4 cm layer of soil mixture is poured on top of the drainage. The plant is placed on the ground and the roots are straightened, while the base of the cactus should be in line with the edge of the pot.
- After that, they begin to fall asleep around the substrate to the root collar, periodically shaking the pot and compacting the soil. A 1 cm layer of sand can be poured on top of the substrate.
- The first 3-4 days after transplanting a cactus, do not water it or place it in direct sunlight.
How to choose a cactus pot?
The main thing is that the volume of the cactus pot is not much larger than the volume in the expanded form of the root system and takes into account the peculiarities of the species.
Example: Ariocarpus is suitable for a deeper than a wide pot, and for mammillaria many children appear and many plants grow in one dish over time.
For specimens with short and branched roots, a low and wide pot is selected, for a cactus with long roots or a rod type, a deeper and narrower one is suitable.
The form... Between the square and round shape of the container, it is better to choose the second option. However, if you have a large number of cacti or are constantly expanding your collection, then square or rectangular pots save space on the windowsill and are easier to carry on a tray to another location.
Material. Both plastic and clay are suitable. Cacti are not picky about the material, they do not recommend using only a metal container.
Soil mix
The soil for cacti differs depending on its type, age, etc. Experienced florists can find various examples of the substrate.
The general features are as follows: the soil for a cactus should be loose, slightly acidic (pH = 4.5 - 6), light and nutritious (the ratio of minerals is different).
A typical DIY potting mix would be leafy soil and river sand (1: 1) + some peat (acidity) and powder with small pieces of hardwood charcoal.
Young plants and seedlings need a looser and more nutritious potting mix (increase the amount of leafy soil).A denser substrate is suitable for adult plants; for this, clay-sod soil is added to it.
- Tricks: for rapidly growing species, it is useful to add humus to the substrate. For cacti with a lot of thorns, it is useful to add crushed eggshells to the mixture.
USEFUL INFORMATION:
1. SECRETS OF CORRECT TRANSFER OF ROOM PLANTS!
2. WHAT SOIL MIX COMPONENTS HOW TO USE?
3. WHEN TO REPLAY ROOM FLOWERS ON THE LUNAR CALENDAR?
How do cacti breed?
The cactus can be propagated vegetatively or using seeds.
How to grow cacti from seeds at home?
To grow a cactus from seeds, it is better to use seeds from a store, since at home, due to over-pollination, related specimens are crossed.
In order to grow cacti from seeds at home, you need to be patient and make a lot of effort.
- Cactus seeds are disinfected in a solution with manganese.
- The substrate is poured in a layer of 1-2 cm, moistened and seeds are laid out on top. Then they are covered with a film or wall.
- Air cactus seeds 1-2 times a day and keep the soil mixture moist.
- After the appearance of the first thorns (depending on the type, seeds can germinate from 2-3 days to 2-3 months), the sprouts are transplanted into containers with a more nutritious substrate than in adult cacti.
- When the seedlings are about three months old, they are cared for in the same way as adult cacti.
- Advice: cactus seeds are best planted so that they germinate in March-April.
Propagation of cacti by cuttings
It is more convenient and efficient to propagate cacti by cuttings. Many species have lateral babies with rudimentary roots that can be easily detached and can be immediately planted in the potting mix.
Cacti that do not have children are a little more difficult to propagate:
1.Cut off a healthy shoot or stem section.
2. The cut site is dried in the sun for 3-4 days and then planted in a moist soil mixture.
How to plant cacti correctly? Video
RECOMMENDATIONS:
1. REPRODUCTION OF ROOM FLOWERS - OVERVIEW!
2. VEGETATIVE REPRODUCTION OF HOUSEHOLD PLANTS IN DETAILS!
Pests and diseases
An excess of moisture, especially in winter, leads to the formation of rot. When the roots rot, the cactus is taken out of the pot, the roots are washed with running water, and dried.
Then rotted leaves and stems, soft and dark roots are cut off, and also treated with an antiseptic (only roots). Plant the cactus in a new pot and do not water until it begins to grow.
Of the pests, cactus affects: spider mites, aphids, scale insects and mealybugs.
- The main thing is to inspect the plant through a magnifying glass weekly and avoid excessively dry air. Remember that regular inspection is much easier and more enjoyable than pest control or disease treatment.
FLOWER REMINDER:
1. PESTS OF ROOM FLOWERS WITH PHOTOS AND DESCRIPTIONS!
2. HOW TO REMOVE PESTS IN HOME CONDITIONS?
3. POPULAR DISEASES OF HOUSEHOLD PLANTS!
If you have questions about how to care for a cactus at home, you can ask them in the comments.
 Having mastered the basics of planting cacti, you should not rely on the fact that succulents on your windowsill will grow for many years, without any outside interference. Like any plants, cacti need decent care when growing, otherwise they will simply suffer, refuse to bloom, and then die altogether. You can learn how to properly grow cacti at home by carefully studying this material.
The technology of proper cultivation and care of cacti at home
The experience of growing and caring for cacti, familiarity with the relevant literature lead to a paradoxical conclusion: almost all cacti (like the overwhelming majority of other succulents) cannot be counted as indoor plants themselves.Of course, the cultivation and care of home cacti can be carried out in rooms - which is what millions of people do, but at the same time, firstly, you have to change the usual room conditions (highlight the plants, isolate them from dry and warm air, etc.), secondly, admirers of cacti still use every opportunity to "expel" their pets from the windowsills to the wild (outside the windows, balconies, hotbeds), and thirdly - and this is the most important thing - it is simply not possible to grow full-fledged specimens of most species in rooms ... Only rare representatives of cactus, due to their biological characteristics, seemed to be sufficiently adapted precisely to the conditions of the dwelling and therefore became common in indoor floriculture.
In temperate zones (Europe, North America, Japan), where decorative succulent growing is most developed, the best results are obtained in greenhouses, but many species are grown all year round in open ground (even in northern Europe and in Canada).
Thus, there are three main directions for the cultivation of cacti and other succulents for decorative purposes - indoor, greenhouse and garden. Each of them assumes its own, specific agricultural technology.
It is important to note that, no matter how different the methods of growing cacti at home or other conditions, they are all based on a few common biological characteristics of these plants. This is, first of all, slow growth and its pronounced periodicity. Almost all cacti, even giant treelike cereus and lush epiphytic bushes with leafy shoots, grow relatively slowly in nature. Neither their root system, nor stem tissues are able to quickly assimilate a large amount of nutrients and water from the environment, and therefore cannot quickly form an increment. In addition, regardless of the place of natural growth, almost all cacti have pronounced periods of growth, flowering and, which is very important, dormancy.
The correct methods of growing cacti at home take into account, first of all, these are their features. It is curious that venerable cactus growers sometimes fiercely argue, defending their, often diametrically opposed ways of keeping and growing their favorite plants, but usually the conflicting parties have equally good collections, since their different methods are still based on understanding the nature of cacti. But most of the failures are explained precisely by ignorance of this nature.
In general, in cactus growing, a huge number of different rules, recommendations, methods and technologies for growing cacti have been accumulated, in addition, different rules and recommendations often contradict each other (especially regarding the content during dormant periods, the composition of substrates, watering, seed germination). This is not to say that formal methods are wrong, but when evaluating them, one must bear in mind two circumstances.
At first, before growing cacti at home, keep in mind that in nature these plants are to a certain extent plastic. Most of them are capable of growing in markedly different conditions. One and the same species can be found, for example, in the canopy of a tropical forest, and on bare, sun-drenched rocks. It was this ability that allowed many species to spread widely around the world (for example, the notorious conquest of the world by prickly pears). Further, the needs of cacti change markedly with age, and what is unacceptable for a two- or three-year-old seedling is quite suitable for a veteran plant (and vice versa). In addition, like other plants, cacti get used to certain conditions (for example, hardening can be used to train them to tolerate stronger sunlight or colder temperatures).
SecondlyWhen studying information on how to properly care for cacti, do not forget that, like any living organisms, these plants do not react to any particular environmental factor (temperature, humidity, etc.)and on a complex of these factors. The addition of humus to the soil mixture under some conditions of watering, light and temperature can lead to rapid death of plants, and under others, it can provide excellent development.
Every serious cactus grower has his own set of methods for caring for cacti at home, developed by practice, and each such set has certain pros and cons. But, of course, there are some general principles of growing cacti, and unacceptable techniques.
How to properly grow cacti at home: choosing a place
Before you can properly grow cacti, you need to choose the right place for them. In the room, cacti always lack light and are too warm during the winter dormancy. In addition, even for these drought-resistant plants, the indoor air is dry. Therefore, the best place for them in the house is on the windowsill of the sunniest window, closer to the glass (the glass, of course, must be clean).
As you can see in the photo, when caring for home cacti, you need to put plants at the bottom of the window:


If there are shelves on the window, then the plants on the upper shelves only get side lighting, which leads to an ugly curvature of the stems. Usually, such an arrangement of cacti does not cause technical problems, since most other plants do not compete with them for these - near the glass itself - places.
Problems arise when the passion for succulents becomes so serious that because of dozens or even hundreds of pots with "hedgehogs" there are no more suitable places in the rooms. Then, for proper care of cacti, plants can be placed in the house only for the winter period, and in the spring-autumn time, find an opportunity to place them outside the apartment (in greenhouses in the country, on the balcony, in a greenhouse outside the window). During the period of winter dormancy, the abundance of light for most cacti is not so important, and they can be kept near the northern windows, on the upper shelves near the window, and even in full shade.
What kind of pot is needed for a home cactus
Having decided to start breeding succulents, you need to imagine what pots are needed for cacti. The main requirement for a container for planting succulent plants is compliance with the size of the root system. The pot should not significantly exceed its volume in a straightened form, as a rule, a container of much smaller volume is chosen. If the plant has shallow, wide roots near the surface of the substrate, it needs a relatively flat pot. In flat boxes (bowls), cacti are usually sown and seedlings are planted. Conversely, cacti with deepening, especially tap and turnip roots, need deeper utensils.
The nature and development of the root system when transplanting cacti will also be appreciated by a layman, but it is better to check the reference books. Of course, when planting relatively rapidly growing cacti (large prickly pears, echinopsis, pereski, epiphytes), the dishes can be more capacious - "for growth."
What are the most commonly used cactus pots? Usually, plastic pots are taken for these plants. But this is not a dogma. Ceramics is also widely used, and you can use dishes from other natural and artificial materials. It is only important to understand the possible consequences.
One of the peculiarities of caring for cacti is that the state of the substrate in plastic and clay pots under exactly the same conditions will be different (in a clay pot, an earthen lump, naturally, dries out faster and cools more after watering). At the same time, in some cases, rapid drying is a plus (for example, during winter watering and for cacti with sensitive roots), in others it is a minus (for young, rooting plants or when watering in hot weather).
Which pot is best for a cactus
For a long time, answering the question "which pot of cactus is better", experienced cactusists answered that for planting these plants, rectangular containers are required, which are convenient for a denser planting of succulents. However, modern design trends are gradually leading to the return of round tableware. Indeed, a spherical plant in a rectangular pot does not look perfect. Round pots also have functional advantages: firstly, both the aerial part of the cactus and its root system develop in all directions, filling the pot more evenly; secondly, when tightly installed, there is a lot of space between the rounded pots, which provides a more favorable mode of humidity and air exchange than in the case of rectangular containers standing close together.
When deciding which pot to choose for a cactus, do not forget that almost all succulents, even the most moisture-loving ones, do not like stagnant water. Therefore, cactus pots must have reliable drainage holes. Many cactus growers make several of them in the bottom, sometimes capturing the side walls.
Rapid drainage of water occurs in pots with a retractable bottom; they are also convenient for plant transplantation. A retractable bottom is easy to build in any pot by placing a shard or a plastic plate slightly smaller than the main bottom on the main bottom. Small legs under the outer bottom also help to avoid stagnant water in the bottom of the pot. Epiphytic cacti are especially sensitive to drainage deficiencies (that is, to stagnant water). For them, you can use "orchid" dishes (ampelous baskets).
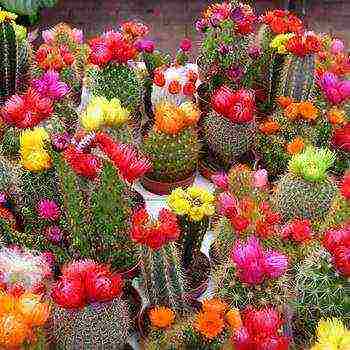
It has been noticed that when taking care of cacti at home, succulents grow better and faster if they are planted together in one container. Of course, at the same time, neighbors are selected that require similar care. In this case, the conditions for the development of the root system are partly close to natural, and the biological environment, chemical composition, water and gas regime of the substrate become more stable.
Pay attention to the photo - with decent care for cacti at home, such groups are very decorative:
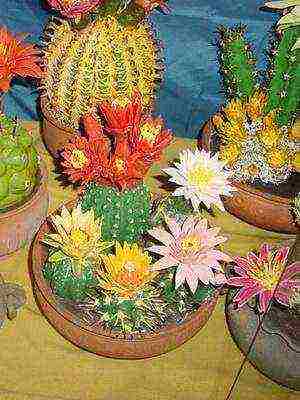

In many ways, such groups make it easier to care for plants. Collective planting and purely collectible cultivation of cacti do not contradict - jointly planted plants representing forms of the same species or closely related species of the same genus, each with its own label, is a completely acceptable and convenient form of keeping the collection. However, one must also imagine the disadvantages of such a landing: difficulties in transplanting and manipulating plants - it is almost impossible to move, photograph, donate, sell, exchange, quarantine or treat one by one, separately from the rest.
The selection of dishes, of course, must also meet aesthetic requirements. Too bright or fancy pots interfere with the perception of the beauty of the plant itself. The cacti standing in different types and multi-colored pots look ridiculous next to each other. It is bad if the color of the pot does not match the color of the cactus flower, but the color of the container also has a functional significance: the strict and neutral for the perception of the plant, black color contributes to overheating of the roots in the sun, and white, on the contrary, reflects the sun's rays.
Recently, pots are becoming more widespread, a vessel into which a pot with a plant is inserted. In this case, it is important to observe two conditions: the edges of the pots should not be significantly higher than the edges of the pot with a cactus, and there should not be water in the pots.
It is convenient to place cactus pots in common trays. They are easy to water from below, as well as to transfer plants. If the pallet has high sides, the pots in it can be covered with coarse-grained substrate (pebbles, expanded clay, etc.). Such external drainage protects them from drying out too quickly (which is important especially when using clay pots), overheating or hypothermia of the roots.In addition, this technique will make the group of cacti more decorative.
How to properly care for cacti at home: feeding and fertilizing
 There are diametrically opposite views on the use of fertilizers for cacti in cactus growing - from their complete denial to mandatory use. In the literature, there are a wide variety of recipes for nutritional compositions for feeding cacti at home, but there is practically no experimental evidence that a particular substance (mixture) is really necessary or gives better results.
We must not forget that cacti are not an annual, but a perennial culture. On perennial crops, a separate result of the impact of fertilizers for cacti at home is usually not traced. Again, we emphasize that growing an unusually large, wildly blooming, monstrously nibbed specimen, which does not exist in nature, is not an achievement at all! The collection (and aesthetic) value of such plants is low. But since the cacti in the collections are in completely unnatural conditions for them, fertilizers, in principle, are not prohibited.
Various compositions are used that are also used for other indoor plants, but with several reservations: much less often - usually 1-2 times during the entire growing season, in a lower concentration, with a relatively lower nitrogen content and preferably mineral. Organic fertilizers and feeding for cacti at home in the form of relatively weak (compared to those used for other plants) solutions can be applied only under hardy, fast-growing large-flowered succulents.
Light and temperature for keeping cacti in winter
One of the most important conditions for growing cacti and the normal development of most other succulents is an abundance of light. There are no shade-loving ones among them - there are shade-tolerant ones. They require as much light as possible, and sunlight. You can, of course, find an artificial light source that allows species from even the sunniest deserts to grow, bloom and bear fruit. And, nevertheless, they will differ from those grown in the sun not for the better.
The needs of cacti for warmth are closely related to light. Most of them require both a lot of light and a lot of heat. But in the temperate zone, these two factors come into conflict. The maximum amount of light can be given to plants simply by exposing them to the open air, but with the exception of mountain species, most cacti will be cold and unable to grow normally. Any protection, for example, glass, film, provides the necessary heat (and protection from precipitation), but eats up part of the light. Each amateur in his specific conditions must find the optimal ratio of air temperature for cacti and the amount of light.
Needing warmth, cacti, however, are not afraid of coolness (up to light frosts) and sudden temperature changes. Such species can be outside the home from spring to mid-autumn, and even longer when heated. Some of them tolerate frost and are even able to hibernate in the open air.
Having provided the right temperature for keeping cacti, it is important to remember that these plants do not like stagnant air - even greenhouses with the most thermophilic species must be ventilated. But drafts are also enemies of cacti. The place on the windowsill at the constantly open window is not for them.
The combination of a lack of light with a high temperature, especially in a wet substrate, can lead to irreversibly ugly growth. Therefore, with a lack of light, neither heat nor moisture is needed. This general principle determines the rules for placing cacti during winter dormancy. The main task in ensuring the required temperature for keeping cacti in winter is to protect them from overheating, while preventing hypothermia.
For most species, wintering at 5-15 ° C is suitable.The easiest way to reach the required temperatures for cacti in winter is to fence off the window sill with cacti from room heat with a screen made of film, glass, etc. Since the vegetation of most cacti in winter completely stops, there is no need for light.
Some amateurs use extreme methods - placing the plants in the cellar for the winter or shaking them out of the pots, just in the room, in this case the dryness and lack of light compensate for the effect of room heat that stimulates unwanted growth, and the state of dormancy is not disturbed (however, the plants can dry out a lot. and even dry out completely).
After wintering in low light conditions, cacti need to get used to bright sunlight. To do this, in the spring, the plants are shaded: they whiten the glass of a window or a greenhouse, cover it with tissue paper or a net. The popular thin white synthetic nonwovens have proven useful for spring (and summer) protection of cacti from sunburn. It is also necessary to close the walls of the pots facing it from the sun - the overheating of the root system is not as noticeable as the burn of the stem, but it also disrupts growth.
Watch the Cactus Care video for a better understanding of how to grow these succulents:

It is not difficult to ensure the reproduction of cacti at home, you just need to know the rules and follow the planting technique. We will learn about this from the article.
Cacti - description
Cacti are succulents, that is, plants that store water in the stem. Instead of leaves, they have thorns that can be hard or soft, straight or with a curved end. The thorns grow in bunches. Some species (for example, pereskia) also have leaves.
Peresky cactus
The most dangerous spines are bent, they can easily dig into the skin and pull them out is not so easy. Therefore, be sure to wear protective gloves when handling cacti.
- The Cactus family contains about 300 genera and 2500 species.
- The homeland of cacti is America, some species grow in Madagascar and Sri Lanka.
- Preferred climate: semi-desert, dry steppes and deciduous forests.
The surface of cacti is covered with a wax-like skin, which is almost impervious to water and gases. The pubescence on some types of cacti is a kind of "sponge" for absorbing water. The spines of cacti perform the same role - to collect moisture from the air.
Most cacti have spherical or columnar stems. In prickly pears, the stems are flat, consisting of segments that can be ovoid or cylindrical in shape.
Prickly pear cactus
Flowers in cacti appear in their areoles - axillary buds. Areoles also produce hairs and spines. Some cacti can have about 100 thorns on one areola!
Areoles from which spines, hairs and flowers grow
Cacti bloom for a short time. Flowers can be self-pollinated or require cross-pollination. After pollination, in place of the flowers, fruits are formed, in most cases edible.
The bloom of cacti is very bright, but short-lived.
The cultivation of prickly pears occurs for the industrial production of fruits that have various medicinal properties.
- To grow a cactus, you need: a minimum of water, a lot of sunlight and a certain temperature during the growing period and during the dormant period (there are features depending on the species).
- Cactus pots need to be selected shallow, with good drainage.
- For planting, use special mixtures for cacti: loose rocky (sandy) soil with a low organic content.
- Watering from spring to winter is needed as the soil dries out.
- In winter, most cacti are kept at low humidity, without watering and at a temperature of 8-15 ° C.
How do they reproduce
Breeding methods for cacti:
- children (processes);
- cuttings;
- seeds;
- vaccination.
The simplest methods are reproduction by children and cuttings.
- Babies are formed on many types of cacti.
- Species without the formation of children can only be propagated by cuttings or seeds.
- Cacti are propagated and planted in spring or early summer, during growth.
- Seeds are sown in January-February.
Seed propagation is the most difficult method, which requires heating, sterility and frequent picks. Not all seedlings survive.
When breeding, you need to know 2 important rules:
- never use nutritious soil, it increases the risk of seedlings rotting and mold;
- use soil with a large (1/2 or more) amount of sand and be sure to disinfect it (ignite or scald with boiling water).
Reproduction by children at home
In the species of cacti that form children, it is enough to detach them from the mother plant and root them in the substrate. Cacti do not root in water.
Too small baby should not be detached, wait until she grows up a little (1.5–2 cm).
You can root the baby directly in the ground or use this method:
- Secure the baby to a glass in which water is poured. The distance from the bottom of the cactus to the water is 5–7 mm.
- As the water evaporates, add it to the glass.
- It is desirable to maintain the water temperature from 25 to 30 ° C.
- After the formation of the roots, plant the baby.
- For rooting and planting, use non-nutritive soil with sand. For example: sheet earth 1 part, sand 2 parts.
It is necessary to plant a cactus, in no case deepening the root collar! To prevent the cactus from falling, pour gravel around it: vermiculite, zeolite, coarse sand or small pebbles. Gravel will also better retain moisture in the soil and protect it from mold.
Do not cover the root collar with soil, otherwise it will rot
You can plant several cacti in one pot, including different types and varieties, but they must correspond to the peculiarities of care and feeding. It is necessary to plant at a distance, taking into account the growth of each cactus.
You can plant several cacti nearby
It is better to use plastic pots for cacti with small drainage holes at the bottom or without them, but with an increased drainage layer (by a third of the pot). Plastic pots are cooled less and moisture retains longer.
Step-by-step instructions for rooting a baby
- The baby can be separated with a sharp sterile instrument, but it is better to just gently "unscrew".
We choose children for rooting and carefully unscrew from the mother cactus
- If a piece of the mother plant remains on the baby, it must be cut off with a sterile knife so that it does not rot.
- Before rooting, dry the baby vertically in a warm and dry place for 2-3 days.
- We put the drainage 1/4 into the pot (expanded clay, broken brick), pour in slightly damp soil and tamp it a little with a spoon. Cacti love loose soil, so when planting, you do not need to tamp it hard.
- We install a cactus on top, add soil to the root collar. Tap the pot on the table so that the soil does not sag further during watering. If necessary, add more soil to the neck of the cactus and fix it around with gravel (the best option is zeolite).
- We put the cactus pot in a dark place for three days.
- You can water a cactus only a week after planting.
- After three days, set it in a bright, but not sunny place, before rooting.
- When the cactus takes root (visually - starts to grow), you need to accustom it to the sun.
Transplant the cactus as it grows. The root system of small cacti is small, so the pot should be shallow, with good drainage. Even in adult cacti, the roots do not grow too deep.
The roots of small cacti are small
- Cacti are fed with inorganic fertilizers with a minimum nitrogen content starting from six months of life and only during growth. Study your species of cactus, because some species do not feed at all, while others have their own specific characteristics.
- In winter, cacti enter dormancy: in September, feeding ends and watering is reduced. In the first two years of life, they should not be watered at all in winter!
The same rules apply to other types of reproduction of cacti.
Propagation by cuttings
For propagation by cuttings, you need to choose only healthy and strong (non-flabby) parts of the cactus.
The upper part of the cactus is cut off, sharpened, dried for about a week, and rooted in the ground, just like the baby. The stalk should be stuck into the ground vertically to avoid the appearance of lateral roots on the stem.
For better rooting, the following technique is used: the lower part of the cut cactus is placed in a warm Kornevin solution for several hours. Then it is dried for 2-3 days and planted in the ground.
- Kornevin's consumption: half a teaspoon for half a liter of water.
Step-by-step instructions for grafting
- We cut off the selected stalk with a sharp disinfected instrument. The cut is done quickly and smoothly.
Cut off the cuttings with a sharp disinfected tool
- We sharpen the cut on a truncated cone, without touching the cambium (rings in the middle).
We sharpen the cactus without touching the cambium
- Sprinkle all the cuts with crushed coal. If you are using Kornevin, then you do not need to sprinkle the bottom cut with coal.
- We put the cactus in an upright position to dry for 5-7 days.
- We plant in the same way as the rooting of the baby, filling in the cut part. Stick a stick next to it and tie the cactus to prevent it from falling.
Planting scheme of cuttings: 1-sand (gravel), 2-soil, 3-drainage
You can water the cactus after 2 weeks. Before watering, it is useful to spray a little of the cactus from a fine-dispersion sprayer so that only fine water dust gets on it, and does not drain water.
Breeding methods for forest cacti
All genera and species of forest cacti are also propagated by cuttings: Schlumberger, Ripsalidopsis and others. Unlike regular cacti, they can be rooted in water.
Forest cacti are epiphytic plants with leaves that are made up of segments. They grow mainly on the trunks and roots of trees.
Important differences between forest cacti from other genera of cactus:
- at home, they are grown in very loose, breathable soil with the addition of nutritious peat;
- forest cacti do not tolerate excessive moisture or drying out;
- it is useful to spray them with warm and soft (no lime) water.
Schlumberger forest cactus
Step-by-step propagation of the cuttings in the substrate
- We break off the desired stalk (it can even be one segment). We do this by simply pinching it off between the segments with our fingers. It is good if it already has air roots (it will take root faster).
We pinch off the desired stalk between the segments
- We dry the cutting for two or three days in a warm and dark place (not in the sun, but not in complete darkness).
Drying the segments for two to three days
- We superficially set the cutting on a moistened substrate (this can be a soil for succulent plants, cacti, or just peaty with the addition of half sand).
Installing the cutting on the substrate
- We fix the cutting. For example, tie it to a stick in the ground.
We fix the stalk
- Build a greenhouse: tie it up with cellophane or cover with some kind of lid.
Making a greenhouse
- Place the greenhouse in diffused light in a warm place.
We put the cuttings on diffused light in a warm place
- Do not forget to ventilate the greenhouse a little every other day and spray the cutting and the ground around so that it does not dry out.
The cover is removed when you see that the cutting is rooted - that is, it gives a new growing segment. After removing the cover, you can water the cutting a little to keep the ground moist, but not wet.
A new segment of the cactus has begun to grow - a signal of successful rooting.
Tips for rooting a cutting:
- it is useful to spray with the addition of Kornevin (or another rooting agent) + Fitosporin (powder or paste): dilute each product in half a liter of warm water at the tip of a teaspoon;
- do not spray too much, just so that the soil around is moist (not wet!);
- it is advisable to plant the cutting immediately in a small pot with drainage, so that after rooting the cactus continues to develop there. Transplant it into a larger pot as the root system grows (when the roots begin to crawl out of the drainage hole).
Rooting the cuttings in water
- After drying, place the cutting in water with the addition of the rooting agent + Fitosporin powder (the proportions are the same).
We put the cutting in the water
- Watch the water level, the cuttings should be about 5–7 mm in it (you don't need to change the water before root formation).
- When the cutting is rooted, plant it in the substrate. You can deepen into the soil no more than 5 mm.
There is one more "water" method, but using foam rubber:
- Put disinfected foam rubber in a jar (or glass).
- Moisten the foam with water so that it protrudes slightly on its surface.
- Place the handle on the foam and cover with cellophane.
- Make sure the water does not dry out before roots appear.
- After the roots appear, wait for them to grow a little, and plant in the substrate.
Wait a little more for the roots to grow
You can propagate forest cacti and seeds just like any other. When planting seedlings, consider their generic characteristics.
Seed propagation
It is not always effective to propagate cacti by seeds. You need to know that not all seeds that hatch will survive. Fungi appear on some, others lose roots, dry out or rot.
Cactus seeds are quite large or very microscopic, like dust. Depending on their size, they can be soaked in a solution (for example, Micrass) before planting, or planted dry. In practice, the difference in germination between dry and soaked seeds is almost imperceptible.
For correct sowing, you need to prepare:
- a low container with holes at the bottom, washed in water with soda (for example, a plastic container or a cotton swab box);
- cover for creating a greenhouse;
- spilled boiling water or calcined substrate with sand (you can use one sand);
- drainage for the bottom of the container: fine expanded clay or perlite;
- cactus seeds;
- a ruler or stick to create grooves in the ground;
- a disinfected needle (or toothpick) for spreading seeds;
- warm boiled water to wet the substrate if you have ignited it;
- thermometer for measuring temperature;
- means for heating the greenhouse (for example, a fan heater with a thermostat) to 28–33 degrees during the day and 22–25 degrees at night.
If no heating agent is available, place greenhouses in the warmest place, for example, near a heating system. But make sure that the temperature drops by a few degrees at night.
- The soil should be moist, but not wet. When filling the container, it must be sealed so that it does not sag when watering. The height of the soil with drainage is approximately 3 cm (1 cm for drainage).
- For sowing, it is convenient to use plastic containers with lids, in which you need to make holes at the bottom with a distance of 1.5 cm. Seedlings are watered by immersing the container in water.
- To water the substrate, it is necessary to collect boiled water about 40 ° C into the pan and place the container there until the substrate is completely wet.
- Further, the seedlings are irrigated in the same way. It is impossible to overdry the substrate.
- For immersion irrigation, add a biofungicide (for example, Fitosporin, Fitolavin) to the water to prevent fungal diseases: half a teaspoon of the drug per liter of water.
Tip: if you are planting seeds of different cacti, then sign each groove with a glued piece of paper with the name, and cover it with tape (so as not to get wet). Subsequently, re-glue the strips with the inscriptions in accordance with the transplant, so as not to forget where which cacti you grow.
Sowing step-by-step instructions
- With the corner of the stick or ruler we make shallow grooves at a distance of 1.5–2 cm from each other. The seeds should lie on the surface and not sink into the ground.
- With a needle, we pick up the seeds one at a time and lay them along the grooves at a distance of 1 cm. You don't need to sprinkle them!
- We close the container with the seeds with a lid and put the greenhouse under the illumination lamps at a temperature of 28–33 ° C.
- At night it is necessary to create a temperature difference and reduce it to 22–25 ° C.
For better germination, it is convenient to use wooden boxes in which you place containers with seeds and place fluorescent lamps on top. Such greenhouses can be covered with glass (lamps are placed on top of glass) or covered with agrofibre (over lamps).
- The substrate temperature should be measured daily. If it falls below the required level, it is necessary either to put boxes near the heaters, or to heat it up. One of the methods of heating: a heater for an aquarium with the required temperature is placed in a container with water, the container is covered with glass and a container with seeds is installed on it.
- Seeds, depending on the type of cactus, germinate from 3 days to a month. Seeds that are particularly hard to germinate can take up to two months to germinate. It is better to remove the seed coat from sprouted cacti from the sprouts with tweezers so that it does not become moldy.
- Until the first pick, the temperature is kept the same.
- After a month, cactus seedlings need to be planted in the same substrate. It is convenient to take them from the transplanting substrate with a fork-shaped skewer (which is for olives).
Seeds do not germinate at the same time
When transplanting, a small depression is made for each sprout. Make sure that the root collars of the cacti are not buried, otherwise they will rot. Tamp the sand around with a spoon.
We plant the grown cacti in a month
The distance between the cacti should be at least their diameter. The picking procedure will have to be repeated every 1.5–2 months for the first year.
This is how cacti dive in rows
All drying out and decaying sprouts, unfortunately, must be removed.
Cacti should be gradually taught to:
- open air;
- sunlight;
- drying the substrate.
Before the first pick, cacti are accustomed to open air. Ventilate the greenhouse every day, adding time for 5-10 minutes. After the cacti get used to being outdoors for more than 2 hours a day, remove the lid completely.
After the first pick, keep the cacti warm, but there is no need to observe the temperature regime so strictly. In general, the temperature should be in the range of 22-28 ° C. Keep cactus plants away from drafts and cold air!
A week after the second dive, gradually accustom the sprouts to diffused sunlight so that by summer they will already get used to the sun. But don't place them in direct sunlight!
For the first six months, it is necessary to keep the substrate moist. After six months, teach the cacti to dry gradually so that the substrate dries out completely, and then just water it. Watering can be done both in a submerged way and in the usual way, but very carefully so as not to erode the soil around the cacti.
Only after the cacti are completely accustomed to the sun and dry substrate, they need to be planted in pots in a permanent place and watered according to the usual scheme for this type of cacti.
Cacti planted in a permanent growth site
Picking (planting) cacti - video
Graft
Most cacti are quite capricious in their content and grow slowly. For very slow-growing cacti, the method of grafting serves as a stimulator of growth and development. Grafted cacti grow 3-5 times faster.
Vaccination of cacti is needed for:
- growth stimulation;
- flowering stimulation;
- growing seedlings;
- saving a rotten cactus;
- reproduction of rare and mutant species;
- colored cacti unable to grow on their own;
- spectacular (some cacti look much better grafted).
The transplanted upper part of the cactus is the scion, and the lower part with the roots on which the cut cactus is planted is the rootstock.
The stock can be temporary - for rooting and growing of cacti, or permanent: for all colored cacti, for those that have lost a large lower part and are unable to root, etc.
Any type of cacti can be grafted together, but there are two basic rules:
- The stock must be completely healthy, with strong roots and appropriate to the size of the scion. The graft will grow much faster than the rootstock, so you need to calculate the size of the upper cactus so that it does not curl the lower one with its weight.
- The stock must correspond to the characteristics of the scion, for example, for the content of lime. If the scion requires a higher content of this element, then you will need to provide the stock with a sufficient amount of lime in the soil. Moreover, if the species of the lower cactus does not tolerate an increased content of lime, you can destroy both plants.
Study the characteristics of the cactus that you are going to plant and select the appropriate stock for it.
- Examples of rootstock: Cereus, Echionocereus, Selenicereus, Trichocereus, Periscus, Eriocereus, Myrtillocactus.
- Examples of scion: mamilaria, lobivia, rebutia, hymnocallicium.
From experience: Echinopsis as a permanent stock depletes in 3-5 years, so it is better to use it for a temporary stock.
Prerequisites for vaccination:
- cacti must be in a state of growth (spring-summer);
- the stems should not be lignified;
- a week before vaccination, cacti are not watered;
- the cutting tool must be very sharp and disinfected (for example, alcohol or boiling water);
- if the stock was transplanted, another cactus can be grafted onto it only a month later;
- it is desirable that the diameters of the aligned sections be the same. If they do not match, they need to be aligned in the middle so that the cambular rings match, and sprinkle the open sections with crushed coal.
- For fixation, you need to make 2 tourniquets (for example, use elastic bands or strings). You can put some kind of matter on the top cactus so as not to push it and not to break the bundles.
Attention! All actions must be done quickly, without delay. After an even and quick cut, you must immediately graft the cactus onto the stock.
Step-by-step instructions for plant grafting
- Cut off the top of the cactus for the stock.
You need to cut with a very sharp disinfected tool.
- Bevel the edges of the stock a little. Make another thin, even cut and leave this piece on the rootstock to keep it moist.
Cut off the edge on the rootstock
- Cut off the scion evenly and bevel the edges. Before installing on the stock, we quickly update the cut (the main thing is to cut off a thin layer on the cambric ring) and then act without delay.
Cut off the edge on the cactus scion
- We remove the cut layer from the stock with tweezers and press the scion against the stock cut in order to maximally combine the cambial rings. Twist the scion a little, pressing it into the lower cactus so that it joins it as tightly as possible.
We apply the scion to the stock tightly, combining the cambium
- We press the scion with prepared bundles crosswise. If the scion has thorns, place the material to avoid tearing the strands. Sprinkle the remaining open sections with crushed coal.
We press the scion of the cactus to the stock crosswise with bundles
- We make a greenhouse by covering the cactus with a glass, jar or piece of agrofibre.
Covering the grafted cactus
- We put the grafted cactus in a warm, shady place, away from sunlight, for 2-3 weeks.
Grafted cacti usually grow together easily 2-3 weeks after grafting.
- Water the cactus very sparingly, a few days after vaccination.
- The sections must be protected from water ingress, so wipe the condensation from the walls of the coating.
- The greenhouse and bandages are removed after two weeks.
- In the future, care for the grafted cactus is needed in accordance with the stock.
- The resulting children from the stock must be removed.
If the scion has given roots, it will have to be removed from the rootstock and planted in the ground. Or try to cut again and graft again (you will have to update the cut on the rootstock). But I do not advise doing this, it is better to plant the graft that gave the roots.
If the graft has given a root, it is better to plant it.
In case of an unsuccessful attempt at vaccination, when after 3 weeks the cactus does not take root, the operation should be repeated again.
Nuances for forest cacti
Forest cacti can also be grafted. The peculiarity is that it is even easier to do this than with ordinary cacti.
For example, how to graft a Schlumberger on prickly pear:
- cut (or cut) the trunk in the selected part of the prickly pear and attach or pin the Schlumberger stalk to the cut. We make a cut on the Schlumberger handle in the middle of the segment.
Schlumberger, several times grafted onto prickly pear
- It can be grafted into the incision from above, while the cutting is sharpened from the sides under the incision (grafting with a wedge).
We fix the Schlumberger stalk in the incision on the prickly pear
We plant ripsalidopsis on Schlumberger:
- make a cut in the middle of the Schlumberger segment.
- Cut off the bottom on the ripsalidopsis handle, and fix it (with a string or tape) on the Schlumberger cut.
Grafting Ripsalidopsis on Schlumberger
All other steps are the same as for the usual grafting of cacti. You can experiment with vaccinations, it's very interesting!
Side grafting Schlumberger
Vaccination of succulents - video
Grafted cacti - gallery
Reproduction of cacti is an interesting and simple matter. Cacti grown by you from seeds or shoots will not only be cheaper than purchased ones, but also dearer to your heart!
Ksenia, 39 years old. By education, a pastry chef, but had a chance to work in many other areas (sales, office, renovation). I love to cook and plant flowers. Rate the article:
(5 votes, average: 4.2 out of 5)
Growing cacti from seeds in the video.
Usually, the cultivation of cacti from seeds is practiced in breeding work, since these plants reproduce well in a vegetative way. But it is quite possible to grow cacti from seeds and at home, there is nothing complicated in this agrotechnical procedure. You can learn how to grow a cactus from seeds from the proposed material. It tells about the necessary tools and equipment, the preparation of planting material and the organization of care for seedlings. A description of the entire reproduction process by seedlings will allow each grower to repeat this work.
Before growing cacti from seeds at home, you need to prepare everything you need and be patient, since the initial growth and development of these crops will be very slow. Cacti grown from seeds at home can first bloom only after 5-6 years. Otherwise, propagating cacti by seeds is not very difficult.
How to germinate and sow cactus seeds
Before planting a cactus from seeds, you should make sure that this variety or genus does not give rise to genetic mutations. If it retains all the varietal characteristics, then the process will be fun. The only thing, before sowing cacti with seeds, you must follow a few basic rules. So the seeds of cacti germinate, in accordance with the nature of the growth of these plants in general, slowly; seedlings also develop slowly. In addition, although cactus seeds need moisture and warmth to germinate, on the other hand, cactus seedlings are very susceptible to fungal diseases. Therefore, when sowing seeds, it is necessary to maintain the required humidity and temperature and at the same time strive to prevent the appearance of fungal diseases. How to germinate cactus seeds is described in detail in this article later on the page.
Sowing cactus seeds on a larger scale or propagating particularly difficult, slow-growing cacti, which often have very small seeds, should be carried out only by experienced amateur cactus growers. The information required for this can be found in the specialized literature. However, even novice hobbyists can try to propagate by seeds suitable types of cacti - for example, fast-growing columnar cacti - with simple means. Seed propagation of cacti is an interesting sight to observe, besides, there is always a special attitude towards a plant grown with your own hands from seeds. Therefore, some recommendations are given below for sowing cactus seeds.
What cactus seeds look like (with photo)
Specialty stores offer a wide variety of cactus seeds. Usually, for their first attempt, beginners choose either a mixture of seeds of different varieties, or the seeds of fast-growing columnar cacti, or the seeds of species that bloom several years after planting, such as rebutia. You need to know about how the seeds of cacti of the species and variety you are interested in look like, otherwise you cannot avoid disappointment in the future.
Of course, you can also sow seeds from another cactus lover. For sowing, seeds should be used that have been stored for no more than one to two years. To prevent possible damage to seedlings by fungal infections, the seeds must be cleaned from possible residues of fruit pulp before sowing.
To do this, the larger seeds are poured into a tea strainer, and the smaller ones into a linen bag and thoroughly washed in warm water, then sprinkled on paper and dried.
See how cactus seeds look like - the photo shows the planting material of different groups of these plants:
Before planting cactus seeds, prepare the soil and dishes.
First, we prepare the soil and dishes. Cactus seeds can be sown in low wide pots or bowls, for example, made of styrofoam. Before planting cactus seeds, the dishes are washed with hot water. A convex clay shard is placed on the drainage hole, which, if necessary, can be made in the bottom of the bowl with a pencil. Then the container is filled 2/3 of the soil mixture for cacti, which should be especially loose and, if possible, contain more coarse sand or perlite.
Steamed, and therefore well sanitized, potting soil provides the best protection against fungal diseases, but this is not necessary. A layer of broken brick, crushed basalt (lava) or coarse sand is poured on top of the soil with a layer of 0.5 cm. This material is first sieved to a grain size of 1-2 mm, then washed to remove all small dust-like particles, dried and then scattered over the soil surface in a bowl. As a result, this layer will not be a breeding ground for accidentally germinating pathogens.
Reproduction of cacti by seeds in a mini-greenhouse
The propagation of cacti by seeds in a mini-greenhouse has many advantages, since favorable conditions are created for the germination of planting material. The seeds of most cacti germinate especially well at temperatures between 20 and 25 ° C. Lowering the temperature to 15 ° C at night is often beneficial, but cooler conditions or temperatures above 35 ° C slow or stop seed germination altogether.
It is easiest to maintain the desired temperature in mini-greenhouses for growing seedlings, along the bottom of which a special low-power heating electric cable is laid.
The most convenient mini-greenhouses with a thermostat that allows you to regulate the temperature, however, the need for this arises only when there are strong temperature changes in the room.
Of course, additional heating is not necessary if the mini-greenhouse is located in a heated living room, for example, on a windowsill under a central heating battery, where the required temperature is constantly maintained. Thanks to the closed lid, a higher air humidity is also achieved and maintained inside the greenhouse. Since cactus seeds need light for germination, the mini-greenhouse must be placed in a bright place, for example, on the windowsill of a north or east facing window.
However, it should not be in the sun, that is, on a sunny south or west window, since intense solar radiation very quickly heats the air inside a small enclosed space to critical values. Although light is desirable for cactus seeds for germination, it should be soft and not bright sunny.
Sowing cactus seeds
When sowing, cactus seeds must be evenly distributed over the surface of the substrate.
For this, a sheet of paper is folded in half, the seeds are poured into the formed groove, after which, by lightly tapping on paper slightly inclined to the bowl, the seeds are evenly poured one at a time onto the soil surface.
Since cacti develop slowly and grow better in the community, seeds are sown relatively densely. As a guideline, it can be indicated that about 20 cactus seeds are sown on the soil surface in a 2 x 2 cm bowl.
After sowing cacti with seeds, they are lightly pressed into the soil using any object with a smooth surface, such as a matchbox. Since the seeds of cacti need light for germination, they are not sprinkled with soil on top.
After that, the seeds and substrate must be moistened. Of course, this cannot be done from a watering can, since in this case the seeds will be washed off the soil surface with a stream of water. Therefore, bowls with sown seeds are placed in a container filled with settled water and kept there until the substrate is well saturated with moisture to the uppermost layer. For the prevention of fungal diseases for irrigation, you can use a 0.05% quinosol solution (1 tablet per 2 liters of water). Quinosol is a mild disinfectant. Finally, the sowing bowls or pots are placed in a mini-greenhouse, where, thanks to the transparent plastic lid, the required substrate moisture will be maintained.
Germination of cactus seeds after planting
During germination after planting cactus seeds, the substrate should not dry out. Temperature is best controlled with a minimum-maximum thermometer.
Many cactus seeds germinate within two weeks. It is interesting to observe how small green balls begin to appear on the surface of the soil and two well-marked cotyledons develop, between which a cactus stalk is later formed.
When the majority of the seeds have germinated, the lid of the mini-greenhouse is slightly lifted from time to time to reduce the humidity in the air, and with it the risk of fungal infection. After three to four months, bowls with seedlings can be removed from the greenhouse. Now they need to be placed in a bright and slightly sunny - however, not in bright sun - place; since in natural conditions, cactus seedlings grow in the light shade of adult cacti or under the protection of higher surrounding vegetation.
Seedlings are best pressed for several months to develop in the bowl where they germinated. Now, between the next waterings, the soil in the pot should dry out slightly, however, despite this, the seedlings need to be watered more often than adult cacti, since a relatively looser soil mixture is used for sowing seeds, and the roots of the seedlings are not yet very well developed. Watering should continue from below. In order for the seedlings to grow healthy and the substrate does not alkalize, potassium phosphate (1 g per 2 L of water) can be added to the irrigation water.
Picking.
When the seedlings begin to form a dense pillow (curtain) in the bowl, they must be cut into fresh soil.
In this case, the substrate in the planting bowl or pot must be dry, then it easily disintegrates and allows you to remove the seedlings without damage. Young plants, which by this time have a diameter of about 0.5 cm, are not planted in separate small pots, but are planted in large quantities in larger pots or bowls.
The juvenile planting container is filled with a relatively dry conventional cactus potting mix. Then, with a pencil or a pointed stick, make a depression, place a seedling in it and carefully pour soil from all sides.
Seedlings are planted from each other at a distance equal to approximately three times the diameter of young plants.
After transplanting, the seedlings are kept in a warm, shaded place; they are carefully watered not immediately after transplanting, but only after a few days, when the possibly damaged roots will overgrow. When the seedlings take root in fresh soil - after about a week - they are again transferred to a bright, slightly shaded place from direct sunlight. Plants now grow and develop relatively quickly and without any problems.
How to plant cacti with seeds in a closed plastic bag (with video)
Some cacti growers achieve good results using a simple method of sowing cactus seeds. Before planting cacti with seeds, the pots or bowls are filled, as described above, with a well-steamed potting soil mixture, and covered with a layer of sterile material, such as sand, perlite, crushed basalt or pumice. Then cactus seeds are sown on the surface of the substrate and the crops are thoroughly watered from below, adding any fungicidal preparation, such as quinosol, to the water.
After the excess water drains from the pot, it is placed inside an airtight (no holes) plastic bag, tied and placed or suspended in a bright, but not sunny place.
Since the moisture in a closed plastic bag cannot evaporate, crops do not need constant monitoring and can be left to themselves for a quarter of a year. The decisive factor for the successful production of seedlings with this method of sowing is the elimination of fungal infections.
After three to four months, the bags are opened, the substrate is slightly dried in the bowls and the seedlings are dived, as described above. This simple method of sowing cacti is definitely worth trying, first of all, in the case when you have received - for example, from a friend, an amateur cactus grower - a lot of seeds of some particularly hardy species.
See how to properly propagate a cactus with seeds - the video demonstrates all the complex technical coins of sowing, picking and organizing the care of seedlings: