Content
In recent years, more and more people have begun to master technologies that allow collecting oyster mushrooms on stumps. Growing these mushrooms at home does not require any special knowledge and skills. After reading this article, you will learn about the main stages of this process.
Mycelium selection
To collect oyster mushrooms on stumps, cultivation must begin with the acquisition of high-quality planting material. Some vendors offer to buy mycelium on sticks. However, long-term practice has shown that when using them, the first harvest can be obtained only after two years, and sometimes even later. Therefore, experts recommend purchasing fresh mycelium from oats or wheat. When choosing such planting material, you must make sure that there is no gray-green mold on it, the excess of which indicates the poor quality of the offered product.
When is it better to plant oyster mushrooms on stumps?
It is advisable to start growing these mushrooms in the autumn months. It is during this period that they do not require frequent watering, and the crop ripens much faster. If, with spring sowing, it will be possible to feast on mushrooms after a year and a half, then with autumn sowing - just a year later. In the first six months, oyster mushrooms require special care, which consists in frequent watering.
All of the above does not mean that you need to abandon the spring sowing of mycelium. It's just that in such cases, the logs with the future harvest are not buried in the ground, but placed in the basement and covered with wet burlap so that they gradually become overgrown with mycelium. In the fall, they are taken out of the cellar and buried in the ground.
Sowing technology
It should be understood that growing oyster mushrooms at home on stumps is a long and laborious process. In this case, you can only get a seasonal harvest, depending on climatic and weather conditions. The preparation of stumps must begin at the end of January. It is advisable to choose those on the surface of which there are no signs of mold. Before adding planting material, the logs should be soaked in water for three days. This will create the increased moisture required for the mycelium to be set. Stumps with mycelium can be taken out into the garden no earlier than May, when the threat of frost will completely disappear.
To get a good harvest of oyster mushrooms on stumps, cultivation and sowing can be done in several different ways:
- Holes are made in the logs, the depth of which is about six centimeters, and the diameter is about ten millimeters. Then they are filled with mycelium in grains and covered with moss or scotch tape.
- Planting material is laid out on the end of the stump and covered with a disc previously cut from a log, the thickness of which is about three centimeters, and then fixed with nails.
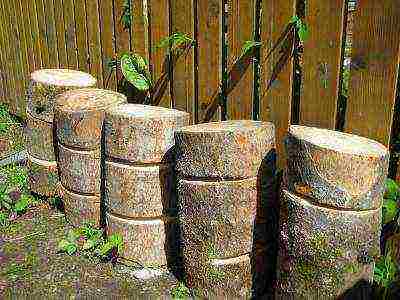
- A pyramid is built from the chocks, and the end of each log is covered with a two-centimeter layer of mycelium.
After sowing, the stumps are placed in a cellar and covered with burlap or foil.
Growing oyster mushrooms on stumps in the basement
In order for your venture to be crowned with success, it is necessary not only to choose the right mycelium, but also to create optimal conditions in the room chosen for these purposes. It is important that the air temperature in the basement is at least fifteen and no more than twenty degrees, and the humidity is within 80-95%.
It is recommended to pay special attention to providing good ventilation and lighting. It should also be understood that growing oyster mushrooms on stumps in the basement implies insulation and re-equipment of the room. To avoid carbon dioxide build-up, it is imperative to install fans. It is advisable to use fluorescent lamps as lighting devices.To place blocks with mushrooms in the basement, special racks should be equipped in advance. It is preferable that they are made of durable plastic that is resistant to moisture.
Transplant to open ground
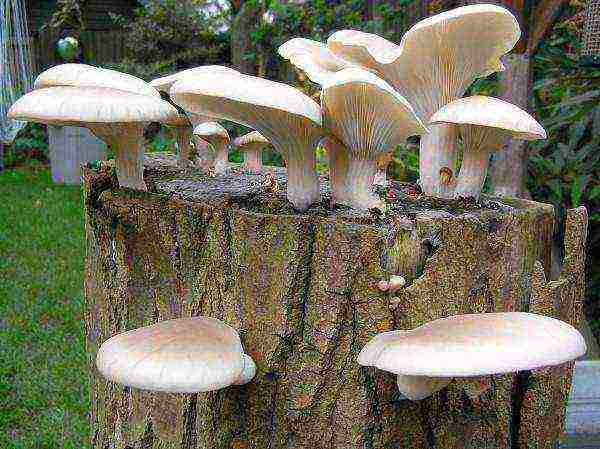
In May, hemp with oyster mushrooms can be moved to the garden. The readiness for landing on open ground can be judged by the presence of a dense white bloom. For the most successful fruiting of myceliums, it is advisable to put the logs in the shade, for example, under densely leafy trees.
Wet leaves are lined at the bottom of the pre-dug pits, and then stumps are planted. It is important that the embedment depth of the logs does not exceed fifteen centimeters. The distance between adjacent chocks should be about half a meter. Further care of the plantings consists in periodically moistening the soil around the logs. The first crop can be harvested at the beginning of autumn.
With the onset of winter, it is recommended to wrap the hemp with spruce branches, leaves or straw. A similar mycelium will bear fruit abundantly for several years in a row. The maximum mushroom harvest can be harvested in the second and third years.
Technology of growing oyster mushrooms on stumps. Description. Video
Large-scale cultivation of oyster mushrooms, when the harvests are on an industrial scale, is associated with the use of intensive cultivation methods. For this, a special room and bags with a straw substrate are usually used. But the intensive method, for various reasons, is not suitable for every mushroom lover. In this case, the solution may be to grow oyster mushrooms on stumps.
It is possible that for beginners in the field of mushroom growing, it is the cultivation of oyster mushrooms at home on stumps (extensive method) that would be an ideal launching pad, which is largely due to the fact that the time and effort required in this case will be minimal.
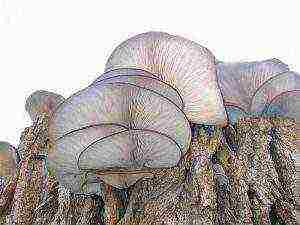
Growing oyster mushrooms is not a difficult process. It is quite possible to grow these mushrooms at home.
Mycelium (seeds)
The first step in growing oyster mushrooms will be the purchase of mycelium. It can be purchased from any mushroom growing company. Also, the mycelium is sold in online stores, sending it by mail. If this is your first time growing oyster mushrooms, buy up to one kilogram of mycelium. It will become the basis for obtaining about three to four kilograms of oyster mushrooms. Storage of mycelium should be carried out in the refrigerator for a period of 2-3 months. It is impossible to freeze the mycelium.
Opening the mycelium bags must be sterile, so treat it with a disinfectant solution and use gloves.
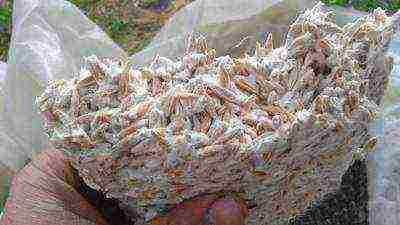
Tips for purchasing mycelium:
- Choose a trusted supplier with recommendations.
- Buy a trial batch before purchasing large quantities.
- Find out the type and strain of oyster mushrooms, the rate of mycelium growth, mold resistance, and do not forget to pay attention to the shelf life.
- Determine the temperature inside the mycelium (it is important not to overheat during delivery) - +20 degrees will be optimal.
- You shouldn't see black or green spots on the mycelium.
- The shade of the mycelium is normally bright orange. A little yellow exudate may be added to it.
 How to grow at home
For self-cultivation of oyster mushrooms, two methods are used:
- Intensive
- Extensive
Intensive way
This is the name of growing mushrooms on a substrate placed in a plastic bag.
Its pluses:
- You can get a harvest of mushrooms regardless of the season.
- Mushrooms ripen quickly enough.
- You can make money by selling mushrooms.
Its cons:
- We need financial investments.
- You need a suitable room in which a certain microclimate is maintained.
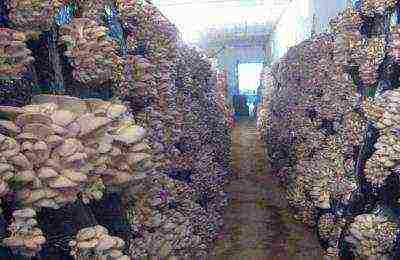 Room selection
It is advisable to grow oyster mushrooms in a room that has:
- good thermal insulation;
- good ventilation system;
- height 3-5 meters;
- artificial lighting approximately 100 lux;
- source of clean water and sewage.
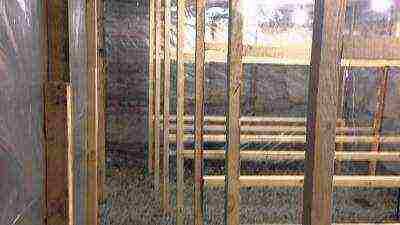
Suitable premises might be:
- Cellar;
- Basement;
- Poultry house;
- Fruit storage;
- Cowshed or pigsty;
- Granary;
- Vegetable store;
- Greenhouse;
- Garage;
- Pantry.
Remember that during fruiting on oyster mushrooms, many spores appear that can cause allergies, and therefore the room where the mushrooms are grown must be far from the living rooms.
 Substrate
Next, you need to start preparing the substrate.
Oyster mushrooms are grown on:
- Sunflower husk;
- Barley straw;
- Buckwheat husk;
- Wheat straw;
- Chopped corn cobs;
- Shavings or sawdust of deciduous trees.
Beginners should choose straw, husk or husk as a substrate, since it is more difficult to grow mushrooms on sawdust and shavings. Make sure the raw materials are clean and free of mold. For a kilogram of mycelium, you need about ten kilograms of substrate. It should be crushed to obtain a fraction of 4-5 centimeters.
Thermal treatment of raw materials is also important, which will exclude its contamination and at the same time moisturize the substrate. The crushed raw material is placed in a large-volume container and completely filled with water, and then boiled for about two hours or less (the softer the raw material, the less it is boiled). The water is drained and the raw materials are cooled to + 25 + 28 degrees.
The result should be a moist substrate. To check if the raw material is waterlogged, you should squeeze it in your hands and see if water is flowing (a few drops may appear, this is permissible). The processing of the substrate can be performed not only with hot water, but also with steam. Note that steam can be sprayed over both dry and already moistened substrate.
 Mycelium bookmark
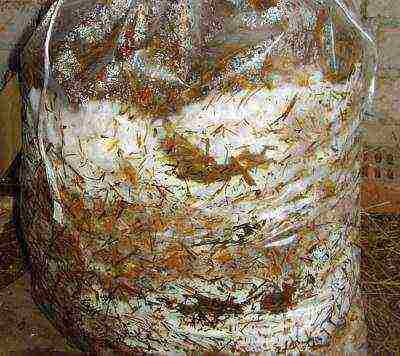
The substrate is placed in polyethylene, picking up the bags so that in the end there are about five kilograms of raw materials in one bag. Pre-disinfect the bags - first they need to be washed, and then soaked for an hour in a 1-2% solution of bleach. After this treatment, start filling the bags with the substrate. After every 5-6 centimeters of raw material, put the mycelium in a bag in a layer of about 0.5 centimeters. So fill the bags layer by layer to the top, so that the last layer is the substrate.
You can also simply mix the mycelium and the substrate so that the total mass of the mycelium is 3-5 percent for the mycelium from domestic producers and 1.6-2.5 percent for the mycelium from an imported manufacturer. Bags are filled with this mixture, and then tamped tightly.
Having tied the bag, perforation must be made over its entire surface in a checkerboard pattern. Let the distance between the holes or slots, the size of which will be 1-2 centimeters, is 10-15 centimeters.
 Incubation
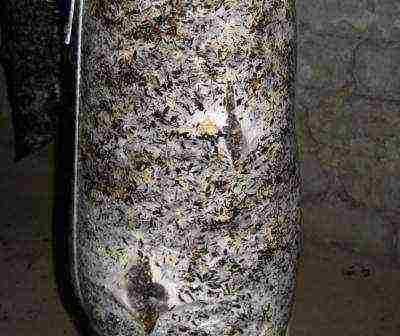
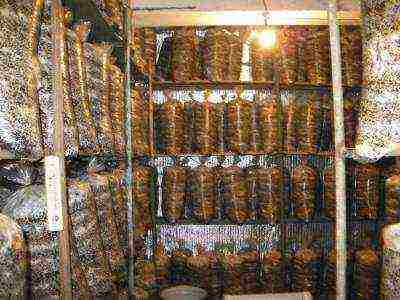
The next 10-25 days is the incubation period. By placing the blocks with the seeded substrate in the place where you will grow the mushrooms.
In this room, keep the temperature between 18 and 22 degrees Celsius. The room also needs to be ventilated several times daily, but make sure that flies do not get into it.
The temperature inside the bags will rise in the first three to four days, and it is important to prevent the substrate from heating more than +30 degrees so that the mycelium does not die. To lower the temperature, you can use a fan by directing it towards the blocks with mycelium. There is no need to illuminate the blocks at this stage. After three days, the filaments of the mycelium will become noticeable in the thickness of the substrate, and after about ten days they will completely fill the mushroom blocks. As a result, the blocks will become filled with a dense homogeneous mass, which will have a white color and a mushroom smell.
 Harvesting
The last stage of growing oyster mushrooms is fruiting.To wait for it, immediately after the incubation period, you need to:
- Set the humidity to between 90 and 95 percent.
- Set the air temperature at + 10 + 15 degrees.
- Air the room up to four times daily.
To maintain a high level of humidity, you can start spraying the floor and walls with water, but make sure that water does not fall directly on the mushroom blocks.
If you create optimal conditions, you will soon see how the rudiments of oyster mushrooms appear in the slots. Mushrooms bear fruit for ten to fifteen days, rapidly increasing in size. When harvesting, do not cut the oyster mushrooms, but twist them out of the substrate. The color of the mushroom cap is influenced by lighting. Know that the more light falls on the mushrooms, the darker the caps of the oyster mushrooms will be.
Having collected the first crop, you should ventilate the room and wait for the second wave of the appearance of fruit bodies in about two weeks. In doing so, try to maintain the same conditions that you created for the first harvest of mushrooms. Also, after the first crop has been harvested, it is recommended to check the blocks and if they are found with mold, then take them out of the room, leaving only not infected.
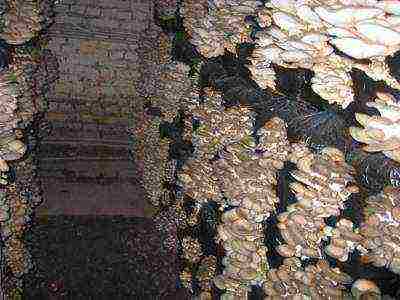
In total, mushrooms can bear fruit up to four times, but the highest yield is observed in the first two waves (they give about 75 percent). After harvesting the fourth wave, the blocks are replaced with others. Used blocks can be applied as fertilizer in the garden.
We invite you to visually familiarize yourself with the process of growing oyster mushrooms in the next video.
Ready-made mushroom blocks
A simpler option for growing oyster mushrooms at home is to buy ready-made blocks from companies specializing in the industrial cultivation of these mushrooms. Such blocks are supplemented with detailed instructions on how to successfully grow oyster mushrooms at home. The buyer only needs to place the blocks in the right room and provide the right conditions for the harvest to ripen.
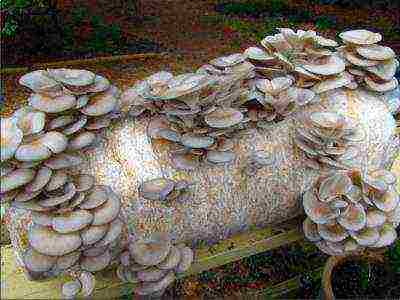 Extensive way
If it is not possible to obtain a suitable substrate, find a suitable room or create the conditions necessary for the fruiting of mushrooms in it, oyster mushrooms can be grown in an extensive way. It provides for growing mushrooms in the open air on stumps or logs. This method is also good for a beginner, as it requires a minimum of money and labor costs. Its disadvantage is that such cultivation is influenced by the climatic conditions of the area, that is, seasonality is characteristic of such cultivation of oyster mushrooms.
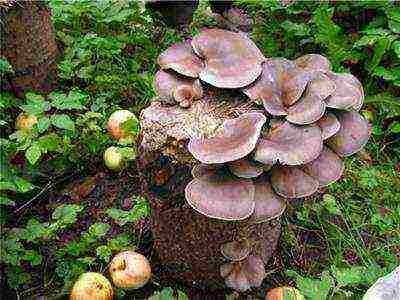 Preparing logs
The preparation of logs and hemp begins at the end of winter. If there are stumps on the site left after the felling of trees, oyster mushrooms can also be grown on them, however, such stumps are sown during the period with the established above-zero temperature (April-May). If there are no such stumps, they take cuttings 30-50 cm long and 15-30 cm in diameter from ash, aspen, beech and other deciduous trees. Only healthy wood that is not infected with mold is suitable for growing mushrooms. Usually, the logs are soaked in water for several days - this will make the wood damp enough for the mycelium to develop in it. However, if the wood is not dry, then there is no need to soak it.
 How to sow mycelium
Sowing mycelium on logs is possible in several ways:
- Place the mycelium in the holes in the stumps. Logs are drilled or filed, creating holes five to six centimeters deep and about a centimeter in diameter. It is recommended to place these holes on stumps in a checkerboard pattern. If the mycelium is grain, it should be poured into the holes, and then covered with moss or sealed with adhesive tape. If the mycelium is represented by sticks, they are inserted into the holes and then sealed with plasticine.
- Place the mycelium on the end of the log.From the hemp, you need to saw off a disk two to three centimeters thick. Cover the end of the remaining stump with mycelium, place the sawn-off disk on top and attach with nails.
- Make columns from logs. On the end of the log, place 100-150 grams of mycelium (the layer will be about 1-2 centimeters), then lay the second log, on which the mycelium is again poured. Then the third log is laid and sprinkled with mycelium again. Thus, you can make columns with a height of 1.5-2 meters. For their greater stability, the logs used must have a sufficiently large diameter (more than 20 cm).
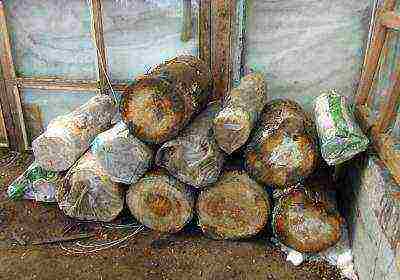
Having sown mycelium on logs, they are folded in a place where the temperature is maintained at about +15 degrees, leaving for two or three months. This can be a basement or a shed that can be regularly ventilated. If the first two methods were used for sowing, then the logs are folded horizontally one on top of the other, and then covered with burlap or perforated film. In the third method of sowing, the logs are placed vertically in several rows, filling the gaps between them with moistened straw or sawdust. From the sides, such columns are also covered with burlap or foil in order to maintain a fairly high humidity inside.
Planting logs
After a white bloom appears on the stumps, they should be planted in the ground in a shaded place. Most often this happens towards the end of spring. Pits are dug in the ground, on the bottom of which wet sawdust or wet leaves are laid. The stumps are placed in rows so that there is a distance of 35 to 50 centimeters between the logs. The cuttings are immersed in the ground for about 10-15 centimeters. Further, in case of dry weather, you should carefully water the soil around the stumps.
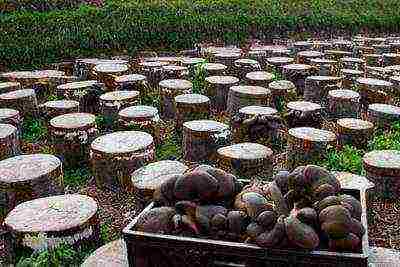 Harvesting
The first oyster mushrooms begin to appear in August. If the fall is protracted, then the harvest can be harvested until November. For the winter period, hemp is covered with leaves or straw. You can also cover them with spruce branches.
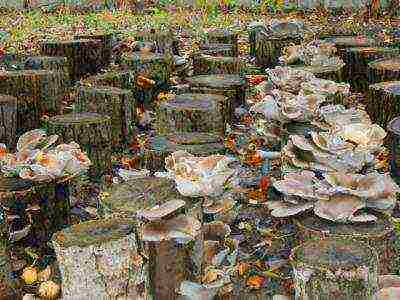
It is possible to get a mushroom harvest from such a stump plantation for up to five years. At the same time, the maximum fruiting of oyster mushrooms on stumps is noted in the second and third years.
It is not difficult to grow oyster mushrooms. I will tell you what conditions are necessary for this.
I harvest healthy hardwood: poplar, aspen, apple, pear, walnut. I saw it into stumps 30-40 cm high and at least 18 cm in diameter. On each one I make sure to make notes (small notches) on the cut, which was on the side of the crown. The bark does not need to be removed. Along the entire lateral surface of the stumps, I drill holes with a diameter of 10-15 mm, a depth of 7-10 cm at a distance of 12-15 cm from each other. I soak the workpieces in water in any container (bath, barrel) for 2-3 days. Fresh wood need not be soaked.
Pick-up location
In a shady, damp place of a garden plot or vegetable garden (it is possible between currant bushes, gooseberries and in a raspberry tree), I dig holes 15-20 cm deep, slightly larger in diameter than hemp. At the same time, it is important to observe the distance between the holes - 30-35 cm. At the bottom of each hoard I put moistened sawdust (or small shavings, straw) with a layer of 1-1.5 cm. On top I pour the planting mycelium of mushrooms with a layer of 1 cm and put the hemp notches up. It is very important.
Growing oyster mushrooms on stumps
The fact is that wood has the ability to absorb water only in the direction from the root to the crown. And if the stump stands incorrectly, "roots" upwards, it will not absorb water from the soil and will give a very small harvest of mushrooms (only one harvest, and in dry weather it may not be at all).
Oyster mushroom growing technology
Before putting the hemp in the hole, I fill the holes drilled in them with planting mycelium and close the outside with wax or corks from wet sawdust. Instead of holes, you can make cuts, slots and fill in the same way.
Around the stumps installed in the holes, I compact the soil - I trample it down with my feet.To save space, wooden blanks can be stacked on top of each other, matching by diameter. Each or all together I cover for 2-3 weeks with a piece of clean plastic film, which I must first perforate (pierce) through 10-15 cm with a nail.
For this purpose, you can use clean plastic bags or bags - put them on the stumps and fasten them so that they do not fly off. Such a shelter protects the mycelium and wood from drying out and promotes better survival of the planting mycelium.
Oyster mushroom growing on a tree stump
How to care for oyster mushrooms?
In this way, I plant the oyster mushroom in May - early June, so that during the warm summer time the mycelium grows well in the wood. Care consists in keeping the soil around the stumps moist. If weather conditions are favorable, fruiting begins in September-October of the current year. When using high-quality mycelium and certain strains (varieties), I harvest oyster mushrooms annually from April to November for 4-5 years, depending on the density of the wood and the diameter of the stumps.
As you can see, it is not so difficult to grow oyster mushrooms in the country. Try it - and you will surely be able to harvest a good harvest of mushrooms.
