Content
- 1 Growing methods, their pros and cons
- 2 Mycelium selection
- 3 Growing on stumps
- 4 Preparing for growing in the basement
- 5 Basement landing
- 6 Planting care
- 7 Conclusion
- 8 Features of growing oyster mushrooms: necessary conditions and premises
- 9 How to grow oyster mushrooms at home: growing technology
- 10 Oyster mushroom diseases and pests: control measures and precautions
- 11 Growing oyster mushrooms intensively
- 12 Growing oyster mushrooms extensively
If you decide to grow mushrooms on your own, it is better to start with oyster mushrooms. Growing these mushrooms at home does not require the study of complex theoretical information or special skills. Oyster mushrooms are not as demanding as other types (for example, mushrooms). Another argument in their favor will be high yields. You can cook many delicious dishes from them, the taste of which will not leave anyone indifferent. Let's figure out what are the ways of growing oyster mushrooms and how to cope with the difficulties arising for beginners.
Growing methods, their pros and cons
There are two ways to grow oyster mushrooms at home - extensive and intensive.
Positive aspects of the first method:
- it does not require the creation of special conditions, since a natural environment is needed for maturation;
- for the same reason, the extensive method does not have to spend a lot of money;
- in addition, the mushrooms do not need constant supervision in this case.
But there are also negative aspects:
- the appearance of the crop depends entirely on the season and suitable weather;
- ripening period is quite long;
- due to the impossibility of control, it will not be possible to turn this hobby into a business and grow mushrooms for sale at home.
With intensive technology, the growing conditions are created by the mushroom grower himself at home.
Pros of the intensive method:
- the ability to control the time of harvesting;
- You can also regulate the amount of harvest - when using this method, it will be more;
- thanks to this, there is the possibility of selling mushrooms and compensating for costs.
Some cons:
- you will have to make more effort and spend a lot of time doing landings;
- cash investments will also be required - to create the necessary conditions at home.
In the intensive method, the mushrooms are ripened in a basement or other suitable room.
Mycelium selection
First of all, you need to purchase "seeds" - in mushrooms they are called mycelium. Recently, it has become much easier to do this - there are many online stores with mail delivery throughout the country. But there are also local companies. For beginner mushroom growers who fear failure, it is enough to purchase one kilogram of mycelium. The result will be about three to four kilograms of mushrooms. You can purchase the material in advance. Mycelium is stored in the refrigerator for up to two months, but it cannot be put in the freezer. It is not allowed to get mycelium on the skin, therefore, when opening the package, do not forget to wear gloves.
When buying, pay attention to the following recommendations.
- Check reviews for a store or individual seller.
- Even if you are an experienced mushroom grower, purchase a small amount of planting stock from a new supplier for the first time.
- Learn all the information about the selected variety, the time of mycelium growth, mold resistance.
- Check the expiration date on the packaging.
- Check the temperature of the mycelium immediately after delivery - it should be about +20 degrees Celsius.
- The mycelium should be free of black and green spots.
- The color of the "seeds" is bright orange, interspersed with yellow.
Growing on stumps
If you are a beginner and are not yet ready to invest a lot of effort and money in growing mushrooms, try the extensive method.
To plant oyster mushrooms in this way, you do not need a lot of materials.
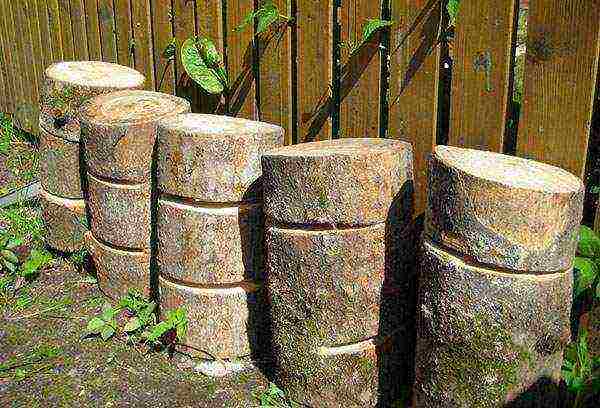
- Hemp that is on the site of your house. But they can only be sown in late April or early May, when a constant high temperature is established.
- Pruning from deciduous trees such as beech or aspen. They should be no more than half a meter in height and fifteen centimeters in diameter.
Check every stump carefully - they should be free of mold.
Advice
If the wood is dry, soak it in water for several days. Only in such conditions will mycelium be able to develop.
The technology is as follows:
- drill or cut out six centimeters in the stumps (they should be staggered);
- mycelium is placed in these holes;
- then they need to be covered with moss;
There is another way - you need to saw off a disk two centimeters thick from the top of the stump. Apply a layer of mycelium to the cut. Cover with a disc. For strength, nail it down.
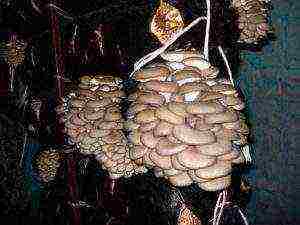
After sowing, stack the logs on top of each other in a room where the temperature is maintained at +15. Leave them there for three months, covered with plastic wrap or thick cloth. By the end of the term, a white bloom will appear on the stumps. This means that it is time to "plant" them. To do this, at a distance of half a meter in the ground, they dig holes and fill them with wet leaves. Hemp is placed in them - to a depth of fifteen centimeters. The soil around them must be constantly moist.
The harvest will appear at the end of summer. You can collect it throughout the fall. For the winter, the planting must be protected by sprinkling with straw.
Preparing for growing in the basement
To grow oyster mushrooms in an intensive way at home, you will need to prepare a basement that meets the following requirements:
- it must maintain a temperature of +15 degrees;
- a good ventilation system is needed in the basement;
- its depth can reach five meters;
- you need to create bright lighting;
- there must be a source of clean water in the basement.
Other types of premises are also suitable:
- cellar;
- poultry house;
- greenhouse;
- garage;
- cowshed.
The main condition is that this basement should not be adjacent to the living rooms of the house, since spores can cause allergies.
The next important condition for harvesting is a good substrate. This is a breeding ground, thanks to which mushrooms will grow. To prepare it, you can use:
- buckwheat husk;
- wheat straw;
- barley straw;
- cobs of corn.
Grind one or a mixture of these materials. Fill it with warm (up to twenty-five degrees) water for twenty minutes. Stir the workpiece periodically. Drain this water and fill a container with hot water (not boiling water). Cover with something heavy and let sit for five hours. Drain, squeeze out the substrate (liquid residues can cause mold) and add nutrients (urea and superphosphate) to it.
Basement landing
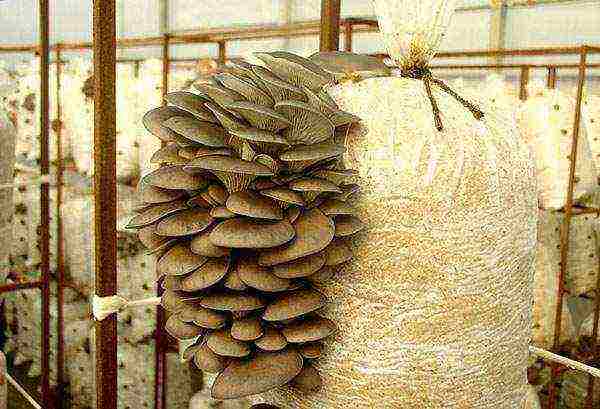
In this growing technology, it is not only the place and the basis for planting that are important. The vessels must also be prepared. Oyster mushrooms are usually grown in bags. At home, ordinary garbage bags as large as possible are also suitable.
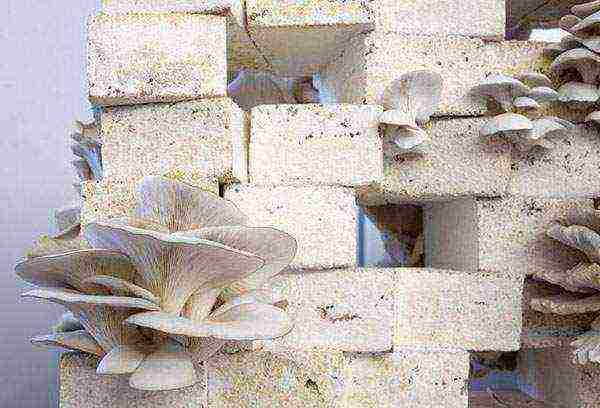
Punch holes in them at intervals of twenty centimeters. Through these holes, the mushrooms will break out.
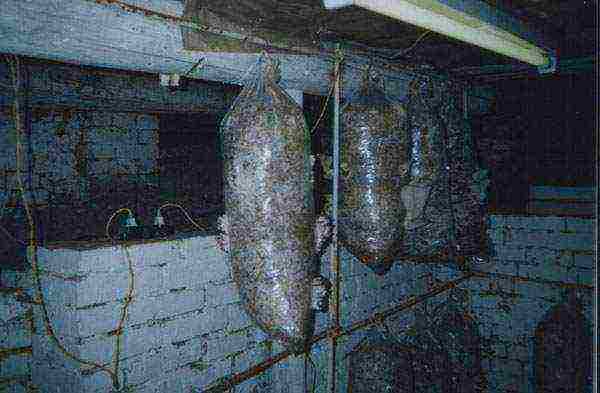
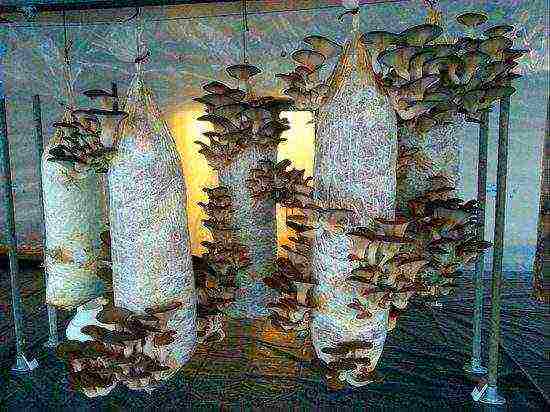
The bags need to be filled with substrate and mycelium. The bottom layer should be the substrate - pour fifteen centimeters of the mixture. Sprinkle it with a layer of mycelium. Alternate them, filling the volume of the vessel by 2/3. The bags should be moved to the basement and placed on top of each other or hung from the ceiling.
Planting care
In the early days of growing oyster mushrooms, it is most important to maintain suitable conditions.
- The temperature in the bags will rise, but it is important to ensure that it does not reach +30 degrees (when growing at home, in a small basement, it is enough to use a fan for this).
- Keep flies out of the basement.
- The lighting can be switched on after three days.
- The humidity in the basement should be about 95% (for this you need to spray the walls and floor with water, but not the oyster mushroom plantings themselves).
When collecting oyster mushrooms, you also need to follow some rules.
- They do not need to be cut off, but unscrewed from the substrate.
- After harvesting the first crop, it is important to maintain the same conditions in the basement for two weeks, then another batch will appear soon.
Conclusion
Oyster mushrooms are the most suitable mushrooms for growing at home. They don't need much care. The conditions for their development are easy to maintain even at home.
There are two ways to grow them. One of them requires less effort, but the result will be a long wait for the harvest. For another, you need to prepare the room, but thanks to this you will quickly get a large amount of mushrooms.
Choose the method that seems to you the most successful, and feel free to start planting. In this case, you will be satisfied with the result.
Growing mushrooms at home allows you to pamper yourself with this tasty and healthy product all year round, and can also become an excellent source of additional income. Oyster mushrooms are one of the simplest types of mushrooms of their kind. Anyone who has decided to try their hand at mushroom growing can feel like a master growing oyster mushrooms. This variety is very unpretentious and does not require special care. Where is the best place to grow oyster mushrooms at home and what is needed for this? Let's try to figure it out!
Features of growing oyster mushrooms: necessary conditions and premises
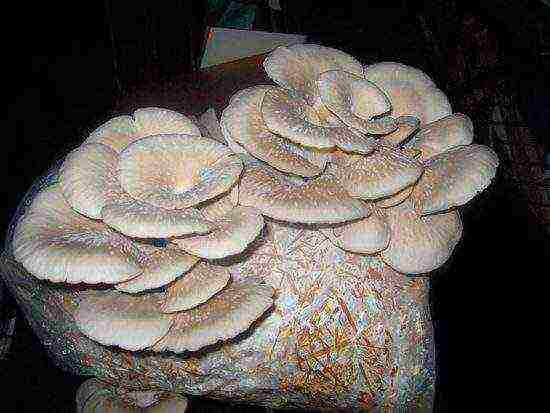
Oyster mushrooms or oyster mushrooms are a unique species that can sprout on any soil, be it dry grass, thyrsa, coffee grounds or even cotton fabric. This stunted plant is able to extract nutrients from everything in its environment. Another advantage of the species is its fast growth rate. Already two weeks after sowing, the first crop can be harvested.
Growing oyster mushrooms does not require any special knowledge and skills. The best place for growing oyster mushrooms will be the basement or cellar of a private house. Oyster mushrooms are not thermophilic and do not need a lot of light. If you do not have a basement, they can be grown in a greenhouse in a country house or shed. Despite the simplicity and the absence of excessive maintenance of mushrooms, the growing room must be properly prepared.
The following equipment should be installed in the room and special conditions for growing oyster mushrooms should be created:
- Growing equipment (bags). The choice of equipment depends on the method of growing oyster mushrooms. The most convenient and economical option is bag cultivation. To do this, you need special supports with hangers, on which the bags with the substrate are suspended. It is best to use plastic equipment, it does not corrode and is much cheaper. By the way, oyster mushrooms can also be grown on stumps.
- Room temperature. This mushroom does not need high temperatures, so there is no need to create a greenhouse. It will be enough to insulate the room and carry out thermal insulation to retain moisture. Naturally, elementary heating devices must be present so that the temperature does not fall below 13 ° C. An elevated temperature is necessary only at the initial stage after planting the mycelium (22 ° C - 25 ° C). Infrared lamps can be used for additional heating.
- Humidity. Oyster mushrooms are very fond of moisture, so the air in the growing room must be constantly humidified.It is very easy to do this using nebulizers or special electronic humidifiers. The humidity level should be around 70-90%.
- Ventilation and lighting. All mushrooms grow in the fresh air and oyster mushrooms are no exception. The room must be systematically ventilated. This can be done manually, or you can install special hoods that will deliver fresh air. Again, purchasing such equipment is expensive, so unless you plan to grow large quantities of oyster mushrooms for sale, it won't be cost effective. When it comes to lighting, you need to install daylight garden lamps. You won't need a lot of them, since this type of mushroom does not require a lot of light.
- Cleanliness and pest free. To grow a large, and most importantly, a healthy crop, the premises must be clean. If the basement is heated by groundwater, and there is fungus or bloom on the walls, this can seriously affect the yield. The mushrooms will hurt, light spots will appear on them, the mushrooms will lose their density, become soft. To protect future plantings, it is necessary to disinfect the premises. First, they thoroughly clean the walls, ceiling and floor, remove all dirt and mold. Then, all surfaces are sprayed with a solution of sulfate, and the walls and ceiling are covered with a solution of lime and copper sulfate.
Video: a room for growing oyster mushrooms in the basement
Note! If there is a fungus in the room, it is better not to use it as a greenhouse. High humidity, which is necessary for growing mushrooms, will only aggravate the situation, the disease will affect crops, they will become inedible and poisonous.
How to grow oyster mushrooms at home: growing technology
Having decided on the location of the mushroom greenhouse, after thoroughly disinfecting the premises and installing the necessary equipment, you can proceed to the very process of growing the mushrooms. The technology of growing oyster mushrooms involves several stages.
Video: step-by-step instructions for breeding oyster mushrooms at home
Substrate preparation
The key to a rich harvest is a high-quality substrate. Although it is generally accepted that oyster mushrooms are indiscriminate in this regard, the soil should still be fertile.
The best substrates for breeding oyster mushrooms are:
- dry straw of wheat, barley and buckwheat;
- hardwood sawdust;
- sunflower seed husks;
- dried stalks and cobs of corn.
Choose the amount of substrate according to the amount of mushrooms you want to grow. So, one bag for growing oyster mushrooms is designed for 5 kg of substrate. All components of the substrate should be clean and dry, they should not be moldy or rotten, they should not be rotted. It is best to disinfect the selected substrate by heat treatment. Next, you need to grind these components to a fraction of 4-5 cm and mix. Repeated heat treatment for two hours and squeeze out.
Actually, the substrate for growing oyster mushrooms is ready.
Selection and purchase of mycelium
For growing oyster mushrooms at home, it is best to use grain mycelium. It is very convenient to sow and does not require additional processing.
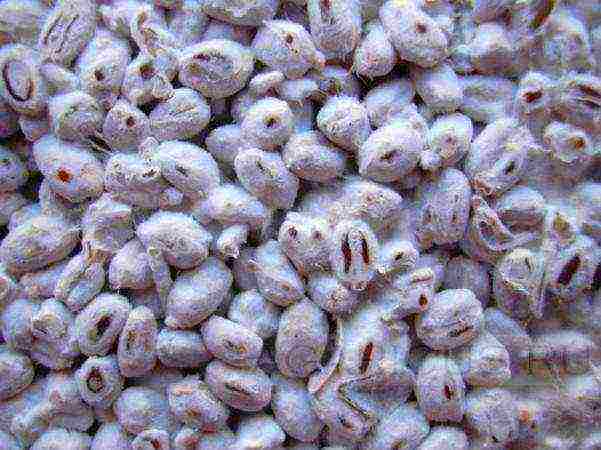
When buying mycelium, pay attention to its appearance. The grains should be yellow with a slight orange tint. It is strictly forbidden to buy mycelium on which dark spots are visible - this is the first indication of the presence of mold. You can also determine the quality of the planting material by smell, it must be fresh and smell like mushrooms. If you smell a slight ammonia smell, it means that the mycelium was stored incorrectly and has deteriorated.
Be sure to pay attention to the manufacturer's company, it is better if it is a well-known and large manufacturer in the seed market, read reviews of gardeners on the Internet. Do not buy large quantities of mycelium at once, take a trial batch.If the mycelium germinates without problems, forms good and healthy mycelium, you can purchase a large batch.
If you want to make your own oyster mushroom mycelium, then read this article.
Landing
Before proceeding with planting, the mycelium must be placed in a room where oyster mushrooms will grow for a day. This is done in order to equalize the temperature and the mycelium does not die from shock.
To grow oyster mushrooms in bags, it is imperative that it first be disinfected or thermally treated. An effective way of processing is washing with a solution of bleach.
The optimal volume of the bag should be at least 5 kg.
Further, the planting of oyster mushroom mycelium or the formation of mushroom blocks is as follows:
- There is a layer-by-layer filling of the bag with a substrate and mycelium. For every 5 centimeters of the substrate, there should be about 0.5 cm of mycelium. The top and bottom layers in the bag should be substrate.
- At the end of the filling of the mushroom block, the bag is tightly tied at the neck.
- Then small holes are cut at a distance of 10 cm from each other, with a diameter of no more than 2 cm. The cuts are best done in a checkerboard pattern.
Attention! The planting of mycelium and the cultivation of oyster mushrooms are carried out in separate rooms, since there is a high risk of infection of myceliums.
Video: how to make a perforation of a mushroom block
Further care
In the period from planting to the formation of myceliums, temperature room air should be 18 ° C - 20 ° C. As soon as they are visible first fungi formations, the temperature is lowered to 13 ° C - 15 ° C. This is the optimum temperature for growing all types of oyster mushrooms.
It is very important to maintain humidity air. Watering the substrate is strictly prohibited, since in wet soil the mycelium begins to rot. Even if the myceliums survive, all the mushrooms will hurt, rot and dark spots will begin to appear on them. To achieve optimal humidity in the room, you can hang wet sheets or any other wet cloth. Open containers with water are left near the heaters, in this way the moisture evaporates faster and saturates the air.
Harvesting
The fruiting period for oyster mushrooms is only 30 - 35 days, which is a very short period. The thing is that these mushrooms have a very high frequency of fruiting: every 7 to 9 days. That is, already 9 days after planting the mycelium, you can harvest the first full harvest.
It is customary to cut the mushrooms with a knife carefully so as not to damage the main root attached to the mycelium. When collecting mushrooms, absolutely all fruits cannot be cut from one mycelium. It is necessary to leave 2 - 3 of the smallest mushrooms on the stem, otherwise the mycelium may dry out and stop bearing fruit.
Video: how to properly harvest oyster mushrooms
Important! After the last crop of mushrooms has been harvested, the substrate and bags must be disposed of. They are not recyclable. The room is well cleaned, ventilated and disinfected. It will be possible to re-breed mushrooms only 2 weeks after all harvesting work.
Video: technology for growing oyster mushrooms
Oyster mushroom diseases and pests: control measures and precautions
It happens that during the fruiting period, the mushrooms begin to hurt. A variety of factors can be the cause of such diseases. If all disinfection work has been carried out in the room, diseases should not disturb the crop.
The main number of fungal diseases lies in the substrate... As a rule, bacteria enter along with wet and rotten straw.
Important! If you are not sure about the quality of the substrate, it heat treatedbefore planting the mycelium. It is placed in a large container and poured with boiling water, after which it is boiled for 2 hours, then squeezed and dried.
In a damp substrate, the mushrooms begin to rot, the legs darken and become soft. This disease is called dark rot. If, nevertheless, she overtook the plantings, it is necessary to remove all diseased plants along with the substrate.
Very often oyster mushrooms are attacked mushroom flies, a little less often - ticks. These parasites are also born in the mycelium when the air is too humid and the room is not ventilated. Light pits appear on the mushrooms, like small bites. Naturally, such mushrooms must be removed immediately, and the room must be disinfected. Do this with smoke bomb, which is left for a day in a hermetically sealed room, and then thoroughly ventilate it.

It is necessary to carefully monitor the state of the mushrooms from the formation of the mycelium to the last fruiting. If one of the myceliums is infected, the entire bag will have to be thrown away, and this will significantly reduce the yield increase.
Summarize. Based on all of the above, it can be understood that growing oyster mushrooms at home is a very simple but time-consuming process. To do this, you will need to purchase special equipment, prepare the premises and fertile soil, and purchase high-quality mycelium. Further, it all depends on your patience and hard work. With proper care, up to 9 kg of mushrooms can be harvested from one bag. Growing oyster mushrooms is a great option for getting your first experience in mushroom growing.
Video: how to grow oyster mushrooms at home
Growing mushrooms on your own plot is not only exciting, but also a profitable business. If you're new to mushroom farming, try starting with oyster mushrooms. These are unpretentious, but very prolific mushrooms. Someone grows them for themselves, and someone was able to make a profitable business out of oyster mushrooms. Indeed, with 1 kg of mycelium, up to 4 kg of mushrooms are obtained!
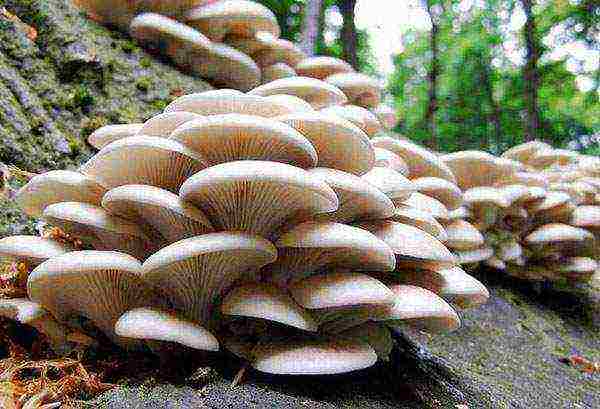
Oyster mushrooms
There are two ways to grow oyster mushrooms: intensive and extensive.
Growing oyster mushrooms intensively
This method involves growing mushrooms under artificial conditions. The task of the mushroom grower is to provide a microclimate that will be most favorable for the growth of oyster mushrooms.
Mycelium preparation
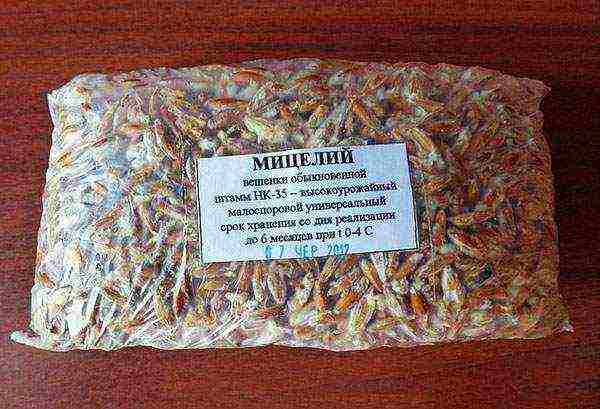
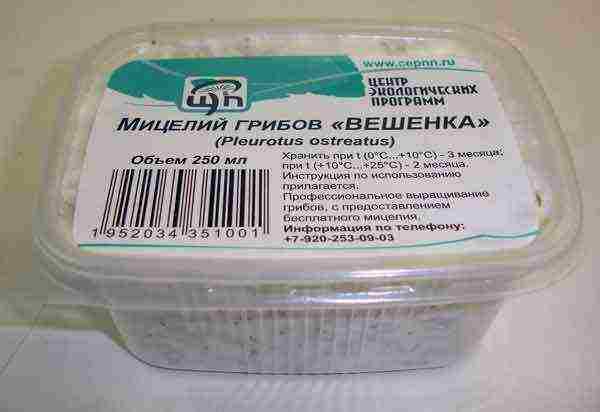
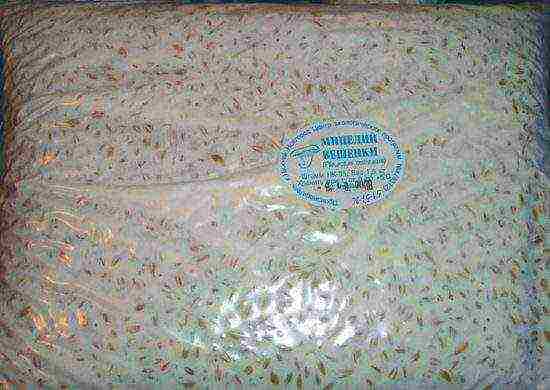
Purchased mycelium for growing oyster mushrooms
Ready-made mycelium can be purchased at the store. For the first growing experience, you do not need to acquire a lot of material - 1 kg is enough.
Oyster mushroom mycelium
Mycelium selection principles:
- buy from trusted sellers;
- look at the color: the mycelium should be white, interspersed with orange and yellow (there should be no green and black spots);
- carefully read the information on the package (variety, shelf life, fruiting rate);
- check the temperature of the bag with mycelium: it should not exceed 20 ° C;
- sniff: the bag should not emit an ammonia smell.
After purchase, the bags with mycelium must be cooled slowly. Before planting, they are stored in a refrigerator at a temperature of 3-4 ° C. The maximum shelf life is 2-3 months.
Before laying in the substrate, the mycelium is removed from the refrigerator, warmed in a warm room to the temperature of the substrate (so that it does not die from thermal shock) and crushed.
Grinding the mycelium
Important! All work with mycelium is carried out under sterile conditions. The room and work surface are disinfected, the mushroom grower works with gloves.
Substrate preparation
The amount of substrate should be 10 kg of material per kg of mycelium.
Substrate preparation
Any plant waste is suitable for the substrate:
- wheat or barley straw;
- shredded leaves, stalks and ears of corn;
- cleaning from sunflower seeds;
- buckwheat husk;
- sawdust.
Important! The raw material must not be rotten or moldy!
To disinfect the substrate and saturate it with moisture, treat the material with water or steam. There are three processing options:
- digestion of dry material in hot water;
- steam treatment of dry material;
- steam treatment of wet material.
Heat treatment of the substrate
The first method is used most often.The raw material is placed in a tank, poured with water and boiled for 1.5–2 hours. Then the water is poured out, the substrate is sent under pressure and cooled to 25 ° C.
In order for the mycelium to develop comfortably, the moisture content of the substrate must be optimal.
Advice! How do I check the humidity level? You need to take a lump of material in your hand and squeeze it. If the material is springy, but water does not flow out of it, the humidity is ideal. If it gets too wet, you need to let the excess moisture drain.
After cooling, the substrate is crushed into pieces 4–5 cm in size.
Mycelium packing
The mycelium and substrate are placed in bags in a sterile room: in a room that is intended for incubation.
Step 1... The room is treated with chlorine. Work is carried out with gloves, all tools are wiped with alcohol. Grow bags must also be sterile. For disinfection, they are placed in a bleach solution for a couple of minutes.
Step 2... If this is your first time growing oyster mushrooms, take 2 small bags, each of which will hold 5 kg of material, and put the mycelium with the substrate there.
We fill the bags with substrate and mycelium
Advice! There are two ways to put the mycelium in the substrate. The first option involves mixing the substrate and mycelium on a surface and then placing the material in bags. The second is a bookmark in layers. You need to take a bag, pour 5-6 cm of substrate into it, then 0.5 cm of mycelium. And so on to the very top.
Convenient bag filling tool
Step 3.Make holes on the bags through which the mushroom growths will grow. The incisions are made in a checkerboard pattern every 10–15 cm. The incision length is 1–2 cm. You can make perforations in the form of holes, "crosses" or "check marks" to obtain more compact splices.
In the photo there are holes for germination of oyster mushrooms
The bags must have holes for the germination of mushrooms
Step 4.The finished blocks are placed in the germination room in such a way that the notched sides have unlimited air access.
Bag arrangement option
Incubation
Incubation takes 10–20 days. At this time, provide the mushrooms with a favorable microclimate:
- indoor humidity - 70–80%;
- room temperature - no more than 25 ° C;
- the temperature inside the bags is not more than 30 ° C, otherwise the mushrooms will not sprout;
- reduce the temperature with fans, but never ventilate;
- do wet cleaning daily.
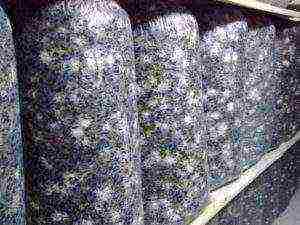
If everything is done correctly, after 3-4 days you will see that white filaments of mycelium begin to spread over the substrate. After 10–20 days, the mycelium will grow throughout the entire package. It will acquire a whitish color and a characteristic mushroom aroma. The incubation is over and the fruiting time begins.
Germination of the substrate
Video - Growing oyster mushrooms at home
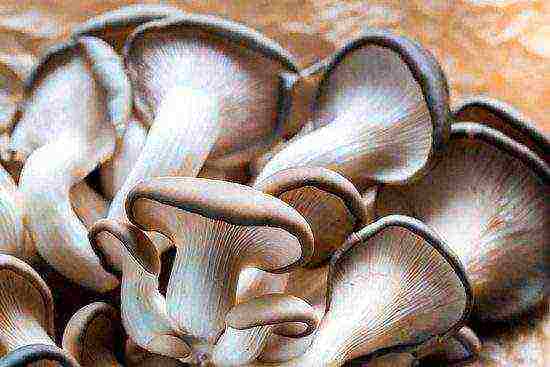
Fruiting
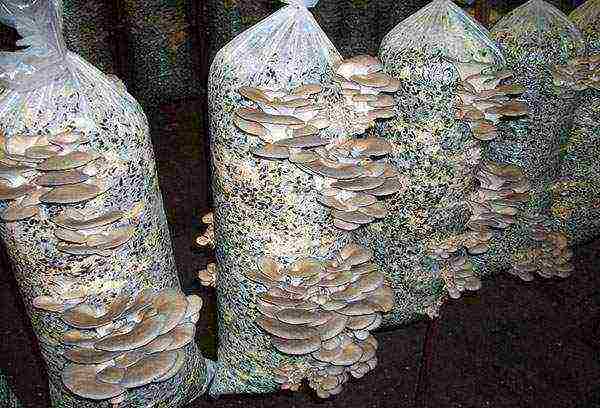
After the end of the incubation period, transfer the bags with the mycelium to the fruiting room.
Oyster mushroom fruiting
Important! The cultivation room should be located away from the residential building. Growing mushrooms secrete spores, which are a powerful allergen.
Fungi require a favorable microclimate:
- temperature - no more than 10-15 ° C;
- humidity in the room - 90–95%;
- fluorescent lighting - 10-12 hours a day;
- put a humidifier in the room;
- irrigate the walls and floor with liquid, but in such a way that it does not fall on the mycelium;
- ventilate the room every 6–8 hours.
Growing mushrooms
After the caps have formed, the mushrooms require daily irrigation. Spray water 1–2 times a day from the top so that it flows over the oyster mushroom caps. During this period, pay particular attention to the ventilation of the room: due to moisture, the mushrooms can rot.
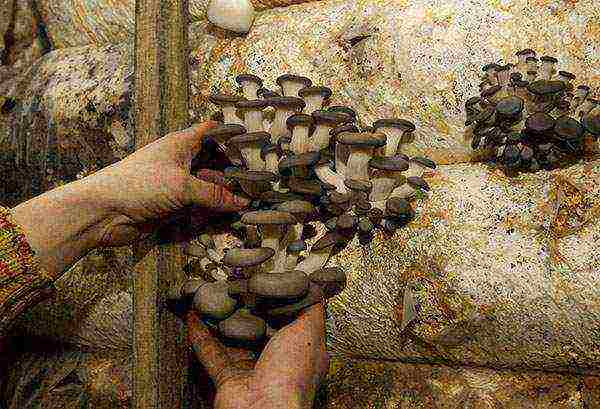
Harvesting
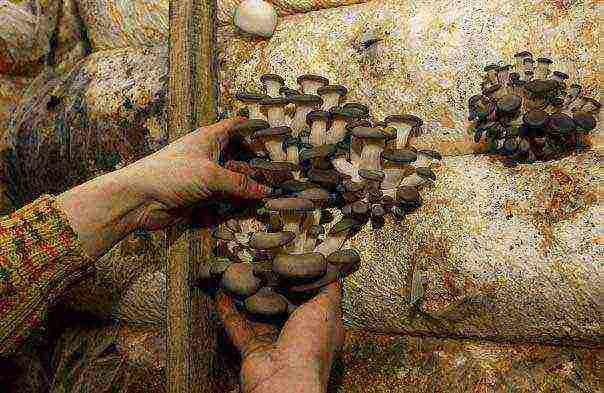
After 1.5 months, the mycelium will delight you with fruits. After removing the first mushrooms, new ones will appear in 2-3 weeks. The mycelium can bear fruit up to 4 times, but 75% of the harvest will fall on the first 2 waves.
The first crop can be harvested
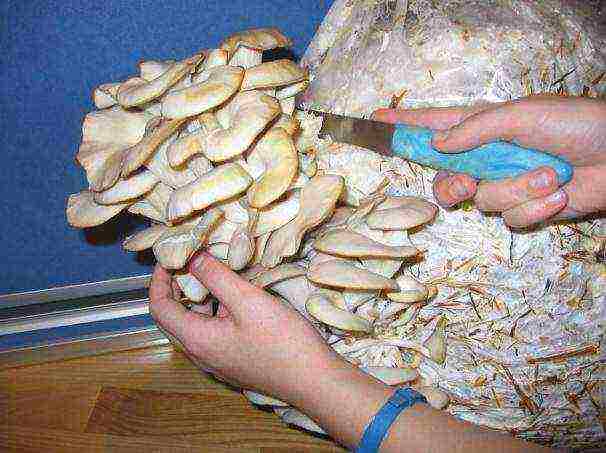
To prevent the mycelium from rotting, the sprouts of the mushrooms must be twisted without leaving the legs in the substrate. After harvesting, sort out the substrate, remove rotten elements from it and put it back in bags. With proper care, the mycelium bears fruit for up to six months.
In the photo, harvesting oyster mushrooms
After the 4th harvest, discard the substrate or use it as garden fertilizer.
Growing oyster mushrooms extensively
Growing oyster mushrooms extensively
This method involves growing mushrooms in conditions close to natural.
- Prepare the stumps or logs that the mushrooms will grow on. Oyster mushrooms love the wood of willow, poplar and linden, however, a good harvest can be obtained from aspen hemp.
Logs for growing oyster mushrooms
Mycelium laying scheme
- Wet the logs, make several deep cuts on their surface with a knife and add the mycelium purchased in advance into them. Cover the holes with tree bark or moss.
- Place the finished logs in the garden. Choose a shady but well-ventilated area. The main thing is that the stumps do not fall under the direct rays of the sun, otherwise the mycelium will die. Place the logs in small recesses and dig in with earth for stability. You can put leaves or sawdust in the holes.
- Water the logs thoroughly and cover with foil. If the weather is dry, then oyster mushrooms require daily watering.
- After 1.5–2 months, the first crop can be harvested. In one season, the logs bear fruit up to 3-4 times.
Oyster mushroom harvest
The next year, the logs will bear fruit again, if you do not forget to water them. The mycelium will retain fertility for 3-5 years.
Crop can be harvested within 3-5 years
Both cultivation options have their own advantages and disadvantages. To make it easier for you to choose a method of growing oyster mushrooms, pay attention to the table.
| The essence of the method | Cultivation takes place in natural conditions | Mushrooms are grown under artificial conditions |
| Tools and materials | Mycelium, tree stumps, moss, film | Mycelium, substrate, bags, air humidifier, fan |
| Premises | Garden | Two rooms: for incubation and for cultivation |
| Target | Grow mushrooms for yourself | Grow mushrooms for sale |
| Dignity | Low costs | High yield, regardless of the season and weather; mushrooms ripen quickly |
| Flaws | The yield depends on the weather; fruiting occurs only in the warm season | The need for additional costs and two rooms |
Video - Oyster mushroom on stumps, An extensive way of growing mushrooms
Video - Oyster mushroom, waste blocks, good harvest
 Growing an oyster mushroom in a home basement is a trend that came from the 90s. Craftsmen mastered this business from scratch, planted entire plantations in such conditions and built a business on them. It is not difficult to grow oyster mushrooms - it is important to adhere to the step-by-step algorithm and instructions. This article contains the recommendations of experts on where to start the process and how best to carry it out. Photo and video tips are provided to help beginners.
Step 1: preparing the room
To organize home cultivation of oyster mushrooms, you need a properly equipped room, high-quality mycelium (mycelium), and a suitable substrate. In the basement, mushrooms are grown in two ways:
- Natural. Minimum equipment costs, but no more than one harvest per year.
- Intensive. Requires investment in order to create and maintain the microclimate necessary for oyster mushrooms in the basement. But it allows you to collect several crops per season, regardless of weather conditions.
Advice. Mushroom pickers often choose the second option. This technology will allow the family to feed and sell some of the mushrooms.
You should not count on a safe and healthy harvest if you cannot create and maintain such conditions in the basement:
- purity;
- air temperature in the range of + 10 ... + 20 ° C;
Oyster mushroom is easy to grow on your own
- humidity - 85-90%;
- constant air circulation, well-functioning ventilation;
- no pests and mold.
A deep cleaning in the first step will help detect problems in the basement. You may need a total rearrangement or re-equipment of the premises. To grow mushrooms in winter, take care of the tightness and insulation of the basement. Then, to maintain the microclimate in the cold, one heater will be enough for you, which will turn on for 2-3 hours.
Cover the ventilation openings with mosquito nets. Mold can be removed by hand using special products or vinegar solution. As a preventive measure, a normal balance of temperature and humidity is sufficient. Remove pests using pest control: smoke bombs or chemicals. Further work in the basement can be started no earlier than in a week.
Step 2: preparing the substrate
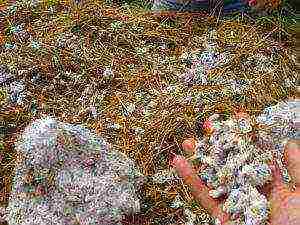
When using an intensive growing method, the substrate acts as a comfortable, moist and breathable environment. It protects oyster mushrooms from mold damage. Experienced mushroom pickers use hardwood shavings. It is easier for beginners to work with buckwheat or sunflower husks, barley or wheat straw, dry corn stalks.
An important task is to properly prepare the substrate for growing.
Prepare the material before use:
- Make sure it is free of fungal microorganisms.
- Heat the raw materials: steam a dry or moist substrate, boil in water. In the latter case, let the liquid drain for a few days. Such saturation with moisture is considered optimal when, when squeezed by hand, the substrate springs, but does not ooze with water.
- Cool and grind the material.
- Place the substrate in plastic bags with small holes. Transfer them to a separate, disinfected, warm room to place the mycelium.
- Use bleach for surface treatment. The same sterilization is needed in the basement.
Step 3: buy quality mycelium
In order not to make a mistake in choosing a basis for the reproduction of mushrooms, follow these recommendations:
- If you are not sure about the quality of the myceliums you are purchasing, take several small batches from different suppliers.
- When buying, study the data on the variety and strain, productivity, mold resistance, crop saving time.
- The optimum temperature for mycelium is about +20 ° C. Make sure no overheated material is sold to you.
- The mycelium should not exude an ammoniacal odor and be covered with black or green spots. A healthy color is bright orange.
Oyster mushroom mycelium
After harvesting, the seed mycelium is stored in the refrigerator at a temperature of + 3 ... + 4 ° C. Under such conditions, normal mycelium will retain productivity up to 3 months, substrate mycelium - up to 9 months. Check with sellers for compliance with these conditions. After purchasing mycelium:
- place the bags separately in a well-ventilated room;
- leave for a couple of hours at room temperature;
- before laying, grind the mushroom base without opening the bag.
Attention! It is necessary to open the package and carry out all subsequent operations only with gloves, in a sterile environment. After opening, treat the mycelium with a disinfectant solution.
Step 4: laying the mycelium
You will need a sterile table. The bags also need to be treated with a disinfectant solution and then with water. Turn off ventilation, close windows and doors during work. Mix the substrate and mycelium directly on the work surface. Correct proportions for mycelium:
- domestic raw materials - 3-5% of the total volume of the substrate;
- foreign product - 1.6-2.5%.
Put the mixture back into bags and tamp. The optimal weight of one bale should be 5-15 kg. Flatten the bags lightly and using a sharp knife, cut openings on both wide sides. The length of one is 0.5 cm. This technique will lead to the fact that the mushrooms will break through in bunches.
Place mycelium under sterile conditions.
Place the bags on props or shelves in the same room. The bags should be at least 5 cm away from walls and each other and should be well blown from all sides. The most favorable air temperature is around +25 ° C. In the block with the substrate, it may be slightly higher. Sowing maintenance is simple:
- do not ventilate the room;
- Wipe floors and surfaces with chlorine and water every day.
Attention! Do not overheat the mycelium at + 30 ° C or higher.
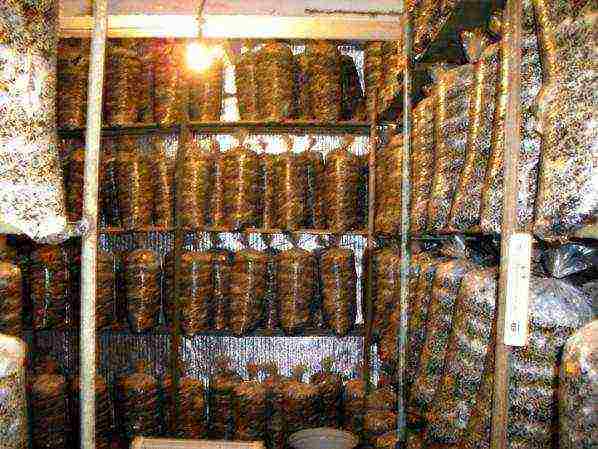
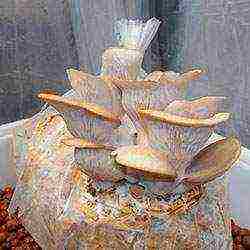
Step 5: growing oyster mushrooms in the basement
In a warm room, the bags should lie for 18-25 days. After that, they should be transferred to the basement. There the blocks are placed vertically. They can be placed on top of each other, however, a gap of at least 0.5 m is required between the columns. The first mushrooms can be collected after 1.5 months. after laying the mycelium.
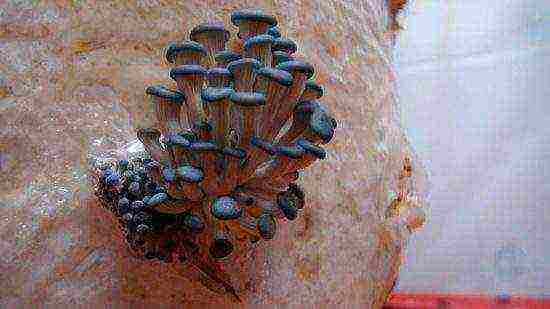
Growing oyster mushrooms in the basement
In the basement, you need to maintain optimal conditions for growing oyster mushrooms. The desired lighting intensity is 5 W / sq. m. In order for the body of the fungus to mature dense, and not watery, use a humidifier or sprayer for irrigation. Water with a temperature of + 10 ... + 25 ° C should flow from top to bottom no more than twice a day. Ventilate the area after watering.
Attention! Oyster mushrooms form a lot of controversy. To prevent them from causing allergies, the basement must be isolated from the living rooms.
Subsequent waves of fruiting in oyster mushrooms occur at intervals of 2-3 weeks. Remnants of the mushroom legs should be removed between these periods. Go through the bags. If you notice mold, remove it from the room. Such a substrate will fit on the site as an organic fertilizer. Growing oyster mushrooms in the basement is easy, especially if you are well prepared for the process.
Growing oyster mushrooms at home: video