Content
- 0.1 Method 1 Planting pine seedlings
- 0.2 Method 2 Caring for a pine sapling
- 0.3 Method 3 Growing pine from seeds
- 1 Tips
- 2 What do you need
- 3 Warnings
- 4 Seed preparation - collecting and growing cones
- 5 Soil preparation for sowing seeds for seedlings
- 6 Stratification - is it really necessary for pine seeds?
- 7 Temperature range for seed germination
- 8 What should be the lighting of seedling containers?
- 9 Watering and fertilizing the soil in containers with seedlings
- 10 Pine seed selection
- 11 Seed selection
- 12 Preparation of planting material
- 13 Soil preparation
- 14 The need for stratification
- 15 Temperature regime
- 16 Lighting
- 17 Landing rules
- 18 Watering and feeding
- 19 Features of growing pine from seeds in the open field
3 methods: Planting pine seedlings Caring for a pine seedling Growing pine from seed
Pines are evergreen trees with many species. Young pine trees require special care, and need strict protection from animals and damage from sunlight for the first two years. Once set in, the pines will grow for decades. Try to grow pine from seed only if you set yourself such a task; the purchased seedling has a much better chance of success.
Method 1 Planting pine seedlings
-

Find the type of pine that best suits your soil and climate. Several types of pine, including Weymouth pine, Banks pine, Scotch pine, are used in landscaping. If you live in an excellent climatic zone or in an unusual elevation unlike the area where the seedling grew, inquire with the seller about the growing environment.
-
 Decide whether you want to plant open-rooted seedlings or potted seedlings.
Bare root seedlings should be planted in late fall and winter when the pine trees are dormant.
Potted seedlings can be planted at any time, however during the hottest summer months additional shade and water will be required to protect the tree from dehydration and sunlight.
- Most seedlings can be kept for several weeks at 1.7-3.3 ºC, but it is best to check with the seller in case the type you bought has excellent requirements.
-
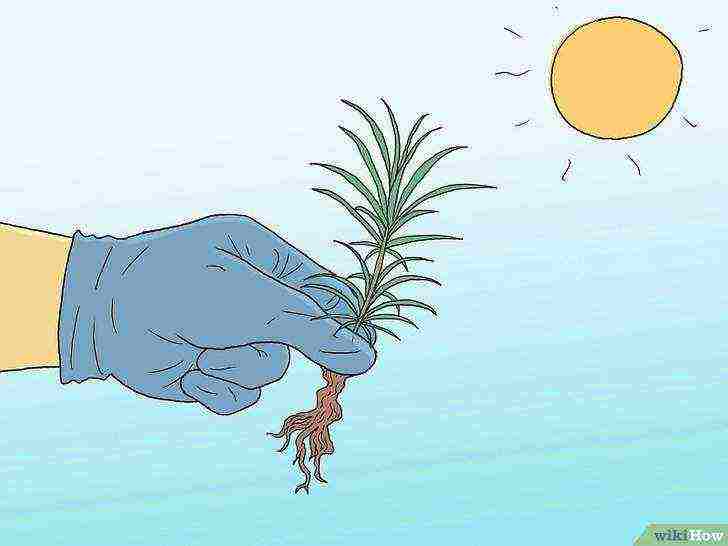
 Water the root system lightly and tidy up if necessary.
Keep the roots moist until you are ready to plant, but do not let them soak in water - this can kill them. If the roots form a thick ball or wrap around the sides of the pot, gently redistribute the main roots so they are more loose.
- Some seedlings are sold with a little potting mix on the roots. Try to keep as much of this mixture on the roots as possible when spreading.
-
 Find a suitable place to plant your pine.
Each pine tree should have a lot of open space, with no small plants around its base and no root systems of other trees nearby. Choose a location where the tree will be exposed to direct sunlight during cooler periods of the day.
- If you are unable to plant a pine tree where there is shade on the west side, below are instructions on how to make a sun shade.
- A mixture of sand and humus is best for pine trees, but you should only add a suitable organic humus sod soil, such as sphagnum, if the soil is a dense clay consistency.
- Choose a location with well-draining soil. A pit 30 cm deep filled with water should be emptied within 12 hours. If this is not the case, then you may need to install a drainage system.
-
 Pick a good day to board.
Do not plant trees when the weather is windy, dry, or temperatures over 30ºC. There should be no standing water or ice on the soil on the day of planting, but there should be no dry soil either.
-
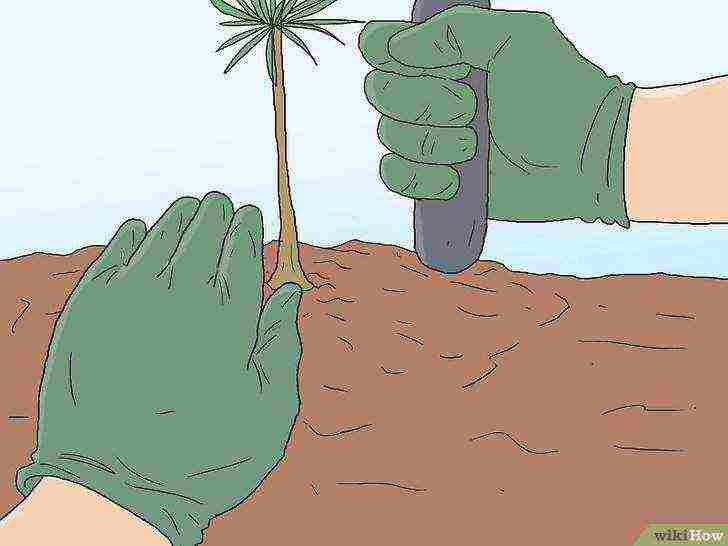
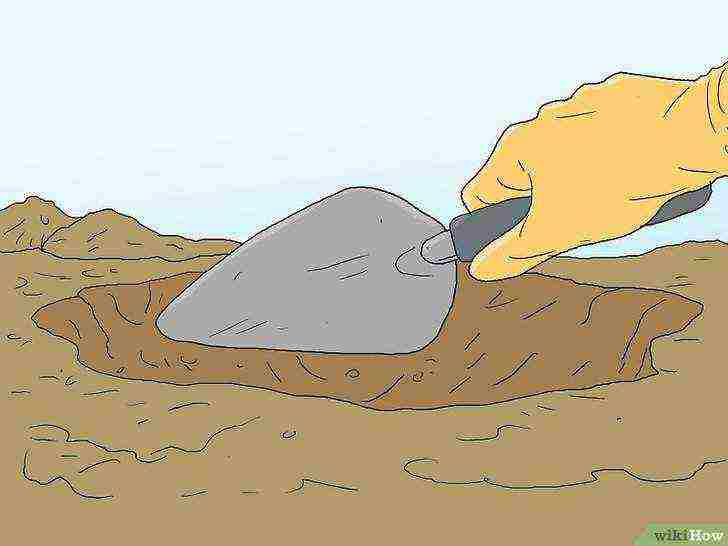 Dig a hole larger than the root system and fill the base with sandy clay turf.
The topsoil will be of the best quality, so fill the bottom with about 10 cm of sand and clay turf after you dig the hole. Make sure to dig a hole deep enough for the roots to fit in after you add the topsoil.
- A warning: Contact your municipal office for the location of underground cables before digging large holes.
- Try to plant the tree at the same level as it was planted in the greenhouse. If you are unsure, it is better to plant the tree higher than lower.
-
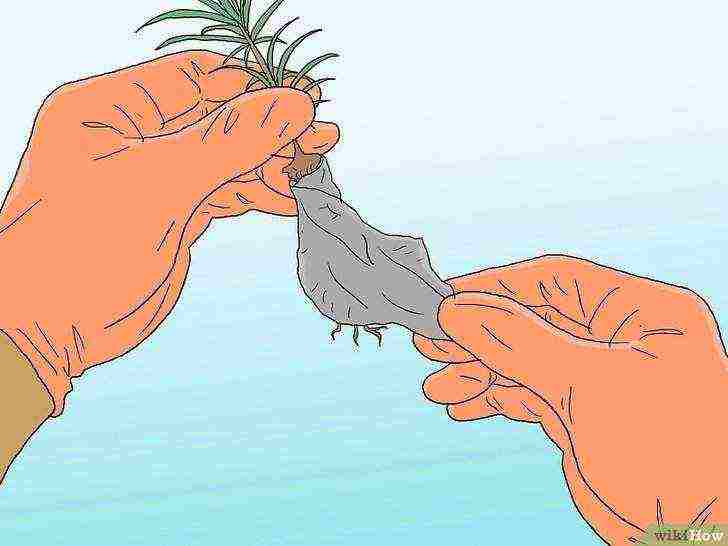
Remove the pot or burlap from the seedling. While burlap and other biodegradable materials can be left on when planting, careful removal of the burlap will give the seedling more room to grow.
-
 Place the pine roots carefully on the bottom and cover with soil.
Refill the hole after planting, periodically trampling the loose bud with the handle of your shovel, but not with your feet.
Bury the hole until it is level with the surrounding soil, or slightly sagging if the climate is extremely dry so that the water can reach the roots.
- If necessary, find an assistant to hold the tree upright while you dig the hole.
-
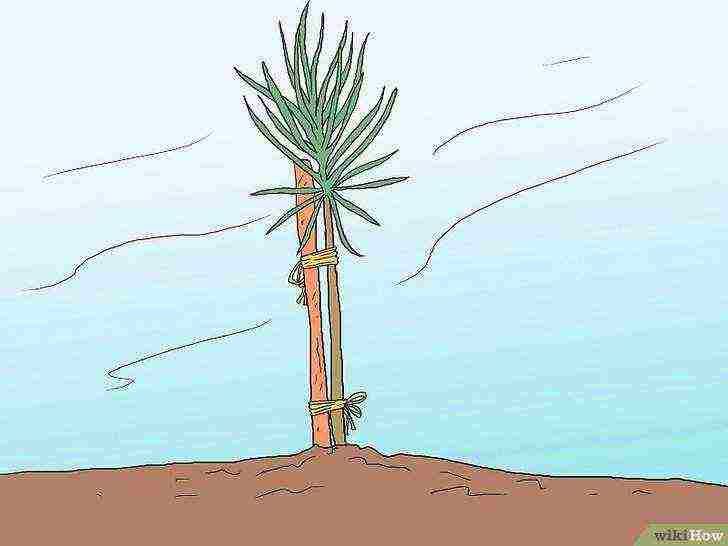 Use a stake if the tree cannot hold itself.
Strengthening tree sprouts with a stake is only necessary if the terrain is heavily blown. If you think the pine is being blown hard, use 1 or 2 stakes tied in knots or straps and leave enough room for the tree to wobble.
Do not strap the tree directly.
-

Protect your pine trees from the sun. You may need to make a sun shade for your little pine tree using tarp or a sheet of painted plywood. Planting in a location where there is shade from another tree or building is also a practical option. The shade should be on the west side of the tree, that is, in the place where the sun is located during the hottest period of the day.
Method 2 Caring for a pine sapling
-
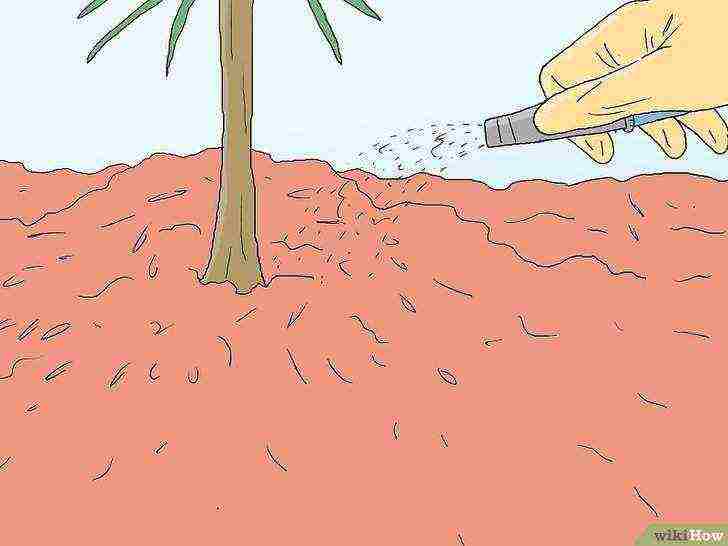
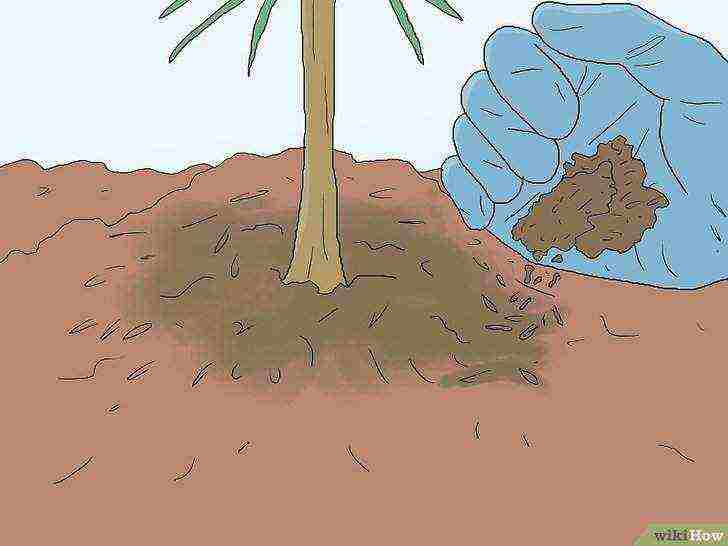 Sprinkle mulch around the tree frequently.
Wood shavings are inexpensive and work well for pine trees. Place it a few centimeters high around the tree, leaving space around the trunk.
- Although mulch helps to suppress weeds while maintaining good growing conditions, you should pull up any grass or other small plants near the base of the tree, if any.
- Do not use a plastic fence under the mulch. The tree needs water and air to grow through the mulch.
-
 The amount of water required depends on the type of pine, weather conditions and soil.
Instead of following one principle of irrigation without modification, you should pay attention to how moist the soil around the tree is. Here are some tips:
- Soil that is moist to the touch and does not disintegrate when raised should not be watered, as over-irrigation can suffocate the roots. Water only when the soil is nearly dry and crumbled until it becomes damp again.
- Water more often in the fall to keep the tree ready for winter. Water also during dry winters to protect young trees from drought, which is most dangerous when the tree is in the wet season.
-
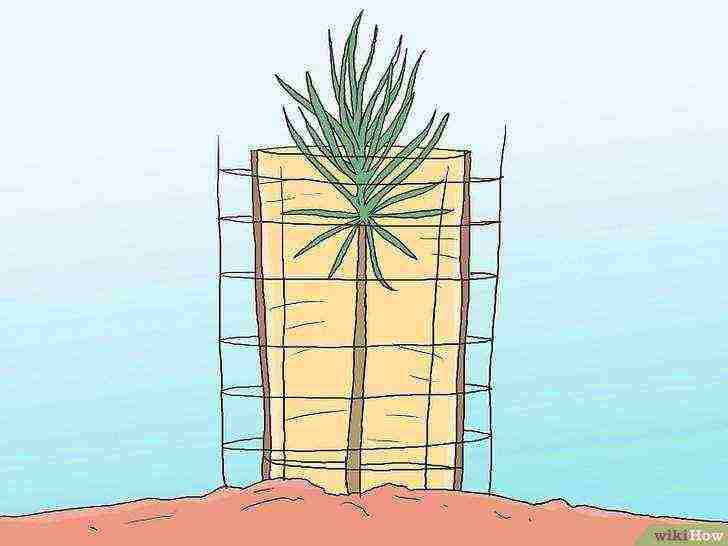 Protect young pines from animals.
A plywood sun visor can also act as an animal repellent. If you live in a habitat of deer or other permanent large wildlife, you may need a plastic pipe or fine wire mesh fence around the seedling.
-
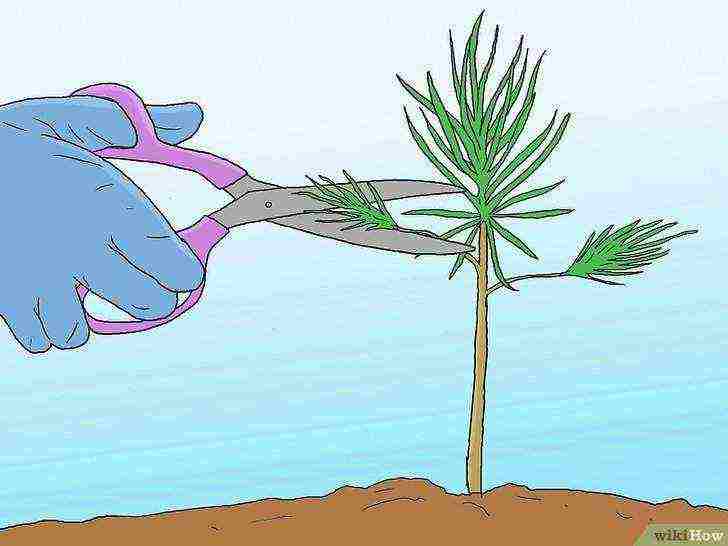 Only prune dead or dead branches.
Pruning is not necessary to direct the pine's growth and can stop the tree from growing. Cut off dead or dead branches near the trunk, leaving a “trunk neck” ring between the branch and the trunk.
Prune the tree carefully so as not to harm the pine tree.
Method 3 Growing pine from seeds
-
 Find out how long this method takes.
Growing pine trees from seeds can be a long and difficult process. You will need to harvest the seeds when the pine cones are ripe, most likely in the fall. Depending on the species and climate, you will need to prepare the seeds 30-60 days before planting them in the pots. They will grow slowly and it can take more than a year before they can be moved outdoors without much risk of plant death.
- Although many pine cones mature between August and October, other species, such as Scots pine, remain healthy until March. Your local climate also needs to be considered. Read the description for ripening pine cones so you have an idea of what to look for.
- Check out growing pine trees from seedlings as an easy and quick method.
-
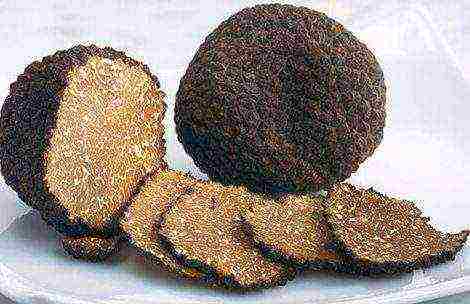
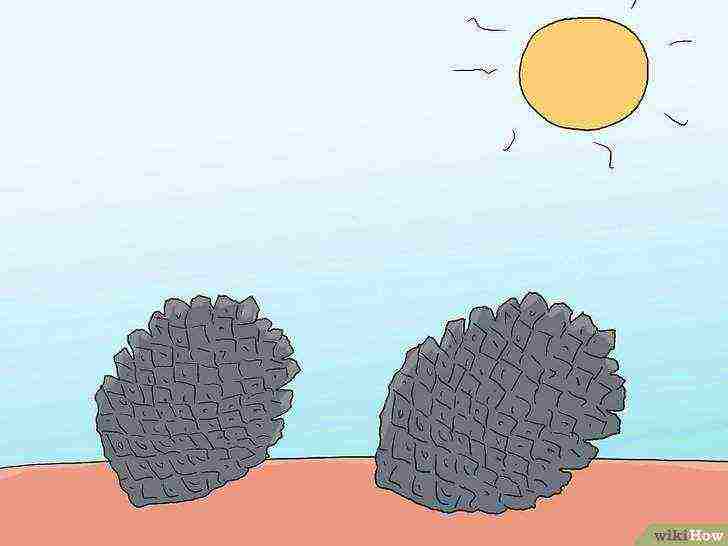
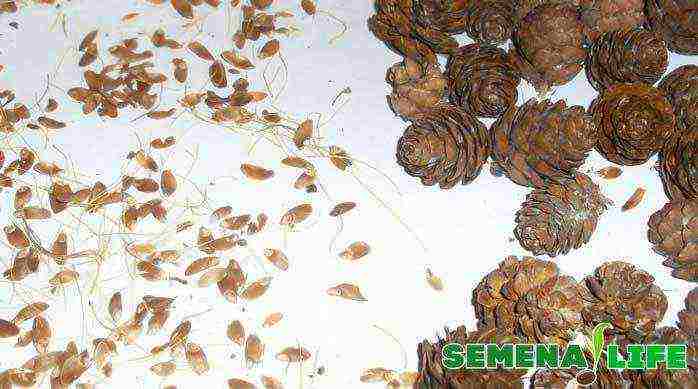
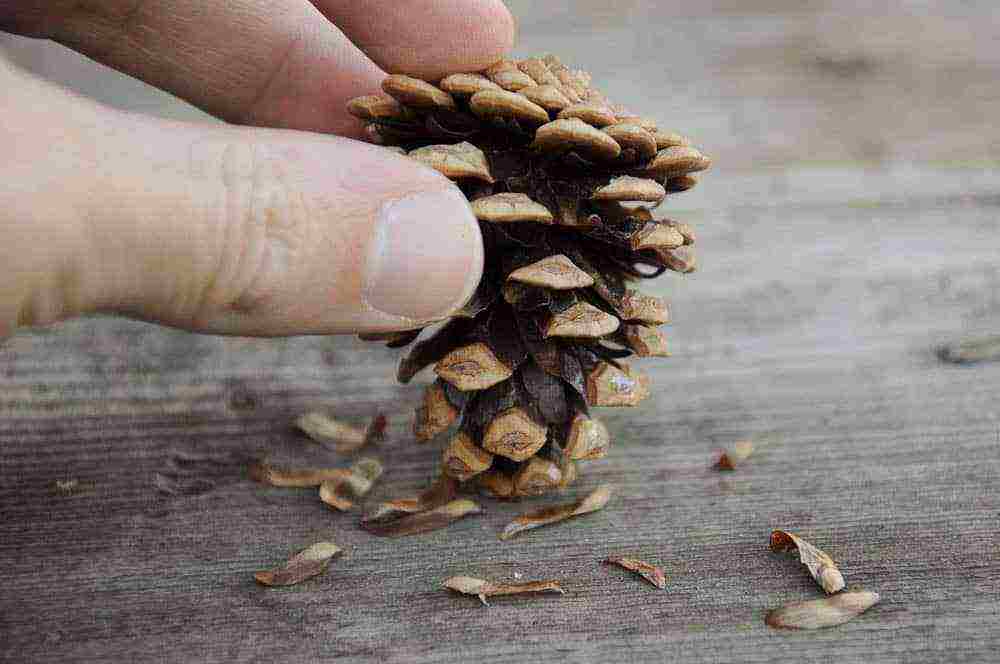
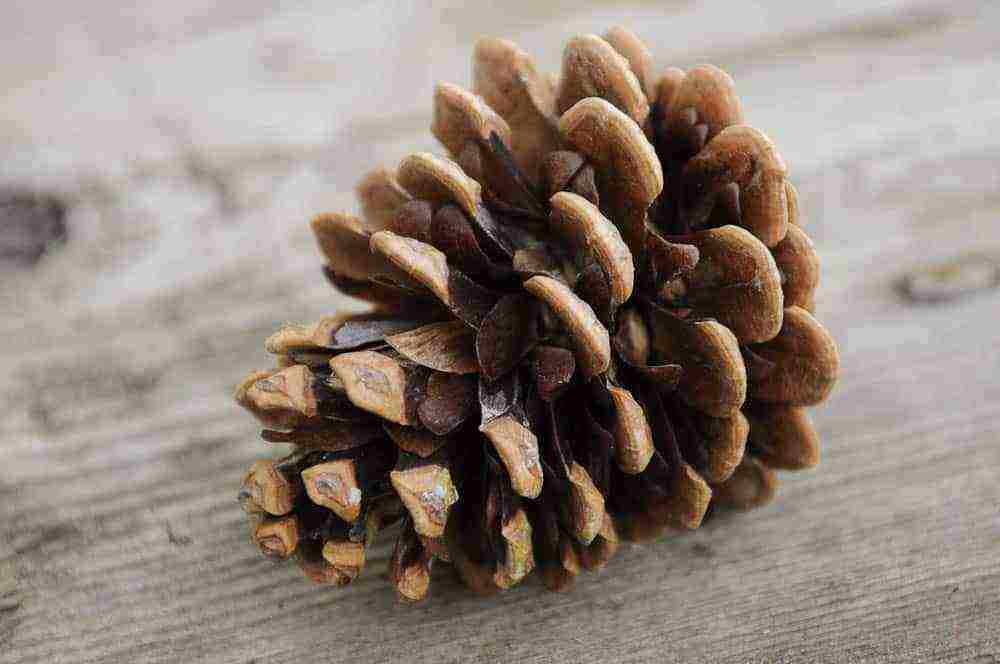
 Collect large pine cones.
Pine cones are of two types: small male cones and large female cones. Only female cones have seeds. Choose large pine cones with scales that are not fully opened or separated. If the scales are detached, the seeds may have already spilled out.
- You can pick up fallen cones, or pluck them from the tree by twisting them off the branches. Female pine cones tend to be higher in the tree, so you will most likely need a ladder or a stick with a hook at the end.
- Choose brown or purple pine cones as fully green pine cones are not yet ripe and do not contain suitable seeds.
- Pines that have already yielded good cones are more likely to have a fertile seed crop.
-
 Spread the buds out on a dry, warm surface.
If possible, dry them in direct sunlight, letting them dry so that the scales open up, allowing you to reach the seeds. You can heat the room to speed up the process, but do not heat the buds above 45ºC.
-
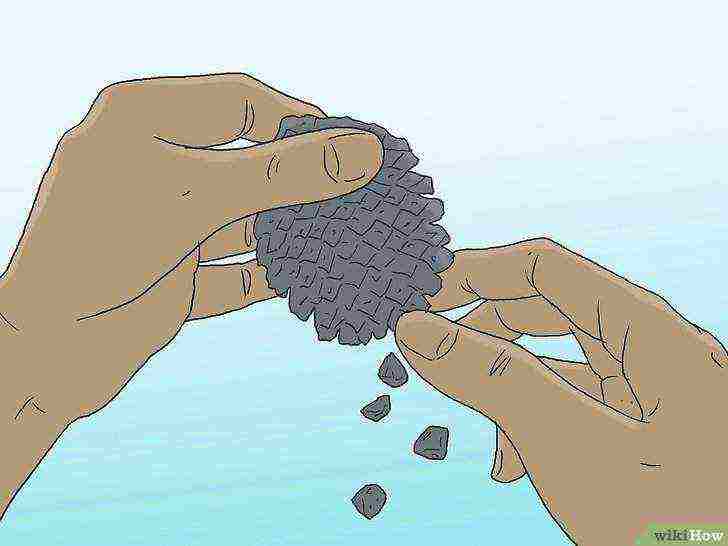 Remove the seeds.
Each scale should have one or two seeds underneath, sometimes attached to a thin "wing" for blowing away. Shake the buds on a tray with 1.25 cm holes or in a steel fine mesh; the seeds should fall out of the buds and pass through the cells.
- Shake over the tarp to easily collect the seeds afterwards.
- Use tweezers to remove stuck seeds, or if you have collected a few buds.
-
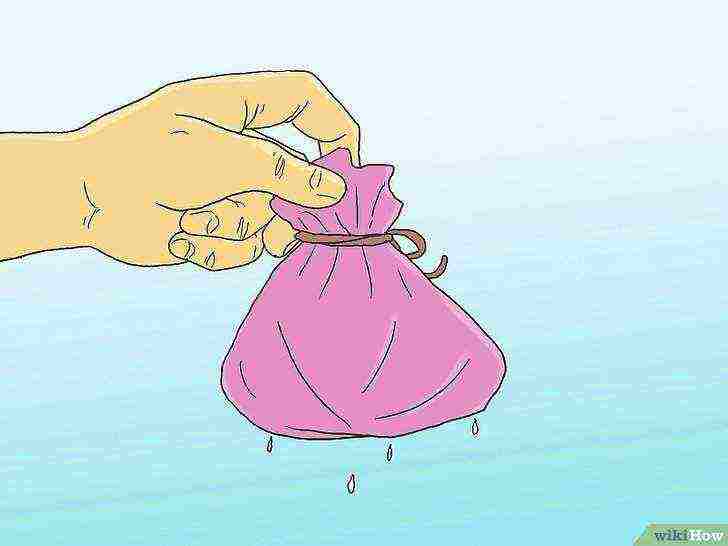
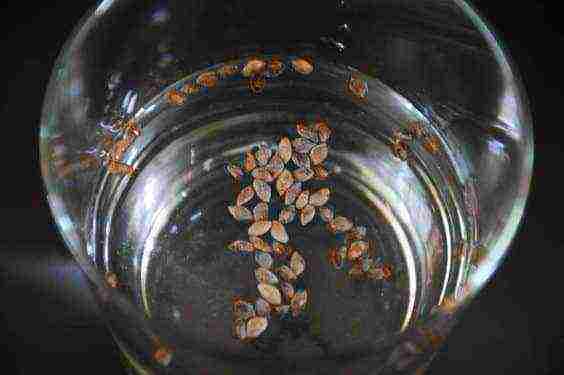
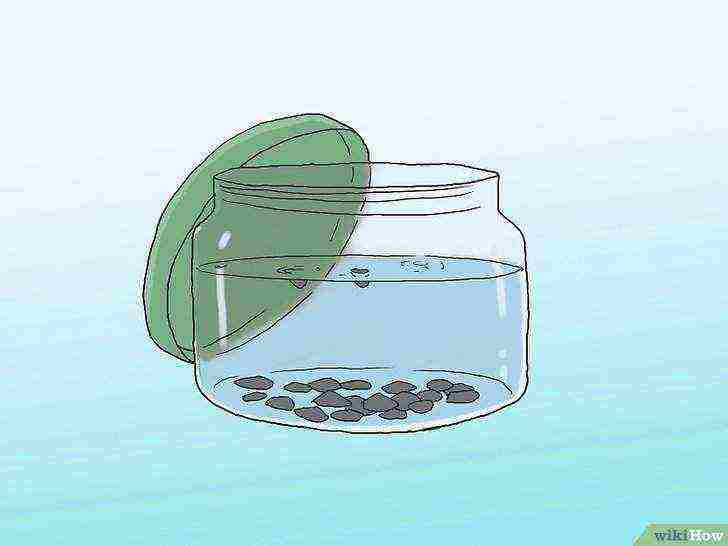 Place the seeds in a clean, water-filled container for 24 to 48 hours.
Use water at room temperature. In addition to providing the seeds with water, they must be taken, which will serve as a test for the suitability of the seeds. Full, hardy seeds should slowly sink to the bottom of the container. Empty, useless seeds will float to the surface.
- Cut open one or a couple of the largest floating seeds to see if they are really empty. If they are full, wait longer for the remaining seeds to sink.
- Discard the floating seeds at the end of this test. They are not suitable.
- On a large scale, sometimes a bag of seeds is placed in a stream of water, which is good for removing fungal spores that can cause infection. This is difficult to achieve at home, however, alternatively, you can change the water every 12 or 24 hours.
-
 Decide if you need to store the seeds before planting.
Freshly harvested autumn seeds can usually be planted immediately. However, even freshly harvested seeds will only benefit from a special medium that increases the germination rate and reduces the susceptibility of your seeds to hibernation after sowing.
Storing seeds that reproduce ideal seasonal conditions is called
seed stratification .
- Different types of pines behave differently in excellent conditions. Locate your pine species in your local tree identification book, or website if available, and look for how long it takes to “stratify”. If this is not available to you, then the methods below should help as you regularly check the condition of the seeds.
- As a rule, pines growing to the south in relatively warm climates (but not at high elevations) almost do not need stratification before sowing, and they can simply be stored dry at room temperature, while pines from moist, cool climates cannot grow outside the cold and wet period.
-
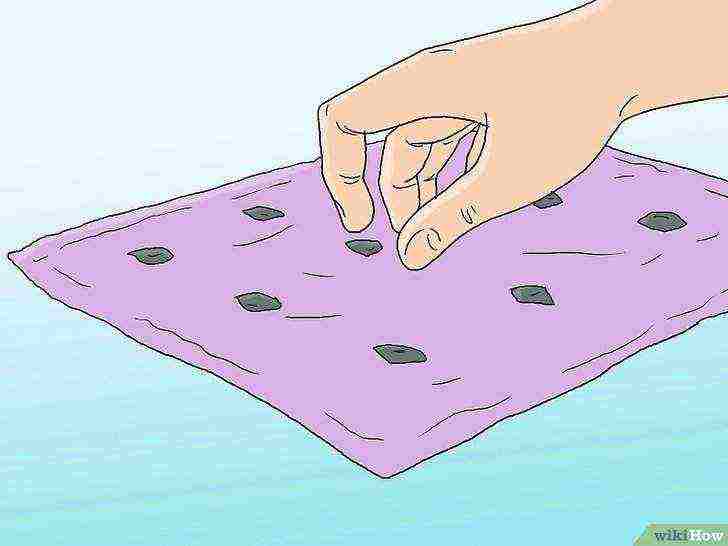 Small amounts of seeds can be stored in paper towels.
If you have a handful or two seeds, or maybe less, this method is likely to be the easiest.
Fold paper towels until they are 3-6 mm thick. Add enough water to just moisten all of the towels, then hold them upright at one corner until the excess water is drained away. Place the seeds on one half of paper towels in one layer, then fold the other half over the seeds. Isolate the seeds in a ziplock bag or similar plastic bag and store in the refrigerator at about 5ºC.
- You may want to put a thick straw or other thin tube so that there is a little air circulation from the outside, which will provide your environment with oxygen in abundance.
- Comment: Certain species are beneficial to store for several weeks in a warm, dark room before refrigerating. The length of this warm period varies greatly from species to species, so search the internet for specific information if you can identify your seeds.
-
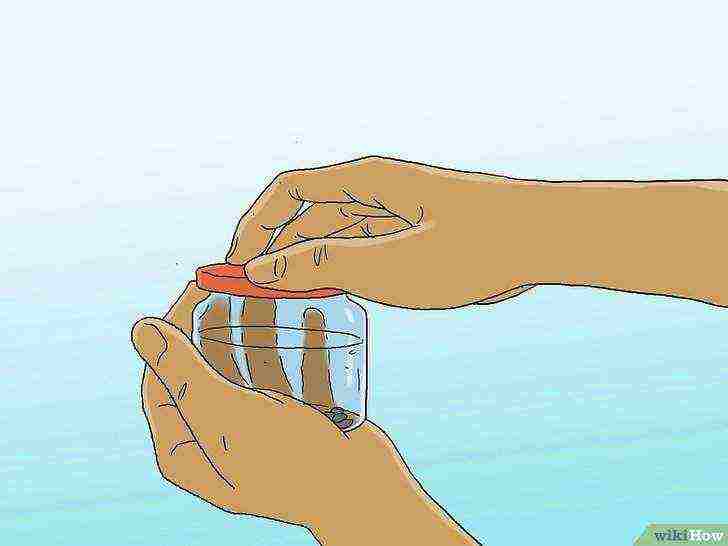
 If you have a lot of seeds, store them in a gauze bag.
Immediately after completing the soaking step, pour about 230 grams of seeds or less into a gauze cloth or other soft mesh material and tighten into a pouch.
Hang or hold the bag for a minute, allowing excess water to drain off. Tie the neck of a large plastic bag to the neck of a gauze bag so the water can drain continuously without soaking the seeds. Hang it all up in your refrigerator at about 5ºC.
- Comment: If you can identify your species, search the internet for information on "stratification" for that species. You may want to store the pouch in a warm place before moving it to the refrigerator.
-
 Check seeds weekly for germination.
The germinating seed will break in half and the root will begin to grow. Depending on the type and characteristics of the seed, this can take anywhere from 3 weeks to several years, although you do not need to store the seed for that long before planting.
- Seeds that have not sprouted after a few weeks can be stimulated to grow by allowing them to dry and then re-care.
- If the growing season is over or if you want to store the seeds for next year, dry the surface, but leave the seeds slightly damp on the inside, then keep them in the refrigerator. Check from time to time to see if the seeds have begun to germinate.
-
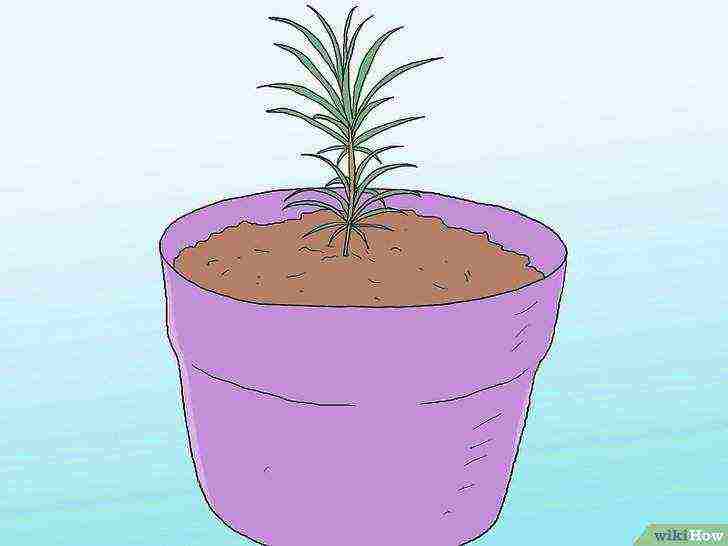
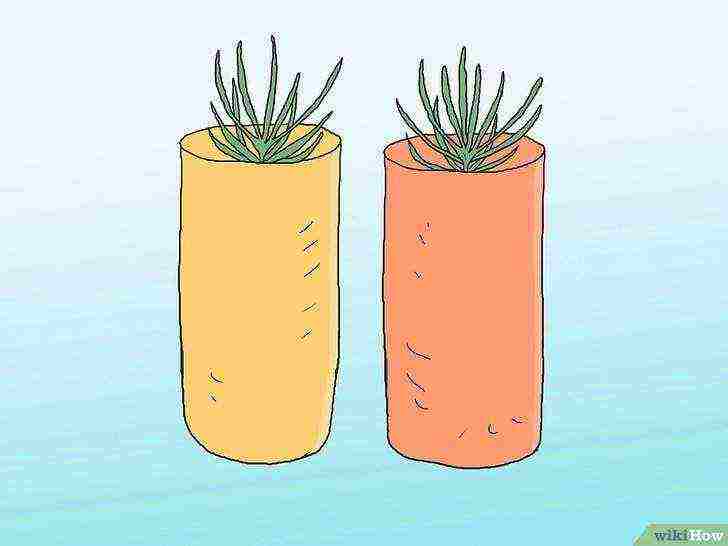 Plant the seeds in a balloon or pot of pine potting soil.
When used outdoors, pine trees are vulnerable to infection and rodents. Try to find plastic containers designed for growing pine trees, as these are best for long root systems that support the tree.
As a last resort, an ordinary small flower pot will do.
- Instead of using soil, use pine soil mix, or make your own mix of 80% pine bark and 20% sphagnum.
- Place the seeds under the soil with the roots facing down.
- If you are storing plants indoors, keep the pots on a high table to prevent mice from reaching them.
-
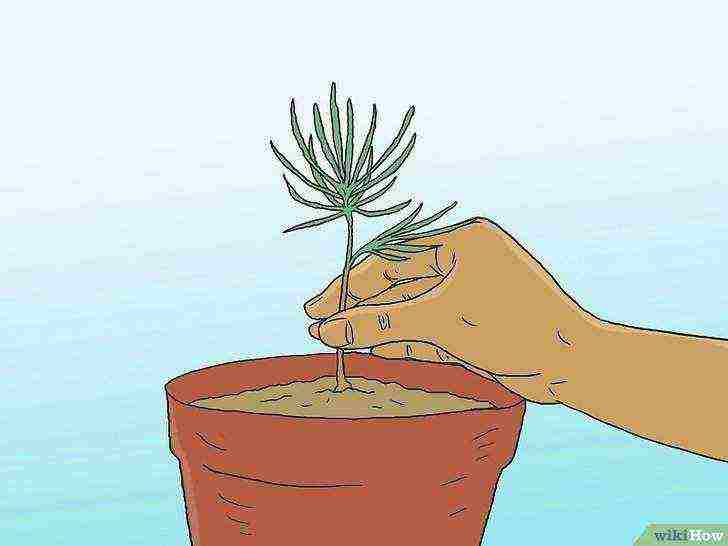 Take care of your seedling.
Follow the instructions on how to care for your pine saplings to get proper care. With the right sunlight and water, your tree should be ready to be transferred to a deeper container or pot after a year or two, depending on the species.
- Pines thrive best in adequate sunlight, however young seedlings are susceptible to damage during the hottest periods of the day. Place the seedling where it will have shade in the afternoon, for example, as close to the east window as possible.
- Keep the seedling moist, but not soaked.
- Transfer the sprout carefully to a larger pot after it has grown to 5 cm in a small pot, or if it grows to 10-15 cm in a medium-sized pot or balloon.
Tips
- Consult a professional gardener or post pictures of your pine cone or seedling on the internet gardening forum to determine your pine species. This will help you determine exactly how best to take care of your pine, which is extremely important when growing from seed.
- Take a look at this list of common pine seedling problems to find out what happened to the unhealthy tree and how to cure it.
- Although pine trees are evergreen trees, it is normal for them to lose some of their brown needles during the fall. It is only worth worrying if it happens during another season, or if only one of the trees is affected.
What do you need
For a seedling:
- Wood shavings or mulch
- Shovel or garden shovel
- Stand and string (usually not needed)
- Sun visor (if no natural shade in the afternoon)
- Fine wire mesh or other enclosing material (if there are large animals)
For seeds:
- Pine cones (see instructions for detailed selection)
- Paper towels or gauze cloth
- Plastic zip bag (or other insulating plastic bag)
- Refrigerator or cool environment
Warnings
- While many use a wet sand or sphagnum environment when storing seeds, these methods are at greater risk of contamination than those listed here.
- Fertilizer is usually unnecessary for pine trees and, if used improperly, can burn the plant. Only use fertilizer if advised by an experienced pine grower.
Article Information
Categories: Gardens and vegetable gardens
In other languages:
English: Grow Pine Trees, Español: cultivar pinos, Italiano: Coltivare i Pini, Français: faire pousser des pins, Deutsch: Fichten pflanzen, Português: Cultivar Pinheiros, 中文: 培育 松树, Bahasa Indonesia: Menanam Pohon Pinus, J eština borovice, العربية: زراعة شجرة الصنوبر, Nederlands: Kweken van dennenbomen, 日本語: 松 の 木 を 栽培 す る, Tiếng Việt: Trồng Cây thông
- Edit
- Write a letter of thanks to the authors
This page has been viewed 16,022 times.
Was this helpful?
Foreword
For the improvement of a suburban economy, it is often important to know how to properly grow a pine tree from seeds and get a beautiful landscaping of the site.
Seed preparation - collecting and growing cones
If you decide to improve your site and plant a pine grove on it, take care of the planting material first. To do this, you need to go to the nearest forest, where strong enough trees of the species you need grow, and notice some of the healthiest among them. Then, starting from mid-September, you need to visit the chosen place from time to time and watch when the cones begin to fall, with the help of which the pine forest reproduces.
You may have to follow up until November, so take a photo of the selected trees in advance. It is advisable to collect fruits from under several pines. Before choosing trees, familiarize yourself with their species, since there are separate varieties of pine, the seeds of which ripen for about two years. After picking up the buds, make sure that they have not yet showered with seeds.

Pine cones selection
Then, carefully placing them in a paper bag or box, transfer them indoors, where try shaking them over a large sheet of white paper, or directly in the bag.If the seeds do not fall, then the buds are not yet fully ripe. You need to dry them on a heating radiator or on a stone stove, if there is one. In the oven, despite the recommendations of many gardeners, it is undesirable to heat, you can not calculate and overheat the seeds. When the cone scales open, gently shake out the planting material.
To select the strongest seeds that will go for propagation, prepare several cups, according to the number of cones collected. Next, we place the seeds from each fruit of the Scotch pine (or other variety) in a separate container and select those that plunged into the water faster than others. Those that remain to float on the surface are not suitable for breeding. Many people advise to dry the planting material and place it in the soil prepared for germination. However, it is much more effective to pre-soak for 24 hours in at least warm water at room temperature. Better yet, leave the seeds on damp gauze (between its two layers) until they hatch.
Soil preparation for sowing seeds for seedlings
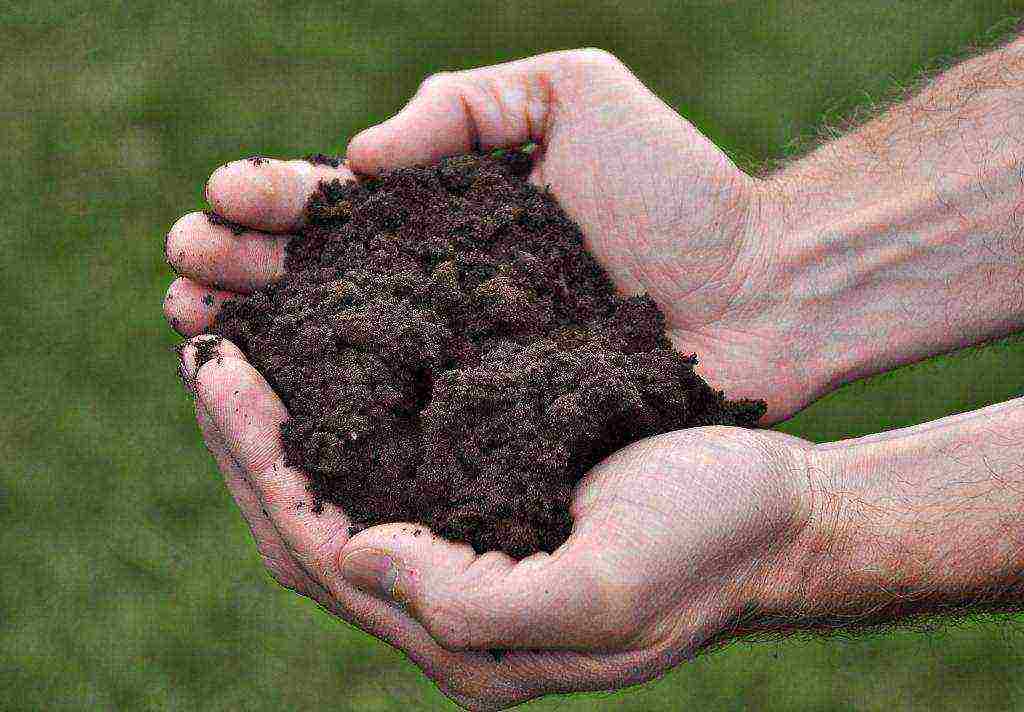
First of all, it should be noted that pines are quite unpretentious plants, but it is extremely difficult to grow them on heavy soils. The ideal soil for them is considered to be one that is well saturated with oxygen, that is, it can be sandy soils or sandy loam. By placing the seed in heavy and poorly loosening soil, you have every chance of not waiting for the sprout to appear.
In the absence of air access, rot forms at the end of the hatched root, which quickly covers the entire embryo. The same thing happens when there is an excess of moisture in the soil. If planted in sand, then the optimal ratio of its particles with water will be such a state when moisture does not ooze from the lump raised in the fingers, but the individual fractions remain linked by it. The ideal environment where it is recommended to place Scots pine seeds, both for germination and already hatched, is peat compost. And not any, but obtained from the upper layer, more friable.

Peat compost
The fact is that peat is formed from peat moss, which turns under the influence of dampness and in the process of decomposition by bacteria into a kind of compost. This planting substrate, in addition to excellent oxygen saturation, is very rich in various trace elements, initially replacing fertilizer for seeds. Moreover, top peat retains to some extent the antiseptic properties of sphagnum moss and protects pine embryos from rot and fungus.
Low-lying peat is not suitable for sowing pine, since it is too dense soil, practically not saturated with oxygen, slowly absorbing and also slowly releasing moisture. To distinguish between the top and bottom layers of peat, you first need to pay attention to their color by comparing photos or finished samples, the first is much lighter than the second, some redness is inherent in it, while the low-lying layer is closer to brown and dark brown. They also have varying degrees of looseness, as mentioned earlier, and it is enough just to knead a lump with your fingers to understand what type of substrate is in front of you.
To some extent, it is suitable for planting hatched seeds and black soil, which it is advisable to dry beforehand. Before planting, such soil is watered with a weak solution of potassium permanganate to destroy the fungus.
Stratification - is it really necessary for pine seeds?
Some tree species, when growing seedlings from seeds, need mandatory sharp cooling, or, in other words, they need stratification. These include linden, ash, mountain ash and even a pear. This method of activating the development of planting material is also applied to Scots pine seeds.
According to some statistics, stratification somewhat accelerates growth at the initial stage, during the first year, which can be noted by making for comparison a photo of seedlings planted with and without pre-cooling. But at home, such methods of seed preparation are undesirable, since a violation of the temperature regime can eventually lead to decay of the planting material. However, extracted from well-dried cones at room temperature, pine seeds are capable of sprouting even without aging in a cool, humid environment (within 0 degrees).

Dried Pine Seeds
In addition, you can try to apply a method of soaking in ice melt water to a small batch of seeds, which, like stratification, according to some gardeners, activates accelerated growth and saturates the planting material with energy. In general, it is enough to germinate well-dried seeds in warm water in order to get uniform friendly shoots. If stratification for Scots pine seeds is considered by you as a necessary stage of preparation, you can use the following advice from foresters.
When the buds are fully open, the seeds are soaked in cheesecloth for 3 days. To hatch them, you need to keep the planting material in a humid environment for about 10 days, so a shorter period will simply reduce the dormant period. Next, the seeds are mixed with coarse-grained sand (preferably river, with a rounded shape of fractions), in a ratio of 1: 3, which will require small wooden boxes. Stratification requires keeping seeds cool, at temperatures from 0 to 6 degrees, for which a dry cellar is suitable, or a half-meter deep ditch, subsequently covered with snow.
Temperature range for seed germination
Pine is a heat-loving plant, but here the emphasis should be placed on the word "warm", it does not tolerate high temperatures, especially since the heat dries up the soil, and the seeds need moisture no less oxygen. Even at the drying stage, care should be taken that the air around the seeds does not heat up over 40 degrees. But cooling the environment below 27 degrees is also undesirable. You should not listen to advice on drying in the oven, since 120 degrees are destructive in most cases for planting material.

Drying of planting material
After placing the seeds in peat or in a sandy substrate, you need to try to prevent the pots or containers from getting too hot - the warmer, the more favorable the conditions for fungi. Therefore, in the sunlight, do not overheat the plantings, provide a constant supply of fresh air. In this case, in no case shade the emerging shoots, the pine needs a lot of light. The optimum soil temperature for active growth is 22-24 degrees, no more. That is, you need to regularly moisten the peat or sandy substrate, at least once a day.
What should be the lighting of seedling containers?
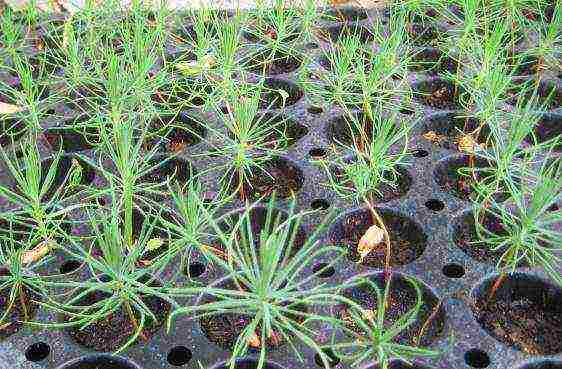
Having mentioned the temperature setting, it will be natural to focus your attention on the lighting. As already mentioned, the Scots pine needs a lot of bright sunlight. Therefore, containers are best kept on windows facing south. Shading of sprouts leads to inhibition of their development. However, it should be borne in mind that not just light, but the ultraviolet spectrum plays a key role in photosynthesis, therefore, on a window where natural light is not available all day, the growth of pines will be slower than on open ground.

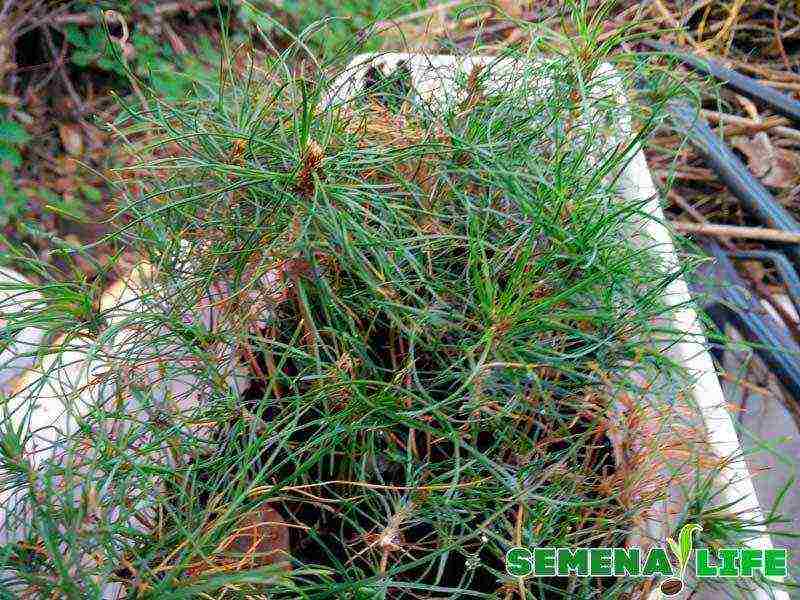
Pine sprout container
It should be noted that artificial lighting in no way replaces natural lighting. In particular, only bright light and heat can be obtained from incandescent lamps, but not ultraviolet light. Fluorescent lamps do not even provide heat. There are special fluorescent lamps with photosynthetic effect, but they are not powerful enough to fully provide the pine sprouts with the necessary lighting.Therefore, it is easier to make a greenhouse in the garden so that the sun's rays fall on the shoots from morning to evening than to install them at home, an ineffective imitation that consumes electricity.
Watering and fertilizing the soil in containers with seedlings
Moistening of the substrate in which the seeds are placed should be constant, more precisely, daily. The degree of water hardness when growing pine does not play a special role. At the same time, it does not matter at all how the hatched seed is immersed in the soil or sand, spine down or sideways, it will still develop correctly. Moderate watering is recommended so that the oxygen needed by the roots remains in the substrate.
Also, for air access, it is advisable to drill small holes in the walls of containers or pots, so that earth does not spill out of them. In general, it all depends on the volume of soil - if it is prepared more than 500 grams per plant, then you can do without holes in the container. The substrate should not be less than 200 grams per seed. It is best to water not with a stream, which quickly oversaturated the soil, but with water dust from a spray bottle, gradually moistening the peat or sandy substrate. Watering from the bottom is considered a good solution, using wicks from quickly absorbing moisture fibers brought out through the drainage holes in the pot.
Such a container is placed in a pan with water, which is then absorbed from the bottom into the soil. Similarly, you can feed the plantings with soluble mineral fertilizers. As for organic fertilizers, they are categorically contraindicated, since nitrogen oversaturation can occur, and there is a risk that the roots will begin to choke. You need to stop feeding in the middle of summer, so that the winter period of rest comes on time. Attention - over the course of a year, the growth rises by 10-12 centimeters, which can be seen by taking a photo, the pine tree can be transplanted only in the 5th year, when a sufficient number of needles appears, and the stem is formed.
Rate the article:
(6 votes, average: 4.3 out of 5)
Evergreens are a picturesque decoration of any local area, all seasons pleasing to the eye with luscious green needles. To buy, if necessary, a ready-made pine or spruce seedling is not a problem today, but it is unlikely that it will warm the soul as much as one or several trees grown with our own hands from tiny seeds. Moreover, this it's not such a difficult thing to grow pines from seeds on your own at home.

Pine seed selection
Everyone understands that small pines appear from the very cones that are often found on a New Year tree and delight children. But not every cone is suitable for extracting seeds from it.
 DIY Pine Seeds
For planting material, it is better to go to a nearby coniferous planting. With the seeming monotony of pine, the plants are still of different varieties, so you need to find an adult tree that is optimally suitable in appearance. Most species of the pine family take two years to mature, so those that are still green and tough are not suitable. Large, brown fruits in which the scales have already opened or have begun to open should be selected.
Note: the harvesting of cones is carried out in the fall, before the snow.
At home, the cones need to be dried at a heat source until the doors are fully open, and then knock them on each other so that the seeds spill out. Then fill them with water: those seeds that remain floating on the surface are not suitable for reproduction. Grains immersed in the water should be removed, dried and processed for planting.
Preparing for landing
There are two opinions regarding the pre-planting seed preparation. Adherents of stratification argue that staying in a cold temperature regime will positively affect germination.According to this version, after collection and selection, it is better to soak the seeds in water for 2-3 days, then mix with clean sand and remove the box in the cold (from 0 to +5 degrees) for the winter. Other gardeners believe that stratification of the pine is not at all necessary, and it is better to germinate the seeds before planting in room conditions. In this case, the grains still need to be soaked in warm water for about 3 days, and spread between layers of wet cloth (gauze) until they germinate. You can withstand planting material in potassium permanganate or growth stimulant.
 Seeds must be soaked before planting!
Seeds are planted both in containers with soil (boxes, pots, containers) and in open ground on the site.
Prerequisites for good growth of seedlings:
- constant moderate soil moisture
- excellent drainage
- optimal soil composition (peat + sand + turf, you can add dry needles and pieces of pine bark for looseness)
- a sufficient amount of sunlight (not artificial!)
- temperature not lower than 22 ° С and not higher than 40 ° С
The seeds are deepened into the ground by three centimeters, the distance between them is kept 2-3 cm.If the planting goes directly into the open ground, then in the ground you need to make a groove on a bayonet and a half shovels 25 cm wide, fill it with the same soil mixture and plant in the same way seeds. Top up with a centimeter layer of sand or mulch.
Important: the area for sowing must be well lit.
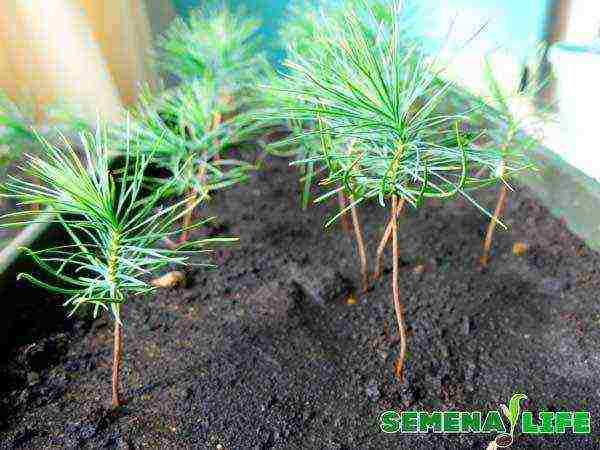
The first time after planting, you need to strictly monitor the moisture content of the soil, preventing it from drying out. Daily watering from a sprayer or sump is carried out for the first two weeks. Seedlings usually appear 15-21 days after planting.
Seedling care
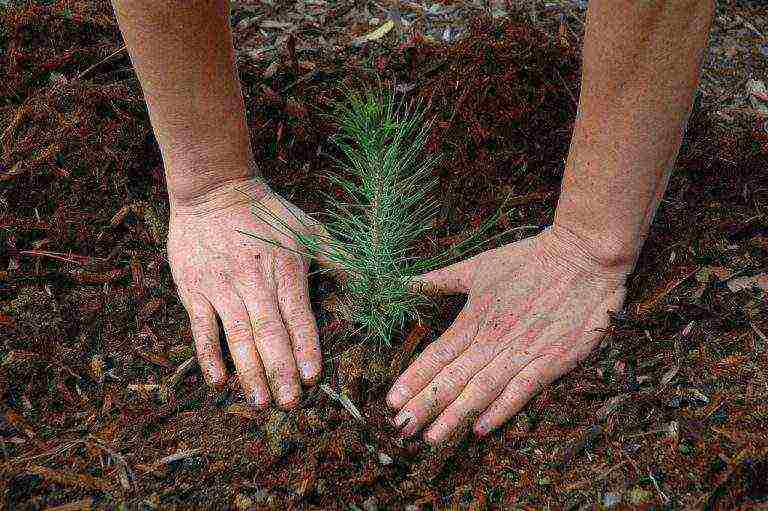
For the first two to three years, young pine shoots do not require complex manipulations, you just need to monitor regular watering, feeding and protection from curious pets. In spring, it is better to cover sprouts grown in open ground with a foil to protect them from frost, and in winter - to cover them with spruce branches. After three years, you can carry out the first planting of seedlings, and after five - plant them in a permanent place. It is better to land at the end of spring.
Of the fertilizers, special ones are preferred - for conifers, as well as compost. One should also not forget about protection from fungi and diseases, periodically treating it with a fungicide (potassium permanganate).
The final location of the pine tree should be lit, not too wet, with a little shading on the west side. Pine trees usually grow in open areas, maintaining at least one and a half meters of free space on each side. Drainage is poured into the dug hole and fertilizers are applied, then a layer of soil mixture. It is important when transplanting that the roots are not exposed, but planted together with a lump of adjacent earth.
Gardener's advice. Transplanting is an important stage in the life of a tree. If the roots are removed from the clod of earth and planted in new soil, the tree may not take root well and even dry out. The fact is that in the soil near the root, during the growth of the plant, its own microflora is formed, which protects against diseases and pests. Therefore, a clod of earth with roots should be transferred as intact as possible into the planting pit, then the transplanted tree will quickly take over and continue to grow.
While the plant is young, it needs to be watered, fertilized, weeded, protected from severe frost or heat. In an adult state, pine is quite unpretentious, and no longer requires effort, but on the contrary, it pleases with constant beauty and purifies the air.
A pine tree grown personally from seeds can become a real friend, like pets, because watching how long and persistently this amazing plant grows is an exceptional pleasure.
Perennial conifers are one of the best ways to decorate the local area.Undoubtedly, it is very easy to purchase a ready-made seedling in the nursery, but growing pine from seeds at home with your own hands will give you incredible pleasure. Self-grown from the moment of a tiny grain to an adult pine tree will warm the soul every time you look at it. In this article, we will share all the intricacies of this process, from collecting planting material to the features of caring for grown seedlings. In addition, we will definitely share a photo of growing pine from seeds at home, which will clearly make sure that the process is simple. So, we will start with one of the most important stages.
Seed selection
The process of growing pine from cone seeds is a fairly simple but lengthy process. If you decide to create your own pine grove on your site, it is important to take responsibility for the choice of planting material. The collection of cones is carried out either in early spring or in the fall - during periods when they have not yet opened. The autumn harvest period lasts from mid September to early November. Moreover, it is advisable to familiarize yourself with the species of trees in advance and collect cones under several pines at once. The strongest, fully ripe and healthy buds are chosen - two years are enough for them to fully ripen. In the first year, they are green in color and medium density, and at the end of the second year, their color changes to brown. In addition, the cones begin to grow stiff, and the seeds inside - fully ripen. It is important to remember that only female cones are suitable for growing pine from seeds at home, on the scales of which are seeds with wings. The buds are collected as carefully as possible to prevent the seeds from scattering. Seeds are transported to the house in paper bags.
Preparation of planting material
Before you start preparing the seeds for planting, free them from the cones. To do this, shake the buds well over a white sheet of paper or in the same bag where they were stored. If the seeds still do not sprinkle after this procedure, let the cones ripen at room temperature or on a radiator. You should not use an oven for these purposes, since you can not calculate the temperature regime and overheat the seeds, which can lead to their death. After the flakes are completely open, you can try to shake the buds again to get seeds.
After that, the strongest seeds are selected and cups of water are prepared (their number corresponds to the number of collected cones). The seeds of each fruit are immersed in a separate cup of water for a while, after which those specimens are selected for planting that have sunk to the bottom of the container much faster. Floated seeds are not suitable for further use and must be removed. After that, there are two ways of preparation: germination in room conditions in wet gauze and stratification, which we will talk about a little later.
Soil preparation
In terms of soil selection, growing pine from seeds at home is a fairly simple procedure. However, it is worth remembering that heavy soil is not suitable for these purposes. Seeds in such soil may simply not sprout even if other comfortable conditions are created. Preference should be given to sandy or sandy loam soil, which will be well saturated with oxygen.
In addition, light and loose soil will prevent rotting of the hatched root and embryo. Rot can develop not only with a lack of oxygen, but also with excessive soil moisture. If you plan to plant pine in sand, then its moisture can be controlled as follows: moisture should not ooze from the lump of substrate, but its particles should be well adhered to each other. Peat compost from a looser, upper layer is considered an ideal medium for germinating seeds and developing sprouts that have already hatched.This substrate is rich in various trace elements necessary for the growth and development of pine.
The need for stratification
From experienced gardeners, you can often hear reviews about growing pine from seeds at home. And they say that the pine necessarily requires stratification, or, in other words, significant cooling of the seeds before planting. According to some statistics, this procedure accelerates the growth of the plant not only in the first year after planting, but also at later stages. However, it is not recommended to stratify seeds at home, since it is quite difficult to control the temperature regime, which, as a result, often leads to decay of the planting material. Fully ripe seeds germinate well even without keeping in a refrigerator or a cool room. It is enough to germinate them in warm water or damp gauze.
Temperature regime
Scots pine is considered a heat-loving plant, and it does not tolerate too high an air temperature. The heat dries up the soil and kills the seeds. At the stage of ripening and drying the seeds, it is important not to heat them more than 40 °. However, lowering the temperature to -27 ° C is completely undesirable for this plant. After planting the seeds, care should be taken that the soil does not overheat, because this threatens the development of fungal diseases. The optimum temperature for growth is 22-24 ° C.
Lighting
In addition to pleasant and warm air, the pine tree needs sunlight. Therefore, containers with plantings are best placed on the south side. Even a little shading can slow down the growth of sprouts. When growing pine from seeds at home, it should be understood that it is ultraviolet radiation that plays a key role in this process. Therefore, you should be prepared for the fact that home plantings will develop a little slower than those that were planted in the open field. Replacing natural light with artificial light will not change the situation for the better at all. Therefore, it is much more correct to organize a place for the pine in the greenhouse, and not to spend money on expensive fluorescent lamps and other equipment.
Landing rules
Pine from seeds at home grows, though not quickly, but without any particular difficulties. The main thing is to comply with all the requirements for the selection and preparation of planting material, as well as competently carry out the planting process itself.
After two to three weeks of germination in moistened gauze, the seeds are split into two parts, and a root begins to grow from them. Planting material is immediately planted in separate containers with prepared soil and a drainage system. For each seed, at least 200 grams of substrate is calculated. The seeds are buried slightly and very carefully so as not to damage the fragile sprouts. Regardless of the location of the seed, the plant will develop correctly and grow evenly. Plants will be ready for transplanting after reaching twenty centimeters in height.
Watering and feeding

The soil should be moistened regularly, namely daily. But at the same time, watering should be moderate and not impede the access of oxygen. The hardness of the water has absolutely no effect on the development of the germinated seed. To ventilate the substrate, make small holes in the side walls of the container. This is done if more than 500 grams of soil is prepared for each plant. It is advisable to water from a sprayer or by immersing a container with plants in a pan with water (provided that drainage holes are prepared in it). Pine is fed exclusively with mineral preparations until mid-summer.
Features of growing pine from seeds in the open field
This method of growing pine is permissible only in warm regions.In this case, preparing seeds for planting is no different from growing at home. The seeds are sown to a depth of about three centimeters at a distance of at least 15 centimeters from each other. After planting, the soil is mulched, but not shaded, as this will lead to inhibition of growth. In spring, seedlings are covered with a film to protect them from birds and rodents. Such a shelter is removed after dropping the remnants of the seeds. In such conditions, pines grow for three years, after which an intermediate planting should be carried out. At the same time, the distance between seedlings increases to 90-100 centimeters. After another five years, the pines are transplanted to a permanent place. With each transplant, it is necessary to bring land from a pine forest into the soil.