Content
- 0.1 Harvesting of seeds
- 0.2 Laying to reveal flakes
- 0.3 Stratification, aka hardening
- 0.4 Method # 1 - in open ground
- 0.5 Method # 2 - in plastic containers
- 0.6 Method # 3 - in a roll-up
- 0.7 Rules for harvesting twigs
- 0.8 Cutting at home
- 0.9 Winter cuttings
- 0.10 Nuances of planting in the ground
- 1 Features of blue needles
- 2 How to get a quality seedling when grown at home?
- 3 Cutting method: features
- 4 Growing needles from seeds
- 5 Seed collection
- 6 Preparing the soil
- 7 We plant seeds
- 8 Seed germination
- 9 Plant transplant
- 10 How to carry out a transplant correctly?
- 11 Blue spruce - useful information for lovers
- 12 Harvesting cuttings - collection time and size of planting material
- 13 Sprouting in the refrigerator and the rolling method - process differences
- 14 Cutting on the windowsill followed by transplanting into the ground
- 15 Reproduction of blue spruce in a greenhouse - we maintain temperature and humidity
- Type: conifers
- Full-bloom Period: June
- Height: 25-30m
- Color: green, bright blue
- Perennial
- Hibernates
- Shady
- Drought resistant
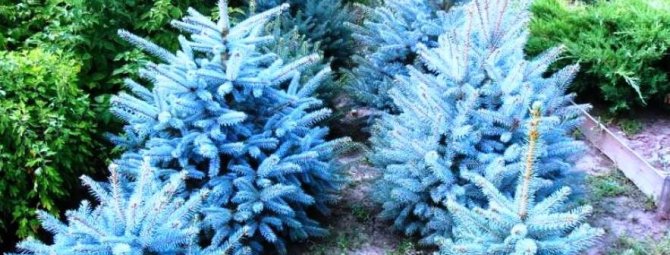
Among all the variety of conifers, blue spruce is considered an elite plant, as it has an amazing color, lush needles and a solid appearance. It is not for nothing that she more often than other representatives of her species flaunts near the Government Houses, banks and other institutions that are of considerable importance for the city. Therefore, summer residents increasingly want to grow their own specimen, especially if the territory allows. The prickly beauty is used as a tapeworm, making a kind of accent on the site. And in winter, she becomes the main heroine of the New Year holidays, shining with garlands and lights. But buying a blue-blooded Christmas tree is expensive, so many owners try to propagate it with seeds from cones or cuttings. Let's figure out how to grow a blue spruce from seeds and cuttings.
Preparing planting material
Seed preparation
Growing any spruce, not only blue, begins with harvesting seeds. At the end of summer, look in advance for a suitable blue spruce, the color and shape of which you like best. Check if the tree has formed cones. If they are, wait for the November cold snap and in the first decade of the month pick as many cones as possible from the selected plant. The more seeds you have, the more likely you are to grow a blue specimen.
Only 30-40% of young Christmas trees that sprout from one tree will have exactly the same color as their “ancestor”. The rest can be blue-green, or even green, like ordinary spruce. This is the problem of seed propagation, in which the traits of the mother plant are much less inherited than with cuttings.
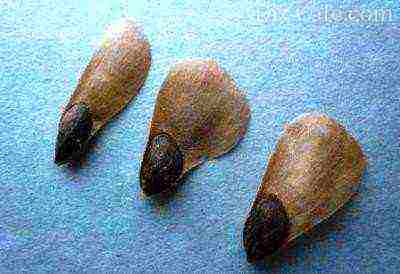
Seeds of blue spruce have a translucent impeller that helps them fly further, but when planting at home, you can remove it by brushing it off with your hands.
You can also collect in February, if you are late in the fall. But then it will have to be planted at the end of June. And this option is suitable only for areas with cool summers. In the heat, the seeds burn from the temperature.
The most difficult thing is to climb the tree, because the cones grow in the upper part of the crown. Tear only tight, completely closed bumps. You can, of course, look under the trees, but it will be difficult to find an unopened specimen.
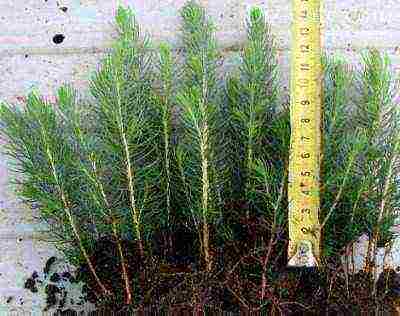
No more than 30 percent of blue seedlings will grow from seeds sprouted at home, so you can only select the most beautiful ones in a year.
Laying to reveal flakes
Take the collected material to a warm room, where the cones have to ripen, open up and give up their seeds. In nurseries, the opening of the cones takes place in a couple of days, since they are placed in a bunker with a temperature of 40-42 degrees and kept there until the scales open. But in the conditions of an apartment, it is difficult to recreate such a climate, and it is not necessary.It is enough to put the cones in a narrow cardboard box and put them on the radiator.
Those who do not have batteries - put it on a heated floor or take it to the kitchen and hide it at the top on the highest cabinet. The temperature under the ceiling is always higher, so the ripening process will go faster. During drying, you will hear the crackling of the scales. When the bump is fully open, shake out the seeds by tapping the "nose" on a hard surface.
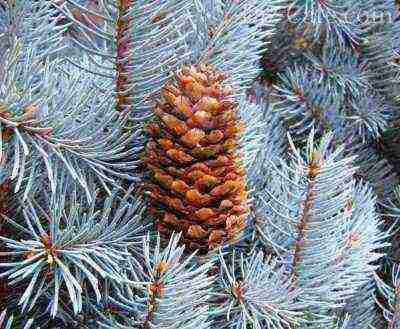
In an open or half-open cone, there will be almost no seeds, since they will have time to spill out on the ground, so look for cones with tightly closed scales
You can also buy seeds from the nursery instead of collecting them. But choose a trusted company, as the seeds can be stale, stored in warehouses for many years, and the germination rate will be weak. The best option is 1-2 year old seeds.
Stratification, aka hardening
Under natural conditions, cones on spruce open up by January. Seeds fly in the wind to put roots in new places. Until April, they lie under the snow and undergo a hardening process called stratification. In a home environment, you will have to provide the seeds with such hardening so that the plants grow together and have good immunity.
If the winter turned out to be snowless, then divide the collected seeds into 2 parts and sow one of them immediately into the open ground. They will be covered with snow, and the hardening process will take place naturally. Christmas trees are not sown on the snow cover. Sprout the second part at home, and then compare which entrances were more friendly.
How to stratify seeds at home:
- Make a 1% solution of potassium permanganate (per 100 ml of water - 1 g. Potassium permanganate).
- Submerge the seeds in it and disinfect for 2-3 hours.
- Place the seeds on a towel or paper and pat dry.
- Pour into a linen bag.
- Place the pouch in a glass jar, close and place on the coldest shelf in the refrigerator
- In this form, let the future Christmas trees sleep until spring (and with the February gathering - until June 20).
Planting options for blue tree seeds
After hibernation, the seeds need to be awakened. To do this, they are immersed overnight in a solution of water and microelements (root formation stimulator + antifungal drug foundationol). A moist environment will restore cell structure and accelerate germination.
Landing begins in the morning. To do this, use different methods. You can choose one that is most convenient, but it is better to divide the seeds into equal parts and try each option. So you can clearly see which method is most effective for your particular case and for the plants in your area.
Method # 1 - in open ground
If the spring frosts have passed by April, sow the trees directly into the ground. To do this, knock down the greenhouse and fill it with low-lying peat mixed with coarse sand and earth from a coniferous forest. You can immediately apply complex fertilizers for conifers or feed them later, when the sprouts come out of the ground.
The soil from the forest is an essential component for the good growth of spruce trees, as it contains the mycelium of fungi. The mycelium in real conditions helps the root system of conifers to receive moisture and nutrition, and takes harmful substances from the soil. The symbiosis of mushrooms and trees is so close that, without mycorrhizal fungi, blue spruces grow sluggishly and often die.
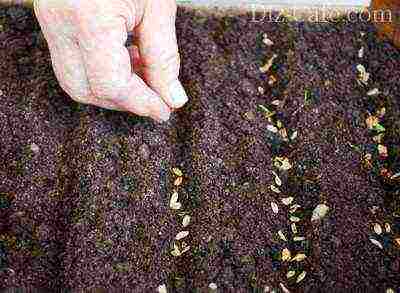
When planting blue spruces in open ground, the seeds are scattered often, since the germination rate usually does not exceed 50 percent, but then the weakest sprouts are pinched
Work order:
- The soil is tamped tightly.
- The seeds are laid out on top, at a distance of 3-4 cm from each other.
- Peat is mixed with coniferous sawdust in equal proportions and the seeds are sprinkled with this mixture in a layer up to a centimeter.
- The land is sprayed.
- Cover the greenhouse with foil.
- Periodically check the humidity and, if necessary, ventilate the greenhouse.
- Seedlings will appear in 3 weeks. They are thinned out, leaving strong plants at a distance of 6 cm.
- Sprayed daily in the morning, but without fanaticism, since excess moisture will lead to the development of a "black leg" - a viral infection that can destroy all the material.
In this form, the Christmas trees grow for a year, until next spring. In summer, protect them from the sun and dry soil.
Method # 2 - in plastic containers
You can sprout Christmas trees at home. To do this, you need to prepare wide plastic containers with lids (from store salads, cookies, etc.) or planting pots.
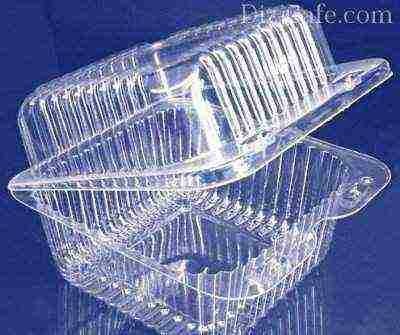
Disposable plastic food containers are inexpensive, but they are convenient for spruce seeds to germinate, as the container is tightly closed with a lid.
The order of work is as follows:
- Fill the containers for 2-3 volumes with soil mixture: 3 parts of dry sand + 1 part of peat.
- Spray the ground thoroughly.
- Spread the seeds over the moistened soil.
- Slightly stir the soil with your hand or fork to deepen the seeds.
- The lid is closed, and if not, cover the pot with foil and put the containers in a warm place where the direct rays of the sun do not fall.
- As the soil dries up, spraying is carried out.
- When the sprouts hatch and become visible, the containers are slightly opened so that the plants are normally ventilated.
- In the summer, the pots are taken out into the fresh air, under the shade of large trees, and in the winter they are returned to a room with a temperature of 10-15 degrees.
Young plants should be planted next spring, in May, when the soil warms up.
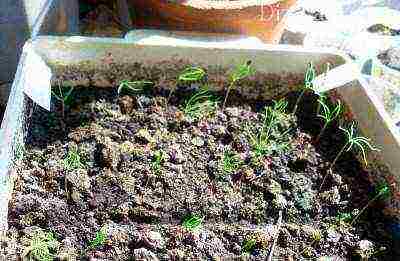
The sprouted sprouts of blue spruce are afraid of high humidity, as it leads to various fungal infections and destroys all planting material
Method # 3 - in a roll-up
A very unusual, but convenient way of germinating seeds is considered to be planting in a roll-up. This option is good for those summer residents who do not have large window sills, so there is nowhere to store containers with seedlings.
A roll-up is a long tape consisting of several layers (like a roll).
- The outer layer is a soft backing made of laminate or other building materials (length - not limited, width - 10-15 cm).
- The second layer is toilet paper or napkins.
- The third is fertile soil.
The essence of the technology is that a landing site is prepared for seeds from the above components:
- roll out a support cut into long ribbons on the table;
- toilet paper is placed on top of it, filling the entire area of the substrate;
- the paper is moistened with water from a spray bottle so that it is saturated with moisture;
- spruce seeds are spread on the edge of the paper every 2 cm so that the lionfish protrude slightly beyond the boundaries of the roll, and the seeds lie on wet paper (the seeds should stick to the wet base);
- a layer of fertile soil is poured on top;
- carefully twist the tape into a roll, tighten with an elastic band so as not to unwind;
- put the roll vertically on cardboard or a saucer, seeds up;
- spray the resulting roll on top;
- covered with a film, creating a greenhouse effect, and put in a warm, sunny place.
- after pecking the seeds, the film is removed, and the seedlings are looked after, periodically wetting the top of the roll.
- in this form, the Christmas trees sit until next spring.
The technology can be clearly seen in the video:
How to plant a spruce from cuttings?
Professional gardeners prefer to plant ornamental conifers by cuttings in order to completely preserve varietal characteristics. Blue spruce can also be grafted. This is done in the spring, at the beginning of May, when active sap flow begins in the tree.
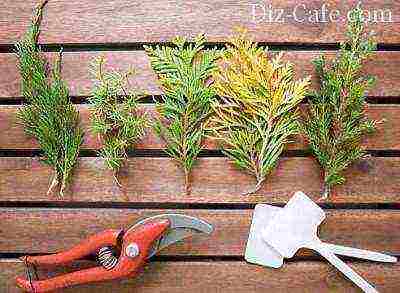
For cuttings of blue spruce, young lateral shoots are selected, which are located on horizontal lignified branches. They are carefully plucked against the growth of the shoot.
Rules for harvesting twigs
For grafting, twigs from Christmas trees are used, the age of which is from four to ten years. Such trees have the maximum survival rate of cuttings. To prepare planting material, you need to find branches with side shoots and carefully tear off 2-3 cuttings 6-10 cm long.
It is necessary to tear it so that at the end of each cutting to keep the "heel" - a thickening, the remainder of the older wood. It prevents the release of resin that can clog the lower cells of the seedling and block moisture from entering the tree. That is why conifers do not cut with a knife, i.e. they do not cut off, but tear.
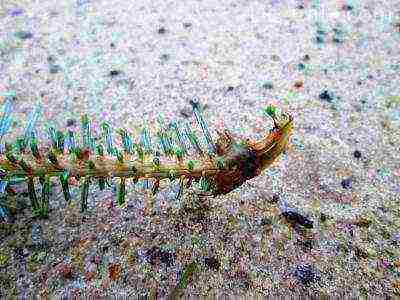
The thickening at the end of the spruce stalk, called the heel, accelerates the rooting process, since through it moisture freely flows into the seedling
The material is harvested on a cloudy day or in the early morning. The plucked branches are immediately packed in a plastic bag so that they do not dry out, and are planted on the same day.
If, before planting, the cuttings are held for 2 hours in a root formation stimulator, then the Christmas tree will grow roots in 1.5 months. Without stimulants, this process will take 3 months or more.
Cutting at home
All of the above methods of planting blue spruce with seeds are also suitable for cuttings. Therefore, here we will focus on other interesting options.
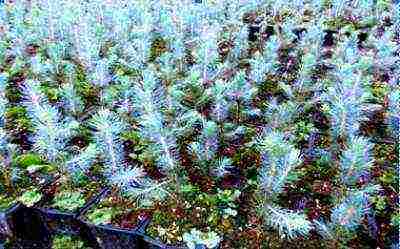
One hundred percent blue color remains only in Christmas trees grown by cuttings, so it is better to look for a suitable tree in the city and pluck the required number of legs from it
There are 2 options - germination in the refrigerator or in a roll-up.
Let's start with the refrigerator. If you managed to pick ornamental spruce by accident, and nothing is ready for planting in the ground, use the trick of an experienced gardener. It is necessary to immerse all the cuttings in water for an hour, and then plant them in wet sand, deepening by 2 cm. The sand is poured into a plastic bag, and the twigs are also there. The bag is tied up - and in the refrigerator. We need a temperature of +3 degrees. And they forget about them for 2 weeks. Further - the usual landing in a greenhouse. With this planting technique, the roots will appear by the end of the second month. When germinating in the refrigerator, do not treat the cuttings with stimulants, as the survival rate will decrease.
When using hand-rolled cuttings, the principle is the same as for seed propagation: substrate + napkins + soil. Just pay attention that the part of the Christmas tree that will lie on toilet paper must be cleared of needles, and the step between the plants is 5 cm.
Winter cuttings
It happens that you saw the desired plant out of season, but you want to collect cuttings. Tear boldly and try to "tame" them at home in the following way:
- peel half of each branch of needles;
- dip the base into the root (powder);
- put the Christmas trees in the prepared "roll": roll out a paper towel, lay a layer of moss over it, moisten it and put the branches so that the bare bottom part is on the moss;
- twist everything into a roll, tighten with an elastic band;
- place vertically in a bag;
- Tie the bag tightly and hang it on the window.
During the winter, half of the cuttings will take root, and in May you will plant them in a greenhouse.
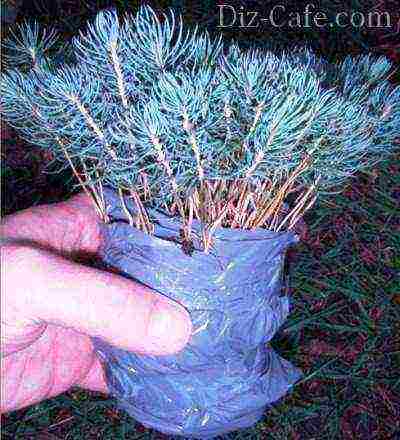
Some gardeners use a regular dense film for the outer layer, but it does not have thermal insulation properties, so the seedlings germinate more slowly.
Video in the topic:
Nuances of planting in the ground
When planting in a greenhouse without prior germination, you need to remember:
- The optimum temperature is not less than +13 degrees of air and +10 degrees of soil.
- To prevent decay of roots at the bottom of the greenhouse, drainage is created 5 cm thick from gravel and small pebbles.
- Blue spruces love light soil.
- The distance from the film or glass that covers the greenhouse to the seedlings is at least 20 cm.
- Cuttings are planted at an angle of 30 degrees.
- They are buried in the soil by 1-2 cm.
- Humidity is checked by the "ceiling" - large drops should not hang, only a fine mesh of dust.
- It is necessary to ventilate daily.
It is also important to note that for the first month, the greenhouse is shaded by throwing burlap or spunbond on top to make the sun less aggressive.
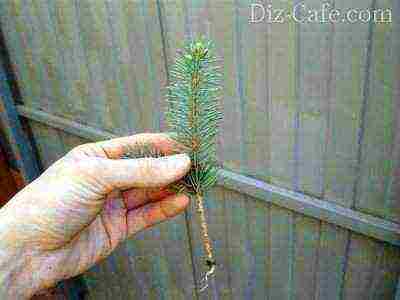
The roots on the branches will appear in two months, but they need to be transplanted very carefully, since they often break off when transplanted into the ground
All the methods described in the article are suitable for the propagation of any coniferous plants.So, starting with a blue spruce, then you can grow a whole garden of evergreen beauties with your own hands. The main thing is to find the most successful germination option. And this is a matter of practice.
Rate the article:
(5 votes, average: 5 out of 5)
Spruce is a coniferous plant that serves as a classic decoration of the territory. The blue spruce is one of the endangered species, therefore it is listed in the Red Book. This factor affects the cost of pine needles seedlings. But why spend money on buying young trees if you can grow them yourself? We will try to understand together how to grow a spruce from seeds, because in addition to saving finances, the gardener gets a healthy plant adapted to the environment.
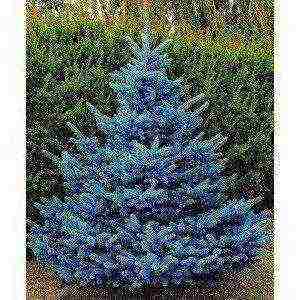
Owners of country estates massively purchase cuttings of blue spruce for further cultivation, even despite the high cost. This is because not everyone has an idea of how to grow a spruce from seeds, but you will know for sure.
Features of blue needles
The main difference between conifers of this species is the color of the needles. When growing spruce at home from seeds, it is possible to obtain a tree with 30% of thorns, painted in noble blue, the rest acquire a classic green hue. Therefore, many are interested in the question: "How to grow a spruce from seeds at home and get a high-quality seedling?"
How to get a quality seedling when grown at home?
There are three ways to reproduce spruce trees:
- vaccination;
- by cuttings;
- growing from seeds.
Cutting method: features
This is the easiest way to grow a new coniferous tree. Planting material is rooted in a greenhouse, since open ground has a negative effect on still immature conifers. So, planting a spruce begins with the selection of cuttings. Winter cuttings work best and produce results up to 4 times faster. The most favorable period for rooting is considered the moment of swelling of the kidneys. The main thing when breeding spruce is not to forget about maintaining the temperature regime and the required level of moisture.
Blue spruce, grown in this way, reaches 1 meter in height after 5 years. At this point, the tree can be replanted to a permanent place of growth.
Growing needles from seeds
How to grow spruce from seeds? This process is painstaking and lengthy, and the result depends on the selection of the material and how high-quality it was.
Seed collection
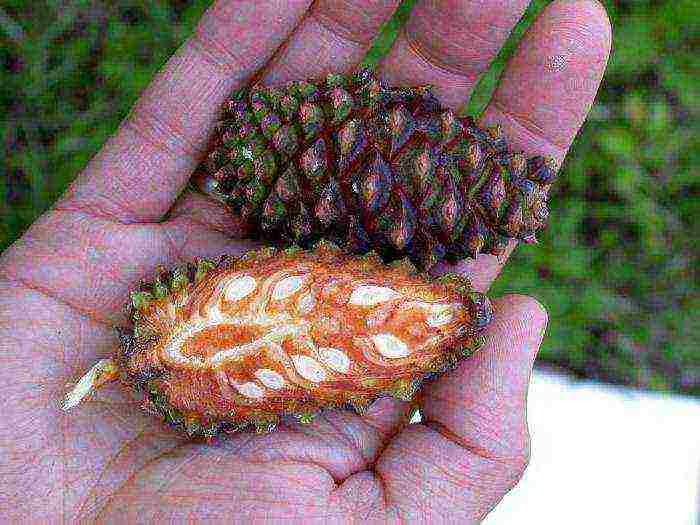
To grow any plant with your own hands, you need selected planting material, which is better not to buy, but to get it yourself. For growing spruce seedlings, seeds obtained from the fruits of a coniferous plant - cones are used. The collection of cones is carried out in mid-February. This is the perfect time to harvest complete spruce seeds. The cones are placed in a cloth bag and placed next to a heater or fireplace, which facilitates quick opening and free access to the grains. After a few weeks, you should be able to take out the seeds without damaging them. After the cones open, the spruce seeds in the bag are rubbed together to cleanse the lionfish. Rinsing under running water will get rid of the greasy film formed due to the release of essential oils. At the final stage of preparation, the planting material is well dried.
To ensure complete protection of seeds from bacteria, they are washed with a weak solution of potassium permanganate, after which they are wiped with a cloth. The prepared seeds are placed in a glass jar, which, tightly closed, is placed in the refrigerator. The conditions in the freezer are as close to natural as possible (in the cold season), where the seeds are kept until mid-March.
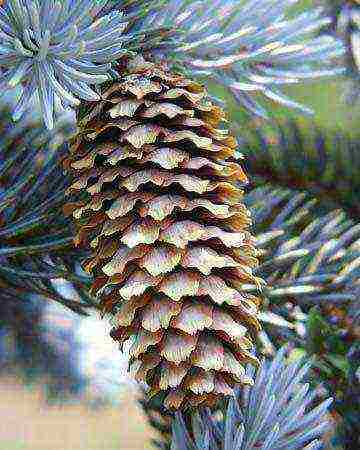
How to grow a spruce from seeds yourself? It is very important to get good planting material, which, however, can be purchased on the market if necessary. The main thing is to know a good manufacturer.
Preparing the soil
In order for the blue spruce from seeds to grow healthy at home, it is recommended to prepare the site before sowing the specimens.
Important! Do not sow blue spruce seeds in places where you grow vegetables - they do not take root in the beds and quickly die.
The optimal growing medium is lawn soil mixed with soil taken from a coniferous tree. Growing in greenhouses involves two planting techniques:
- directly into the ground;
- into an additional container.
When planting seeds in pots, do not forget to prepare a peat mixture with the addition of limestone flour and ammophos in a ratio of 6: 0.035: 0.020 kg. The mixture is scattered into containers in which the spruce is planted. The pots themselves are buried deep into the earthen embankment in the greenhouse.
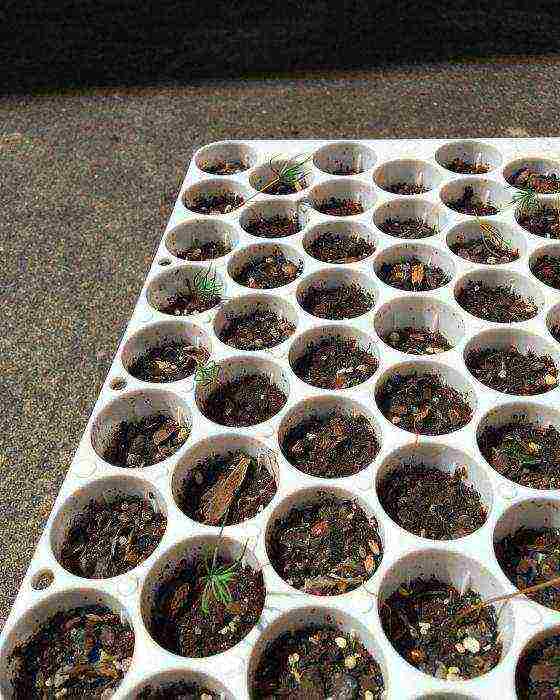
Important! Choosing the first method of planting, an additional top layer is poured over the soil layer - from sawdust and peat.
We plant seeds
First, determine the most favorable date for planting the spruce. The seedling will feel comfortable in nature if the ambient temperature is around + 19 ° C (+ -1-2 ° C).
Important! After changing the temperature regime (i.e. after the refrigerator), they can only be stored for 50 hours.
Before landing, the planting material is treated with a foundationol solution: 20 g per 10 liters of water.
Spruce is planted in well-moistened soil. If the spruce is grown in greenhouse conditions, then the containers are deepened into the ground by 1.5 cm, and a film is pulled from above. If on the open ground, first they tamp the earth in the hole, after which they put the seeds, covering them on top with a peat mixture and a thin layer of sawdust (about 1 cm).
Important! The distance between individual seeds should be at least 3.5-6 cm.
Seed germination
The first shoots can be observed in 10-14 days. If spruce seedlings are placed close to each other, there is a need to thin them out. Of the entire row of plants, only the strongest specimens are left, keeping the distance between them up to 7.5 cm.
When immature seedlings move to the active growth phase, it is necessary to maintain optimal conditions for growing needles, which are as follows:
- cancel watering and put into practice light spraying of seedlings with water - 2 times a day;
- maintain the temperature regime: the minimum temperature is + 13 ° C, the maximum is + 15 ° C.
Important! Remember that night frosts and direct sunlight during the day have a detrimental effect on immature young needles.
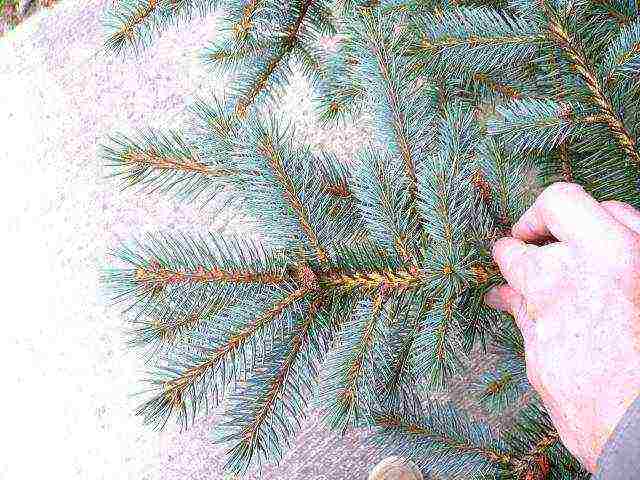
A month later, the seedling of a young blue spruce reaches a height of 3-4 cm. Experts note that indirect diffused sunlight has a good effect on the growth rates of specimens. Since small needles are not resistant to diseases affecting plants, namely to root rot, there is a need for special protection: first, the application of a fungicide will be required, after - treatment with an insecticide solution.
Plant transplant
You already know how to grow spruce seedlings from seeds, but it is impossible to do this qualitatively without transplanting annual plants. The procedure is carried out in early spring. After the seedlings reach the required level, it is important to plant the specimens you bred so as not to lose the plants.
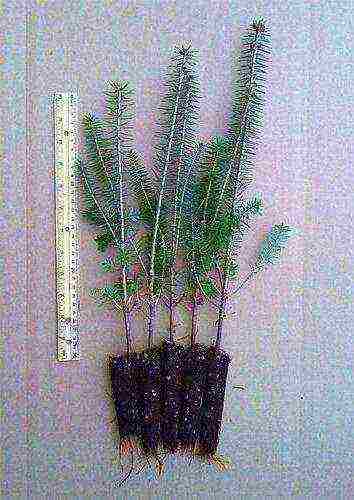
Before transplanting, pits are prepared, which are tamped and sprinkled with a layer of earthen mixture from under a coniferous plant.
How to carry out a transplant correctly?
Small Christmas trees are dug out of the ground, separating the interwoven roots of individual specimens. It is necessary to carry out this work quickly, but carefully so as not to damage the root system and not let it dry out.
Blue spruce, grown from seeds at home, requires special care. These are often standard rules.
Interesting! By the third year of growth, less than half of the seedlings survive.
Three years after the sowing of the seeds, the plants are re-transplanted. This is done to provide sufficient space for the roots of the spruce. During this period, the Christmas trees are planted at a distance of 1 m from each other.

Are you wondering how much spruce grows from seed? And we have an answer to this question. After 5 years, you will have a full-fledged spruce, exceeding 1 meter in height.
Such a bluish-green beauty will become a real decoration of the garden or will successfully complement the landscape composition. It is quite difficult to grow plants with your own hands, but due to the entertaining process and in case of a positive result, when it turns out that the efforts were not in vain, you will certainly be proud of your herringbone tree.
Foreword
Experts in the cultivation of conifers for propagation of blue spruce recommend cuttings. After all, it is this method with a 100% guarantee that allows you to preserve the natural blue hue of the spruce. Take the time to find a suitable tree in your city and pluck a few cuttings from it.
Blue spruce - useful information for lovers
The natural habitat of blue spruce trees is North America. Today this type of ornamental plants is gaining more and more popularity and is actively cultivated by gardeners all over the world. In addition to attractiveness, blue spruce is unpretentious in maintenance and has a high resistance to winter frosts, which makes it possible to grow it even in the most severe conditions. Against the background of other conifers, it stands out with an unusual blue tint. The needles have a conical shape and there are a large number of cones on the branches.
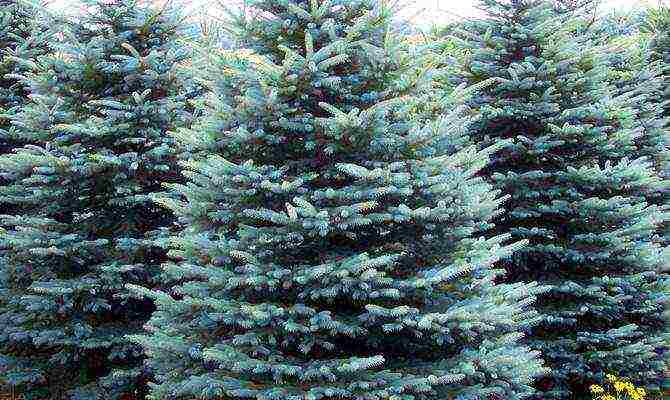
Blue spruce on the site
Under natural conditions, blue spruce grows for a very long time, and its age can reach 600-800 years. But in a home garden, such a spruce will live no more than 100 years. If we talk about the height of the tree, it differs depending on the species. There are quite powerful trees with a height of 25-30 m or more, medium trees up to 4 m in height and undersized dwarf species creeping along the ground. At the moment, breeders have bred about 70 species of this coniferous plant. However, the most popular is the last version of the blue spruce, the crown width of which can reach 2 m, and the height does not exceed 0.5 m. Moreover, such shrubs are more resistant to frost than their large counterparts, withstanding up to -35 ̊С.
Harvesting cuttings - collection time and size of planting material
The optimal time for harvesting blue spruce cuttings for propagation is the beginning of May. It is during this period that the tree finally wakes up after hibernation, saturated with nutrients and sap. It is advisable to pluck twigs from young spruce trees up to 10 years old. This increases the likelihood of survival of the cuttings. When choosing branches, pay attention to their size. They should not be shorter than 7-12 cm and should have a "heel", a thickening of old wood at the base. Due to the presence of a "heel", coniferous resin will not clog the cells of a young seedling and limit the flow of the required amount of moisture. In order not to damage it, it is better to pluck the twig with your hands, rather than cut it off with a knife.
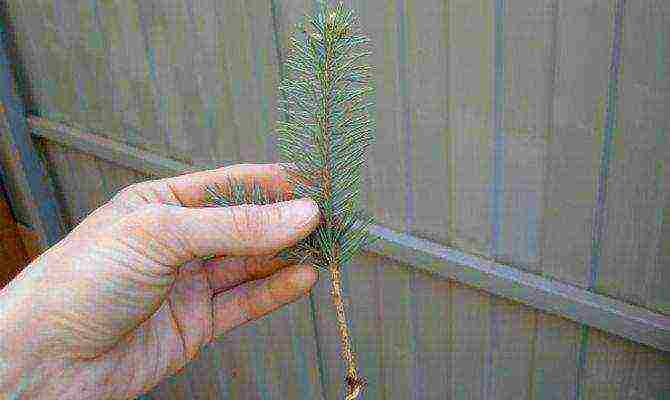
Stalk of blue spruce
It is advisable to harvest planting material in the morning or on a cloudy day. Put the branches in a plastic bag immediately so that they do not dry out, and transplant them into the ground on the same day. To speed up the process of growing a seedling and its survival rate, a root formation stimulator will help, in which we leave the cuttings for 2 hours. This will allow you to get a developed root system, subject to all subsequent care rules in 1.5 months. But without the use of a stimulant, this process can take up to 3 months or more.
Sprouting in the refrigerator and the rolling method - process differences
If you did not have time to prepare the soil for planting in advance and have already plucked the branches of the blue spruce, then germination in the refrigerator is suitable for you. To do this, we send the cuttings into water for an hour, and then plant them in wet sand. Pour the required amount of sand into a plastic bag and add twigs to it to a depth of 2 cm, tie the bag and send it to the refrigerator for 14 days. We keep the seedlings at a temperature of +3 ̊С.After this time has elapsed, we transplant the cuttings into a greenhouse or greenhouse. After about 2 months, roots will appear. However, for this method to work, do not spray the branches with stimulants. This can have a bad effect on their survival rate.
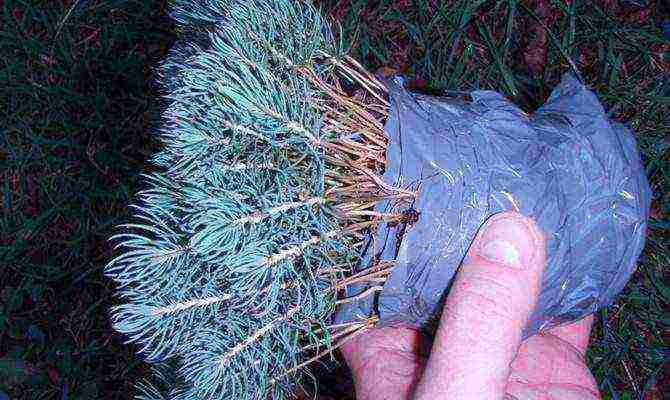
Spruce cuttings for germination
An unusual and very convenient way to propagate spruce is considered to be a roll-up. This method is great for saving space and is especially suitable for those gardeners who do not have large windowsills to grow. It is best used for winter cuttings. A roll-up is a long tape folded in several layers. The first layer is a cotton towel or any soft backing from laminate or similar materials. The main thing is that the material is heat insulating. The length of such material can be unlimited, and the width is 10-15 cm.
The second layer is absorbent paper or napkin, moss is ideal for cuttings. We start the process by preparing the branches. Remove the needles at the base and dip each end into Kornevin's powder. Next, roll out a cotton towel or other material, lay a layer of moss on top of it, moisten it well and put the exposed part of the twigs on it. Twist everything in a roll and tighten with an elastic band. Place the structure vertically in a bag, tie it up and hang it on a window, where it is warm, but not so sunny. As the top layer of the roll-up dries, moisten it with water. In the spring, the cuttings will take root, and they can be planted in a greenhouse.
Cutting on the windowsill followed by transplanting into the ground
In order for the cuttings to take root well, do not rush to immediately plant them in open ground. Better to leave them on the windowsill, planting them in a special substrate. Prepare a convenient container, such as a homemade plastic bottle container or pot. Lay drainage, small pebbles or pebbles 4-5 cm high at the bottom. Next, fill in nutritious soil, preferably for conifers, but if there is none, it is better to use universal soil. The final top layer is sand. Its height is about 5 cm. Before planting the seedling in the substrate, treat the base of the cuttings in a growth stimulator or a weak solution of potassium permanganate. Then we deepen it by 3-5 cm at an angle of 30 degrees and moisten the soil with water.
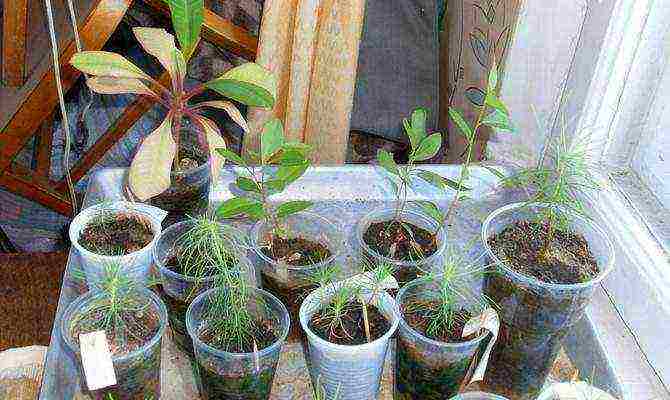
Germination of coniferous cuttings at home
As the top layer dries, we water it, but we do everything in moderation, without waterlogging. In this process, it is not so much watering the soil that is important, but spraying the cuttings themselves with water from a spray bottle, which should be regular. Also, do not place the container with cuttings on a sunny windowsill. The partial shade will be optimal for them. It is recommended to plant cuttings one year after the start of cuttings, but many do it much earlier. The best time to transplant cuttings to a permanent growing site is late autumn or winter. It is during this period that the least likelihood of root rot development in blue spruce is created.
Depending on the color scheme of your spruce, we select the most favorable place for planting. The darker it is, the more comfortable it will grow in the shade.
We choose the planting scheme, focusing on the type of landscape design. We put compost, mineral fertilizers into the prepared pit, and also lay the drainage from broken bricks on the bottom. When planting a seedling in the ground, we leave the root collar at ground level, not strongly compacting the soil around the spruce. During the dry season, the weekly watering of blue spruce should be at least 12 liters. At the same time, we preheat the water in the sun, especially on cloudy days. Otherwise, the sharp contrast between warm soil and cold water can adversely affect the root system of young seedlings.
Reproduction of blue spruce in a greenhouse - we maintain temperature and humidity
If you nevertheless decide to plant the cuttings in a greenhouse, then you need to ensure that all conditions are met.First of all, this concerns the temperature regime, which should be at least 13 ̊С for air and 10 С for soil. Ideal indicators in a greenhouse are considered to be a mark for air of 18-24 ̊С, and for soil - 21-27 С. Therefore, it is best to purchase soil heating. To prevent the root system from rotting, at the bottom of the pit for planting cuttings we make drainage from gravel or small pebbles (5 cm), sprinkle it with light nutritious soil (about 10 cm) and sand (5-7 cm). At the same time, we maintain a distance between the cuttings and the greenhouse film of 20 cm. As in the case of planting in a container, we deepen the branches of blue spruce into the ground by 3-5 cm at an angle of 30 degrees.
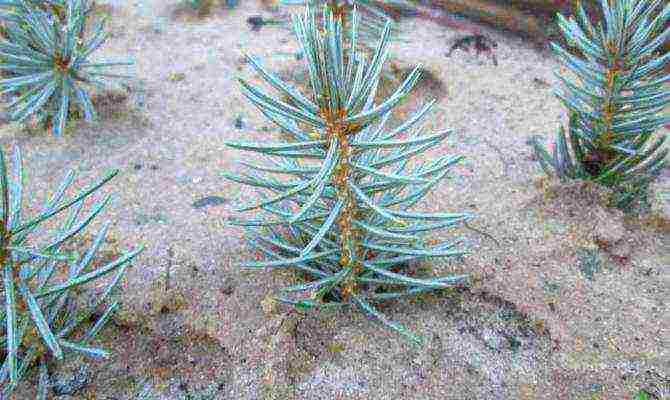
Growing blue spruce in a greenhouse
The second important indicator in a greenhouse is air humidity. We check it on the greenhouse film. We make sure that too large drops of moisture do not form on it, only light blotches. To do this, we carry out daily airing. And in order to limit the cuttings in the first months from the aggressive sun, we throw burlap or spunbond on top of the greenhouse. Also, make sure that the soil is not dry. Water it moderately. Fluff the ground periodically. However, do it carefully, do not harm the cuttings and delicate roots.
Throughout the entire propagation period, pay attention to the appearance of young seedlings. If their pine needles turn red, this may indicate infection with fungal infections, and if they crumble, an excess of moisture. In this case, you can try to save the cuttings with antifungal drugs, but the risk of recovery is minimal. If a positive result is achieved after 2 months of intensive care, the cuttings should take root. We transplant seedlings into open ground. However, we do this as carefully as possible, since they break off quite easily.
Rate the article:
(11 votes, average: 3.8 out of 5)
