Content [show]
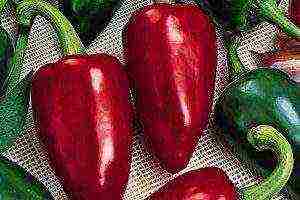
Bell pepper is the result of a selection of Bulgarian botanists. Therefore, it received such a name. The birthplace of culture is South America. It was from there that it was brought to neighboring continents, where varieties suitable for the local climate were already bred.
Bulgarian pepper - description
There are many types of pepper and it is valued as a spice, as a vegetable, and even as an ornamental plant. Due to its excellent taste and pleasant aroma, sweet bell pepper is widely used in cooking. The main value is the content of ascorbic acid in the pulp of the fruit, which is even more than in lemons and black currants. Vitamin C enhances immunity, strengthens blood vessels, fights excess cholesterol, putting blood in order. Pepper contains carbohydrates, proteins, fats, vitamins that regulate metabolism and are involved in various chemical processes in the body. Having eaten a medium-sized peppercorn per day, you can satisfy the body's daily need for vitamin C. Agrotechnology of bell pepper does not cause big problems for vegetable growers and is successfully carried out not only in garden plots, but also at home on window sills.
Bell pepper varieties for growing at home
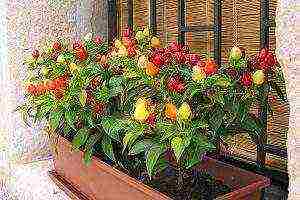
Many gardeners even in cold weather plant pepper at home in order to enjoy its taste all year round and beautifully flowering bushes on the window. There are many varieties recommended for indoor cultivation. Below we will consider the most popular of them.
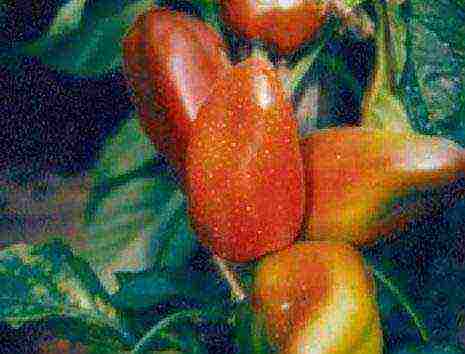
Treasure Island

Belongs to the category of early maturing varieties. Its term of technical maturity is 90-100 days. Fruits are juicy, smooth and shiny orange-red, heart-shaped. The average weight is 60 g. The height of the seedlings does not exceed 50 cm, and is classified as a dwarf species. Differs in a high ability to adapt to breeding conditions, repeated flowering and fruit formation, excellent for cultivation in an apartment on windowsills or balconies.
Firstborn of Siberia

An early ripening variety of universal purpose. Fruits are large, cone-shaped, very fragrant, fleshy and tasty, weighing up to 100 g. Ripening period 110 - 120 days. Standard bush, slightly spreading, up to 90 cm high. Observing the rules of agricultural technology, you can get an excellent harvest both in open soil and in greenhouses.
Dwarf
Low-growing compact type of pepper, up to 50 cm, ideal for breeding in an apartment. Fruits are small, juicy, conical, weighing up to 80 g. The crop is harvested on 110 days from the appearance of the first shoots. During the growing season, constant feeding with minerals is required.
Watercolor
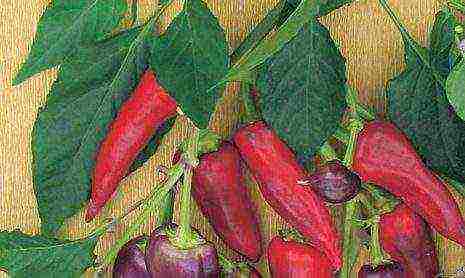
Indoor early variety: blooms on 60-65 days, reaches technical maturity on 85-95 days, and biological - on the 110th day from germination.Bush 45-65 cm high with foliage and bouquet-type fruits, very decorative. Inflorescences are white with purple edging. Peppers are cone-shaped, thin-skinned, glossy, weighing 20-30 g. Color varies from bright lilac to red. This species is characterized by high and abundant productivity, shade-tolerant, resistant to phyto-diseases.
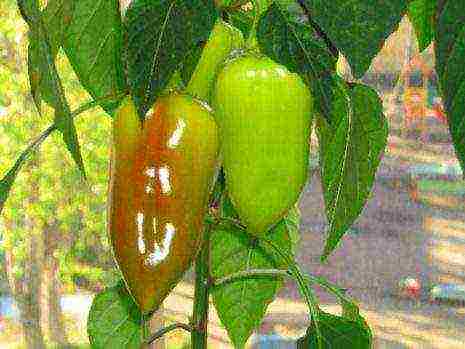
Gift from Moldova
Time-tested, requires a minimum of effort to grow, withstands weather surprises. Mid-season variety, ripens on 115 - 135 days. A small semi-stemmed plant, with a maximum height of up to 50 cm, with a massive, well-developed root system. Fruits are elastic cones drooping downwards, large, juicy and sweet, weighing 70-90 g. In technical ripeness they are light green, and in removable ripeness they are beautiful bright red. Consumed fresh and for preservation. Fusarium resistant. They are bred both without shelter and in greenhouses.
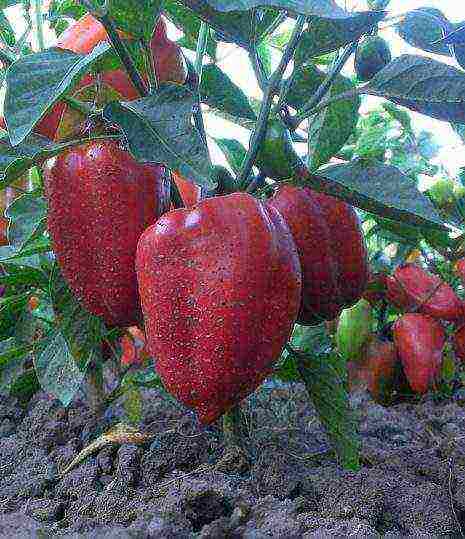
Martin
Standard semi-spreading bush, 50 - 65 cm high, with cone-shaped thick-walled fruits of light green color, in biological ripeness - red. The weight of a vegetable reaches 80 -100 g. From the first shoots to removable maturity, 120 - 135 days pass. Cultivated in open beds and greenhouses. Due to the high content of ascorbic acid, it is widely used in the canning industry.
Growing seedlings
All varieties of bell pepper are very popular for their high yield and year-round fruiting with such beautiful and healthy fruits. The key to a good harvest of representatives of the nightshade family is properly prepared seeds and high-quality seedlings.
You may be interested in:
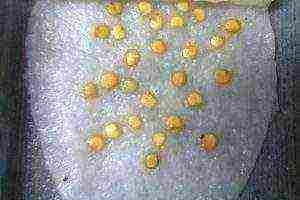
Seed preparation
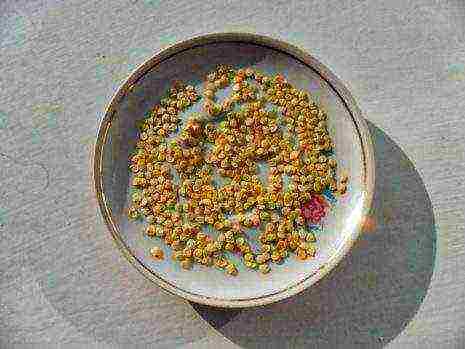
First of all, viable seeds are selected. To test seeds for germination, gardeners use the folk method. Pour the planting material into a saline solution (0.5 l of water + 1 tsp salt) and mix well. Seeds that have settled to the bottom of the glass can be safely prepared for sowing. After selection, the seeds are immersed in a dark manganese solution and washed after 20 minutes.
The next stage is hardening: the raw materials are first kept in warm water for several hours, and then placed in a refrigerator (under a freezer) for 6 hours. You can make an extract from the ash: mix 0.5 l of water and 2 tsp of wood ash, let it brew for a day and soak the seeds for 5 hours. After that, the seeds can not be washed, but immediately start sowing.
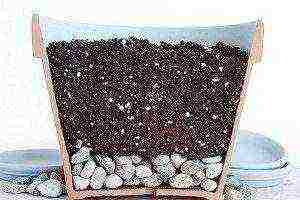
Soil preparation
To grow bell peppers from seeds at home, you need to properly prepare a mixture of soil, which consists of peat or humus, turf or garden soil, mixed with river sand. The soil used is disinfected by incandescence or spilled with a manganese solution. These techniques will help protect plants from disease. It is also very useful to add mineral fertilizers.
Planting seeds and picking
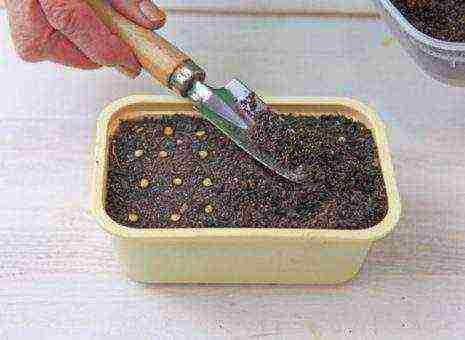
Seeds are sown at a distance of 2 - 3 cm from each other, sprinkled with a thin layer of soil and carefully watered with warm water. The containers are transferred to a warm place and covered with glass or film, creating a kind of greenhouse. When all the seeds hatch, the film is removed and the seedlings are rearranged in a bright place. It is very important at this time to maintain the temperature in the room up to 25 degrees during the day and 14-16 at night.
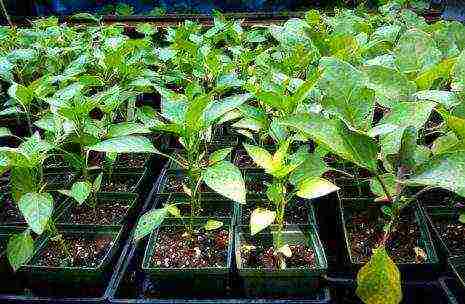
When 2-3 true leaves appear, the seedlings dive into separate pots. Having a vulnerable root system, pepper is difficult to transplant and takes a long time to recover. In the case of indoor peppers, seeds can be planted directly into individual pots or glasses. To drain excess water in the pots, drainage holes are made. When picking, the sprout is carefully removed and, without deepening below the point of root growth, the soil is squeezed and compacted, and then moistened. Until the seedlings have taken root, they are protected from direct sunlight for 10 days.
Care rules
An important stage of cultivation is proper care and timely feeding. If the plants are protected from drafts, sufficiently lit and fertilized, they will please with a good vitamin harvest.To increase yields, you can pollinate the peppers by hand, gently shaking the flowering bushes or walking over the inflorescences with a soft brush or feather. Watering is carried out in the morning with warm water. Be sure to observe thermal and light conditions. If there is not enough lighting, fluorescent lamps are used. Ornamental peppers need regular loosening of the soil and annual replanting to renew the soil.
Top dressing
The first feeding after the pick can be done after 10 days. To do this, dilute 5 grams of 5 liters of water. ammonium nitrate, 20 gr. superphosphate and 15 gr. potassium sulfate. Before and after feeding, the plants must be watered with clean water. Top dressing is carried out every 2 weeks.
Sometimes, when breeding indoor peppers, there are cases of yellowing of plants and leaf fall. This kind of trouble can have several factors.
- Poor watering. Peppers love water, but it is important not to overdo it so as not to provoke root rot.
- Sudden temperature changes. Pepper is a thermophilic culture.
- Insufficient nutrition of young seedlings due to intertwining of roots. To avoid such a problem, seedlings are planted at a distance from each other.
- Lack of micronutrients:
- the absence of calcium is determined by the curvature of young leaves and yellow spots on them;
- from a lack of iron, the leaf plates turn yellow completely. First, the center of the young leaf seems to rust, and then the yellowness spreads to the entire leaf;
- when the seedlings lack nitrogen, the lower leaves begin to wilt and turn yellow. This problem is solved by feeding vegetables with nitrogenous fertilizers (mullein, chicken droppings, ammonium nitrate);
- lack of potassium is manifested by yellowing of the lower row of leaves, they dry out at the edges, while remaining green in the center of the leaf plate. In this case, the peppers are fed with potassium sulfate.
Growing bell peppers on a windowsill is very easy. Go for it and the result will certainly please you.
Reviews
In my friend’s kitchen, the entire window sill is lined with pots of pepper. Very bright and beautiful, some bushes only bloom, while others have small multi-colored peppercorns. But I tried to plant it, but nothing happened. The sprouts were quite stunted, probably doing something wrong or the hand was heavy.
Thank you for such detailed instructions. I grow pepper at the dacha, but I just stare at the indoor one. I did not dare, now I will definitely try to grow the Aquarelle variety. I really like the photographs.
Our whole family loves bell peppers. We eat it all year round, and even little grandchildren crunch it with pleasure.
Hello dear readers!
So, dear friends, after reading the previous articles, you are probably thinking about planting lemon, dill, parsley or cilantro at home. Maybe some of you have already planted these plants? Then let's talk about the next inhabitant of our windowsill - sweet pepper.
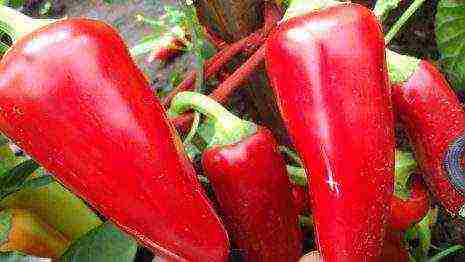
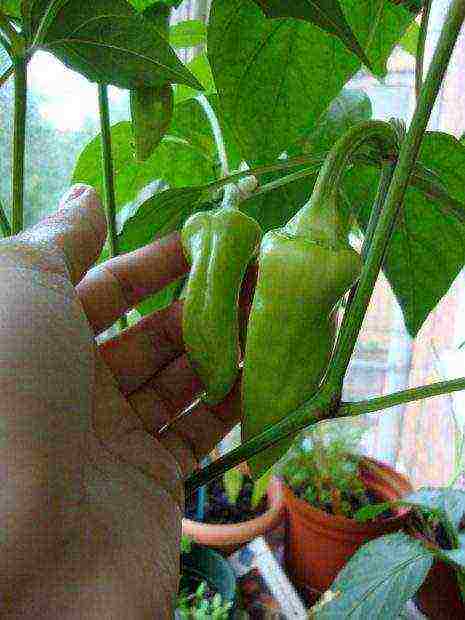
Sweet pepper is very beautiful for its tight fruits, bright, tasty, filled with vitamins. It is him that we lack so much on rainy autumn days, and on harsh winter weekdays, and during the period of spring beriberi.
Do you want to admire the pepper and eat it all year round? In this case, feel free to start landing. pepper on his windowsill, as these plants are ideal for home care and cultivation.
Best grade pepper on the windowsill
Compact, undersized varieties of pepper (they are the most unpretentious and persistent) will be ideal for planting at home. The growth of this plant will reach half a meter and it will perfectly fit into the size of your window. The best varieties:
- Treasure Island. After 90-100 days, the pepper will invite you to taste its juicy orange-red heart-shaped fruits. Their mass reaches up to 60 grams, the thickness of the peel is up to 7 mm.
- The firstborn of Siberia. The crop ripens in 108-113 days from the moment of germination. The fruits are large, up to 100 g (peel thickness up to 6 mm). Bright red in color, these peppers are aromatic and tasty.
- Dwarf. Pepper variety with juicy, red fleshy cone-shaped fruits. Their weight reaches up to 83 grams (walls up to 9 mm). You can harvest the crop after 110 days from the time the sprouts appear.
- Watercolor. Glossy scarlet cone peppers will be ready for your table in 110 days. This pepper on the windowsill has small fruits, "for one bite", their weight reaches 30 grams, with a thin peel up to 2.5 mm.
- Gift from Moldova. Large peppers of a dark red color will delight you with a rich, sweet taste after 124-136 days. The weight of the fruit reaches 90 grams, the thickness of the peel is up to 6 mm.
- Martin. A fragrant variety, the red juicy fruits of which can be used to decorate the table after 130 days. Fruits are large up to 84 grams with thick (up to 5 mm) walls.
These varieties of pepper are distinguished by high yields, they will delight you with their attractive fruits all year round.
Seed preparation
To rid future plants of infections, the seeds should be kept for 20 minutes in a 2% solution of potassium permanganate, then rinsed with cool water. And soak in nutrient solutions of epin or zircon (growth biostimulants):
- Epin. Take 2 drops for 100 ml of water.
- Zircon. Add 1 drop to 300 ml of water.
In the healing solution, the seeds should be kept for about a day at room temperature. Then place them in damp gauze and place them in a dark, warm place.
Keep the pepper seeds there for 3 days at a temperature of + 20 ° C to + 25 ° C. Periodically moisten the cloth with warm water (it must not be allowed to dry out).
As soon as the seeds hatch, you can transfer pepper on the windowsill.
Getting started landing
We need to prepare several containers in advance for growing pepper... Each pepper needs its own house, a separate wide and deep enough pot (so that the plant's rhizome is spacious and comfortable).
Do not forget about the drainage layer (fine gravel, expanded clay or broken small pieces of red brick will do).
You can plant seeds at one of the most convenient periods for you:
- The last days of February are the beginning of March. It is necessary to find the most suitable time for landing (be guided by the weather forecast). If, a week after planting the seeds, nature decides to pamper us with very warm, sunny weather, the pepper can slow down its growth. In this case, at home, at the beginning of its growth, it is better to keep the pepper on the north window for a while.
- Winter months. When planting seeds in winter, it is necessary to ensure that the daylight hours are 12 hours daily. In addition, light the pepper with fluorescent lamps.
- The plant germinates well when planting seeds in late July or early September. Again, keep an eye on the weather forecast (so there are no too warm days ahead).
Preparing the soil
For peppers, it is better to purchase ready-made soil ("Terra-Vita" or "Ogorodnik"). This soil is already enriched with essential microelements and does not contain harmful microorganisms.
If you decide to use ordinary garden soil, ignite it first with a saturated solution of potassium permanganate, then pour it over with water. Or prepare an enriched soil:
- Sod land 2 parts
- Humus 1 part
- Clean, sifted sand 1 part
Sod land is best taken from the place where meadow clover grows. Ash must be added to any soil (2 glasses of ash for every 10 kg of soil). Peppers are extremely sensitive to the soil's salt content and acidity levels. Add dolomite flour or lime to the soil (take 16 grams of the substance for 1 kg of soil).
You can use special hydrogels. They are made for home gardening. When hydrogels mix with the soil, they swell, absorb excess water and simultaneously loosen the soil, retaining nutrients.
Planting seeds
To wait for the first shoots of pepper on the windowsill, you need to be patient. Peppers germinate after 1-2 weeks.
If the plant stubbornly does not want to germinate, increase the length of daylight hours (extend additional lighting from 7 am to 9 pm).
- Plant two seeds in small peat pots (pre-filled with loose, fertile soil). Pour and cover the pots with cling film. Place them in a warm place at a temperature of + 25 ° C. The pots can be dug under adult, fruiting peppers in a lighted place (if you have already grown peppers before).
- After the first, tender sprouts appear, pierce the film with a knitting needle in several different places. When the peppers start growing confidently and acquire the first two or three leaves, the film can be removed. And start transplanting (picking) one young sprout into a large pot. We remove the weaker plant.
Picking. Transplanting seedlings into a more spacious dwelling (with root shortening). The shortened root begins to branch out and develop more violently.
The rhizome after the pick becomes stronger, wraps around and holds the earthen ball better, and the homemade pepper itself on the windowsill brings more harvest. Dive process:
- fill the soil in the pot where you will transplant the pepper with plenty of water a day;
- before diving, make a depression in the center of the pot in the new ground;
- moisten the soil around the sprout abundantly an hour or two before the operation;
- gently take it and lift it together with an earthen lump, shake it off the ground;
- very carefully shorten the root by about 1/3 (you can pluck it with your nails);
- gently place it in the prepared hole in a new pot so that the central root does not bend, and the leaves are 2 cm above the soil level;
- compact the soil around the seedling with your fingers;
- pour warm water over the transplanted pepper.
In order for the pepper to grow large, fertile, it must be transplanted and grown in small capacious buckets or large ceramic bowls.
Before diving, gradually accustom the young sprout to more severe conditions (gradually take it out into fresh air, increasing the walking time).
But make sure that the small pepper does not fall under drafts and the effect of a low, destructive temperature for it (below + 13 ° C).
Taking care of our pepper
| Operation | Pepper desires | Advice |
| Watering | As needed | Pepper on the windowsill should be watered with settled warm water (water temperature + 30 ° C). Sprinkle the pepper with warm water daily. To prevent the plant from overheating during the winter heating season, cover the battery with a damp cloth. Remember to loosen the soil constantly. |
| Lighting | In winter, daylight hours should be 12 hours | Periodically turn the plant with different sides to the window. Fluorescent lamps will work with the usual white spectrum. Avoid direct sunlight. |
| Temperature | Day + 25 ° - + 27 ° С Night +10 ° - + 15 ° С | In the summer, it is good to keep the pepper on the balcony, in the winter, transfer it to the windows in the south. Beware of drafts and sudden temperature fluctuations. |
| Top dressing | Fertilize once every two weeks after watering | You can feed the peppers on the windowsill with purchased nitrogen fertilizers for indoor flowers. Or make a nutrient solution (3 liters of water and 6 tablespoons of ash). As a top dressing, you can prepare decoctions of nettle, plantain, clover. This is very beneficial for peppers. |
The plant may suffer from a lack of minerals. How to grow peppers in the most favorable conditions? Just monitor the condition of its leaves and apply the necessary fertilizer with a suitable composition in a timely manner:
- the leaves curl, a dry edge appears at the edges - a lack of potassium (add potassium sulfate or potassium nitrate);
- the matte color of the leaves with a grayish tint, the foliage begins to shrink - there is not enough nitrogen (ammonium nitrate, which contains 35% nitrogen, will help);
- the lower part of the leaves acquires a purple color, and the leaves themselves begin to nestle against the trunk and stretch up - there is little phosphorus (phosphoric acid is needed 16-18% percent);
- the deciduous crown acquires a marble color - the pepper on the windowsill lacks magnesium in the diet (magnesium in sulfate form is needed).
You can not use potassium salt, potassium chloride (their composition with an excess of chlorine is harmful to the roots of the pepper). But the excess nitrogen is not terrible for pepper.
We are waiting for the harvest
Most domestic peppers are self-pollinated plants. By the way, they can also be pollinated. Therefore, try to keep different varieties of peppers apart from each other.
When the first fruits appear, do not overload the plant - leave up to 4-5 fruits on it.
Getting our own seeds
For this we select red, ripe fruits. Cut the pepper neatly in the circle of the stalk and very carefully remove the seed-bearing, holding it by the stalk.
We devote the next 4 days to drying the seed crop at a temperature from + 25 ° C to + 30 ° C. And we separate the seeds. Store them in a paper bag in a warm, dark place.
The maximum shelf life of seeds is 5 years.
We transplant the plant
It is necessary to transplant peppers on the windowsill once a year. He wants new, fresh land for a richer harvest (after all, he has already taken everything useful from the old soil). Change the land completely to fresh.
Transplant the plant carefully, being careful not to injure the root system with an earthy clod.
And after two years of the pepper's life, it already needs to be changed. It is a biennial plant and will readily pass the baton to younger, stronger peppers.
I wish you a rich harvest!
See you soon, dear readers!
You can also read on this topic:
Tags: pepper
This vegetable, due to its simply fantastic healthy composition, should be present in dishes all year round, but since it is a thermophilic crop, the time for growing outdoors is very limited or even impossible due to the climatic conditions of Russia.
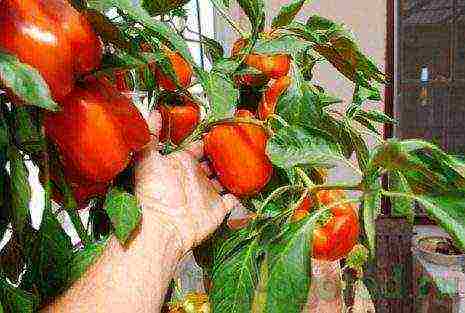
To keep bell peppers fresh throughout the year, they are grown at home or on the balcony.
We select varieties
For indoor or balcony cultivation, sweet pepper varieties are selected that have small growth, compactness and early ripening.
Let's take a look at some of them.
Dwarf pepper
"Dwarf". The fruits of this variety are ready for consumption 110-115 days after the appearance of the first seedlings.
The weight of one pepper, shaped like a cone, can reach 80-85 grams. The beautiful red fruits look great on a small bush.
"Treasure Island". It is an early ripening variety with red-orange fruits that reach technical ripeness at 95-105 days. Each pepper is 4.5 to 5.5 cm long and 0.5-0.6 cm thick.
Swallow pepper
"Martin". On small bushes, large red fruits ripen within 130 days. The weight of one pepper can be 90 grams.
"Mysterious Island".
This early ripening variety attracts attention with its erect small bush (40 to 60 cm), similar to a bouquet, resistant to tobacco mosaic, long fruiting time.
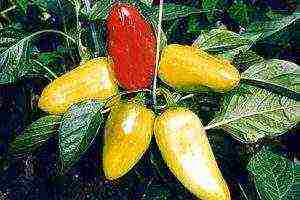
"Yarik". The light yellow fruits of this early ripening variety are technically ripe at 120-125 days. An ornamental small shrub (60 to 80 cm) gives a large yield.
Getting ready for sowing
 For indoor cultivation, bell pepper seeds are best picked from specialty stores or garden centers.
This vegetable culture retains its excellent germination capacity for 3-5 years, but after 8 and 10 years most of the seeds germinate.
If you have seeds that are stored for a long time, and you want to check their germination, then you should do this: take a few seeds and germinate them on a damp cloth (such as gauze) for several days (from 2 to 5 days) in a warm place. Then count how many seeds have sprouted and convert to percent.With a germination rate of 30 percent or less, you should not use seeds.
Gardener tip: It is advisable to process the seeds of bell pepper ready for sowing in a solution (not strong) of manganese for one third of an hour.
After that, the seeds are rinsed in water, and then to increase the germination energy, they are soaked in water with growth stimulants (heteroauxin, indoleacetic acid, novosil, zircon) from 6-8 to 12 hours.
You can also add trace elements, fertilizers based on humates (ideal), mineral fertilizers in a small dose to this solution.
It is possible to shorten the time of emergence of the first shoots with the help of germinated seeds. To do this, after processing the seeds, they are placed on a damp cloth and kept for 2 to 3 days at 23-25 degrees Celsius, but be sure to inspect every day. As soon as most of the seeds have sprouts, they are sown.
Sowing and picking
 Bell peppers are sown in cassettes, small pots or just plastic cups in March, since the length of daylight hours increases during this period.
Sow in cassettes one at a time, and 2-3 in pots and cups, depending on the diameter.
For sowing, any seedling soil with an average amount of nutrients is suitable.
Seeds are placed at a depth of 0.7-1.2 cm of moistened soil. Moreover, it is moistened before being distributed in pots or cassettes.
Specialist's note: seedlings that have two pairs of true leaves are ready to be transplanted into a growing container.
For a room or balcony culture, containers are selected with a diameter of at least 25 cm and a height of at least 30 cm. They can be made of various materials (plastic, ceramics).
Care
 Drainage must be poured onto the bottom (layer height from 2 to 4 cm).
It can be expanded clay, gravel, pieces of a broken clay pot, pebbles and much more.
For growing in rooms, the soil should be loose, breathable, with a high nitrogen content.
The soil for the pots can be made by yourself from turf, humus, sand and ash, or you can use a universal soil for flower crops (terravita).
When transplanted into permanent containers, young plants are buried by 2-3 cm.
An important point: for good development and fruiting, bell pepper plants need regular watering, top dressing, high temperatures, and sufficient daylight hours.
This crop requires a lot of water during the intensive growth of the bush and the mass of the leaves, as well as during the appearance of flowers and the formation of peppers. But between waterings, the soil in containers should dry out by three quarters, since excess moisture will quickly lead to rotting of the roots and death of the plant.
The optimum temperature for bell peppers is between 23 and 27 degrees. The length of daylight hours should be at least 12 hours. In winter, phytolamps or ordinary lamps with white light are used for additional lighting.
Top dressing
 When cultivating this plant, special attention should be paid to top dressing, since with a lack of nutrition, the amount of harvest sharply decreases and the decorative appearance is lost.
Top dressing is carried out every two weeks, while using mineral fertilizers for vegetable or flower crops. During flowering and fruit setting, fertilizers should contain more nitrogen than phosphorus and potassium.
During the ripening period of the crop, nitrogen in fertilizing becomes less, and the amount of potassium and phosphorus increases. Usually, during the winter time, the plant loses its decorative effect and is replaced with a new one, re-grown from seeds.
Watch a video in which an experienced user explains how you can plant bell peppers from seeds at home:
Rate the article
“Sweet” is the name given to the pepper by the inhabitants of Bulgaria. It is also a juicy, fleshy, colorful, aromatic and healthy vegetable. Contains few calories and many vitamins such as A, C, E, PP, B9, H, as well as carbohydrates, fiber and proteins.With proper care, growing bell pepper seedlings is easy.
What harm or benefit a vegetable brings, useful properties and contraindications - you need to know this only when you can grow and get a good harvest.
Proper cultivation of bell peppers
Growing a plant is quite laborious. This is the culture thermophilic and demanding on the composition and structure of the soil.
Peppers love soil with neutral acidity and high moisture content. The land should be fed with manure or ammonium-potassium fertilizers, clean of weeds, it must be looked after in advance.
The ripening of the fruits of this culture is long, therefore, the seeds are planted in pots at home... It makes no sense to plant and plant seeds directly into open ground due to this feature.
 The cultivation of bell pepper seedlings takes place in pots
In northern regions, cultivation is preferred in greenhouses, because here the required temperature regime is observed around the clock so that the vegetable can grow well.
The complexity of cultivation does not scare summer residents, nevertheless, they reap the harvest of a whimsical culture.
Sweet peppers - popular types
There are many varieties of sweet vegetables. Planting type subdivided into greenhouse and open field, and are also divided according to the period of fruit ripening into early maturing, mid-early, late and hybrid.
The most popular variety for open ground, very beloved by novice gardeners "Lumina", As it is unpretentious in care, resistant to numerous diseases and bears fruit early. Variety "Ivanhoe»Is also early maturing, its bushes are not high, so there is no need to pinch and tie the stems.
Bulgarian pepper "Funtik»Ripens by 110 days from the day of planting, compact, well resistant to verticellosis and can be grown both outdoors and indoors.
From mid-season beginners in vegetable growing, a disease-resistant variety is suitable "Cow's ear", The harvest from small bushes is obtained on day 130, with little effort for watering and feeding.
From hybrids, gardeners distinguish a red high-yielding variety "California Miracle F1"Requiring a minimum of labor and a large-fruited hybrid"Atlantic F1", Yielding crops even in adverse weather conditions.
How does the landing at home begin?
Peppers are planted on seedlings in February or March depending on location and weather conditions. The first step of planting is to test the seeds by sampling in salt water (30 grams of salt per liter).
In salted water, weak and damaged seeds will float, while heavy ones capable of germination will remain at the bottom.
After drying, the seeds are soaked for several hours in plain water, then placed in a humid environment, for example, in a wet napkin or plastic bag until germination.
Also, to accelerate the ripening of fruits and prevent diseases, the seeds must be treated with a disinfecting solution of potassium permanganate, and then a growth stimulator. Since the culture does not like transplanting, it is better to immediately place the seeds in large 500 gram plastic cups, in loose, moist soil. to a depth of 1-2 cm, 2 pieces per cell.
When several shoots appear, the weak one is removed. Cups with seedlings are placed in a bright and warm place, regularly moistened and, if necessary, warmed up.
Transplanting seedlings and timing of planting in the soil
On the stage 3-4 leaves peppers are transplanted into open ground. For planting, the ground must warm up to +15 degrees. Seedlings are planted in May, after the end of the frost.
Before planting, loosen the soil, spill and fertilize with 1 tablespoon of potassium. Leave the distance between the bushes equal 30 cm.
The level of the planted sprout should correspond to the depth of the seedling material.
Post-plant care for a good harvest
When properly planted, the first new leaf appears approximately on day 10... If the plant has a lot of leaves and stems, then by pinching a crown is formed, and each stem is tied to a peg. The main thing is to remove the first flower during flowering, this will increase flowering, pollination and fruiting in the future.
During the growing period, you need to mulch the soil under the pepper, weeding the weeds in order to provide oxygen to the roots of the plant. To water 1-2 times a week, depending on the weather, the water consumption per bush is 1.5 liters for planted seedlings, and 2.5 liters for fruiting bushes.
During flowering and 2 more times during the fruiting period, fertilizing is carried out with a solution of manure (1: 5) or chicken droppings (1:10), as well as mineral fertilizers.
Bell pepper does not like coolness, therefore, when the air temperature drops, they must be covered with a film, rags and during the frost period they are fumigated with smoke.
Pest and disease control
Pepper often wilts outdoors. The reason for this is the disease and insects that feed on vegetables.
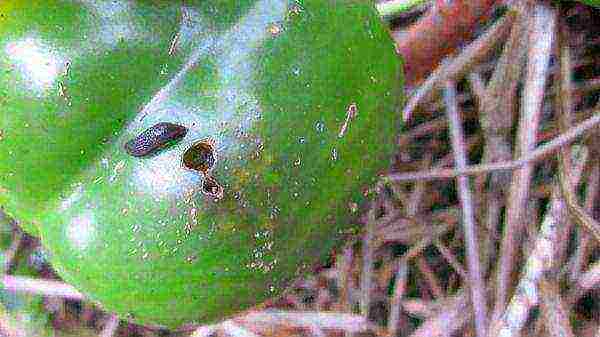 Defeat of bell pepper by naked slugs
Damage to the plant is caused by:
- colorado beetle; the spread of the beetle can be avoided by collecting the larvae and destroying
- aphid; destroyed by chemical attack
- naked slugswho are afraid of dry mustard, tobacco or lime dust
- spider mite loves leaf juice, so the affected plants are burned, and the untouched ones are sprayed with an alcohol solution, soapy water, garlic or onion infusion.
Diseases also often affect peppers:
- a fungal disease in a humid environment, affecting stems and leaves in the form of brown spots with a pale green zone is late blight; 1% solution of Bordeaux liquid can save pepper
- the most common is verticillary wilting, which appears due to the penetration of the virus into the damaged roots, the leaves fall off and, as a result, the plant dries up. It is necessary to burn diseased parts to stop the spread of the fungus.
- among diseases are distinguished white, gray and apical rot... White appears on the stems in the root part from a lack of fertilizers, gray appears against the background of an incorrect water balance and affects the entire fruit, and the apical often affects the tip of the pepper with spots and arises from both bacteria and planting conditions. To avoid exposure to rot, plantings are fertilized with calcium and watered abundantly.
Difficulties of growing bell pepper
To obtain a large yield of bell pepper, you need to regularly loosen and water the soil.
You also need to know that fertilizers are the main part of nutrition, the lack of vitamins immediately affects the appearance of leaves, stems and fruits. When planting seedlings, it is important to try avoid windy areas, plant a bed with tall, wind-proof crops.
Choose your neighbors carefully for culture: the neighborhood with fennel, beets is unfavorable, and tomatoes, lettuce, onions, carrots will have a positive effect, repelling pests.
After the end of the summer season, plant the barley in the place of the pepper and dig up the ground after the grown cereal, get the humus saturated with vitamins, which is necessary for growing the crop of the next season.
Pepper is a southern plant, but in the conditions of our climate, it requires careful attention to itself. Abundant watering, creating a favorable soil for plant growth and protection from the cold all contribute to obtaining a well-deserved high yield. And this means that you will provide yourself with vitamins and macronutrients of sweet bell pepper until next year!


