Content
- 1 Feeding turkeys
- 2 Keeping turkey poults
- 3 Basic requirements for the premises
- 4 Fattening for young meat
- 5 Description
- 6 Pros and cons of withdrawal
- 7 The most famous breeds for breeding
- 8 Conditions for keeping and growing
- 9 Care and feeding during puberty
- 10 How to maintain and grow
- 11 How to keep and how to care for turkeys
- 12 The main diseases of domestic turkeys and turkeys
- 13 Prevention of young stock during rearing
- 14 What to feed the birds
- 15 The most famous breeds for breeding
- 16 Negative and positive aspects of breeding
- 17 Features of turkey care
- 18 Breeding turkeys
- 19 Nutrition for proper and complete growth
- 20 Growing turkeys for meat
- 21 The main diseases of domestic turkeys
- 22 Turkey breeding business
- 23 How to start growing turkey poults at home
- 24 Proper feeding and diet
- 25 Features of walking turkey poults in an aviary
- 26 Features of temperature and light conditions
- 27 Features of the behavior of turkey poults
- 28 Conditions for growing oyster mushrooms at home
- 29 How to grow mushrooms at home
- 30 How to make mycelium for oyster mushrooms
- 31 Stages of growing mycelium
- 32 Care of mushrooms during growth
- 33 The profitability of growing at home
- 34 Choosing seeds and preparing the substrate
- 35 We process and germinate seeds
- 36 Popular mistakes of newbie summer residents
- 37 How to dive home seedlings correctly?
- 38 When to plant tomatoes in the garden?
Diet turkey meat is useful for children and adults, and especially for people prone to allergies. Poultry meat has a lot of taste advantages, and everything that is grown at home will be an environmentally friendly product and can be used for food without thinking about the dangers to health.
Growing turkeys for meat at home
Feeding turkeys
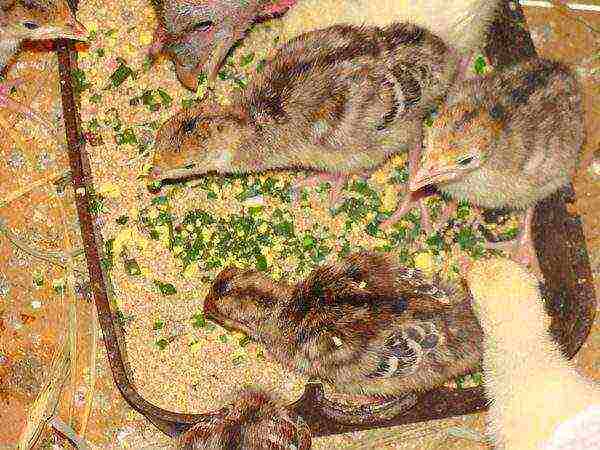
The very first food for them will be a boiled egg, carefully chopped, about 5 g per baby. For a variety of feeding, you can offer them homemade or store cheese, as well as millet. In the first three days, the chicks are fed in small portions, but often (after 3 hours) well-cooked cereal porridges. Chicks need to mix in food with grated carrots and finely chopped grass or green onion feathers, which is very useful for them as a fight against intestinal parasites. In the future, you need to observe what kind of porridge will be eaten best of all, and that one should be offered, always mixing various greens.
Feeding turkeys
From the fourth day of the chicks' life, you can give a mash based on milk, yogurt or skim milk, adding a little cottage cheese. It is advisable to prepare it immediately before feeding so that the food does not have time to sour and disappear.
From the age of one week, babies can add more varied greens to their food. Fresh plants will serve as a vitamin complex in the diet of turkey poults, therefore, between feedings without porridge, you can give a dandelion, finely chopped or twisted through a meat grinder, cabbage leaves and clover, plantain or nettle, previously scalded with boiling water. Sometimes you need to add fish oil to cereals, which contains a lot of vitamins for the growth and development of poultry.
At a month and a half, turkeys can include whole or sprouted grains in their diet. Boiled food waste or chopped apples and pears are added to the mash.
Attention! When feeding potatoes, it is imperative to remove the sprouts from it, and drain the water after the decoction of vegetables, thereby excluding poisoning and death.
Turkey diet
From two months, the diet of grown birds should include trace elements and vitamins necessary for growth, four meals a day are recommended. Along with the compound feed, alternating, you need to add corn and millet grains, yeast and bone meal, shells and chalk, and table salt should be added in very small quantities. Compound feed must be strictly poultry; feed intended for large animals, which contains a lot of salt and few nutrients, must not be given. The high salt content will soon kill the bird.
If the poultry feed is difficult to access, then you need to prepare it yourself. You will need grain 60% crushed into fine grains, 25% legumes, 25% sunflower meal and 4% chalk, all this mixture will be considered mixed feed.
Advice! In the summer, prepare brooms from a set of acacia, birch, poplar and linden. You need to hang them indoors so that the birds can reach them. Also, dry broom leaves are ground and added to the mash.
From autumn to spring, 3 g per day are added to the mash, chopped needles and silage, rose hips and rowan berries to provide feed with valuable natural vitamins. Sprinkle food for chicks on a flat, level surface, such as heavy paper or waste material. Each time they are fed, you need to pour fresh clean warm water, frequent water changes contain fewer microbes and this measure will become one of the methods of disease prevention.
How and what to feed turkeys
Important! Cleanliness of feeders and drinkers will protect birds from diseases.
For babies, water should be poured into a container so that they cannot get into it. After the end of drinking, it is advisable to remove the container so that the chicks do not accidentally get wet.
The drinker for adult turkeys should be heavy and up to neck level, and the feeder, as for chickens, should be in the form of troughs or troughs. In winter, it is imperative to warm the water and pour it slightly warm into the drinking bowl.
Nipple drinkers for turkey poults
Keeping turkey poults
Rules for keeping turkeys
Small and tender chicks are very susceptible to the environment, unlike adults, so it is worth considering a few important rules:
- the temperature of the content is 33 degrees of heat from the first to the fifth day of life, 27 degrees to the tenth day and then gradually decreasing to 23 degrees;
- chicks react poorly to a sharp temperature drop and strong drafts;
- chicks do not need to be allowed out in the rain or dew until they are five weeks old. At this age, skin growths form on the necks of the chicks. Make sure that they never get wet on the street;
- avoid damaging the chicks' beak. To do this, a cardboard bedding is laid for them under food, and a solid base will damage the beak and guaranteed death;
- protect chicks from adults on a flat surface without pits, so that the kids are less injured;
- to avoid various diseases and injuries, you must not place them together with other types of chicks. Development and adaptation of turkey poults is slower than, for example, chickens.
Basic requirements for the premises
How to set up a turkey house
It is worth taking care of the previously suitable conditions for keeping, especially in the cold season, otherwise all the work on growing turkey poults will be in vain.
- In winter, you need to insulate the room as much as possible. Cover the floor with dry straw and trample it down, and when the temperature drops to -10 ° C, provide the house with an additional heater.
- In the summer period of the year, ensure the ventilation of the room (without a draft) from dampness and excess air humidity.
- Lighting in winter lasts about 14 hours a day, and additional lighting will increase the egg production of adults.
Walking turkeys
Birds love long walks, besides, they run fast, and in case of danger they can fly. Given their behavior, you need a large space in the form of a mesh enclosure or a quiet and calm environment, if there is none, you should carefully trim the wings of adults.
Walking turkeys
Attention! Restriction in a small space leads to obesity and disease in poultry.
- Walking is mandatory and will only benefit the birds. Self-foraging, they will get more nutrients, and the presence of bushes or trees will protect them from the scorching sun in summer. When walking in an aviary, you need to artificially create a shade in one of the parts of the fence and take care of the presence of water.
- At the beginning of the second week of life, the chicks are released for a walk for about 20 minutes, which will be enough for the first time, given the good calm weather. With each subsequent time, the walk increases. Monitor the weather at this time so that the chicks do not catch cold.Important! Chicks are released for full-scale walking only after the appearance of real feathers.
Chick walks are allowed after plumage
- On street walking, drinkers with water and feeders with food are placed, as well as in a buried aviary. As early as a month and a half, birds will begin to use nests, so they are installed indoors at a height of 45 cm and 35 cm in diameter per individual.
- It is necessary to let turkeys out for a walk not only in summer, but also in winter in calm weather at least 25 degrees, having previously spread straw on this place in order to avoid frostbite of the limbs of birds. Also, to attract them for a walk, you can lay out brooms of dried nettles and bunches of hay for a long devouring and a long walk, harvested from the summer.
Fenced turkey walk
Fattening for young meat
From four months of age, they begin to fatten to increase the weight of the turkeys. The month of increased nutrition from August to September should pass on free grazing and three meals a day, including a bag and grain crops in the diet.
How turkeys are fed
For limited grazing, feeding consists of four times per day. The food should be more flour mixture, cottage cheese, egg waste and greens, boiled potatoes and fodder beets, legumes, sprouted grains and including meat waste.
A wet mash should be prepared at the rate of: 80 gr. milk and 100 gr. flour mixing everything. Yeast and malted foods, soaked or steamed grains will help increase your appetite during weight gain.
Turkey poultry fattening diet
Show on page Open in full size
- The malted food is prepared as follows: pour one kilogram of flour mixture with two liters of boiling water and mix everything, and after two hours add the rest of the ingredients and knead until the food is loose.
- For the preparation of yeast food: take 50 g of fresh or 25 g of dry yeast for baking dissolve in lukewarm water, and then add 10 kg of dry flour composition a little, then keep it warm for six hours. Feeding lasts 45 minutes, after which the leftovers are removed and then they give root crops or useful greens. Pour a lot of water. In a separate feeder for individuals, chalk and shells should be poured.
- Of the germinated grains, wheat, oats or barley are usually used. The grain is pre-soaked and then poured onto the racks in a layer 10 cm thick. At a positive temperature above 22 degrees, the grain will germinate in three days.
What to do if birds are not gaining weight
The next month they do not walk the birds, but keep them indoors and dim the lights. They give compound feed and protein mixtures, and a mash at least twice a day. For a positive result of weight gain, one bird should eat about 800 grams of compound feed per day, and together with a mash, almost a kilogram per unit of an individual.During these months, you should provide many different grain foods with oats and buckwheat, which will provide sufficient protein and fat. The cake of various plants included in the diet will additionally affect the rapid weight gain of the bird and provide it with amino acids.
Caged turkeys before slaughter
Forced feeding
Pellets are prepared from a special mix: flour from corn and barley, 20% each, from wheat and add bran to 15% each, flour from oats 25% and common salt 1%. Add 5% yeast to the mixture and, per 100 g of the resulting mixture, pour 150 g of liquid of your choice, knead the hard dough. First, rolls of dough are made about 2 cm thick and 6 cm long. The finished pellet is moistened with water and placed in the bird's esophagus. With one hand, you need to open the beak of the individual, and with the other hand, lay the pellet, with a slow movement, gently press on the part of the neck from below and push it into the goiter. With this fattening, it is worth monitoring the filling of the turkey crop with food. Having increased the consumption of food, slowly begin feeding from twice a day to 30% of the food per day. With forced weight gain for an individual, the feeding period is reduced to two weeks.
Poultry machine feeding scheme
Self-feeding
Birds are allowed to graze in fields with harvested melons, grains or sunflowers. They feed the birds two or three times right in the pasture with unlimited containers with preferably cool water. Warm water, of course, will be worse to drink, so it is worth replacing it several times a day with fresh and cooler water. It is best to equip an artificial shade at the walking site, using the structure of a hut and a shed. With this method, large areas are needed, but the advantage is the insignificant consumption of grain crops, and weight gain is faster and better.
Fatty turkey carcasses
Reference! The older the bird is, the tougher the meat and, accordingly, the worse the taste.
Fattening of adult poultry
First, it is worth inspecting the birds, you may not have to intensively feed everyone in a row. For those who need fattening when probing, the skin forms a fold, while it is very thin without fat, and the bones are sharper and strongly protrude. This also includes the average weight of birds. But a well-fed individual with rounded body shapes and palpable subcutaneous fat in the lower abdomen is already ready for slaughter. After inspection, the entire selected individual is sent to an additional set of missing kilograms. During the weight gain of young animals, it is imperative that they maintain a good appetite, peace and quiet, and given that the bird's eyesight and touch work well, they will pay attention to the shape and even color of food of a lighter color.
Home fat turkey
The fattening period lasts about a month and will be the best time at the end of autumn. Fattening consists of four meals a day without walking. The composition and variety of the forage is the same as for young animals, the prevailing flour mixture. Adults of common turkeys reach up to 12 kg, and turkeys up to 16 kg when breeding thoroughbred birds will have different weight data.
Large turkey on the scales
Advice! During hot summer days, food intake decreases accordingly and leads to a loss of kilograms. You need to feed more vegetation and grated carrots these days, which will increase your appetite and prevent weight loss.
The secret to feeding turkey for delicious meat
- Tasty and healthy meat directly depends on a properly balanced diet, including biologically active additives and necessary for feathered matter. Compound feed with nutritious components will reduce the consumption of cereals and provide a correct, balanced nutrition for poultry.
Compound feed for turkeys
- For the successful assimilation of grain by individuals, vegetation, dried straw or hay should be added to the diet. Nuts or acorns mixed with vegetable oil or finely chopped bacon will provide juicy and tender turkey meat at the output.
- During fattening, it is worth excluding the intake of fish oil and fish meal 10 days before the end of the term, otherwise the meat will have a fishy flavor. Corn and alfalfa give the meat a yellowish hue. Oats and barley give the meat a lighter color. If it is necessary to lighten the meat at the end of feeding, give more of this grain.
Sorting turkeys and the need for fattening
In conclusion, it is worth noting that for breeding a turkey for meat, you need to monitor its diet. A variety of feed will have a positive effect on the strong immunity and health of the bird. In summer and winter, for turkeys, food must be both wet and dry. Those birds that eat what they themselves find, without human participation, of course, will not achieve much weight.
It is important to take part in the fattening of the turkey and monitor the quality of bird nutrition.
Feeding errors
Video - Feeding turkeys
Video - Breeding turkeys at home
America is considered the birthplace of turkeys. Turkeys were domesticated about a thousand years ago. They came to Europe only in the 16th century, after four travels of Christopher Columbus.
Description
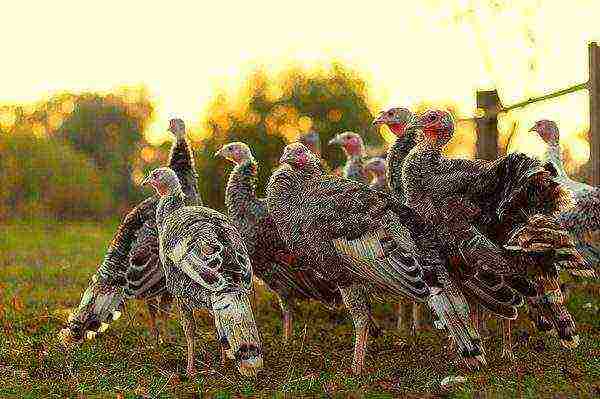
Turkeys are colorful, majestic and at the same time, poultry of different sizes. They love space and freedom.... From the first days of life in the turkey community, a hierarchy begins to build.
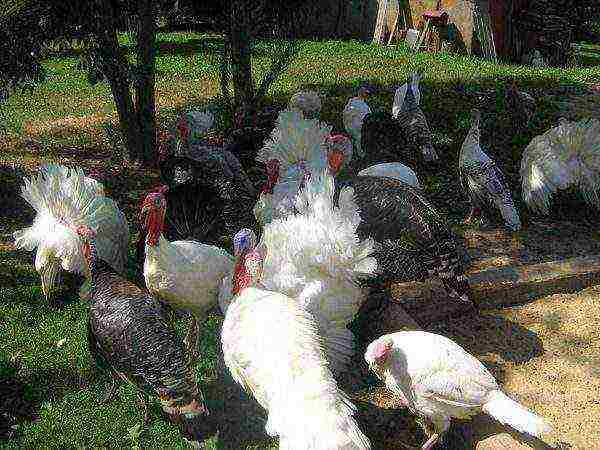 Turkeys walking in the yard
A brave and cocky male appears and gluttons are already visible - applicants for fattening for meat. In flocks of male turkeys, the right to fertilize female turkeys belongs to only one turkey, which is at the top of the hierarchy.
Pros and cons of withdrawal
The clear advantage of raising a turkey herd at home is getting wholesome meat and eggs. Turkey meat is a dietary meat that is low in cholesterol and high in minerals and vitamins.
 Turkey eggs
It is hypoallergenic and easy to digest, useful for pregnant women, young children and athletes. Eggs also have a large set of useful components, occupy the 3rd place in terms of the amount of nutrients, after quail eggs and guinea fowl eggs.
Note! The only drawback in keeping and raising turkeys is that they produce much fewer eggs than, for example, chickens. The number of eggs from turkeys can reach up to 100 pieces per year, while chickens produce up to 340.
But, if we consider that turkey meat costs twice as much as chicken and eggs in terms of the amount of nutrients and weight three times higher than chicken, then this minus does not seem so significant.
The most famous breeds for breeding
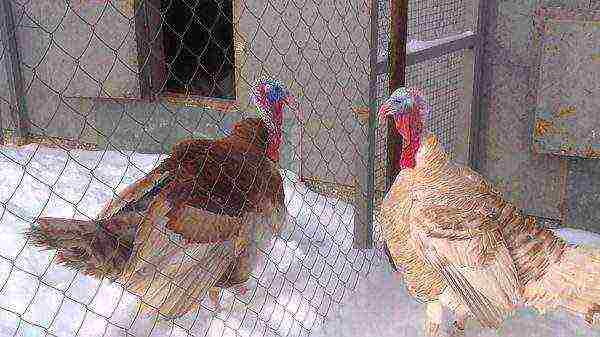
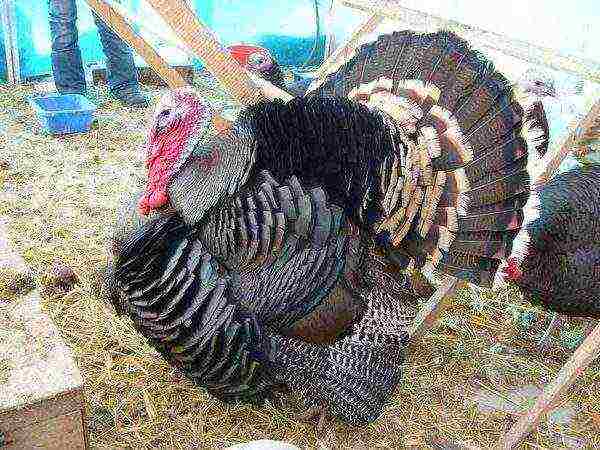
The most common breed of turkeys for breeding in a private courtyard is the breed North Caucasian bronze... She has an elongated body, small chest and bronze plumage.
These birds are very mobile, long-legged and well adapted to foraging. Live weight of adult males from 13 to 18 kg, females 7-8 kg. Egg production of turkeys varies from 80 to 100 eggs per year.
A very profitable breed for keeping is white broad-breasted... They are classified into three main types:
- Heavy: the weight of males reaches 25 kg, the weight of females is up to 10 kg;
- Average: males weigh 15 kg and females 7 kg;
- Lungs: turkeys weigh 7 kg and turkeys up to 5 kg.
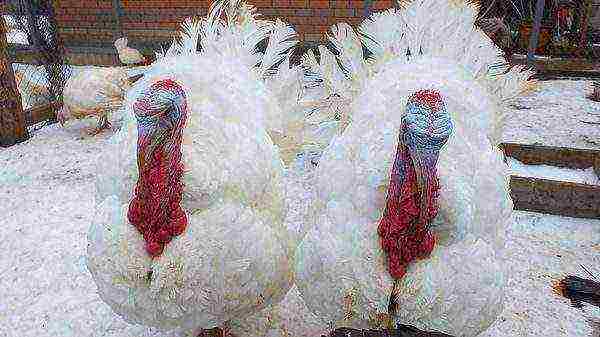 White broad-breasted breed
Turkeys mature for egg production by 9 months of age, bringing up to 115-125 eggs per year.
The broad-breasted bronze turkey breed has a high viability of young animals and almost one hundred percent fertility. The live weight of males is up to 18 kg, of females up to 10 kg.
Moscow white and bronze rocks are characterized by strong body construction, productive fertility and early egg production. Turkeys begin to lay as early as 6 months, they bring from 100 eggs per year. The live weight of males reaches 13 kg, females - 7 kg.
Conditions for keeping and growing
The main requirement in the maintenance of turkeys, which is worth focusing on, is the heat factor. Turkeys themselves are frost-resistant birds, but for full growth and development they need warmth and dryness in the enclosure.
Important! Create conditions in the pen that will exclude dampness and draft. The temperature in the summer season should be at least 20 degrees, and in the winter season the air temperature should not be lower than 5 degrees.
The room should be frequently ventilated. It is not uncommon for turkeys to be kept in "former" chicken coops, which are slightly modified for larger birds.
 Turkeys in the aviary
The main indicators of the pen for 10 turkeys:
- Square not less than 5 square meters, since up to 2 birds can be placed on 1 square meter (ideally, there should be 1 square meter per individual);
- Ventilation, to eliminate dampness;
- Straw bedding, which must be changed at least twice a week;
- Perches, arranged at a height of 70-80 cm from the floor, 5-7 cm wide and 8-10 cm high.
- Lighting can be carried out using a conventional electric lamp, the power of which should be 60 watts.
- In order not to start parasitic organisms in the turkey house, small boxes with sand and ash.
One turkey requires a minimum of 40 cm per roost, so there should be as many perches as the number of birds in the pen. The distance between the perches should be more than 60 cm.
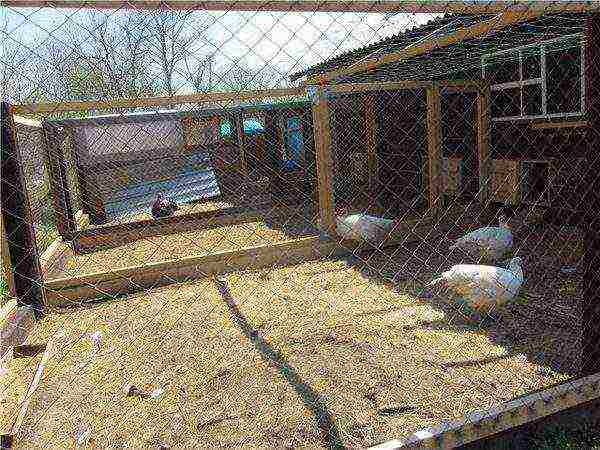
Turkeys need constant walking. In the summer season, outside aviaries are set up for them near the poultry house, an area equal to the number of birds, at least one square meter is allocated per bird.
Conditions for arranging a summer enclosure:
- On the territory of the corral there should be a canopy, under which birds can hide from direct sunlight in hot weather;
- It will be ideal if it grows on the territory alfalfa, oats and cloverthat sow in early spring;
- Drinking bowls, the water in which should change as it gets dirty, at least once a day;
- Feeders with barley, or oats.
 Keeping turkeys in a cage
In the winter season, when the air temperature is below 10 degrees, it is also recommended to let turkeys go for walks. To do this, a layer of straw is lined on the territory of the corral so that the birds do not freeze their paws, and the feed is scattered throughout the corral.
Walking turkeys is simply necessary, otherwise they will only get fat without gaining muscle mass.
Most turkey breeders keep heterosexual individuals separately.
In this case, only one manufacturer is launched to females. But there are poultry farmers who prefer to keep all birds in one enclosure. In this case, there should be no more than 5 females per male in a turkey flock, otherwise he will not be able to cover all the turkeys.
If the herd of turkeys is large, then it is better to divide it into small groups., each of which will have one manufacturer.
Care and feeding during puberty
Puberty in turkeys occurs at the age of 8-10 months. For the most complete development, turkeys must be fed with a special mixture, which consists of:
- Yeast - 5 grams;
- Carrots and greens 70-80 grams;
- Cottage cheese 20 grams;
- Sprouted corn 100g.
 Youngsters on the run
The turkey begins to lay eggs from 10 months. Very often they suffer from the "brooding" syndrome, so in order to collect the eggs they have taken out, they often have to drive them away.
It is very important to monitor the feeding of the roosting individuals. When birds are just starting to lay, they need to be fed up to 5 times a day. In the winter season, you need to give moistened cereals, finely chopped carrots, grass flour. In the summer, cereals with herbs.
After mating, the egg-laying process begins.
How to maintain and grow
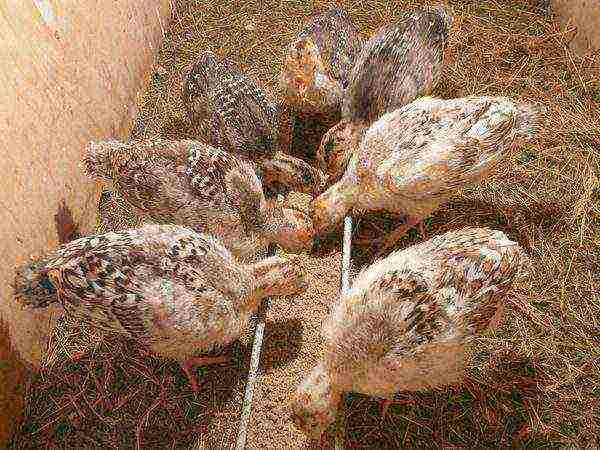
 Young turkey poults
During lay, a young turkey can lay up to 17 eggs that need to be tested for fertility.To do this, the eggs must be lowered in turn into a container of water, if the egg sinks, then we return it to the nest, if it floats up, to the refrigerator.
The hatching process lasts up to 28 days. During this time, it is necessary to ensure that the turkey eats on time. Feeding is done in the morning. It is best to feed the hen with soaked and swollen oats. When the turkey is eating, it is imperative to cover the eggs with a warm cloth for this time to prevent hypothermia.
One turkey is able to hatch and raise not only its offspring, but also someone else's. One bird is capable of raising 75-80 turkeys.
How to keep and how to care for turkeys
The heat factor is the basis for growing turkey poults. Chilled young animals are highly susceptible to various diseases, which can prevent them from gaining the necessary weight, even with a good balanced feed.
Turkey poults should be bred in cardboard boxes with fabric bedding, or dry fine sawdust. For 10 babies, a container with dimensions of one meter by one meter and a wall height of up to 40 cm is suitable.
 Feeding turkeys
Heating and lighting is carried out by electric lamps, the power of which must be at least 40 watts. Light bulbs are fixed on top of the box, using a table lamp. You can lower the lamp directly into the box, but for this, it is necessary that it be in a special weighted glass shade.
The first two days, turkeys are kept under round-the-clock lighting, gradually reducing the light regime by 30-35 minutes.
From 20 days, the light regime lasts 15 hours. In addition, for the first 10 days of babies' life, it is worth maintaining the temperature to +36 degrees, gradually lowering and bringing it to + 25 degrees. At two months, the temperature should be +20 degrees.
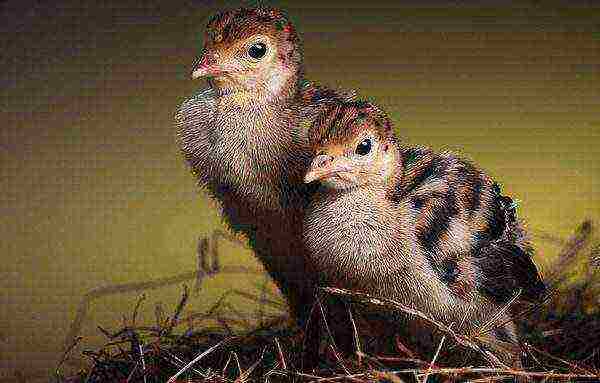 Turkey chicks
Under such conditions, it is recommended to keep the turkey poults until the end of feeding., that is, up to 7 months.
Turkeys are prone to developing diseases, most of which are fatal.
The main diseases of domestic turkeys and turkeys
- Coccidosis - the development of the simplest microorganisms in the bird's body, leading to the death of the carrier.
- Trichomoniasis incidence occurs in the body of birds when Trichomonas is absorbed by drinking water, or contact with other bird species that are carriers of the infection.
- Tuberculosis... It develops if the rules for keeping turkeys are not followed. Direct sunlight is the only source of healing for a sick bird.
- Pasteurellosis... Most often occurs in fattened turkey poults, whose age is from 1 to 2 months. The reason is the pecking of manure by turkeys and the harmful substance pasteurella contained in it, which is destroyed from direct sunlight in a day.
- Development parasitic organisms in the digestive tract.
- Aspergillosis - a fungal disease of the pulmonary system of organs, which develops as a result of the presence of straw or other litter on the territory of the aviary, containing fungal microorganisms.
Important! From the first days of life, prevention of diseases and reinforcement of chicks with vitamins are carried out to develop their own immunity.
Prevention of young stock during rearing
- On the 1st day, the solution is drunk ascorbic acid with glucose, since the turkey is still weak and unable to assimilate other complex elements;
- From the second to the fifth day is given irex vital (a pinch is diluted per liter of water);
- You can also amino-vital (pinch per liter of water).
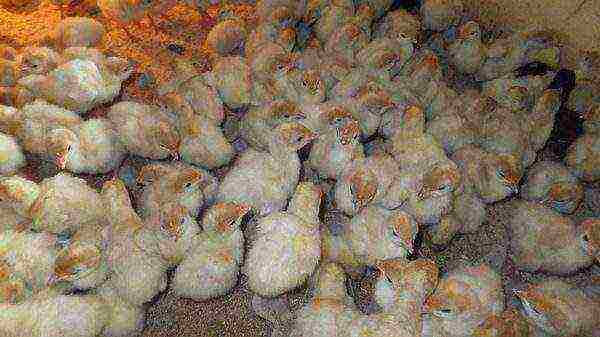 Keeping turkey chickens
The earlier the poultry begins to feed, the more viable they become. On the first day, it is best to feed a hard-boiled and minced egg.
Then a specialized compound feed is given for young animals up to 40-45 days old, and also include milk mash, return, sour milk and buttermilk in the diet. It is imperative to give babies finely cut greens of nettles, dandelions, clovers. In a month and a half, you can transfer them to an adult diet.
- From 6th to 10th day given to chicks in small quantities furozolidone, which is for the prevention of gastrointestinal diseases;
- From the 15th to the 20th day, turkey poults need to be drunk amproliumthat goes against coccidia;
- Before releasing turkey poults for walking, you need to give them ASD-2 - faction against fungal and aspergillosis;
- In 40 days it is soldered metronidazole, within 4 days (4 tablets per liter of water). It will protect the young from the development of the simplest microorganisms that form when the earthworms chew and can cause the death of the turkey.
Important! For the first 10 days of life, feed babies only with boiled water.
What to feed the birds
In preparation for the winter period, it is recommended to harvest linden, birch and poplar brooms for turkeys, which are subsequently hung in the house at a height accessible to turkeys and are a source of additional vitamins.
 Compound feed for feeding
The diet of adults includes:
- Compound feed, which contains proteins, vitamins and proteins. Usually used to feed brood males.
- Oatspreferably sprouted.
- Best fed to turkeys for fattening wheat.
- Tops vegetable crops (in summer).
- Shredded vegetables (potatoes, carrots, turnips).
- Greens (alfalfa, green onions, clover, dandelions).
- Young twigs trees, hay, sauerkraut (in winter).
If you raise a poultry for fattening, then you need to feed it more with wheat and other grains. During morning feeding, it is better to moisten grain crops with water, and give dry food in the evening. In order for the meat to be tender and juicy, you need to feed greens and vegetables as much as possible.
In order for laying turkeys to be carried in a balanced way, their diet should also include:
- 150 grams boiled potatoes per day, despite the fact that the laying hen produces up to 9 eggs per month, if from 15 to 18 eggs per month, then potatoes, respectively, from 110 to 130 grams.
- Bone flour and table salt should be up to 2 grams daily, regardless of how many eggs the bird gives out.
- Fish waste should be 30 grams for 9 eggs per month, 40 grams for 15 eggs per month, 50 grams if the turkey produces 18 eggs.
- Cottage cheese, if laying hens is 3 eggs per month, then 3 grams per day, 9 eggs, then 5 grams, 15-20 eggs, then 10 grams.
Important to remember! That turkey nutrition should always be balanced, enriched with essential vitamins and microelements, feeding should always be done on time.
 Mature turkey
Breeding turkeys on a personal backyard, subject to all the necessary measures for the care and rearing of young animals, will become a very interesting and profitable activity even for a novice farmer.
Maintain and raise a free-range turkey herd in summer and cellular content in winter will give a large number of large eggs and dietary meat, enriched with vitamins and various microelements. Recently, broiler turkey breeds, which are kept for fattening, are gaining popularity. They are not picky about food and are easy to maintain.
Turkeys are beautiful and majestic animals ideal for keeping on a home farm. However, breeding, keeping and caring for turkeys is a headache for many novice poultry farmers. How to breed turkeys correctly?
Turkeys: breeding, maintenance, care at home
The most famous breeds for breeding
If you have chosen turkeys as a breeding bird, the first thing you need to do is decide on the breed. They usually choose it in accordance with the goals, method of content and personal desire. Before buying individuals, you need to learn how to navigate the characteristics and main features of the chosen breed - this is the only way to organize proper care.In Russia, several of the most common breeds are distinguished.
|
Bronze |
Red and brown striped feathers, black necks in males. Females are more modest in color. They are good for keeping in the fresh air, they do not require special conditions. | 13 | 7 | up to 100 |
|
Moscow bronze |
Hardy individuals intended both for breeding in production conditions and for a home farm. Relief chest, elongated torso. Feel good when grazing. | 15 | 9 | 100 |
|
Bronze broad-breasted |
In appearance they are similar to their bronze ancestor, but larger and larger in the body. Low egg production, inability to walk. Are intended more for industrial content. | 14 | 8 | 70-80 |
|
North Caucasian bronze |
They first appeared in the USSR, in 1946. One of the most common breeds for growing at home. Large birds adapt well to any conditions. | 14 | 7 | 80 |
|
White broad-breasted |
Oval body with a large chest and a broad back. They are characterized by rich plumage, strong legs. Grown for healthy dietary meat and eggs. | 15 | 7 | 100-120 |
|
North Caucasian white |
Hardy birds with good performance and quick weight gain. They are well kept in pasture conditions, not picky about food. | 13 | 7 | up to 180 |
Read also: Turkey breeds
Negative and positive aspects of breeding
Home farmers are increasingly opting for turkey farming. Some breed turkeys for personal consumption, some make a profit from the sale of meat and egg products. Either way, turkey breeding has its advantages and disadvantages. Before deciding whether to do this business, you need to know them.
Bronze broad-breasted turkey
The advantages of content are the following:
- dietary turkey meat is very useful for humans, all thanks to low cholesterol, vitamins, amino acids and trace elements;
- the cost of a turkey growing business quickly pays off;
- for the purpose of earning money, you can sell not only meat and egg products, but also down, feathers;
- turkeys gain weight quickly and rapidly;
- undemanding to conditions of detention and unpretentiousness to nutrition.
Turkey meat is considered dietary
Turkeys are excellent pets for keeping at home and running a business selling meat, eggs, fluff. But some breeders refuse to keep turkeys. They justify this with the following disadvantages of keeping turkeys:
- low productivity - turkeys produce much fewer eggs than chickens;
- the risk of death of chicks after birth;
- demanding for water - use only fresh liquid at room temperature;
- turkeys are often sick, especially if hygiene rules are violated when caring for them;
- the tendency of turkeys to obesity.
Obesity turkey
The note! Turkeys first appeared in America, domesticated them about a thousand years ago. Europe saw birds only in the 16th century.
Features of caring for turkeys
Turkeys are unpretentious animals that can withstand cold temperatures down to -15 ° C, but they still prefer dry and warm care. Make sure that the pen is not damp and that there is always warm bedding on the floor - you need to keep the legs of the turkeys warm. Change the bedding at least twice every seven days. Equip each paddock with small boxes of sand and ash to prevent parasites.
Ash bath for birds
You should especially carefully approach the issue of caring for young animals. Provide chicks with a dry and warm place for the first time. For these purposes, you can use a cardboard box or box. In a temporary dwelling, the temperature must be at least 36 degrees, in addition, it must be constantly illuminated. When the chicks mature, you can move them to a common stall. When arranging a nest, you need to raise its walls high, isolating the hen from other individuals.
Turkey nest
Read also: DIY turkey nest
Requirements for the premises
Experienced livestock breeders have specific room requirements for comfortable keeping and profitable turkey breeding. To set up a comfortable house, follow the instructions below.
Step 1. Decide on the size of the room. The correct calculation is as follows: at least 1 m2 for two turkeys. Ideally, there should be 1 m2 per individual.
Turkey house on a small flock of birds
Turkey house project for 15-30 heads
Step 2. When the house is set up, check the room temperature. The acceptable temperature in summer is 20 ° C, in winter it is no colder than 5 ° C.
Step 3. Adjust lighting. You can illuminate the poultry house with a conventional 60-watt light bulb.
Lighting in the poultry house
Step 4. Be sure to equip ventilation, this will help eliminate dampness.
Step 5. Equip the perches according to the number of birds in the pen (one perch per bird), the distance between them is 60 cm or more.
Step 6. Check the height of the perches. Correct indicators: about 70-80 cm from the floor, width - from 5 to 7 cm, height - from 8 to 10 cm.
Turkey roosts
The note! If you keep all individuals in the same pen, the flock should be no more than 5 females per male, otherwise not all hens will be covered.
Do turkeys need walking?
Turkeys are prone to obesity, so they need to spend enough time walking. While walking, the bird eats useful food, finds worms, beetles, eats greens, seeds and nuts. The ideal place for walking in summer is dry ground with shrubs and green grass. Make sure that the bird can find shade and hide there from the heat. For walking turkeys, you can equip special outdoor enclosures. Install feeders with oats and barley, drinkers, and change the water regularly.
Walking for turkeys
It is especially important to walk the turkeys during the winter - take daily walks for several hours, but not in too windy weather. Cover the area with plenty of straw to keep the turkeys from freezing their feet. You should also scatter food to lure pets out for a walk. If there are too many turkeys, divide the herd into small groups (each with one breeder).
Organization of walking turkeys
Breeding turkeys
Experts recommend for beginners to start breeding with grown young individuals. The best option is three or four month old individuals. By this time, they get used to the classic food, and their immunity is getting stronger. When breeding from scratch in the house, it is necessary to have individuals of different sexes. One male - for 8-10 females. If there are more of them, the male will not be able to properly perform his duties.
North Caucasian silver turkey and turkey
Female eggs incubate for about a month. The bird should be rooted in the spring. Ideally, there are about 17 eggs under one turkey, and all are freely located under the female. Under an inexperienced turkey, which became a mother for the first time, it is better not to lay a large number of eggs. At the very bottom of the nest, place a thin layer of earth, and put dried straws on top. Put the nest in an isolated place, put a drinker and a feeding plate with food next to it.
The note! Female turkeys can raise about 80 babies. A turkey is able to hatch even other people's chicks - chickens or ducks.
Hatched chicks
Using incubators and brooders
Turkeys are wonderful mothers who hatch responsibly and then raise and protect their offspring. Sometimes they give themselves up to their duties so much that they forget to eat - in this case, forcefully remove the hen from the nest and take it to food. While the turkey is feeding, you can inspect the eggs for scratches or dents. After hatching, it is recommended to immediately add the babies to the hen and keep them with the mother for about 6-8 weeks.
Bronze turkey with chickens
On a home farm, you can use an incubator. Eggs that are intended for incubator rearing must be removed from the poultry and transferred to storage.Place eggs on the tray with the pointed end downward - this saves a lot of space. From the moment the eggs are placed in the incubator to hatching, it takes about 28 days. Turn eggs up to day 22 inclusive 12 times a day so that they warm up evenly. You should also observe a strict temperature regime.
| 1-3 | 37,8-38 | 29-29,5 | closed |
| 6-12 | 37,6-37,8 | 29-29,5 | ajar 15 mm |
| 13-25 | 37,5-37,6 | 28-28,5 | ajar 15 mm |
| 26 | 37,2 | 29-30 | ajar 20 mm |
| 27 | 37-37,2 | 30-33 | ajar 20 mm |
| 28 | 37 | 35 | ajar 20 mm, open completely 3 hours before sampling |
Setting eggs in the incubator
Video - Turkeys: breeding and maintenance
In the video, an experienced livestock breeder tells the audience where turkeys came from in Russia. You will learn how to organize the keeping of a bird from egg to adult. The video covers the incubation process, as well as the main issues of care and maintenance. You will also see how to properly equip an aviary and how animals behave while walking.
Nutrition for proper and complete growth
To successfully raise turkeys on a home farm, feed them properly. In most cases, poultry farmers use a combined type of food. Feed the birds with sprouted grains, dry or damp mash. In the fall and spring, take your pets for walks in the pasture so that they can feast on the greens. Use vitamins and top dressing: add chopped carrots, chopped cabbage and beets. Food can be diluted with dried, steamed herbs.
Turkey feed recipes
Turkeys love oats, grains, and barley, but germinate them first. During the breeding time, feed the pets about four to five times daily, during the other period - three times. In the morning and in the afternoon, you can feed with wet food, and in the late afternoon - with dry grain. To make turkey meat tastier and more tender, experienced livestock breeders recommend increasing the concentration of juicy mixtures, gradually reducing the number of grains.
To improve the quality of meat, poultry farmers recommend increasing the concentration of juicy mixtures
Small chicks need to be fed eight times to ensure good health of the brood later on. Three days after hatching, feed dry flour grits, which are mixed halfway with chopped hard-boiled eggs. For up to a month, feed your little ones with small cereals mixed with a variety of nutritious herbs - lettuce, cabbage leaves, nettles and clovers. You can also use a combination feed containing all the elements required for healthy growth.
Feeding at puberty
Puberty in turkeys occurs when they reach 8-10 months. Females lay eggs from 10 months. Watch the birds closely during this time, feed them about five times daily. In winter, feed moistened grain feed, finely chopped carrots, and grass flour. In summer, any grain crops mixed with fresh herbs are suitable. Sexually mature individuals should be fed with a mixture of yeast, carrots, greens, sprouted grains and cottage cheese.
Adult turkey and turkey
| Yeast | 5 |
| Carrots and greens | 70-80 |
| Cottage cheese | 20 |
| Sprouted grain | 100 |
The note! The weight of one egg laid by a turkey is between 70 and 90 grams - much more than that of chickens. Eggshells are pockmarked, not brown or white.
Video - How to feed turkey poults?
The brood owner explains the basic principles of poultry feeding. From the video you will learn how to feed babies from 0 to 7 days inclusive. The farmer also considers the following questions: in what percentage to add feed, whether it is worth introducing greens into the diet, and also how to properly give the turkey poultry water.
Growing turkeys for meat
To grow turkeys for meat in a farm, use hybrids (individuals that were born from crossing representatives of different breeds). Purchase chicks weighing at least 50 grams, which were removed from the incubator no more than eight hours ago.The most common meat production technology used by many Russian farmers is that young turkeys should be kept in cages until they are eight weeks old before being moved to the floor. Babies should eat fortified feed. Feed the birds about eight times daily, but gradually reduce the number of feeds to 4 times. Otherwise, the rules for caring for individuals intended for slaughter do not differ from the rules for keeping other individuals. It is recommended to slaughter animals at 16 weeks, males at 22 weeks.
Growing turkeys on a farm
The main diseases of domestic turkeys
Some diseases are contagious and are transmitted from other animals that are kept on the farm. Most often, ailments are caused by certain infections and viruses, and in many cases they can be prevented. Experts identify several main infectious diseases of turkeys:
- respiratory mycoplasmosis... Runny nose due to excessive moisture in the pen, as well as due to unbalanced nutrition;
- tuberculosis... One of the most dangerous ailments. Acts on the upper respiratory tract, lungs and other organs. Transmitted through dirty water, eggs, foul bedding and tools;
- histomoniasis... The defeat of the cecum. The disease spreads to the digestive system. Develops in individuals that were placed in an untreated room, where chickens or geese were previously kept;
Turkeys histomoniasis
- worms. The most common disease that affects not only the digestive system, but also the respiratory system. Infection occurs through land, food, water, as well as from other birds;
- smallpox. It is not treated - the dead bird is burned. It is transmitted to turkeys from chickens through food or water, as well as through contact with sick animals. Sometimes transmitted by insect vectors.
To avoid the development of diseases, feed pets only with proven food, provide the turkeys with decent conditions, periodically clean up the pen, keep food bowls and drinkers clean, and periodically inspect animals and vaccinate them. Proper care will help save your pets from the most common diseases.
The first manifestation of smallpox in a turkey
Turkey breeding business
Some novice farmers often think about breeding turkeys. They are attracted by the low competition, as well as the high return on this business. This is more profitable than breeding chickens - the turkey is larger, and its meat is more nutritious and tastier. One individual gives about 100 eggs annually and more than 600 kilograms of meat when fattening offspring. However, there are important points to consider when planning a business.
Step 1. Decide what you want to create a business for. Choose a breed, carefully study all the rules for caring for turkeys, acquire useful equipment and collect initial capital.
Step 2. Draw up a competent business plan for your business, in which all aspects are considered. Determine the main stages of the business, analyze all financial costs, indicate the possible risks, the expected profit.
Step 3. Register the farm with the relevant authorities. Obtain quality certificates and all permits from the sanitary-epidemiological and veterinary services.
Breeding turkeys in a large production environment
Step 4. Rent an area, land or farm. Equip the poultry house, create all the conditions for proper care of pets. Purchase turkeys from specialized farms. For self-breeding, purchase an incubator.
Step 5. Take up the sale of products. It is best to define marketing methods in advance. You can choose to sell on the market or make contacts with retail outlets - shops and restaurants.
The note! Advertise in your local newspaper for the sale of the product.If possible, place ads on the Internet - this will several times increase your chances of selling the product.
Sale of Inuk carcasses on the market
Benefits of a turkey breeding business
Breeding turkeys is a fairly profitable business that requires large investments at the initial stage. In the first few months, you will be engaged in raising the acquired young stock, which requires constant financial investments. First, you need to pay for the construction of the pen, its insulation, the purchase of turkey poults, feed, electricity. In addition, you will have to pay for utilities and feed every month.
After about six months, the profit received from the sale of products will cover the initial costs. Soon, your farm will acquire a new livestock, which will bring new income. For example, if you buy 30 turkey poults and several adults at the beginning, you will receive about 150 thousand rubles after six months of work. At the same time, by increasing the number of birds, you will increase your profit.
Turkey breeding is a profitable business
Breeding turkeys on a farm is an interesting and profitable process even for an inexperienced and novice farmer. It is not difficult at all if you know the theoretical information well. Observe all the conditions of keeping, properly care for the birds, feed them on time and take care of your pets, then they will grow strong, healthy and bring you long-awaited profit.
 It is not for nothing that the farmers call the king's bird turkey poultry. Growing them at home has several advantages. Firstly, the turkey meat is dietary and extremely tasty, and secondly, the bird itself grows to an impressive size.
How to start growing turkey poults at home
There are several criteria by which poultry is selected for breeding. In appearance, healthy turkey poults differ from weak ones, which immediately catches the eye.
 Healthy chicks are active, clean, responsive to sound and light, the down is dry, soft, with a uniform coverage of the entire body.
Any draft is contraindicated for chicks, which should be taken into account, first of all, upon delivery. It is advisable to prepare a place in advance, since the high-quality maintenance of turkey poults from the first day affects their condition and further development.
The cage where small turkeys are located should be warm, always dry and with the possibility of ventilation. It is best to install a pallet to make cleaning easier and cleaner for the chicks.
 Such a dwelling is heated and illuminated with the help of ordinary and infrared lamps. After all, 3-5 day old turkeys, which are harder to grow at home than young ones, should be kept at a temperature of 33-35 degrees. When chicks are cool, they gather in heaps, try not to move, do not approach the stern, when it is hot, they can lie with open beaks and outstretched wings.
The lack of light and heat in the cage, even for the shortest period, threatens overcrowding and piling of turkeys one on top of another in search of warmth, which leads to rapid death. This is especially true for chicks from 4 to 7 days old.
There should always be a drinking bowl with clean water at room temperature and a food tray in the cage. Moreover, it is necessary to ensure that the poults do not get wet and do not trample the feed. Therefore, so that growing turkey poults at home for beginners does not seem troublesome and difficult, vacuum drinking bowls and trays with sides are recommended.
 Starting from the 10th day of life, turkey poults can be transferred to a freer cage with a temperature of about 20 degrees and an open-air cage for walking in the fresh air.
Proper feeding and diet
The nutrition of the chicks is a very important point. At the initial stage, when growing turkey poults at home, the diet is a combined feed with the necessary vitamins, microelements, various natural additives.
 Ready-made feed should not exclude the use of chicks, especially at the initial stage, mashed cottage cheese, steamed millet, boiled eggs. Turkey poults are happy to eat finely chopped greens (green onions, bum, nettle, carrot tops, clover).
For the prevention of intestinal diseases, drinking water may contain a small solution of manganese, and for better digestion, be sure to put a separate tray with fine gravel, shells and chalk.
In the early days, the risk of death associated with improper digestion is very high. If the turkey “froze” for a long time with his eyes closed, ruffled, drooped and dropped his feathers, then he has stomach problems. It is urgent to put a pea of black pepper deeper into the beak.
In the first week, the turkey poults are poured with food every three hours, after that four meals a day are enough, with the obligatory addition of a mash to the diet.
Meshanka is a mixture of bran or chopped grain (millet, rolled oats, wheat) with herbs, sour milk. The mixture should always be fresh, crumbly and not sour. It should be given so much that the poults can cope with it within 15-20 minutes.
 Starting from 1.5 months of age, turkey poults are fed only with dry food, herbs, finely chopped vegetables.
Knowing how to care for turkeys from the first days, providing them with correct and balanced nutrition, good living conditions, you can avoid unpleasant moments associated with diseases and death of chicks.
Features of walking turkey poults in an aviary
Growing poultry means having a special and free space for them to walk. Therefore, starting from 10-13 days of life, turkeys need to be released into fresh air.
 For this lesson, an aviary should be equipped, fenced and covered with a net, to protect against drafts and predators. It is better if the entire territory of the enclosure is sprinkled with sand or sawdust.
As with a pen, drinkers and feed trays should be present. Turkey poults, especially on warm, hot days, consume a lot of water, you need to monitor its amount.
In addition to feeders, place trays for gravel, shell, chalk in the aviary.
Heat also adversely affects the condition of the bird, they can refuse food, move little, and this leads to slow growth and weight gain. Therefore, the aviary should be equipped with several places with a canopy.
Turkey poults love to climb, take off on perches, which also need to be installed in the main pen and in the aviary.
Small home-grown turkey poults are afraid of dampness and moisture. Do not let them out into the fresh air through dew, as well as immediately after rain.
Features of temperature and light conditions
Little chicks need round-the-clock lighting. For this, the lamps are placed at a distance of 1.5-2 meters from the location of the birds. In the early days, this is necessary for their full adaptation, finding feeders and trays with water.
If you arrange lamps with a blue or green tint, the bird will grow more actively. Also, for rapid growth, daylight hours, on the contrary, are extended. The use of fluorescent light bulbs will significantly reduce energy consumption.
With each day of growing up, daylight hours should decrease slightly, and eventually come down to 16 hours.
 From birth, turkey poults do not know how to keep their body warm, and acquire such skills only by the age of two weeks. Ensuring proper thermoregulation is the main condition for successfully raising turkey poults at home.
For the first 4-5 days, the temperature in the house or cage should be kept at 33-35 degrees, and only after 10 days can it be gradually reduced to 22-20 degrees.
In this case, incandescent lamps are located at the edges of the heated room, and not in the center. Thus, the chicks will be able to choose a more comfortable place for themselves.
Heaters are never used to keep the cage warm, nor are they installed on the sides to avoid poultry crowding to the warmer edge.
Proper cultivation of turkey poults at home (there are plenty of videos on this topic on the Internet) provides for separate maintenance from other types of poultry, to exclude the transmission of infectious diseases.
Features of the behavior of turkey poults
Sometimes, among turkeys, there is such a phenomenon as cannibalism. It is expressed in the pecking of both his own body and the body of congeners.
 Causes:
- dry environment in the house, lack of water;
- poor maintenance, feather parasites, insects;
- improper diet, lack or excess of protein;
- adding new turkey poults to a group of birds.
When wounds, scratches, turkey poults appear on the skin, feeling itching, they peck at the diseased surface even more, which leads to deeper wounds and damage. For this reason, many young animals die.
To avoid this, you need to know how to raise turkey poults, protecting them from such a phenomenon.
 Prevention methods:
- monitor a sufficient amount of fiber in the diet of turkey poults;
- avoid crowding, providing a good walking area;
- monitor the cleanliness of the room, carry out disinfection actions before moving in;
- add abrasive substances to grind down beaks;
- keep in a bright room, avoid bright aggressive colors;
- beak cutting - only as a last resort.
Sometimes, in order to avoid the spread of mass cannibalism, it is necessary to resettle or remove the most aggressive turkey poults.
Growing turkey poults at home is the most profitable and advantageous option, it is not an easy task, but it pays for itself quickly. By showing maximum attention to the chicks, especially in the first two weeks of their life, you can absolutely do without serious losses and end up with tasty dietary meat.
Problems of growing turkey poults - video
The technology of growing and breeding oyster mushrooms at home with your own hands is quite simple, even an amateur can handle it. However, before you get down to business and grow mushrooms, you should familiarize yourself with the existing methods and requirements for the environment in which mushrooms will develop normally. Where to start and how to make the process from scratch, we will tell you step by step, and even a beginner will find it easy to breed and plant mushrooms.
Conditions for growing oyster mushrooms at home
You can organize a place for the cultivation of mushrooms in basements, cellars or specially designed rooms at a summer cottage. For the cultivation of oyster mushrooms, you need to create the following conditions:
- the ability to set and maintain a temperature regime within 10-20 degrees;
- equip the room ventilation system for the removal of carbon dioxide and lamps with fluorescent lamps;
- set humidity mode 70-90%.
Due to their properties, mushrooms absorb elements of the environment, including toxins. Therefore, it is important that all surfaces in the basement are disinfected. free from mold and pests... It is necessary to maintain cleanliness until the very end of the harvest.
When growing oyster mushrooms, it is important to maintain cleanliness until harvest.
The temperature regime in which oyster mushroom grows well is limited to marks from 20 to 28 degrees.
How to grow mushrooms at home
There are several ways to grow oyster mushrooms at home. Each method has advantages and disadvantages, so it is recommended that you familiarize yourself with all the intricacies of technologyto choose the one that suits you best.
How to dissolve in bags with your own hands
The substrate can be purchased ready-made or prepared with your own hands. The best raw material for oyster mushrooms is barley or wheat straw... Also suitable:
- hardwood shavings;
- buckwheat husk;
- sunflower husk;
- corn cobs and stalks.
The components used must grind to 5-10 cm.
Ready substrate for growing oyster mushrooms
Those who are just starting to master the technology of growing mushrooms at home are advised to refrain from using sawdust. This method is complex and requires special requirements.
Before using the substrate, it is necessary to carry out disinfection material. For this, it is subjected to heat treatment.
Step-by-step procedure for the disinfection of the substrate:
- the selected crushed raw material is poured into a metal tank or a spacious pan;
- fill the container with water (proportions 1: 2);
- bring the contents of the pan to a boil and cook for about 2-2.5 hours.
The finished base should be wet and soft, but do not overdo it with water. The correct composition releases the minimum amount of moisture during spinning.
In addition to the substrate, the seed (mycelium) is placed in the bag. It is not worth buying a lot at once, it quickly deteriorates. With proper care, from 1 kg of raw materials you can get up to 3 kg of oyster mushrooms.
The base is laid in the bags in layers, alternating the ball of the substrate with the seed. The bags are filled tightly without tamping. After tightly tying the edges of the container, cross-shaped holes are cut with a blade on the surface of the polyethylene. They need to be arranged at intervals of 10 cm in a checkerboard pattern.
Oyster mushroom mycelium in packing
For 2 weeks, the bag is lowered into the basement for an incubation period at a temperature 19-23 degrees... Lighting is not required at this stage.
The main advantage of the method is the simplicity of the technology. However, there is often poor or no fruiting. In such cases, you need to sort out the substrate and check for mold.
Mushroom picking begins 1.5 months after planting. Two crops are taken from one bag.
Step-by-step technology for breeding on stumps
There are two main ways of growing oyster mushrooms: intensive and extensive. In the first case, special premises with favorable conditions. The second method introduces the technology of mushroom cultivation open air... The timing of the harvest depends entirely on weather conditions.
If there is neither a felling nor a cellar at the dacha, you should not be upset. You can grow oyster mushrooms directly on stumps or scraps of hardwood (chestnut, ash, poplar, beech, etc.).
Sowing dates begin in the spring in establishing positive temperatures. The cuttings are soaked for 1-2 days before use. This procedure is not performed with a fresh tree.
In the country, you can use stumps to grow oyster mushrooms.
On the stumps, holes are pre-made with a diameter 10 mm with deepening on 5-6 cm... The seed is placed in the holes and covered with moss or adhesive tape. A stick-shaped mycelium is enough to insert into the hole and close it with plasticine.
The place for growing mushrooms is selected in the shadow under the dense crowns of trees. This is necessary to prevent the oyster mushrooms from drying out during the warm season.
When using logs, digging holes and laying wet sawdust on the bottom are provided. Further, soaked wood scraps are inserted into the prepared recesses and buried with soil for a third of the length (at least 15 cm). The spacing between stumps should be 35-50 cm.
Further care of the mushroom beds is to water the soil around the blanks. The collection time for oyster mushrooms more often falls on Aug. Sept... Such a plantation will yield good growth up to 5 years with the most generous fruiting 2-3 years after planting.
On substrate briquettes
Substrate briquettes are polyethylene sleevestuffed tightly with filler. Pre-applied on the surface of the film perforation round or other shape. The holes can be evenly spaced throughout the block, or span only two sides.
In the first case, when fixing the briquettes, their contact must not be allowed, in contrast to double-sided perforation, where the junction has no holes.
The most popular are the capacities of the following parameters:
- weight - 15 kg;
- length - 70 cm;
- diameter - 25 cm.
The density of the substrate in the sleeve, the level of humidity and the environment depends on the raw materials used and the method of its heat treatment.
There are many options for placing substrate briquettes. They can be suspended 2-3 pieces per rope or hang each one individually on the fittings. The weight of the bags is quite heavy, which provides stability when stacking blocks Each other... The result is a solid wall.
Substrate briquettes
The arrangement of briquettes on the shelves is also allowed. in vertical or horizontal position. The rope stretched from the back of the shelves acts as a safety net against falling or falling of the substrate. When growing mushrooms at home, the decision on the placement of bags is made based on the characteristics of the room.
The advantages of the method:
- convenient application;
- easy care;
- getting a quick harvest (after 1.5-2 months).
The disadvantage is the additional costs for the purchase of substrate briquettes.
On racks
Briquettes or bags with substrate and seed in the basement or cellar can be placed on shelves if space permits. The shelves themselves should be made of wood or rolled steel. Blocks are placed vertically or horizontally.
Shelves are manufactured in various designs. Craftsmen independently develop drawings, providing safety elements that prevent the bags from falling. One of the options is equipped with special pins on the shelves, on top of which blocks are placed. Due to this, their stability is increased.
It is permissible to install mushroom sleeves in several tiers, but no more than three... In this case, the distance between the shelves should be 70 cm, and between mushroom bags - 15-40 cm.
Racks for growing oyster mushrooms
When installing mushroom containers in 2 or 3 tiers, it is necessary to leave a free space under the lower blocks of at least 30 cm to ensure normal air circulation.
This method of growing oyster mushrooms is characterized by convenient maintenance and harvesting. However, not all summer cottages and cellars have a sufficient amount of space for installing shelving.
How to make mycelium for oyster mushrooms
It is not difficult to buy ready-made mycelium, but you can only evaluate the quality of your purchase after a few weeks. If a low-quality product is identified, it will no longer be possible to compensate for the costs of raw materials and energy resources, so many mushroom growers master the technology of mycelium production on their own.
The mycelium is planting material, which is introduced into the substrate to obtain a harvest of mushrooms.
At home, mycelium is grown mainly on wood or grain... The method with wood is appropriate to use with the subsequent replanting of mycelium on hemp. This seed has a long shelf life and disease resistance. The cereal appearance is obtained by applying the mother culture to a substrate of cereal grains.
A high quality mushroom is obtained in laboratory conditions... At home, this process can be repeated by preparing special equipment in advance:
- agar;
- thermometer;
- tweezers;
- test tubes;
- pipettes.
Also, work will require water, electricity, gas.
The fixtures and the surface on which the work is planned must be pre-treated with an alcohol solution for disinfection.
Stages of growing mycelium
- To obtain uterine mycelium, you need pinch off oyster mushrooms (from the area closer to the cap) a few small pieces.To cleanse the separated fragments from bacteria and parasites, it is recommended to dip them in hydrogen peroxide and dip the processed pieces into test tubes with crushed grains. Carrot, oatmeal, or potato agar can be used in place of the grain medium.
The tubes are tightly closed and stored in a room with an average humidity level and a temperature of about 20 degrees... After 2 weeks, a white edge will appear in properly prepared tubes. This is the uterine mycelium.
- To obtain an intermediate mycelium, you should boil cereal grains for 15 minutes. After cooling and drying, they are mixed with chalk and gypsum (for 1-1.5 kg of grains, take 30 grams of gypsum and 10 grams of chalk). The resulting mixture is poured into jars, filling it by 2/3. Then, uterine mycelium from a test tube is added to the container. The neck of the jar is closed with foil, which is fixed with tape. The workpiece is stored in the same conditions as the test tubes for 2-3 weeks... The result is a jar filled with grains and a fringe - an intermediate mycelium.
- The inoculum is obtained in a similar way, by replacing the intermediate mycelium in clean containers with a substrate. After the growth of the mycelium, it is transferred into bags or briquettes with a substrate in which the mushrooms will be grown.
Growing mycelium in a jar
Care of mushrooms during growth
After replanting the mycelium in the holes of the polyethylene, the bags are sent to incubationwhich takes up to 3 weeks. The temperature regime should not reach 30 degrees, otherwise the planting material will undergo a heat shock.
At this stage no ventilation... The accumulation of carbon dioxide creates favorable conditions for the development of mycelium. All that is required is daily cleaning of surfaces using chlorine-containing products. This will help prevent mold growth.
Next, the bags are placed in a specially equipped room with a temperature 10-20 degrees... The cooler the air, the less saturated the color will be. Lighting should be 12 o'clock with an intensity of 5 kW per 1 m2. The mushrooms are watered with a special sprinkler 1-2 times every day.
In the room where mushrooms are cultivated, there is a high level of spores in the air, so work should be done with a mask and glasses. This will help prevent an allergy attack.
The profitability of growing at home
You can grow mushrooms in several briquettes, satisfying the needs of your family. But this type of activity, with a reasonable approach, sometimes becomes a means of additional income. Moreover, caring for mushroom beds is not considered difficult.
About 350 kg of oyster mushrooms are obtained from 100 bags
If you create optimal conditions for keeping mushroom briquettes (bags) and adhere to the established temperature regime, then 3-3.5 kg of mushrooms can really be removed from one block. Respectively from 100 bags get 350 kg of oyster mushrooms.
Taking into account the market value (approximately 130 rubles per kg), the income will be 45,500 rubles. About half of the funds are spent on related costs associated with creating conditions for the cultivation of mushrooms. The net profit will amount to 20,485 rubles. The profitability in this case is 75%, payback - 5.2 cycles, which translated into months means 13-15 months.
If the dimensions of the premises allow accommodating 200 bags, then the profitability increases to 82%, and the net income will be in the range of 40,000-41,000 rubles. The investment will pay off in just 3.4 cycles or 9 months.
The process of growing oyster mushrooms at home is quite exciting and educational. By accumulating experience, you can gradually increase the volume, which will allow you to turn your hobby into a small business.
The entry How to grow oyster mushrooms properly at home first appeared About the farm.
In our country, tomatoes are the most popular crop. These fruits are tasty, nutritious, fortified and indispensable for the preparation of many dishes.So what is the difference between apartment conditions and an ordinary greenhouse? Why is it more difficult to grow in the first case, and what should be taken into account? Wouldn't there be a worse tomato seedling at home than the one that can be purchased on the market? Rather, the opposite is true. You will be surprised how healthy and strong such seedlings will turn out, and how environmentally friendly and tasty the harvest will be. Are you ready to figure it out and master a new skill?
Choosing seeds and preparing the substrate
So, planting tomatoes for seedlings begins with the selection of seeds. Foreign brands always seem to us in something better - but this does not always actually concern the planting material. The fact is that the seeds are prepared specifically for certain regions, with their climate and traditional cultivation technology. Specifically, for home cultivation, it is better to take today such varieties as "Ilyinichny", "Russian Ogorod", "SeDeka". Buy seeds in stores so-called "zoned". Plant 4-5 varieties at once - you will immediately see which are the best and which are not.
There is no need to pickle these seeds - they are already pickled. But if you collected material from your own garden, be sure to process it in a dark pink solution of potassium permanganate - about half an hour. For convenience, wrap in cotton pads. After that, wash well before sowing - in several waters.
As for soaking the seeds before planting, two points can be noted here: unprepared seeds can give 70% fewer shoots than germinated ones, but, on the other hand, many believe that if dry seeds cannot germinate in the ground themselves - vitality and yield of a certain sort is a big question.
But the seedlings are not particularly demanding on the soil - they tolerate the dryness of the earth and air well, do not die without fertilizers and can grow calmly even in acidic soil. That is why it is not at all difficult to grow it in an apartment - dry air is only beneficial. Therefore, if you plan to grow at home, then prepare the substrate yourself (earth + loam + humus + compost) or buy peat soil. In any case, the earth will have to be steamed, wherever you take it. The fact is that home seedlings are an ideal place for the development of fungi, even completely harmless ones in a greenhouse or vegetable garden. And never take land from flower beds or a vegetable garden - nothing sensible will grow here for you. Take sod land from a site where perennial grasses have been growing for at least 5 years, and take humus when it is three years old.
So when to plant tomato seedlings for open ground and for the greenhouse? It all depends on the variety and on what conditions you can provide for it: will the greenhouse be heated, or will you make warm beds in the open air. In any case, already in the second half of March, you can plant it in protected soil.

We process and germinate seeds
But before planting the seeds, soak them in a special solution. Add one of these options per liter of water:
- 1 teaspoon wood ash
- 1 teaspoon nitrophosphate
- 2 grams of "Bud"
- 1 teaspoon "Effecton"
- 1 ml of the drug "Epin"
- 1 teaspoon of Agricola Vegeta fertilizer.
- 1 teaspoon "Drops".
Soak the seeds in cloth bags and for a whole day - so that the temperature of the solution is not below 20 ° C. Immediately after that, place the still damp bag in a plastic bag and put it in the refrigerator for another two days - this will harden the seeds well. Sow them chilled directly into the soil - the seedlings will be friendly and fast.

Popular mistakes of newbie summer residents
So, at home, seedlings should be started to grow a little later than in a greenhouse. The fact is that in an ordinary apartment or house it is always darker and hotter than in covered ground. Even on the windowsill you can't just grow it - it will "toil" if you sow it too early.
It is convenient to sow large tomato seeds with tweezers. Place them on compacted soil one at a time, and attach tags to each groove with the variety name.Sprinkle on top with soil in a 1 cm layer, water and cover the crops with foil. The optimum temperature for seedlings is + 20 ° C. As soon as you see the shoots, transfer to the windowsill and remove the film.

When growing, the most important thing is to avoid common beginner mistakes:
- The varieties were chosen which are unstable to stretching (they are “rolled up” at home).
- The temperature regime and humidity level were not observed to the end.
- The seeds were planted too early.
- Too much watering.
- The soil was taken of poor quality.
- The seedlings were not hardened at all when transplanted into a greenhouse or open ground.
And the most unfavorable conditions for growing are waterlogged soil, heat and low light. This can be indicated by such signs: thin elongated stems, fragile leaves and fallen buds.
It is especially convenient to grow seedlings in peat tablets - it turns out to be of high quality and does not need a pick. Get those about 33-36 mm in diameter and plant 2-4 seeds in each. Then just pinch the weak sprouts. When the sprouts have a lot of roots, transplant it directly with a peat tablet into another container - about 0.5 liters. Further - everything is the same as in ordinary home cultivation, only a pick is no longer needed.
How to dive home seedlings correctly?
Do not feed seedlings before picking - just water. Dive in the two-leaf phase. When the time comes, transplant the tomatoes one at a time into your individual containers. Deepen to the cotyledonous leaves. At the same time, add one tablespoon of the Signor Tomato mineral fertilizer to the soil. After two weeks, feed the usual complex.
For everything to be successful, prepare individual containers for young plants - preferably 0.5 liter plastic cups. If you take a smaller volume, you will have to dive twice. In general, the process itself can be performed in two versions:
- We plant one plant at a time, and then we end up with good seedlings with a strong root system.
- We plant two plants in one pot, and as a result has two root systems. As soon as the seedlings reach 10-15 cm in height, we tightly tie their stems with a nylon thread. As soon as they grow together (and they grow together), gently pinch the top of the weaker one. The result is one bush with a powerful stem and a rich harvest. For tall varieties - what you need.
10-12 days before planting, be sure to harden the seedlings - at least an elementary temperature drop from 18-20 ° C to 14-16 ° C. And 4-5 days before disembarkation, take it out for 2-3 hours in the open air, and on the last day - already for a day. The lowered temperature affects the sprouts in such a way that they even change their physiological properties, and the tomato becomes completely ready with completely different growing conditions.

When to plant tomatoes in the garden?
So, here we figured out how to properly grow tomato seedlings at home. But how to understand that she is already ready to plant? According to such physiological characteristics:
- The internodes are short.
- The stalk is thick, and no more than 30 cm high.
- Each plant has 6-7 leaves.
- Flower brushes - one for mid- and late-ripening varieties, and one or two for early-ripening varieties.
Growing seedlings on your windowsill, you know exactly what it is, what it was poisoned with, what kind and whether it is intended for a specific area. You know what to expect and you can even accurately calculate the future harvest and its quality. And this is already a real entrepreneurial activity!
You can save great money by growing these foods at home.
Growing plants from seeds is correct and logical, but truly unusual is to grow vegetables and fruits from their leftovers. Does it take more time? Yes. Does it make going to the store easier? Definitely! Then let's get started ?!
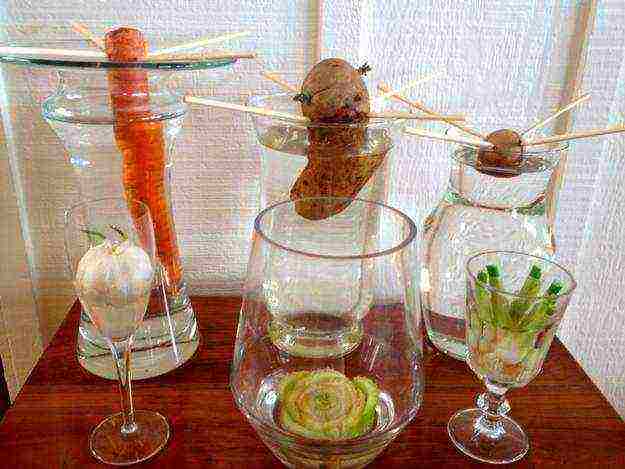
Level 1: novice gardener
1. You can grow green onions from bulbs.

Green onions are the simplest things you can grow at home. Change the water every day and you will see the result in a week.
2. You can grow garlic sprouts (they are edible) from a garlic clove.
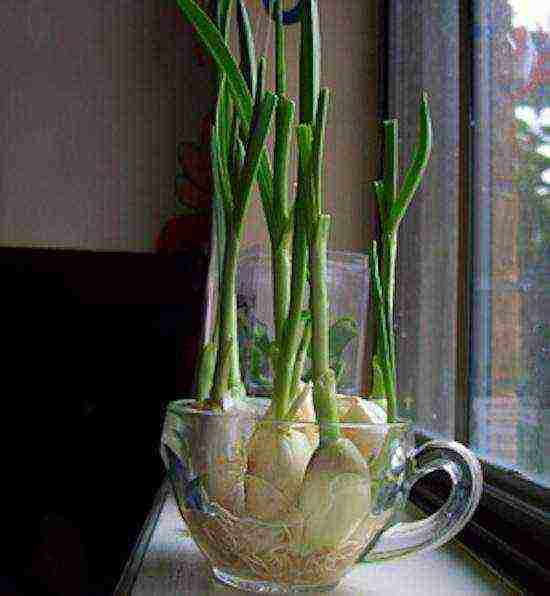
Or, you can only use the garlic itself after it has grown.
3. You can grow a variety of romaine lettuce from the bottom.

You don't need soil to grow lettuce, but if you do grow in soil, the leaves will be twice as large. The same principle can be used to grow cabbage.
4. Try to sprout carrot tops using only the top of the carrot.
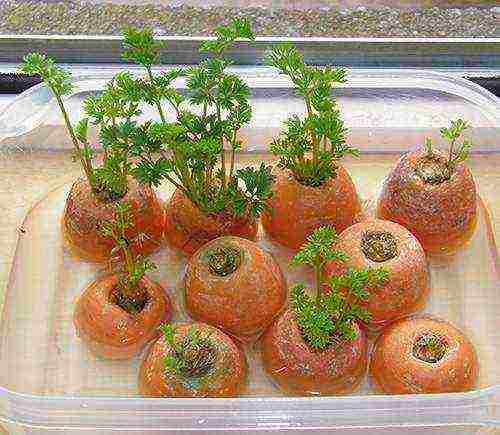
At first glance, this looks more like a school experiment than what you are about to eat. Carrot tops may be slightly bitter, but you can crush some garlic into them, add vinegar and honey to sweeten them.
5. Basil can be grown from cuttings.
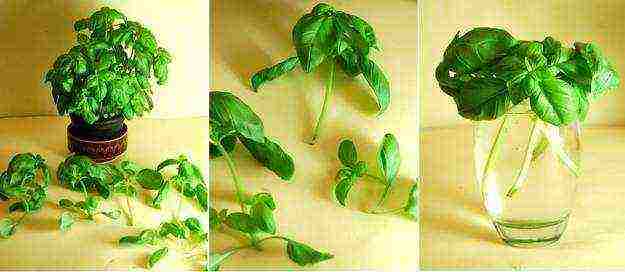
Basil's supplies can be literally endless. Change the water as often as possible to keep the plant from getting mucus.
Level 2: confident amateur
6. Lemongrass also grows from the bottom of its stem ...
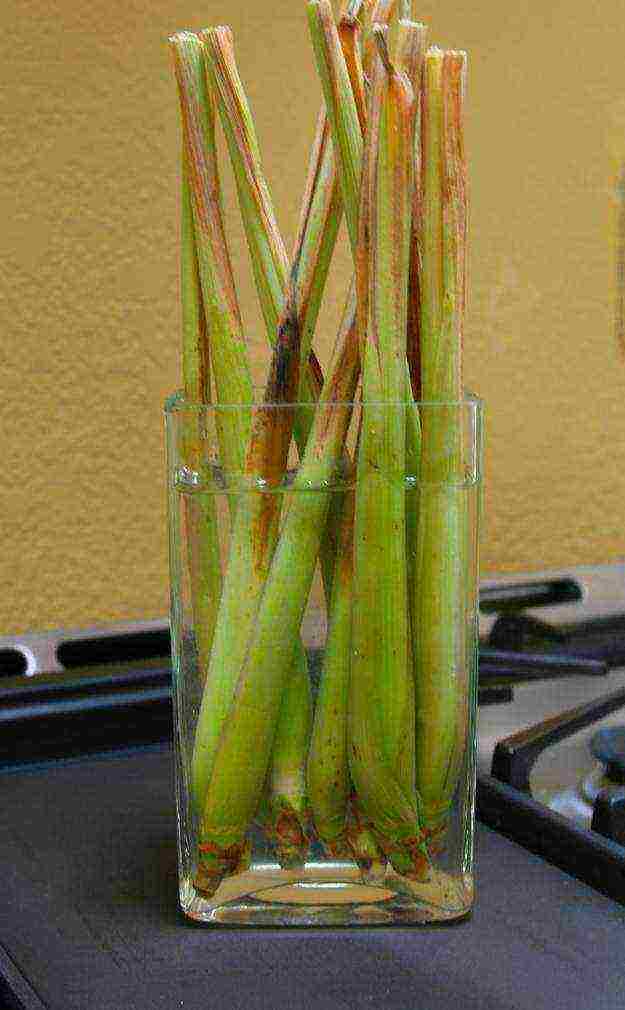
The underside of the lemongrass stem is too hard to cook, so it can be used to grow new stocks without having to discard half of the plant. Let the lemongrass pieces sit in the water for about three weeks. When you see that the roots have appeared, then transplant them into the soil and place them on a sunny windowsill.
7.… like celery.
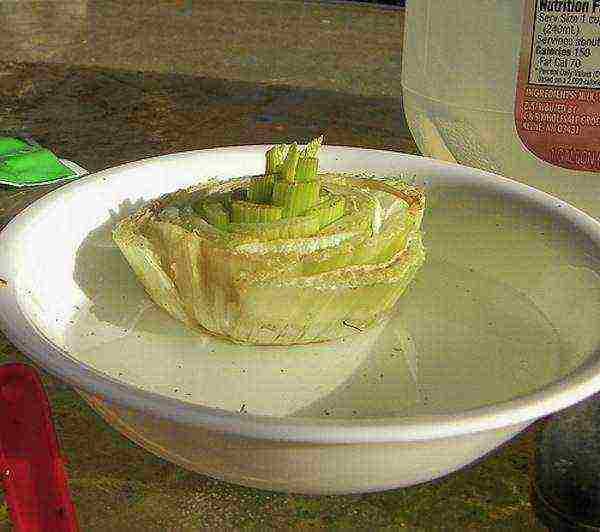
Looks strange, right? Leave some of the celery in the water for three days, then be sure to transplant it into soil.
8. But the onion sprouts from the bottom of the onion.
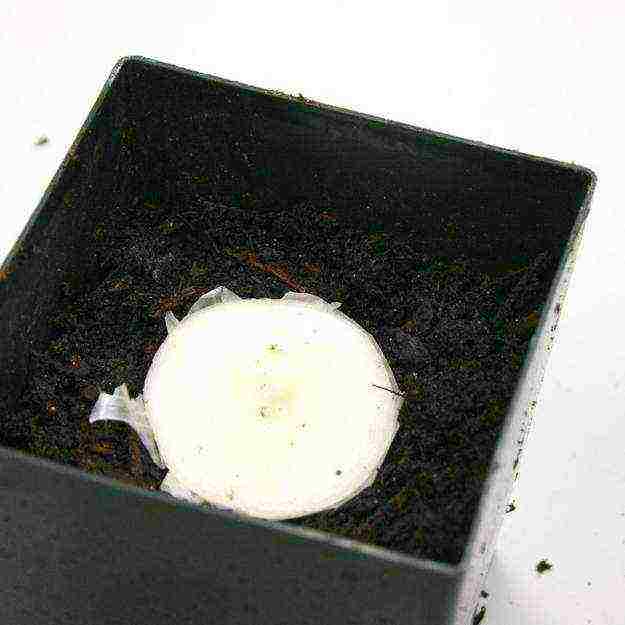
It seems odd that you can just cut off a piece of an onion, plant it in the soil, and after a while something magical will happen.
9. Chinese cabbage can be grown from its leftovers.

It is grown according to the same principle as celery.
Level 3: Experienced Gardener
10. A small tree grows from the avocado seed.
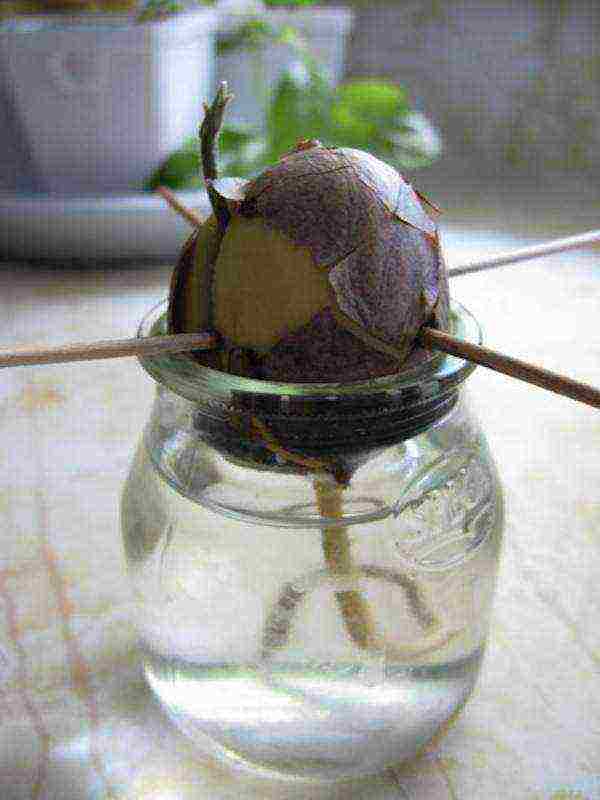
The seed can only germinate from a ripe fruit, but the seed must be removed from the fruit before planting. Growing avocados requires a lot of attention. In order for the first avocados to sprout, the plant will take 5 to 13 years. If you are confident and have a lot of free time, then why not?
For this:
- Wash the seed. Using three toothpicks, insert them into the part of the seed that is not in the water.
- Place it in a warm place with direct sunlight and change the water as needed. You will see the roots and stem grow back in about two to six weeks.
- When the base is 15-17 cm long, cut it back to about 7-8 cm.
- When the roots are thicker and the base is green foliage, transplant it into a pot of humus-rich soil, planting only half the seed.
- Water the plant frequently. Usually the soil should be moist, but not damp. Yellowish leaves are a sign that there is too much water. If this happens, stop watering the plant for a few days.
- The more sunlight the better.
- If the leaves turn brown and dry out at the tips, this indicates that too much salt has accumulated in the soil. In this case, pour a little water on it and let it soak into the soil for a few minutes.
- When the stem is 30cm tall, cut it back to 15cm to allow new shoots to grow.
- Don't expect your houseplant to bear fruit. Although this does happen sometimes, it usually requires transplants. A plant grown from seed will take 5 to 13 years to flower and fruit. Fruits on trees grown from seeds are rarely suitable for consumption.
11. Sweet potatoes sprout from which new fruits will emerge.
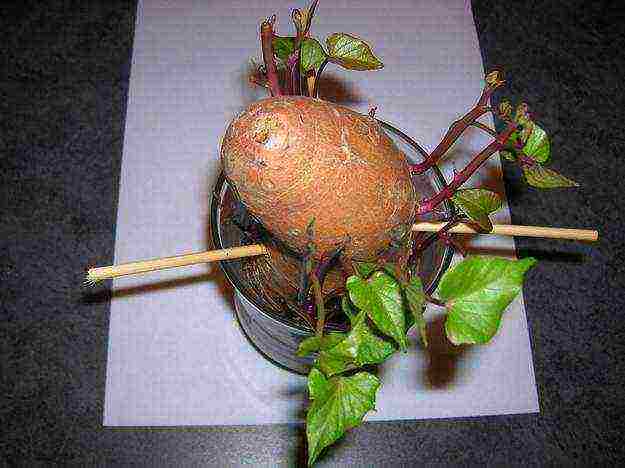
Sweet potatoes grow from shoots, not seeds or potato pieces like white potatoes.Sweet potatoes can be grown in both water and soil (only half of the tuber should remain in the soil).
To grow in water, place the tuber in a bowl of water, but stick wooden sticks (you can use toothpicks) on both sides and then it will start growing faster. You can put the cup both on the window and on the refrigerator - there will be no difference in plant growth. When grown in water, you can get about 50 shoots from one tuber.
Over time, he will need much more space.
Potatoes also grow fairly quickly in soil. It is much more convenient to grow potatoes in the garden. If the grown potato leaves lie in the soil for a long time, then later they can also bear fruit. These leaves can be eaten because they are edible and you can find recipes for making them. But when growing outside the home, keep in mind that potatoes are very sensitive to cold.
12. You can grow ginger from its roots.
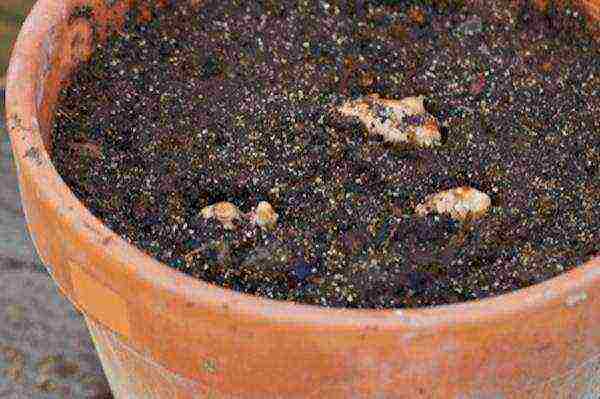
Shoots can germinate only after a few months and expect a harvest only after a year, but at least this undertaking will not require special expenses.
Prepare some rhizomes that are already budding. You will notice greenish outgrowths at the tops of the rhizomes. The roots must be large and healthy. Cut them into pieces so that each has a scion. If they dry out, they most likely will not germinate. Soak ginger in water overnight.
Fill the pot with soil and plant the rhizomes with the sprouts facing down. Press the rhizomes lightly into the soil and pour in some water. If you live in a cold climate, then put the pot on the sunny side, and sat in a hot, then on the shady side. Ginger is a tropical plant and loves heat, but it cannot tolerate too much sun in this climate.
Water the plant periodically and be patient. It may take quite a long time (from 3 months) before the first shoots appear.
13. Try growing a pineapple from the top.
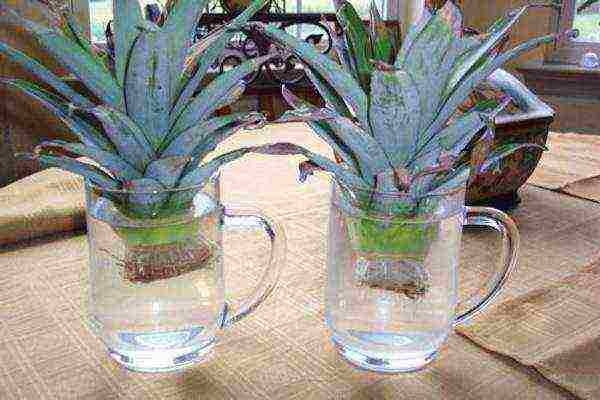 height = "400 ″ alt =" how to properly grow at home "/>
That's right, you can grow pineapple right at home, but it will take about 3 years.
Step 1. Get mature pineapple from any grocery store that has healthy, green leaves (not yellow or brown) and a golden brown skin. Your best bet is to try growing two pineapples in case one of them doesn't sprout. If you decide that you bought too many pineapples than you can eat, then simply cut them up and freeze them. Frozen pineapple tastes great!
Step 2. Prepare the top. Take the entire top with all the leaves and twisting movements try to pull it out with a small part of the stem (If you just cut off the top, you will have to remove all excess fruit pulp, otherwise the rotting processes can kill the entire fruit). After removing the stem, carefully slice small, horizontal sections from the bottom of the apex until you see root buds that look like small dots or circles on the cut surface. Cut as little as possible to avoid cutting off the base, which will then germinate. Once the tip is ready, let it dry for a couple of days before proceeding to the next step.

Step 3. Let the roots germinate from the top. Place the top in a clear glass vase of water and change the water every few days. Set the vase out of the way in a place that is neutral (not too hot or too cold), such as at the top of the refrigerator. After three weeks, you should be able to see the root sprouting.
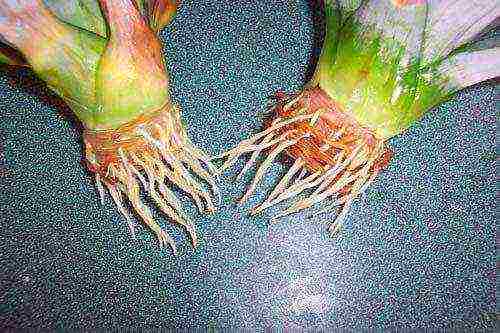
Step 4. Once the roots appear, transplant the pineapple into a clay pot with potting soil, with perlite at the bottom. A clay pot 45 cm in diameter with a drainage system is ideal for this. The perlite layer should be approximately 5 cm at the bottom of the pot before adding the mixture.
The soil should always be slightly damp (not wet, which will cause rotting, and not dry). It will take 6 to 8 weeks for the stem to emerge for strong roots to sprout. Don't speed up this process.
Over time, you will begin to notice that the leaves that were originally on the pineapple will begin to die off and turn brown, but new ones will grow to replace them. Cut off dead leaves throughout the year, and water the pineapple no more than once a week. If they grow up, then everything is going as it should. As soon as the year has passed, the plant will need to be transplanted.
Step 5. Transplant.
When replanting, avoid getting soil between the leaves. As the pineapple and its roots grow, it will also need to be transplanted into an even larger pot.
In winter, the pineapple stops growing, but growth should resume with the onset of spring. If it doesn't, then gently pull it out of the soil and check the roots. Change the potting mix if necessary.
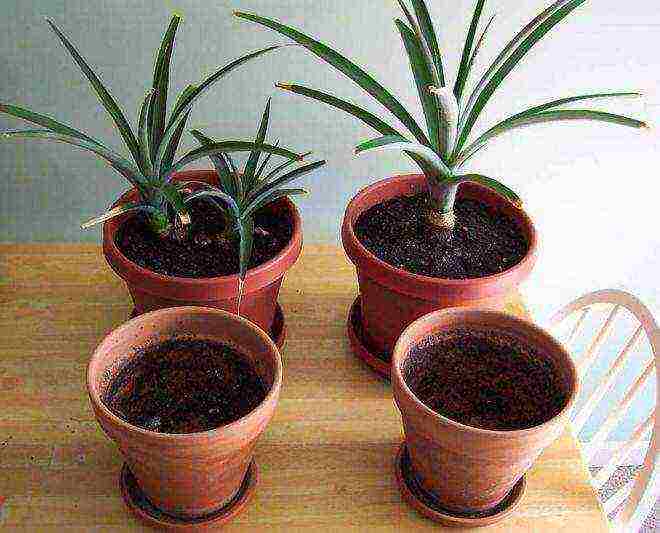
Pineapple is a tropical plant and cold temperatures can kill it easily.
Pineapples need to get at least 6 hours of bright light every day. In the summertime, place the plant on the sunny side of a windowsill or even in a garden.


