Content
- 1 Petunia: species, varieties and description
- 2 Growing petunias from seeds at home
- 3 Nuances of further care for petunia
- 4 Reproduction of petunia by cuttings
- 5 How to grow petunia seedlings at home: general recommendations
- 6 How to properly care for seedlings
- 7 How to plant petunia in open ground
- 8 What are the top dressing of pepper seedlings for?
- 9 How to determine what feeding is needed and what substances are missing
- 10 How to feed at home
- 11 How to feed peppers seedlings to be plump
- 12 Seedling problems, how to feed
- 13 When you don't need to feed
- 14 How and when to feed pepper seedlings: video
- 15 Description of petunia flowers
- 16 Rules for growing petunias from seeds
- 17 Sowing petunia seeds
- 18 Seedling care: lighting and watering
- 19 Diving - how to do it correctly
- 20 Growing seedlings in peat tablets
The beauty of petunia does not need constant care. This plant is unpretentious, and therefore, when the basic rules of care are followed, it is easy to grow a real blooming miracle from ordinary seeds. A flower pot will decorate a terrace, balcony or garden.
Petunia: species, varieties and description
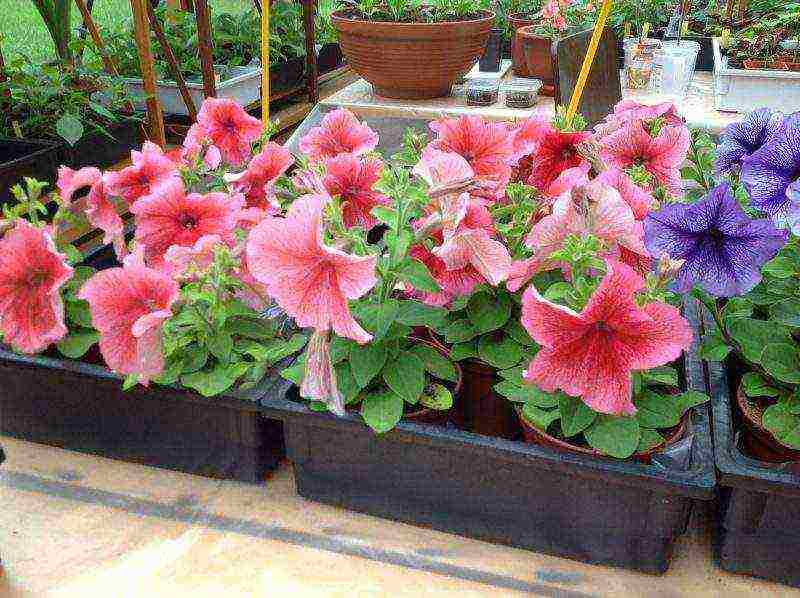
In nature, there are about 20 species of petunias, on the basis of which breeders have created many varieties. For growing at home, use a hybrid or garden variety. The varieties of the latter differ in the shape of the bush and the color of the flowers.
According to the shape of a bush, petunias are:
- bush - Fantasy, Dream (undersized series), Ultra, Titan, Polaris, Storm (weather resistant), Hit parade;
- cascading - Silver, Cherry, Rose, Ramblin, Typhoon;
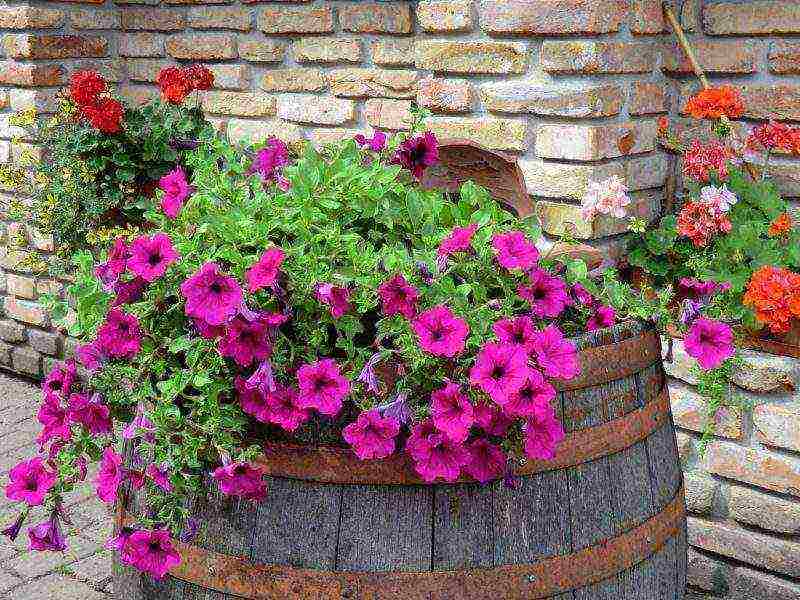
- ampelous - Surfinia, Lilac surf, Waterfall, Pearl surf, Wave of good luck.
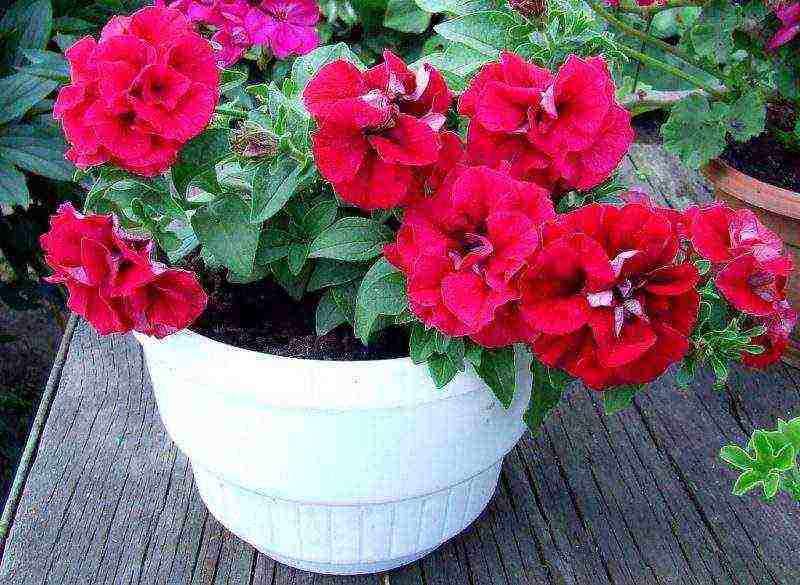
By the shape of the flower, the plant is represented by double, semi-double and simple varieties. By the type of flowering, large-flowered, floribunda (intermediate varieties between large-flowered and multi-flowered), multi-flowered, small-flowered and mini-flowered petunias are distinguished.
Popular varieties:
- large-flowered simple - Daddy, Picotee, Prism, Sophistica, Storm;
- large-flowered terry - Double Cascade, Pirouette, Sonata;
- floribunda - Sonya, Celebrity, Madnes;
- multi-flowered - Carpet, Celebrity, Mirage;
- small-flowered - Bonanza, Duo;
- miniflower - Fantasy.
Petunia cultivars are often represented by a series of similar plants with different flower colors.
Growing petunias from seeds at home
Growing petunias begins with the selection of quality seeds. If on a bag with seeds next to the name of the variety is the designation F1, then this is a hybrid variety obtained by artificial pollination.
Hybrids are slightly more expensive than conventional varietal plants, but have a number of advantages over them:
- resistant to diseases and pests;
- more decorative;
- better tolerate the vagaries of nature.
Adult plants obtained from hybrid seeds can only be propagated vegetatively.
When to sow petunias for seedlings
From sowing to disembarkation, it takes 3 - 3.5 months. Sowing seeds for seedlings in mid-January will allow you to get flowering plants by the end of April.
If it is not possible to highlight the seedlings, the seeds are sown in mid or late February.
It is advisable to sow terry varieties of petunias 1 - 2 weeks earlier than the rest, since such plants are characterized by slow growth, they need more time to form.
Ideal composition for soil
Sowing seeds is carried out in light soil, permeable to moisture and air. A store-bought universal primer mixed in equal proportions with coarse sand is suitable.
Petunia prefers to grow in acidified soils. Growing in acidic soil, it better absorbs nutrients introduced with top dressing. In ordinary alkaline soil, the root system absorbs fertilizers poorly, the plant develops and blooms worse. This is important to consider when planting petunia seedlings in a permanent place.
Sowing seeds for seedlings
Petunia is a small seeded plant and can be sown in two ways. The first consists in superficial spreading of seeds over the soil. In the second method of planting, the seeds are lightly sprinkled with fine river sand.
Embedding the seeds deeply will prevent successful germination.
- Seeds are sown in rows. The distance between seeds is up to 1 cm, between rows - 4 or 5 cm. The sowing system in rows is favorable for good ventilation of the seedlings.
- After sowing, watering is done using a spray bottle.
- The box with seeds is covered with foil or glass so that they do not dry out.
It is convenient to sow rare varieties of petunias in peat tablets. 2 seeds are placed in each large tablet.
- Before sowing, peat tablets are soaked in melt or spring water with the addition of HB-101 growth stimulator (dosage is 2 drops per 1 liter of liquid).
- The seeds are spread with a toothpick on the surface of the tablets and sprayed with a spray bottle.
- The tray, which contains peat tablets with sown seeds, is covered with a transparent lid or foil.
Seedling care
During seed germination, it is important to constantly moisten the soil so that the seedlings do not die. After planting in the soil, the seedlings hatch for 5-10 days.

The box with seedlings is immediately placed on a well-lit rack or a warm window sill, the air temperature should be +20 or + 25 ° C. The film or glass is removed.
It is necessary to highlight the emerging sprouts with a special lamp for seedlings so that the plants do not stretch out and grow healthy. It is advisable to lower the air temperature to +18 or + 20 ° C.
Artificial highlighting of seedlings is carried out around the clock during the first two weeks. Lamps use fluorescent lamps, at the rate of 2 lamps of 30 watts per 1 m2 of area.
Watering should be moderate, the plants are not flooded or overdried. It is useful to loosen the soil between the rows.
Seedling picking
- The first pick into boxes is carried out when the plants begin to shade each other. If the seeding was done in cassettes, one procedure can be dispensed with. The distance between the seedlings in the box after the first pick should be about 5 cm in a row and the same distance between rows. After all the manipulations, petunia is watered with a complex mineral fertilizer. Phosphorus should prevail in the top dressing for good root development of seedlings. Other trace elements must also be present.
- When the seedlings become cramped, a second pick is carried out into the seedling glasses. In this case, the seedling can be buried up to the cotyledon leaves. After the pick, top dressing is carried out using a growth stimulator or mineral fertilizer.
Humidity should be moderate, watering should be regular, but not excessive. After watering, the water should not pour out abundantly through the drainage holes - the leaves may turn yellow from the overflow.
From time to time, in glasses with seedlings, the surface layer of the soil is loosened so that the root system is better formed. Additional lighting of grown seedlings is not carried out. The air temperature should be around + 20 ° C, and at least + 16 ° C.
How to pinch a petunia
To form a beautiful bush, petunia must be pinched. Thanks to this technique, a lush plant with a lot of flowers is obtained.
When and how to pinch petunia? They begin to do this when 6 - 8 leaves appear on the seedlings and lateral shoots are formed. Pinch the central shoot (the main point of growth) by a few millimeters. After that, the side shoots will begin to grow more intensively, forming a beautiful, lush bush.
Top dressing of seedlings
The first feeding of seedlings is done with Teraflex or Kemira fertilizer. The ratio of the main components is N11: P40: K11. Dilute 25 g of the drug into 10 liters of water. In time, they begin to feed the seedlings when the first true leaves appear.
As the plants grow and develop, they are fertilized with complex mineral fertilizers. You can use nitroammophoska (20 g per 10 liters of water).
Top dressing is done no more often than once every 2 weeks, in the morning. Root dressing can be combined with leaf dressing. The foliage is sprayed with preparations with trace elements, for example, "Brexil".
If the soil and water are alkaline, once every 14 days it is necessary to irrigate with the addition of phosphoric acid at the rate of 3-5 cm3 per 10 liters of water.
Transplanting a flower to a permanent place
Healthy seedlings bloom even in the planting pots. Planting petunias in open ground is carried out when the threat of severe frosts blowjob. The seedlings will be able to withstand a nighttime cold snap to 0 ° C.
The soil on the flowerbed is prepared in advance - they pull out the weeds, dig up. The plant loves acidified soil, the best will be a mixture of fertile sod land, peat and sand.
Nuances of further care for petunia
The beauty of petunia pleases with bright colors all summer long until the very cold with proper care. It is important to take into account the characteristics of the plant, observe the watering schedule, do top dressing and pruning.
Watering schedule
Petunia does not like a lot of moisture evaporation from the soil, it does not need to be watered often. Drip irrigation is the best option, but you can use a regular watering can as well.
In hot weather, it is enough to water the flower bed with petunias once a week.
If the plants are planted in flower pots, they will need more frequent watering. Water is poured under the plants, avoiding sprinkling over leaves and flowers.
Useful fertilizers for indoor flowers
In order for the ampelous and bushy petunia to grow better and bloom magnificently, it is important to fertilize it. Potash and phosphorus fertilizers should prevail in feeding adult plants. You can use "Potassium Phosphate" or "Pekacid" (20 g per 10 L). Potassium-phosphorus fertilizing stimulates the growth of lateral shoots and flowering.
Plant pruning
Petunia care sometimes involves pruning adult plants.
- If the bush begins to decay, loses its beautiful shape and compactness, pruning is necessary. Shoots are not cut off completely, but only the tops. The length of the cut will depend on the desired shape for the plant.
- There are cascading varieties with lush shrubs and lots of flowers that don't need shaping. In such plants, only dried and thinned shoots are cut off.
- Anti-aging pruning is helpful for petunias. Soon, new shoots with flower buds appear on green, pruned branches. It is advisable to prune the petunia when its flowers become smaller or signs of disease appear.
Disease and pest control
Most often, petunia suffers from chlorosis. Leaves turn yellow if the soil is not acidic enough or in the absence of essential trace elements (mainly iron). To treat chlorosis, plants are sprayed with iron chelate.
At an older age, petunias are susceptible to powdery mildew disease. This fungal disease occurs due to waterlogging.It can be recognized by the white bloom on the back of the leaves. For treatment, the plants are sprayed with drugs: "Chistotsvet", "Ordak", "Tiovit Jet", "Protan". It is advisable to carry out treatment for prophylaxis in wet, rainy weather.
Timely feeding contributes to the fact that plants grow stronger and get sick less.
Reproduction of petunia by cuttings
Beautiful hybrid varieties of petunias, reproduced only by cuttings. To propagate a plant you like, it is important to know the rules for growing seedlings from cuttings.
- In March or April, when it is best to carry out cuttings, the ends of young shoots with 2 or 3 internodes are cut off. The stalk should be 5 or 6 cm long.
- At the cut off shoot, remove the lower leaves and plant, deepening 2 or 3 cm into a box with prepared soil.
- The land should be light - 50% peat, 25% sand and 25% fertile sod land. It is advisable to pour 1 cm of dry sand on top. The end of the cuttings is dipped into Kornevin before planting.
- Water the cuttings with clean water with a weak solution of potassium permanganate.
- After 2 weeks, the cuttings will take root and then they need to be planted in separate containers.
Petunia flowers will decorate the front garden, loggia or flower bed with abundant flowering. Many varieties bloom all summer long and smell pleasantly. You can choose any color of flowers to create a beautiful garden or room decor.
Bright petunia is good for everyone: beautiful flowers of various shades, splendor, long flowering, unpretentiousness. However, not every gardener succeeds in decorating his plot with these popular flowers, the reason for this is the difficulty of growing seedlings.
Since the cost of the finished planting material is quite high, the device of a large flower bed will require considerable financial costs. It's better to learn how to get sprouts on your own, even if it takes some time. But, knowing from personal experience how to properly grow petunia seedlings, in the future it will be much easier for you to grow any other flowers.

If you want to get flowering plants earlier, start sowing seeds at the end of January.
It is best to plant petunia in open ground in mid-June, which means that you should start sowing seeds from mid-March. It takes about 12-13 weeks for the seedlings to get stronger, the root system becomes stronger, and the first flowers appear. If you want to get flowering plants earlier, start sowing seeds at the end of January.
Video about growing petunias
How to grow petunia seedlings at home: general recommendations
The choice of soil for seedlings
The correct soil is one of the keys to the success of growing seedlings. For petunias, it should be lightweight, breathable, moisture-absorbing and nutritious.
The easiest way is to purchase ready-made seedling soil in the store. The advantages of this solution are obvious. First of all, the prepared soil is sterile and does not contain pathogens. In addition, it is a clean soil, in which there are no foreign inclusions. For seeds as small as petunias, this point is especially important.

It should, of course, be borne in mind that not every ready-made soil mixture is suitable for growing petunia seedlings.
Did you know: Often petunias do not germinate well because of too acidic soil. The “culprit” of this situation is high-acidity high-moor peat.
First of all, you should pay attention to the type of peat used in the soil mixture. He can be riding (red) or low-lying (black). The soil for growing petunias should not be too acidic, so you need to choose a soil based on lowland peat.
Did you know: You can lower the acidity of the soil by adding lime to it. A teaspoon of limestone or dolomite flour is added to one liter of soil.
The German soil of the Green World brand is well suited for growing petunias. It is also possible to use soil from the Russian manufacturer Pelgorskoye-M.
If you decide to prepare the soil yourself, you will need turf soil, peat and sand. In this case, the sand should be chosen not red, but river sand - white or grayish. Red sand contains too much iron oxide. Mix sand, peat and garden soil in a 1: 2: 2 ratio. All components of the soil mixture must be carefully sieved to remove debris, lumps and stones. After that, the soil should be spilled with boiling water or calcined in the oven to destroy all pathogens.
Sowing technique of petunias for seedlings
Petunia seedlings need good lighting. If you have the opportunity to provide the seedlings with additional daylight, you can sow as early as the end of February. Otherwise, it is better to wait until mid-March, otherwise the sprouts will be weak and elongated.
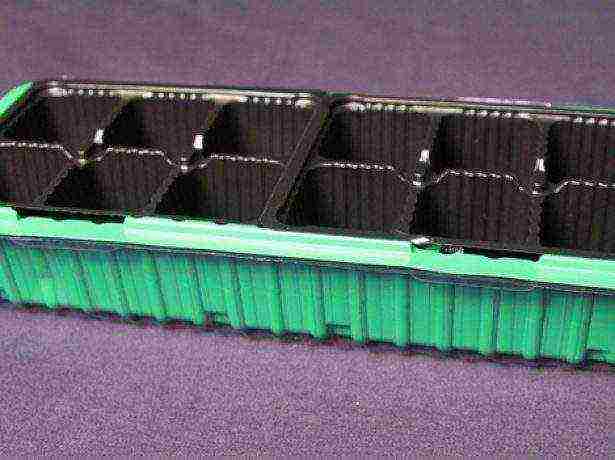
As containers for seedlings, you can use plastic containers (preferably with opaque walls), special seedling greenhouses with cassettes, or sow in peat tablets. Pour drainage on the bottom of the containers, on top - a soil mixture with a thickness of at least six centimeters.
On sale, petunia seeds can be found in two versions: in granules or in bulk.
In granular form, hybrid seeds are most often found. These are very beautiful ampelous, terry, multicolored and other interesting varieties. There is only one drawback of such seeds - high cost. In addition to the higher average price per bag itself, each such bag usually contains from three to seven seeds. However, it can be convenient for planting petunias in pots, balcony boxes and flowerpots. For a flower bed, you will need a lot of such bags.
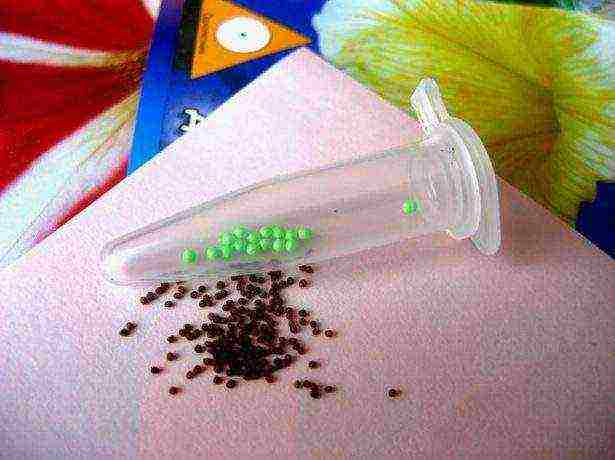
There are many advantages to granulated seeds. First of all, petunia seeds themselves are extremely small, they are much smaller than a grain of sand, and it is difficult to sow them. But sowing granules is extremely simple. It is enough to put the granules on the prepared and moistened soil mixture and slightly press them in (you do not need to sprinkle it with earth, the petunia is sown superficially). The seeds are laid out a few centimeters apart. You can sow directly into pots or cups - two per cup. The seeded granules are covered with plastic wrap. By the way, granulated seeds give on average a higher germination rate than ordinary seeds.
But with seeds in bulk, everything is somewhat more complicated. Here, the inconvenience is offset by the lower cost. In addition, a loose sachet can contain up to several hundred seeds (this information is usually indicated on the package). In this situation, one of the following instructions will come in handy.
Option 1: Mix with sand
- Prepare potting soil and sprinkle it with room temperature water.
- In a flat bowl, combine the seeds with a little sand.
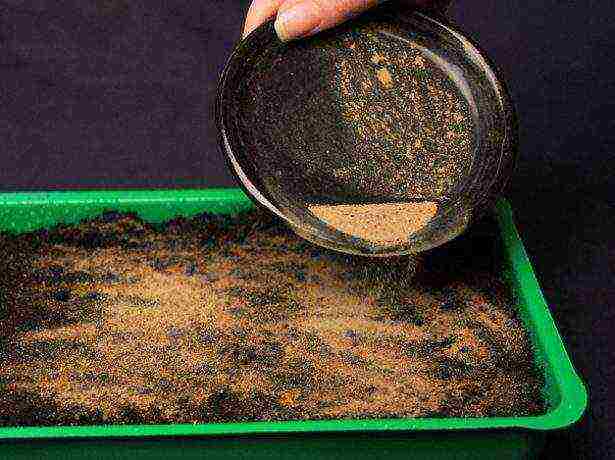
- Spread the resulting mixture on the prepared soil in an even thin layer.
- Spray the crops from above with water from a spray bottle.
Option 2: With tweezers or a toothpick
- Prepare a container of soil. Pour the seeds from the bag onto a white sheet of paper, so you can clearly see them. Prepare two toothpicks and a glass of water.
- Dip the tip of one of the toothpicks into water. Now it will be easy to pick up a petunia seed on it and transfer it to a container. Shake the seed onto the soil with a second (dry) toothpick.
- Sprinkle the sown seeds on top with water from a spray bottle.
Likewise, you can carefully transfer the seeds to the soil with tweezers.
Option 3: Sowing in the snow
- Prepare a container with soil, lay a thin layer of snow (1-2 millimeters) on top of it.

- Spread the seeds carefully over the snow. The point is that they are clearly visible in the snow, and if the seeds have fallen too thickly, you can redistribute them with tweezers or a toothpick. As it melts, the snow itself will pull the seeds into the soil to the desired depth. You don't need to water anything.
For all sowing options, the seeds are covered with plastic wrap from above.
Sowing seeds in prepared soil mixture or in peat tablets
The soil for sowing seeds should not be alkaline or strongly acidic. Loose, nutritious soil mixtures are used, which are able to retain moisture, but also not freeze at the same time, letting in excess water. A ready-made soil mixture is sold in stores, you can mix a suitable mixture yourself, taking two parts of well-decomposed peat, turf soil, rotted humus and one part of sand. Mix all the ingredients well, sift twice - through a very coarse sieve and through a smaller sieve.
Pour crushed expanded clay into boxes or pots as drainage, on top of expanded clay - large screening of soil mixture, fill the upper third of the container with fine screenings, leaving about 6 cm to the edge. Spread the seeds in even rows over the moistened soil and lightly sprinkle with water on top.

The soil for sowing petunia seeds should not be alkaline or strongly acidic
You do not need to sprinkle the seeds with earth, since they need light for germination. It is enough to lightly press each seed to ensure contact with the ground. If you are interested in how to grow petunia seedlings in the easiest way, use peat tablets instead of seedling containers. They must first be poured with boiled hot water, and then cooled. Small seeds are carefully placed with tweezers in special recesses.
How to properly care for seedlings
The air temperature in the room for growing seedlings should be 20-22 degrees. You need as much light as possible (ideally, backlighting during the day). The substrate should be constantly moist, but at the same time, stagnation of water should not be allowed. Condensation on the lid or foil should be wiped off daily. In addition, you need to take care of hardening the sprouts. To do this, after sprouting, remove the lid for 10 minutes every day. Airing time is gradually increased. You can completely remove the lid or film after all the sprouts acquire real leaves.
Top dressing at the first stages is not needed, but you can strengthen the immunity of seedlings by adding Epin to the spraying water (a few drops on a spray bottle).

It will be more convenient for the plant to develop in individual containers, it will grow healthier
Seedlings can be dived when their height reaches 4-5 centimeters. Using a narrow knife, remove each sprout, pinching the root at a depth of about three centimeters. After that, each sprout is planted in an individual container.
The main problem that can be encountered when growing petunia seedlings is excessive stretching of the sprouts due to lack of light. You can cope with this problem when diving, by deepening the seedlings into the soil up to the cotyledon leaves.
Granulated seeds can be sown directly into peat tablets - then nothing will have to be dived.
It will be more convenient for the plant to develop in individual containers, it will grow healthier, and it will be easier for you to transplant seedlings into open ground. When picking, deepen the seedling to the first true leaves, so that a good root system is formed and the likelihood of damage to the shoots by the "black leg" is reduced.
Useful tips for growing seedlings
In order for a healthy, beautiful petunia to grow from seeds, the growth of sprouts must be accompanied by regular careful watering. When the soil dries up, the plants will die, and waterlogging will lead to the appearance of a "black leg", and as a result - to rotting and death of small seedlings. Fragile seedlings should be carefully watered at the root.

Top dressing is applied two weeks after plant picking
To harden a young plant from the second week, open the window for 10 minutes, thereby lowering the air temperature in the room. However, in this case, the sprouts must be protected from drafts and direct flow of cold air, the temperature of the seedlings themselves should not drop.
DIY video about growing petunia seedlings
Top dressing is applied two weeks after picking the plants. At first, apply only spraying with leaf fertilizer every two days, alternately changing growth stimulants and complex mineral fertilizers containing nitrogen. In the future, you can add root dressing. Important little things:
- sprouts need light almost around the clock, you will need to provide not only daytime supplementary lighting of seedlings in gloomy weather, but also leave a dim light for the night;
- do not allow a crust to appear on the ground, otherwise the seedlings will suffocate;
- when the roots of the plant fill the entire coma of earth, transplant the petunia into a larger container;
- if you notice that the seedlings are too elongated, add a little potting soil;
- for growing expensive and rare varieties, use peat tablets.
At first, petunia will grow rather slowly, do not worry - the plants will form a root system. In about 1.5 months, the aboveground part will develop no less actively.
How to plant petunia in open ground
At least a week before planting in open ground, seedlings must be taught to new conditions. To do this, the seedlings are taken out to the balcony or veranda every day, increasing the time they spend in the open air every day. Three days before planting, the pots are left to spend the night outside.
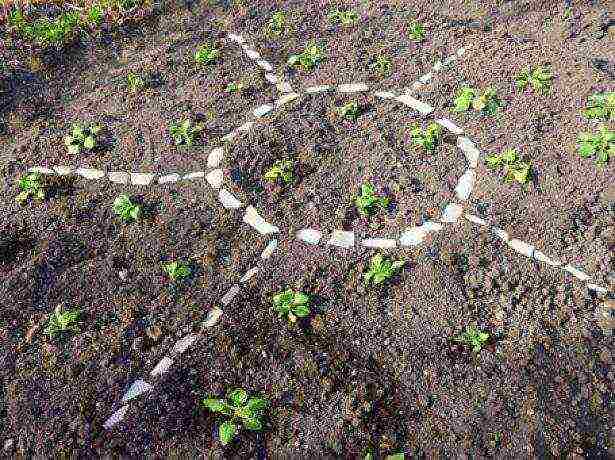
It is better to plant seedlings in the evening or on a cloudy day (not in direct sun). For seedlings, holes are prepared at a distance of 18 to 35 centimeters (depending on the variety). Fill the wells with plenty of water. Remove the seedling as carefully as possible from the glass, along with the earthy clod. Dip an earthen ball into the hole, sprinkle with earth and tamp it tightly.
Immediately after planting, the seedlings of petunias must be thoroughly watered.
The article was updated on 29.01.2018 Rate the article:
(28 votes, average: 4.6 out of 5)
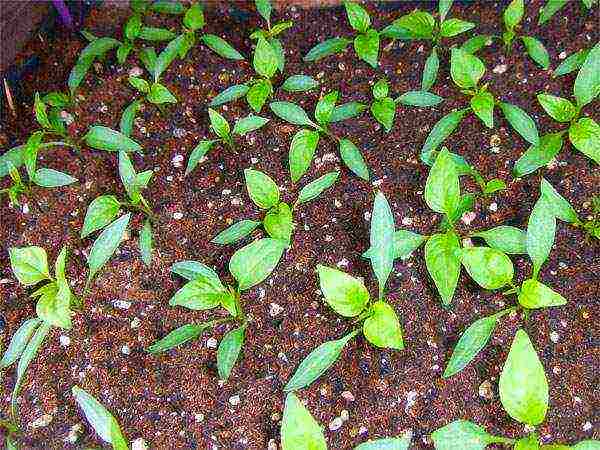
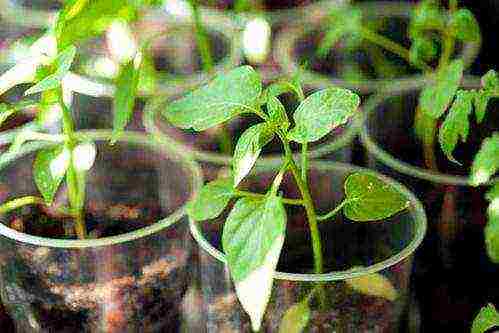
Sweet pepper is a capricious plant. Growing strong, healthy seedlings requires many conditions. The culture is very fond of light and warmth, responds gratefully to timely watering, grows better without picking. The composition of the soil and the application of fertilizers also play an important role - without them, it is hardly possible to get normally developed plants.
What are the top dressing of pepper seedlings for?

At each stage of development, pepper needs its own dressing. By applying fertilizers at an early stage of plant development, the summer resident will receive seedlings with a powerful root system and good immunity. Having received all the necessary elements from the soil, the pepper will actively grow and successfully resist diseases and pests.
- In the early stages of the growing season, the vegetable needs nitrogen salts for the formation of the stem and leaves. But an excess of nitrogen must not be allowed, this leads to the accumulation of nitrates.
- The culture makes special demands on the amount of potassium introduced. This element is necessary for the plant for the formation of flower buds and for abundant fruiting.
- Phosphorus is just as important for peppers. This element is involved in the development of the roots and the aerial part of the plant. It is desirable that fertilizers contain this element in the most accessible form.
But all this does not mean that you need to feed the seedlings beyond measure. Pepper is one of those crops that react negatively to excess fertilization.
How to determine what feeding is needed and what substances are missing
The gardener can determine which elements the plant lacks in appearance. The main necessary components for the normal growth of pepper are: nitrogen, potassium and phosphorus. But in addition to them, other microelements are needed, the lack of which the plant will also signal. Let's see how you can recognize the deficiency of all these essential substances:
- If not enough nitrogen, the seedlings will not grow well. The formation of new leaves on the tops of the plants will take place more slowly, while the lower leaves will begin to turn yellow and die off. It is from them that the pepper will take nitrogen for the construction of new cells. At the same time, the production of chlorophyll decreases, which further inhibits the growth of seedlings.
- Phosphorus is necessary for peppers to participate in metabolism. With its deficiency, a purple tint appears on the underside of the leaves. If the plants look normal in general, you can leave everything as it is until the seedlings are planted in open ground.
- a lack of potassium manifested by yellowing, and then browning of the leaves at the tips, which indicates their dying off. The roots develop inadequately - they have no lateral processes. Such a root system will not be able to feed the plant normally after planting in open ground.
- With a lack gland chlorosis begins in pepper seedlings. The leaf plates turn pale, darker veins stand out against the main background. The plant becomes weakened, reacts more sharply to adverse conditions. The situation can be aggravated by insufficient illumination.
- Deficit calcium can be seen by the thinning of the stem. As a result, the plants may even lie down. When there is enough calcium, the stems of the seedlings are plump and strong.
On a note! Sometimes you can see several signs of micronutrient deficiencies at once. In this case, it is recommended to feed the seedlings with a complex mineral fertilizer.
How to feed at home

Both industrial and folk remedies can be used as fertilizers. Each of them has its own advantages. Some summer residents do not want to use chemistry, so they use what is at hand for feeding.
Ready dressing
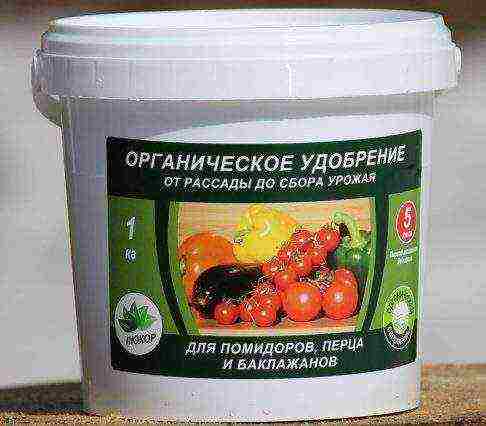
When applying industrial fertilizers, do not forget about the sense of proportion. If you bought a supplement for adult vegetable crops, then for seedlings you will need to reduce the concentration of the solution by half. Plants need fertilization if they are planted in poor soil, are in a stressful situation, have recently undergone a pick, are preparing for flowering and fruit setting.
For peppers, the best fertilizers today are: "Kemira Plus" and "Kristalon". They take into account the individual needs of the culture and have a perfectly balanced composition. If it was not possible to purchase these particular preparations, you can buy additional fertilizing: "Krepysh", "Ideal", "Agricola" and the like. They will also provide the vegetables with a basic micronutrient profile.
Folk remedies
The positive experience of using folk remedies as fertilizers has long been obtained. They were also used by our grandparents. What did they use for pepper seedlings besides special fertilizers?
Yeast
In addition to minerals, beneficial bacteria will also benefit the plants, which will make the soil looser, which will help the roots of the pepper to better absorb nutrients. It is for this purpose that yeast feeding is used for pepper seedlings.
To prepare this fertilizer, you will need 1 liter of water, 1 tsp. sugar and 1 g of dry yeast.
All components are mixed, allowed to brew a little, after which the plants are watered. Top dressing should remain slightly warm. You will soon notice that your seedlings are literally growing by leaps and bounds.
Ash
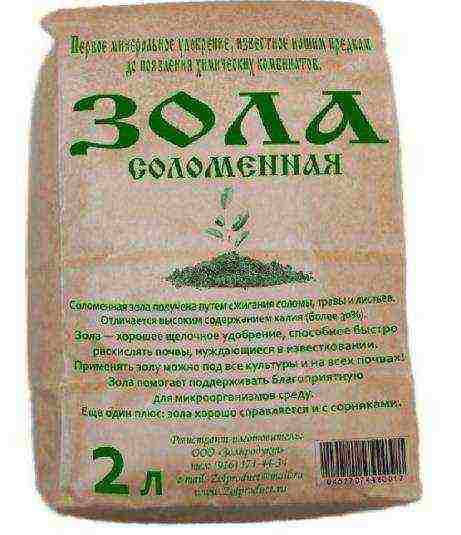
Ash, which is formed when burning environmentally friendly wood, performs several positive functions at once.
- Firstly, it reduces the acidity of the soil, sometimes it is necessary.
- Secondly, sprinkling ash on the soil in the pot prevents the attack of pests such as aphids or midges.
- Third, it is an excellent source of potassium in an easily digestible form.
Fertilize the soil with ash in moderation, as excess ash can reduce the nitrogen content and dry out the soil excessively. It can be applied both dry and liquid by dissolving in water.
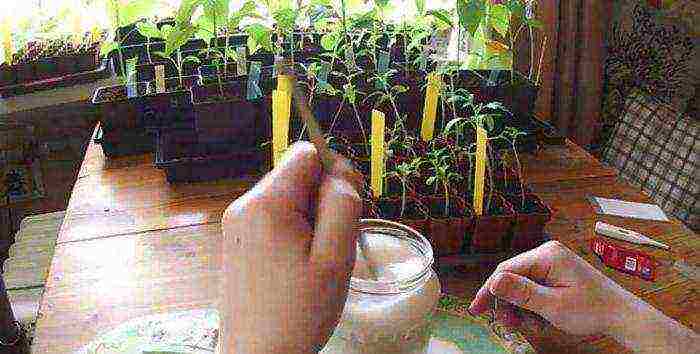
Iodine

Iodine is an element that pepper seedlings need just as much as other minerals. In addition to the fact that such feeding serves as food, iodine also disinfects the soil, killing fungal spores.
You need to use this substance in a very small amount. Only 1 drop of iodine tincture is required for 2 liters of water. This is enough for the foliage to become bright and juicy for two whole months. For foliar feeding, 1.2 cups of whey is added to the finished solution.
Hydrogen peroxide
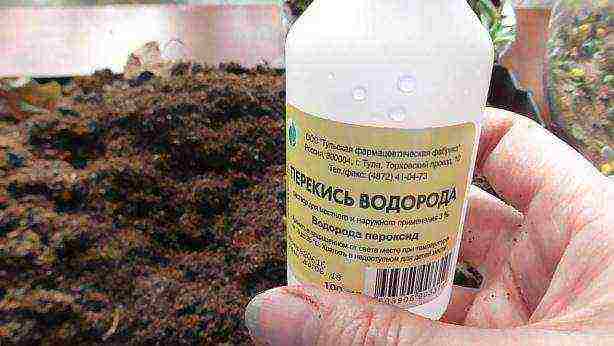
This tool does not carry nutrients, but with the help of a solution of hydrogen peroxide, the earth is disinfected and saturated with oxygen molecules. If you regularly use a weak solution of peroxide for watering, the seedlings will grow well, they will look lively and vigorous. For 1 liter of water, 3-5 drops of the product are enough. The same solution is good for pre-sowing seed treatment.
Ammonia
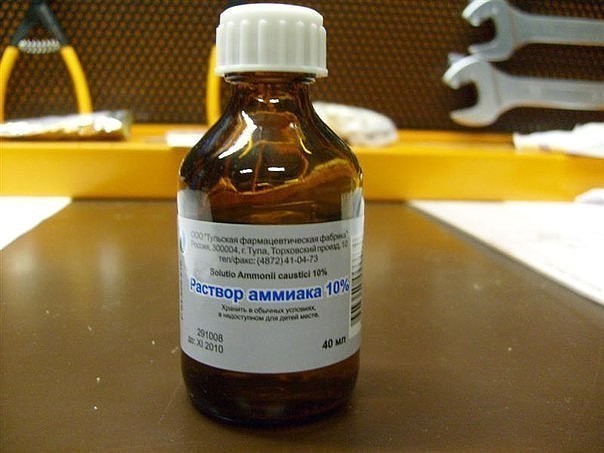
Ammonia solution is called ammonia solution. This remedy from a home medicine cabinet can relieve seedlings from growth retardation, yellowing of leaves, fungal diseases and pests.
For feeding, you should dilute 1 tsp. ammonia in a liter of water. At this concentration, the solution is used for root dressing. If you want to spray the peppers over the leaf, the amount of ammonia is halved.
How to feed peppers seedlings to be plump
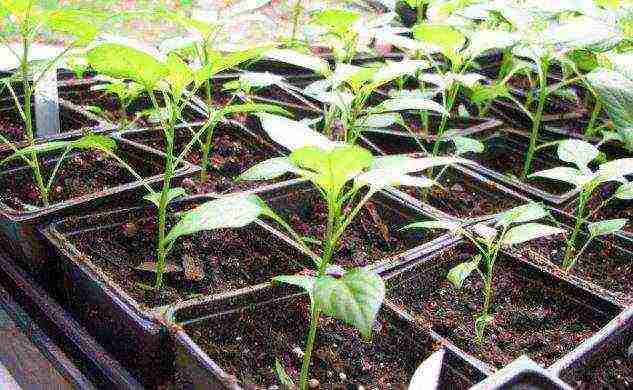
You need to know not only how to feed the seedlings, but also in what time frame it needs to be done. The first time fertilization is applied after the emergence of seedlings, the second fertilization is carried out after the pick.
After germination
Summer residents need to take care of the first feeding 2 weeks after the sprouts appear above the soil surface. By this time, real leaves have already formed on the peppers, and food will come in handy for them. Fertilization will give an impetus for the further development of seedlings. At this stage, it is customary to use nitrogen-phosphorus mixtures. For example, such:
- complex fertilizer "Kemira Lux" (1.5 tablespoons per 10 liters of water);
- a mixture of foskamide and superphosphate (15g / 30g per 10 liters of water);
- fertilizer "Kristalon" (20-gram package for 10 liters of water);
- urea and superphosphate solution (7g / 30g per bucket of water);
- a mixture of ammonium nitrate and superphosphate (15g / 30g per 10 liters of water);
- infusion of mullein, prepared at the rate of 1:20 with the addition of 1 tbsp. l. superphosphate per 10 liters of solution.
Very little fertilizer is poured under each plant, otherwise the seedlings will be overfed and begin to "fatten". After 2 weeks, you can carry out a second top dressing, bringing from 70 to 100 milliliters under each bush.
It is also recommended to spray with a solution of Zircon or Epin Extra a week before the pick. The drugs will help prevent the seedlings from pulling out and increase the immunity of plants on the eve of transplantation.
After the pick
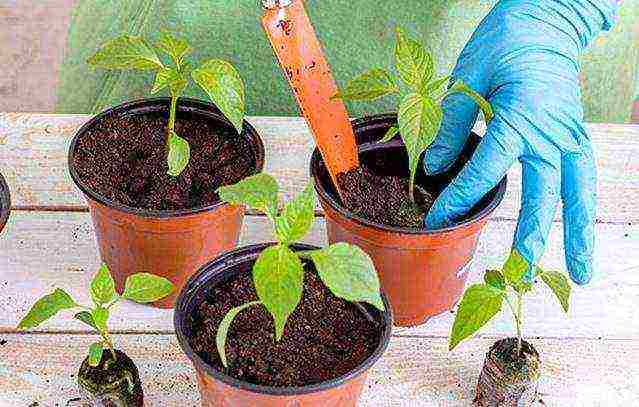
Picked peppers should be given time to regenerate roots that may have been damaged during transplantation. Top dressing is carried out no earlier than 2 weeks after the pick. For feeding, in this case, use the same mixture of all the main trace elements: nitrogen, phosphorus and potassium. The ratio should be as follows - add 3 parts of phosphorus and potassium to 2 parts of nitrogen.
With this composition, it is necessary to fertilize the plants once every 2 weeks, adding 100 ml of nutrient solution to each pot. First, the seedlings must be watered so that the roots do not get burned. The last time the seedlings are fed 10 days before planting in a greenhouse or soil. To fertilize dived seedlings, many use the folk remedies mentioned above.
On a note! A good result is given by the alternation of industrial and self-prepared fertilizers.
Seedling problems than feeding
Gardeners often share their experience of growing seedlings and share their care methods, feeding recipes. It may turn out that some seedlings are strong, the stems are thick and short, while others have thin, stunted stems in the seedling box.Plants can be fast growing, or they can hardly grow. Problems can be solved by applying fertilizers, but first you need to clarify the cause of these troubles.
If she is thin
The main reason the seedlings have thin stems is the depletion of the substrate. This happens due to the fact that the volume of the soil, even after the dive, is very small and the pepper quickly draws out all the nutrients from the soil. If the seedlings are not fed in a timely manner, their appearance will be very unsightly. How can you feed the seedlings so that the stems become plump?
To prepare the solution, take 2 g of nitrogen and phosphorus, add 4 g of potassium and dissolve in 2 liters of water. 2 tbsp is poured under each plant. l. solution.
After 2 weeks, feeding should be repeated, increasing the amount of minerals by 2 times and adding 2 g of magnesium to them. You can prepare a solution of 6 g of azofoska, 3 g of superphosphate and 1 g of potassium sulfate per liter of water and add to a bucket of water for irrigation. It is recommended to water pepper seedlings with this composition up to 3 times a week.
On a note! You can also make the substrate more nutritious with the help of industrial preparations: "Aquadon", "Apion", "AVA".
If it grows poorly
Experts' opinions on the need to feed pepper seedlings were divided. Some believe that from an excess of fertilizers, the crop begins to stretch and outgrow and advise not to use fertilizers at all. Following this advice, the gardener may be faced with the fact that at some stage the growth of peppers almost completely stops. Especially if the seedlings were planted in not very nutritious soil.
Therefore, if you are unsure of the quality of the soil and notice a lag in growth, urgently fertilize your peppers to meet their nutritional needs. This can be done with any complex mineral fertilizer mentioned above, or using organic matter.
It is enough just to sprinkle the soil in the pots with ash left over from burning wood or grass. Suitable for feeding and compost from an old compost heap. It's good if the fertilizer has been in it for 3-4 years. For 1 part of the compost, take 5 parts of warm water, let it brew and fertilize the pepper seedlings after watering.
When you don't need to feed

If you want to do without fertilizing altogether, select a soil that is initially balanced in composition, suitable for growing this particular crop. If you decide to skip one of the dressings, then the appearance of the plants should serve as a reference point.
Healthy, normally developing seedlings will have strong fleshy stems, bright shiny leaves in an age-appropriate amount. The color of the leaves will be uniform, without a yellow border and spots. Conditions of detention play an important role in this. If you provide the peppers with sufficient light and warmth, and regularly water them with warm, settled water, your seedlings will have good immunity and normal growth rates.
Even if you think that the peppers need top dressing, do not spend it ahead of time, otherwise there is a high risk of oversaturation of the soil with minerals, and they will no longer be normally absorbed by the plant. Be sure to maintain the required interval of 2 weeks.
How and when to feed pepper seedlings: video
Fertilizing pepper seedlings with hydrogen peroxide: video
As you can see, there are many subtleties in the application of fertilizers for pepper seedlings. Over time, you will be able to determine by appearance alone whether the plants need feeding or not. Knowing the need for fertilization comes with experience, so don't be afraid to try.
 In our country, petunia is grown as an annual ornamental plant. While this representative of the nightshade belongs to perennials. But due to the harsh climate in most of our Fatherland, no one thinks about preserving petunias for the winter. This business is troublesome and unpopular with Russian flower growers.Meanwhile, breeders have long bred hybrid varieties of petunias that are capable of blooming profusely several times a year.
Description of petunia flowers
 The flower came to Europe from South America. At home - in Brazil and Paraguay, petunias grow up to a meter in height. Petunias used in cultivated floriculture are plants that have the shape of a small bush.
Its height depends on the type and variety. Low-growing petunias grow up to 20-30 cm, larger ones form a bush up to 60 cm. Petunias are also distinguished by the location of the stem:
- upright;
- creeping.
Breeders are constantly expanding the range of these many-sided decorations for any garden or flower bed. Most often, petunias are divided into two large groups:
- Shrub.
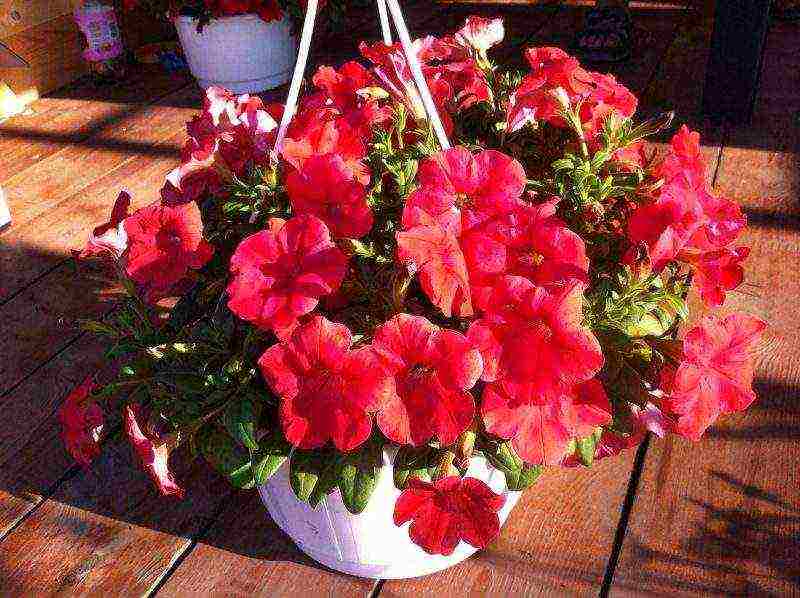
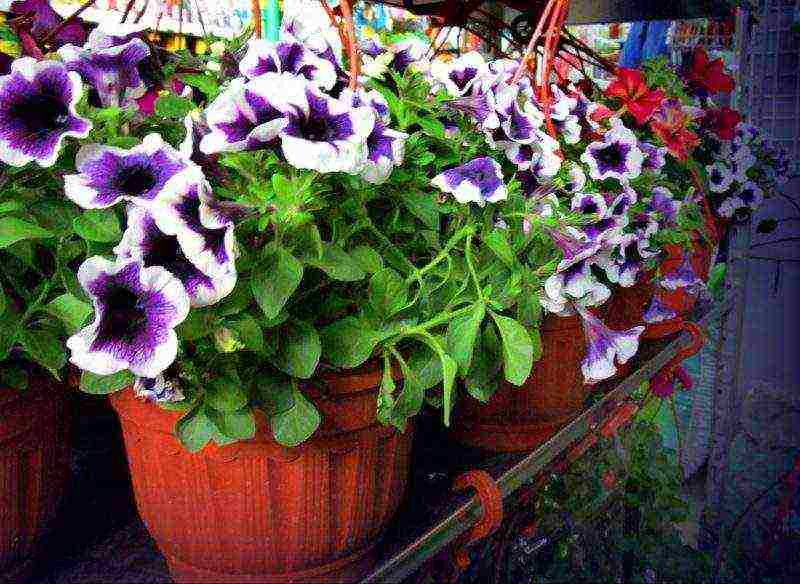
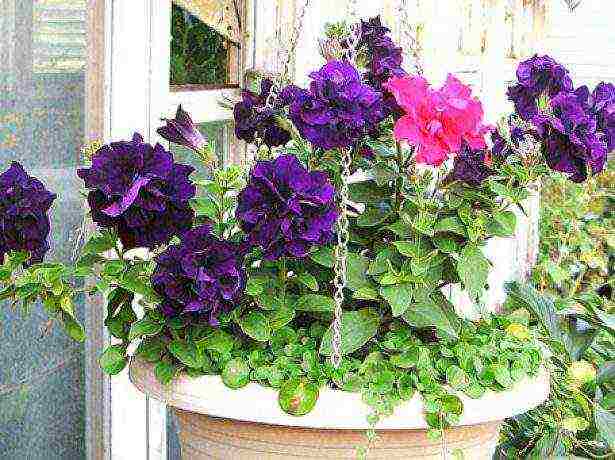
- Ampel petunias.
The varieties of the latter type are well suited for planting in hanging pots, because due to flexible short shoots and a large number of small flowers, a bright "ball" is formed, visible from afar.
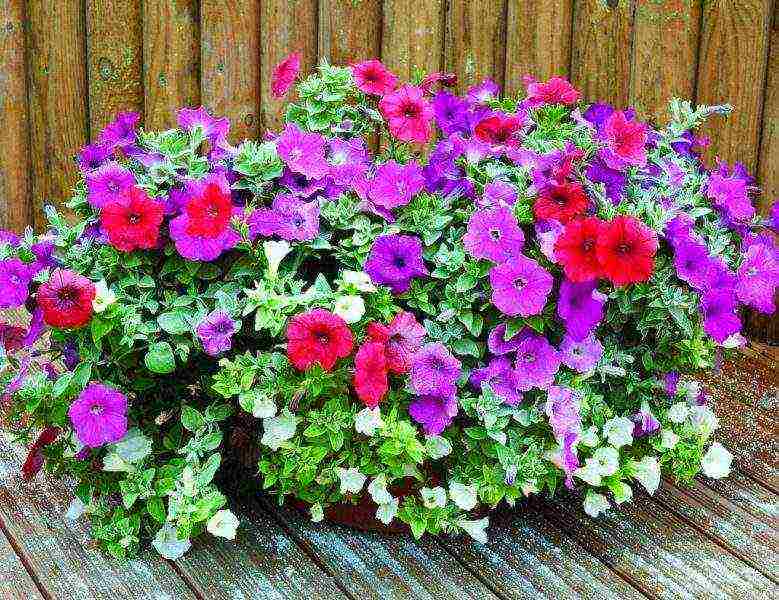
By the size of the flower, petunias are subdivided into large-flowered and multi-flowered... The first group is distinguished by flowers more than 10 cm in size. They decorate strong branches with single funnels. Such petunias look very elegant.
In plants of the second group, the flowers are much smaller, a little more than a five-ruble coin, but there are many of them. The bushes look elegant and even fun.
Petunia is extremely popular with flower growers all over the world for its variety of colors, long and abundant flowering with proper care. Many are trying to grow petunia seedlings with their own hands at home.
How and at what time to start this responsible business? How to grow petunia seedlings at home? At the first stage, it is necessary to purchase high-quality seed.
Rules for growing petunias from seeds
 Sowing is carried out in late February, early March. Although you can start growing seedlings at a later date, but in this case, you have a danger of not seeing flowering.
Keep in mind that it will be at least 10 weeks before this beauty will delight you with her colorful outfits. Petunia produces very small, less poppy seed, seeds.
However, you can see them on the shelves of flower shops. granular form... They are much larger and more expensive than conventional ones. The whole focus is in a special nutritionally protective shell that surrounds the seed of the plant.
Sometimes the pellets are sold by the piece. It is impossible to determine the appearance of the seeds in the package, because they are sold in opaque bags. It remains to trust the information on the package. Study it carefully. The label should state:
- Seed producer.
- Shelf life.
- The name of the variety.
- Flowering time.
- Adult height of the bush.
Keep in mind that paper-wrapped seeds remain viable for up to a year. Longer shelf life is provided by packaging foil or polyethylene - up to two years. How to grow petunia from seeds?
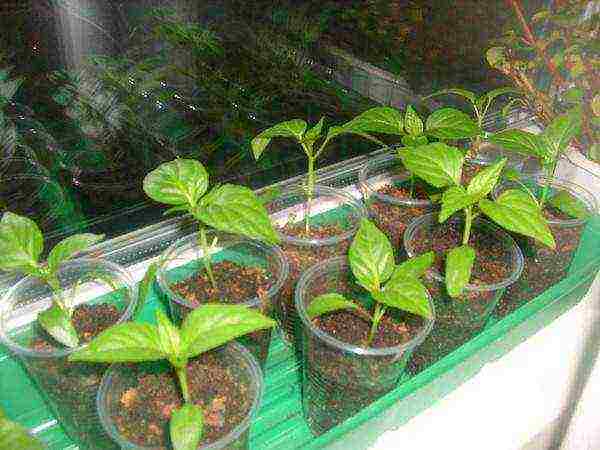
How to choose containers for seedlings
 For a homemade "greenhouse", in which seeds will sprout and young seedlings will pick up the first leaves, containers from cookies, biscuits, ice cream will do. You can purchase plastic containers at the hardware store.
A budget and convenient option is to use an empty five-liter water bottle. With a sharp knife along the long side, make an incision on three sides and slightly bend the plastic upward, you get a "greenhouse" with a lid, light and comfortable.
Whatever you choose to grow petunias from seeds at home, do not forget to do in the bottom of the container with a heated nail drainage holes... Then the water will not stagnate in the soil and the roots will not be affected by rot.
Soil preparation
 You can buy a ready-made mixture at a flower shop. Such compositions are produced on the basis of peat. There is even special soils for petunias... A high-quality substrate is industrially disinfected from pests.
But you can prepare the necessary soil composition yourself, if you have the necessary ingredients, time and desire for this.
Take in equal proportions (2 parts each):
- peat;
- garden land;
- humus;
- add 1 part sand to this set.
Mix everything, the necessary nutrient base for seed germination is ready. Pour a layer of expanded clay or small river pebbles on the bottom of the container. On top of this drainage pad, place a layer of soil about 3 to 5 cm thick.
But before you do this, please accept parasite precautions... Heat the purchased or homemade composition in the oven for 15-20 minutes, or pour boiling water over it.
Some growers advise adding potassium permanganate crystals to the water so that a solution saturated in color is obtained. In this case, hang the container with the soil above the basin, where the water will drain. After the ground has cooled down after disinfection, moisturize it well with a sprayer and start sowing.
Sowing petunia seeds
 Petunia is a plant that is very fond of light and warmth. For successful germination (assuming you are lucky with the starting material), you need to create these conditions. Therefore, the seeds are only lay out on the surface moistened soil, but we do not fall asleep with earth.
For the convenience of performing the operation, moisten a match or toothpick with water and pick up each seed with it. The intervals between them must be the same, at least 10-15 cm.
After you're done press the seeds to the ground, to improve tenacity. Close the homemade greenhouse with a lid, glass, plastic wrap and put it in a warm place, the simplest thing is to a room battery.
Additional illumination is not required at this stage, but heat is vital for the emergence of sprouts. Germinate petunia seeds should at a temperature of +25 degrees.
Open the ventilation container lid once a day. Seedlings will appear on the third or fourth day. However, if the seeds are expired, then they will germinate longer, about ten days.
Seedling care: lighting and watering
 For healthy and strong seedlings at home, consider some of the developmental features of petunias. If the sprouts do not have enough light, they will reach for the sun, they will turn out to be tall, but weak.
Therefore, after the seeds germinate, move the boxes away from the battery, but closer to the window. At this stage, the second factor plays the main role - light. Without relying on window lighting, resort to the help of additional lighting.
For these purposes use fluorescent lamps or lamps for seedlings. Turn on the additional lighting as soon as the seeds hatch. The lamps should burn over the seedlings for at least 12 hours. In the future, this will contribute to the formation of flower buds more quickly. The temperature in the place where you have boxes with sprouts should be + 18-20 degrees.
It is extremely important at this stage, when the seedlings are fragile and can easily die, carry out competent watering... Experienced growers advise doing this in the evening, when more intensive plant growth occurs.
Water should be soft, chlorine-free and warm... To do this, stand the tap water for at least a day on a windowsill or in another warm place. Before watering, squeeze a few drops of juice from the lemon into it.
From the very first day, as the sprouts appear, ventilate the greenhouse”By sliding the cover. Start with two to three minutes, increasing the aeration time from time to time. Such a simple method will help maintain the right amount of moisture and protect the seedlings from the disease, which is called "black leg".
Diving - how to do it correctly
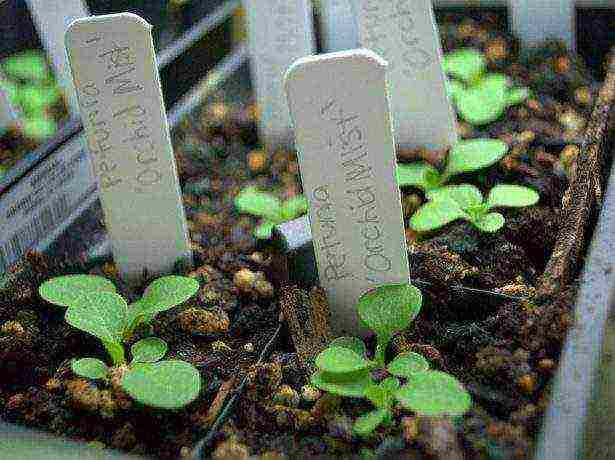
 The moment comes when the seedlings get cramped in the box and each sprout already needs a separate space. For this purpose, a transplant is performed. So that you don't get confused, let's figure out what leaves are on plants.
Germinating, the seed releases two cotyledons.They are elongated and much larger than the leaves that appear later. The cotyledons are a kind of bottle of milk from which the sprout feeds. But now he and his brothers on TV grew up, and like kids in kindergarten, they began to push and interfere with each other.
So it's time to dive. This operation includes transplanting and pinching the root... Each sprout is placed in a separate transparent cup. We deepen the sprout in the soil until the cotyledon leaves.
While the plants are very fragile, the root system has not formed and consists of only one root, as thick as a hair. In order not to damage, the sprout is taken together with a lump of earth and placed in a new place of residence. The soil is sterilized, as before sowing seeds - with boiling water or calcining in the oven.
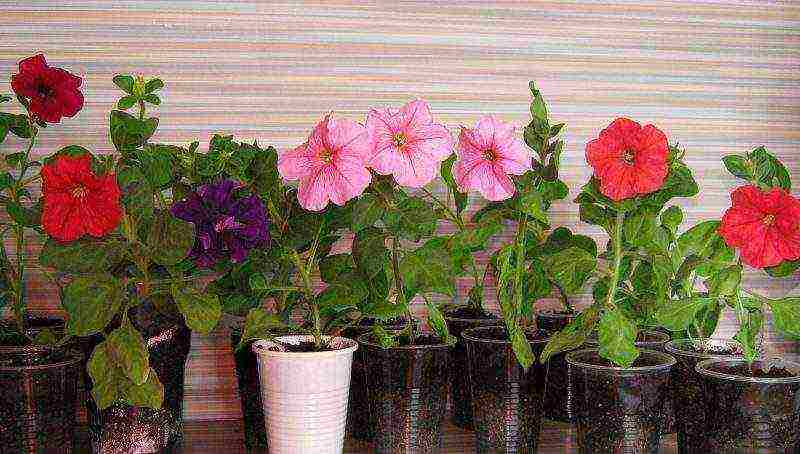
After the first transplant of petunia seedlings, if you did everything correctly, the plant begins to develop more actively, increasing the root system. About a month and a half after sowing, a second transplant will be required, into larger pots. Here, petunia is left before it is planted in open ground in the garden or outdoor pots.
Strictly speaking, root shortening is also part of the diving procedure. They do this so that lateral roots begin to develop and the whole system is formed more powerful, branched. Then the plant will receive more nutrients from the soil.
But recently, flower growers have moved away from this practice, considering it too risky. Some masters in growing seedlings at home, do not do the second transplant.
They choose containers for diving with a margin, "for growth." Explaining this by the fact that there is nothing to injure the plants once again. You can choose the best way from your own experience.
Temperature regime and feeding
 Having received a separate living space after diving, the seedlings begin to grow vigorously. Now, for their own benefit, start accustoming young petunias to low temperatures, up to + 10 °. Florists use the term "hardening" in this case.
Seedling cups taken out to the glassed-in balcony or open a window in the room. Start with 15 minutes, gradually increasing the time.
After a couple of weeks of such repetitions, and provided that the outside air temperature does not drop below normal, the seedlings can be left completely in a cool place before they are transplanted to a permanent place.
It is impossible to grow good seedlings without care, and also timely and regular feeding... Start fertilizing two weeks after the first seedling transplant. In the future, do this for adult plants, once every two weeks.
Specialized shops offer florists complex fertilizerscontaining a lot of potassium. Concentrated liquid formulas are also good and must be diluted with water at home.
After the second transplant and in the future, do not forget about loosening the soil. The roots need oxygen. Petunias will respond to such care with prolonged flowering until late autumn.
Pinching seedlings
 The heart rejoices from looking at the bright dense "ball" of multi-colored petunias. How to achieve perfect shape at home? The secret is simple. It's all about pinching the top of the plant.
Begin this procedure as soon as four to five leaves appear on the sprout, not counting the two that grow from the hatching seed (cotyledon). It turns out that you will do the first pinching when there are seven leaves on the petunia.
By limiting upward growth, you force lateral shoots to develop. So it will be formed round bush... But keep in mind that pinching postpones the beginning of flowering in time. Therefore, leave the plant alone a couple of weeks before.
Growing seedlings in peat tablets
 In addition to the above-described method of growing seedlings, there is another, more economical in time. Industry produces peat tablets, which are great for getting strong seedlings at home.
They are placed in a plastic deep dish and fill it with water. Within 10 minutes, swelling, the tablets increase in volume several times. Drain off excess water and make a small indentation in the upper part of the peat column with a match or a toothpick.
Place the seed of the petunia there. Sowing is complete. In the future, take care of the seedlings as described above. Convenience is that in the case of peat pellets, a dive is not required.
The grown seedlings are planted immediately in open ground, along with a tablet. In the ground, it will disintegrate without your intervention. It is also good that peat gives necessary nutritional supplementation developing petunia roots.
From all of the above, we can conclude that even a beginner can grow petunia seedlings at home.