Content
- 1 Plant characteristic
- 2 How to grow at home on a windowsill
- 3 Indoor hot pepper care
- 4 Diseases and pests
- 5 Varieties and features of the plant
- 6 Properties of bitter pepper
- 7 Secrets of growing hot pepper
- 8 Picking and planting peppers in a permanent place
- 9 Hot pepper transplant rules
- 10 The most cultured of the cultural
- 11 Descendants of American Aborigines
- 12 Agrotechnics of bitter pepper
- 13 Diseases
- 14 Beauty or productivity?
- 15 Conclusion
- 16 Preparing a vessel for a future plant
- 17 We make the soil for indoor hot pepper
- 18 Planting seeds in the soil and process features
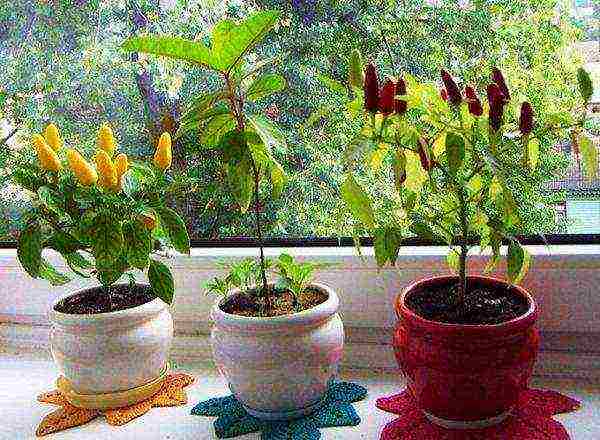
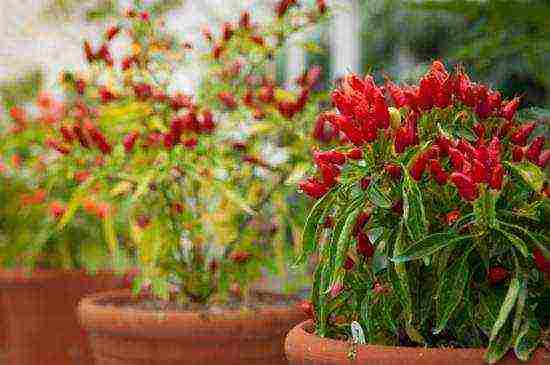
Bitter pepper on the windowsill is not only a necessary spice, which is always at hand, but also an excellent decorative home decoration, easy to grow. A pot with a bright beautiful plant will serve as an exquisite decor for any home, and the piquant taste of such a spicy spice will make this pepper indispensable in the kitchen of every hostess.
It is possible to grow sweet bell peppers and hot hot peppers, Drakosha or other varieties at home. How to plant seeds for seedlings and the conditions of planting in an apartment, we will tell further.
Plant characteristic
For growing on the windowsill, breeders specially bred several varietal varieties of hot peppers. Such indoor peppers are also divided into a fruit variety and an ornamental (no fruit) variety.
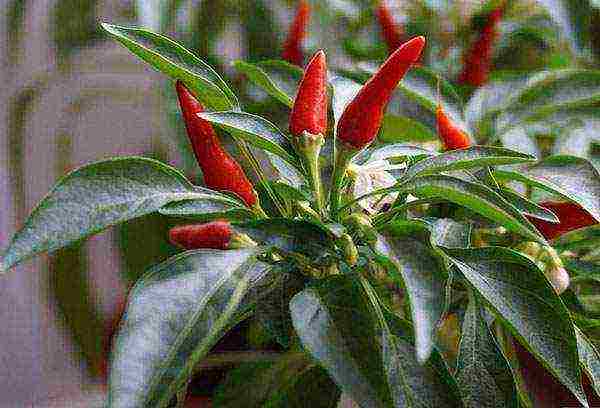
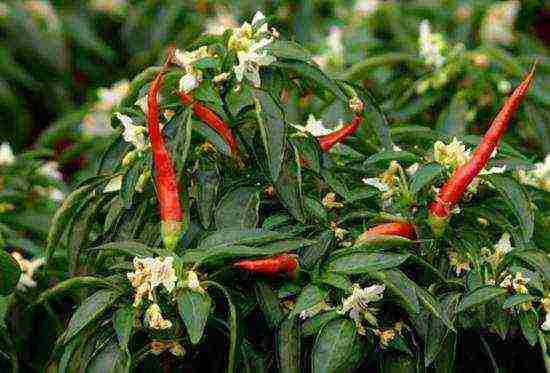
The fruit variety of indoor hot pepper is a perennial that reaches a height no more than 40 cm... The plant has bright green leaves and multi-colored fruits of a rich color: scarlet, sunny or orange.
Growing indoor pepper is not difficult and does not require special knowledge and wisdom. Very unpretentious and undemanding in care.
 The windowsill is ideal for growing light-loving peppers
It is recommended to grow and plant peppers exclusively on windowsills, since the vegetable is very sun-loving, and with sufficient sunlight it will certainly delight you with beautiful fruits with a piquant pungent taste.
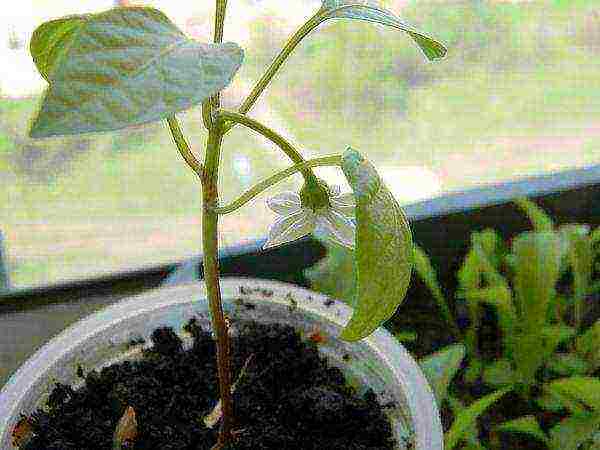
Flowering begins in June. During this period, delicate white flowers with a slightly yellowish tint appear on the stems.
How to grow at home on a windowsill
To get a plant with beautiful fruits on the windowsill, you need to sow seeds for seedlings. Do it late February - early March.
To speed up the process of seed growth, they can be pre-heat treated. For this, the seeds are poured with warm water (no higher than 40 degrees) and corked in a thermos for 3 hours.
Preparing the soil and pot
The soil for seeds must be chosen nutritious. You can prepare it yourself. To do this, mix 5 parts of humus, 2 parts of turf and peat and 1 part of sand. At the bottom of the container it is necessary there must be drainage... Small expanded clay or pebbles are suitable for this.
 Peppers need nutritious soil
The soil must be additionally disinfected: treated with boiling water, or a solution of potassium permanganate and loosened well. Seeds are sown to a depth of 1 cm.
Growing seedlings from seeds
The containers are covered with glass or foil and left in a warm place where the temperature should not be below 20-25 degrees.
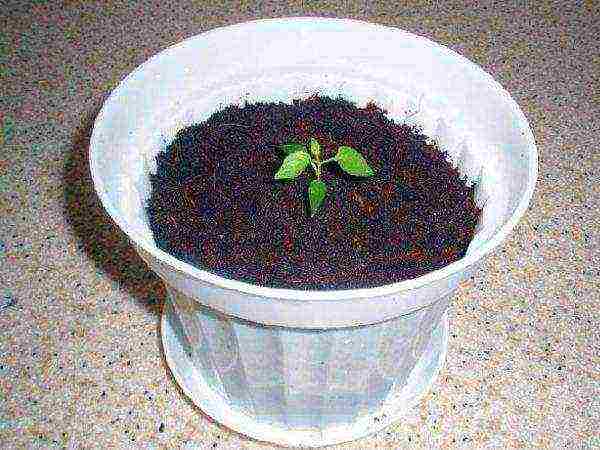
As a container, you can use a regular pot or box, it all depends on how many seeds are sown.
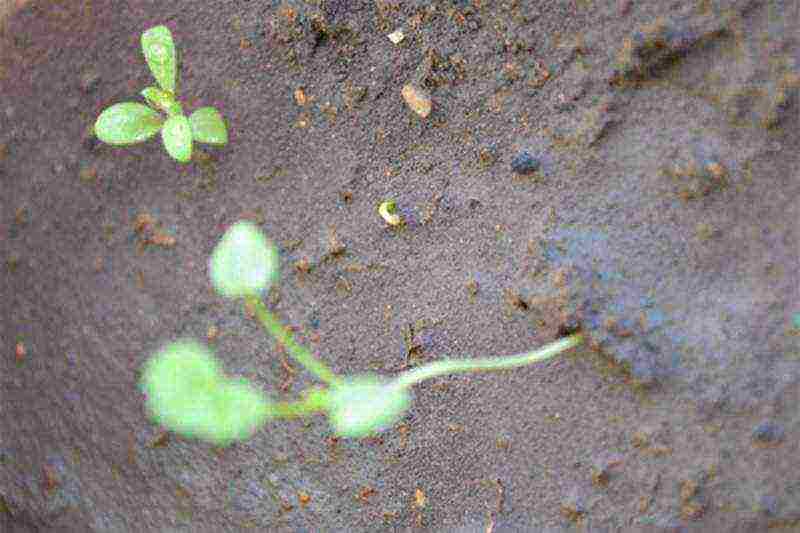
The first shoots appear already in 7 - 10 days... There should be enough sunlight in the room.
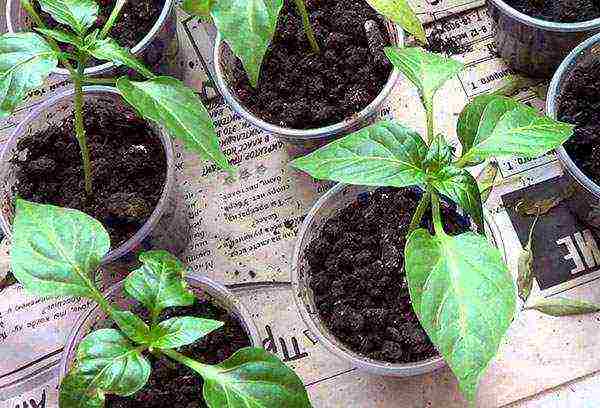
When the first shoots appear, the plants dive into separate pots. When several true leaves appear on the seedlings, they are dived again, while the strongest and strongest shoots are selected.
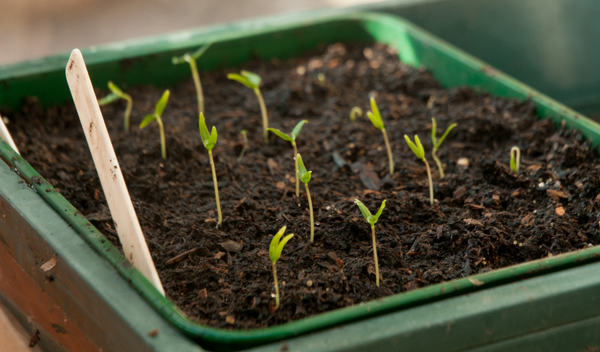 Pepper seedlings must be dived after the first shoots appear
The plant needs a sufficient amount of moisture, heat and light, at any stage of growing.
During the growth of seedlings, it is necessary to ensure that the seedlings do not stretch too much. To do this, they need to provide a certain ambient temperature.
When the first leaves appear, then within 7 days it is necessary to reduce the temperature to 20 degrees. And when three real leaves appear, be sure to reproduce the pick in a spacious pot. Seedlings are planted in a permanent place after 2 months after planting seeds.
Indoor hot pepper care
To grow hot peppers on a windowsill, you need to provide him light and warm.
Fertilizer
He loves such a pepper of various kinds of feeding. The most optimal fertilizer is 2 tablespoons of ash mixed with 3 liters of water. The mixture should brew well. Fertilize is necessary every two weeks.
 Wood ash diluted in water is suitable for feeding peppers.
Nitrogen fertilizers can be used, but much less frequently. With such fertilizers, it is important not to overdo it, otherwise you may be left without a crop.
Watering
The soil must be regularly loosened and watered two times a week warm, settled, or purified water. It is necessary to ensure that the soil in the pot does not dry out, but it is also not constantly damp. Both will contribute to various plant diseases.
In winter, you can not use fertilizers and water the plant much less often. If the air in the room is dry, you can slightly moisten the leaves by spraying them with water from a spray bottle.
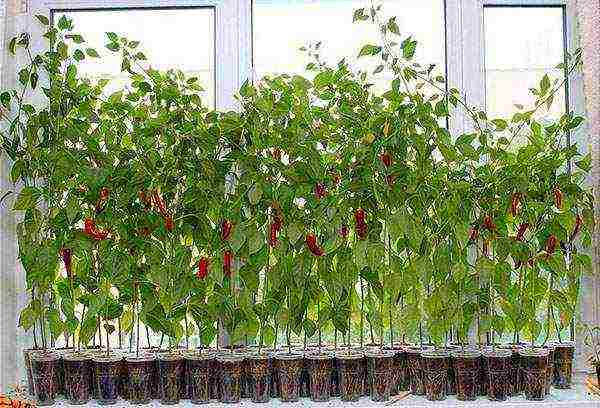
In the warm season, the pots are taken out on the balcony or outside.
Fruiting
Subject to all the recommendations and rules of cultivation, the plant will bloom in May - June, and fruiting will continue until the end of the autumn period.
 If the recommendations are followed, the pepper will bloom in early May.
Temperature regime
Until about February, the plant can be kept indoors at a cooler temperature, but not lower than 18 degrees.
But before the start of the growing season (it usually starts in February), the pot must be moved to a warmer room and pruned. To do this, you need to cut the stems so that they are no higher than 5 cm.
If you correctly follow all the recommendations for growing and caring for the plant: starting from the harvesting of seeds itself and ending with timely cutting, then such a pepper will retain its decorative effect and will actively bear fruit up to 5 years.
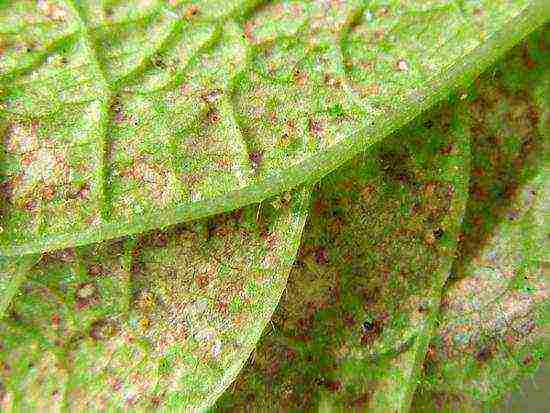
Diseases and pests
This type of indoor plants can be subject to the following diseases: blackening of the stem or spotting of the leaves... This happens with too much watering, in which stagnation of water in the pot is formed.
 Powdery mildew on indoor pepper
The main pests of this pepper include aphids, spider mites and powdery mildew... Aphids or mites can appear with the help of the wind through an open window.
You can use the plant itself to fight the tick. To do this, it is necessary to grind the pepper seeds together with the inner veins and pour water over them for a day. Then you need to add a little grated laundry soap to the mixture and spray the plant. To completely get rid of pests, it is enough to carry out three spraying procedures.
In order to prevent the appearance of a tick, you need to provide the plant with sufficient moisture or put a container of water near the pot of pepper.
With proper cultivation and care, the plant will delight the eye with excellent decorativeness for as long as 5 years, and its fruits will become a piquant spice in the kitchen.
Bitter pepper is not only a useful spice, which is difficult to do without when preparing meat dishes, but also a bright, beautiful plant that can give joy and admiration. How to grow healthy plants and get an amazing bush with colorful peppers at home? This is not difficult if you know how to choose a variety and properly care for young seedlings.
Varieties and features of the plant
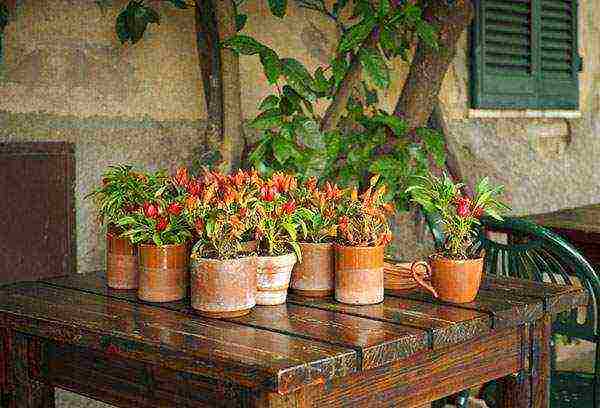
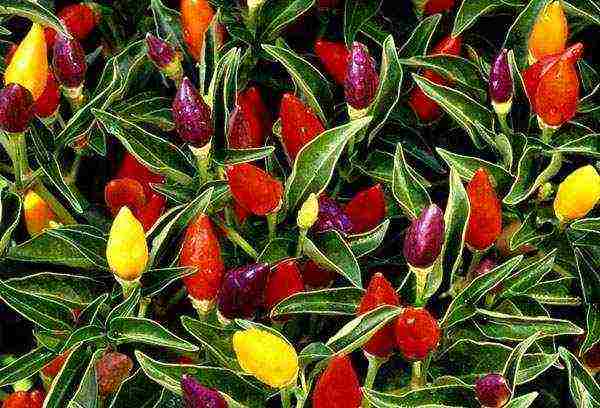
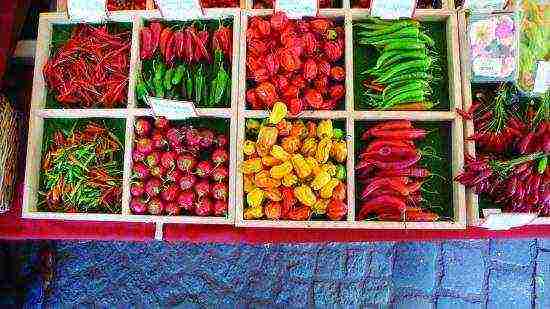
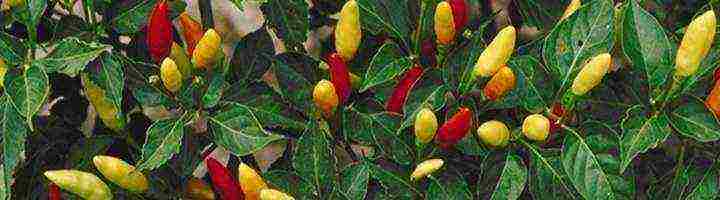
The bushes of hot peppers of the varieties Adjika, Ogonyok, Chili reach a height of 50 cm. On one plant, multi-colored fruits can grow: white, green, orange, purple, yellow. Indoor hot chili is a long-liver. The bush can bear fruit for 5-6 years.
It is interesting
In Europe, pots of decorative peppers for Christmas are put on the balcony, windowsill, near the house.
In shape, the pods on the bush are round, flattened, similar to a pyramid or cylinder. Chili has long, pointed fruits, and Ogonyok will delight you with cone-shaped, bright peppers. On one plant, about fifty fruits can ripen at the same time.
Properties of bitter pepper
Both garden red peppers and decorative chili peppers, Ogonyok, Adjika, Indian Summer are used in cooking for preserving and preparing delicious dishes. For those who are engaged in the cultivation of such plants, a balcony or a windowsill is also a spice shop.
- The fruits have antibacterial properties and protect the premises from the harmful effects of microbes.
- Vases with a plant are placed on the balcony near indoor flowers, which are affected by aphids and mites. Pests disappear in a few days. Chili peppers do this well.
- Food with the addition of a small amount of pepper improves appetite and boosts immunity.
You can buy a hot pepper bush in a store or market. In the spring, flower markets sell young seedlings of the varieties Ogonyok, Coral, For the mother-in-law. But it is best to grow hot hot peppers at home from seeds and decorate the balcony and windowsill with elegant bushes.
Secrets of growing hot pepper
Have you decided to grow hot peppers on the windowsill? First you need to choose the type of pepper: indoor or hot red, which grows in gardens. Some varieties of open ground have shown themselves well in indoor conditions: Chile, Adjika, Coral. They grow well indoors and delight with a rich harvest.
All types of ornamental peppers are designed for indoor cultivation. A balcony is also suitable for successful maintenance. Plants with multi-colored pods look beautiful on the window. Cultivation of bitter pepper Ogonyok, Indian Summer, Bolivia, Dark Olive, Mambo, Medusa will create a bright parade of colors on the balcony.
If you know the secrets of caring for this plant, then it is easy to get beautiful bushes that will delight the eye and give a rich harvest.
- The key to a rich harvest is seeds. Their quality determines the strength of growth and the capabilities of the plant. Seeds that have been stored for a long time will not grow a strong plant. An important point before sowing is seed calibration. To do this, take a glass of warm water, add a tablespoon of salt to it. The water is stirred and waited for a few minutes. After pre-drying, sow that part of the seeds that sank to the bottom of the glass.
Important!
Sowing seeds should be calculated so that the first shoots appear in March. During this period, the daylight hours are already long and the plants have enough sunlight for normal development.
- An important point is soil preparation. Hot peppers are undemanding to the soil and grows well on ordinary garden land, but it is better to create comfortable conditions for the plant. Indeed, in the garden soil there can be pests or an infection that will lead to the loss of seeds even before the emergence of shoots. For sowing, purchased peat or a mixture based on it is suitable.
- Moisten the soil before sowing. It should crumble in your hand and be damp. Peppers are sown in small containers with holes at the bottom.A bowl or seed pot is suitable for this. Seeds are laid out in a checkerboard pattern and covered with a low layer of earth (up to 2 cm). The earth is compacted, the dish is covered with film or glass.
- For a quick emergence of shoots, they maintain a high temperature (up to 25 degrees), constant humidity and ventilate. Until the sprouts appear, the soil is not watered, but only sprayed from the sprayer.
- When the first shoots appear, the container is opened and placed in a greenhouse or simply put on the balcony. At this time, it is necessary to ensure that a black leg does not appear: you need to limit watering and not lower the temperature below 22 degrees.
Advice
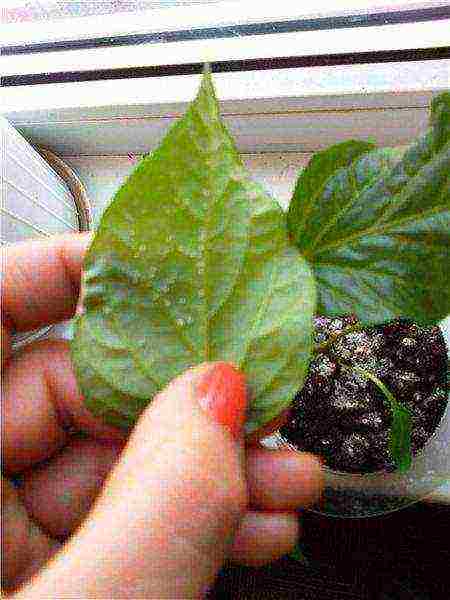
On some seedlings, a film of seeds may remain, which sticks together the cotyledons. It is not always possible to remove it so as not to harm the plant. Try to moisten the skin with water and, after a few minutes, gently pull it off the leaves.
Picking and planting peppers in a permanent place
They start picking seedlings at home when the third true leaf appears on the plant. The soil is watered so that the entire earthen mixture is saturated, a day before the procedure. Seedlings dive into moist, but not wet soil. It is better to replant the plants so as not to injure the roots. This can be done with a garden trowel or a regular spoon. After transplanting, the cups are placed in a greenhouse on the windowsill so that the seedlings quickly take root. A new leaf after a pick is a signal that the pepper has successfully rooted and you can start feeding.
At the first stage, the peppers need nitrogen and potassium supplements for the development of the vegetative system. But do not get carried away: an overdose can destroy the plant.
Advice
Top dressing is carried out one day after watering, with wet soil. Plants with signs of the disease should not be fed. First you need to find out the reason for the poor condition of the bush, eliminate errors in cultivation - and only after that add minerals.
Hot pepper transplant rules
As soon as the roots of the pepper wrap the soil in the cup, they begin to plant in a permanent place. How to do it right?
- For the first planting, take a pot with a capacity of no more than one liter, put drainage on the bottom (expanded clay, bark, pebbles) and pour an earthen pillow. Planting mix is purchased at the store.
- The plant is buried so that the root collar is lowered into the ground by no more than 2 centimeters. Over time, the soil will sink, and the root collar will be at ground level. With a strong deepening, the plant may die or late enter the fruiting phase.
- Top dressing begins two weeks after transshipment. When grown at home, chili peppers respond very well to feeding with phosphorus and potassium fertilizers, calcium, and magnesium. In order not to get confused with dosages, it is better to buy ready-made fertilizers for indoor peppers. If chili peppers are grown for culinary purposes, it is best to use organic fertilizers.
- At home, for successful fruit setting, it is necessary to shake the bushes during flowering so that pollination occurs.
Advice
Indoor pepper Spark does not tolerate drying out of the soil. It reacts especially sharply to a lack of water during flowering. If the soil in the pot is dry, then the plant may shed its buds or ugly fruits will tie.
Drafts and dry air are detrimental to the Chili and Ogonyok peppers when grown at home. Then the plants shed their leaves and hibernate. If this happens, do not be alarmed. You just need to create comfortable conditions on the balcony or windowsill. Then the growth of Chile and Ogonyok will quickly resume.
So, a small step-by-step instruction on breeding hot peppers on the balcony will help even beginners cope with this task. Growing pepper on a windowsill does not require special attention, it is only important to remember that during the sun period it is necessary to shade the plant and water it with warm, settled water.We must not forget about the annual transfer to a larger pot - this will allow the bush to build up a healthy root system.
Rarely, from any amateur florist, you will not find on the windowsill next to primrose or geranium a bush of hot pepper with snooty protruding pods. And, perhaps, any of them can easily write a brochure "Hot Pepper, Growing at Home".
Agrotechnics of bitter (hot) pepper is quite simple. He is less picky about conditions than his sweet brother. But from this, the attractiveness of growing this plant at home - on the windowsill, or on the balcony, does not become less interesting. Below we will consider a wide range of issues: from the history of the appearance on our windowsills of this overseas "bully" to the characteristics of the most modern breeding varieties, which, with their severity, are capable of knocking out an entire army.
The most cultured of the cultural
The history of the domestication of hot pepper by the Indians of Central and South America dates back to the fifth millennium BC. It is generally considered the first cultivated plant on the American continent.
Christopher Columbus, who sailed in search of a short way to India, instead of bringing colossal incomes of hot black pepper, brought from his expeditions the seeds of an equally burning competitor - red pepper.
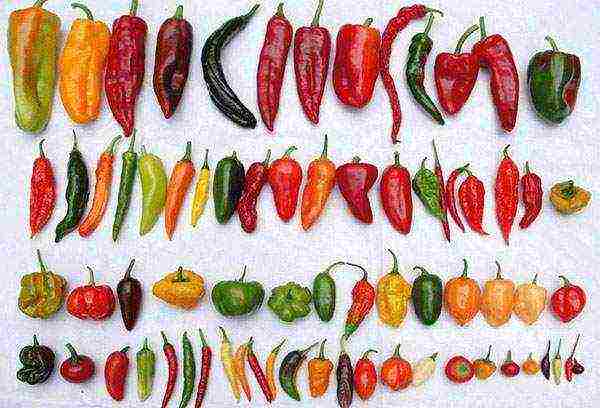
Due to its ability to natural variability, hot pepper already by the time of its "discovery" by Europeans had many varieties and varieties that differed from each other in shape, size, color and, most importantly, in the content of capsaicin. This is the main active ingredient contained in pepper and gives it an indescribable pungency.
The name of the most famous in Russia, and throughout the world, burning "chili" does not come from the name of the country of Chile, but from the Aztec "cilli" - red.
Descendants of American Aborigines
In addition to the wild varieties that still grow in tropical America and local varieties, there are more than 500 selected varieties in the world, obtained in various parts of the world.
The flight of imagination of breeders in breeding new varieties of hot pepper is truly limitless! Bred various in color: green, yellow, orange, red of any shade, and even black and purple hot peppers ("Black Pearl" - even the leaves are black and purple). The second direction of selection is an increase or, conversely, a decrease in the content of capsaicin in fruits.
Today, the record holders for pungency are the varieties of the selection of the USA - "Carolina Reaper" and the brainchild of British breeder Gerald Fowler - "Naga Viper".
According to the accepted ten-point scale, they occupy the top tenth line. They are also in the lead according to the scale of the American chemist Sokovilla (Scavill), who proposed to determine the pungency of pepper by diluting one gram of pepper powder in water. The proportion at which the burning sensation ceases to be felt and is an indicator of Scavill's burning sensation.
To stop the pungency of Carolina Reaper, its powder must be diluted 1,800,000 times! (almost two tons of water). "Naga Viper" surpasses it by another third in terms of pungency. From those who want to taste this pepper, the breeder takes a receipt stating that the volunteer is of sound mind and has excellent health.
Agrotechnics of bitter pepper
You can grow hot peppers at home all year round. In the cold season, it blooms and bears fruit on the windowsill, and in the warm season, it moves to the balcony or loggia. Seed preparation is traditional for most seedling-grown vegetables. Begins in early February. Treatment in a dark purple solution of potassium permanganate (1: 1000) for 20-30 minutes, rinsing, treatment with a growth stimulator and planting in pots. You don't have to wait for the seeds to hatch. They germinate quite well even after several years of storage in a dried pod.
The soil for the peppers is selected fertile, saturated with organic fertilizers, light enough and loose enough to provide good air access to the roots.
Given that most bitter peppers grow indoors as biennials or perennials, the planting pot should be sized appropriately.
In the case when the pepper is grown on a windowsill as a perennial crop, it can bloom and bear fruit up to three times during the year. Moreover, according to the observations of amateurs, the most abundant is the spring (April-May) harvest.
The hot pepper bush grown as a perennial is pruned in the fall from old, fruiting shoots, if necessary, transplanted into another, freer container, and the soil is disinfected. Fertilizers are used complex mineral fertilizers for indoor flowers "Agricola-7", phosphorus-potassium fertilizers. Fertilizers containing a large amount of nitrogen should be avoided, as the plant stretches strongly, but does not form fruit ovaries.

Diseases
Home-grown bitter peppers are prone to disease. Aphids and spider mites are especially fond of them.
Fighting aphids is not difficult. It is enough to treat the plant with pesticides once ("Iskra", "Confidor" or "Fitoferm").
Panicky fearful of the use of pesticides, amateurs can, for the sake of experiment, try a dozen or two "folk" methods of fighting aphids on the unfortunate plant. After losing time and waiting for the aphid to spread to all plants, they will definitely come to the conclusion that it is necessary to use radical means - pesticides.
The amount of hot pepper consumed in food is so negligible that even if all of it is saturated with pesticides - which, of course, will not happen, the concentration that comes with the pepper in the body will be negligible. A breath of air at a busy intersection during rush hour costs our body more.
Beauty or productivity?
The family's need for hot pepper as a vegetable crop is negligible. It is unlikely that any of the amateur gardeners, having started to grow hot peppers on a windowsill or balcony, does it for the sake of obtaining kilograms of fire pods. Much more aesthetic pleasure. Even the most common and nondescript varieties look very elegant and impressive during the ripening period.
But there are also specially bred decorative varieties, the variety of shapes and colors of the fruit of which is simply amazing! Among the decorative ones, there are inedible ones. We will not mention them. But among the edible, the true beauties are: "Confetti" "Aladdin", "Little Miracle" - plants, on sneeze branches at the same time can flaunt the fruits of green, cream, purple and red flowers. They have a very pungent taste.
The varieties "Filius Blue" and "Black Pearl" have an exceptionally original purple color of the fruit, and the "Black Pearl" and leaves also have a superbly pungent taste.
The varieties "Constellation" and "Ryabinushka" are literally covered with small rounded fruits and are very decorative. They can successfully replace indoor flowers on the windowsill, since the fruits last on them for a very long time. They have a mildly pungent taste and are seed-free and can be used to make paprika.
Conclusion
Whichever variety you choose to grow at home, in addition to the true pleasure of ripening fruits, striking in their bizarre shape and color, you will also get an excellent spice to your table. The fruits of hot pepper ripening during the season are more than enough for personal consumption and for a gift to the mother-in-law. Hot pepper is perhaps the only vegetable crop, the cultivation of which at home on a windowsill or balcony is not only entertaining, but also brings tangible benefits. The harvest is always in abundance.
Foreword
Growing hot pepper from seeds is a relatively difficult process, since the plant is whimsical to planting conditions, requires mandatory soaking of the seed, germinates for a very long time even with abundant fertilization. But is it worth giving up or is there a chance of getting an excellent harvest of hot peppers indoors without significant labor costs and financial losses?
Preparing a vessel for a future plant
The first step is to decide where the vegetable will grow. Many gardeners prefer to use long vessels in order to be able to plant several plants in a row at once. This allows you to significantly save space, but there are also many "drawbacks", for example:
- The vessel will be relatively large, at least 20-25 kilograms, which will make it much more difficult to move. A large mass will also adversely affect the material of the window sill, especially if it is plastic. It can deform or "sink" in the middle.
- It will be more difficult to navigate the varieties, since the planting density is quite large and it is often possible to determine what exactly will grow from the seedling only after the first fruits.
- Unkempt appearance and difficulty in dividing varieties. You cannot put seedlings separately after the start of ripening, which will not satisfy the requirements of many gardeners. Some plants can be pollinated.
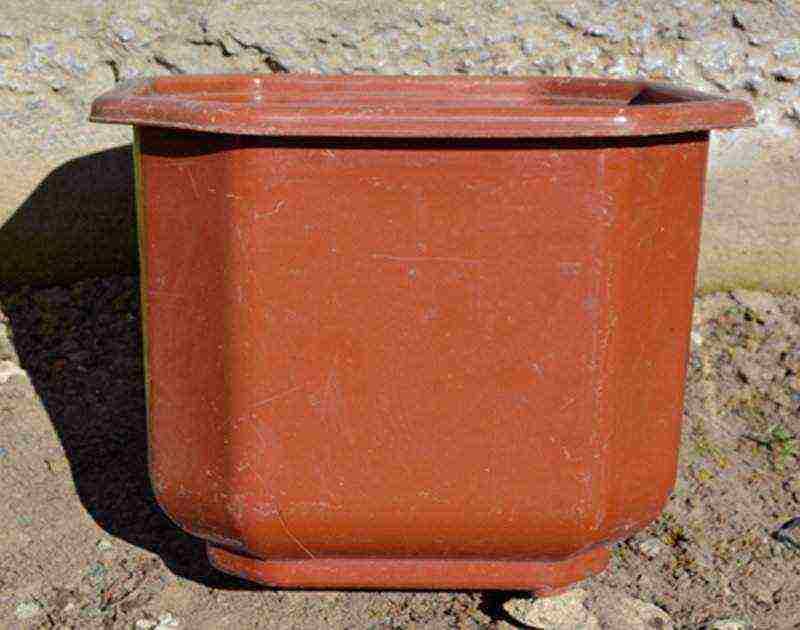
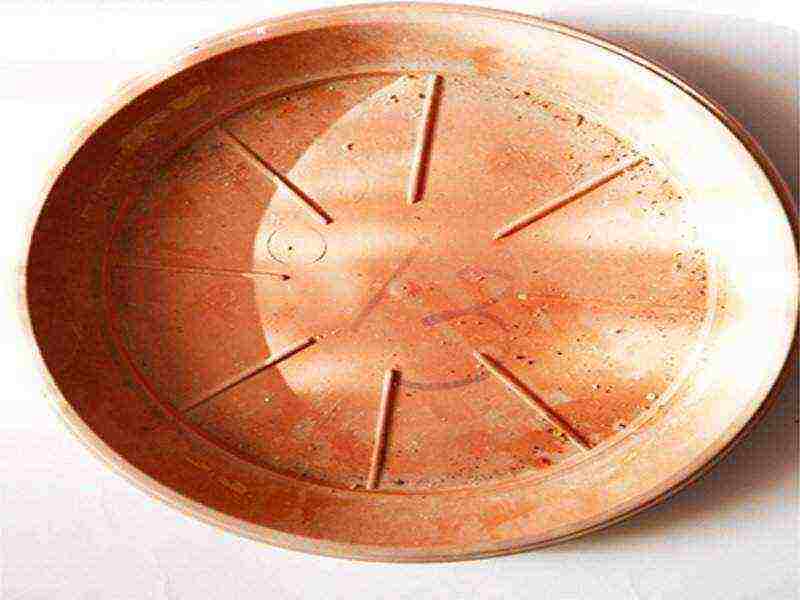
It is better to give preference to traditional flower pots (see photo).
Calculating the amount of land is quite simple - for 1 plantyou must have 5 kilograms of fertile soil (the calculation is made taking into account that the height of the bush will be no more than 35 centimeters, and it will be a room variety).
This is the minimum volume that is required for high-quality growth of the root system. It can also be planted in smaller pots, but, in this case, there is no guarantee that the pepper will develop correctly. If there is not enough free space for the lateral roots, they will twist. This will affect the vegetative mass of the plant, and even the fruits - they will be much sharper, smaller in size. In some cases, they are deformed - the pods have an irregular shape, curl more strongly.
To prepare the vessel, we need: a screwdriver, a heating element (lighter, gas stove, etc.) and a rag to wipe off the plastic. One of the most important points in the manufacture of a pot for indoor peppers is drainage - without it, there is nothing even to hope to get friendly shoots and ripe vegetables on time. To do this, you need to make several holes in the plastic bottom.

Most often, manufacturers produce such containers with special places where the plastic is much thinner and has a lower melting point. Only 140-160 degrees will be enough to melt the mugs at the bottom. If such places are not provided, it will be necessary to make drainage holes in a monolithic base. To do this, heat a screwdriver (best of all curly) on a gas stove or by means of another hearth of fire, then lean it to the bottom.
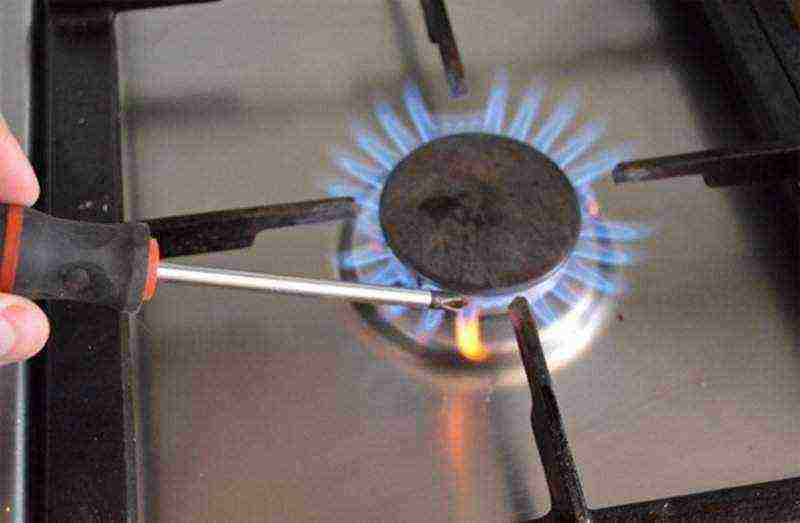
After the diameter of the burn-through matches the thickness of the screwdriver, you need to make several rotational movements at an angle of 50-60% degrees to widen the hole and smooth the edges.

Now the place for planting the plant is ready, all that remains is to find a shallow plate or stand under it, into which excess moisture will be poured after abundant watering. You can use an old ceramic plate or buy a factory fixture for 13-15 rubles on the market - it will be much cleaner in appearance.
Please note that the outer side of such a plate should not be metal (vessels can be steel only for balconies, where they are placed on the floor), since the surface of the window sill can be damaged.
We make the soil for indoor hot pepper
It is far from a secret that it is very expensive to buy ready-made soil.Let's imagine for a minute the prices of any flower shop: expanded clay stones (40 rubles per pack), screened sand of a coarse fraction (30-40 rubles, a pack of 500 grams), fertile fertilized black soil (from 50 rubles per pack). That is why it is better to make the soil with your own hands. It does not take much time, and all the components necessary for this can be found simply on the street, at any construction site or on the farm. We need the following "ingredients for cooking":
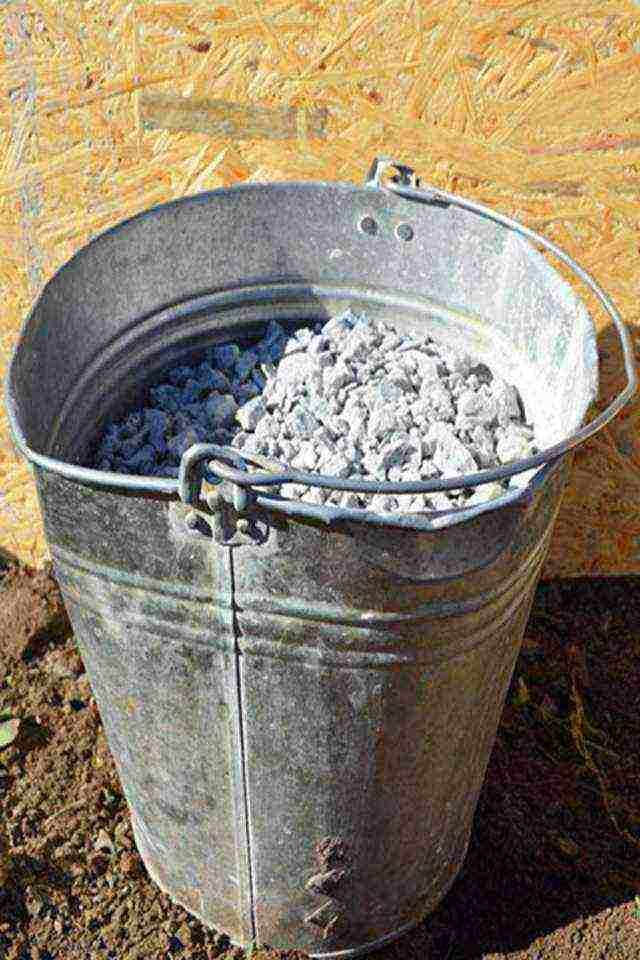
- Crushed stone. This is an alternative to expanded clay. Despite the fact that many are trying to prove the radioactivity of crushed stone, it is an absolutely ecological material. At least, expanded clay gives in to a much greater influence of radioactive substances than crushed stone. It is necessary to choose a moderately large building material, fraction 3-4mm. You can pre-wash the stones if they have been in a humid environment for a long time to avoid possible fungal infection.
- Sand. If possible, choose coarse sand, since its main task is high-quality drainage. Due to the flowability of the sand, the roots will easily penetrate into the depths, and the soil will evenly sink and "breathe". No crust will form and the top layer of the "filling" will always be soft. Ordinary construction sand is suitable, it is possible even with admixtures of clay, absolute purity is not important.
- Fertile black soil. Where can I get it? We are typing right in the front garden! It will be even better if it contains elements of humus, as well as wood - these are all useful substances that will contribute to the best development of your plants. Many people think that worms can harm plants - this is a wrong statement, since they enrich the soil and accumulate a lot of organic matter in it. If the pot is large, you can put a dozen more worms there, mostly Californian. You can also ordinary, rain - there is nothing terrible in this, let them support the natural biocenosis of the soil.
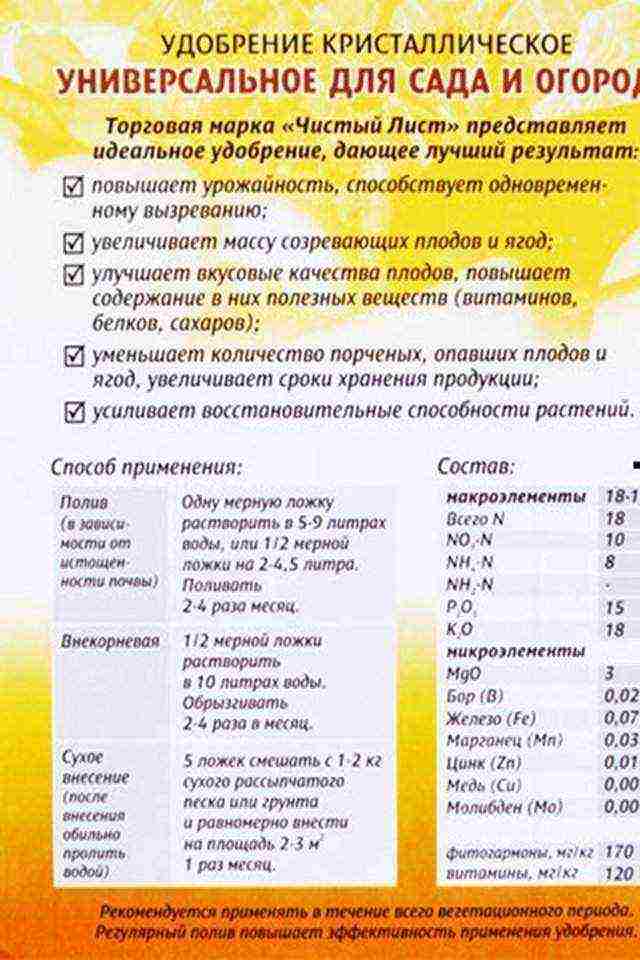
- A universal fertilizer in order to saturate the soil with the necessary complex of nutrients. It is added depending on the proportion, you can fill it dry. About 10 grams per 5-7 kg of soil. It is best to place it between a ball of sand and soil so that the plant receives the necessary complex of nutrients 2-3 weeks after germination.

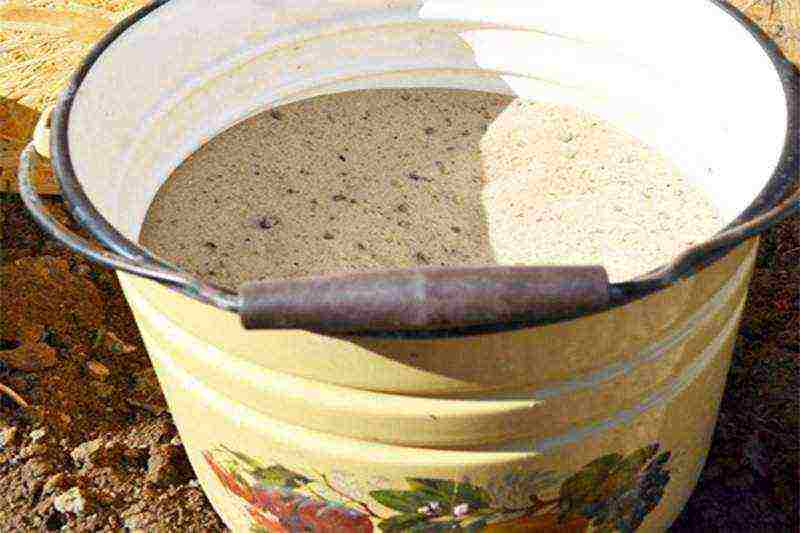
The order in which the layers fall asleep is very important and must not be disturbed. First, you need to place 2-3 kg of crushed stone (about 6-9 centimeters in a pot), then pour up to 10 centimeters of sand and only then 10-15 centimeters of black soil. Such drainage will allow moisture to quickly pass through the entire layer and not knock the earth into a monolithic block.
Do not tamp the soil. It is necessary to ensure maximum looseness and minimum density of chernozem so that the seeds germinate and quickly "get out" outside. The roots of hot pepper, like the stem, are very weak, therefore, plants often die before they even appear outside. Excessive watering, soil compaction and lack of sandy layers are the main problems of beginners, which lead to the death of vegetables.
Planting seeds in the soil and process features
As you sow, it will ... grow. Particular attention must be paid to exactly planting the pepper. Let's first decide what not to do:
- You can not plant seed without preliminary soaking, as well as without treatment with special preparations (for example, a growth stimulator, a complex set of fertilizers, fungicides, etc.). The seeds are very small and have little vitality, so they can be lost without preparation.
- You cannot put grains in cold ground. They can not only rise for a long time, but also disappear. For germination, they need at least a temperature of + 17-22 degrees. It will be better if you can maintain a temperature of +32 C in the first week after the seeds fall into the ground.This can be done using an ordinary 60 W lamp, which is placed 12-16 centimeters from the surface of the earth - there will be enough heat.
- It is impossible to firmly tamp the soil over the seeds, they will germinate much longer and it will take up to 2 weeks of time until you can see the first "signs of life" in the pot.
Now more about the disembarkation process itself. There are many technologies and every gardener does it differently. Let's consider the most common technique in more detail.
- Seed soaking. The inoculum is placed on a gauze bandage or simply on a plate, where 2-3 mm of a previously prepared growth stimulator solution is poured. 1/3 measuring spoon or 2 grams of the substance is diluted with 1 liter of water. It is necessary to keep the grains for 9-12 hours, and the water temperature should be at least 30 degrees. You can warm it up with an ordinary lamp, as is the case with soil.
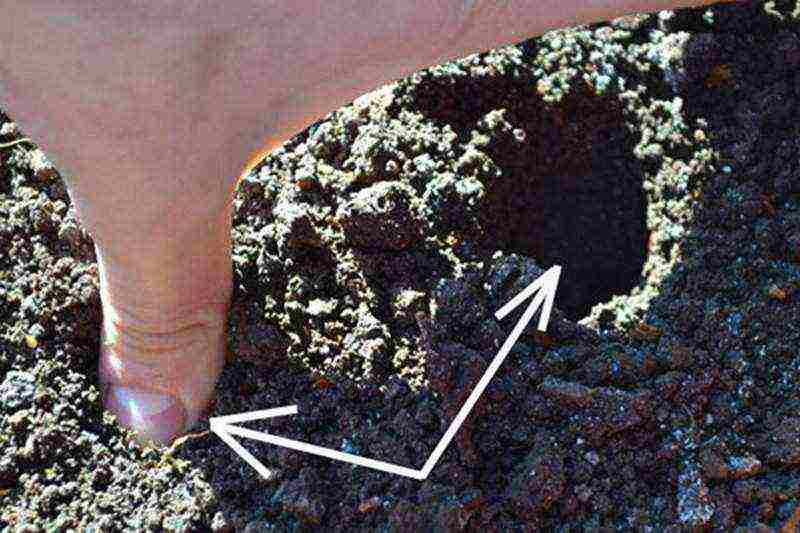
- Preparing pot holes. If you are going to grow several bushes in one vessel, then you need to make 3-4 holes in different sides of the vessel, no more than 3 centimeters deep. It will be enough just to push the ground a little with your finger, so you will immediately kill 2 birds with one stone: install a dense sole and save time. After the seedlings germinate, they can be planted in different pots, or left to grow in one. In the second case, a large vessel is needed or the bushes will be smaller.
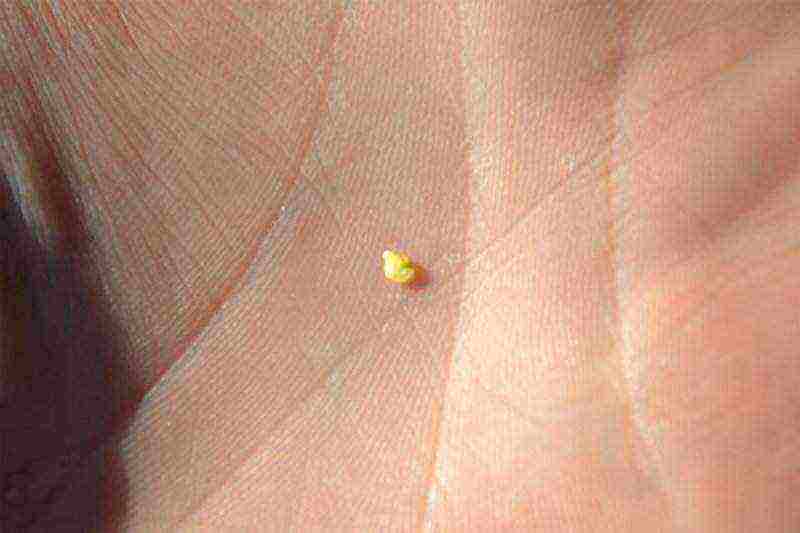
- Planting seed. 1 seed is thrown into the center of the hole and lightly (!) Is sprinkled on top with earth.
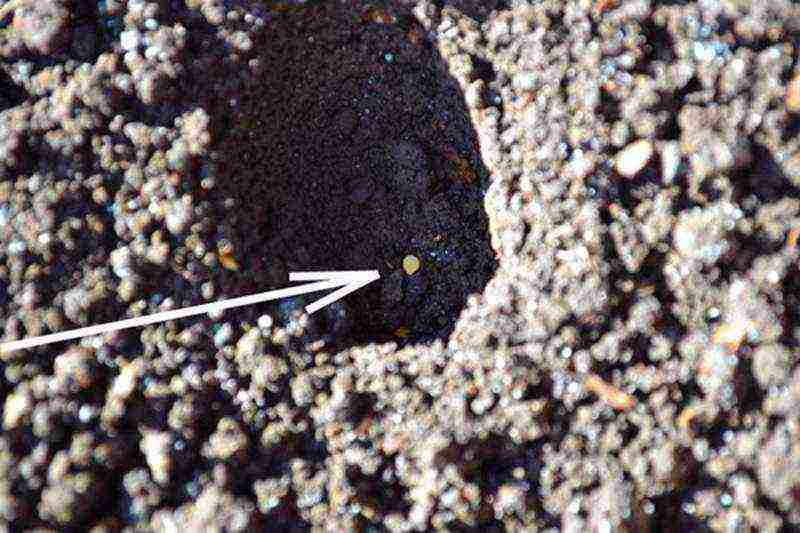
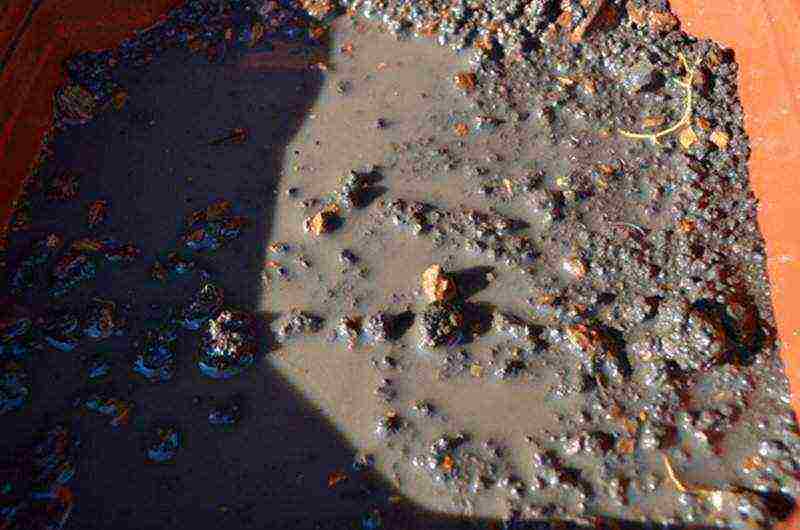
After that, it is imperative to water from a sprayer (you cannot pour water from a bucket, the earth will settle quickly), evenly saturating the soil.
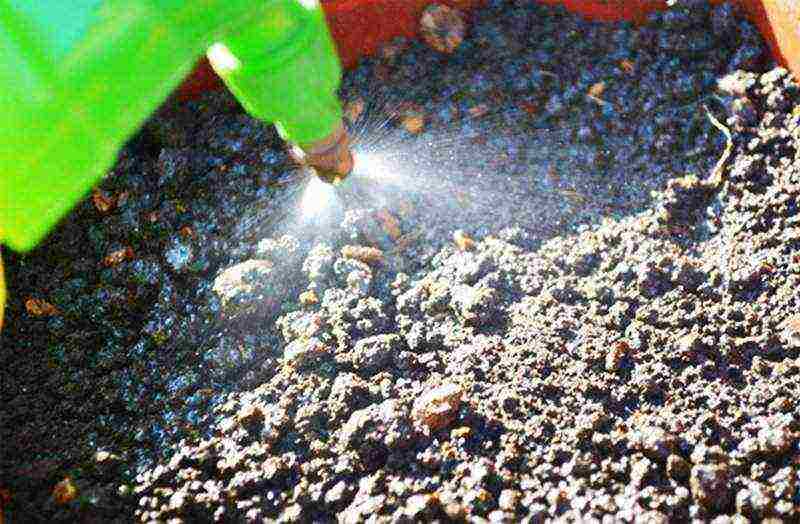
It is necessary that it is filled with water as much as possible. You can determine the sufficient level visually - small puddles should form on the surface (see photo)
If you are going to plant seedlings outdoors or take out the pots for the summer, then you can plant a little smaller - the plant will grow well and take root at high temperatures.
For convenience, you can make special "tags", which indicate all the necessary information about the variety that you planted in this pot. They will be especially relevant with a large number of plants, when it is simply impossible to remember what was planted and where.

With their help, you can further control the growth and development of the plant. The sticky paper can be glued directly to the outside of the plastic pot.

