Content
- 1 How to grow grapes at home
- 2 Growing features
- 3 Step-by-step technology for growing grape bushes from cuttings
- 4 What is a stalk (chubuk) of grapes
- 5 Procurement of planting material
- 6 Processing before storage (step by step)
- 7 Storing cuttings before planting
- 8 Timing of awakening (when do grape shanks start to sprout?)
- 9 Processing before rooting
- 10 What is grape pickling
- 11 Pre-germination of cuttings
- 12 Containers and soil
- 13 Landing in the ground
- 14 Collection and storage of cuttings
- 15 Preparing cuttings for planting
- 16 Germinating cuttings in a jar of water
- 17 Kilchev method for germinating grape cuttings
- 18 Substrate transplant
- 19 Disembarkation of shanks in the garden
- 20 Growing grape cuttings
Grapes are a very thermophilic plant and we are used to growing them on huge plantations, mainly in southern countries. But over the past few decades, through the efforts of breeders, many hybrid varieties have been bred that can bear fruit in central Russia, and even closer to the north in closed greenhouses. At an average ripening temperature of + 18 ° C, you can get a harvest of juicy, fragrant berries in just 100-110 days. We will talk about the cultivation and cultivation of such grapes further.
How to grow grapes at home
Grapes are exactly the kind of culture that does not propagate by seeds, since in this case it does not retain its original genetic characteristics. It is not always possible to buy a ready-made seedling of a favorite variety. That is why the most accessible and widespread method of propagation of vines - cuttings.
Its availability lies in the fact that at home it is very easy to preserve, plant and root grape cuttings, prepare them for planting in open ground or a greenhouse. It is best to do this at home, since the rooting process should begin no later than late February - early March.
The most important thing is to choose a grape variety that is capable of good rooting.
Now, very many hybrid varieties have this ability, since cuttings are one of the main areas of work for breeders. Most often, gardeners like to plant table varieties on a garden plot with excellent taste, sugar content, large berries (preferably seedless), with early or mid-ripening periods. The varieties meet almost all these requirements: Delight, Kesha, Pleven, various varieties of Kishmish, Laura, Kodryanka, Anyuta, Aleshenkin, Veles and many others.
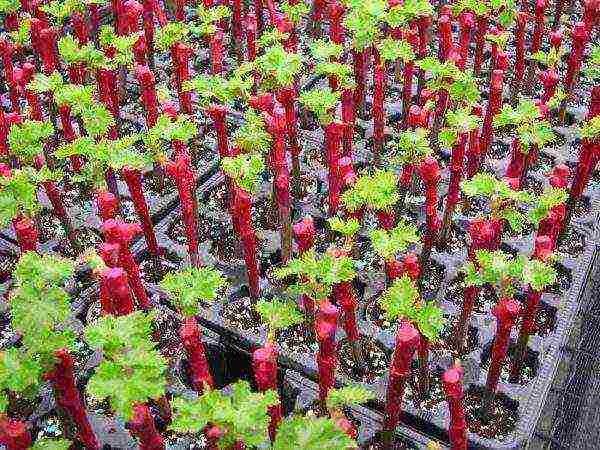 Before planting grapes in the ground, it is necessary to germinate the cuttings and wait for the first leaves to appear.
Growing features
Growing grapes in a greenhouse or in the open field directly depends on the natural climatic conditions of the region. It is clear that in the southern regions in the open field, grapes will have time to ripen not only early varieties, but also later ones. But in the Middle zone, the Moscow region and further to the north in open soils, only the harvest of the earliest varieties will ripen.
In regions where summers are short and winters are cold, it is best to grow vines in greenhouses in order to enjoy the taste of berries with different ripening periods for a longer time. But indoors, you will have to more carefully monitor the health of the bushes., microclimate, soil condition, since cases of fungal and other infections spread much faster. In an enclosed space, it is easier to prevent the occurrence of typical diseases than to eradicate them.
Step-by-step technology for growing grape bushes from cuttings
The whole process of obtaining rooted seedlings takes several months, but it is not very difficult in terms of labor intensity. Even novice gardeners who decide to take up viticulture are able to achieve the best results - this culture is so unpretentious, although it requires some attention. The main thing is to properly care for and carry out certain activities on time.
 Chopped grape cuttings
Cutting and storing shanks
The very first stage is the preparation of planting material. During the pruning of grapes in the fall, when all branches bearing fruit this year are removed, cuttings are being prepared. It is the fruit branches that serve as the best material for future seedlings. What is necessary take into account:
- pruning is carried out after leaf fall, before the onset of the first frost;
- the vine should be as straight as possible, healthy, light brown or sandy;
- the longer the stalk, the better the reproduction will be.
The branch should be without visible damage, with a light bark, on the cut - green, with droplets of liquid (juice) protruding on it, the lower cut is made straight, and the upper cut oblique. Cutting length - at least 40-45 cm, cut diameter - 10-12 mm + 3-4 living buds with an interval of 10 cm between them.Cut with a very sharp pruning shears or a knife so that their tissues do not wrinkle, at a distance from the buds at least 2 -3 cm.
Cut cuttings need to be prepared for storage:
- soak in cold water for 1-2 days, changing the water 2 times a day;
- process with a solution of vitriol or potassium permanganate (it is best to soak for half an hour);
- spread out on paper napkins (towels) and dry well from excess moisture;
- collect cuttings in a bunch, wrap tightly in plastic wrap, tie, fix a tag with the name of the variety (if there are grapes of several varieties, you need to store them in different bags, since different varieties have a bad effect on each other during storage); instead of a film, you can use plastic bottles - lower the vine through the neck and close the lid.
Store the cuttings at t 0 + 5оС (a refrigerator, a glazed balcony, a basement will do).
 Cuttings can be stored both in the refrigerator and in the basement
Preparation for rooting
In late February - early March, they begin to root the planting material. First you need to check how the material was preserved. To do this, the sections are updated, each at a distance of 0.5-2 cm from the upper and lower buds, respectively, in an oblique and direct way - they should be green and moist. Then the cuttings are immersed in water for 1-2 days (depending on the degree of dryness of the branches), to stimulate growth, it is necessary to add honey, aloe juice or humate (1 tablespoon / 10l of water).
At the lower heel, where root growth will occur, several grooves 2-3 mm deep and 2 cm long should be made with a needle - this will help to get a more developed, lush root system. The upper cut can be treated with paraffin.
 Checking cuttings for safety
Germinating the cuttings in water
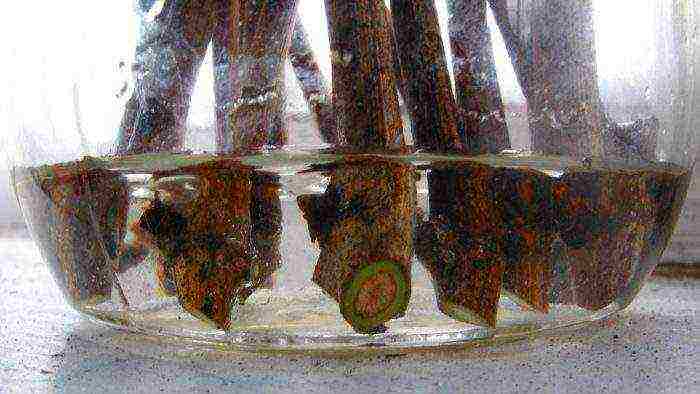
Put a layer of cotton wool about 2 cm on the bottom in an ordinary glass liter jar, pour the same amount of water (melted water is best), lower the cuttings. The heel - the bottom edge - should be in the water at a depth of 4-5 cm. To avoid decay of the liquid, you can put 2-3 tablets of activated carbon, add water periodically. On top of the jar, you can put on a plastic bag to create a greenhouse effect, put it on the windowsill.
Grapes, like any plant, need an abundance of light and warmth to grow vigorously. Twigs will appear first, and then roots. In order for the root system to develop, the shoots should be broken off; for a bush, one, the very last shoot will be enough.
Planting in pots in a greenhouse or greenhouse
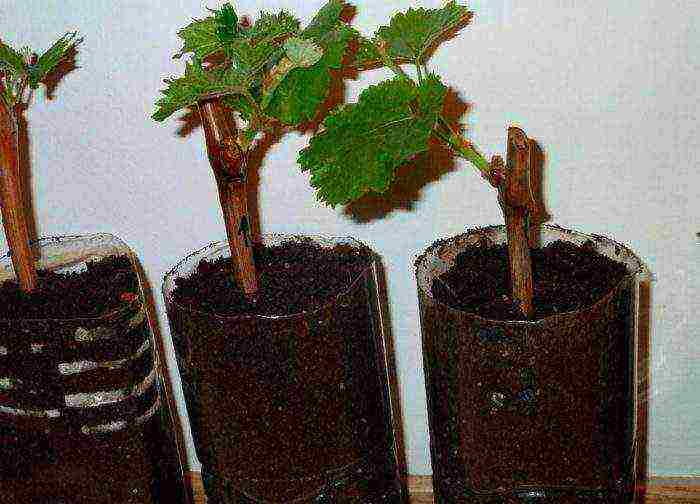
The soil for the seedlings must be prepared in the fall by mixing equal amounts of turf soil, peat, sand, rotted manure or compost; ready-made mixture from the store is also suitable. As a container, you can use plastic bottles, larger disposable cups, etc., make drainage holes. A little drainage is poured at the bottom of the container, then the prepared soil, the cutting is carefully lowered onto it, poured with soil, slightly (!) Moistened.
The heel of the seedling should be at a depth of 1/3 of the container, and young shoots above the ground. Approximately until the end of May - beginning of June, young seedlings will have time to root well, develop full-fledged leaves and branches, and prepare for planting in the ground.
 Planted shanks in pots
Rooting in sawdust or soil
In the southern regions, where in March the soil warms up to a temperature of 10-12 degrees at a depth of 10 cm, cuttings after processing and soaking can be planted directly into the ground - a school. Planting is done in prepared, well-fertilized soil to a depth of 40 cm. The cuttings are laid in pits (or a furrow), covered with earth up to half, tamped well, watered abundantly, pits are filled up to the top. 2 buds should remain on the surface of the earth. Focusing on the climate of the region, you can cover the surface or temporarily cover it with a film.
Another fairly common way to germinate cuttings is in sawdust.
The sawdust should only be of deciduous trees, without any admixture of harmful plywood or chipboard sawdust. They must be steamed before use - pour boiling water, then cool and in a deep dish (bucket) first pour a small layer on the bottom. Then, in an inclined state, lay out the sawdust in layers, placing the cuttings vertically between them. After planting, cover the dishes with foil, put them in a warm place and moisten the environment from time to time until sprouts and roots appear.
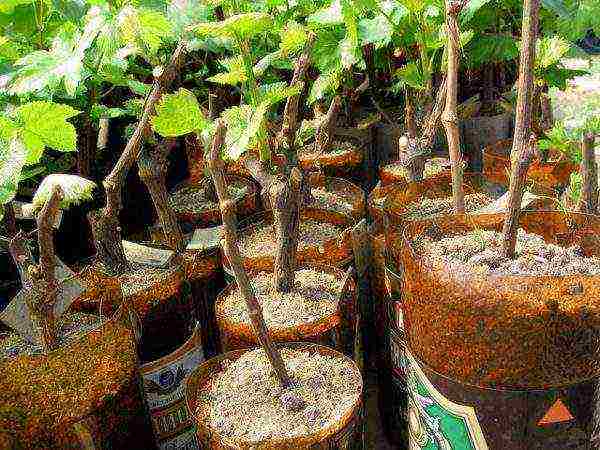 Rooting grapes in sawdust
Correct planting of seedlings in open ground
The technology for planting in open ground is simple. The finished rooted seedling is first prepared for planting in open ground. To do this, within 5-7 days, seedlings in pots are taken out into the street, avoiding direct sunlight. After hardening, cuttings are lowered into the prepared holes along with an earthen lump, the holes are poured with earth mixed with humus, watered with warm water. The main thing is not to deepen the plant and water it moderately. In order not to damage the roots during planting, it is better to carefully cut plastic cups or other containers, then remove the seedling with an earthen clod.
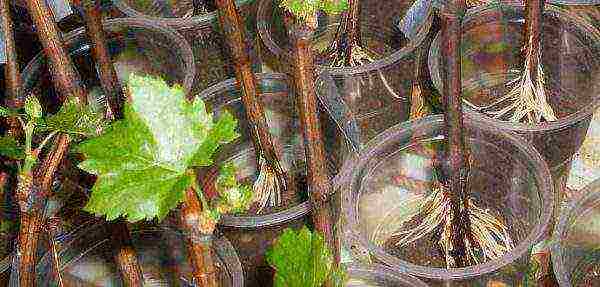 Rooted grapes ready to plant
Be sure to immediately fix the support next to the grape seedling planted in the ground!
Germinating a grape stalk, rooting it and growing a seedling of your favorite crunchy sweet berry is not a lot of work. This can be done both in a polycarbonate greenhouse or greenhouse, and in the open field. Proper care for your pet - and he will thank you with active growth and a rich harvest, literally, in two or three years.
Fruitful grapes are propagated vegetatively - by cuttings, layering or grafting. Seeds are sown for breeding purposes only. Amateur gardeners successfully practice spring rooting of grape cuttings at home.
What is a stalk (chubuk) of grapes
A stalk is a section of a stem with several buds.
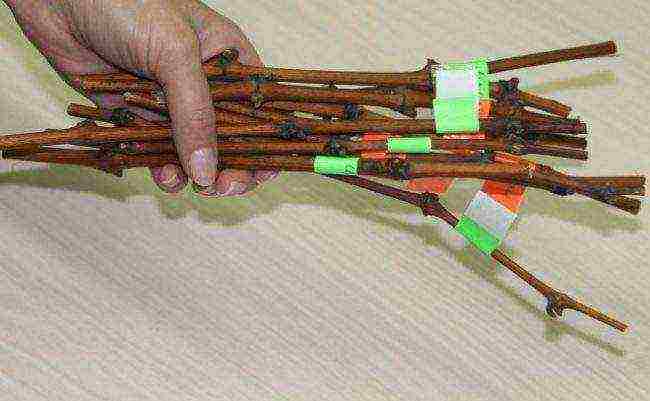
Grape bushes will grow from these cuttings.
For reproduction at home, take lignified twigs from a matured (brown) vine. They are called cuttings or chubuki.
Benefits of grafting
Breeding grapes with cuttings is a simple procedure available to any winegrower, even a beginner. This method has many advantages.:
- Availability of planting material.
- The ability to quickly get a large number of seedlings.
- The cuttings are compact, at rest; they are easy to store, transport, mail.
- Planting material is very easy to process against diseases and pests.
- The cost of cuttings is significantly lower than that of seedlings.
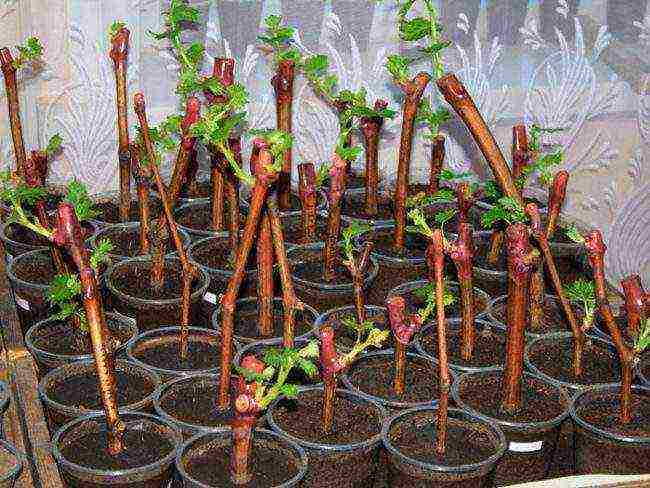
Cutting is the most common method for propagating grapes.
Lignified cuttings can be planted directly in open ground (in spring or autumn), but home rooting is very often used (in late winter or spring).
Pros of a home option
- compact organization of space;
- the ability to control the process of rooting and development;
- removal of negative weather factors;
- a significant run in time, allowing you to build up strong bushes for planting in the current season.

When the snow melts outside the window, good-quality seedlings will already form from the cuttings.
Growing grapes from cuttings at home makes it possible to get full-fledged seedlings in the regions of sheltering viticulture (in the suburbs, in Siberia, in the Urals), even on the northern borders of this zone.
Procurement of planting material
For winter-spring germination, cuttings are taken from ripe (lignified, crackling when bent, brown) annual vine... They are harvested during the autumn pruning of grape bushes (the approximate period is in October, before the establishment of negative temperatures, before the soil freezes). In non-covering zones, breeding shanks can be cut in late autumn and winter - from the vine without signs of freezing or drying out.
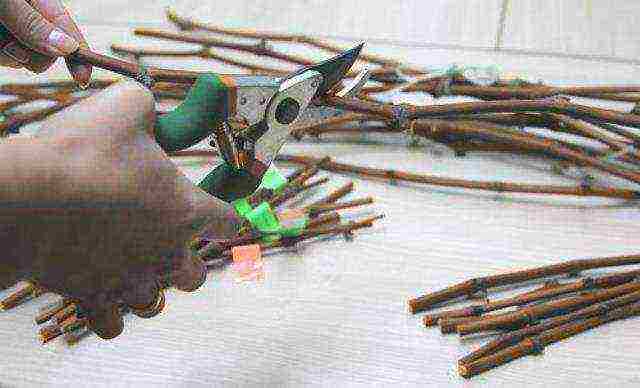
Harvesting cuttings is usually combined with autumn pruning.
It is desirable to obtain material for propagation from the most productive and healthy bushes with typical varietal characteristics. Smooth branches without spots and other defects are considered suitable. If possible, you should choose for grafting middle part those shoots that grew out of central buds of biennial branches.
The optimal cutting thickness is from 0.5 to 1 cm (in varieties with thin vines, this figure may be less).
Too thick, fattening stems have loose wood, it is not recommended to take them.
Shaft length
The length of the shank is not measured in centimeters. It is determined by the number of buds (eyes).

Three-eyed grape cuttings.
Two-eyed and three-eyed cuttings are used more often.although one-eyed and four-eyed ones are also suitable. In the process of cutting, antennae and stepsons, the remains of foliage are removed (cut off) from the branches. Sometimes long vines are stored in winter (50-100-170 cm), and cut them before rooting.
The upper cut is made straight, at a height of 20–40 mm above the upper kidney. The lower cut is performed obliquely - under the lower kidney, slightly stepping down from it (it will be updated before planting). It can be difficult for a beginner winegrower to determine on a cut vine - where is the top and where is the bottom.

Slices on a grape cuttings.
Straight and oblique cuts, made directly near the growing bush, later help to understand this issue.... (The photo shows that the pointed tip of the bud looks slightly upward, but the antennae are often directed downward. A small scar is visible under the bud: this is a trace from a fallen leaf petiole.)
The shawls are tied in bunches, tied in two places. Tags with the names of the varieties are immediately attached. Further, the bundles need to be stored for several months. They are pre-processed.
Processing before storage (step by step)
Cuttings:
- soaked in water (preferably rain) for 12 hours (received by shipment, dried up - for 24 hours); laid horizontally so that the water covers them completely, in a small layer;
- disinfect: immersed for 15 seconds in a solution of ferrous sulfate (300 g per 10 l of water) or copper sulfate (400 g per 10 l); either sprayed with one of these drugs; after treatment with iron vitriol, the vine may then turn black - this is normal;
- dry a couple of hours on paper or fabric;
- some gardeners wax the tips (cuts) - dipped in paraffin (wax) melted in a water bath and slightly cooled (until a film appears on top);
- put in storage as soon as possible, and before that they are wrapped in a plastic bag or cling film.
The shanks prepared in this way are usually preserved normally.
Storing cuttings before planting
The ideal conditions for preservation are considered to be 80–95% humidity and a temperature of +1 +4 degrees (not higher than +8).
Planting material is kept in a cellar (underground, basement) or in a refrigerator, as well as outdoors - in a snowdrift or in a trench.
Snowdrift
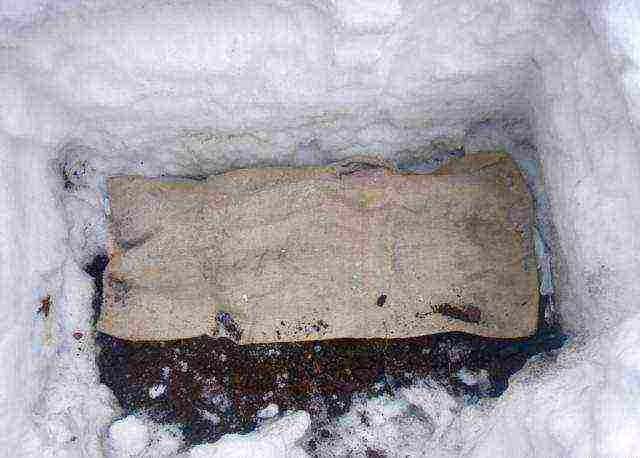
A snowdrift with a thickness of 20 cm or more protects the cuttings from frost, the main thing is not to let it thaw.
In areas with a stable snow cover, it is convenient to store cuttings in a snowdrift, at a depth of at least 50 cm. In loose snow - the optimum temperature and humidity.
Before snowfalls, the cut vine can be wrapped in wet burlap and kept at first just in the garden on the ground, and with the arrival of frost - in a cellar or other room with low positive temperatures. Chubuki are laid in the snow "naked" or pre-packed (in sugar bags, in cut-off plastic bottles).
Trench
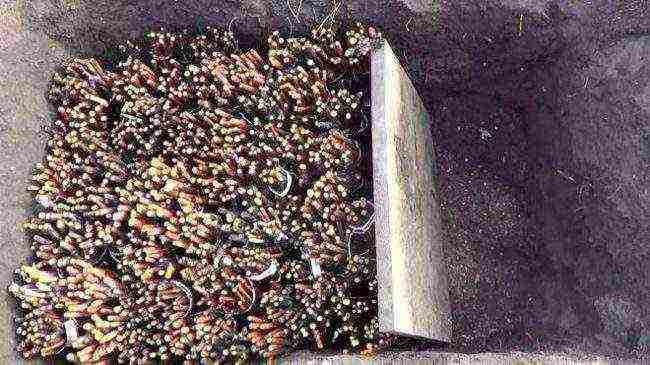
The cuttings can simply be placed in the pit and covered with earth.
- Dig a hole or trench deep in the garden 50-100 cm.
- In it, bundles without packaging are installed vertically on a layer of slightly wet sand, covered with the same sand from above, then they throw the earth to the upper edges of the pit and with a mound on top, cover with a film; overlap with slate or boards is also used.
- Sometimes they just pack the vine in a sugar bag (or cut plastic bottles) and bury it in the ground to a depth of half a meter. The disadvantage of this method is that it will be difficult to get the shanks until mid-spring.
Some growers combine a shallow trench and (top) a shallow snowdrift... The pit is not covered with earth, a cover is installed on it. With this option, planting material is easy to take at the right time.
In the cellar
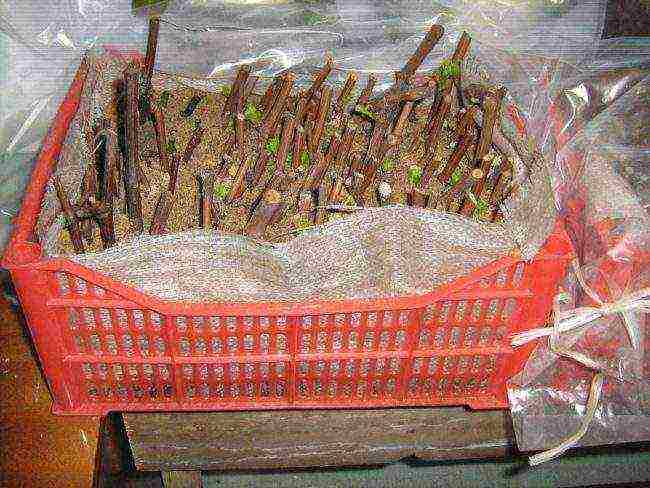
When stored in a cellar, the cuttings are placed in a box of sand.
There are several accommodation options.
- The shanks are placed vertically, placing the lower end:
- in potatoes,
- in a small layer of moss,
- in slightly moistened sand (deepening by 5 cm);
- in a bucket of water (water layer only 3-5 cm).
- The whole cuttings are buried in slightly moistened sawdust or sand (with an admixture of charcoal dust).
In the refrigerator or cellar
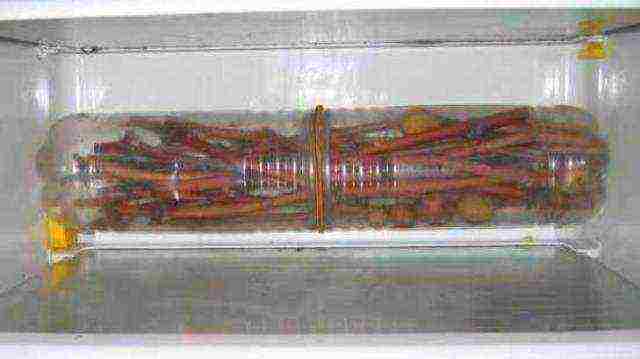
If the cuttings are few, they can be refrigerated.
Use packaging.
- Chubuki are simply put in a plastic bag (garbage bag) or in a sugar bag. The package is lowered into the cellar or placed in the refrigerator (on the door or in the vegetable compartment). Sometimes the vines are pre-wrapped (especially the lower cut) in a slightly damp newspaper. The bag is not tightly tied. At the beginning of January, newspapers are opened once for airing and humidifying.
- Each stalk is wrapped in plastic wrap.
- The bundle is placed in a package of two cut polyethylene bottles. The joint is wrapped with tape. Ventilate 1-2 times during the winter.
There is also such a method of storage: the cuttings are kept suspended in a deep well (above the water).
Timing of awakening (when do grape shanks start to sprout?)
Experienced growers are advised to start this work in February (usually in the second half of the month) or early March.
Those who are used to checking the lunar calendar avoid starting rooting in the barren sign of Aquarius.The development of callus and roots is activated during the waning moon. Sometimes nodules of callus and roots are formed during storage; they need to be protected.
Processing before rooting
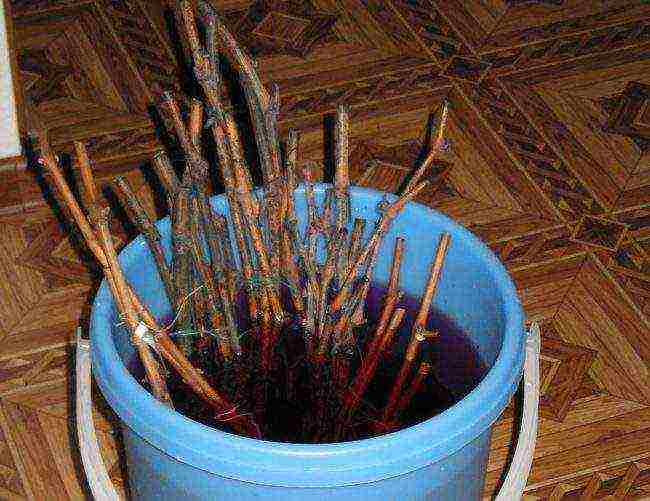
Disinfection of cuttings in a solution of potassium permanganate.
Cuttings are taken out of storage and washed with a solution of potassium permanganate (medium strength), if there are traces of mold. It is important to correctly assess the condition of the planting material, reject the bad one, and prepare the normal one for germination.
Safety check
- Examine the bark: healthy - without wrinkles and blackening.
- Make a cross-section of the stem. A thin layer of cambium under the bark and all wood should be a light green hue. But the brown, black, white color is evidence of death.
- In several branches, the lower buds are incised. Living eyes are bright green inside.
- When pressed with a knife near the cut, a little moisture is normally released from the wood. If there is too much or not at all, the rooting rate will be low.
Soak
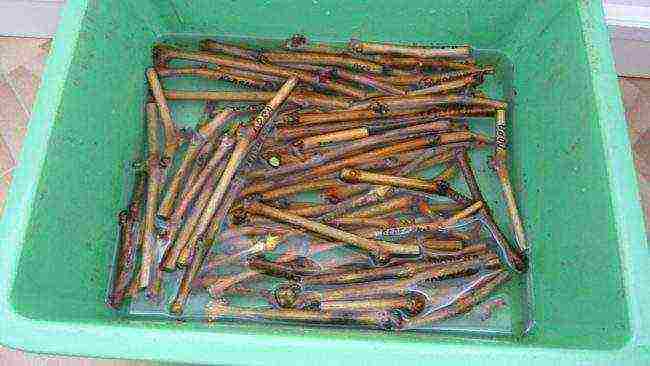
After inspection, the cuttings are placed in a container with melt water for 1-2 days.
- Not only overdried, but also normal cuttings must be soaked before germination.
- They are placed entirely in a small layer of water. (better thawed, snowy) for a period from 12 hours to two days.
- Indoor temperature - about +20 degrees.
- The water is changed every 12 hours.
- Sometimes a little honey is added to it (1 tablespoon per 10 liters of water).
Pruning
Long vines are cut into cuttings with 2-3 eyes.
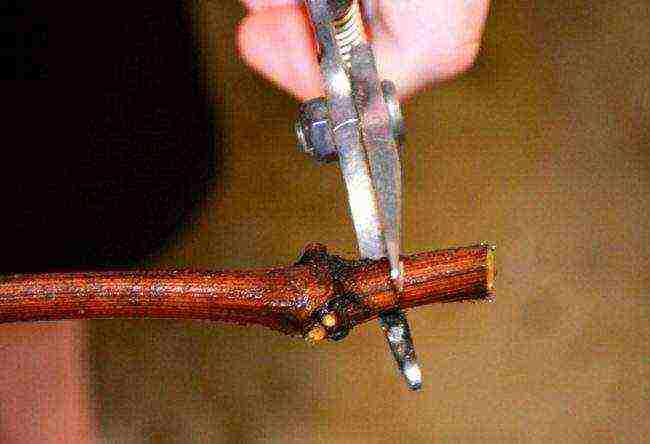
Pruning the grape cuttings under the lower bud.
The shanks, cut from the fall, update the bottom cuts... They are made directly under the lower nodes - obliquely or on a wedge. They work with a sharp knife, without squeezing the tissues. The cut branches are immediately placed in a container with a small layer of water at the bottom.
Some growers remove the lower bud, but there is little need for this.
Waxing (desirable but not required)
The upper sections (height above the kidney 2–4 cm) are not renewed. They are dipped in liquid paraffin (or wax) melted in a water bath and cooled.
Furrowing
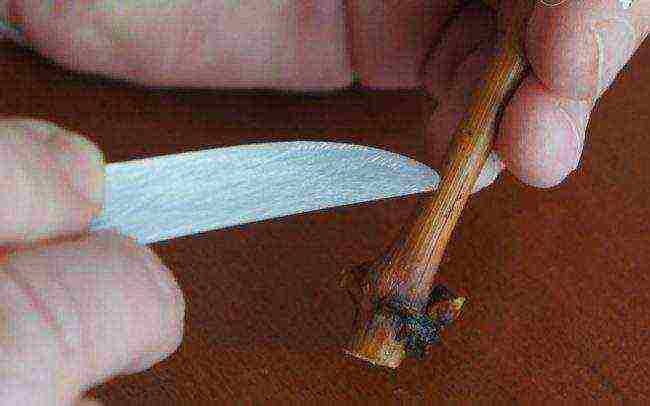
Furrowing provokes root development.
Roots are best formed in places where callus is inflated on wound surfaces.
This phenomenon can be provoked. In the lower part of the shanks, several longitudinal grooves are scratched with a knife, deepening to the cambium or wood.
The length of the wounds is approximately 3-6 cm.
Stimulant treatment
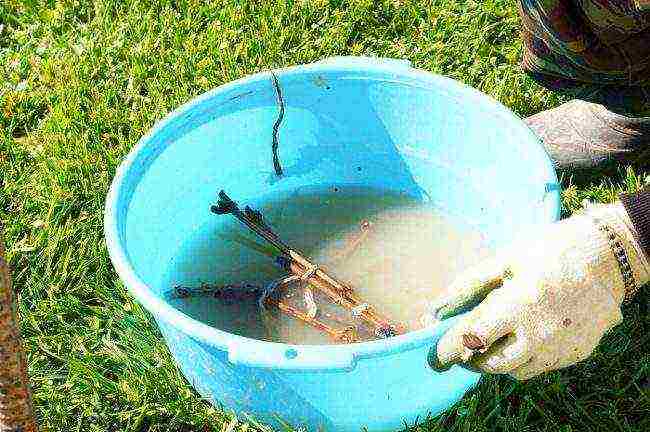
Soaking cuttings in a solution of a root stimulator.
The lower part of the cuttings (the lower node and part of the lower internode) is dusted with Kornevin or soaked in one of the liquid root stimulants (solution Heteroauxin, Zircon, Potassium Humate, HB-101 and others - according to the instructions).

A rooting stimulant is available at every gardening store.
The stalk is now ready for rooting. You can do without preliminary work, but they are all aimed at maximum success.
What is grape pickling
Kilchevanie is the creation of a temperature difference in the upper and lower parts of the cutting: heat from below and coolness from above. With kilchevka, the chances of rooting increase.
An important problem in the germination of grapes is the awakening of the buds before the roots grow. Often, the stalk throws out greens, is depleted and dies, not having time to take root. Kilchevanie helps to overcome this problem. In practice, at home, it is carried out in different ways.
- Heated from below (from +20 to + 28 degrees) Produced by placing containers with cuttings on a battery or in a specially designed wagon with bottom heating. The temperature in the zone of the upper kidneys should be much lower - ideally +5 +10 degrees (in reality, at least not higher than +18). To create such contrasting conditions, the kilcher is placed in a cool room. If they dispense with a kilcher, keeping the containers on the battery, then they often open the window, and also construct a protective curtain-screen between the cool window and the warm air of the room.
- Very effective upside down fishingwhen the seedlings are placed vertically "upside down", a moistened material is placed on top, covered with a heated lid. In the case of such a disturbed orientation, the kidneys do not wake up for a long time; roots are formed faster.
Pre-germination of cuttings
Before planting in a container with soil, cuttings sometimes first germinate - until the appearance of callus and small roots (from 2 to 10 mm). The process takes about 3 weeks in a well-lit place (no direct sunlight). Germination can be combined with kilchevaya or carried out independently. There are various options.
- Cuttings are placed in a container with water poured in a small layer - only 2-5 cm... The vessel is placed in a bag, which is tied above the neck. The ends of the cuttings with buds stick out from above. High humidity occurs in the container. Water can be replaced with a small layer of moistened material: cotton wool and gauze, hydrogel, sphagnum moss, coconut substrate, steamed sawdust, cut foam rubber.
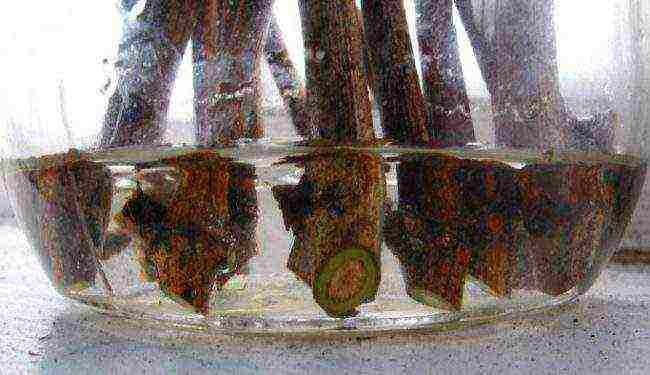
Water must be topped up on time and changed every 4–5 days.
- The lower part of the shanks is wrapped in a damp cloth, then in polyethylene... They are placed horizontally on the windowsill - with their "feet" above the radiator, tops against the window glass.

After 10-12 days, unpack the packaging and moisten the rags.
The substrate and fabric are regularly moistened, the appearance of roots is monitored. They should not be allowed to outgrow. A length of 2 mm is sufficient for transplanting into soil pots. They are installed on a light, warm windowsill.
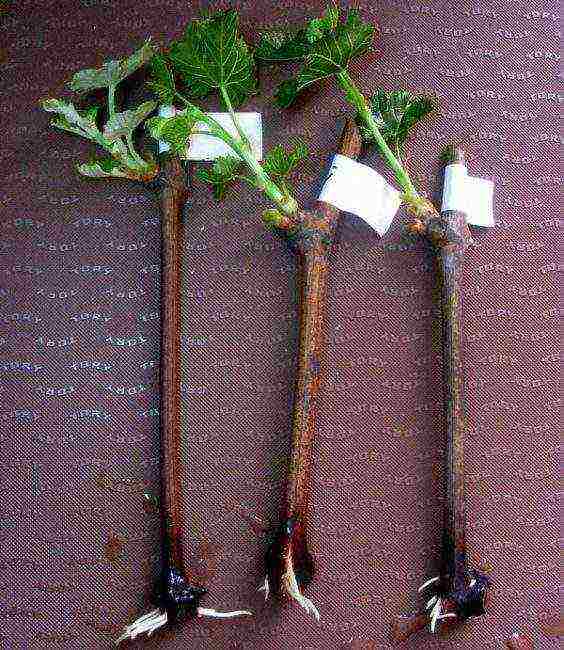
The cuttings have given roots and are ready for planting in containers with soil.
Containers and soil
For growing seedlings of grapes with a closed root system, plastic cups, cut plastic bottles, nurseries are suitable.
The volume of the pot is from 0.5 to 1 liter (a little more is possible)... Drainage holes are required.
The soil mixture is selected light: sod land, compost, sand in equal proportions. The addition of peat is possible, but not sour.
Method of planting cuttings without prior germination
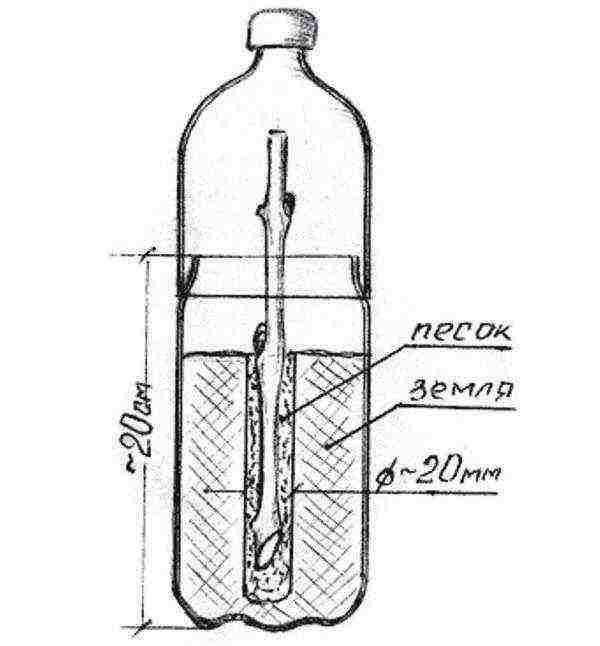
The scheme of germination of the cuttings in a plastic bottle.
- Wet soil is poured into a bottle cut at a height of 20 cm (with drainage holes at the bottom).
- In the center, a hole is made to the very bottom with a diameter of 2 cm, a little sand is poured into it, then a handle is installed, and the remaining space of the hole is filled with sand. It turns out that the grapes are isolated from the soil with a thin layer of sand - this will prevent rotting.
- Above the container is covered with a "lid" from the cut off top of the bottle, creating greenhouse conditions, high humidity.
- The structure is installed on a pallet, which is fixed to the battery near the window. A plastic wrap curtain will help isolate the cool windowsill from the room, frequent ventilation will lower the temperature on the window.
- When the overgrown roots become visible through the cups, the seedlings are rearranged on the windowsill, the cooling is stopped.
- The growing green shoots are gradually hardened, periodically removing the caps for airing. Then the upper part ("greenhouse") is removed altogether.
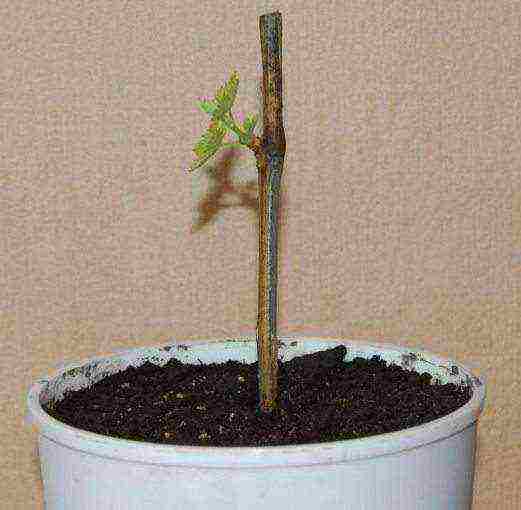
The cuttings are 45 days old, the kidney burst - rooting was successful. Now we grow the seedling before planting it on the street.
Landing in the ground
The grown seedlings are hardened on the balcony, window of a garden house or in a greenhouse at a temperature not lower than +10 degrees, avoiding freezing (negative temperatures). They are transplanted into the ground in May or June (according to the weather), covered with agrofibre from the scorching sun and temperature changes (for 2-3 weeks).
Grapes can be propagated by seed and vegetative methods. The first is used quite rarely, mainly grapes are propagated by the vegetative method. Good results can be achieved using shanks - grape cuttings intended for planting.
Growing grapes from shanks at home
They must be prepared in the fall and planted at home in pots at the end of winter.In the spring, the sprouted cuttings must be transferred to the garden, having previously prepared the soil. By the fall, grape vines will already grow on your site.
All plants obtained during vegetative propagation are essentially cloning, so the resulting vines of grapes will be exact copies of the mother plant and will have the same properties.
Collection and storage of cuttings
You can buy or prepare grape shanks for growing at home. If you chose the second option, you should follow a few simple rules:
- for the selection of cuttings, it is necessary to choose a healthy vine that yields a large yield of high-quality fruits;
- shanks are best harvested from shoots that are located in the middle part of the fruit arrow or on a replacement knot;
- for a shank, a shoot with a diameter of about 8-10 mm is suitable.
Select a healthy vine to select cuttings
To get a high-quality grape shank for planting, you must:
- cut off the selected shoot and separate the vegetative organs - leaves, whiskers, top;
- cut cuttings 3-4 eyes long, while in the upper part the cut should be made obliquely from the kidney at a distance of about 2 cm from it, in the lower part - 3-4 cm from the lower eye also obliquely, at an angle of 45 degrees;
- make several cuts in the bark at the bottom;
- soak the cuttings in water for 12 hours, then soak them for 1.5 hours in a three to four percent solution of copper sulfate to disinfect;
- after that, the cuttings must be dried at room temperature.
Storing grape cuttings in homemade containers
Cuttings prepared in this way must be sealed and stored in a cool place. For this, the bottom shelf of the refrigerator, cellar or basement is suitable. Please note that some of the shanks may not take root and die, so they need to be harvested with a margin. It is necessary to plant cuttings at home in late February or early March.
Correct procurement and storage of shanks is a key point, if everything was done correctly, the further process will not cause great difficulties.
Preparing containers for planting grape shanks
For planting cuttings, you need to prepare containers for seedlings with a substrate. Usually plastic bottles with the top cut off are used for this. You can also use simple plastic cups. A good substrate for germinating grape cuttings can be obtained by mixing soil with sand, humus and sawdust.
Growing grape shanks in plastic bottles with the top cut off
There should be no excess moisture, watering will be done through the pallet, therefore, in the bottom of the glass, it is imperative to make holes with an awl for its outflow.
Preparing cuttings for planting
Before planting, you need to check the safety of the cuttings.
Before planting, you need to check the safety of the cuttings. Press down on it with a pruner:
- if a little moisture is released from the cross section, the cutting is alive and ready for planting;
- if a lot of water is released, the shank has rotted;
- if there is no moisture at all, the cutting is dry and also unsuitable for planting.
Also, the safety of a grape shank can be checked by cutting it: a good seedling has a fresh cut has a light green color, an unusable one will have black specks.
A good seedling has a fresh cut light green in color.
Cuttings suitable for planting must be soaked in water for several days. Then they must be placed in a tub with a root formation stimulator for a day.
Soaking grape cuttings in water
Germinating cuttings in a jar of water
The shafts prepared in this way must first be placed in jars of water in order for the roots to germinate. You can put a 2-3 cm layer of cotton wool on the bottom of the jar and pour the same layer of water on top. The roots should appear in a few weeks.
Sprouting grape cuttings in a jar of water
The room in which the seedling containers are located should be well lit. They are usually placed on a windowsill in a room that is best lit by the sun. Precisely because sunny weather usually comes with spring, it is recommended to plant grape cuttings not earlier than the end of February.
For seedlings to grow faster, you can place fluorescent lamps above the containers with the planted cuttings. Another option is to hang foil, which will reflect light onto the containers.
Germination of grape cuttings on a windowsill
Kilcheva method for germinating grape cuttings
In order to ensure the best growth of grape cuttings planted in containers, you can use kilchevanie: if the lower part of the shank is warm, roots form faster than buds.
If the glasses with seedlings are on the windowsill, under which there is a heating battery, the easiest way is to remove heat from it. To do this, you can put two bars on the window sill, and place a piece of plywood on top of them so that it protrudes beyond the edge of the window sill. The containers are placed on plywood. It will be heated by the air rising from the battery, and this will keep the lower parts of the containers warm.
There are also more complex options: for example, a terrarium heater can be used as a kilchevator. In any case, care must be taken that the temperature at the roots of the cuttings is no higher than 30-35 ° C.
Substrate transplant
Transplanted grape cuttings into the substrate
After the roots sprout, the cuttings must be planted in glasses with a substrate. It is necessary to plant it to a depth of 5-6 cm. If tall glasses made of plastic bottles are used, the substrate can be added to them so that the upper bud of the shank is at the level of the upper edge of the glass.
You can water every day or every two days. To do this, it is better to use warm water, pouring it into the pan. Another option is to water every five days, adding a glass of water (about 100 ml) at a time to the container.
In addition to regular watering, it is necessary to periodically loosen the soil and sometimes apply top dressing. As noted above, some of the shanks may not take root and die.
Video - How to grow grapes at home from cuttings
Disembarkation of shanks in the garden
Sprouted grape cuttings should be planted in the garden in spring in pre-prepared soil. To do this, it is best to choose a well-lit area with loose soil.
Sprouted grape cuttings are planted in the garden in spring
In order for the grapes to take root well, you must:
- before planting, dig up the soil to a depth of 40-50 cm;
- add 2.5 buckets of sand, 1.5 buckets of humus and 100 g of nitroammofoska per square meter;
- re-dig the ground;
- prepare low tubercles for planting shanks;
- plant the shanks and cover the soil with cellophane or roofing material.
Plant seedlings sprouted at home to a permanent place in May. It will be better if, before disembarking, you harden the shanks for 5 days, exposing them to the street. After planting the cuttings, the soil must be watered regularly so that it remains constantly moistened.
The grapes reproduce by cuttings very well. If you follow these guidelines, you can grow strong and healthy seedlings at home, ready to be transferred into the soil. By the fall, vines with a strong root system will grow from cuttings planted in the garden.
Video -Planting cuttings and seedlings of grapes in the ground
If a gardener has a desire to propagate grapes on his own plot, then he can use for this in two different ways. The first and easiest way is to buy seedlings in a special nursery. The second method, although labor-intensive, but more effective is the cultivation of grape cuttings in winter at home.The second method has several positive aspects that distinguish it favorably, namely, the gardener will be able to get grape seedlings of the desired variety, while such planting material is much more stable when compared with that acquired in the nursery. To grow high-quality cuttings on your own, you just need to put in a little effort.
Growing grape cuttings
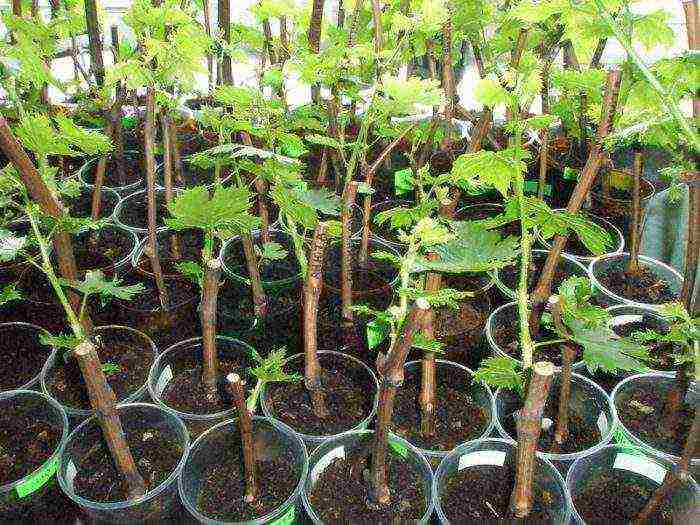
Before planting the cuttings in a permanent place, you must first prepare them. Most gardeners do not have the necessary experience in this matter, because rarely has anyone done this before. The process of preparing grape cuttings is divided into several stages, each of which is of great importance:
- slicing;
- storage;
- preparation for disembarkation;
- germination.
In order to succeed in this business, you need to know all the basic rules for growing grape cuttings, as well as tricks and secrets.
Stage 1: Cutting cuttings
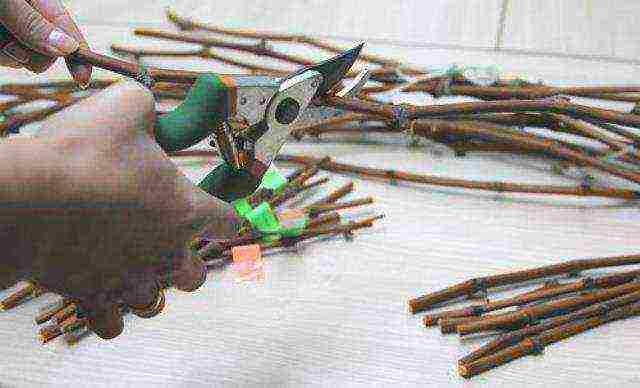
In autumn, all weakened or damaged branches die off, therefore it is at this time of the year that it is recommended to harvest grape cuttings (shanks). When cutting them, you must adhere to several basic rules:
- It is recommended to start cutting the shanks only when all the foliage has fallen from the bush.
- Try to select those branches that produce large clusters. The fact is that it is from such branches that the best planting material is obtained.
- Choose a vine that does not have curved shapes. It is best if it is as flat as possible.
- It should be remembered that the quality of the planting material is directly related to the length of the cutting.
Remember that cutting the shanks at sub-zero temperatures is by no means possible. In this regard, if there are already frosts outside the window, then cuttings can be made only next year. To cut the shanks, you need a pruner. Prepare a solution of copper sulfate and immerse the cuttings in it immediately after cutting them.
Stage 2: Storage
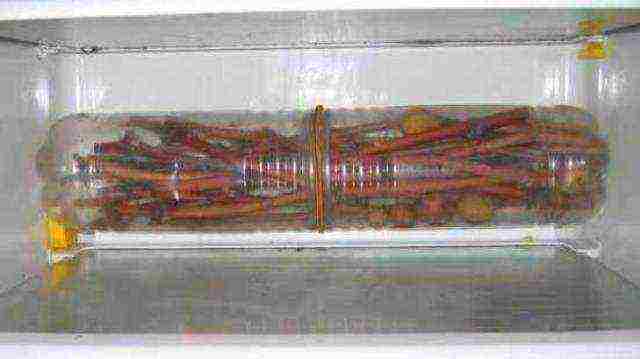
In order for the shanks to survive until spring, it is necessary to create the most favorable conditions for them. First of all, you need to divide the cuttings by grade. Then the cuttings of the same variety are tied together and placed in a separate polyethylene bag, which is then wrapped very tightly. It should be noted that you will have to save the grape shanks until spring. The fact is that it is at the beginning of the spring period that they are planted in open ground. There are several places where you can store grape cuttings quite successfully:
- Refrigerator shelf. This storage method is effective only when there are relatively few shanks.
- Basement. This storage method is ideal for those gardeners who grow grape seedlings not only for themselves, but also for sale.
- Country cottage area. There are also those gardeners who have learned to save material for planting until spring, simply by burying it in the ground. It should be remembered that the cuttings must be buried to a depth of at least half a meter.
In the process of storing the shanks in the winter, various problems can arise, in this regard, it is necessary to systematically inspect them. In the event that you notice that the buds on the stem began to swell, this means that there is a high temperature in the place of their storage. If this is a refrigerator, then you just need to lower the temperature, otherwise move the cutting to a place where it is colder.
Stage 3: Preparing for planting
In the case when the grape shanks are well preserved, they can be quickly and easily prepared for planting in open soil. First of all, you will need to inspect each grape cuttings, while you need to remove those of them that are unsuitable for growing. To understand whether the shank is suitable for planting or not, you can make a transverse cut on it. Examine the incision site.In the event that it remains completely dry, then such a cutting can be thrown away, the fact is that it is completely dry and will not be able to give either roots or buds. In a good growable shank, moisture should come out of the cut. You also need to carefully examine the color of the cut. In the case when the stalk has spent the whole winter in favorable conditions for it, then its cut should be painted in a rich green color. Examine the cut carefully, as there should not be a variety of inclusions.
After you have thoroughly examined the grape shanks and graded them, you can begin the procedure that will wake them up. Take a container of the required volume and fill it with lukewarm water. Then dip the grape cuttings into it. They will have to stay in the water for at least two days. After that, prepare a solution of an agent that stimulates the growth of roots (you can buy it at a specialty store). When you take the shanks out of the water, they must be immediately immersed in this solution.
Stage 4: Germination
This stage is the very last and at the same time it is very important. In order to germinate cuttings, gardeners use two methods, so you can choose the one that is most suitable:
- With a glass. You need to prepare a large plastic glass. On the bottom, you need to make 3 large holes, it is most convenient to do this with an awl. Pour soil mixed with compost at the bottom. Then you need to take a glass of plastic with a smaller volume and cut the bottom out of it. After that, this glass must be inserted into the first glass with earth. A smaller glass should be filled with sand and water it well. The chubuk must be stuck in the sand. In order to keep warm there, it is recommended to use polyethylene film.
- With a plastic bottle. You will need the most common plastic bottle. A not very high drainage layer must be laid on its bottom. A layer of compost, nutrient soil or peat must be poured over it. A shank immersed in the soil should have the tip at the same level as the bottle. The bottle is covered with a plastic glass on top. After the formation of the first young shoots, the shelter is removed.
Both of these methods are quite effective. However, in order to successfully grow grape shanks, they need to provide systematic watering, as well as good lighting. It is possible to transplant cuttings into open ground only after they have formed roots and the first foliage has grown.
