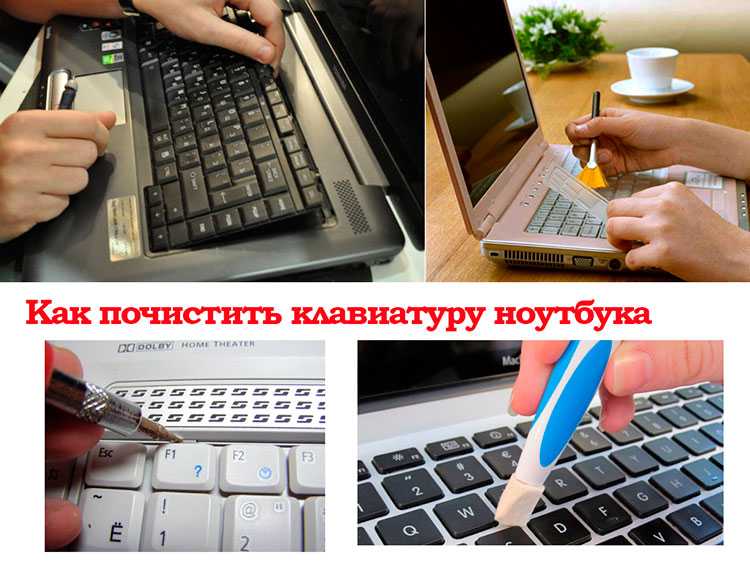
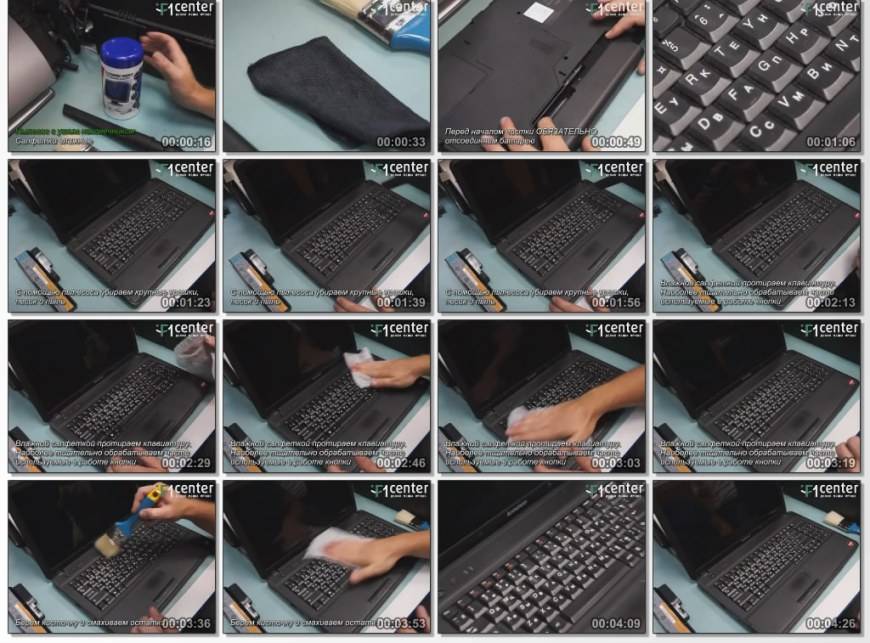
Tip 6: General cleaning your laptop keyboard
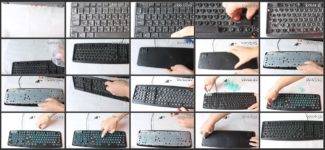
The most thorough and best cleaning of the keyboard is possible if you disassemble it and gently wipe every part inside. But not everyone knows how to disassemble a laptop for cleaning and make sure that the keys do not break. Difficulties may also arise with how to put it back together. Therefore, we offer step-by-step instructions on how to disassemble and wash the inside of the laptop keyboard:
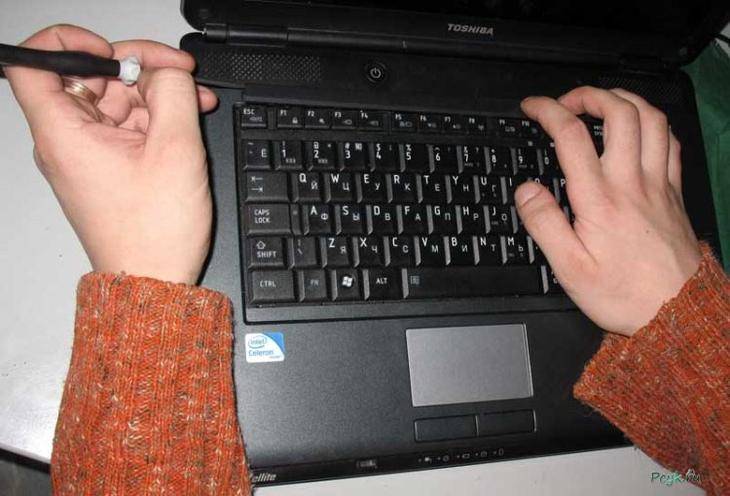
Take a picture of the keyboard so that later there will be no questions related to its assembly and the location of the keys.
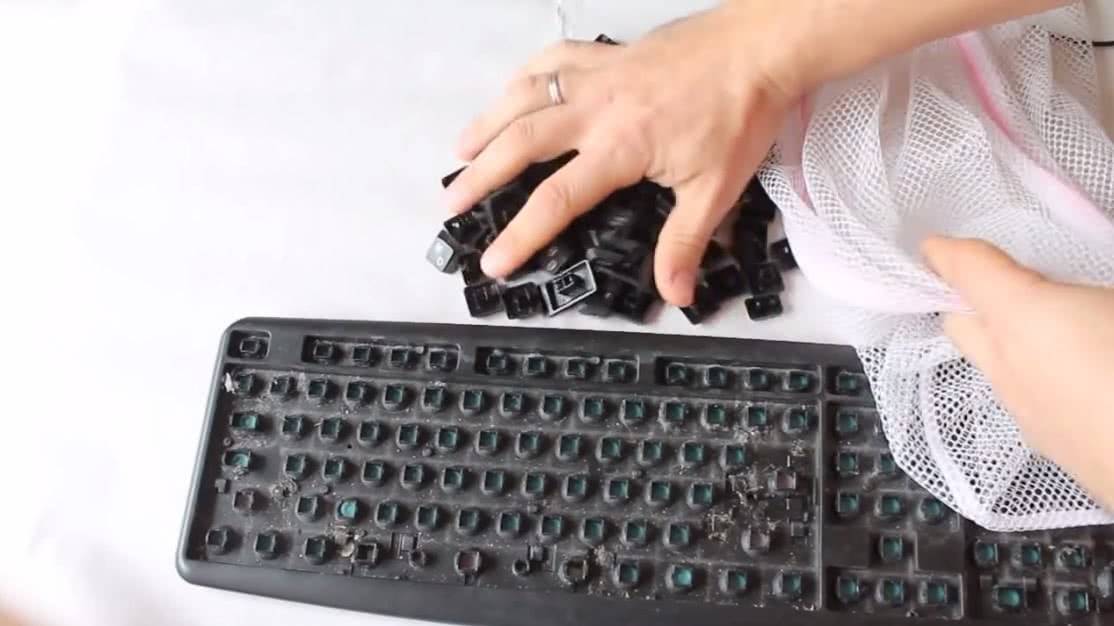
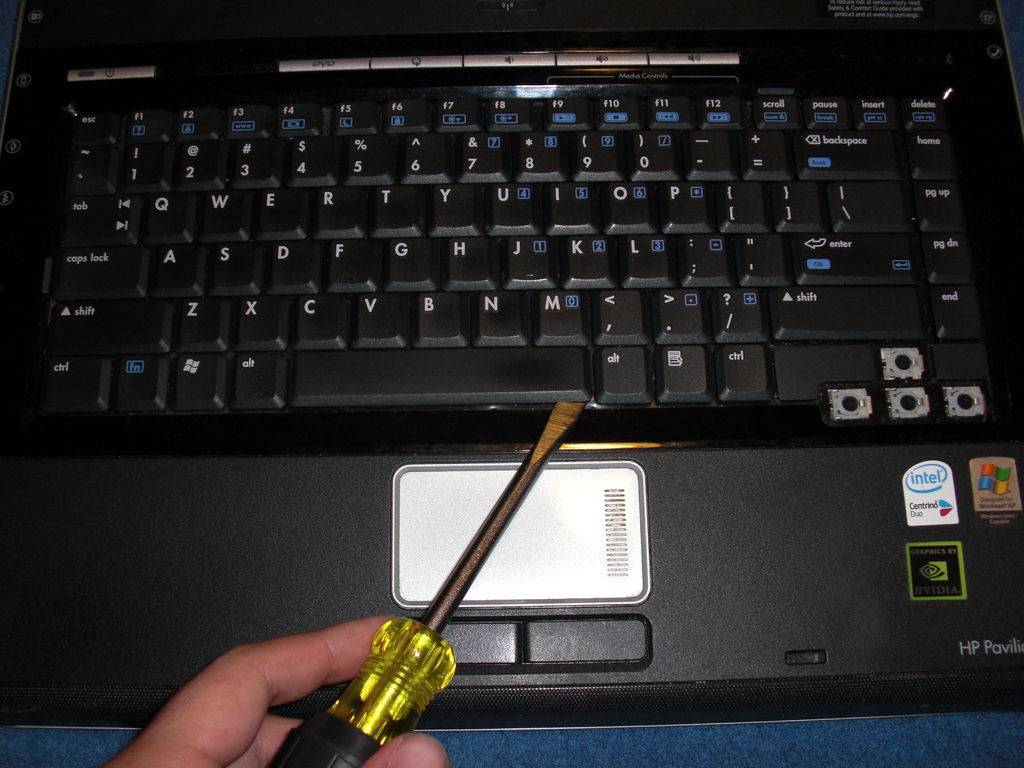
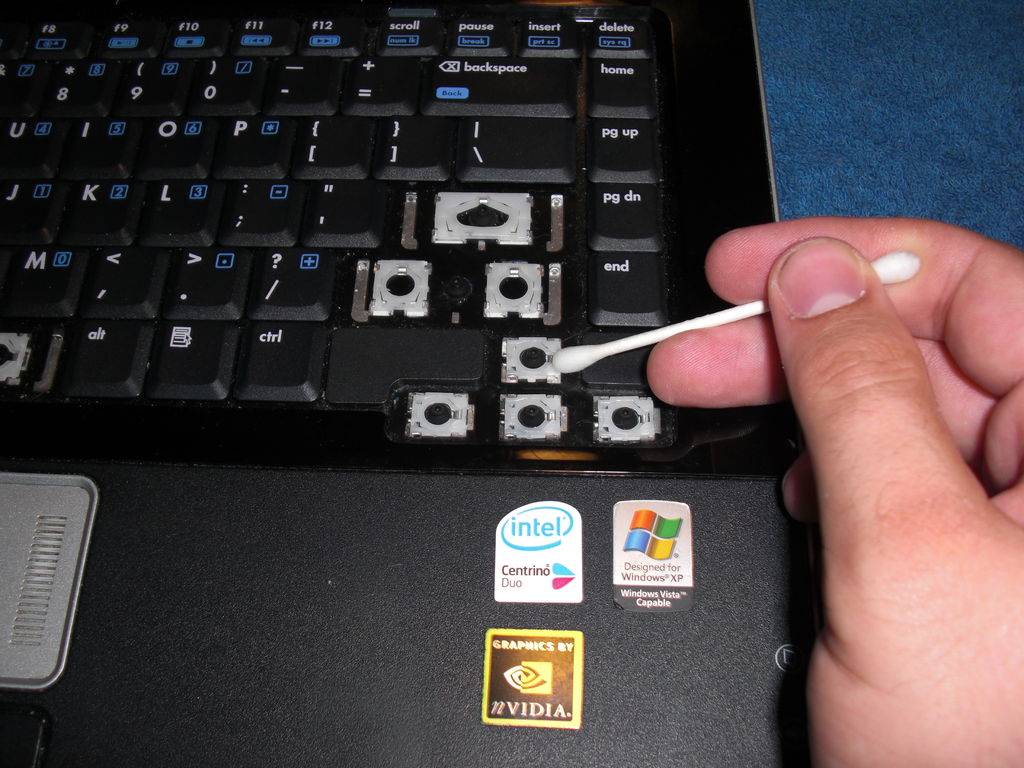
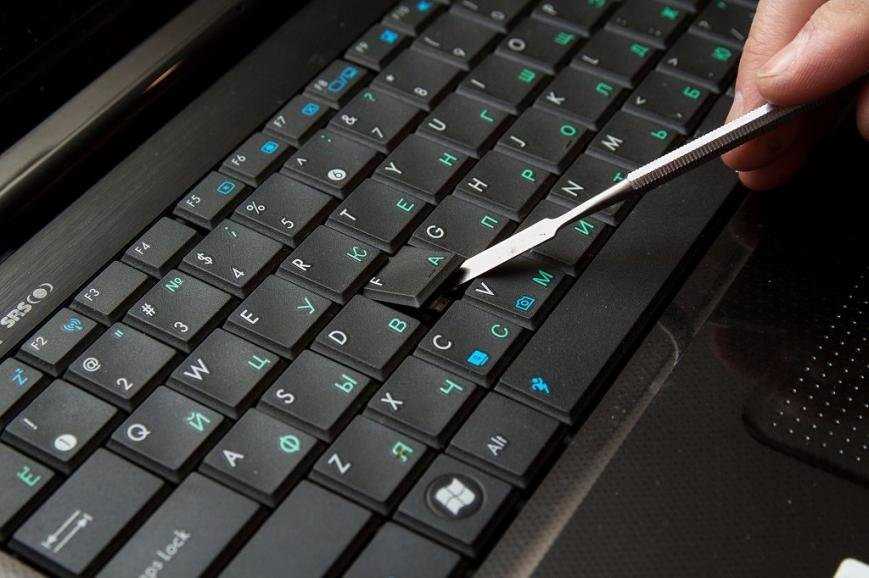
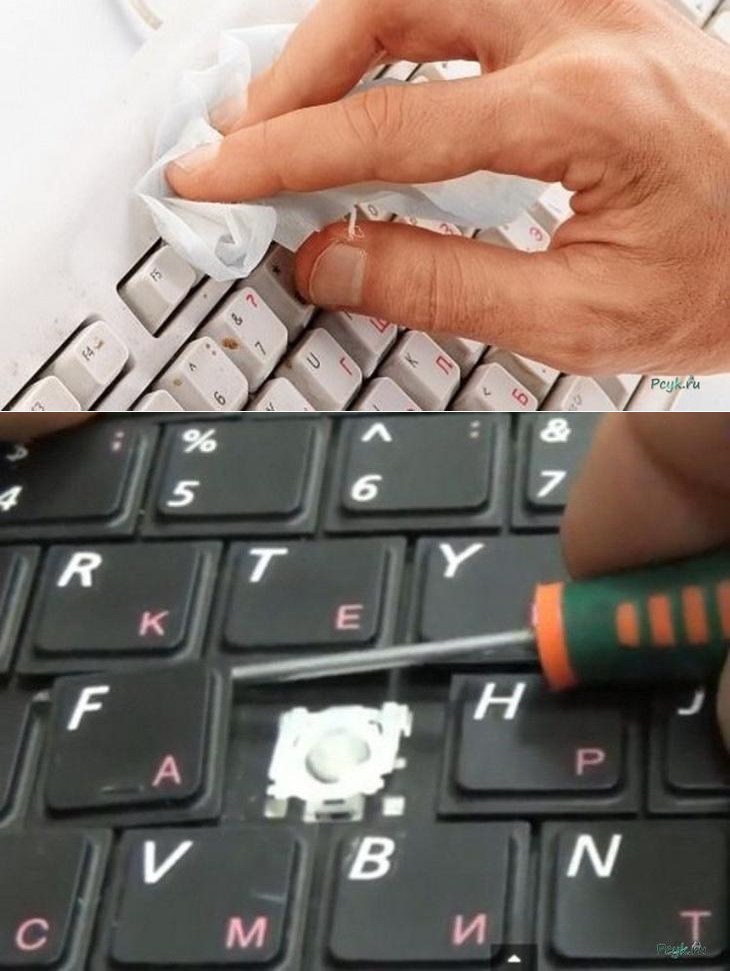
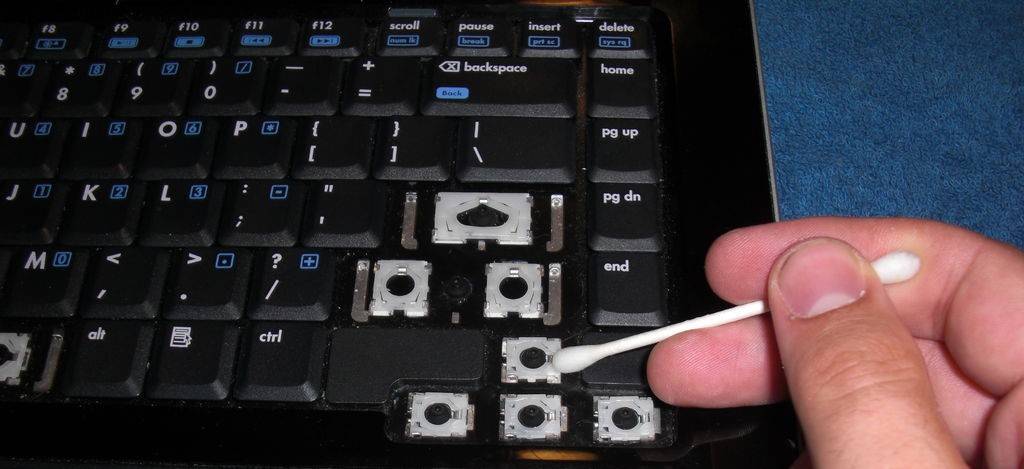
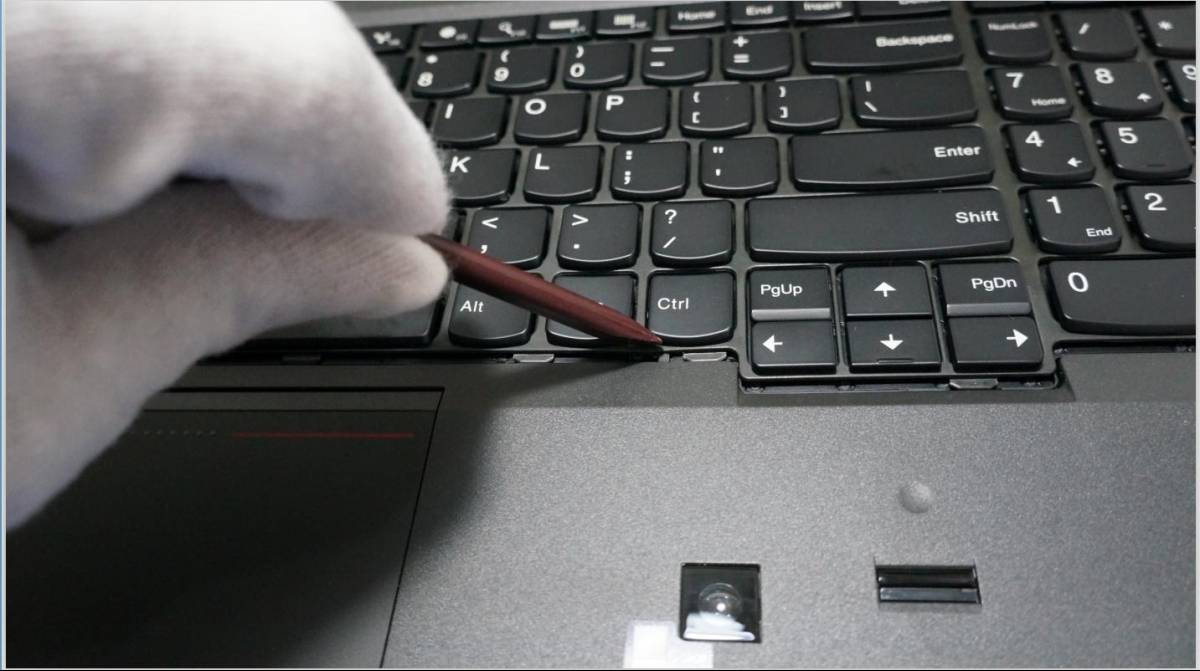
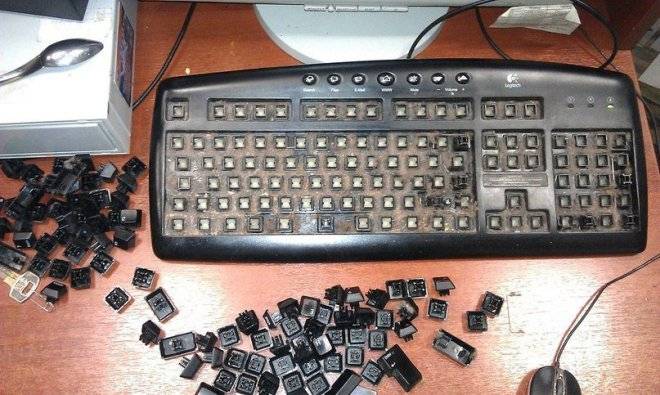
Some laptops differ in disassembly, but most of them (Asus, Samsung and other popular brands) can easily remove the keys with a fingernail or a small screwdriver. To do this, you need to slightly pry the edge of the key and gently pull. After that, it should easily come off.
We recommend that you carry out zone cleaning: removed one key - put it back in place, since if all keys are removed at the same time, there is a high probability that you will collect them back with errors or spend a lot of time on this process.
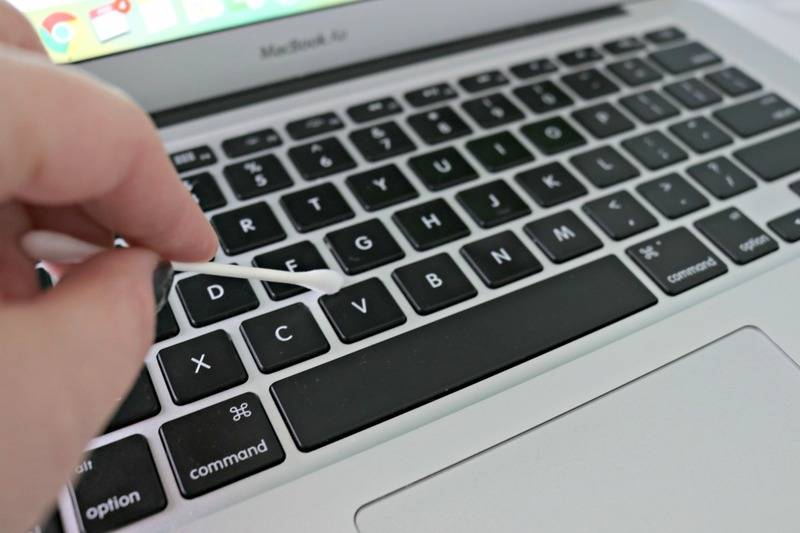
The internal parts of the keyboard can be cleaned with a cotton swab dipped in water, and it is better to wash the removable keys separately in a bowl of warm water.
Please note that cleaned parts must dry completely before reassembly.
Assembling the keys is quite easy: you need to put the plastic part in place, then press lightly until you hear a characteristic sound. Then test its functionality: if the key is pressed as usual and does not drop out, then you have successfully completed the build process.
Your keyboard is now clean and ready to go!
How to remove liquids and sticky dirt from your keyboard
If any liquid has been spilled on the keyboard, such as coffee, tea, energy drink, juice, or something else, chances are it won't be immediately problematic if drinks don't get onto the board. But, over time, the accumulated liquid under the keys will lead to sticky keys. It is impossible to work with the keyboard when the keys are not pressed well or fail and stick.
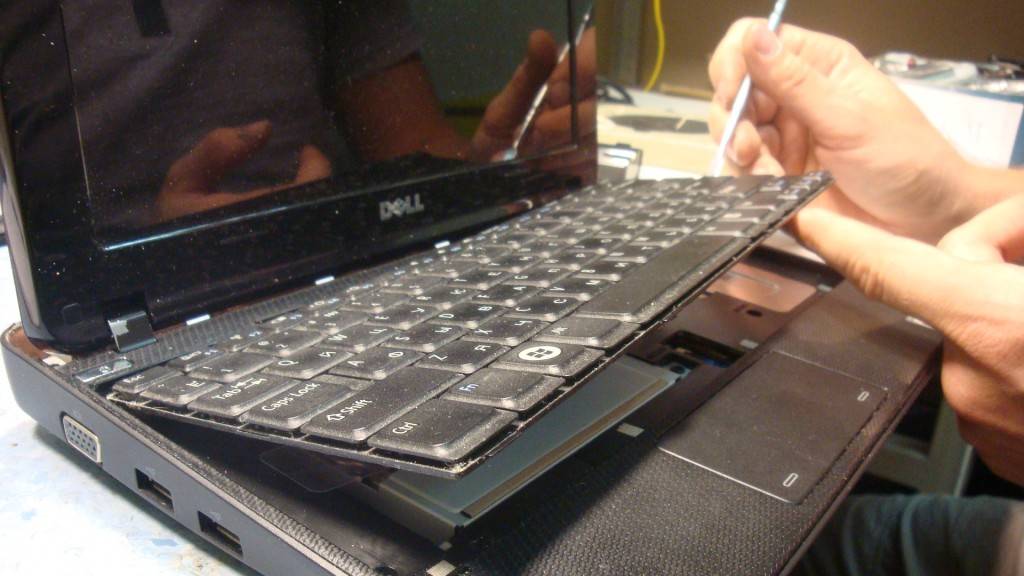
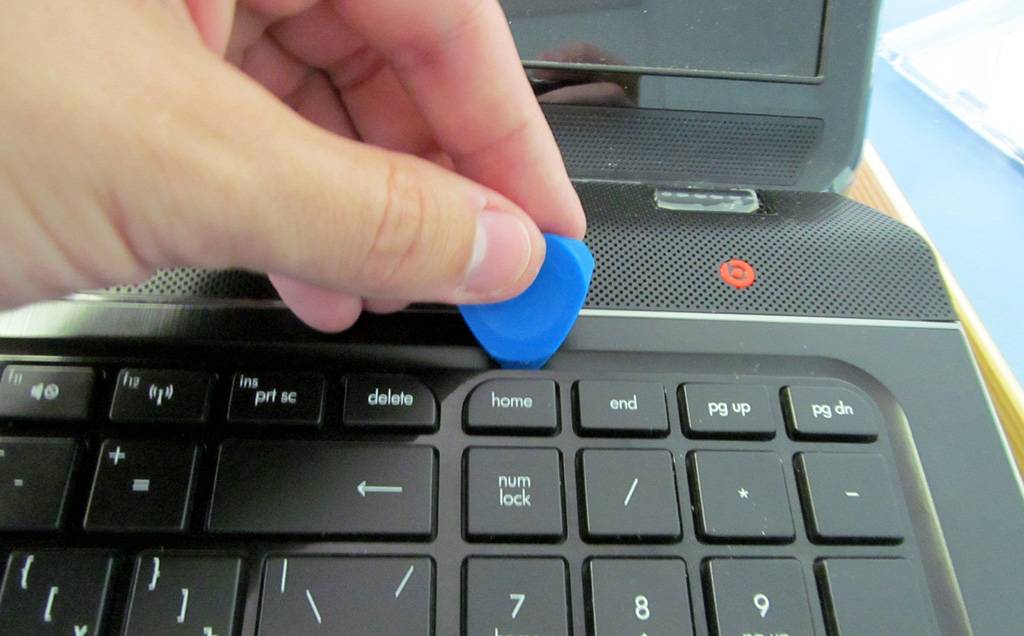
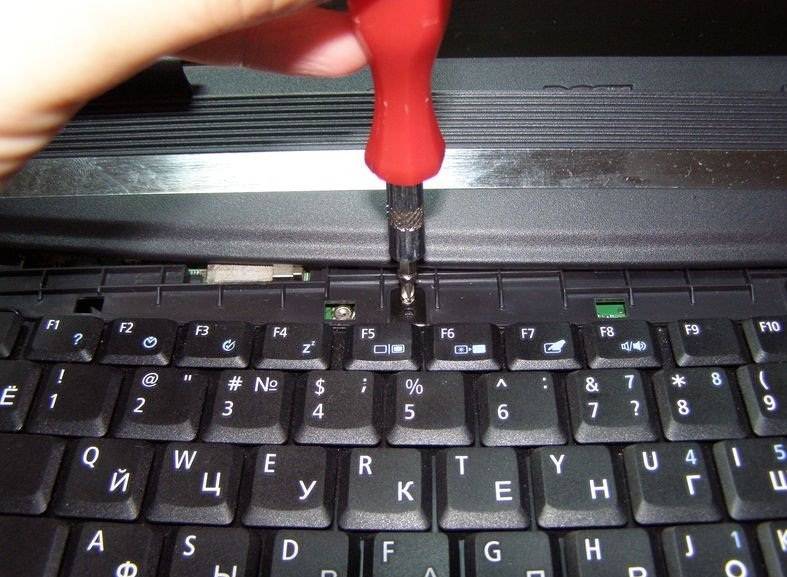
To clean the keyboard of liquids and other sticky substances, first of all, unplug it - disconnect from the computer or turn off the laptop and remove the battery from it. After that, you will need to disassemble the keyboard. Most often, to remove a button from the keyboard, it is enough to pry it from one of the corners with a sharp object - a screwdriver, knife or something similar.
Important: Depending on the type of keyboard you are using, there may be different ways to remove the keys.
Disassemble the keyboard with care and effort
If not all keys stick, only problematic ones can be removed. At the same time, we recommend taking a photo of the keyboard before removing the keys, so that later during assembly there are no problems with where to install which key.
After removing the necessary keys, proceed to cleaning the keyboard. To do this, you can use the methods described above - compressed air, vacuum cleaner and isopropyl alcohol. The keys themselves, which most often simply represent a piece of plastic, need to be immersed in warm water for a while so that they are cleared of adhering dirt.
Important: Be sure to dry the keys before assembling the keyboard. Assembling the keyboard shouldn't raise any special questions
It is enough to place the keys in the positions they occupied. At the same time, you need to press the keys during installation until you click
Assembling the keyboard shouldn't raise any special questions. It is enough to place the keys in the positions they occupied. In this case, you need to press the keys during installation until you click.
Please note: Large keys on the keyboard, such as Enter and the space bar, may have a metal structure in addition to the plastic base. Before attaching the key itself, you need to correctly install this part
Classification of keyboard cleanings
 Before you start cleaning, you need to determine which one is required, it can be of two types:
- superficial - cleaning of buttons and inter-button space;
- deep - removes dust from contacts, which over time can move to the internal elements of the laptop.
Surface cleaning is a preventive measure, the more often you do it, the less often you will need to deep clean.
To lightly clean the keyboard at home, turn the laptop over and shake it to shake out what was under the keys. To make the procedure more effective, you can use a car vacuum cleaner or a furniture cleaner. However, they must be used wisely so that the keys do not accidentally come off.
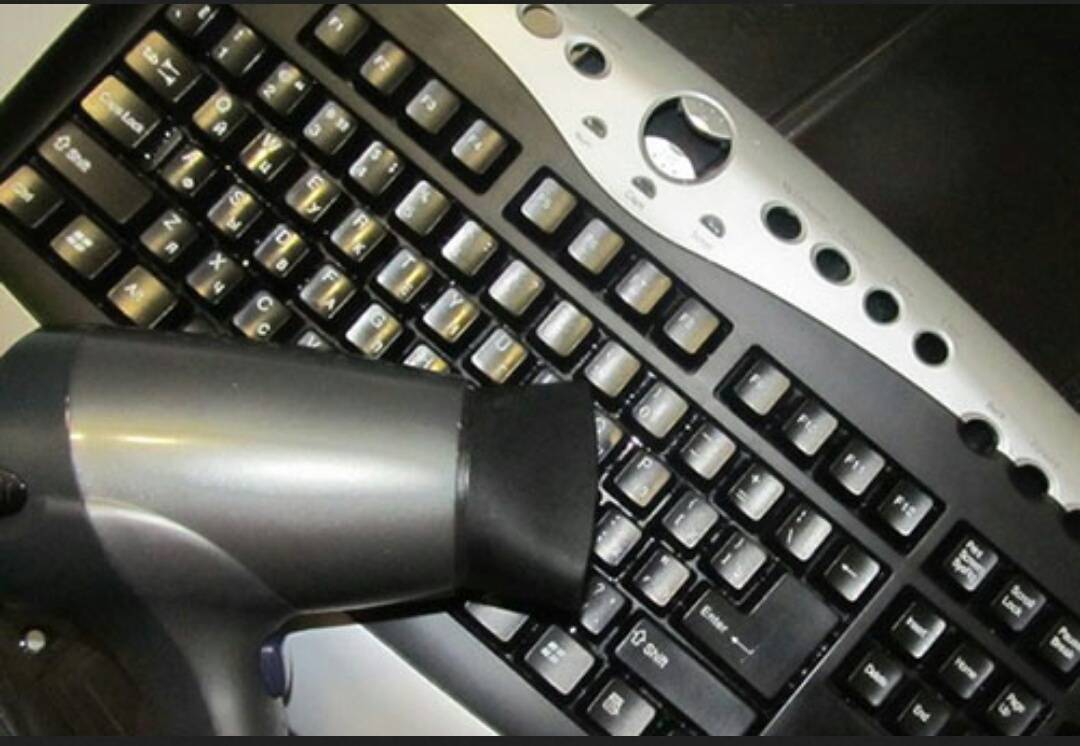
You can use a compressed air canister or even a simple hair dryer for cleaning. The air from the same cylinder will come out under strong pressure, which will be quite enough to remove dust that settles on the contacts of the devices. The contents should not be inhaled. Also, after the end of the procedure, do not forget to ventilate the room.
But deep cleaning is a more complicated process. In addition to cleaning, it includes actions that are beyond the power of beginners:
spin up the laptop;
the keys can be detached from the case with a screwdriver or a table knife
This must be done very carefully so as not to damage the cable that connects the keyboard and the motherboard;
It is also very important after work to assemble the keyboard correctly and assemble the keys in the correct order. It is best to photograph them before dismantling;
before installing buttons with a metal base, make sure that all parts are installed in the desired grooves .. Remember that it will be extremely difficult to replace broken keys in case of something, especially with regard to the space bar and "Enter"
Remember that it will be extremely difficult to replace broken keys in which case, especially with regard to the space bar and "Enter".
Also, after the laptop was disassembled on its own, it cannot be exchanged and repaired according to the warranty. If there are certain problems with it and the warranty period is valid, everything is best solved in an authorized service center, the address of which is indicated in the laptop warranty.
Cleaning the keyboard at home
Using a flat screwdriver, carefully remove all keys. Before that, do not forget to take a photo of the keyboard.
After that, we turn the keyboard over and find all the screws that hold its two halves together. We unscrew them with a Phillips screwdriver. Most often, this is the kind of screwdriver you will need.
Having removed the upper plastic part from the keyboard, you can safely carry it to the kitchen and wash it with detergent. The main thing is then to thoroughly rinse it under running water.
The keys that you removed from the keyboard must be placed in a regular disposable bag and filled with water. You need to add a detergent to the water, but not very toxic. Tie the bag and leave the keys for another hour. When the keys are slightly wet, shake them well. Just do it carefully so as not to tear the bag. We wash each key under running water.
Now that all the elements are clean, you need to give them time to dry. Only then can you put the keyboard back together.
I am sure you will cope with such a procedure as cleaning the keyboard.
And it doesn't matter if it's on a laptop or a regular one for a PC. The main thing is to do everything carefully and gradually, without missing any of the points I have described.
Preventive cleaning
In order to prevent heavy contamination of computer accessories, it is not difficult to clean the computer every day at home. This will avoid paid cleaning in services. In order to start cleaning yourself, you must disconnect the computer from the power supply. Then detach the keyboard as well.
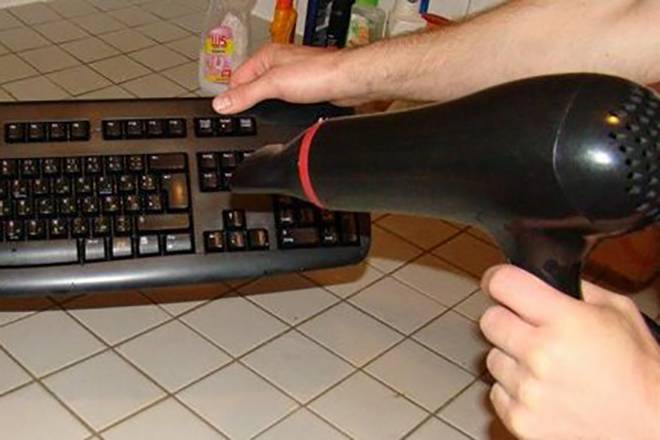
 Turn it over with the buttons down and shake it lightly to get rid of the small debris that has accumulated inside the case. You can use a hairdryer or vacuum cleaner. They will efficiently remove crumbs and dust from the inside of the keyboard.
It is important to choose a cold air mode when using a hair dryer. And if a vacuum cleaner is used, then a flat nozzle is needed to remove dirt from hard-to-reach places
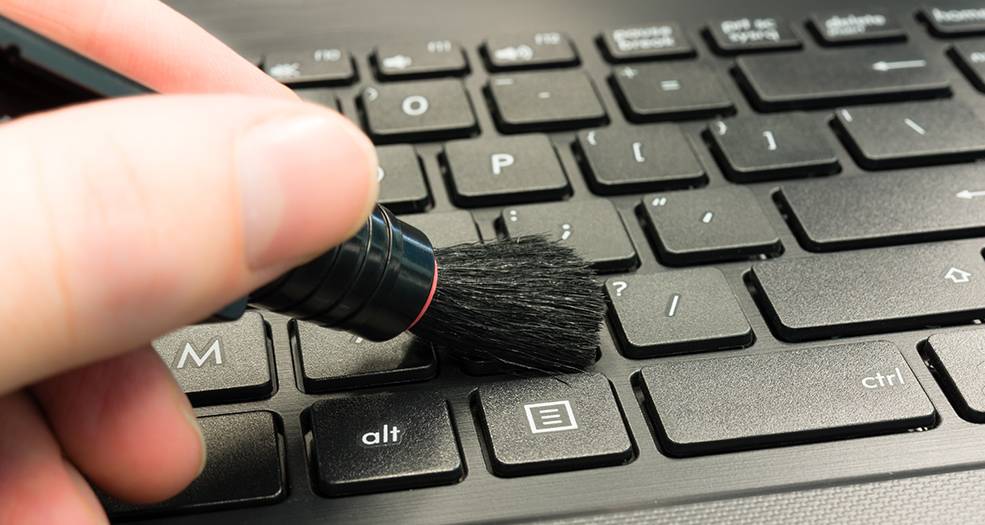
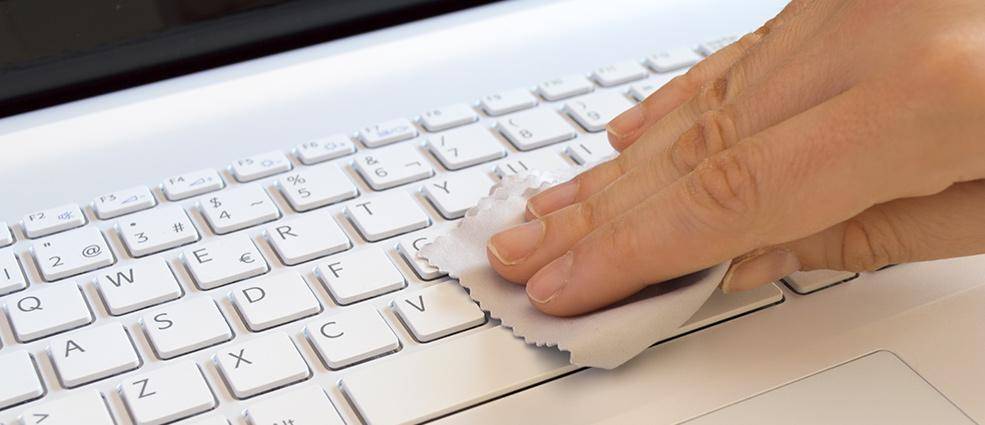
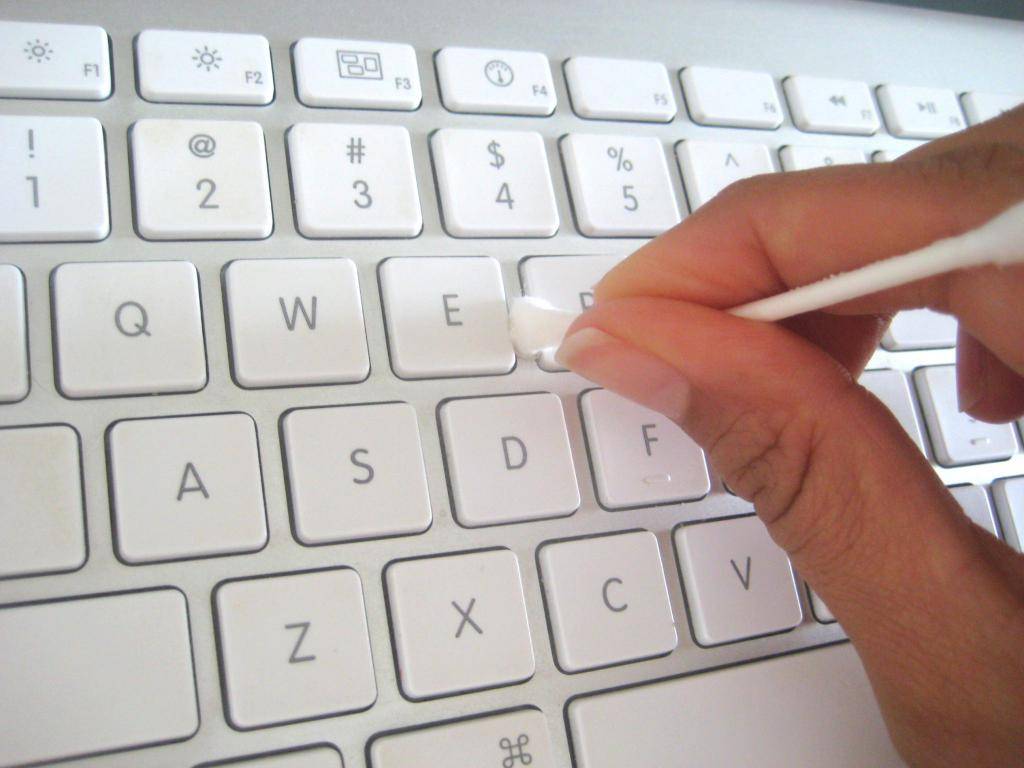
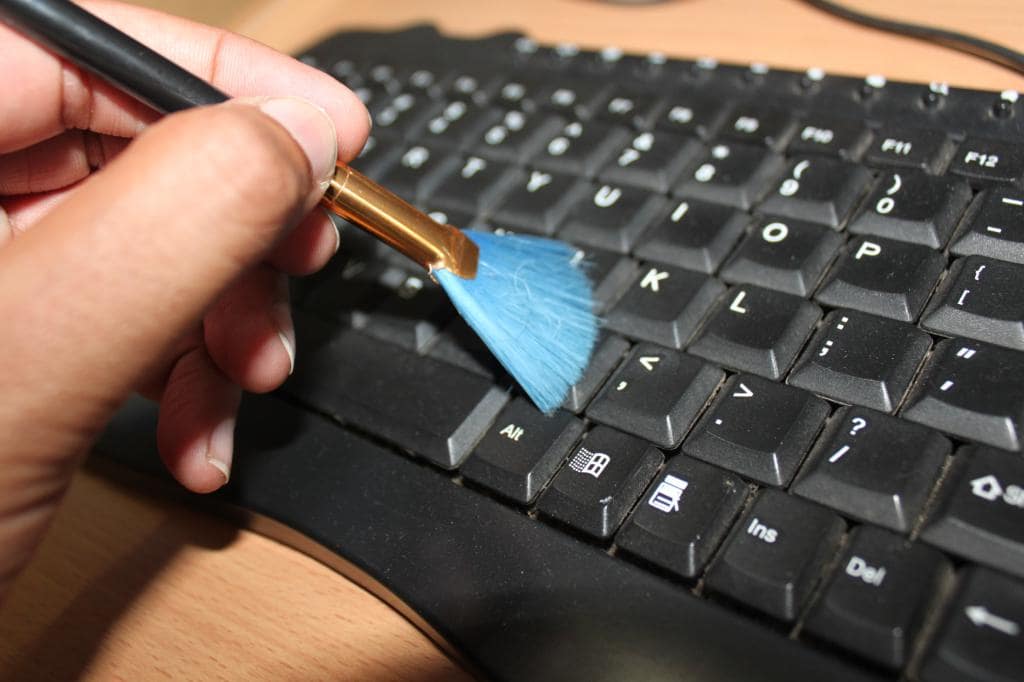
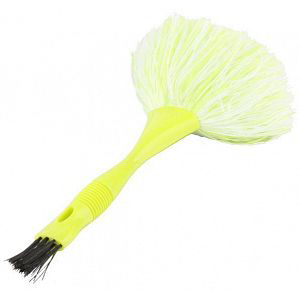
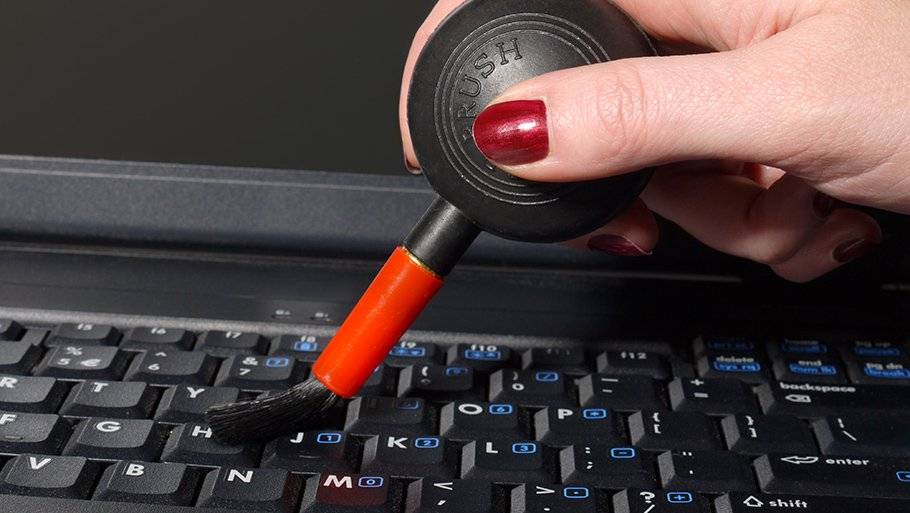
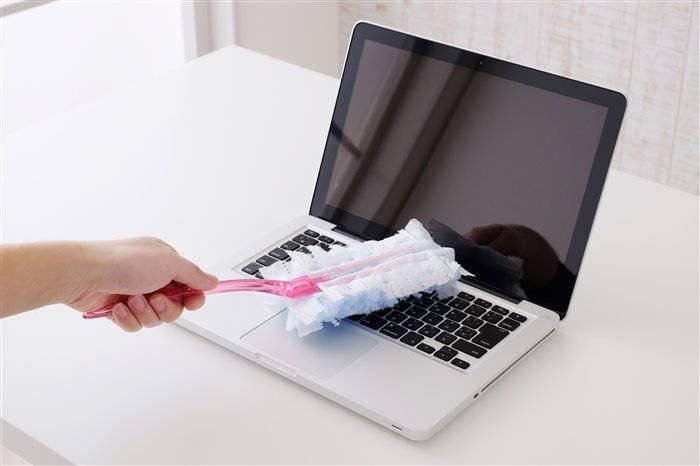
Any soft-bristled brush will help remove any dirt between the buttons. Wet wipes and cotton swabs moistened with an alcohol solution will also help get rid of surface contamination. But it is recommended to carry out such manipulations no more than once every 2-3 weeks.
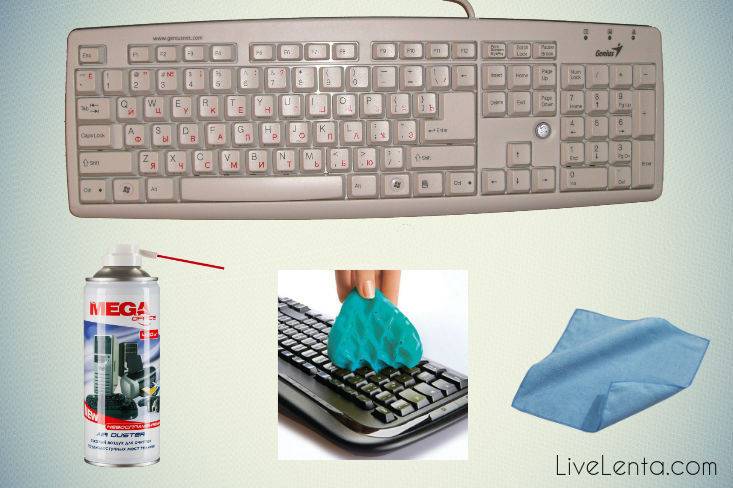
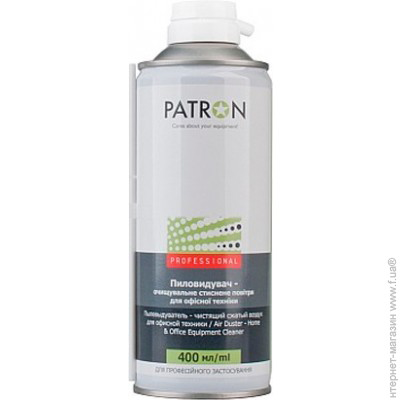
There are a large number of special care products for office equipment and computer keyboards on the market. These are special cans containing compressed air. Using the nozzle included in the kit, a powerful stream blows out debris from the space under the keyboard. Before use, you must read the instructions for use. During and after using the spray, you need to ventilate the room, and also store it out of the reach of children. There are also USB vacuum cleaners designed specifically for cleaning hard-to-reach areas of a computer or laptop. This vacuum cleaner effectively collects crumbs from the inside. You can also buy wipes for cleaning the keyboard of a laptop or computer in a specialized store. They are quite effective, they collect all the dirt on themselves without marks and streaks, and also protect the case from premature wear. It is called cyberlizun - another effective tool. It is presented in the form of an elastic mass that penetrates into hard-to-reach cracks and holes. Passing through them, he takes away small and large debris, thereby making the keyboard clean.
Keyboard cleaning methods
There is simply no point in listing all the existing cleaning methods, since some of them are similar in many ways. The article will present the most effective and least costly methods both in time and in terms of money.
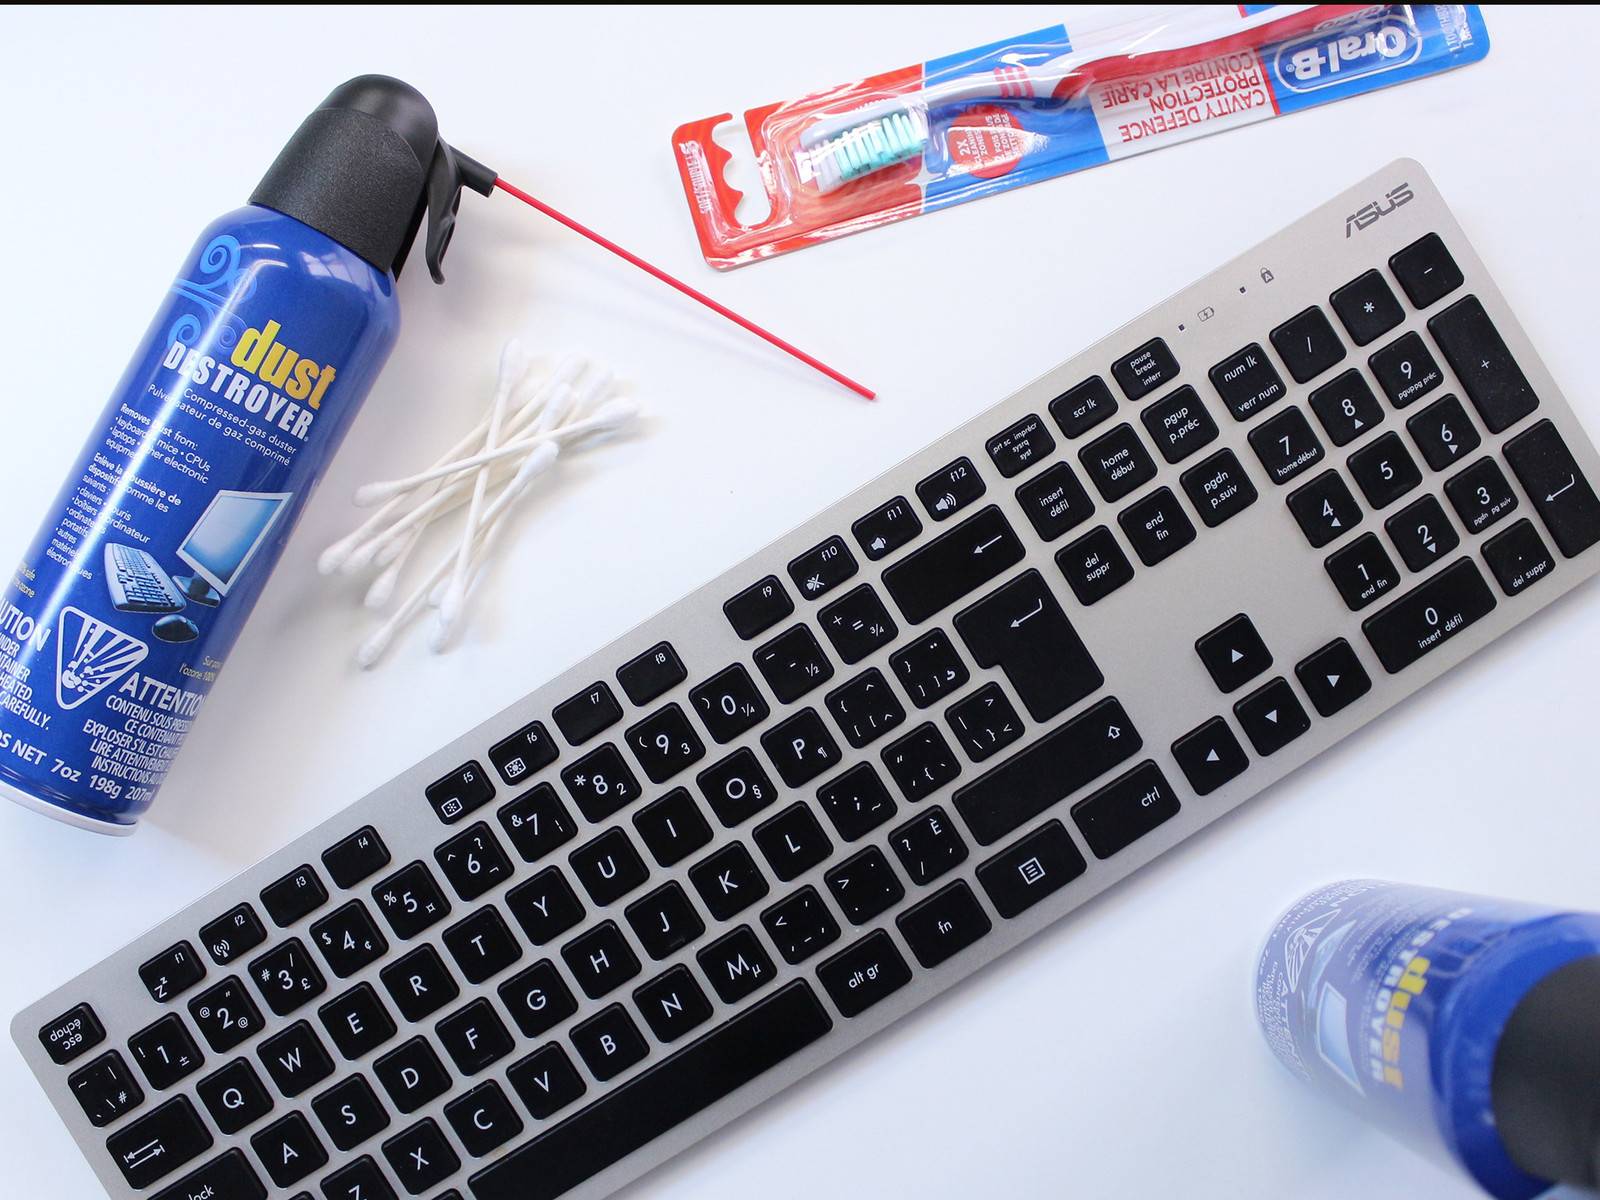
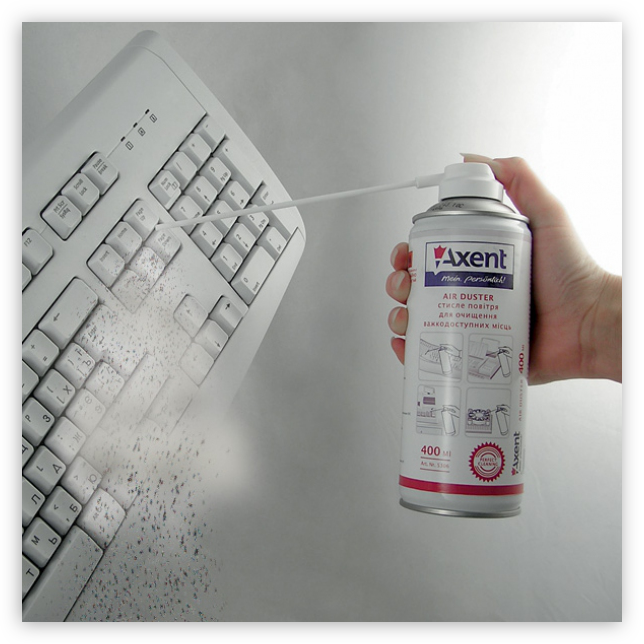
Method 1: Compressed air cylinder
Using a can of compressed air, you can clean both the computer keyboard and the laptop keyboard. Its device and method of application are quite simple. This is a small can with a nozzle in the form of a long thin tube. Pressing on the top under high pressure releases a jet of air that perfectly blows dust and other debris off the keyboard.


Advantages:
- Dry cleaning. When cleaning the keyboard, not a drop of moisture gets into it, therefore, the contacts will not oxidize.
- High efficiency. The power of the air jet is sufficient to blow out even fine dust from the most inaccessible places.
Disadvantages:
Profitability. With a thorough cleaning of the keyboard, one cylinder may not be enough, and if it is also heavily soiled, then more than two cylinders will be required. This can lead to high monetary costs. On average, one such balloon costs about 500 rubles.
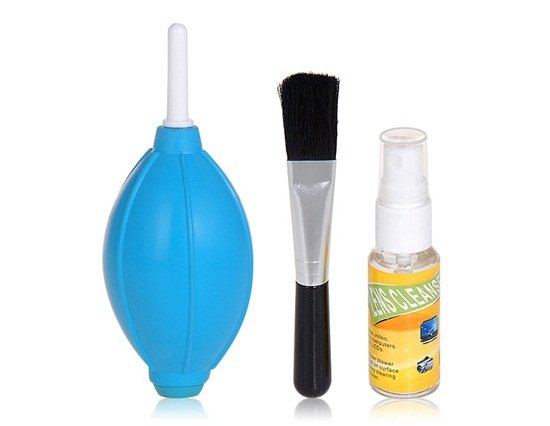
Method 2: Special cleaning kit
In specialized stores, you can purchase a small kit that includes a brush, napkin, Velcro and a special cleaning fluid. It is very simple to use all the tools: first, with a brush, you need to sweep away dust and other dirt from visible areas, then use Velcro to collect the rest of the debris, then wipe the keyboard with a napkin previously moistened with a special liquid.
Advantages:
- Low price. Compared to the same cylinder, the presented set is inexpensive. On average, up to 300 rubles.
- Profitability. Once you purchase keyboard cleaning tools, you can use them for the entire life of your device.
Disadvantages:
- Efficiency. Using the kit, you will not be able to remove all dust and other debris from the keyboard.It is great for preventing contamination, but it is better to use another method for a thorough cleaning.
- Time consuming. Quite a lot of time is spent on high-quality cleaning.
- Frequency of application. To keep the keyboard clean at all times, typing has to be done very often (about every three days).
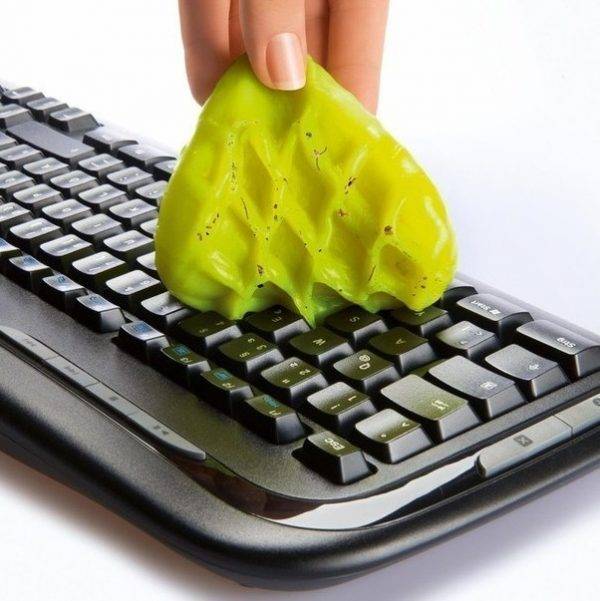
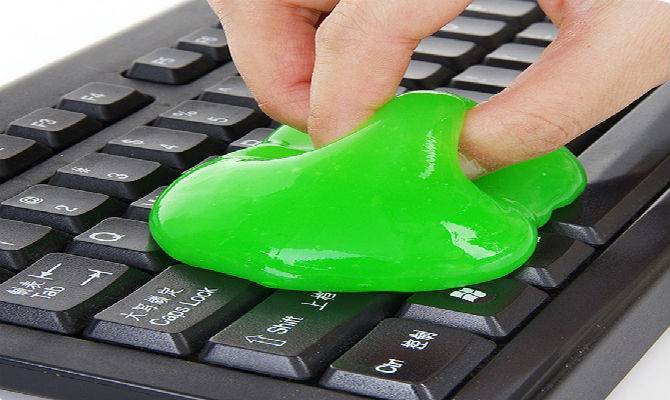
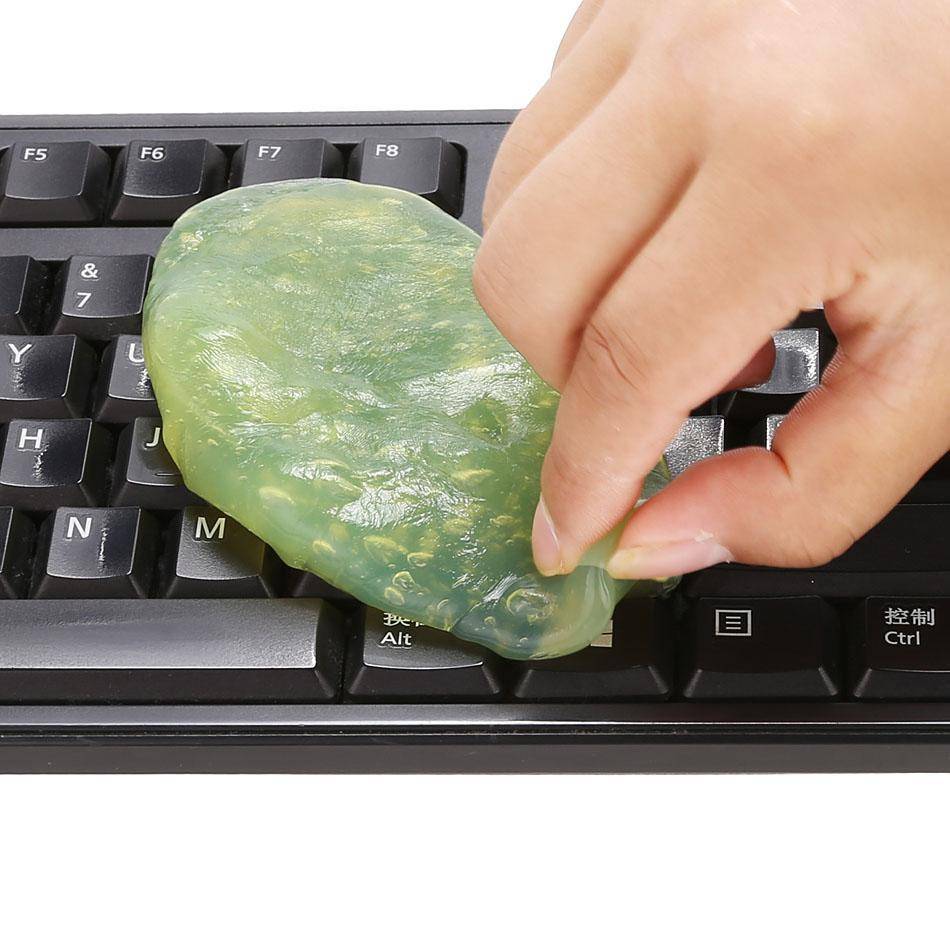
Method 3: Gel cleaner "Slime"
This method is perfect if the gap between the keys is wide enough (from 1 mm) so that the gel can penetrate inside. "Slime" is a sticky jelly-like mass. You just need to put it on the keyboard, where, thanks to its structure, under its own mass, it will begin to seep between the keys. Dust and dirt that is there will stick to the surface of the Slime, after which it can be pulled out and washed.

Advantages:
- Ease of use. All you need to do is wash the Slime periodically.
- Low cost. On average, one gel cleaner costs about 100 rubles. On average, it can be used 5 to 10 times.
- You can do it yourself. The composition of "Lizuna" is so simple that it can be prepared at home.
Disadvantages:
- Time consuming. The slime area is too small to cover the entire keyboard, so the above procedure must be repeated several times. But this drawback is eliminated by purchasing a few more gels.
- Form factor. A gel cleaner will not help if there is no gap between the keys.
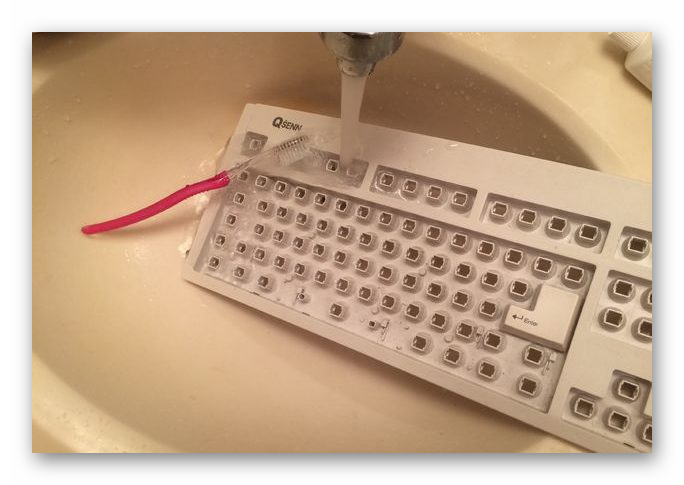
Method 4: Water (Advanced Users Only)
If your keyboard is very dirty, and none of the above methods helps to clean it, then there is only one thing to do - wash the keyboard under water. Of course, before doing this, the input device must be disassembled and all components that are susceptible to oxidation must be removed.
It is also worth paying attention to the fact that such a procedure is recommended only with computer keyboards, since disassembling a laptop without proper experience can cause it to break

Advantages:
- Complete cleaning. Washing the keyboard under water ensures that it is completely free of dirt, dust and other debris.
- Free. When using this method, no financial costs are required.
Disadvantages:
- Time consuming. It will take a long time to disassemble, wash and dry the keyboard.
- Risk of breakage. During disassembly and assembly of the keyboard, an inexperienced user could accidentally damage its components.
Power supply
Rose, Rose, Rose, Rose, Rose, Rose, Rose L »l¸ lµlocl¾ l ° l + l ± l¾Ñ.
- Power supply.
- Bumpy flap.
- Bumpy bump.
- L £ l, l, l, l ± l, l, l, l, l, l. Donut.
- Power supply.
Burgundy, burgundy, burgundy Ooh ooh ooh ooh ooh ooh ooh ooh ooh ooh ooh Rose, Rose, Rose, Rose:
- Burgundy and burgundy
- Burgundy
- Burgundy "
Bump, bump, bump, bump, bump, bump Bang, bang, bang, bang, bang Pointed Toe.Bump, bump, bump:
- Flare up and down;
- Bustle;
- Lightning up and down.
Burgundy burgundy On the floor. ÐÐ'нР° ко ÑÑоР± Ñ Ð½Ðμ Ð'опÑÑÑиÑÑ ÑоÑÐ ° Ð »Ñного Ð · Ð ° гÑÑÐ · нÐμÐ½Ð¸Ñ Ð²Ð ° ÑÐμго ÑÑÑÑойÑÑвР°, ÑÐμкомÐμнÐ'ÑÐμм ÑиÑÑÐμмР° ÑиÑÐμÑки пÑовоРBurgundy table In the morning Bumpy bump.

Cleaning the laptop keyboard
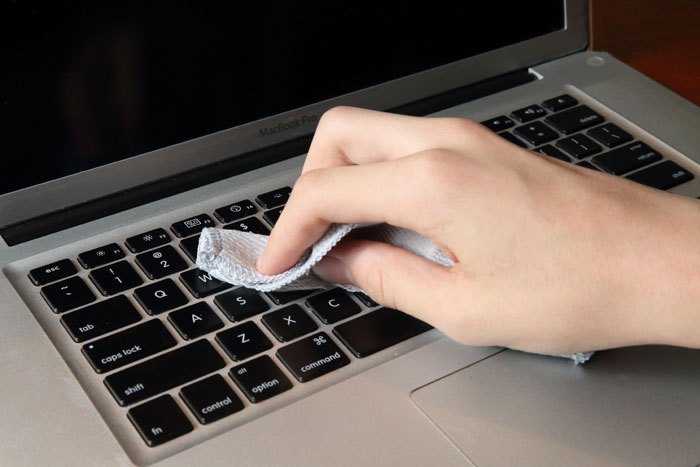
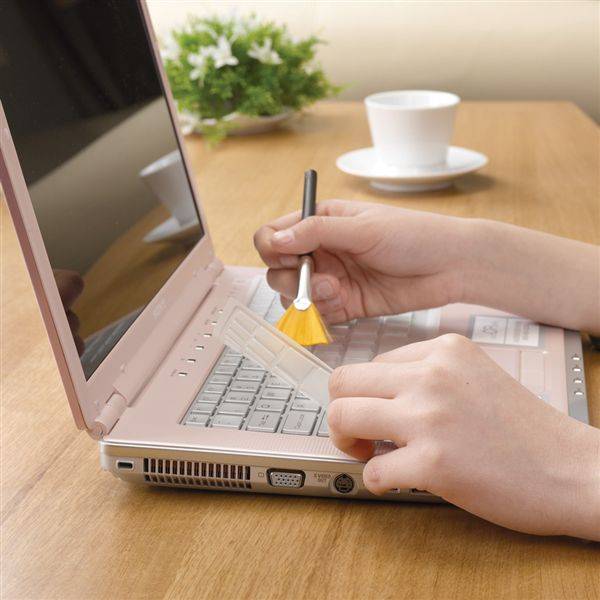
Before you start cleaning any of the keyboards, you need to stock up on special brushes and napkins. They can be purchased both in a specialized computer store and in the regular market, in the department of components and consumables for computer materials. Using the brushes effectively removes dirt and dust between the keys. If only wipes and brushes are used for cleaning, then this is called surface cleaning.
Never use corrosive liquids such as gasoline or acetone to clean the keyboard. Most often, all those who use such elements when cleaning the keyboard kill it completely.
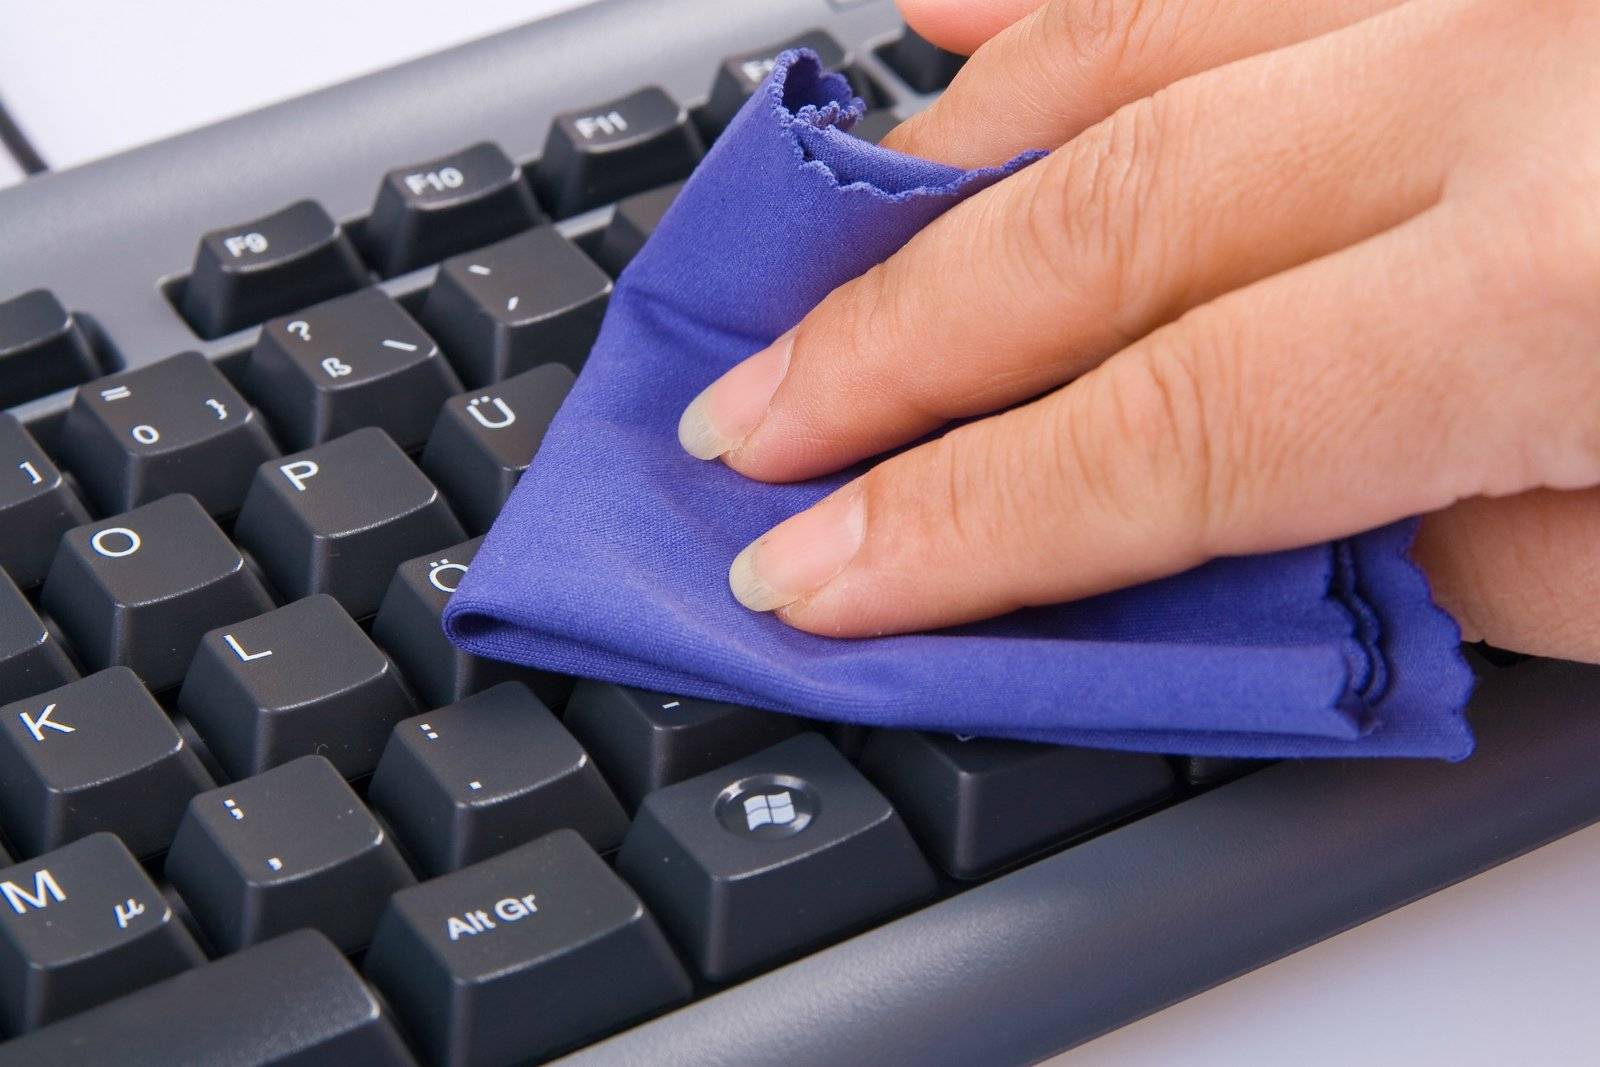
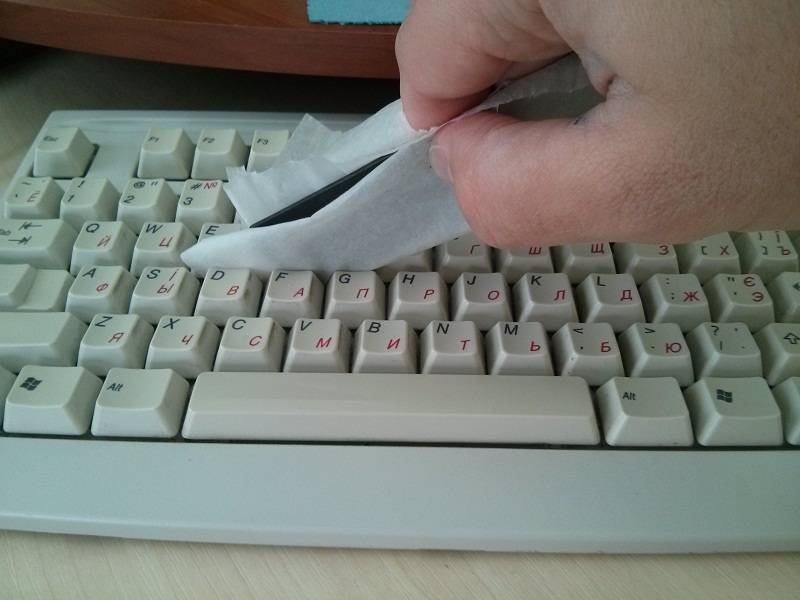
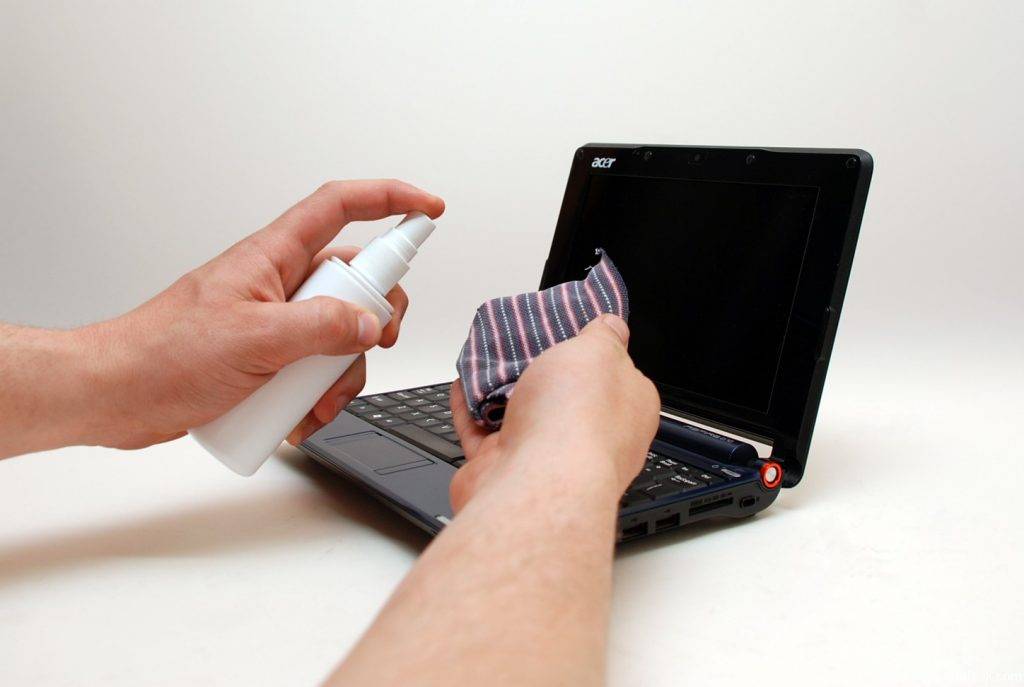
If you do not have the opportunity to purchase special fluids for cleaning the keyboard, then you can use an isopropyl alcohol solution and a soft cloth.
But be careful when using isopropyl alcohol solution. A large amount of it can erase the markings on the keys. So don't overdo it when removing stains from the keys on your keyboard.
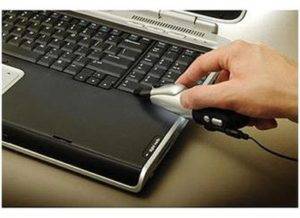
But for those who have everything completely started, and cleaning the keyboard requires additional efforts and devices, we recommend using a USB or a regular vacuum cleaner, and an even more efficient can of compressed air.
In order to carry out a complete deep cleaning of the laptop keyboard, it must be dismantled.
There are times when after detaching the keyboard and cleaning it, putting it in place, the keyboard does not work. Most people naturally panic and think that they have damaged the keyboard while cleaning. In fact, you just need to check whether you have properly secured the train.
Why is it important to clean your laptop keyboard on time?
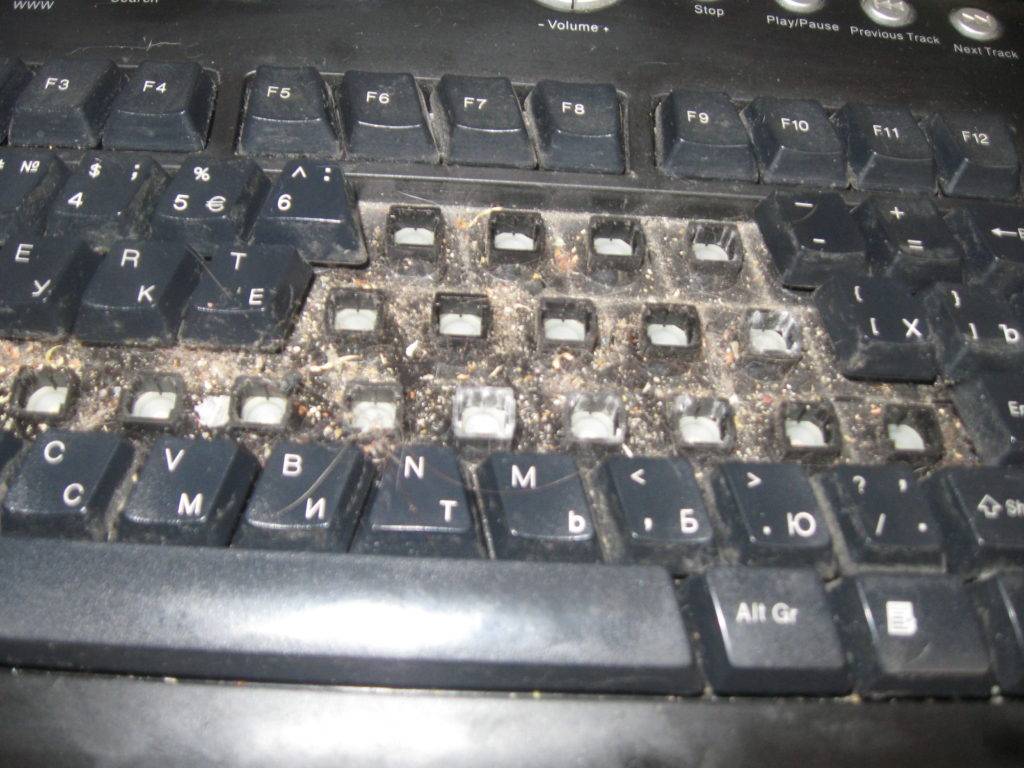
Neglecting to clean your laptop keyboard can break it prematurely. In addition, dust and debris from the keys gets inside, and this can lead to the following problems:
- malfunctions in the ventilation system (if the radiator is dusty), and as a result - the laptop often turns off by itself due to overheating;
- "Sinking" of the keys, and in case of moisture ingress - breakdown of the keyboard as a whole;
- damage to the "filling" of the laptop and various breakdowns.
It is important to clean the keyboard in a timely manner, otherwise you will have to periodically contact a specialist due to breakdowns in your equipment.
Several recommendations
It is logical that regular maintenance of the input device will extend its life. A few tips to help you avoid breakdowns:
- Do not eat at the computer. A bad habit affects not only the state of the device, but also digestion.
- To help the washed parts dry faster, blow dry or place them near a heat source, but do not place them on a radiator - the plastic is likely to melt.
- If water accidentally gets into the keyboard, immediately unplug the device, turn it over and shake it. Then wipe with a dry cloth and set aside for a day until dry.
- If you forgot to take a picture of the keyboard, you can find its on-screen version through the Start menu.
- When drying with a hair dryer, use cold air currents.
- Cotton wool or rice will help speed up drying. They absorb moisture well. Remember to remove all the rice grains before starting work (with a vacuum cleaner).
That's all the secrets to cleaning your keyboard. It is easier to maintain order than to direct, so it is better to avoid the extreme stage of contamination.
How to remove dust from the inside of the device?
Dust is a critical issue in most office spaces today. Getting rid of her is not as hard as it might seem at first glance.
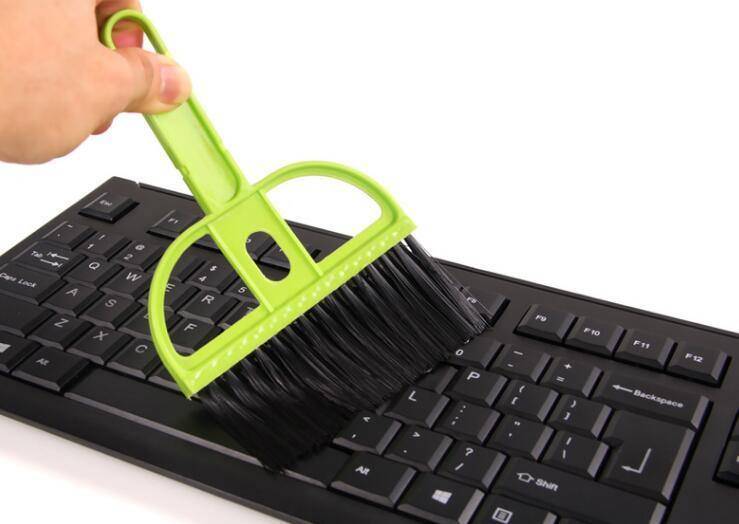
We recommend using a small soft brush to remove dust. It easily penetrates the holes between the buttons and quickly removes traces of dust adhesion to the side edges.
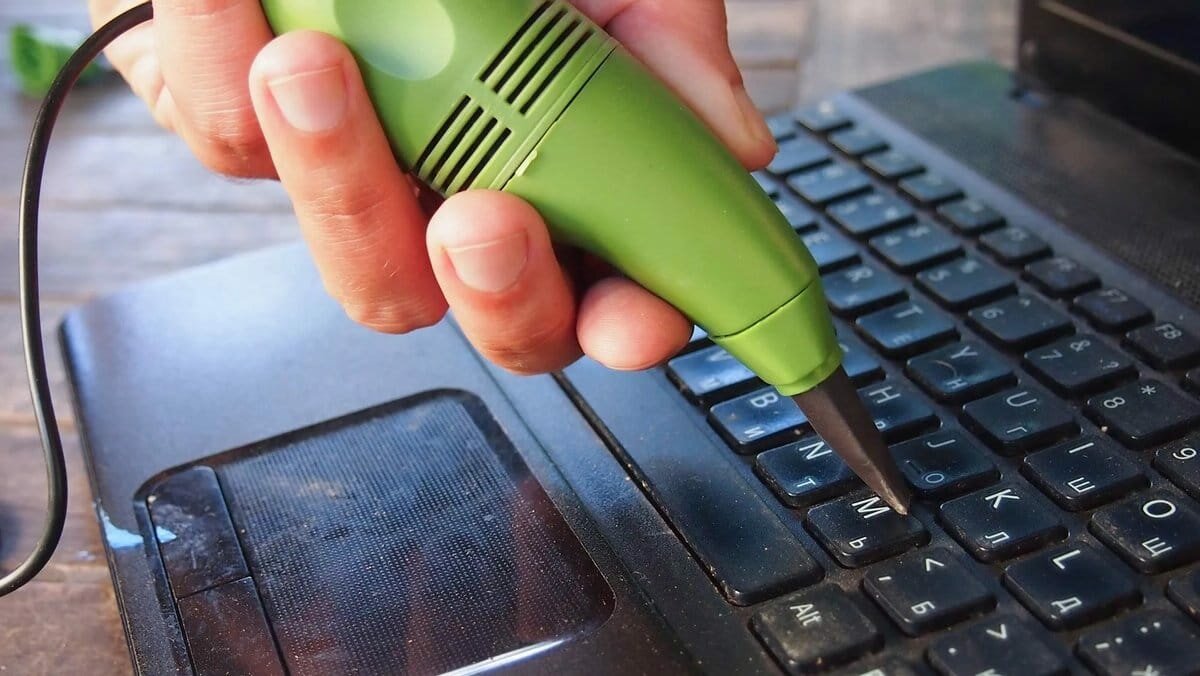
A more convenient device can be considered a mini-balloon with compressed air or a miniature vacuum cleaner that easily fits in your hand.
If the dust has settled more densely, try using a vacuum cleaner that can remove it.
How often should you clean your keyboard?
As I said above, cleaning a PC keyboard is not a very difficult procedure. But despite this, the cleaning itself must be carried out as carefully and carefully as possible so as not to squeeze out or damage any element.


There are two types of keyboard cleaning for laptop and PC. The first type is deep cleaning and the second is shallow cleaning.
During deep cleaning, dirt and dust is removed not only from the outside of the keys, but also under the keys. With a superficial cleaning, you will only remove the dirt from the top of the keyboard, from whom the structure of the keys allows, then between them.
As for surface cleaning, it should be done more often than deep cleaning. At least once a month. But deep cleaning should be carried out at least once every six months or a year.
If you do not neglect the surface cleaning of the keyboard, then it may never get to the deepest point.
Light surface cleaning
If the device looks slightly dirty, you can clean it without disassembling it. Any user can clean the keyboard.
Flip the keyboard over and shake it gently. Knock on the body. You will be surprised how many crumbs and debris you can get. This procedure should be carried out regularly. Just remember to disconnect the device from your computer (or power off your laptop).
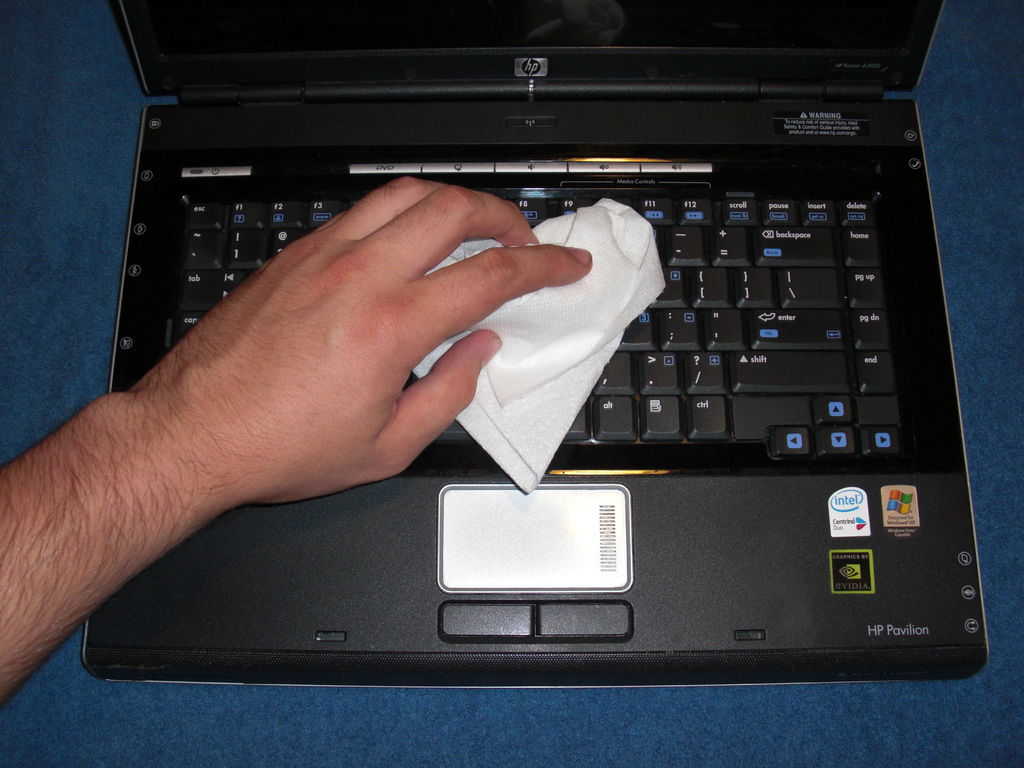
If you see greasy sticky spots on the keys, proceed as follows:
- Pour 1-2 tbsp into a saucer. l. vodka or alcohol. You can also take ammonia.
- Dampen a cotton ball or old toothbrush.
- Clean the keys thoroughly. The pollution will literally dissolve.
It's not scary if a couple of drops of alcohol get inside, alcohol is not as dangerous for electronic parts as water. But you shouldn't be too zealous. You can also clean your mouse and mat with rubbing alcohol.
It is convenient to clean the gaps between the buttons with a special brush or you can take a regular one for drawing. The soft bristles will not scratch the elements and effectively remove debris.
A mini keyboard vacuum cleaner helps a lot. However, not every user can find such a device. Instead, you can use a regular hair dryer to dry your hair.
Direct a jet of air towards the inverted keyboard, paying attention to the space between the keys. Then shake
This will remove crumbs, hair and other debris.
How to clean the keyboard after a liquid spill
 A flooded laptop keyboard is a fairly common problem that can provoke other more serious breakdowns. According to the specialists of the service centers, almost every third broken laptop coming in for repair was flooded with liquid.
If you nevertheless had the imprudence to spill liquid on the laptop keyboard, in no case hesitate, and immediately do the following:
- if the laptop was connected to the network, immediately unplug it from the outlet so that a short circuit does not occur;
- turn the laptop over and pour out as much liquid as possible from under the keyboard;
- blot what's left with cotton wool, and dry the case with a regular hair dryer, while setting it to cold air mode and maximum power.
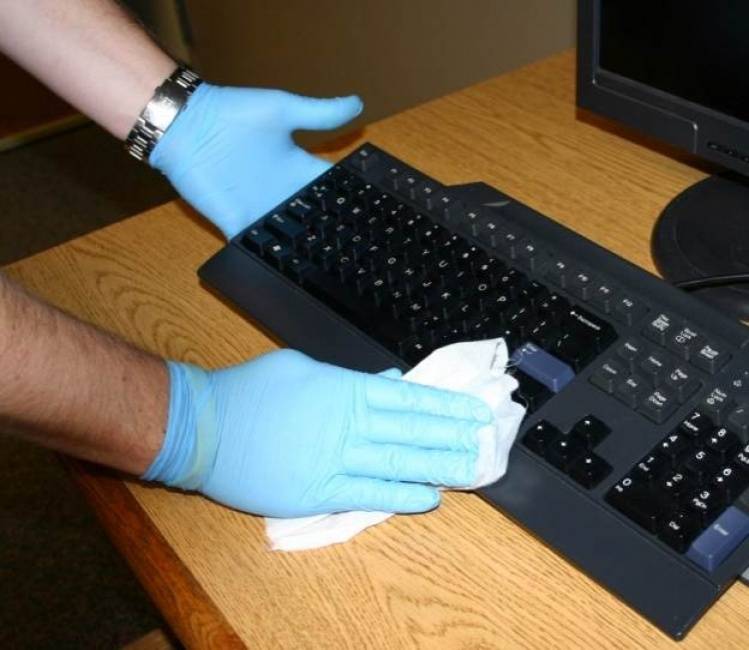
If too much liquid gets into the case, you need to disassemble the computer or separate the keys from it. When removing the buttons, you need to wipe the surface of the case with isopropyl alcohol, and then wipe it dry with a sponge. The protective membranes may need to be changed. Also, if coffee, tea or any other drink that leaves sticky marks gets on the keyboard, they must be cleaned with a special detergent.
In many cases, especially as a preventive measure, you can clean the keyboard yourself, without having any special skills. But if you see that the problem is serious enough and you are afraid to clean the product yourself, it is better to contact the service center. There they should diagnose the laptop and check the contacts for serviceability. If they have oxidized, then some parts need to be replaced, but this is already the work of specialists.
But regular surface cleaning at home can be done without problems, it does not take much time, and thanks to it, you will significantly extend the life of your laptop and save money on repairs that will be required if you do not take proper care of it.
How to clean your keyboard from dust and debris
Even if you do not spill all sorts of liquids on the keyboard, do not crush on it, all the same, over time it will become dusty. Debris will become clogged between the keys, and as a result, their mechanisms may begin to work worse.
When cleaning the keyboard from dust and dirt, it does not need to be disassembled, but it must be disconnected from the computer, and if you are cleaning the laptop keyboard, then disconnect it from the power supply and remove the battery. For cleaning, it is enough to get a furniture or car vacuum cleaner or compressed air.
Please note: You can buy a can of compressed air at almost any computer store. Its cost is low, and one such can is enough for cleaning the keyboard several times.
Point a can of compressed air spray at the slots between the keys to blow out any accumulated dirt and dust. When doing this, use a small brush to make it easier to pick up dirt and dust blown out by the air. If you have a vacuum cleaner or car vacuum cleaner, you can use it to extract air from under the keys.
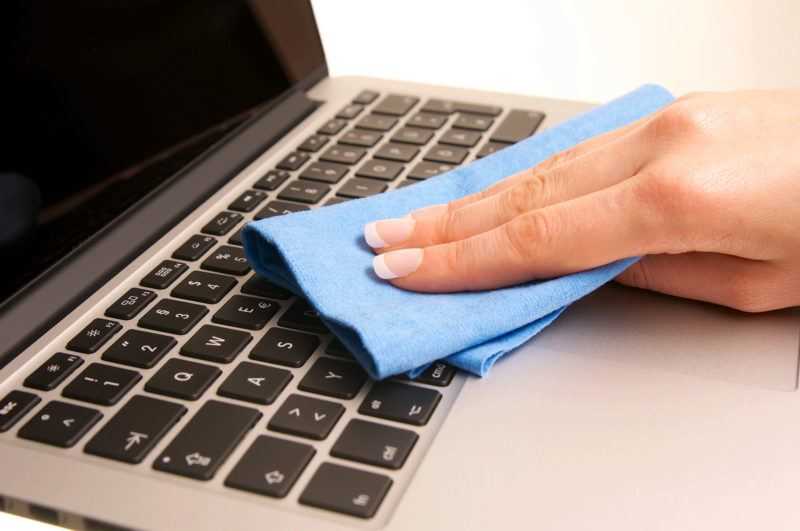
When the dust and debris has been removed from the keyboard, you can start cleaning the keys themselves from the dirt that has settled on them. To remove stains, you can use specialized monitor or disc cleaners available at computer stores. Any other isopropyl alcohol-based cleaning agent will also work. Use these together with a regular, lint-free cloth.
Important: Do not use cleaners made with ethyl alcohol to remove dirt from the keys. This alcohol may affect the letters and numbers printed on the keyboard by erasing them.
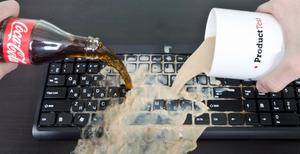
Tea, coffee, beer ... learning how to clean the keyboard from spilled drinks
You can skip the Sticky Keys function, just pour a sweet drink onto the keyboard. If you spill something, immediately disconnect the keyboard from the computer, gently turn it over and shake it so that the excess liquid spills out.
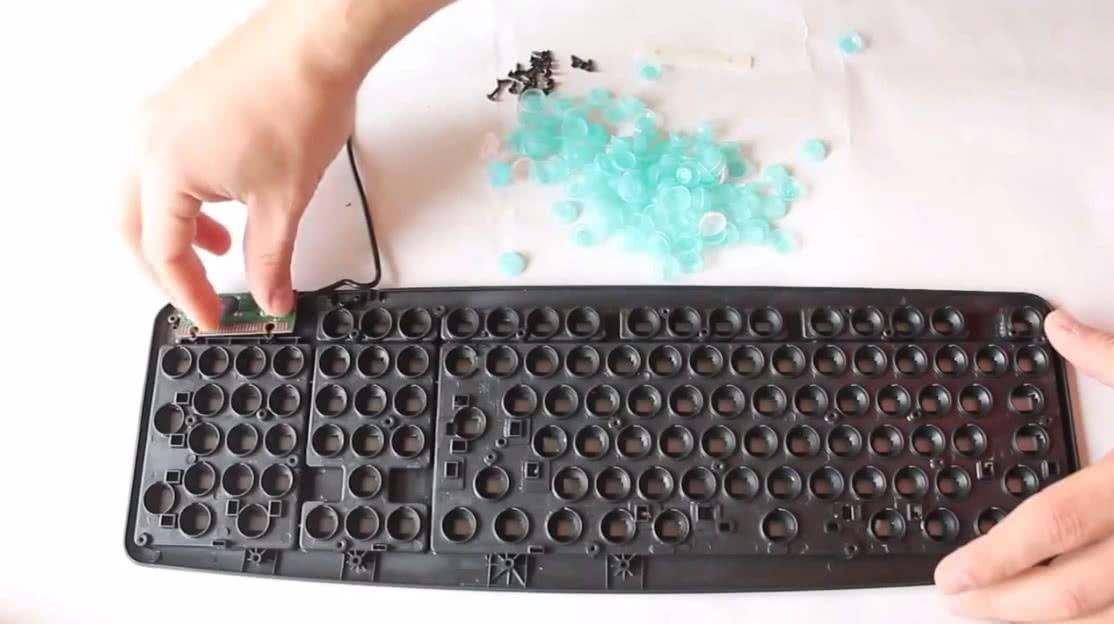
Next, the keyboard is disassembled with a screwdriver, the buttons, and the sealing gum under them are washed with warm water. Disassemble the device like this:
Unscrew the bolts on the back panel, folding them into a matchbox so as not to get lost.
You can degrease the keyboard with an alcohol solution.
- The back panel is removed, and it remains to quickly assemble all the gaskets that are located under the buttons. Replacement 1 for such a gasket is very difficult to find.
- Carefully disconnect the wires and the microcircuit.
- The upper part remains, the lower one is laid aside. The top panel contains dirty buttons that need cleaning.
In a laptop, the buttons are removed from the left or right edge. The upper part of the keyboard is wiped with a dry cloth, then the "iron" is degreased with an alcohol solution. Dirt and debris from the bottom is blown out with a hairdryer or collected with a handheld vacuum cleaner.