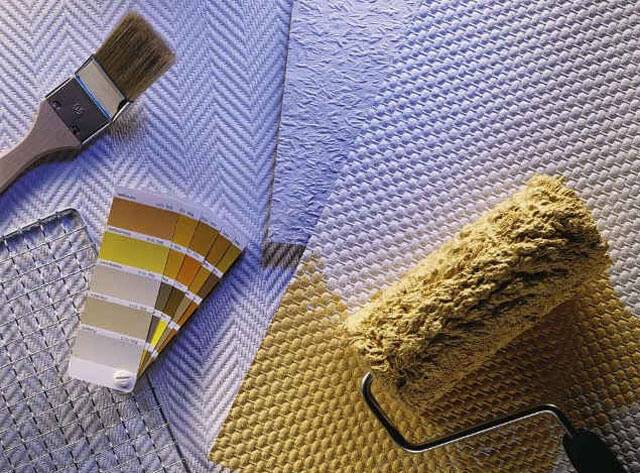
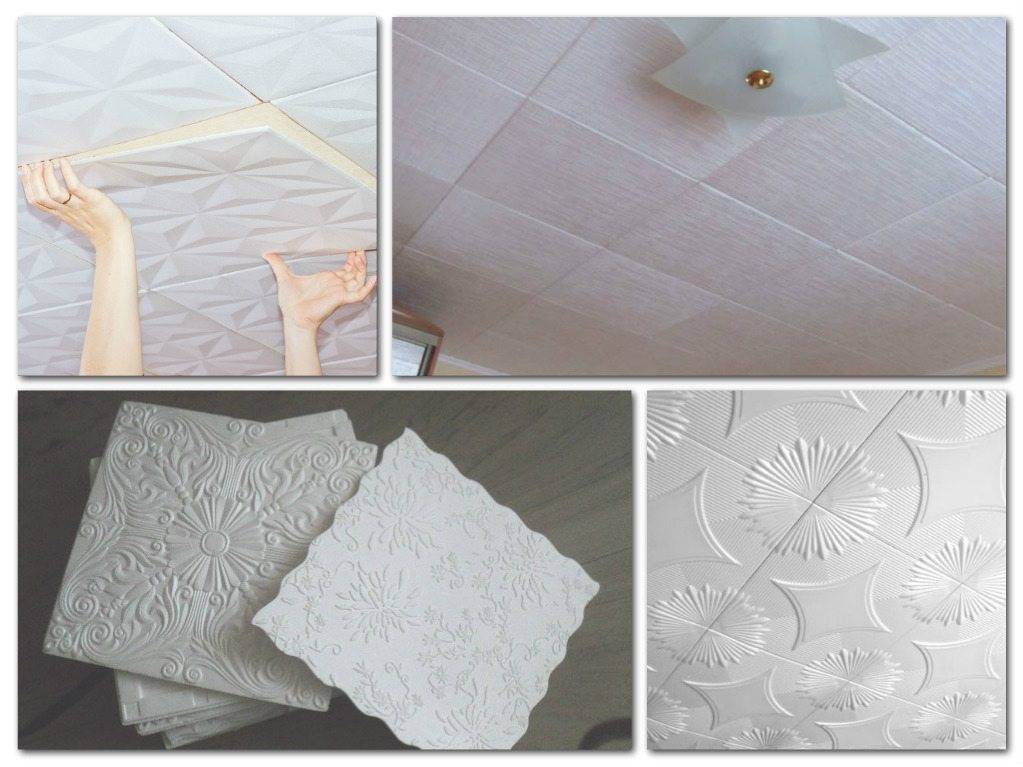
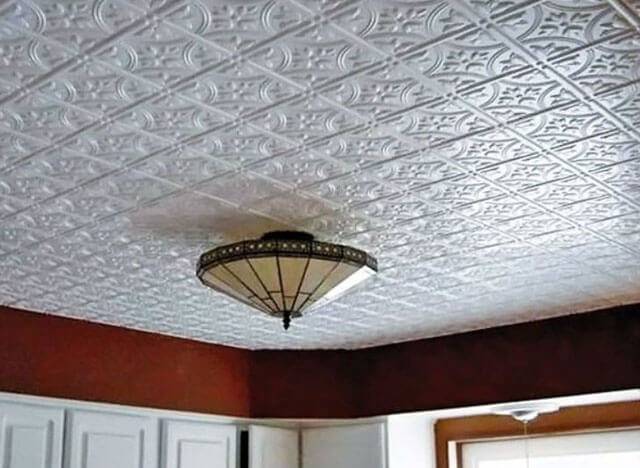
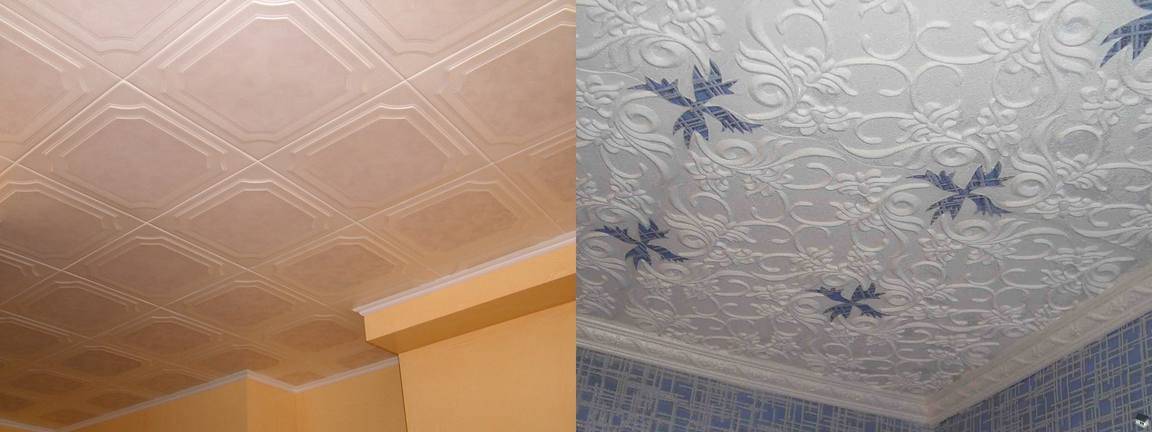
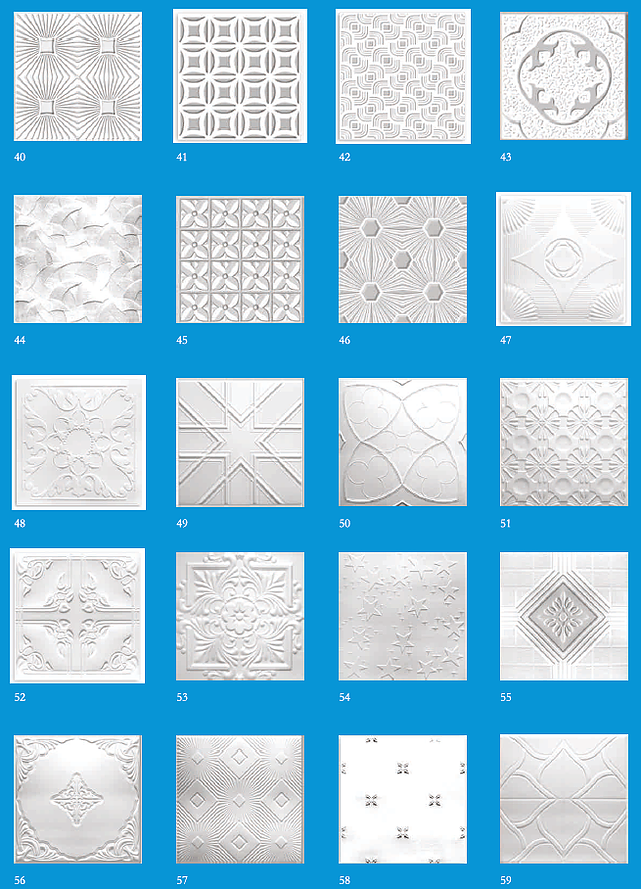
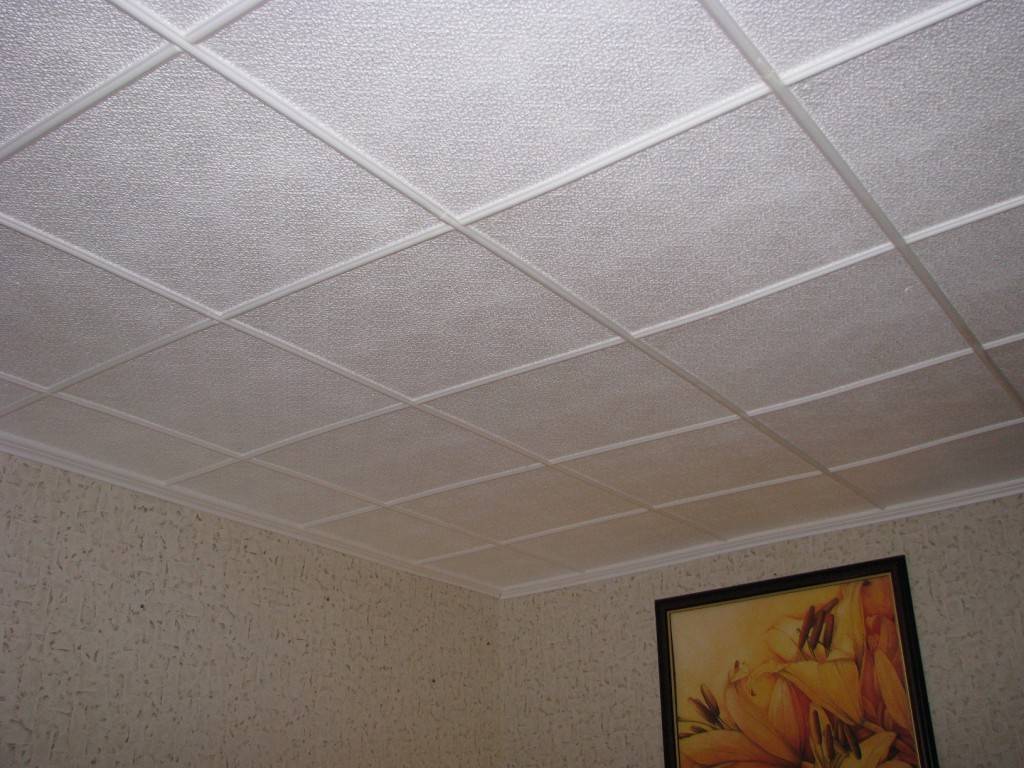
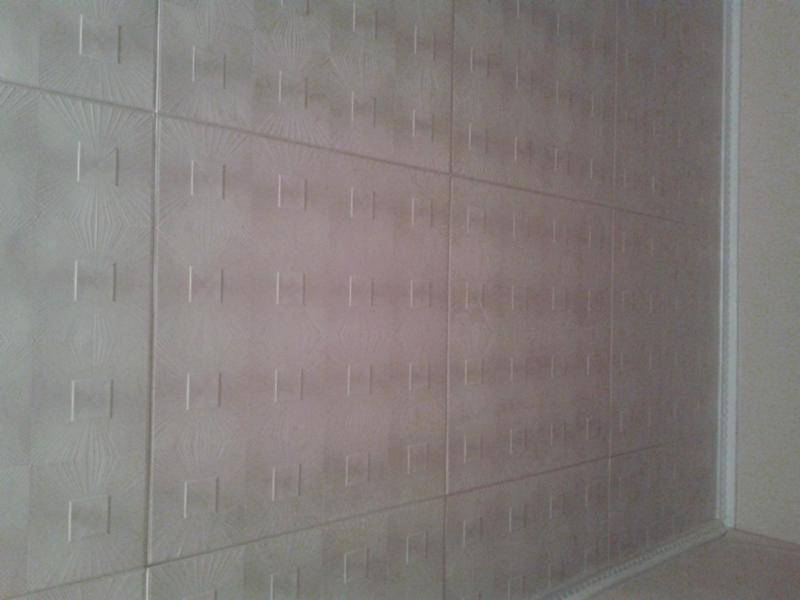
Variety of Foam Ceiling Tile Coverings
The lifespan of the ceiling covering largely depends on the quality of the materials used for its decoration. It is desirable that the selected coloring composition has a sufficient degree of density, is resistant to high humidity and detergent compositions, does not fade over time, looks beautiful and adheres firmly to the surface.
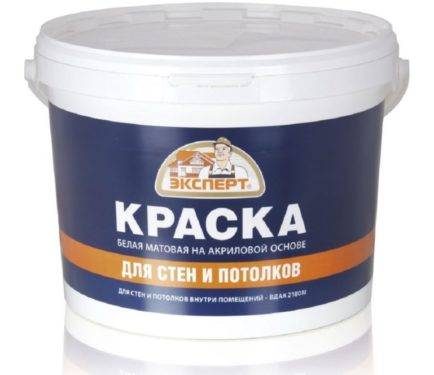
Also, the foam surface is not painted with alkyd compounds, oil paints are very rarely used, since the finish after final drying will not have the required strength. Experts recommend using two groups of water-dispersion paints, or rather water-based and acrylic paints.
The first of them have numerous positive qualities:
- environmental friendliness and complete safety for health, non-toxic;
- fast drying of the painted ceiling;
- easy application by roller and brush;
- moderate gloss and sufficient density;
- affordable cost;
- a wide range of products in relation to color schemes;
- possessing a sufficient degree of vapor permeability;
- resistance to harmful microorganisms;
- fire safety.
Such formulations have other disadvantages as well. For example, they do not adhere well to previously painted surfaces and cannot be used to paint metals. When a very thick layer is applied, the water emulsion can flake off, and in conditions of high humidity, mold appears on it. Surfaces painted with this composition strongly absorb dirt.
Water-dispersive acrylic paints made from polyacrylates have a number of advantages:
- heat and water resistance;
- strength and elasticity;
- environmental friendliness and hygiene;
- ease of application and quick drying;
- color brightness;
- wide palette of shades;
- resistance to ultraviolet radiation, to different temperatures.
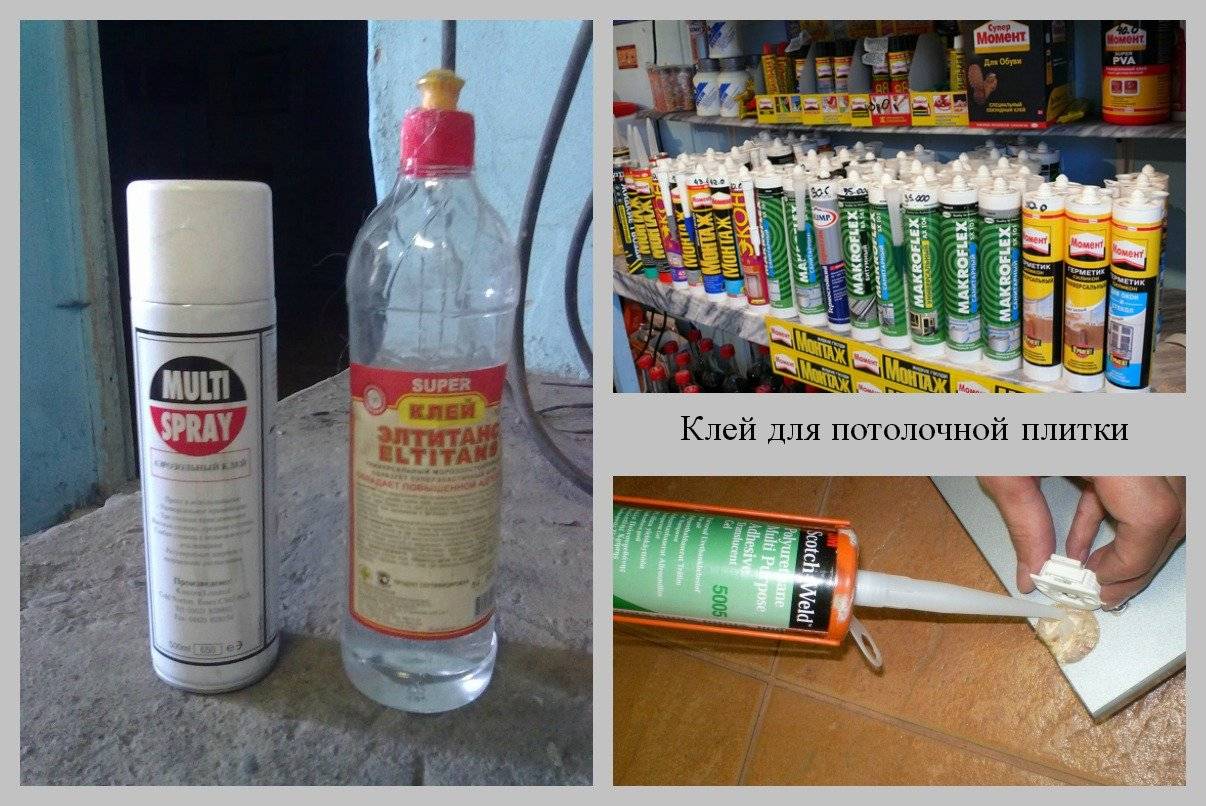
What paint to paint a foam ceiling tile
At the moment when it was decided to update the appearance of the foam ceiling tile, many cannot decide which coloring composition to use in this case. It should be borne in mind right away that the foam is susceptible to chemical influences. As practice shows, expanded polystyrene can melt the solvent that is part of oil and alkyd paints.
That is why it is recommended to use the following paints:
- water-based;
- acrylic;
- latex.
Since water is used as a solvent, such compositions do not cause any harm to the foam. In addition, such coatings have a number of advantages:
- environmentally friendly;
- there is no smell;
- fast drying process;
- high level of durability;
- fits perfectly on the foam surface.
If you plan to paint the foam ceiling in the kitchen, it is recommended to use moisture-resistant compounds. Generally, the price will be higher, but the service life will be significantly increased.
How to paint ceiling tiles with water-based paint
It is worth working with a water emulsion according to the following algorithm:
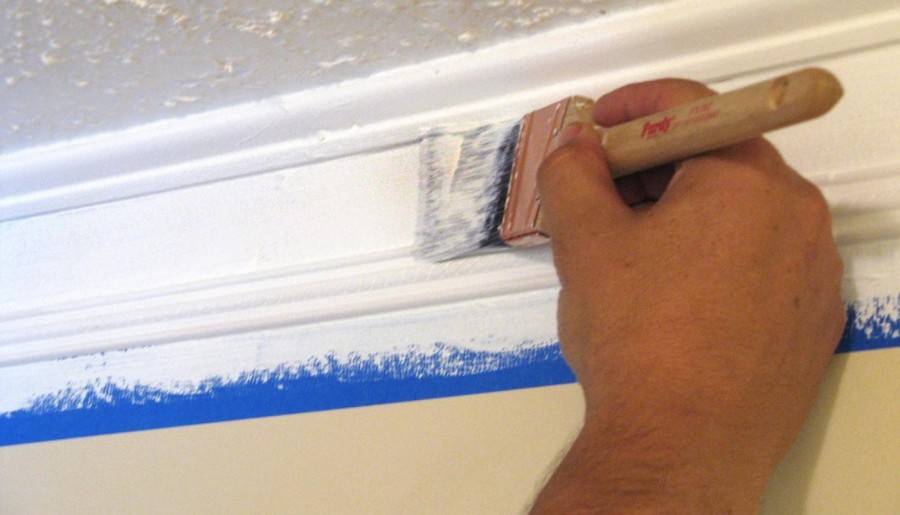
- The first step is to paint the joints of the foam with the walls around the entire perimeter of the room. Since when working with a roller, you can stain the walls, a strip of paint up to 5 cm wide is applied around the perimeter of the room with a brush.
- This composition is applied in 3 layers.
- To remove excess paint, they pass over the surface with a dry roller.
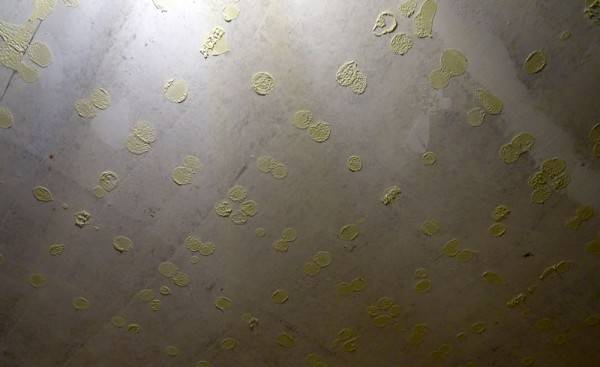
If you shine a light on the ceiling, you can see all the flaws.
Acrylic Ceiling Tile Paint
Before proceeding with the application of the coloring composition, it is recommended to pre-protect the furniture and walls. All work should be done in stages:
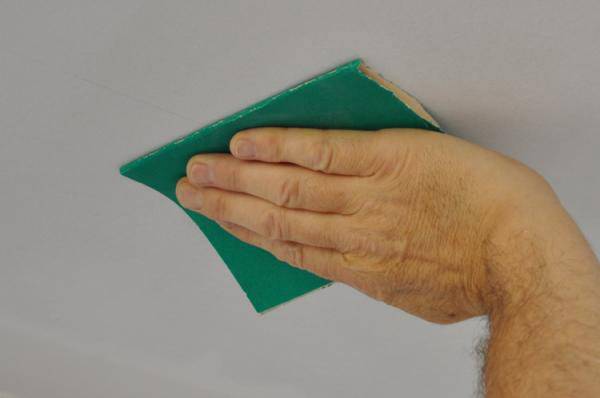
- All existing gaps should be repaired with a putty, and then cleaned with fine-grained sandpaper. After that, it is necessary to remove the formed dust with a dry cloth.
- In order for the paint to lay down as evenly as possible, it is necessary to cover the surface with an acrylic primer.
- The paint is diluted with water to obtain the required consistency and shade. For verification, a small amount of the mixture is applied to another surface and the result is evaluated.
- A roller is used for work, and hard-to-reach places are painted with a small brush. The roller should move in one direction at all times to ensure that the paint is applied evenly.
If you need to get a more saturated color, then it is worth applying several layers.
Painting foam ceiling tiles with latex paint
It is very easy to paint a foam ceiling with latex paint, this coating has a number of advantages:
- the drying process is quite fast;
- the color remains for a long time;
- you can paint not only dry, but also wet surfaces;
- if necessary, you can paint the surface of any material.
In this case, it is not recommended to make a thick layer, since there is a possibility that it will begin to flake off.
Folk remedies
At home, there is always a replacement for ready-made store compositions. What can be used to clean tiles. Consider the simplest and most affordable options.
Laundry soap

Grate a bar of soap on a coarse grater, dissolve the shavings in hot water. The concentration should be like jelly. Cool the liquid, foam, apply to a tile and let stand for 5 minutes. Then remove the remaining dirt with foam with a napkin, rinse the coating with water and vinegar.
Soda
Baking soda will do a great job of removing any type of dirt.
Loading …
- to wash off the yellowness, dilute 2 tbsp. l. soda in 0.5 liters of warm water;
- to eliminate local contamination, clean the dirt with soda and vinegar - 1 tbsp. l. drip soda 2 drops of vinegar, smear the stain with foam, wipe off the dirt after 2 minutes;
- to remove greasy dust, mix 1 tbsp. l. soda with 1 tbsp. l. salt, dilute with 0.5 l of warm water, rinse the dirt.
Ammonia alcohol

We need alcohol, not tincture
To remove dirt, you need to soak rubbing alcohol cotton pad or a napkin and then gently wipe the dirt off the tile
Expert opinion
Evgenia Katyshkina
Household and subsidiary farming specialist
Alcohol can be replaced with vodka without additives. To remove tough old stains, it is better to apply with a spray bottle, immediately removing the dirt with a napkin.
Eraser
The stationery accessory cleans as well as any product. You can wipe off black dots, yellow spots with an eraser. The elastic will not cope only with greasy spots, the rest will be removed without a trace.

Lemon acid
Concentrated solution of 1 tsp. lemons, 2 tsp. soda and 0.5 tbsp. water will wash away persistent yellowness. The gruel should be evenly distributed over the surface of the tile, after 15 minutes, remove the dirt with a napkin, rinse the coating with water and vinegar.
Knowing how to wash and clean the tiles, it is better to avoid the formation of stubborn dirt. Dusting the ceiling once a week will eliminate the hassle of cleaning.
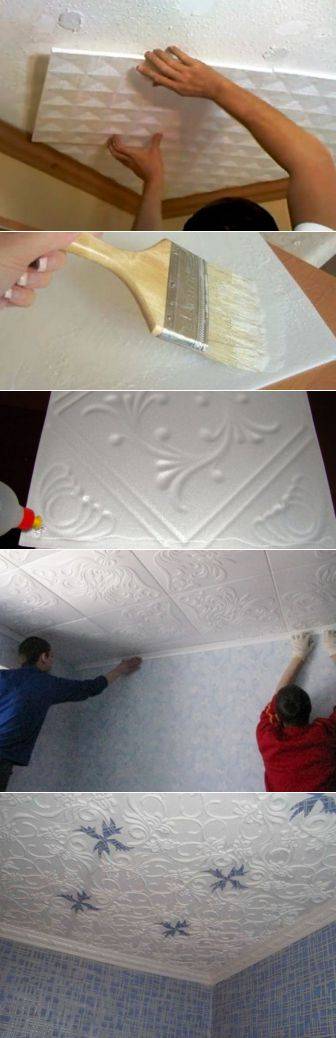
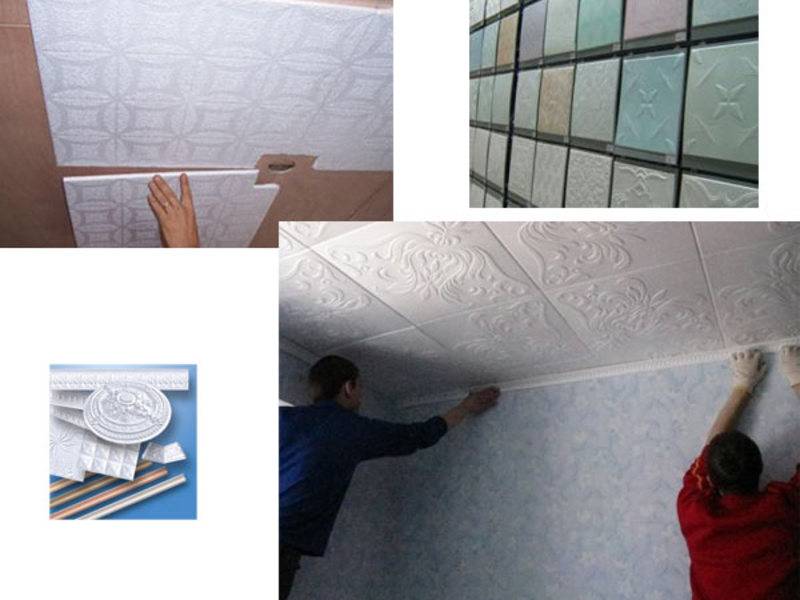
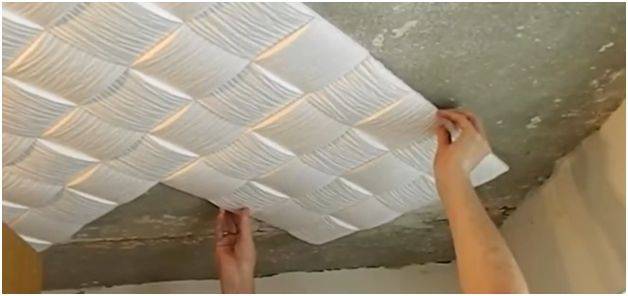
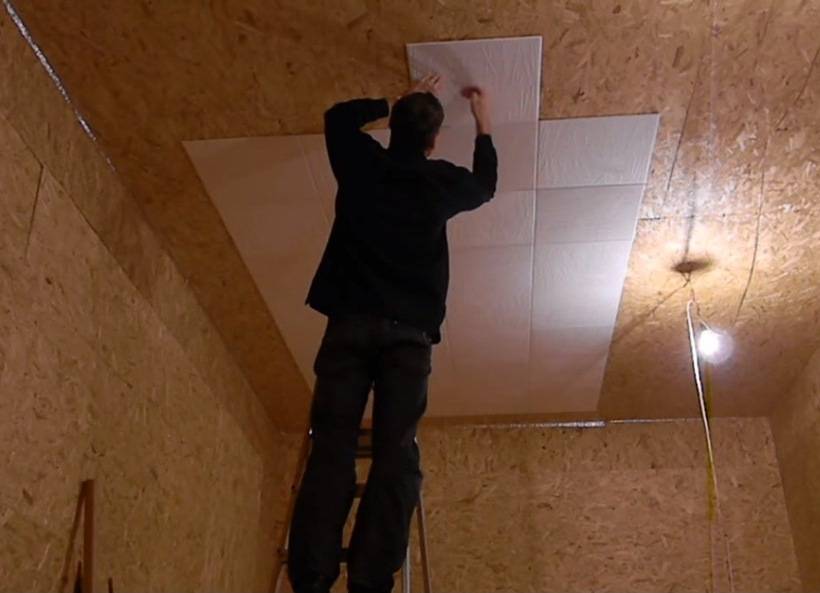
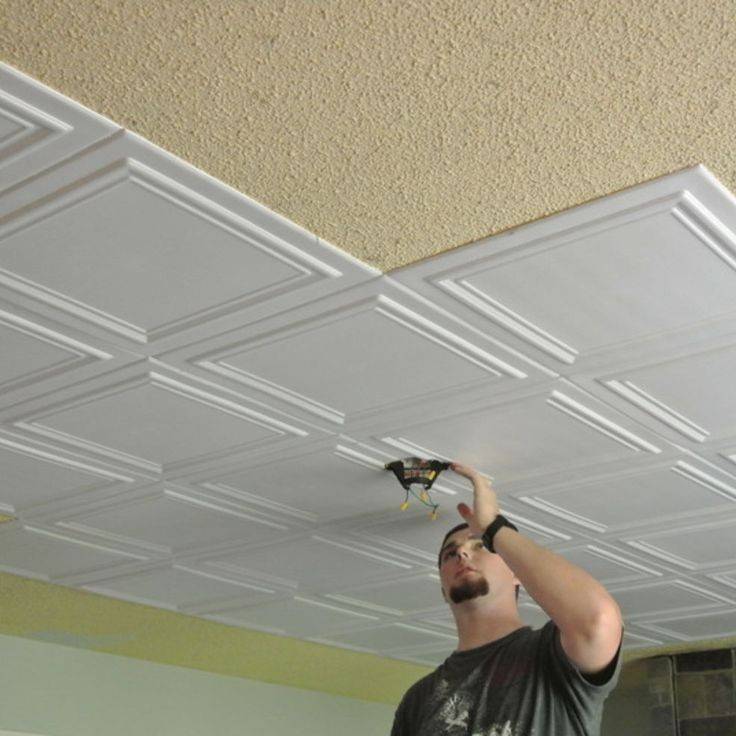
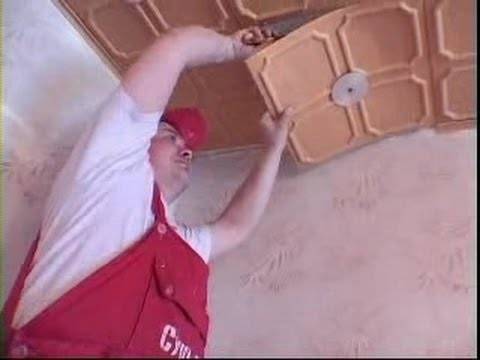
Do-it-yourself ceiling gluing technology
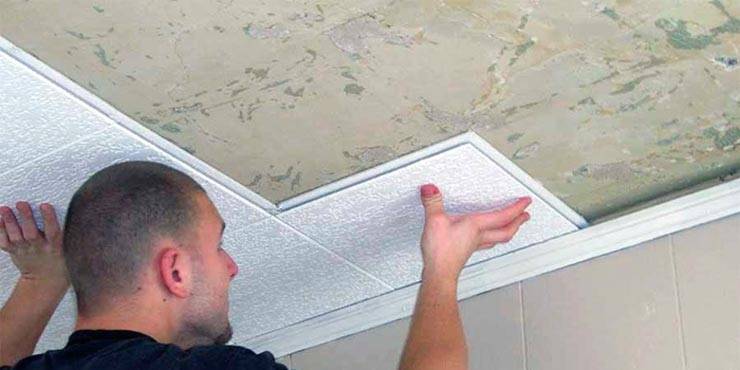
The process of decorating the ceiling depends, first of all, on the state of its surface: flat or curved. In the first case, installation is much faster and does not require additional alignment efforts.
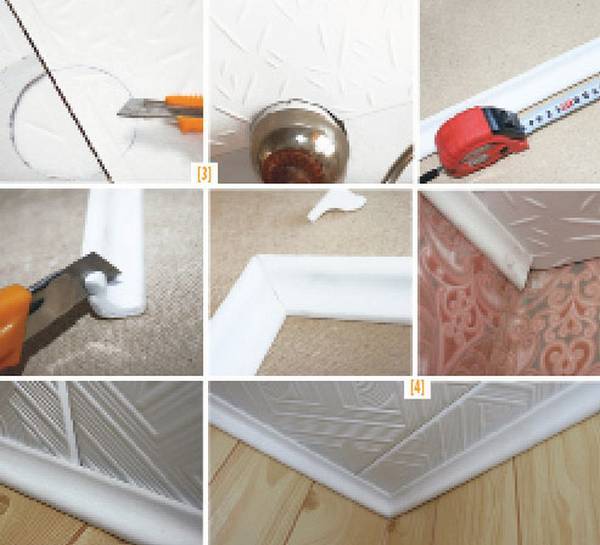
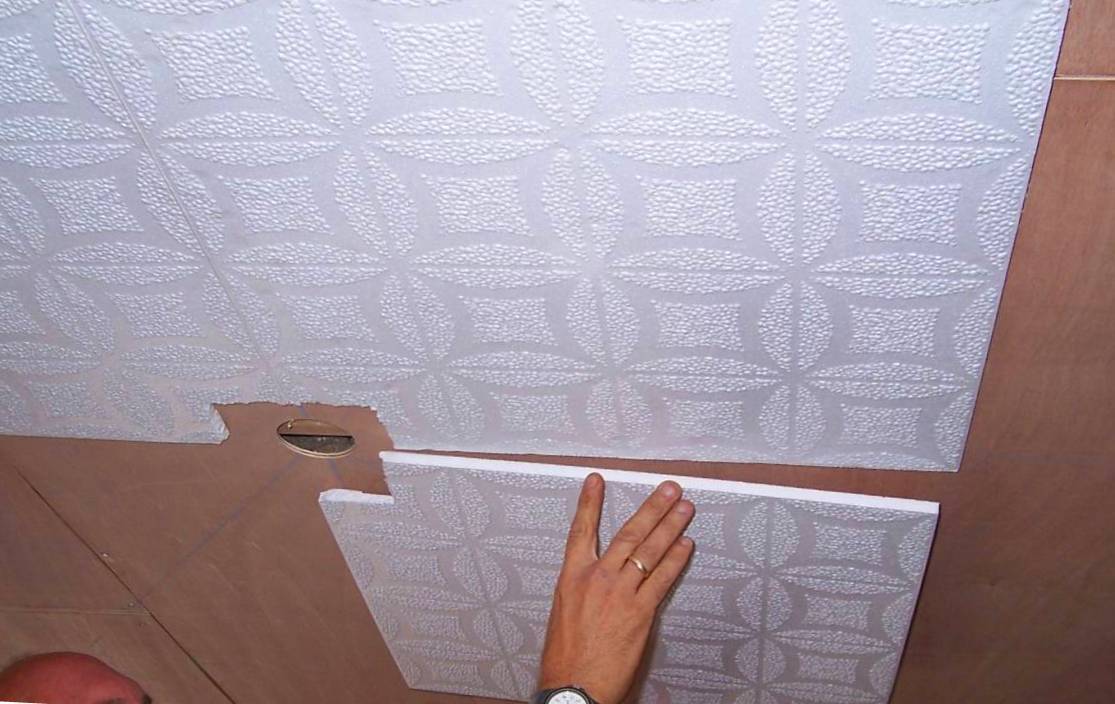
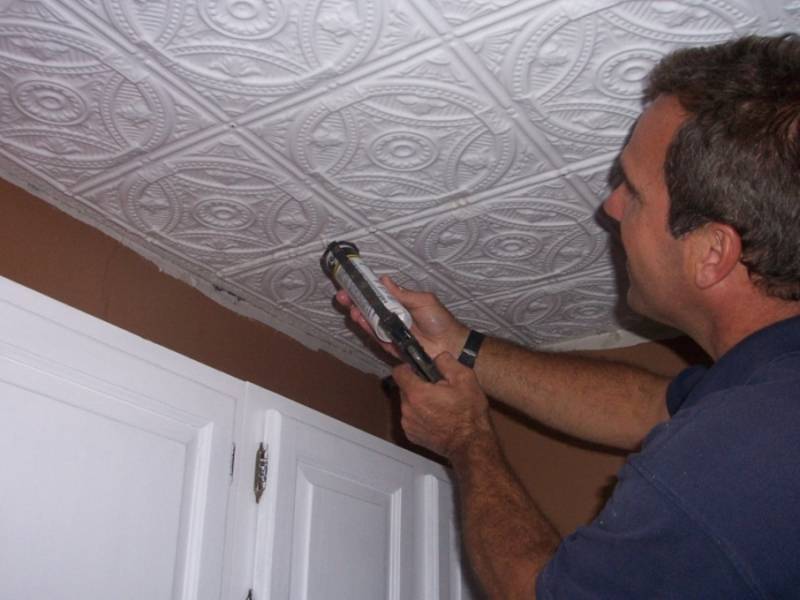
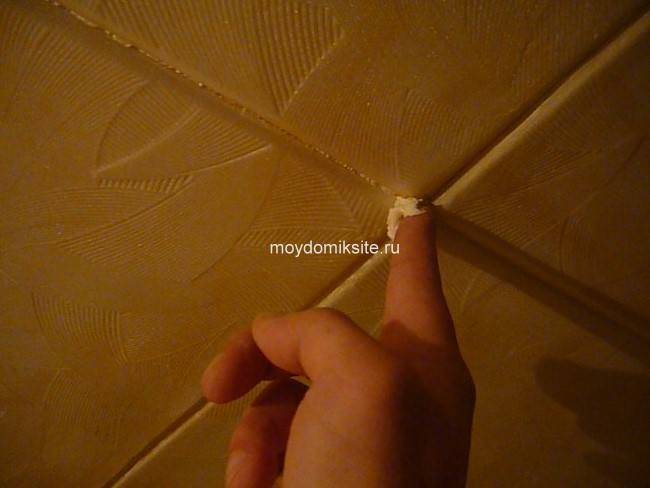
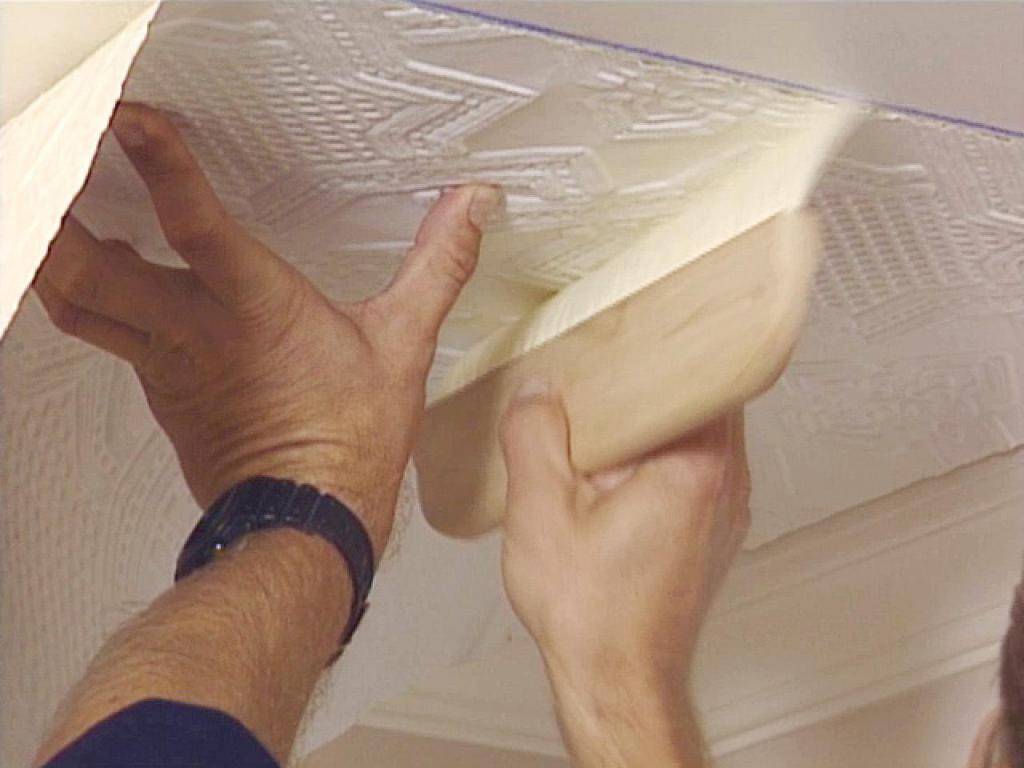
Where you should start installing the tiles depends on the type of room and the method of installation. During the installation process, the aesthetic appearance of the coating should be monitored. Seams between tiles are covered with putty or sealant. Excess glue protruding at the joints should be removed with a damp cloth, without waiting for complete drying.
On a flat ceiling
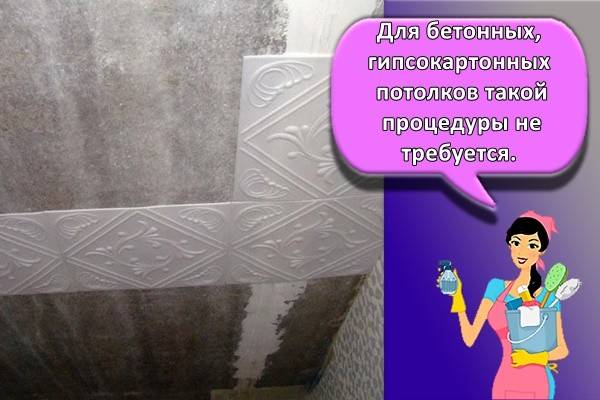
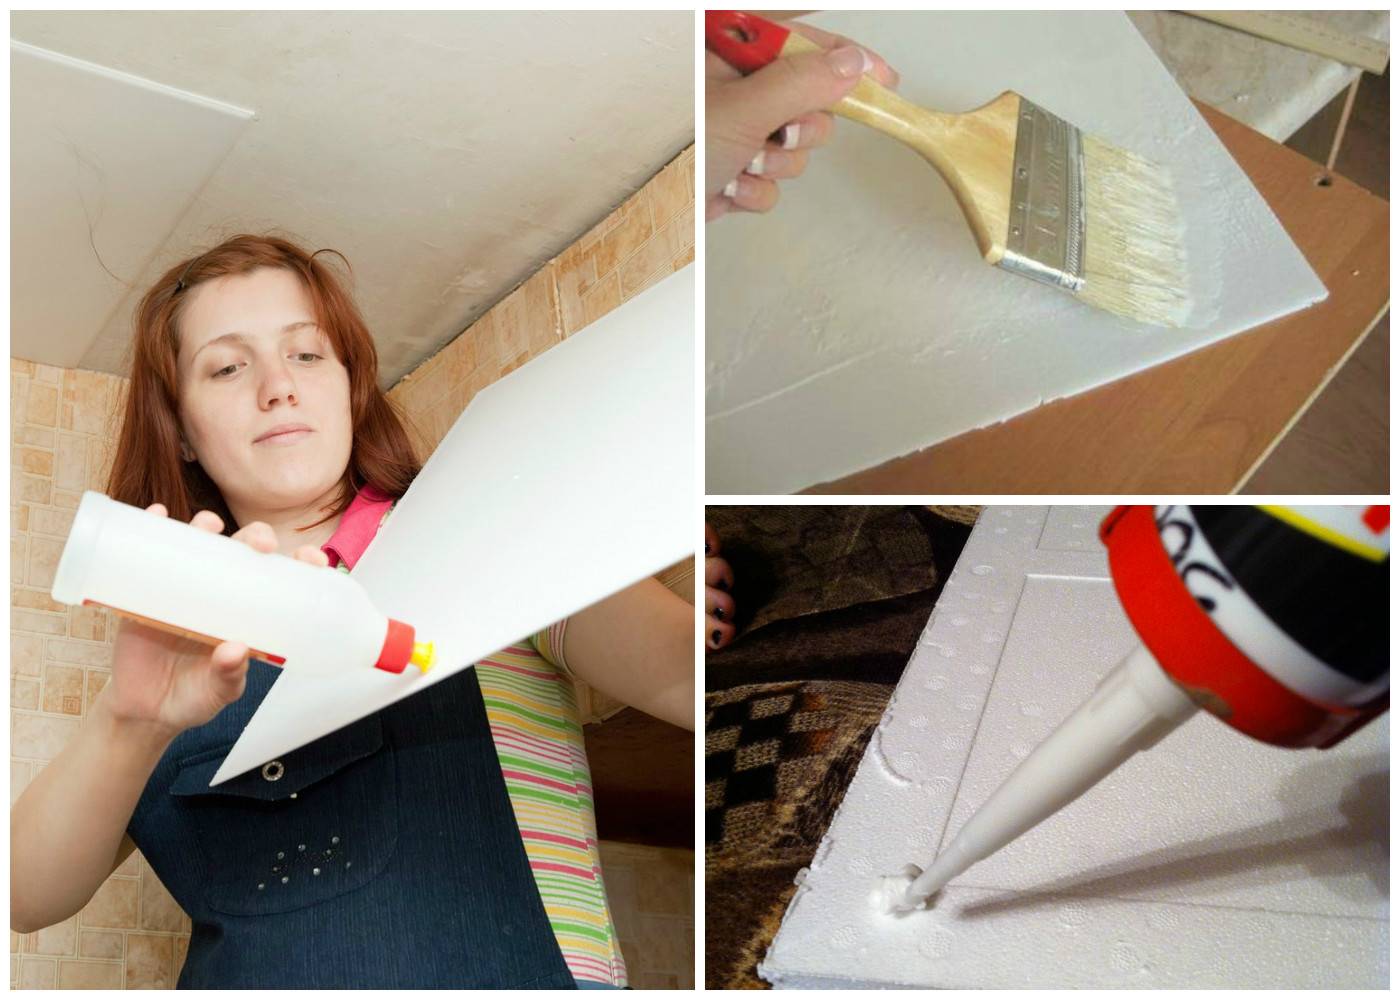
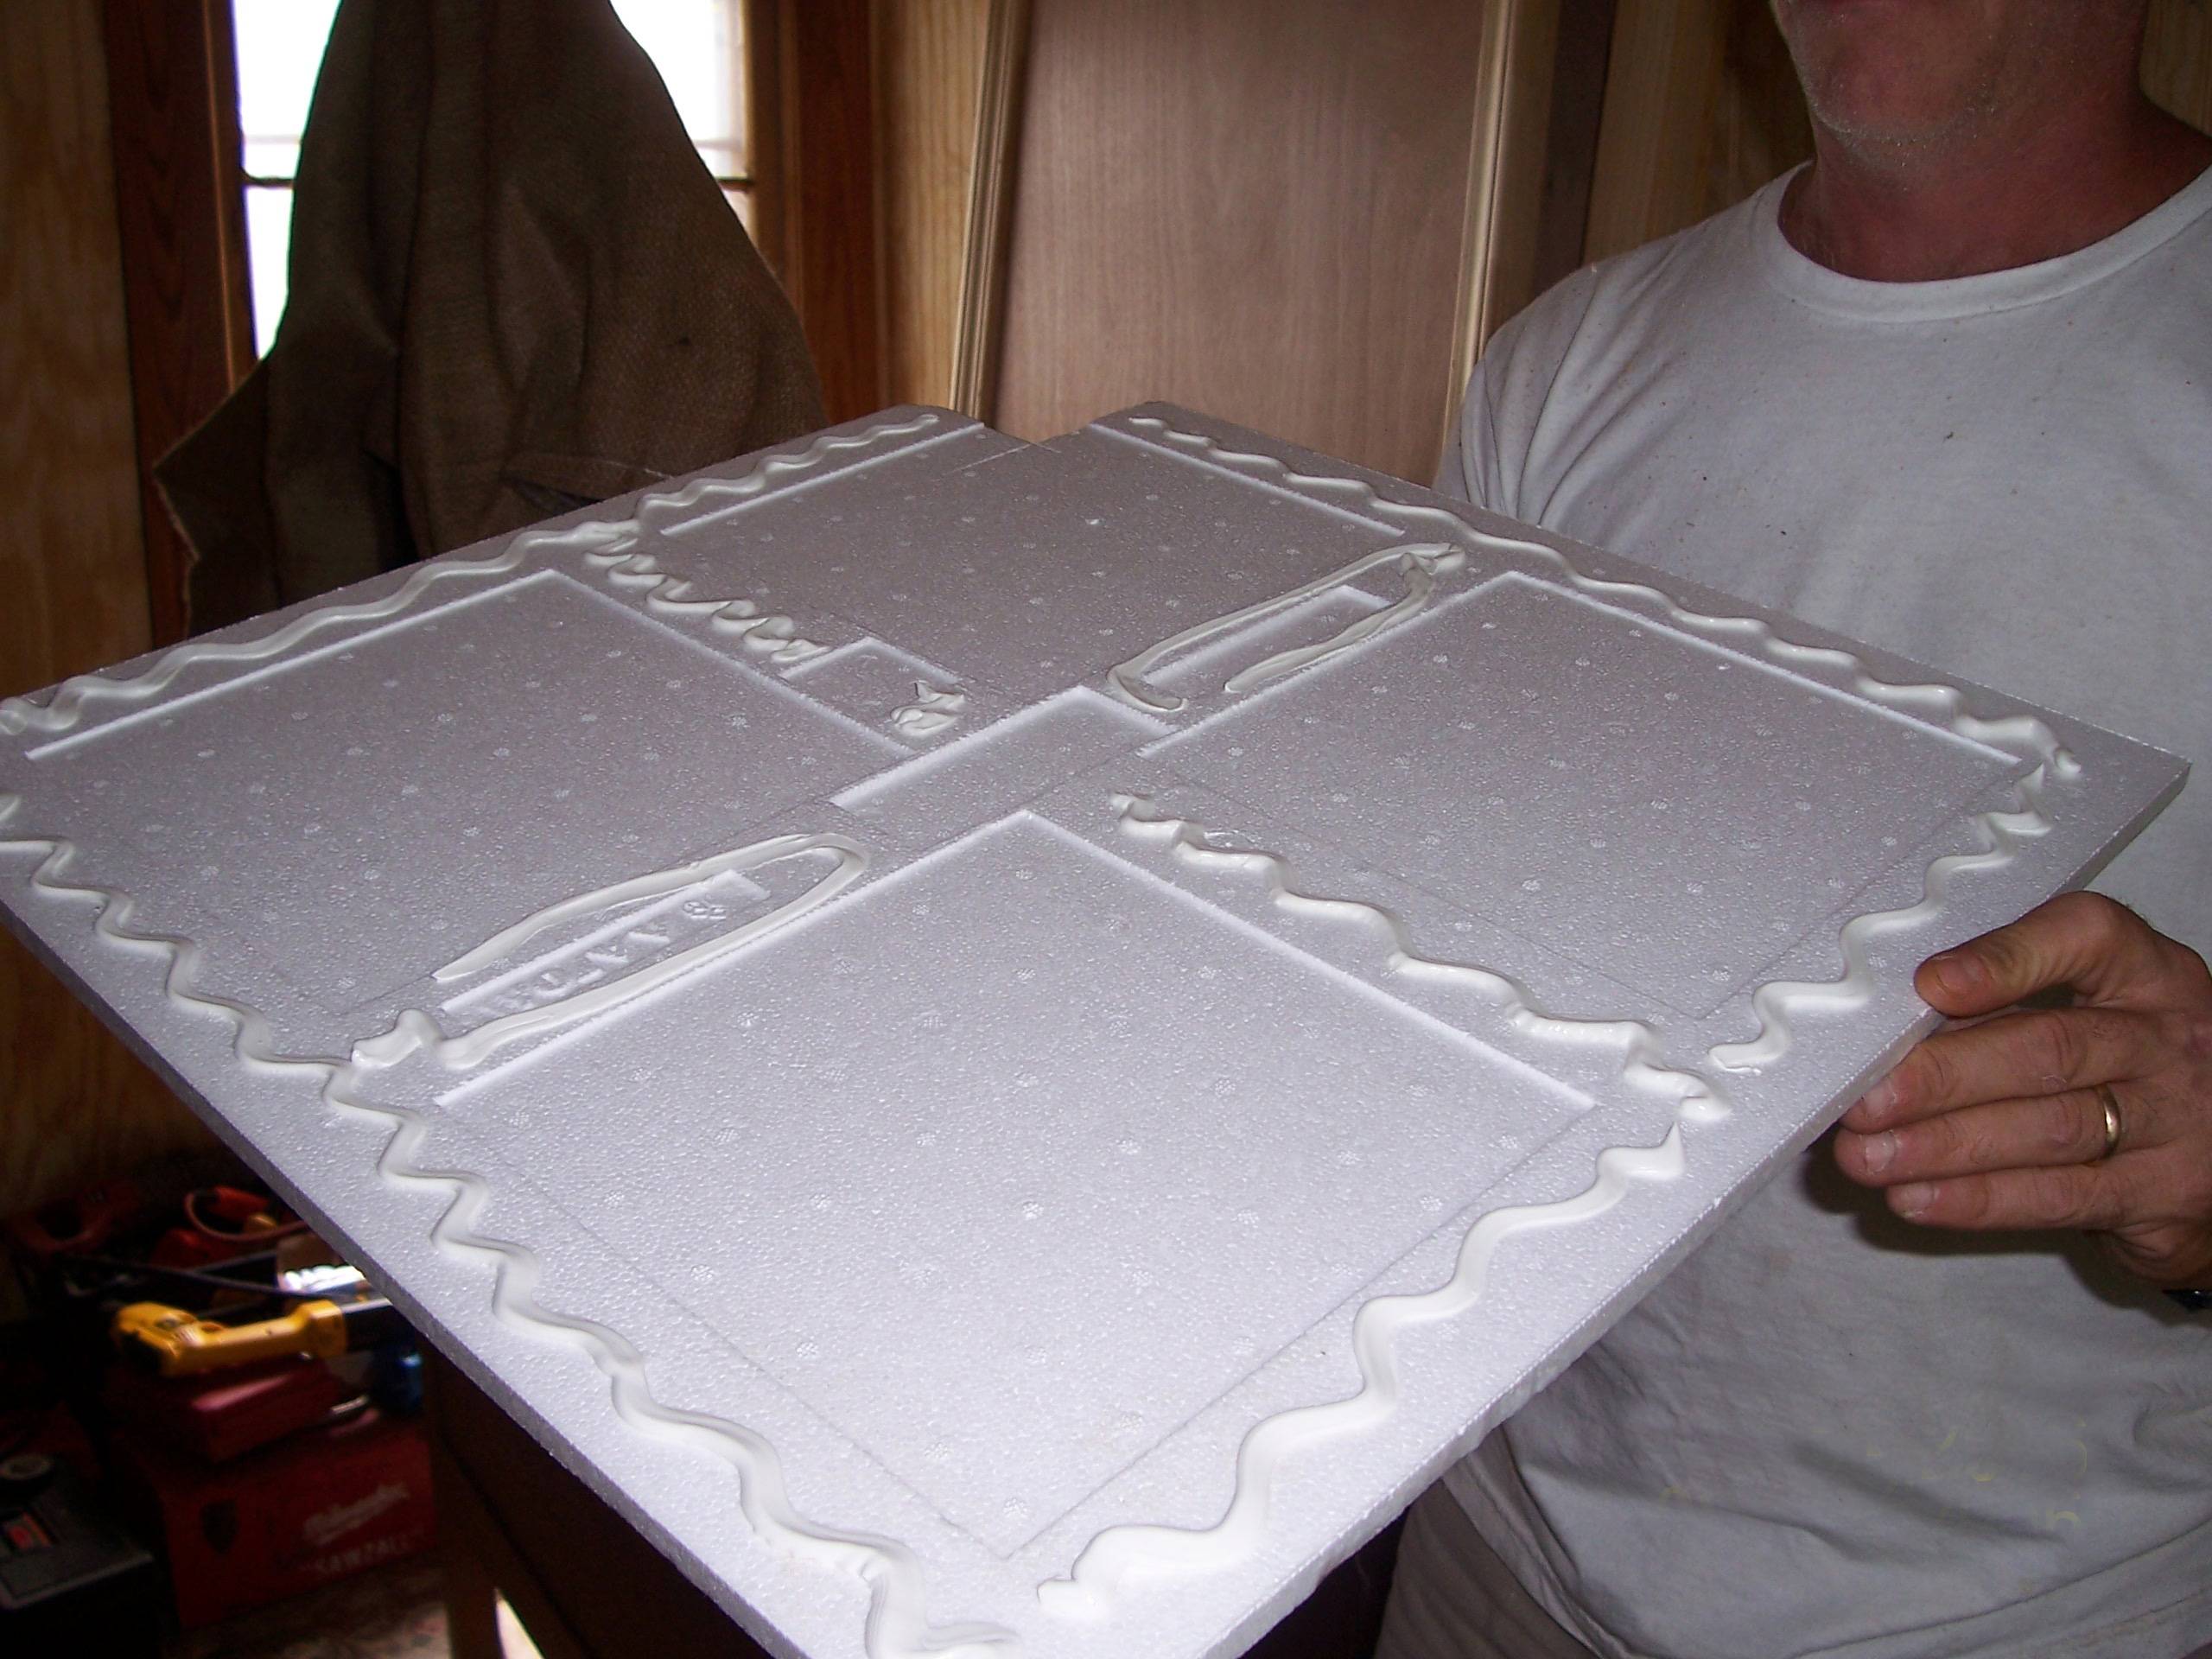
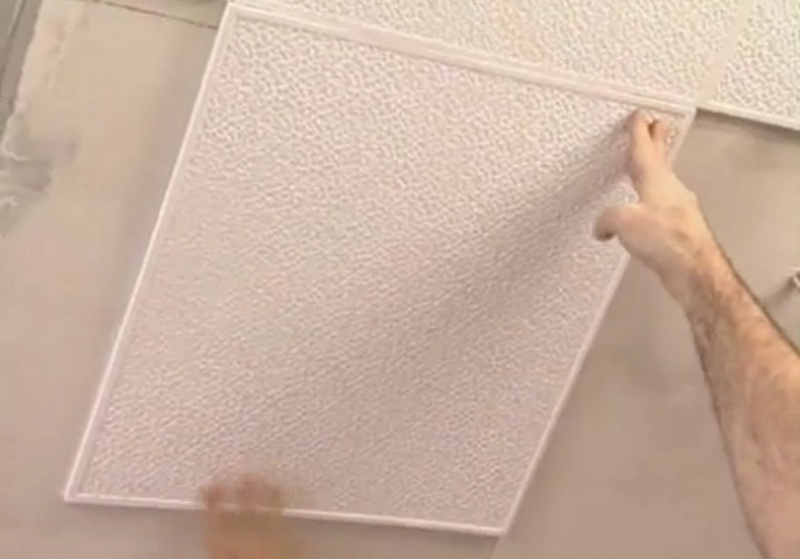
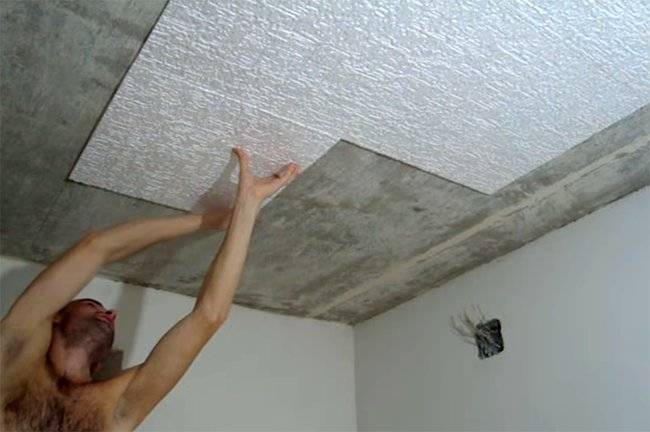
Before gluing the tiles, you should check the surface of the ceiling with a level to make sure there are no differences in height.For concrete, plasterboard ceilings, this procedure is not required. The method of applying the assembly compound depends on the type of glue. Usually the tiles are coated along the perimeter and diagonals. Water-based adhesives, including liquid nails, are applied to the panel in the form of large drops, pressed against the ceiling for even distribution. Then set aside for polymerization for 3-5 minutes and finally set according to the instructions.
Ceiling and tile surfaces are impregnated with liquid adhesives. Putty is applied to the area under one tile with a thin, even layer. Continue after fixing the panel.
If the ceiling is uneven or crooked
It will not work to stick high-quality decorative panels on a curved, cracked surface. It is necessary to fill up the gaps or level the ceiling. One of the most effective ways to align with large differences is to install a ceiling plasterboard. Minor deviations are corrected with a putty.
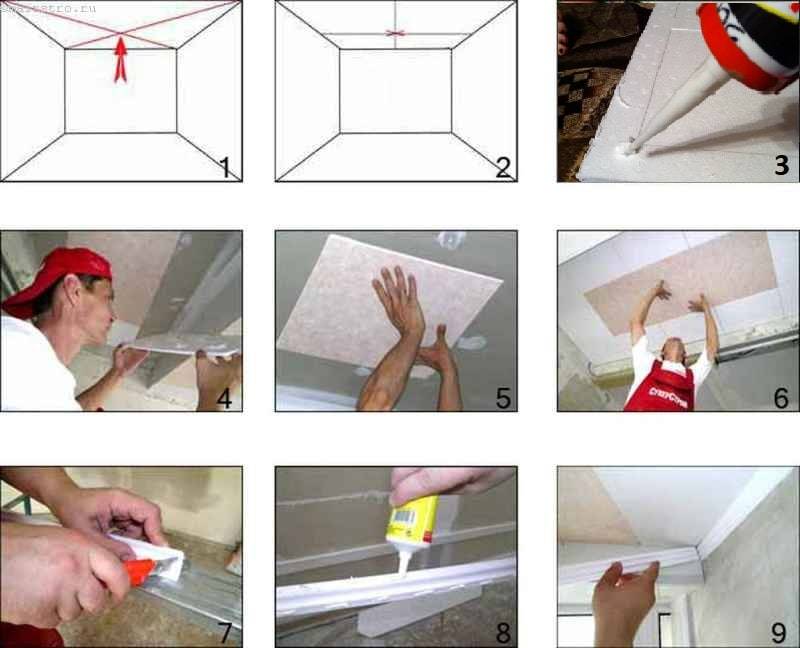
Center of the room
It is most convenient to start installation from the geometric center of the ceiling, which is determined by the intersection of the diagonals. In this case, it is taken into account that a chandelier will be located at this point, so the panels are placed around it, cutting off the edges for the wires.
Methods for Cleaning Non-Washable Suspended Slabs
If non-washable panels are used when installing suspended ceiling structures, then there is no answer to the question of how to wash suspended ceilings, because they cannot be wetted at all. Only dry cleaning is used to clean the coating. A vacuum cleaner with a soft furniture attachment is ideal for these purposes. The unit must be set to minimum power so that the finish does not move away from the base due to strong attraction. A vacuum cleaner simply collects dust and cobwebs from the surface. Do not rub the foam boards intensively.
Many housewives like to dry clean with the Duster brush, the bristles of which are negatively charged and attract dust well. This product is ideal for dry cleaning of embossed surfaces, as the brush fibers collect dust in all recesses. Due to the negative charge of the bristles, the collected dust does not separate from the brush and does not fly in the air, settling on surfaces again. After cleaning, the brush is well shaken outside the house.
Tools and materials needed
To remove particularly difficult dirt from the surface of plates made of non-washable materials, you will need the following tools:
- dry rags;
- metal spatula;
- eraser;
- stepladder or table;
- false ceiling cleaning wipes;
- microfiber rags;
- ammonia for glossy surfaces.
Step-by-step technology for cleaning suspended coverings

Depending on the type of contamination, the following surface cleaning technology is adhered to:
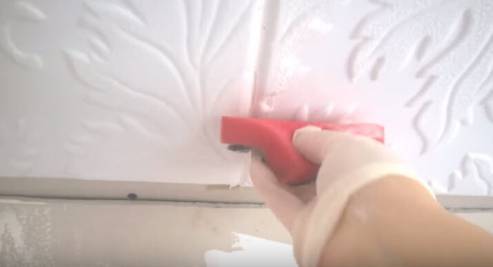
- Dried tile adhesive is very difficult to remove from any materials (washable or non-washable), so it is recommended to remove it without waiting for it to dry. To do this, use a dry cloth or sponge. Do not use detergents or water.
- Dried glue is more difficult to get rid of. To remove it, you will have to use a spatula. Only you need to wield the tool very carefully so as not to damage the surface of the finishing material.
- To give gloss to glossy surfaces, use ammonia or sprays with its content. A soft cloth is slightly moistened with a solution and wipe the ceiling. The panels are then immediately polished with a dry flannel cloth.
Dyeing technology
Before painting, you need to prepare the necessary tools and clean the surface, as well as apply a primer.
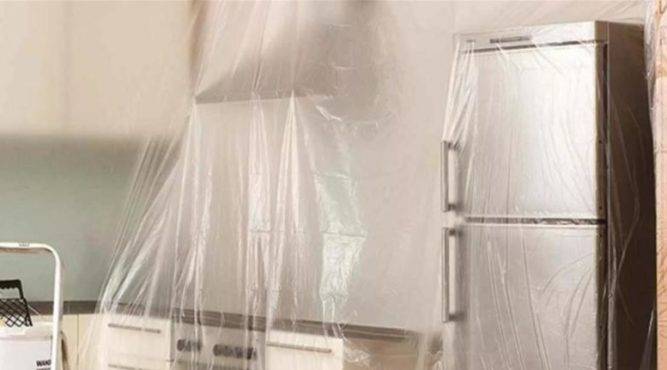
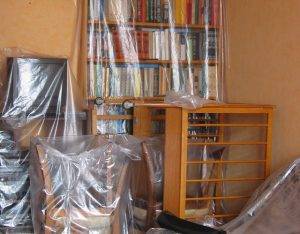
Before all work, furniture is taken out of the room. What cannot be endured is covered. The floor and other surfaces are covered with plastic wrap. Places that can be accidentally painted with foam (the joint between the wall and the ceiling or skirting board) are sealed with masking tape.
What is needed for painting
List of tools and materials that will be required for work:
- dye;
- primer;
- sealant or putty;
- paint brush, sponge, rubber spatula, roller or spray (depending on the chosen painting method);
- goats or stepladder;
- container for paint;
- overalls;
- vacuum cleaner, dry brush and detergent for surface preparation.
Surface preparation
Before painting, the ceiling is cleaned of dirt (grease, dust), since the paint does not lie on them. Use a vacuum cleaner first. Then, with a dry brush, remove dust that has accumulated in the unevenness of the embossed pattern, since the panels rarely have a smooth surface. After mechanical cleaning, do wet cleaning. To do this, apply a soapy solution with a brush, then wipe it dry with a clean napkin or cloth.

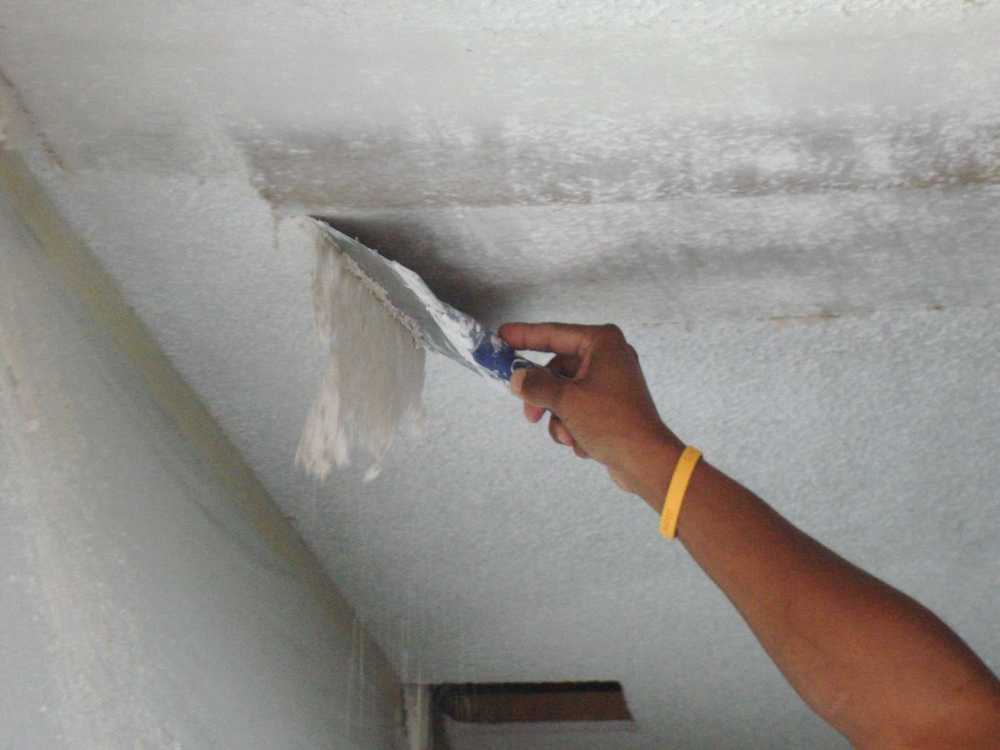
If you plan to paint new, just glued panels, then you need to fill the joints with sealant. Dry joints between old tiles are covered with putty to obtain a seamless surface. Use only rubber spatulas so as not to accidentally violate the integrity of the expanded polystyrene.
Padding
The ceiling is primed 11-12 hours before staining. The leveling compound is applied with a roller or brush, one layer is enough.
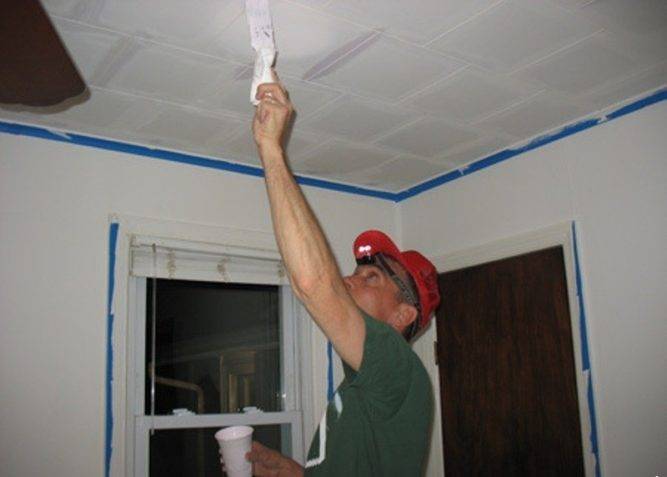
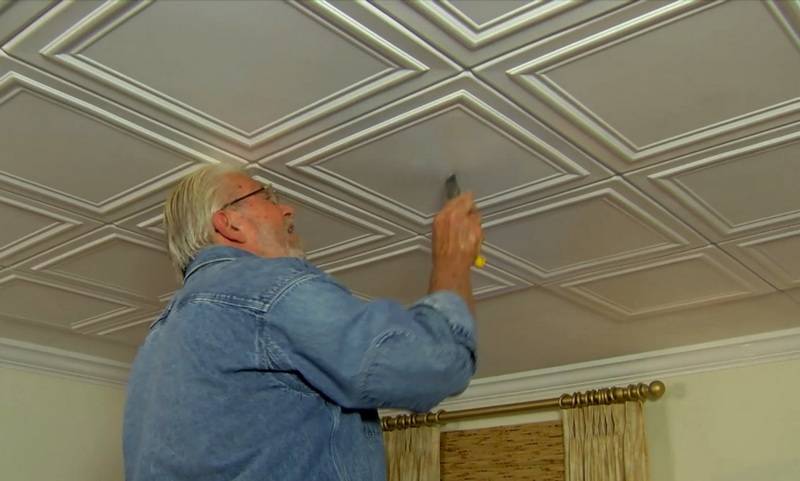
Painting works
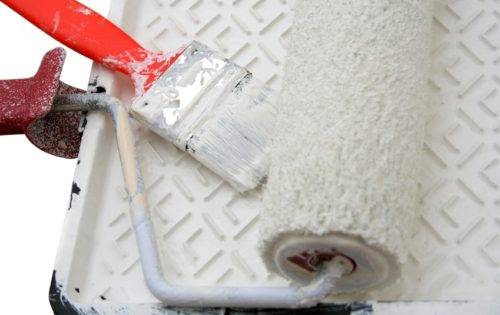
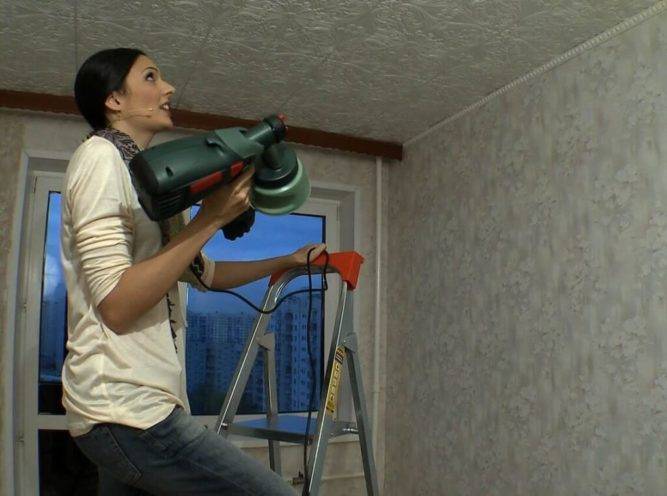
Painting ceiling tiles at home is possible with a spray gun, brush or roller.
Lighting is organized during work on both sidesto avoid uneven coloring and streaking.
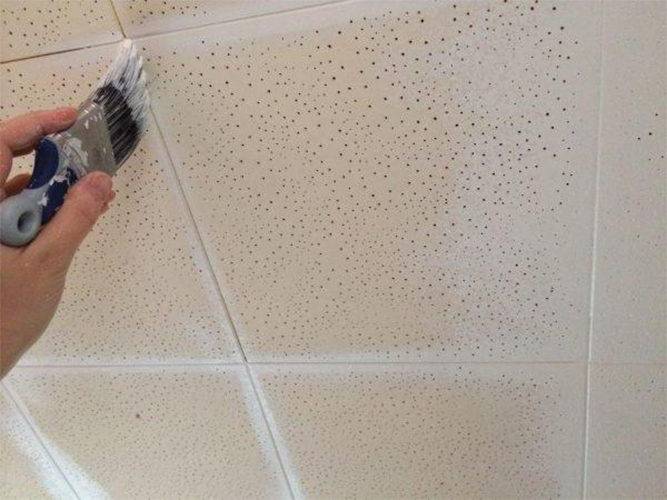
Coloring is recommended in two layers. The second is applied after the first has dried, making strokes in the perpendicular direction. If it was not possible to achieve the desired layer density, the paint is applied a third time.
To obtain a matte ceiling with a glossy relief, the surface is painted with an acrylic agent, then varnish is applied to the protruding parts. Thus, you can make an original design with your own hands.
The option of applying paint to the boards even before gluing is not very successful. After installation on the ceiling, you will still need to seal the seams and paint the surface again.
Stages of work
 First, you need to cover all the furniture and the floor with plastic wrap. This is the most common material for this type of operation. If you don't have one, try doing something else, but film is the best option. After use, it can be rolled up together with the garbage into a neat roll and thrown away, since the cost of the film is very low.
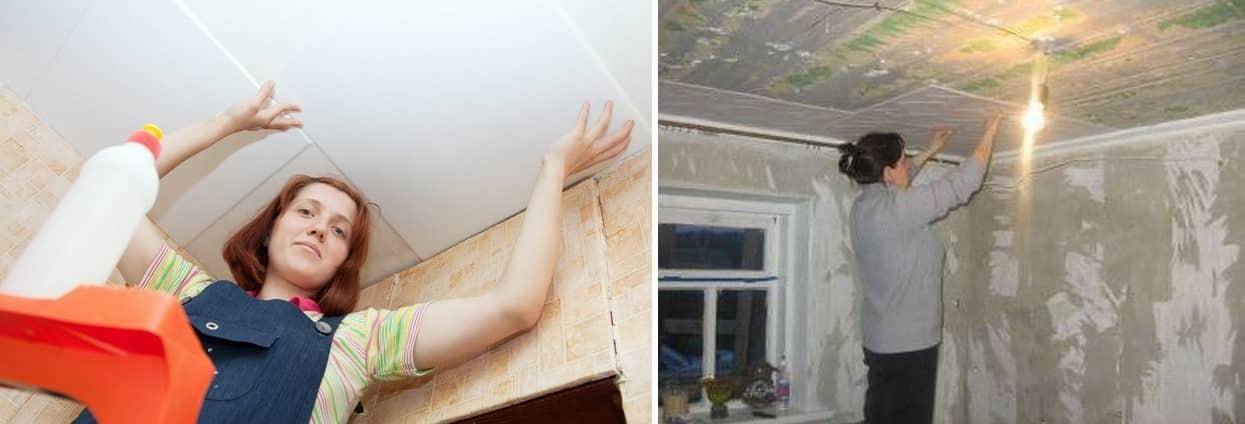
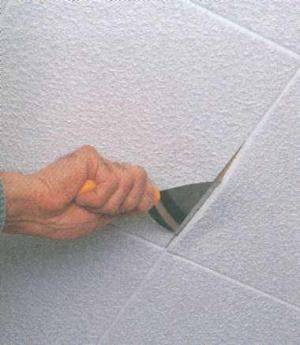
Next, we begin to remove the glued foam parts using a hard spatula. In hard-to-reach places, like corners and so on, a narrow spatula is used. When removed, the material will break and the foam particles will begin to stick to everything that is nearby. Therefore, you need to cover your hair with something and, if possible, use a respirator when working.
Very carefully it is required to remove the tiles that were glued to the PVA glue. After drying, it becomes very hard and you can easily cut yourself on the edge of the panel glued to it
Gloves come in handy here.
Do not try to remove both panels and glue residues at once. It is better to leave the glue stain removal for later, and first, scrape off all the tiles. It will turn out faster, so that you are not told - it has been repeatedly tested in practice.
 It is not always possible to remove the remaining adhesive solution completely. Especially if the finishing was not done by you. In this case, there are not too many options for what can be done. The easiest way is to peel off the dried glue residue with a solvent. If you know what the fixing of the ceiling foam panels was made for, this is the most reasonable option.
The mixture is applied on the spot and for a while affects it, softening. After that, you can use a regular spatula - everything is perfectly removed and there are almost no traces left. It is enough to prime and paint over the plane well.
It is much more difficult if you do not know what the foam tile was laid on.There are only two ways to remove such a foam tile from the ceiling, or rather, to remove all traces of glue:
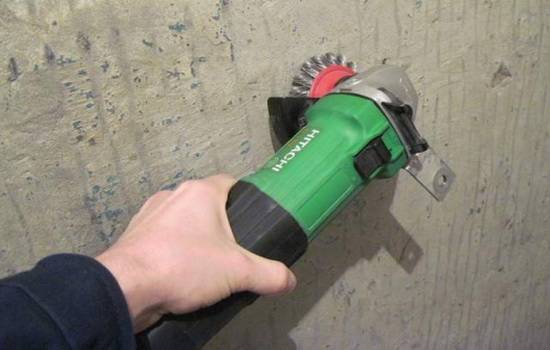
- The first way is to scrape off the stains using different tools - from a chisel to a grinder or a grinder. After such processing, the floor surface will have to be carefully putty, especially if you plan to paint the ceiling.
- The second option for removing stains is to level the ceilings with a thick layer of plaster. This method is suitable in cases where the leveling of the surface is still included in the work plan and the cost of such a finish is not scary.
In any case, before the next finish, the floor surface must be thoroughly dried, primed and smoothed out all small irregularities that were or appeared after removing the old coating.
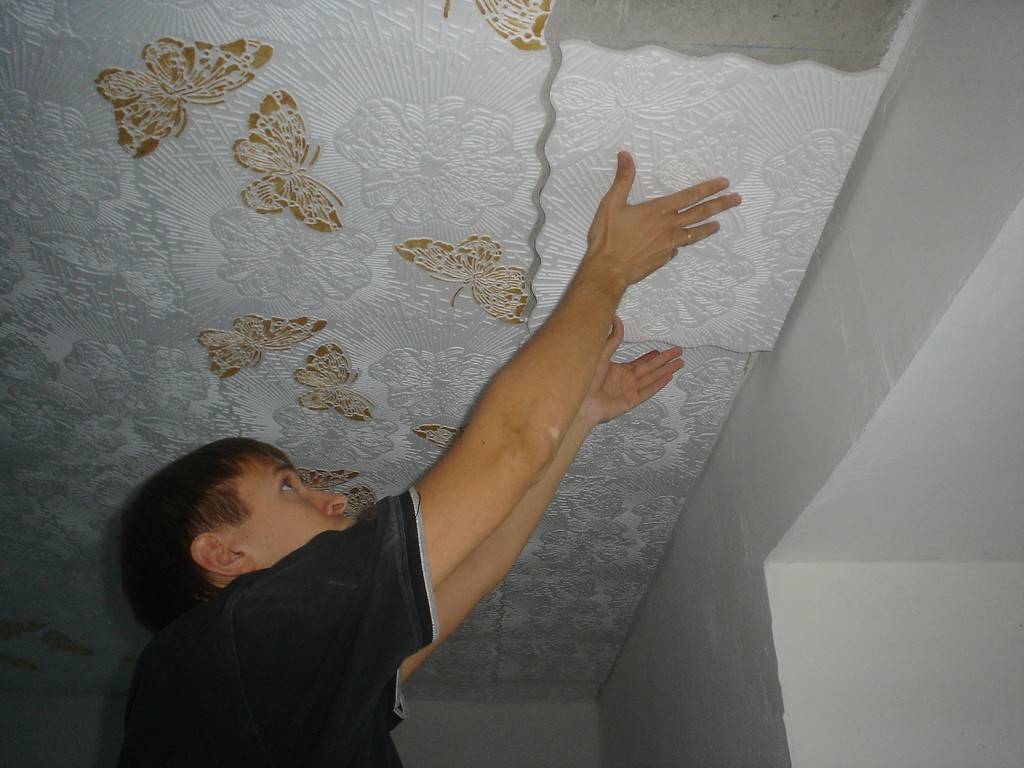
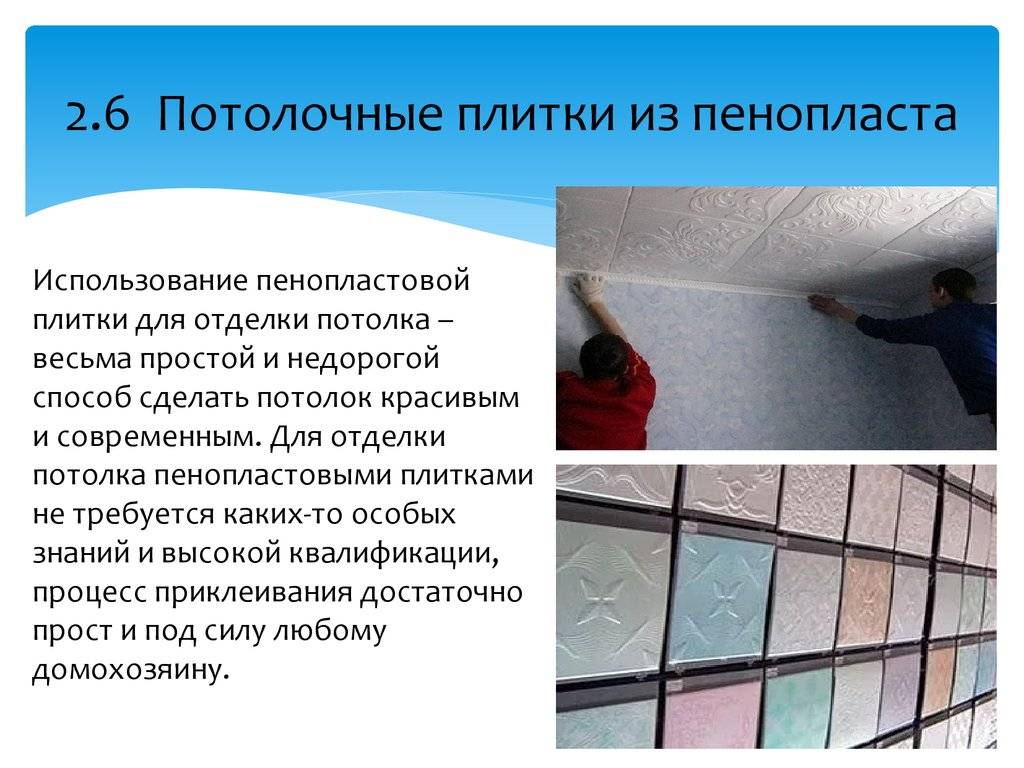
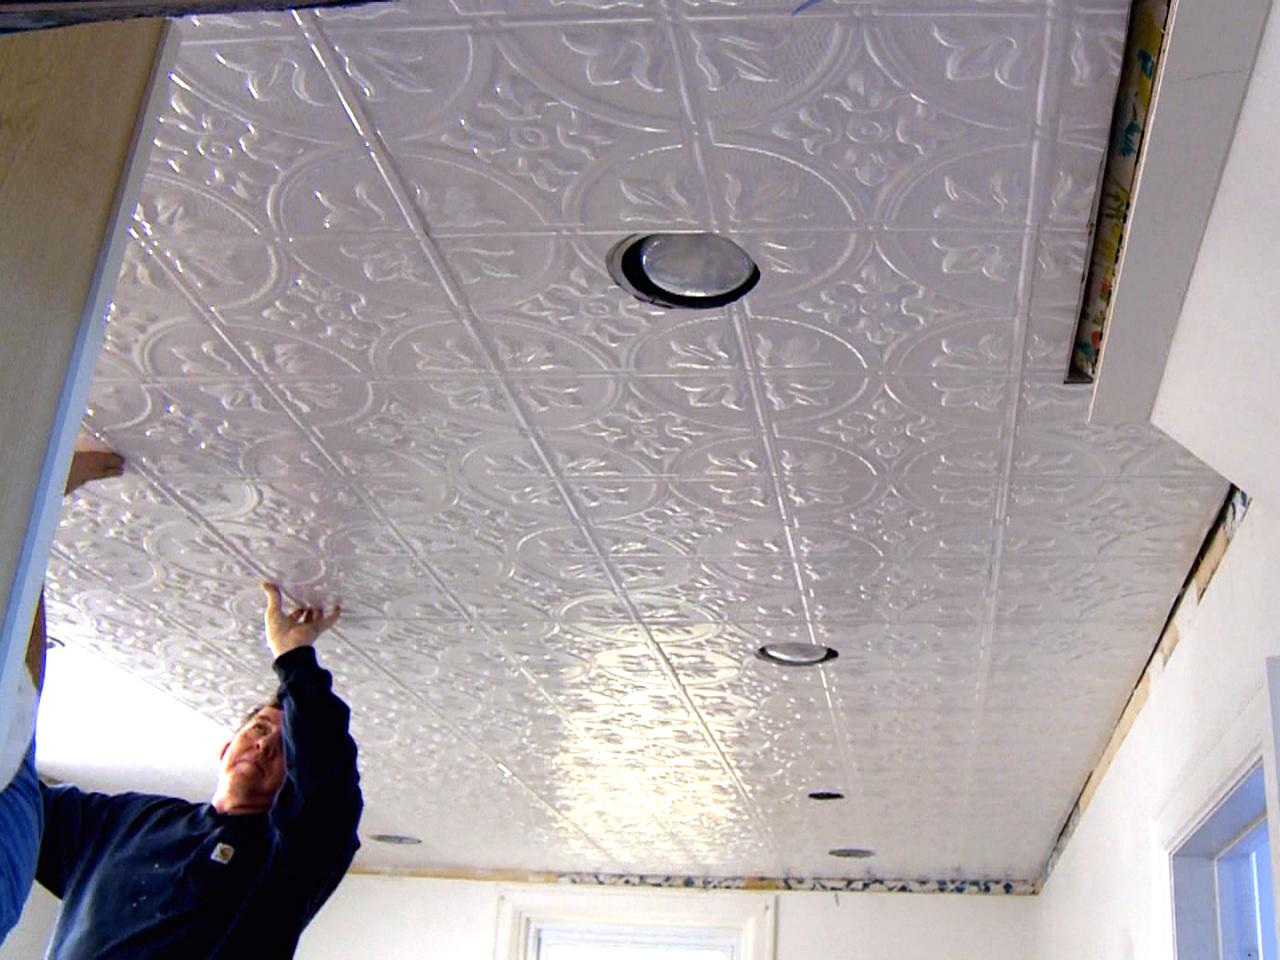
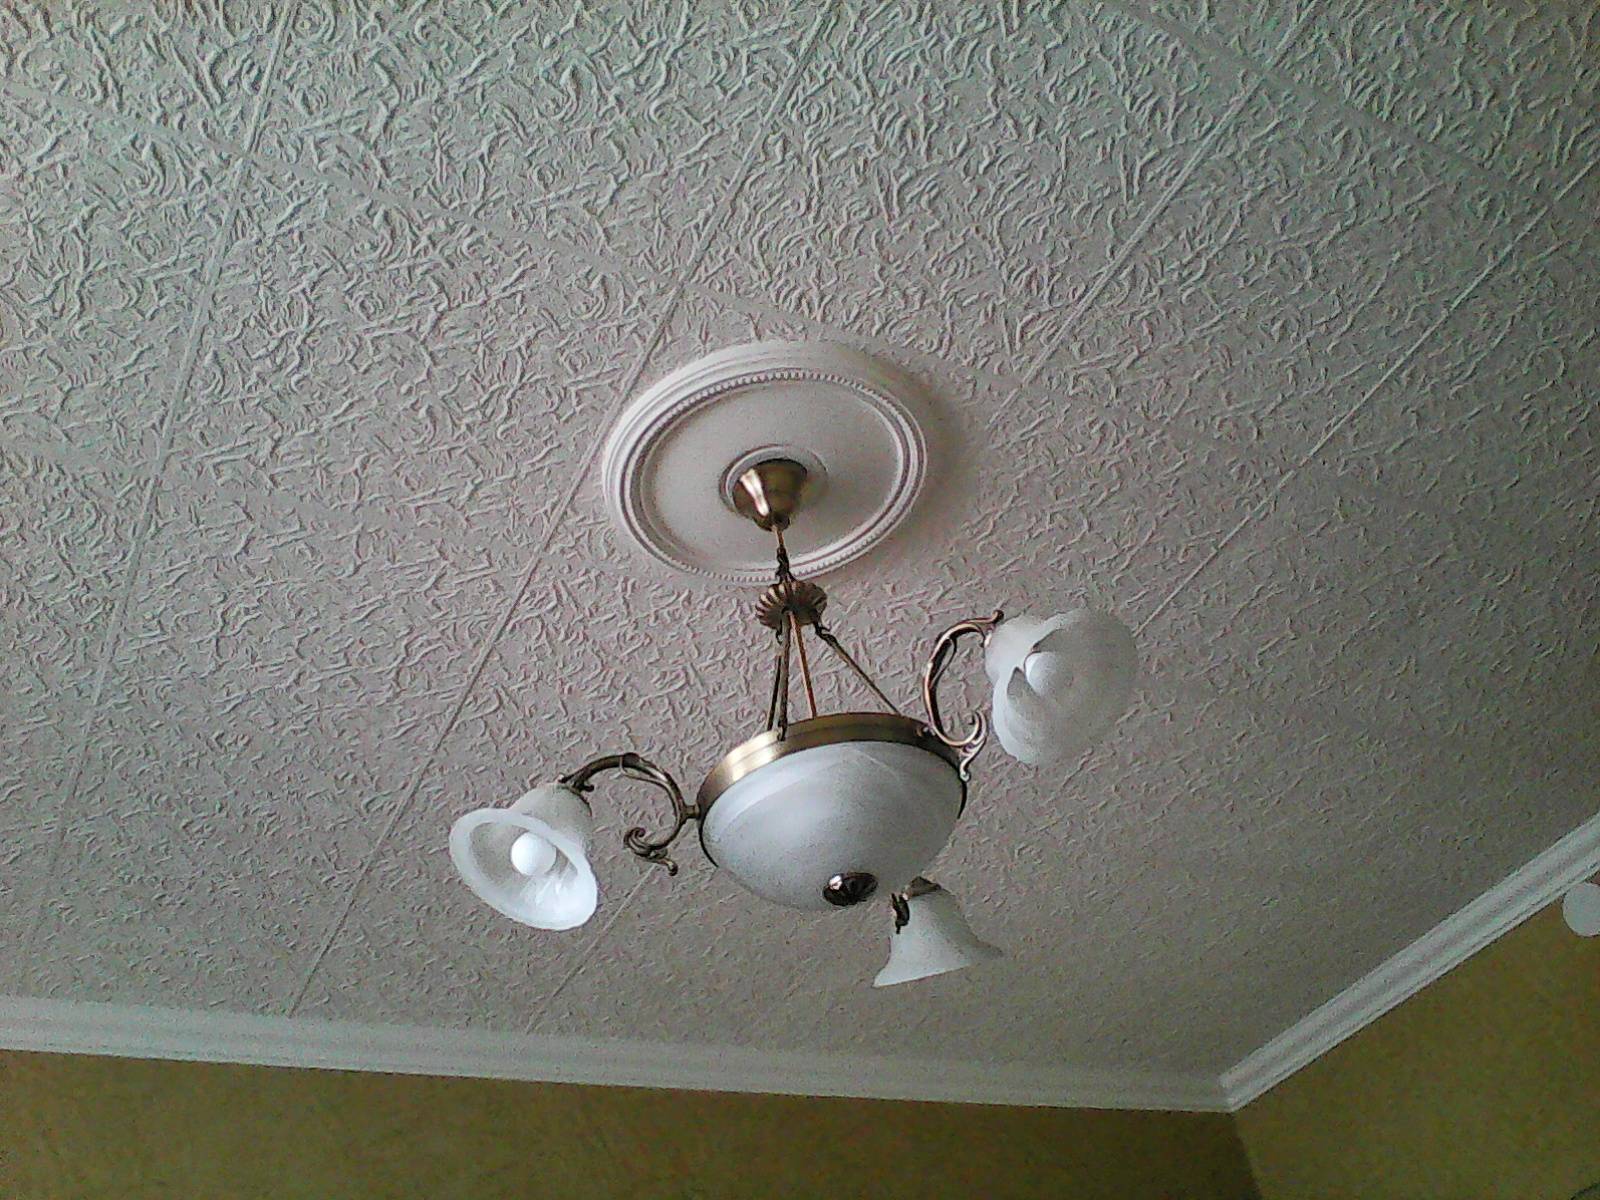
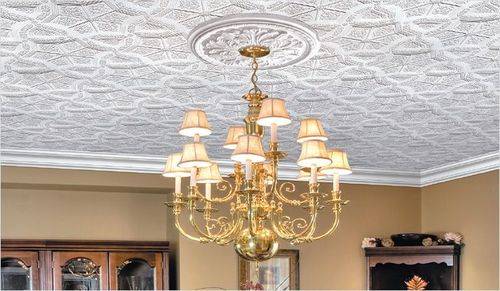
Styrofoam tiles are often used to create beautiful ceiling designs due to their benefits:
- high refractoriness;
- good thermal insulation;
- moisture resistance;
- variety of patterns;
- the possibility of painting;
- low cost.
How to remove glue residues from the ceiling
Usually, after removing the tiles, 3-4 or even more areas of dried glue remain on the ceiling.
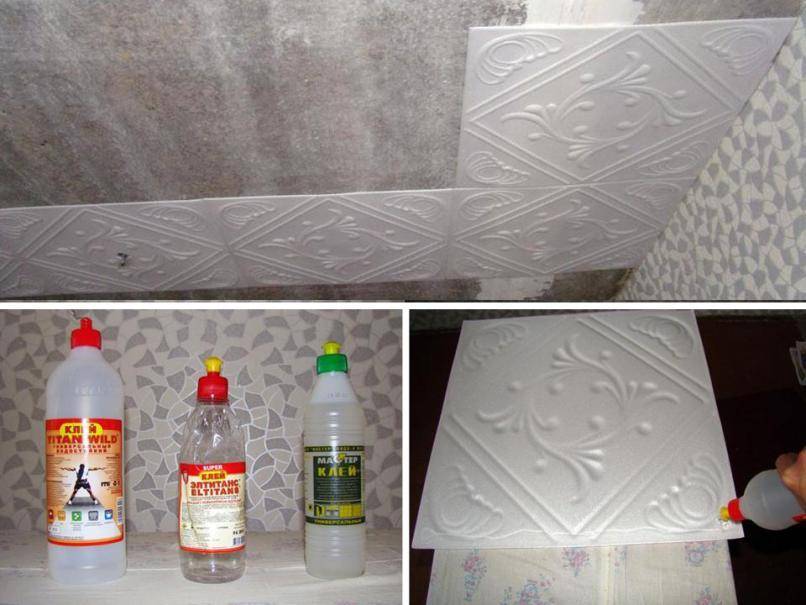
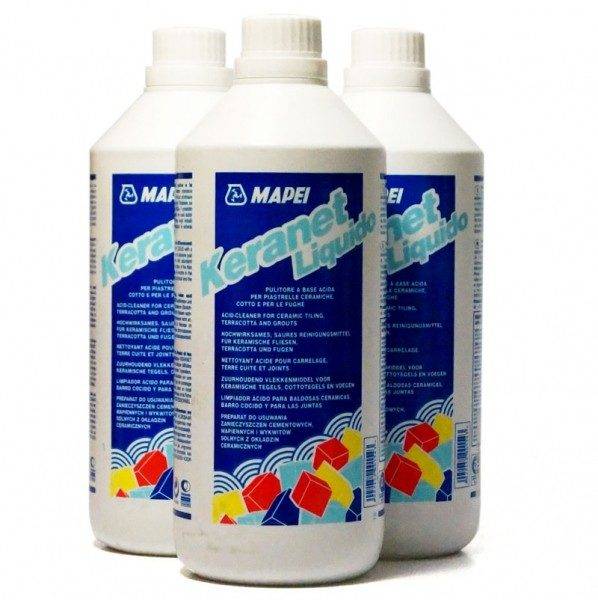
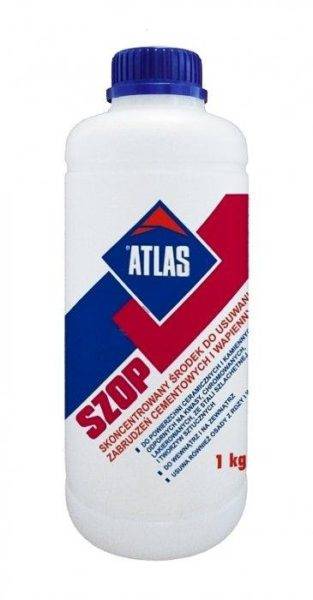
The surface is cleaned with an acetone-based solvent or ordinary nine percent vinegar. Professional products are also suitable, for example, Mellerud, Keranet, Atlas Szop or pharmacy dimethyl sulfoxide, which perfectly dissolves the adhesive composition.

To remove the glue you will need:
- Smear dried-on marks with solvent.
- Clean the “islands” with pieces of tiles with a spatula.
- If the solvent does not help, we use a grinder and a grinder.
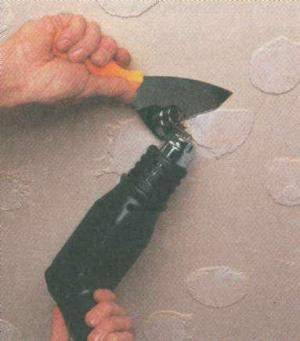
Wait a few minutes after applying chemicals. The liquid is applied with a sponge, brush or old toothbrush. When the solvent starts working, gently scrape off the softened mixture with a spatula. We repeat as many times as necessary.
To soften dried glue, use a dishwashing detergent such as Fairy (manufactured by Procter & Gamble), which almost always contains sodium laureth sulfate, polypropylene glycol, and other solvents. Enough 1-2 caps of the product for 1.5-2 liters of water. After that, rip off the old glue with a hammer and chisel.
If all else fails, then you will have to use a sander, sandpaper or a brush. In this case, a mask and a respirator will come in handy, since there will be a lot of dust. Before starting work, we moisten the ceiling with water with a spray bottle. Tearing off the remaining tiles will be much easier.
Do not set fire to dried glue, thinking that this will soften it faster. This is dangerous and, moreover, will not lead to the desired result. Be patient and treat the glue with water or solvent and gradually it will begin to give in. The softened pieces are scraped off with a spatula, and then the surface is cleaned with other means.
What means dissolve glue
To remove the glue from the ceiling with your own hands, not only professional tools, but also folk recipes will help.
For example, the following are suitable for dissolution:
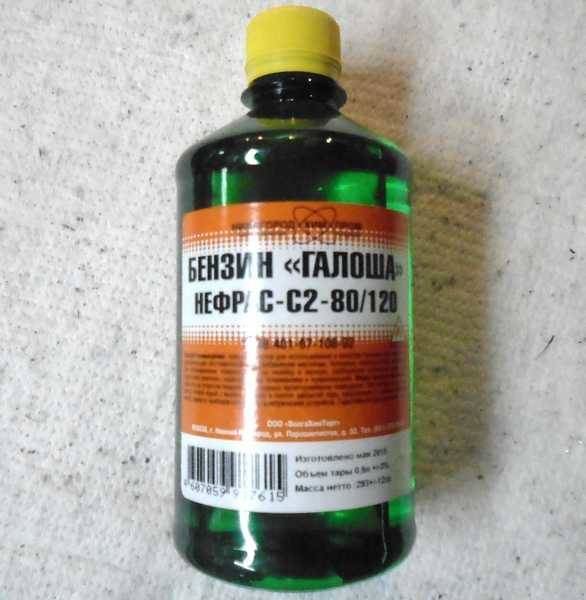
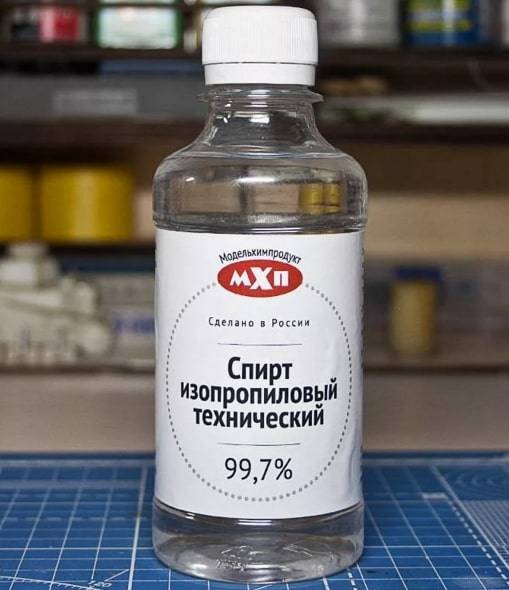
- technical alcohol;
- sunflower oil;
- gasoline, turpentine, ammonia;
- a mixture of soda and water;
- hot soapy water;
- table vinegar.

These funds are applied to the remaining glue and wait from a couple of minutes to half an hour. As soon as the substance begins to soften, it is scraped off the ceiling with a spatula. Sometimes, for faster removal, the treated area is covered with plastic wrap and allowed to wait for several hours. Soda paste, oil, vinegar work the longest, but these options are considered one of the most effective.
It is possible to clean the ceiling from the glue using the above methods only if the mixture is not very old. In more difficult cases, professional tools and serious mechanical cleaning will be required. But if there are only a few problem areas on the surface, then it is really possible to cope with them with water and vinegar or ordinary oil.
Styrofoam Ceiling Tile Cleaning Tools
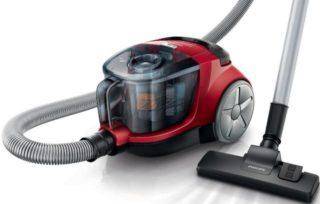 A vacuum cleaner can collect surface dirt from ceiling tiles
To clean the foam tiles on the ceiling, you need to stock up on a set of tools suitable for this particular case. In work you will need:
- Vacuum cleaner with a soft, fluffy brush. It is used to pre-clean the ceiling from dust and cobwebs.
- A soft, lint-free cloth.
- Dishwashing sponges. If the area of contamination is large, then a lot of them will be needed.
- Highly absorbent dry cloth.
- Paper towels or napkins. They are needed to absorb excess moisture.
-
Stepladder.
- Brush with fluffy bristles, for removing yellowness and grease in hard-to-reach places. The Duster special dust brush will be an indispensable tool for dry cleaning. Its negatively charged soft bristles collect and trap dust.
- A bucket or bowl of warm water. It will be needed for wet cleaning.
- Special sponges for cleaning foam from dirt. They are impregnated with special compounds and easily remove soot and other impurities from the ceiling.
- Rubber gloves.
- Protective glasses. When working with chemicals, it is better to protect your eyes from getting harmful components into them. Moreover, during cleaning, you constantly have to look up.
- Putty knife. After repairs, when drops of glue or putty got on the tile, you cannot do without this device. You need to act carefully and carefully so as not to damage the coating.
To clean the foam tile ceiling properly, you should not rush and use force. Such actions only harm the coating.
Water-based staining
To work with this group of paints, you will need the devices and tools listed earlier in the article.
The staining process consists of the following steps:
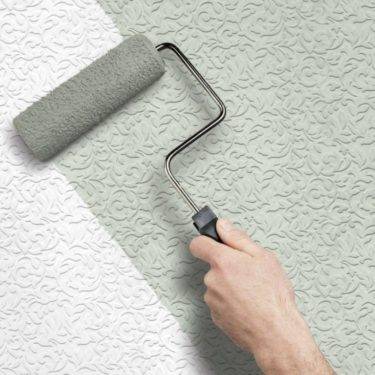
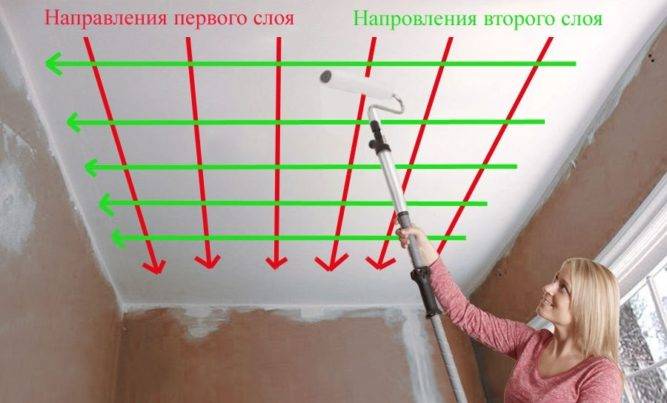
- First, the joints of the ceiling surface and walls are covered with paint, moving along the perimeter of the room. For this purpose, they take a brush, dip it into the dye composition, squeeze it slightly and apply with a strip 3-5 centimeters wide. This is done in order not to stain the walls in the future when using the roller.
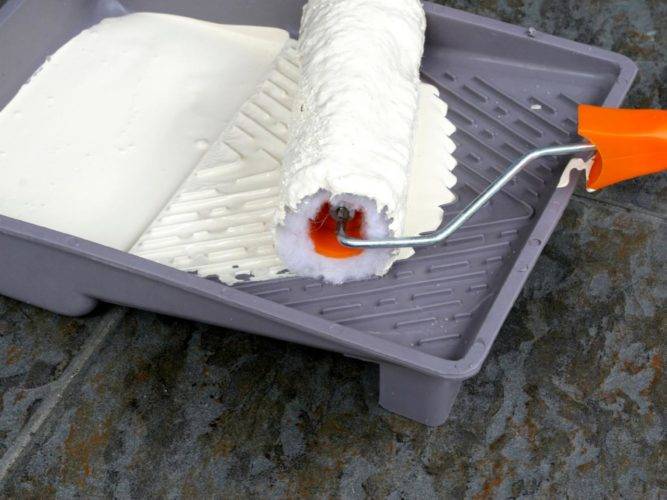
- The ceiling is covered with water-based paint in three layers. They use a wide roller. The first layer is applied in the direction of the luminous flux coming from the windows. Work should start from the left corner near the wall with a window opening.
- To remove excess paint, it is carried out on an already treated surface with an almost semi-dry roller, almost without paint.
- The second layer is placed perpendicular to the first painting after the starting compound is completely dry on the ceiling. This usually takes 8-12 hours.
- After the previous one has dried, the final layer of paint is applied from the corner of the wall opposite the window opening. In this case, the roller is moved in the direction of the light coming from the windows. It is better to paint over this layer with a new roller and then the surface will be uniform.
Until the painted ceiling is completely dry, experts do not recommend opening doors and windows in the room. It is necessary to ensure that the sun's rays do not fall on the newly repaired coating, so it is better to darken the windows.
Formulations for washable suspended ceiling tiles

For work, you will need a container for water, the cleaning agent itself, gloves, sponges and rags, as well as a brush with a long handle. Before cleaning washable suspended ceilings, you need to shake off the dust from them - this is easiest to do with a long-bristled brush on the handle or with a vacuum cleaner.

Now what and how to wash a suspended ceiling - liquid gels for washing dishes are suitable
It is important to select a composition without fragrances, fillers. Soap products such as Cinderella, Fairy dissolve quickly in water, wash away grease, other stains and gently clean the surface
It is strictly forbidden to use hard brushes, sponges, abrasive substances, solvents.If you don't have any gel on hand, hair shampoo will do. Washing is carried out with a soft cloth, then the washable suspended ceilings must be rinsed from soapy water, wiped dry.
And a few more tips:
Stamped foam tiles do not tolerate excess moisture, so the rag must be wrung out
It is best to use dry shampoos that quickly remove dust and other light impurities.
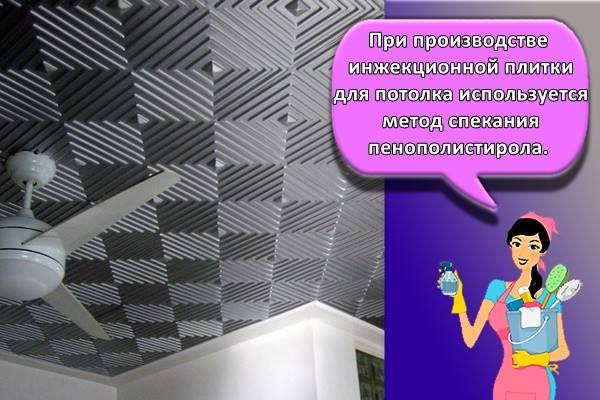
Extruded injection plates are resistant to moisture, so soap solutions with a slightly higher concentration of soap are suitable for cleaning.
In the absence of gel, you can use laundry soap - grate and dilute in warm water.
Apply the solution to the surface carefully, rinse off without zeal so as not to damage the decor.
Remove foam and moisture residues with paper or cotton towels. Toilet paper or ordinary napkins will come in handy - they do not leave streaks and cellulose fibers.
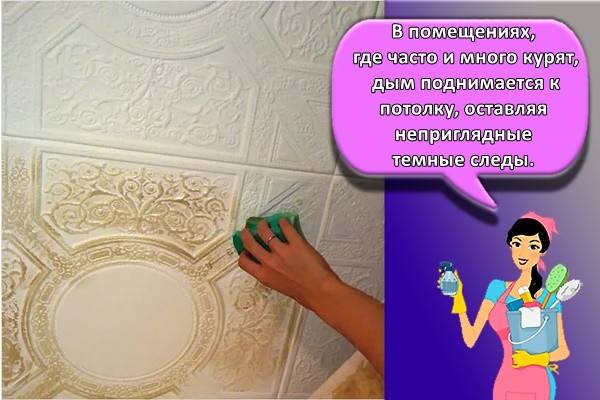
To get rid of gray plaque from cigarette smoke, you need to dilute 2 tbsp in 1 liter of warm water
l. salt, 1 tbsp. l. baking soda and rub the tiles.
What to do with stubborn stains
Dirt with experience cannot be cleaned from the kitchen ceiling with gentle methods. There are more radical recipes for getting rid of them.
| Required substances | Sequencing |
|---|---|
|
|
|
|
|
|
|
|
|
After completing all the actions, excess moisture is removed with paper towels.

Placement methods and markup
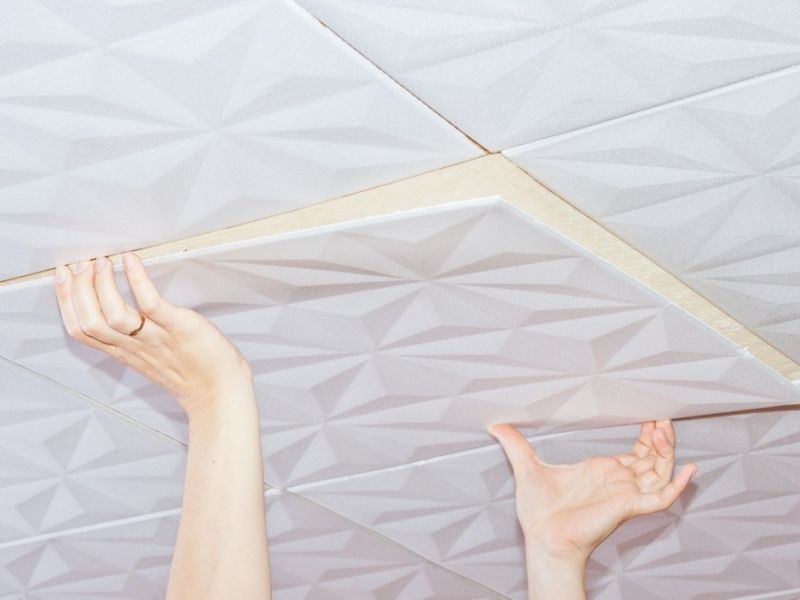
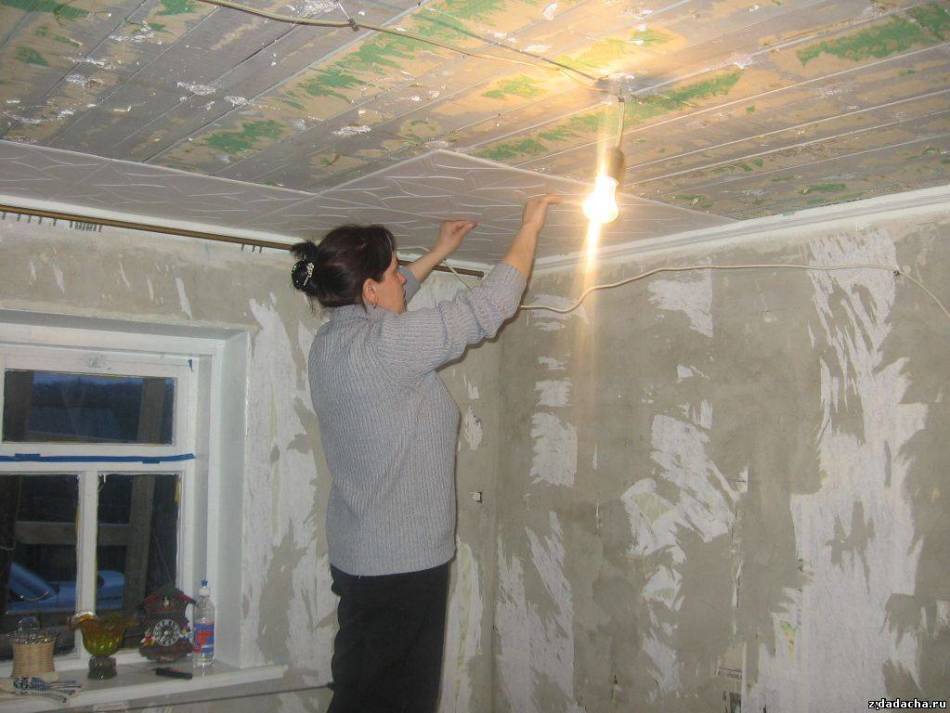
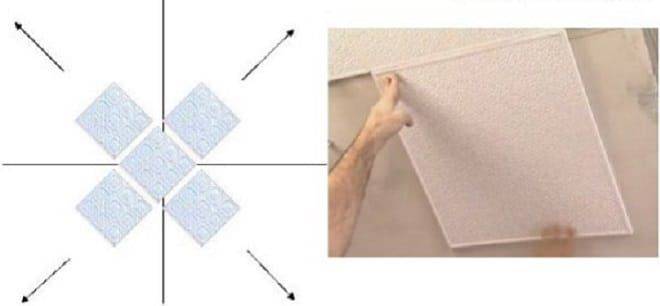
Installation work begins with marking the ceiling. Regardless of the method of placement, diagonal, perpendicular lines, the center of the ceiling, are determined. Lines are drawn from opposite corners, the intersection point of which is the center in which the lamp will be located. 4 perpendiculars are restored from the center to the edges of the ceiling. The position of the first tile depends on the installation method.

Parallel
Laying starts from the geometric center, around which 4 tiles are placed along perpendicular lines to the walls. The inside corner of each tile must be aligned with the geometric center and with each other. The subsequent rows are laid out parallel to the perpendicular guides.
Diagonally
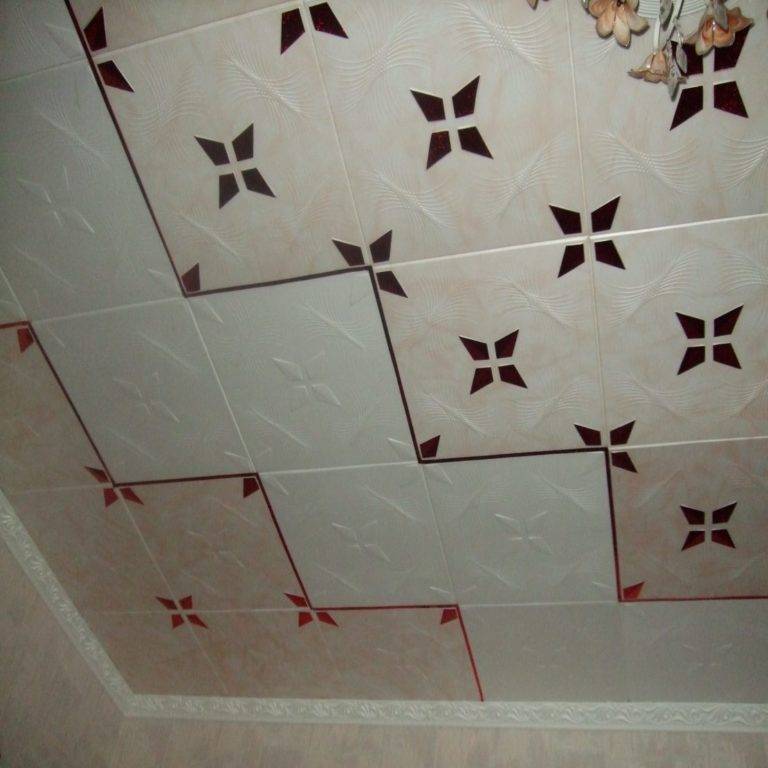
When the tiles are placed diagonally, the 4 center panels are closed by the inner corners in the geometric center. The outer corners opposite to them lie on the perpendiculars, which will be diagonals for the resulting square. Continuation of installation - along the perimeter of the resulting squares with alignment of the corners along the perpendiculars. The second option is diagonal laying: from the central tile glued with corners to the perpendiculars along the geometric center / from the chandelier. Subsequent panels are glued along its sides, filling in the gaps.
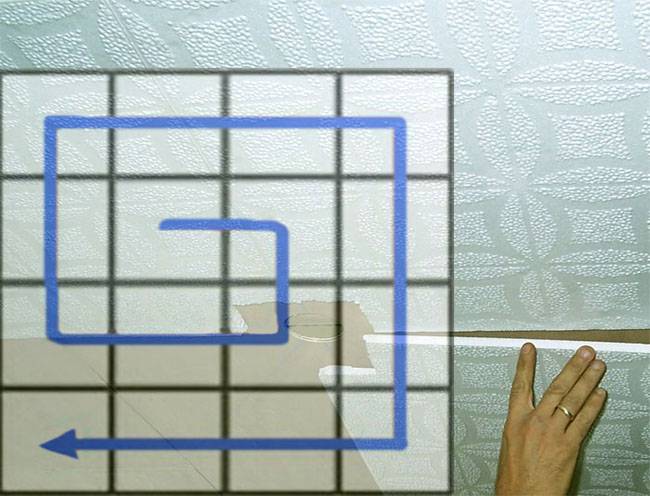
Snake
The sequence of placement from the center of the ceiling along the perpendiculars:
First row:
- 1 lower left tile;
- 2 top left;
- 3 top right;
- 4 lower right.
Second row:
- 5 lower right;
- 6 bottom left;
- 7 lateral lower left;
- 8 bottom left;
- 9 top left;
- 10 top side left;
- 11 top left;
- 12 top right;
- 13 top right side ...
Continuation of movement along the perimeter.
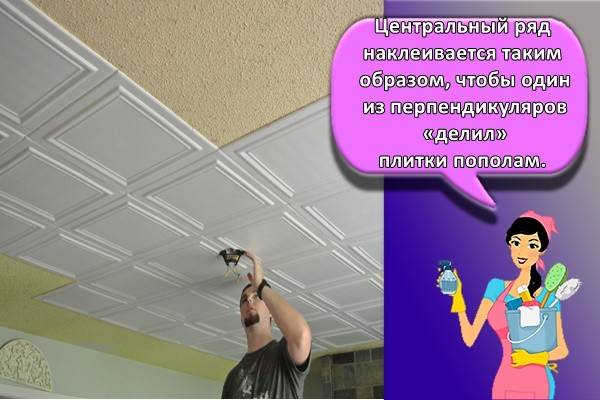
With shift
The central row is glued in such a way that one of the perpendiculars "divides" the tiles in half, and the central one is located at their intersection. Subsequent rows on both sides are shifted symmetrically by ½ tiles.
Criss-cross
The first 4 tiles are glued in the same way when laid parallel to the walls. Subsequent double rows are placed along the perpendiculars to the walls, forming a cross.
Rhombus
Diamond gluing starts from the wall. The first tile is laid at an angle to the wall along the perpendicular. The second and third tiles are placed to the sides of the panel, the fourth next to the third. The fifth is glued in between the second and third, the sixth is adjacent to the second, the seventh to the sixth. Subsequent rows are filled in order.
Tips and tricks for removing old glue from the ceiling
To make cleaning as little hassle and inconvenience as possible, there are some tricks you can use. They will help you avoid some problems:
- To reduce dust spreading throughout the room, the entire ceiling can be moistened with water. This, of course, will not make it easier to remove the glue, but it will significantly reduce the amount of small debris.
- Spread oilcloth or plastic on the floor. At the end of the work, cleaning the room will be much easier.
- If, during the repair, traces of mold are found on the ceiling, then it is better not to ignore this moment. Apply special antifungal compounds to the surface, preferably several times.
- Use a chisel to remove glue from hard-to-reach places (chips, cracks, depressions).
- Avoid unnecessary haste when completing each stage of the work. Don't try to remove old glue in one go. Better to divide the ceiling into several areas and gradually clean each of them.
Description of the washing procedure
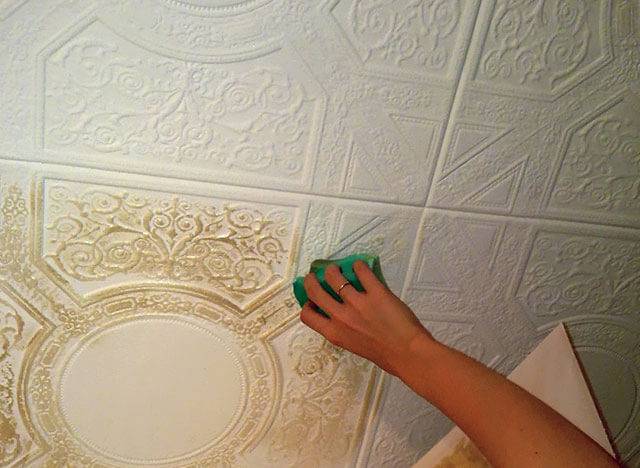
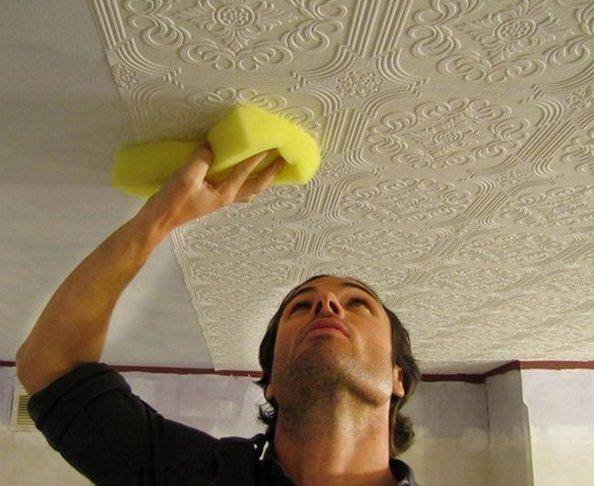
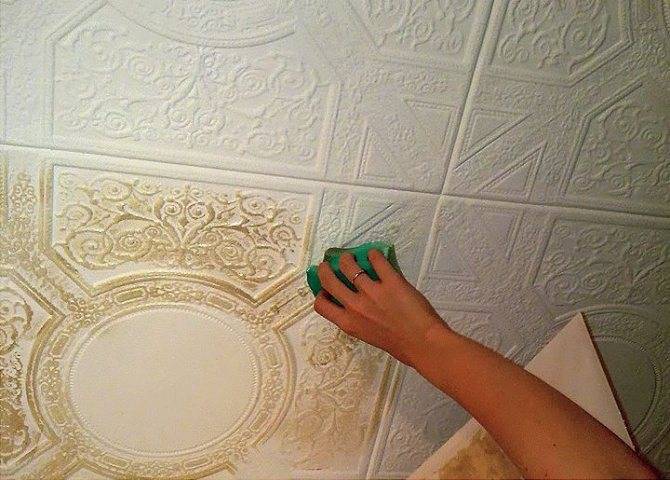
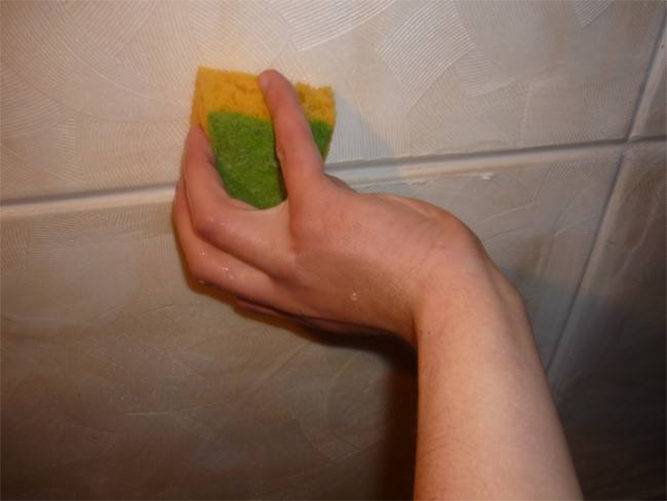
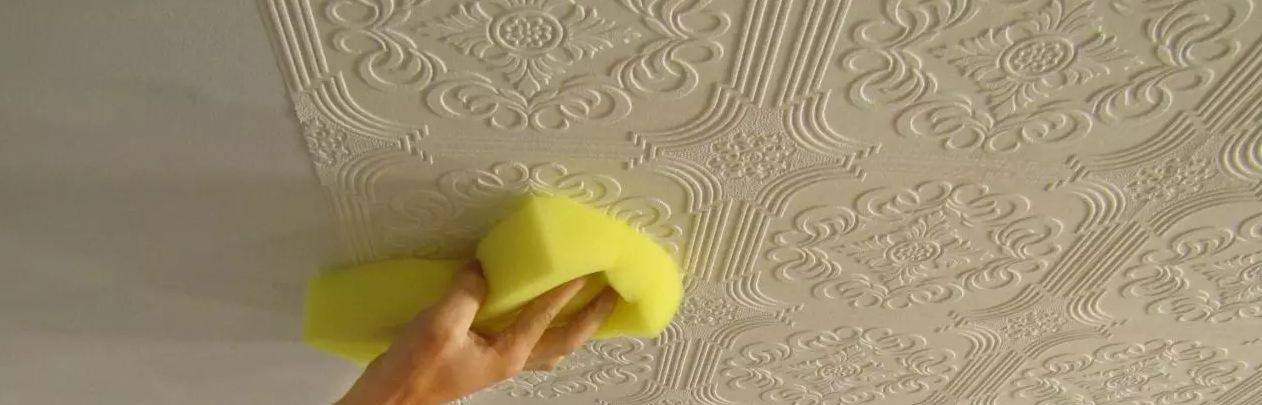
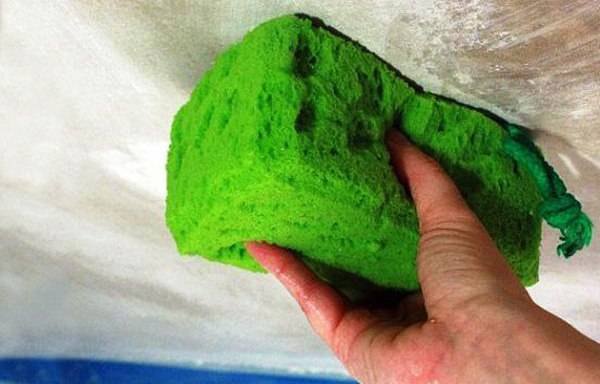
You can wash products using, for example, a sponge. The material is dipped in water with liquid detergent. First of all, the relief elements are “lathered”, after which the mixture is washed off with a sponge soaked in water.
If water remains on the surface, it can be soaked using paper-based napkins. This must be done, otherwise stains may remain in these places.
Under no circumstances should solvents be used. This will cause the tiles to break down. If there is putty or paint on the foam product, they can be removed when fresh with a rag, otherwise a spatula should be used.
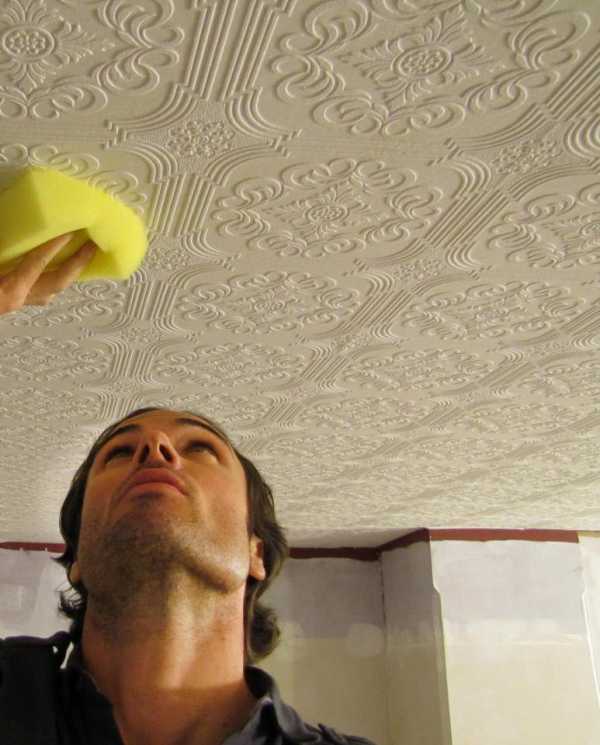
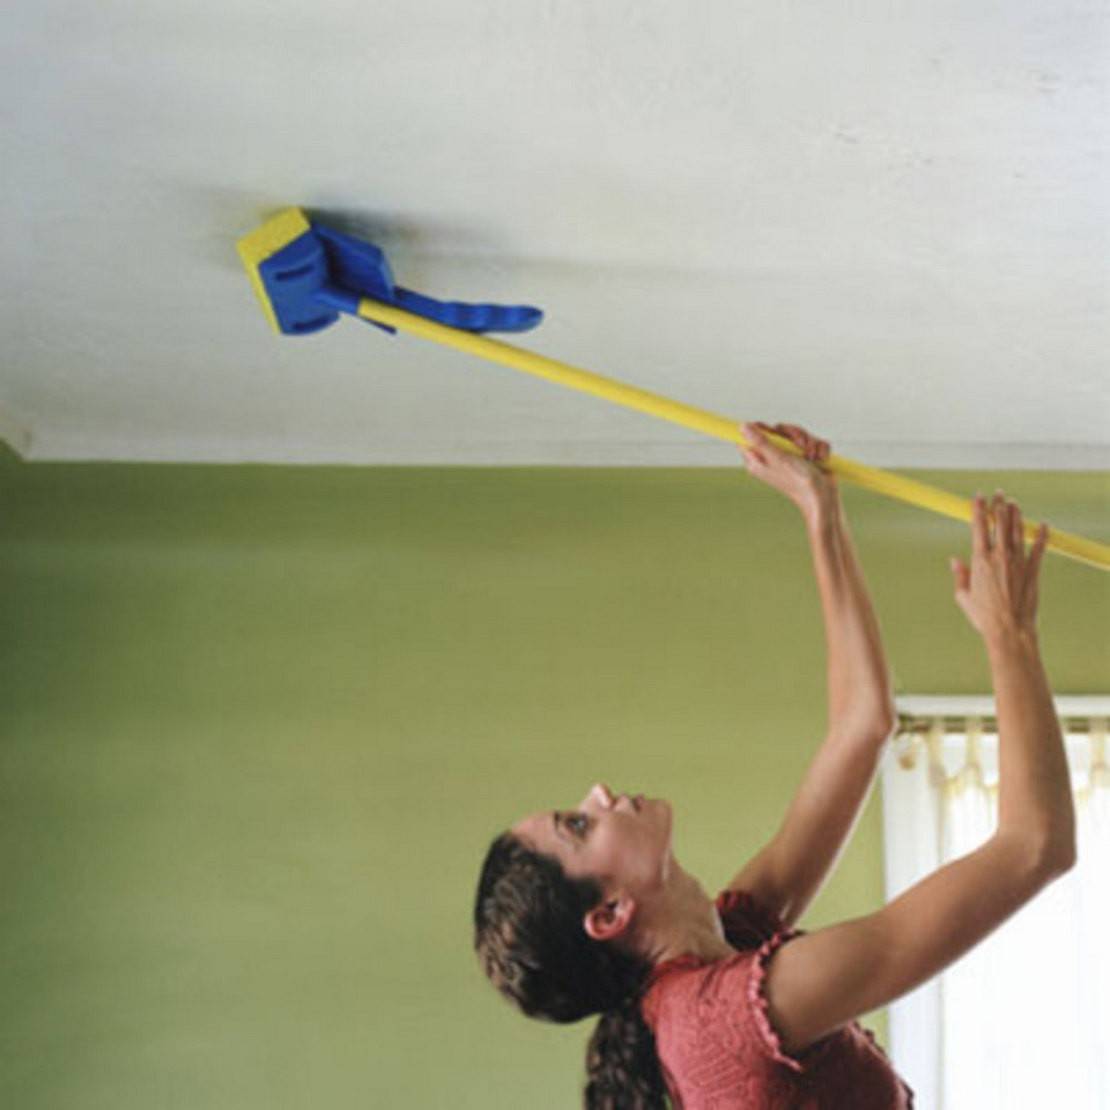
Dry care is preferable
If you intend to regularly care for the ceiling tiles in the kitchen or bathroom, then it is better to do it "dry". And the "wet" option is better left as a last resort, if vacuuming does not satisfy. This reduces the risk of damage to the surface, since washing is in any case accompanied by pressure on it.
The vacuum cleaner should not be used at full capacity right away. You need to start with a minimum, and then observe how much dust is sucked in by the technique, and whether the tile falls off. Having chosen the optimal mode once, it should be adhered to during further cleaning.
Suspended ceilings are very popular, because they allow you to hide defects in the base and utilities, level the surface well and are quickly installed, and allow you to mount different lamps. Despite the unpretentiousness in the care of many types of ceiling tiles, the owners of such ceiling systems still wonder how to wash the suspended ceiling. Since ceiling panels are made from different materials, some items can be washed while others are only dry cleaned.
First, we will figure out how to wash washable suspended ceilings. The work is carried out using the following materials and tools:
- soft kitchen sponges and flannel napkins;
- container with water (basin or bucket);
- rubber gloves;
- suitable detergent;
- protective glasses;
- a window mop or soft brush with a long handle.
Since all work will have to be done at a height, you will need a stepladder, table or small platform.The stepladder is not very convenient for the reason that it will not be possible to put a container with water and detergents next to you, so you will constantly have to go down and up the steps. The platform or table is much more convenient due to the large stable surface on which you can place all the tools at hand.
The question of how to wash foam ceiling tiles is especially relevant in the kitchen, where surfaces are often contaminated with grease and soot. In other rooms, dry cleaning from dust and cobwebs is sufficient. If we talk about how to clean the foam ceiling tiles, then liquid detergent solutions for washing kitchen utensils, gels for washing clothes, shampoos are suitable for these purposes. These products dissolve fatty contaminants well and at the same time do not spoil the surface of the foam.
Loose stamped tiles cannot be wetted too much, therefore, before washing, the rags or sponge are squeezed well. Injection panels and products made of extruded polystyrene foam do not absorb so much moisture, so they can be moistened with plenty of water.
If you don't know exactly how to clean your ceiling tiles, try a regular soap solution first. To prepare it, grate the traditional laundry soap and dissolve the flakes in warm water. To wash loose tiles, it is better to use only foam, so as not to wet the surface too much.

The sequence of washing pressed panels made of loose foam:
- First, prepare a soapy solution with a lot of foam.
- A little foam is applied to the tile surface with a sponge and dirt is easily wiped off. Rubbing loose tiles strongly is not recommended.
- When the stains come off, gently wipe the surface with a dry soft cloth. This removes the remains of foam and water.
- If after wiping, there are residues of detergent, then wipe the panels with toilet paper or soft paper towels. Dry loose paper absorbs moisture well. If the drops of water and foam are not removed, stains will remain after drying.
For painting stamped plates, only water-based emulsion is suitable, which is applied in two layers, and injection tiles can be painted with different paints that do not contain solvents that are aggressive to foam plastic. Do not paint laminated panels.
Tricks of a successful painting
The following tips will help you achieve the best results:
- Water-based paint (like acrylic paint) should be applied as thin as possible. The thick coating will bubble on application and flake off when dry.
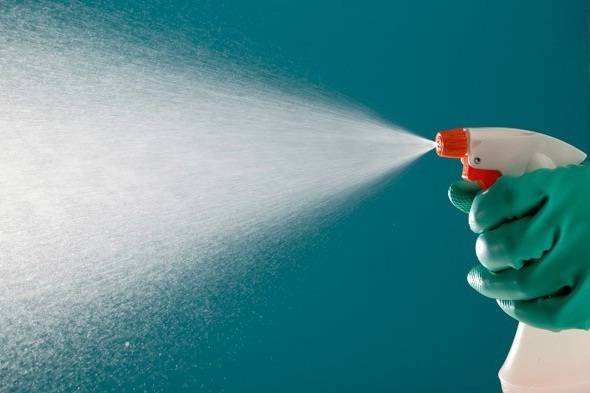
- It is convenient to paint tiles with a relief pattern with a brush. But if possible, it is better to use a paint spray gun. He will spray the enamel in an even layer and easily paint over all the relief elements. In addition, this method of applying paint takes much less time.
- When painting the ceiling, it is not necessary to bring the roller to the very edge, so as not to accidentally stain the wall with paint.
- To check the quality of the painting, you need to direct the light of a bright lamp to the ceiling. It is better to inspect the coating from different sides, illuminating it from different angles.
- Until the paint is completely dry, do not open windows or doors. It is also desirable to protect the surface from heating by the sun's rays. If the sun is shining on the ceiling from the window, it should be curtained.
With this approach, the fresh coating will be smooth and uniform in color. And knowing how to paint a foam plastic ceiling tile correctly, you can create a beautiful, stylish and easy-care ceiling in any room with your own hands.