Choice of materials
For the manufacture of a workbench, it is customary to use two main types of material, which differ significantly in strength and reliability.
- The most durable, strong and comfortable construction is considered to be made of metal. However, in this case, it will not be possible to do without welding, that is, the process of making a workbench will take more time and effort. In addition, you cannot do without welding skills, since it is extremely difficult to process the workpiece yourself. This will definitely require special welding equipment.
- The easiest way to make a workbench is from durable woods. In order to do it yourself, you need a standard set of tools. However, wooden workbenches are less durable and less durable than metal ones.
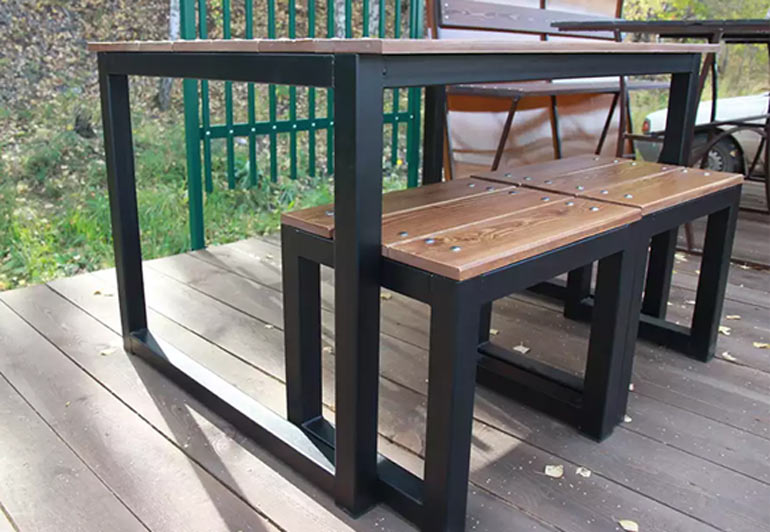
The ideal option would be to combine materials. The frame is best made of wood, but the work surface is made of durable metal. This will create a durable, reliable and comfortable design in just a few hours.
Types of workbenches
Workbenches are classified according to several parameters: by the number of workplaces, for example, single, double and multi-seat; for additional functions - folding (with folding work surfaces) and in the form of cabinets with many pull-out shelves.
Depending on the intended purpose of the equipment, the following types of workbenches are distinguished:
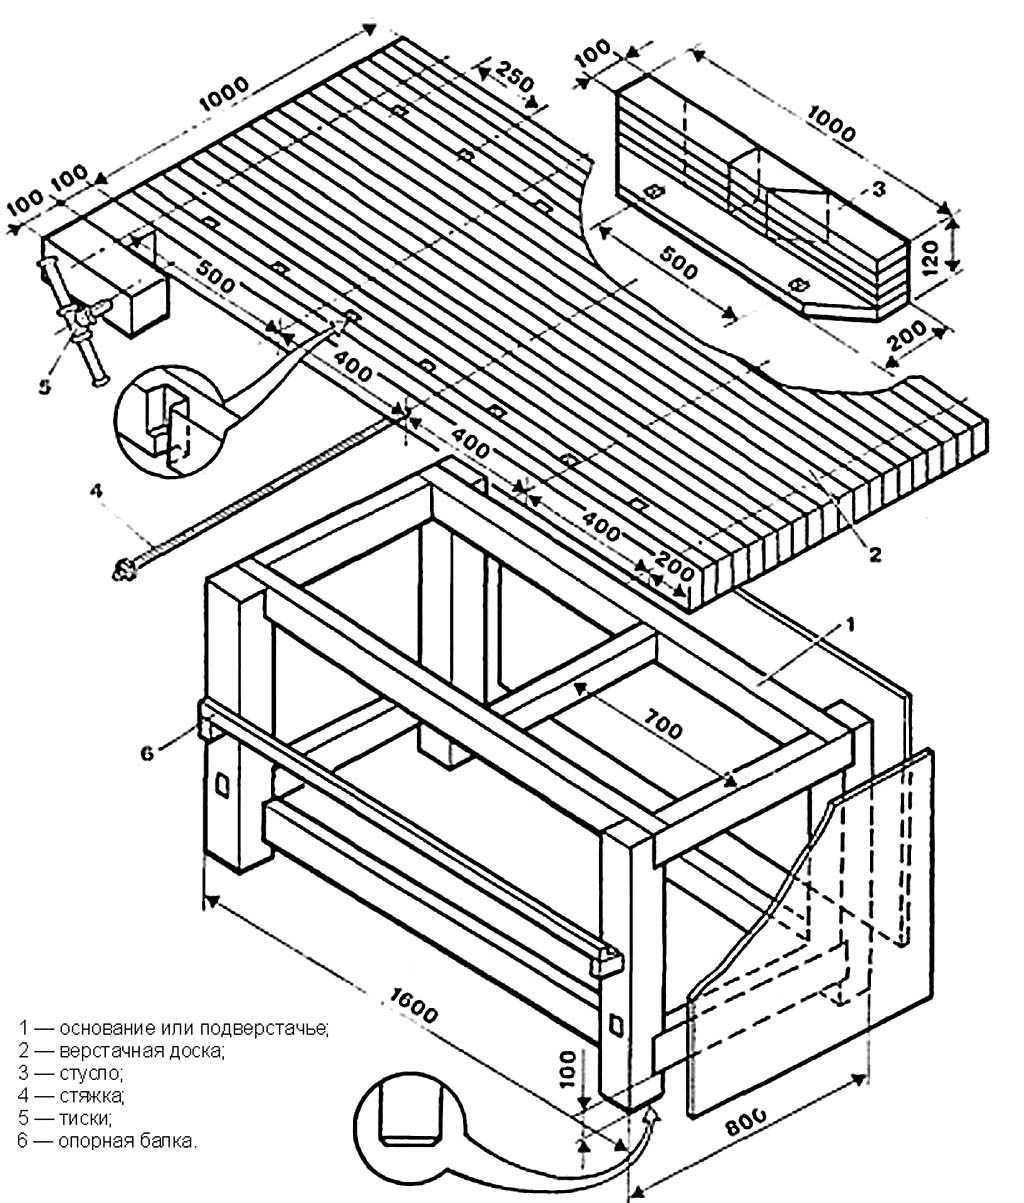
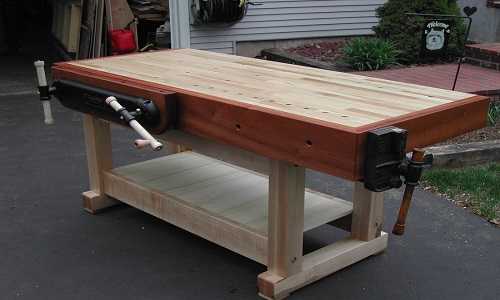
- The least common place is a carpentry workbench. It has a maximum length of up to six meters, which allows very thick and long boards and other sawn timber to be fixed to the surface of the tabletop. In addition, lumber clamps are installed on the surface of the device so that the boards remain stationary during processing.
- The joiner's workbench has a work surface that is always mounted on a sturdy frame. The table top is usually made of strong metal or dense wood (oak or beech), so that various metal parts can be processed on it without fear of damaging the coating. The base is two strong support legs, fastened with longitudinal bars. On the front surface of the tabletop, a working vice is placed to fix metal parts, and on the back, a rectangular cutout is made, which serves to move an additional vice. Holes are made in the countertop to install stops or clamps necessary for carpentry work.
- The best option for a garage is a locksmith workbench, which can be classified as universal. The surface is made mostly of metal, which is ideal when working with hard and heavy metal parts. Any repair and construction work can be performed on the surface of the countertop: sawing, grinding, disassembling the engine, sharpening, cutting and much more. This design is much stronger and more stable than others due to the metal frame.
Three mistakes
Amateurs, sometimes, judging by their designs, are very experienced, knowledgeable and diligent, sometimes make themselves workbenches, on which, figuratively speaking, you can smash a tank with a sledgehammer. They take a lot of time and labor, and hardly less money than a good branded amateur workbench. Repetition in the design for own use of industrial prototypes, intended for intensive work in 3 shifts and a static load of more than a ton, with a service life of 20 years or more, is one of the typical mistakes in the development of workbenches of our own design.

An amateur workbench, reliable but unnecessarily complex, heavy and unwieldy
The second is vibration neglect. Not a clearly felt "game" or "feedback", but a small tremor that significantly complicates the work and reduces its quality. Vibrations are especially strong in workbenches on a metal bed.
The third - repeat the carpentry or locksmith's workbenches; perhaps with some modifications to suit your hand. Meanwhile, there are many designs of workbenches for home / amateur work of a different nature. There are more or less specialized workbenches, or, conversely, universal, temporary from scrap materials, etc.
In this article, we will figure out how to make a workbench taking into account these mistakes, firstly, it is simpler and cheaper in accordance with the range of needs and / or hobbies of the craftsman. Secondly, how to make a general-purpose or universal workbench for special conditions of use - in a cramped garage, for carpentry at a construction site from improvised trash, home for fine precision work, for children.
Preparatory work
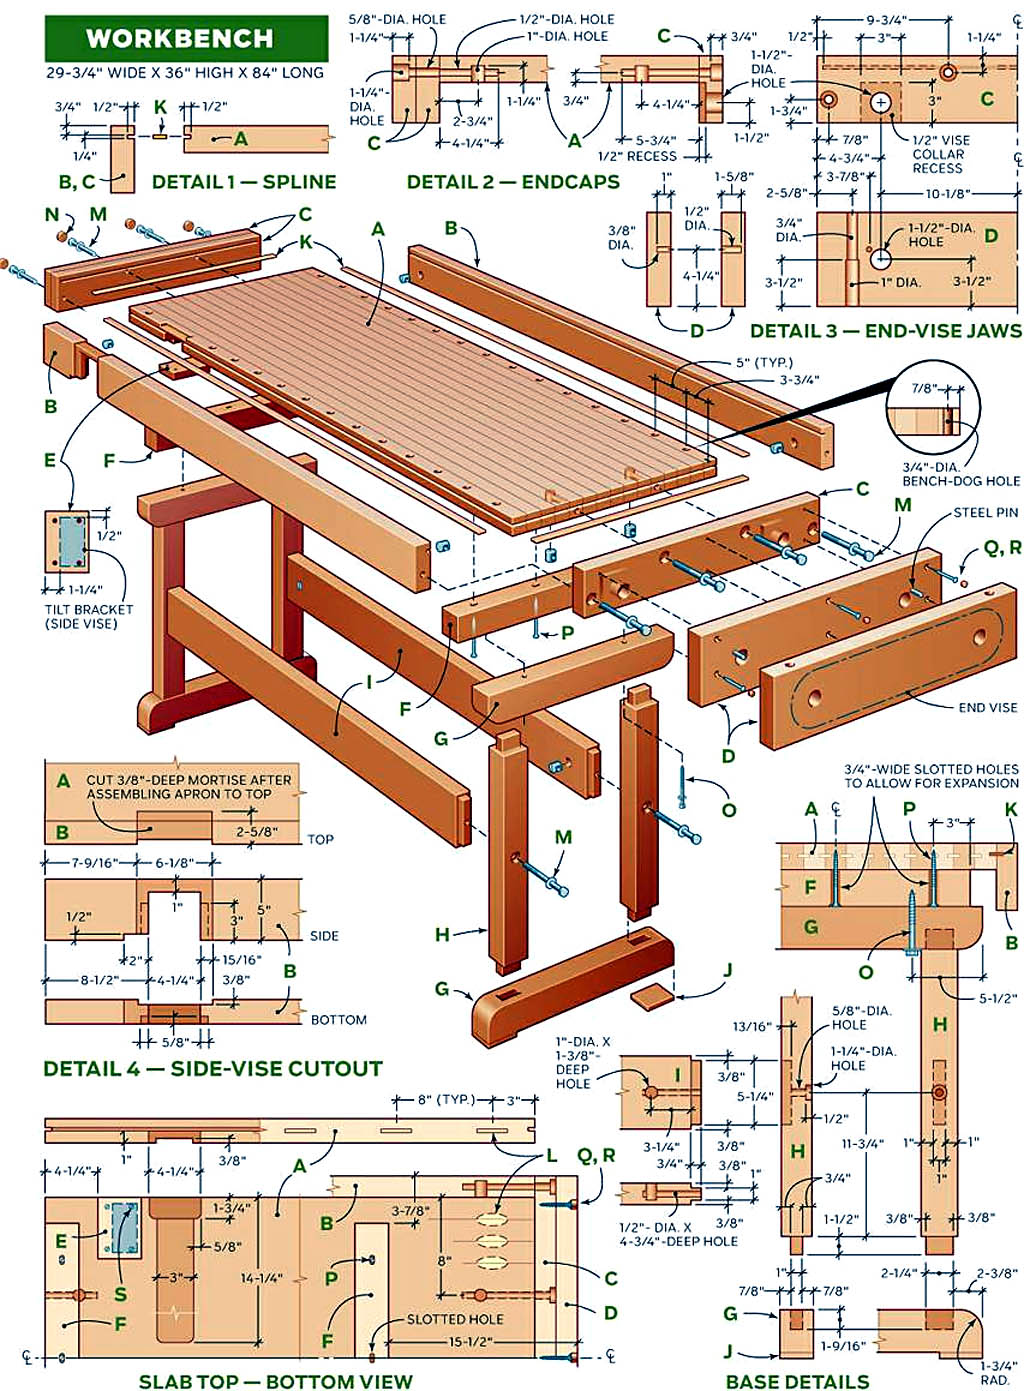
Creating a drawing of a workbench is an obligatory part of the preparatory stage
Preparation for assembling a workbench consists in determining the design features, choosing the size and location of the structure. In order for not a single moment to slip away from attention and be forgotten, it is recommended to create a working drawing of a workbench, made in scale with reference to the dimensions of the garage
Particular attention should be paid to the height of the table top - it differs significantly from the height of a conventional dining table. The best option is the height from the floor to the bend of the elbows of a standing person
Considering the difference in height between different people, assembling the optimal workbench for yourself can be a very rewarding exercise.
In addition, it must be remembered that the width of the tabletop should not be too large. The size of the garage is relatively small, and you often have to work next to a car standing inside.
You will need a place for a person to pass through, so the optimal width is 50 cm. You also need to decide on the size of the shield for the tools that are needed most often.
Workbench construction
If the design of the desktop in the garage is made by hand, then first of all you need to carefully think over every detail, figure out where the tools will be placed, what work will be carried out on the workbench. The model of the table in the garage depends on this.

Metal workbench
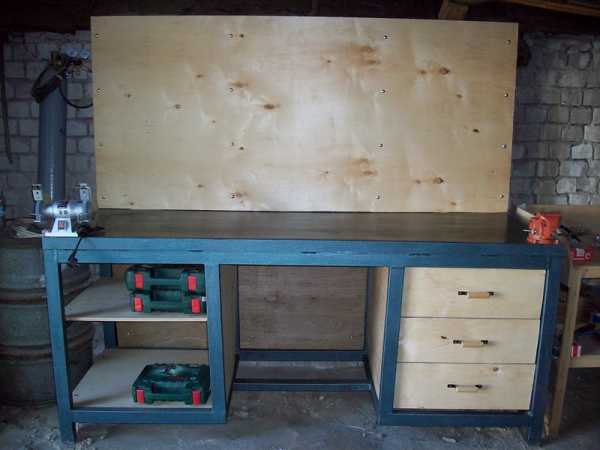
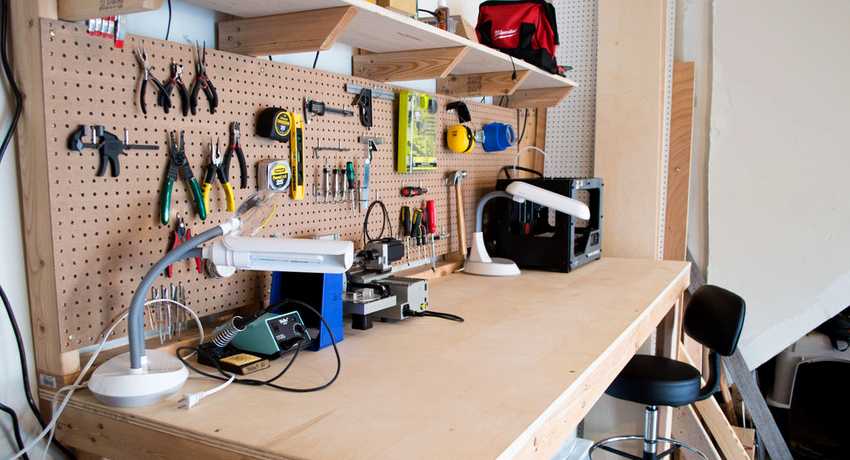
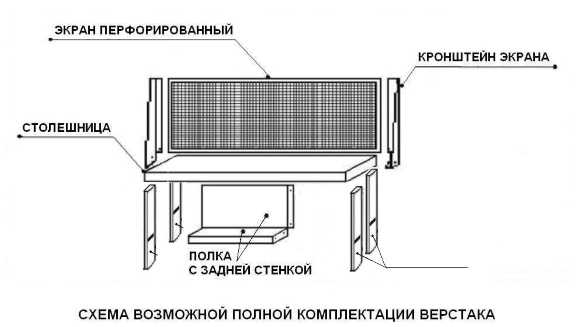
Standard models are often equipped with drawers that can be made of wood or metal. Also, the design of the table can be supplemented with shelves, a power shield for a hanging tool, which will always be at hand. But most importantly, the workbench must be stable, durable and reliable.
Peculiarities
A locksmith's workbench is, in fact, a table on which work with metal and wood is performed. Such requirements are imposed on him.
- Strength and rigidity. The machine is designed to work with shock loading.
- Stability. He must not stagger.
- The convenience of use.
- Acceptable cost.
Therefore, most home craftsmen prefer to make workbenches with their own hands. This not only saves a lot of money, but also allows you to get exactly the design you need.
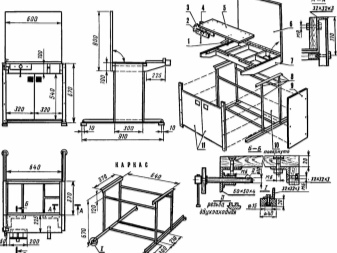
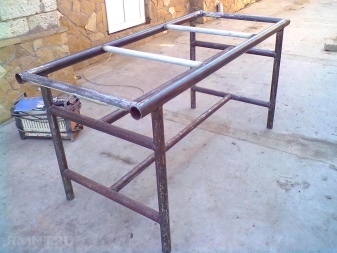
Before self-production, pay attention to a number of features
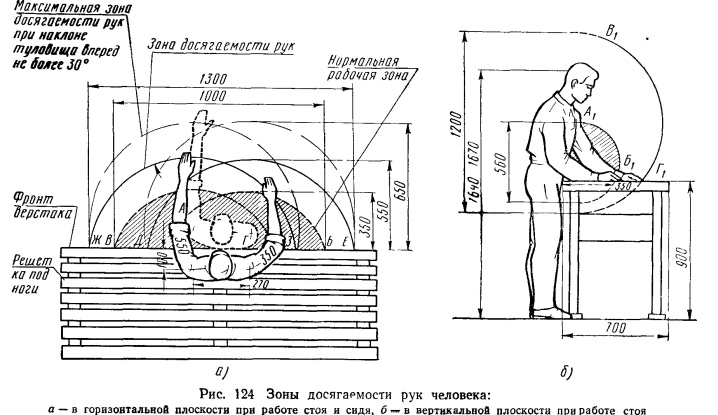
Only a well-designed workbench will be comfortable and ergonomic, so always take into account the height and build of the master. The height of the working surface should be at the level of the navel. When working, the arms should be slightly bent, and the hands should be at the level of the trouser belt.
The length of the table doesn't really matter. But in spacious rooms it is recommended to do more for processing larger parts. In the working position, it is advisable to reach with your hands to the edges of the table or, in extreme cases, take a half-step-step to the side.
If the workbench is large, the structure can be collapsible. But keep in mind that bolted connections are less strong than welded ones.The alternative is to make some workbenches, place them side by side and bolt them together.
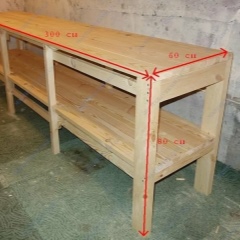
The width (or depth) of the table is in the range of 50-60 cm. This is quite enough.
Well, if the workbench has a niche for legs, then it is convenient to work with it while sitting. If not, more tools can be placed on the lower shelf, and the rigidity of the entire structure is increased.
The locksmith's workbench, in principle, does not have excessive strength
The stiffer the structure, the better, because heavy tools with shock loading are used on the table.
Pay special attention to sustainability. If the workbench wobbles, it will not work properly.
In a particularly difficult case, it will fall on a person with all its mass, and then serious injuries cannot be avoided. Therefore, heavy duty machines are anchored to the floor and / or wall with anchor bolts.
Some tables have 6 or more legs. It is stronger, but on a crooked floor, it will sway (and in most workshops, the floor is uneven). Therefore, the legs must be adjustable in length. By the way, 4 legs are enough for most workbenches.
The center of gravity should be as low as possible, so the heaviest instruments should lie on the lower tiers. Some craftsmen additionally weld ballast. The heavier the workbench, the better, as it becomes more stable and less responsive to impacts. True, it is more difficult to transport it, but this is extremely rare.
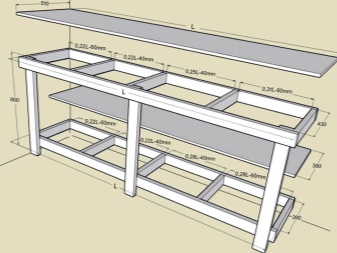
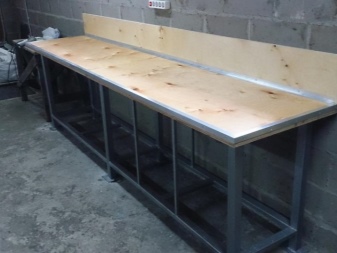
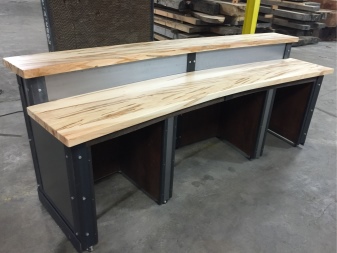
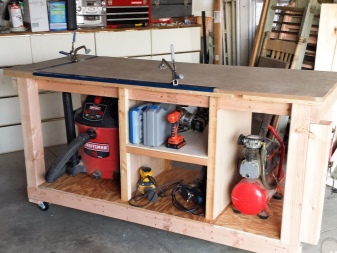
This is, perhaps, all that concerns general requirements. Let's start designing.
Preparatory stage
Competent design is the key to successful work. The dimensions of the workbench should correspond to the size of the room and the height of the master, and the structure should correspond to the types of work performed. In this case, the table can be straight or angular (it is not recommended to make the table U-shaped).

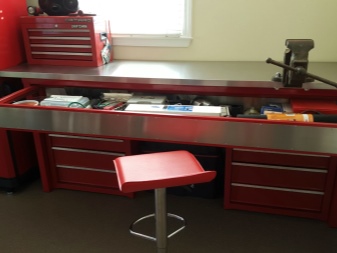
You can use computer-aided design. There are many programs for building 3D models (Compass 3D, SOLIDWORKS, AutoCAD) that have libraries of materials and fasteners. In them, you can calculate the cost of material, select the necessary rental and adjust the design. Moreover, the built-in kernel allows you to virtually apply effort and identify weak structural elements.
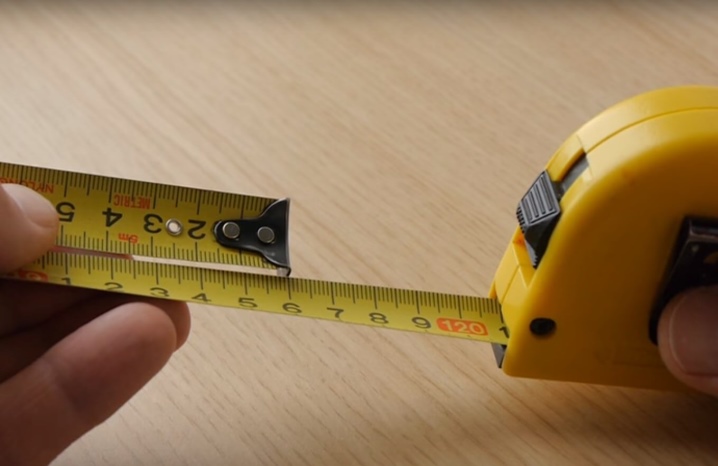
In addition, in the process of work, you can always see the subtleties of the design. And one more advantage of modeling - according to the prepared model, you can make drawings and order a work from a professional welder.
If it didn't work out with the model, you still need to prepare sketches and drawings in a scale convenient for you (not necessarily in accordance with GOST). Only very experienced craftsmen can do without design, and the result will not always be positive.
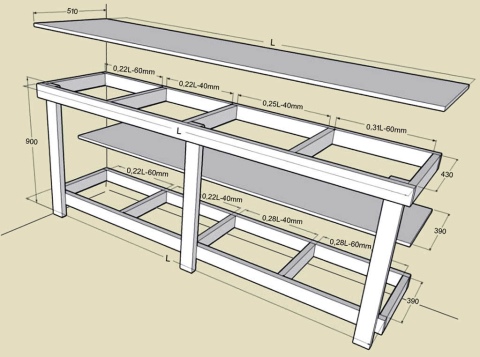
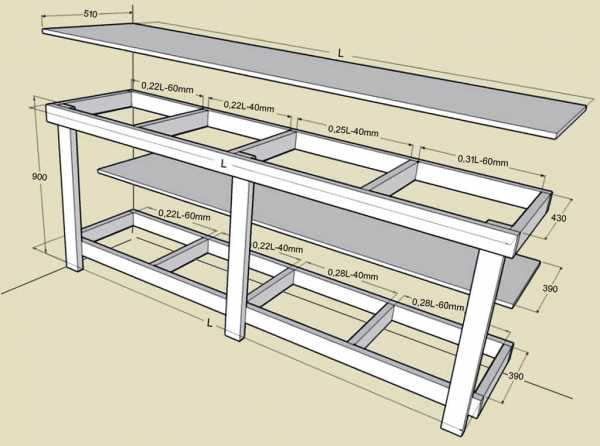
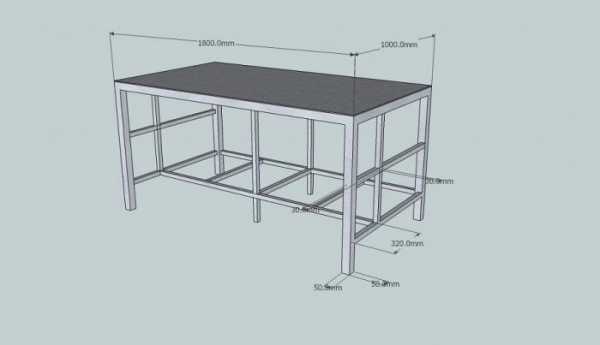
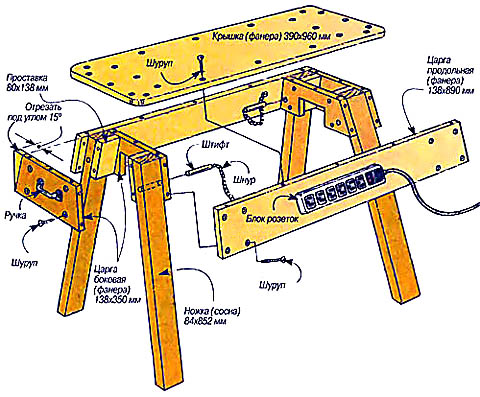
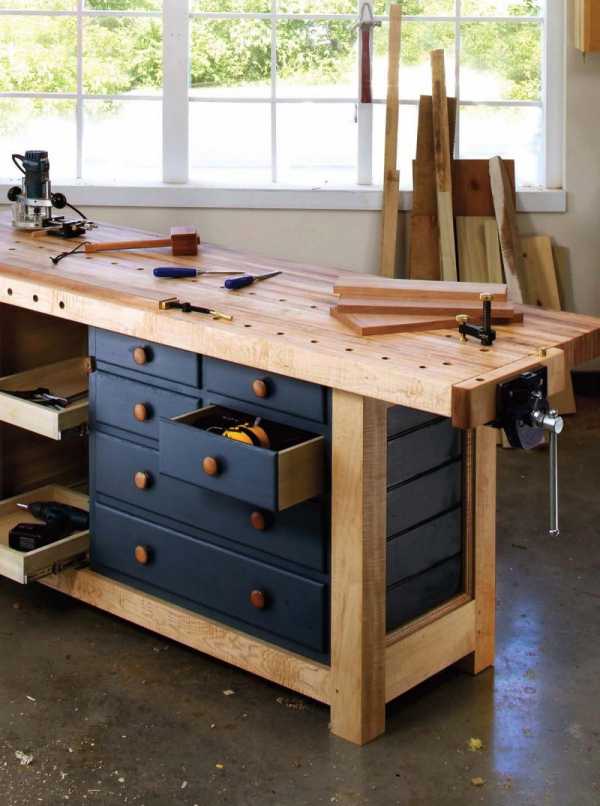
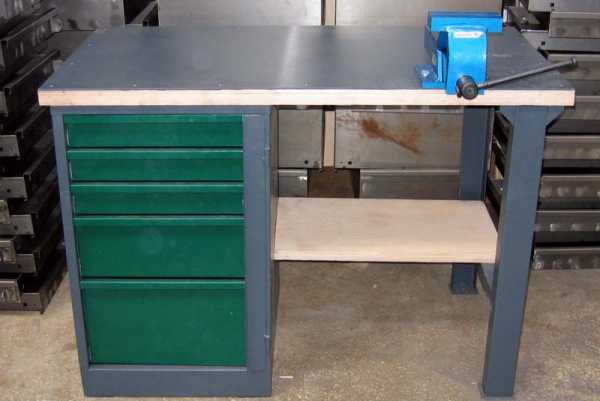
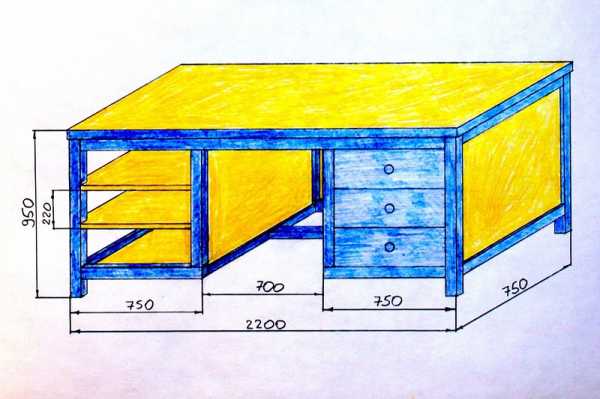
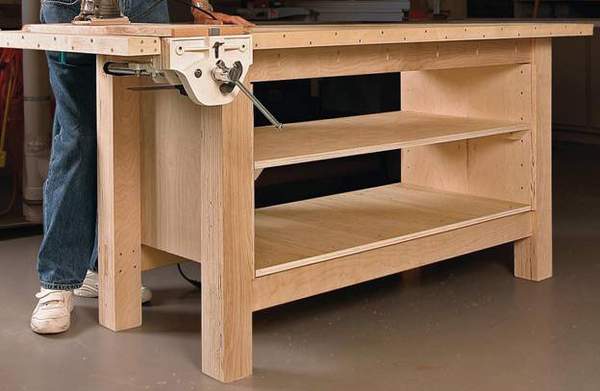
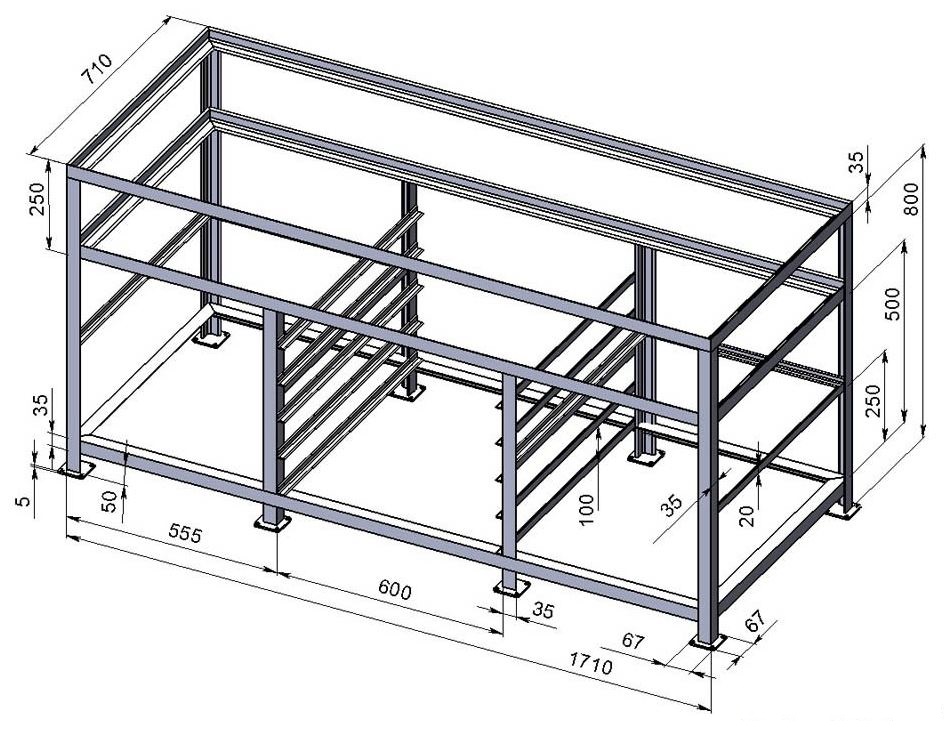
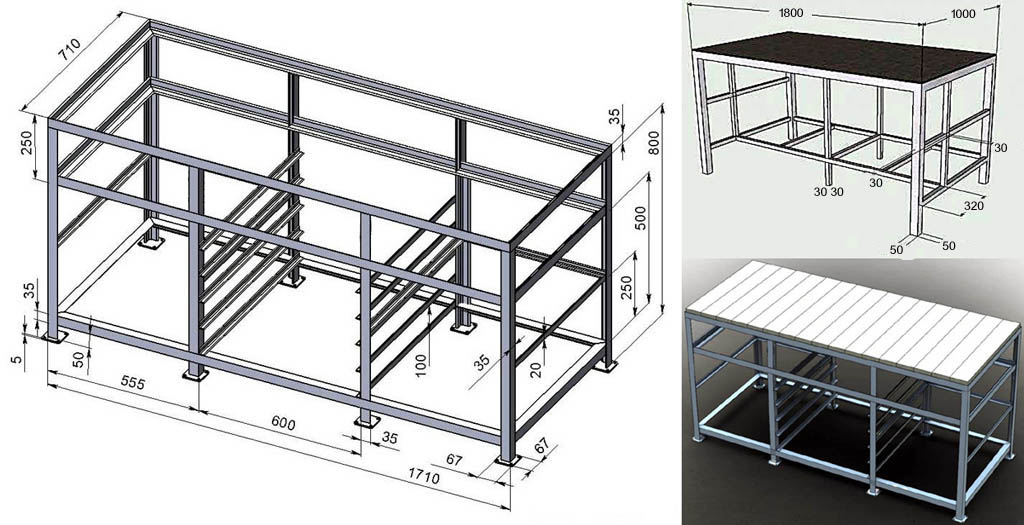
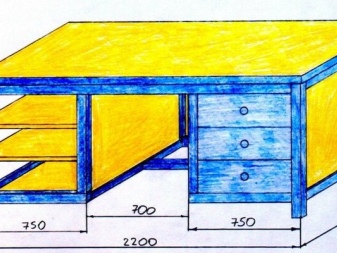
We will give some interesting layouts of locksmith's workbenches with basic dimensions:
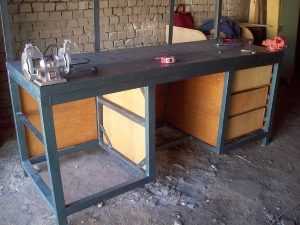
- here, metal elements are shown in blue, and wooden elements are shown in yellow;
- a couple more worthy designs.

Materials and components
As you can see, workbenches are very different in design, and materials can be very different. This is usually what is in the garage, but they can also be purchased.
For example, to make the frame of such a workbench, you will need:
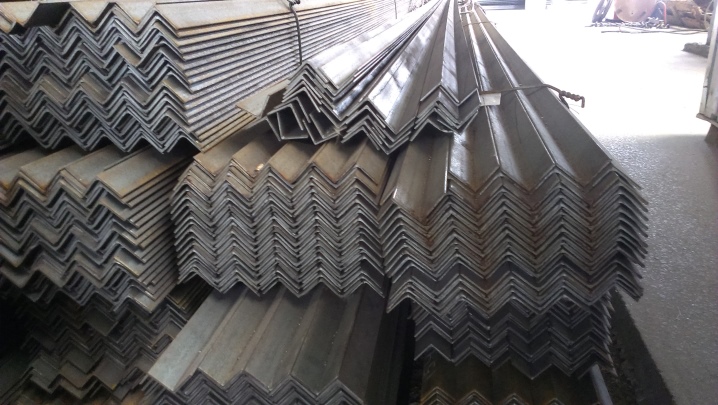
- corner 50x50x4 6.4 m long;
- pipe 60x40x2 24 m long;
- corner 40x40x4 6.75 m long;
- strip 40x4 8 m long.
A total of 121 kg of metal is needed. Its quantity may vary depending on the size.
For such a model you will need:
- 225 m square pipe;
- 8 m corner;
- 10 m strips measuring 40x4 mm.
Rental sizes may vary. The main rule is that the larger it is, the stronger and heavier the structure is.
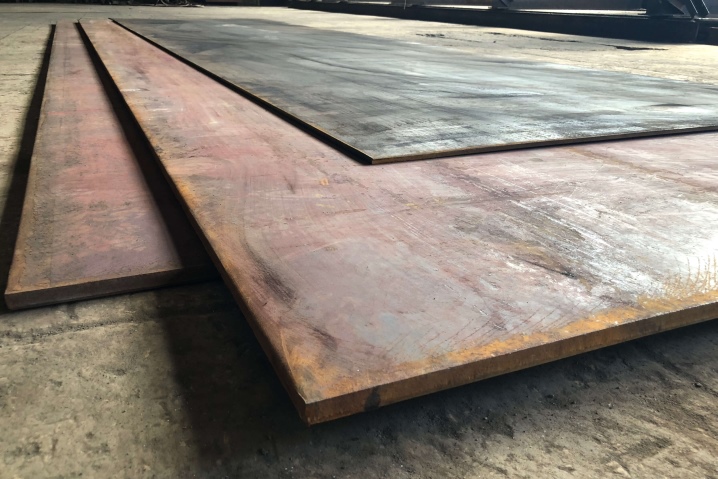
Such a thick area can be small and used as an anvil, while the other part of the table top can be relatively thin. The main thing is to ensure the reliability of the connection.
Think about other points as well.
- For the boxes and toolbox, 5 mm plywood is required. And if you want to make an outlet, you need an extension cord and a wire.
- In addition, bolts with washers and nuts are required.
- For finishing work you need a primer, paint and varnish.


Required tools
To make a workbench, we need:
- "Grinder" or hacksaw for metal;
- cutting and emery wheels for her;
- saw for wood;
- welding machine and accessories;
- drill;
- roulette;
- chalk for marking.
After everything is ready, we start manufacturing.
Assembly stages
First you need to prepare the previously measured workpieces. To do this, cut off all the required metal and wooden parts with a grinder, after which you can start assembling the equipment.
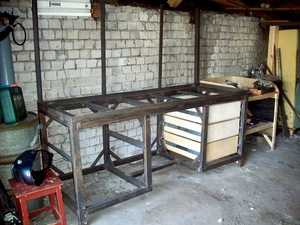
- The first step is to weld the main elements of the frame. To do this, two parts of the frame are connected: the lower and the upper, after which the body of the workbench is assembled, and four legs are welded to it. The height of the legs, which are made from pipe blanks, should not be higher than one meter. The main part of the structure is ready.
- To give the structure strength, it should be tightened. To do this, it will be necessary to weld additional stiffening ribs, which consist of corners and steel strips.
- The next step is to make a protective screen from steel sheet. To do this, weld racks from the corners at the corners of the tabletop, and then overlap them from above with a horizontal corner over the entire surface. To strengthen the structure, additional stiffeners can be welded on. After that, the screen is sheathed with a sheet of durable plywood.
- Drawers and shelves are made of plywood. They are collected using small corners. After that, you should mount the guide elements and fix the handles, treat with impregnation and paint with paint.
- The selected material is installed on top of the tabletop - it can be a sheet of plywood, several boards or DSP. Then the table top is fixed to the frame with self-tapping screws.
- On top of the installed and fixed work surface, a steel sheet is again attached, cut off along the perimeter of the table and painted over with paint.
- After that, it remains to insert the previously prepared drawers and shelves, as well as all the fixing elements on the screen for attaching various tools.
- At the end, locksmith tools are installed and attached on top of the tabletop: vice, sharpening, and so on. Garage inventory is laid out on the shelves, and tools are hung on the screen.
At the end of all work, the structural elements must be degreased and painted over. It is best to select hammer paint, since it is it that is resistant to many external influences and mechanical damage.
What material is better to make a do-it-yourself workbench in the garage
There are several options for making a desktop. By the type of material used for the manufacture of workbenches are:
- wooden;
- metal;
- combined.
Combined workbenches use a wood base and sheet metal to reinforce the worktop. In addition, the design contains metal combs, as well as threaded screws. Combined devices include metal tables with drawers and tool shelves made of wood.
Advantages and disadvantages of a wooden workbench in a garage
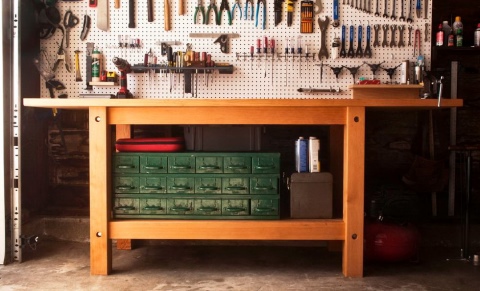
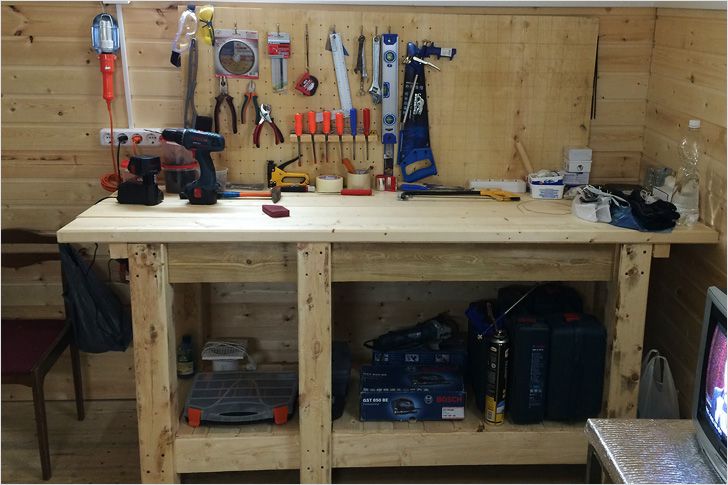
The choice of material for making a table is primarily determined by its purpose. A wooden workbench in a garage is usually installed in cases where you need to quickly organize a workplace to perform simple operations. To create the frame part, you can use boards measuring 4x8 cm or a bar measuring 5x10 cm. The rectangular base is assembled taking into account standard dimensions, and its components are fixed with nails or self-tapping screws.
A wooden workbench is installed in cases where it is necessary to quickly organize a workplace
To strengthen the structure, wooden spacers are installed in the upper and lower parts between the legs. The lower ones, which are located at a height of 15 cm from the floor, can be used as a base for a shelf.For assembling the countertop, a planed grooved board made of oak or beech is suitable. You can also use a couple of 1.8 cm thick plywood sheets that are glued together and trimmed around the edge.
To create a do-it-yourself workbench in a garage made of wood does not require much effort and skills in handling a welding machine. The set of tools is minimal (electric jigsaw and drill), and the process itself takes much less time than making a metal structure.
On the other hand, a wooden table has many disadvantages:
- unable to withstand significant power loads;
- the working surface is not designed for installing several tools, which does not allow using heavy locksmith's vice and sharpening or drilling at the same time;
- the wooden frame is short-lived;
- wood reacts poorly to moisture and contact with various paints, oils and other substances;
- there is a fire hazard.
The disadvantage of a wooden workbench is the inability to withstand large power loads
Advantages and Disadvantages of a Metal Garage Workbench
To assemble a welder's table with your own hands, you will need special equipment and skills in handling it. The elements of the workbench are connected by welding. Not every craftsman can make a high-quality metal structure. In addition, the table turns out to be very heavy, and the material itself, unlike wood, is not cheap.
On the other hand, metal workbenches in a garage have many advantages that many car owners will appreciate:
- compactness with a high degree of reliability;
- the ability to withstand severe mechanical stress;
- increased weight of the structure, making it more stable;
- a wide range of modifications (the design can be folding, mobile, shortened or with a folding table top);
- strength and reliability of all connections;
- fire safety;
- durability and ease of care;
- the absence of sharp corners makes the tabletop safe;
- the working surface allows the installation of two sets of vices;
- due to the high strength of the material on the table, you can perform cutting and sawing, as well as grinding and turning metal and wood parts;
- the space under the countertop can be used to install shelves, organizers, nets and tool boxes;
- metal shavings do not damage the surface.
Assembling the frame
Assembling the structure of a locksmith's workbench is not difficult if you have the skill to work with a welding machine. Thanks to the prepared details, everything becomes simple and clear. The best solution would be to use a semi-automatic rather than arc welding. In this case, the material heats up to the required temperature and does not burn out from the electrode. The seams are neat and durable.
The first step is to make a rectangular base for the construction of a locksmith's workbench. This will require two workpieces, the length of which is equal to the depth of the table, and two workpieces, the length of which is equal to the width of the workbench. The ends are cut with a grinder at an angle of 45 degrees to ensure a perfect abutment knot. Workbench blanks are laid out on a flat horizontal surface. Initially, they need to be fixed with small tacks and trimmed if necessary. Next, a full seam is applied to the structure. In this case, it will be necessary to make penetration on the other side.
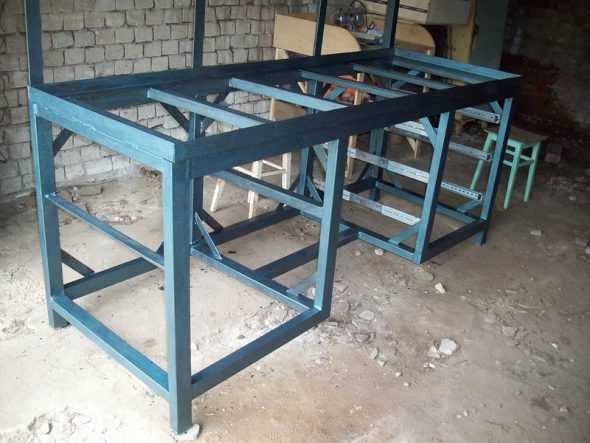
The next step is to install four locksmith workbench posts. They are welded to the prepared frame. They must be placed vertically. After that, the bottom strapping is performed on three sides. At the same stage, vertical stands are welded under the stand for the tool, which will be located above the locksmith's workbench. The next step is the installation of frames for boxes and shelves, as seen in the photo above.At the same time, an additional crossbar is fixed between them, but it is welded with an offset to the middle, so that it is convenient to stand behind the locksmith's workbench.
Locksmith workbench application
The following types of work are performed on such a table:
- finishing;
- fitting and assembly;
- adjusting;
- assembly;
- adjustment;
- straightening and others.
Such equipment is used not only in ancillary premises, but even at car service stations, car services and large industrial enterprises.
A reliable locksmith table is additionally equipped with lighting units in order to process and repair various products on them, vice and other devices
The workbench is intended for a more efficient use of the workplace, therefore, when creating it with your own hands, the specifics of production and the layout of the premises are taken into account
Making a locksmith workbench
First you need to prepare a tool for work:
- welding machine;
- drill;
- grinder, grinding disc, metal wheel;
- jigsaw (for cutting plywood);
- screwdriver;
- level;
- roulette.
Materials you need:
steel corners;
square tube;
steel strip;
wooden boards;
plywood;
guides;
screws;
self-tapping screws for metal;
anchor bolts;
paint for metal and wood.
According to the plan, a workbench with dimensions of 220x75 cm should turn out.
The main stages of making a locksmith's workbench:
- We cut out the prepared material. The frame of the workbench will be made from the profile pipe. The corner is cut into pieces, then a rigid structure is created with its help. The steel corner will still go to the framing of the countertop.
- With the help of a steel strip, guides are made for attaching the side panels. Brackets are also made to secure plywood and boxes. Boxes are made of plywood.
- We weld a rigid frame. To begin with, the details of the countertop are taken - shaped pipes:
2 pcs. - 2200 mm long .;
2 pcs. - 750 mm long.
To increase the strength of the countertop, a couple of pipes are welded in with a step of 40 cm.
- 4 lateral legs are welded along the edges of the structure - 900 mm long. Rigid jumpers are welded between them, which will increase the strength of the frame.
- We weld the structure for the boxes. Square frames are made of steel pipes. They are welded to the worktop on both sides. For greater strength, another pair of longitudinal pipes are welded to them.
- We make a tabletop frame from welded steel corners:
2 pcs. - 750 mm long .;
2 pcs. - 2200 mm long.
Boards are then laid inside the finished frame.
- A frame made of steel corners is laid on a frame made of shaped pipes and welded. The table top will be strong and tough.
- We strengthen the structure. Brackets are cut from a steel strip - 24 pieces are needed, then they are welded on the sides of the table. A hole is made in the center of each bracket in order to attach the plywood table walls to the frame.
- We install boxes for the workbench. We cut the plywood sheets into parts of the required dimensions, which are then connected with screws. You can build many small boxes or a couple of large ones, depending on their purpose.
- We weld metal strips with holes between the sides of the drawer sections. The slide for the drawer guides is installed here.
- Boards (50 mm thick) are cut to the required length - for the table top. Then they are laid along or across the table.
- The surface of the wooden table is sanded. Boards along the edge of the table are screwed to the structure with self-tapping screws. Then a steel sheet is attached to the boards with hidden self-tapping screws, which is pre-painted on both sides with a rust converter or paint.
- We install the boxes on the guides. We attach the plywood to the side walls; it also needs to be treated with a protective compound. We install the power shield and shelves above the table.
The metal frame can withstand a load of more than a hundred kilograms. On it, you can easily sort out the car engine. Make a do-it-yourself locksmith's workbench on the shoulder of any home craftsman.

