G-shaped
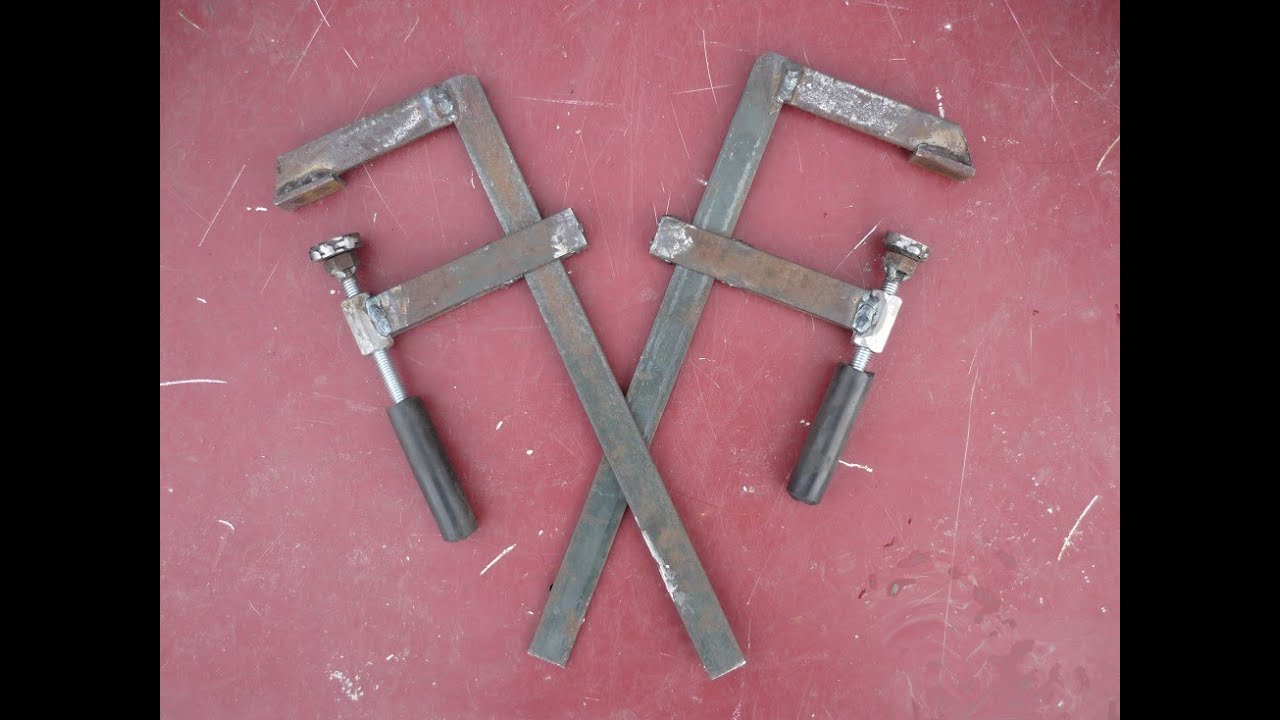
Factory made G-clamp frames are cast. In a garage or shed, even in a forge on your site, you cannot organize a steel mill. Since G-clamps, as the most "gripping" ones, are mainly used in plumbing and welding works with rather long and / or heavy parts, then a home-made G-clamp must be made of welded metal or solid.
Craftsmen often weld steel clamps for themselves, pos. 1 in the figure:

Homemade G-Clamps
Apparently, copying the profile of the beds of factory products, which in this case is wrong. The profiles of the cast clamps are shown in pos. 2
Pay attention to fairings and fillets (shown by arrows). Smoothing the profile is necessary to avoid the concentration of mechanical stresses: they "like" corners and crevices, like bed bugs
But the weld doesn't work like a fillet! No, the clamp will most likely not break or bend. However, by the recoil of the clamped part, the bed will lead a little, and it will be difficult to achieve accurate fixation, and the rotation of the part when tightening the clamp is not excluded.
Self-made clamps from channel sections (item 3) are quite reliable. Disadvantages - laborious, disproportionately heavy compared to the working width. You can cut the channel into the frame of the clamps if you need to compress the parts very hard. The optimal version of the clamps for normal work is from a profile pipe of square section, pos. 4. Depending on the standard size and wall thickness of the workpiece, the clamps from the professional pipe can be made for a working width of up to 1 m or more, see video:
G-E
A type of G-clamp is a clamping clamp, which could be conventionally called a GE-clamp. Clamps are well known to the builders of small boats made of wood, however, they will be very useful in small wooden construction (for example, a country house or frame house, utility block, etc.).
Drawings of the clamping clamp and the method of their application are shown in Fig.:

Drawings and the procedure for using clamping clamps
For example, when sewing, say, a crossbar (rafter structure) of a roof, each next board is first tightly pressed against the previous one, and only then is attached to the rafter beams. Accordingly, the reliability and durability of the entire roofing cake is greatly enhanced.
Installer and Fasteners
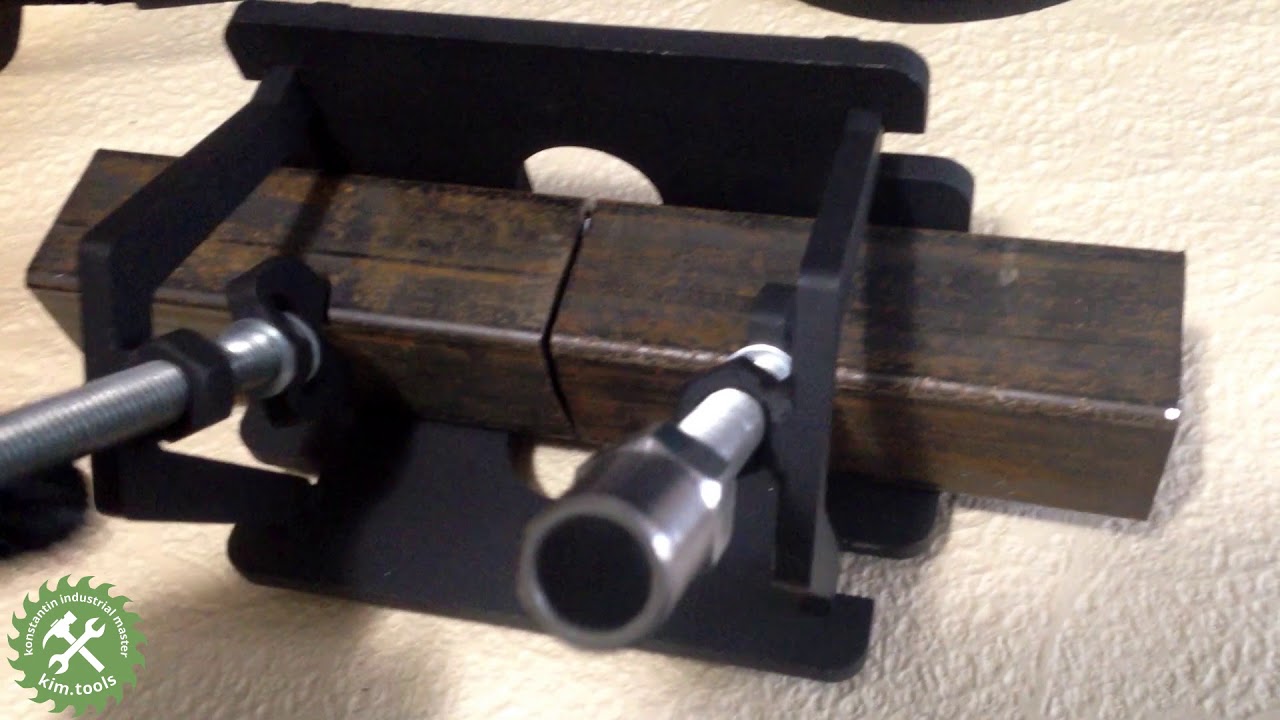
Most of us have to do such work as welding of shaped pipes very often. Therefore, a large number of different devices have been developed for this process.
Centralizers. Thanks to them, the alignment of the parts to be welded is maintained, as well as the alignment of the edges at the ends. They are divided into indoor and outdoor.

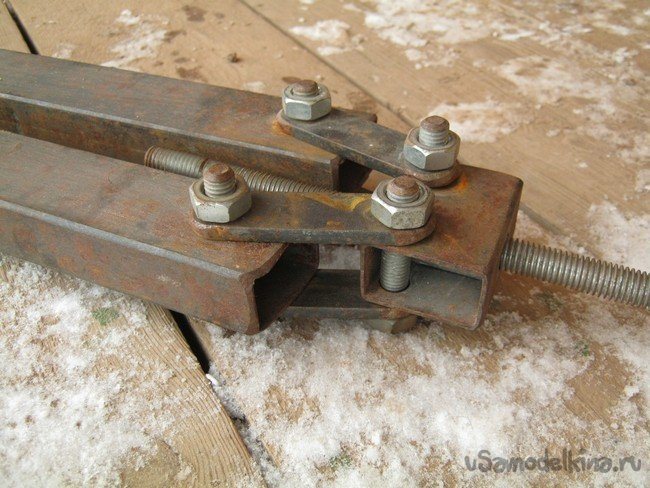
External mechanisms are used much more often. This mechanism is made up of several hinged links. Between themselves, they create a closed loop.
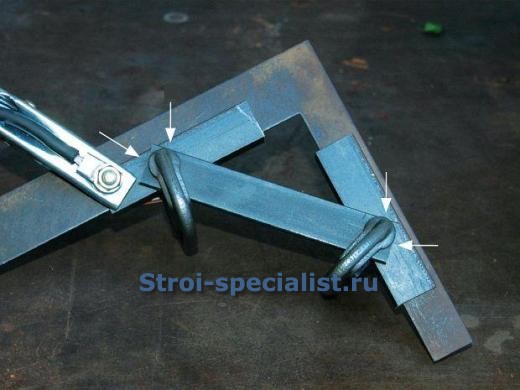
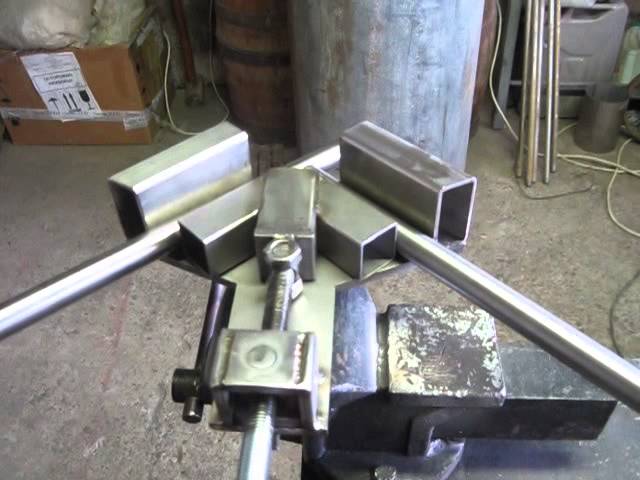
In addition, the alignment of the workpieces is well ensured by homemade structures, which are made from a corner and clamps welded onto it.
Mechanisms with magnets
Magnetic squares. These attachments for welding work are very widely used, and they come in a variety of shapes. They connect sheet blanks, frame structures, and so on in the desired location.

Such devices are used not only in the shape of a square, but also of a different type. The strength of the magnet in them allows you to firmly install a part of the profile structure in the required location, and during the welding process, the parts remain stationary.
DIY welding fixtures: clamp
It is not difficult to make welding devices with your own hands. Many craftsmen prefer hand-made devices for work, since store options are not reliable enough.

You need to prepare:
- Steel sheet with a thickness of 9 to 11 mm.
- Three nuts.
- Washer. It is needed with a large diameter.
- Tube billet with external thread corresponding to the thread on the nut.
DIY making process
Three strips with a width of 4 cm and a length of 50 cm, 25 cm and 10 cm are cut out of a steel sheet. Then two more rectangular plates are prepared for fastening the movable element and for providing an abutment in the static part of the device.
Video: DIY movie 1
After that, an auxiliary is welded to the base of the clamp. All this together creates an L-shaped shape. A second rectangular sheet is welded to the smaller side of the structure. Washers are also welded together.
The nuts are placed “on the edge” to the moving part in such a way that the twisted rod is parallel to the base of the clamp.
Video: DIY movie 2
Welding is performed on the outside of the first rectangular sheet. A movable device is attached to its inner edges. At the end, washers are welded to the edge of the rod, they are placed flat.
Video: DIY movie 3
Homemade device with magnets
You need to prepare:
- A square metal sheet plate with a side size of 25 cm.
- Square tube.
- Three small bolts and three nuts.
- Steel cylinder with a diameter of 4.5 mm.
- Welding machine, drill, drill.
On different sides of the metal sheet plate, two pipes of 15 and 20 cm are welded.Then two auxiliary parts are made.
Video: DIY movie 4
The first is U-shaped (from blanks of 10 cm). The second is an isosceles trapezoid. The base is 11.5 and 5.4 cm, and the sides are 10 cm.
Assemble devices with permanent magnets should be in a strict sequence of fastening the elements. Such devices do an excellent job with the tasks assigned to them.
Devices for welding shaped pipes are indispensable in welding. They greatly facilitate the entire welding process.
Varieties and principles of work
There are two main types of clamps: for joinery and metal. It is possible to use metal clamps for working with wood, but you constantly have to put spacers under the sponges, otherwise the product will be damaged. In carpentry work, it is quite often necessary to use corner clamps - whether it is tightening two frames, where an important aspect is to maintain an angle of 90 degrees, or assembling entrance and interior doors. When gluing the main door frame, clamps are indispensable. On the Internet, you can find a wide variety of options for making clamps with your own hands, drawings are also present. Here are the most common options.
A drawing of a homemade carpentry clamp is shown in the figure.
For assembly, you need: stops, a block of clips, movable blocks and strips, which can be made from 3/4 plywood, and the top and bottom can be made from plywood with a thickness of 1.2 mm. The angle clamp is easy to assemble and the plywood will not scratch the surfaces of the plastic wood and other surfaces. The material will be needed quite little, which significantly reduces the price of the product. The carpentry version of a homemade clamp is simple in design and provides good compression of the parts together. You can make a tool from scrap materials:
- Two bars 4-5 cm thick, the length can be selected depending on the tasks.
- Two furniture nuts.
- Two hairpins.
- Wing nuts for studs.
The bars need to be shaped like mites. This can be done with a jigsaw or a regular wood saw.Then the bars are leaned against each other, and two holes are drilled into them. Studs are screwed into furniture nuts and counter. Compression of two wooden planks occurs with the help of lambs. The cheeks of the product must be made of soft woods in order not to damage the surface during compression.
Band clamps are very popular among carpenters. They can be used to compress large objects. The manufacturing sequence is as follows.
This type provides strong compression, and the material for assembly is sure to be found in every workshop.
How to do it?
If you want to save money, but at the same time you cannot do without additional "third hands", then we can offer the option of a homemade clamp. It is quite easy to make such a device with the help of materials at hand.

Prepare the necessary materials and blanks. You will need a metal sheet on which steel pipes 20 centimeters long are located. The pipes should be placed perpendicular to each other and then welded to the sheet from all sides
It is important to carefully weld each piece to ensure that the clamp is secure.
Create a drawing of the clamp. After welding all the parts, it is supposed to get rid of all unnecessary parts.
In the next step, the remaining parts of the pipes will be soldered from above and below to the main ones. You will have to arrange the pieces of sheet metal in the same way, but so that they are parallel to each other. Another metal pipe will be used with a through hole in the middle. In the future, this scheme will be useful to you when creating a clamp.
We mount the device and check the angle. Be sure to stock up on the necessary elements: a bolt, several nuts, a handle, a clamp. From the corner of the triangle made, you need to draw the so-called bisector. And at this angle, a pipe with a through hole is installed. After that, two nuts and a bolt must be attached to this hole. One nut is screwed on until the pipe is attached, and the other is tightly clamped by hand from the other end. Using welding, you need to attach them to the product.
The bolt from this hole should be easily unscrewed. Next, you will need a pre-prepared centimeter pipe so that it can pass between parallel triangular metal sheets. Then take a profile pipe of the same size as the previous part with a hole of about one centimeter. Slide a nut onto this U-shaped workpiece with a small space to allow the stud to twist easily. It is necessary to solder the nut to the stud first, and later - a piece of a centimeter pipe to the U-shaped part, making holes on the second particle.
The next step is to weld the second and third parts together. Weld the profile tube with the pre-fitted stud to the first piece.
We get a ready-made clamp. You can test a DIY fixture.

Homemade quick-clamping clamp
Consider the option of making a quick-clamping clamp with your own hands, with which you can quickly fasten the parts to each other with one hand and fix them on the workbench for further work. This design can be used for woodworking, furniture repair, shoes, and so on. Alternatively, quick-clamping tools can be used not only when compressing workpieces, but also during work when a spacer of parts is needed.
To make a clamp with our own hands, we need a sealant gun, a wooden block measuring 500x50x40 mm. For the manufacture of sponges, we will use two rectangular bars measuring 10x80x20 mm. To use the gun, it needs to be modified, for this you need to cut off the part in it where the nose of the sealant bottle rests and align with a hammer the plate that connects the gun itself with its removed part.Then we attach the pistol with this plate to the wide side of the 500x50x40 mm bar. using self-tapping screws.
In this design, the sponge bars will move along the 500x50x40 bar, for this we make through square holes in these bars. Putting one of the sponges on a large block, we securely fasten it to the pistol press circle with self-tapping screws. Then, putting on the second sponge, we drill several through holes through the clamp into a large block. Several holes are made in order to be able to adjust the width. For fixing, we will use a bolt with a nut of a suitable diameter.
As a result, it turns out that when you press the trigger mechanism of the pistol, the press will move one sponge to another along the bar. In places where the jaws come into contact with parts, insert inserts made of soft material, such as rubber or plastic. The compressive force of a self-made clamp can reach 300 kg, the installation of the tool can be carried out with one hand. The clamp is also released with one press.
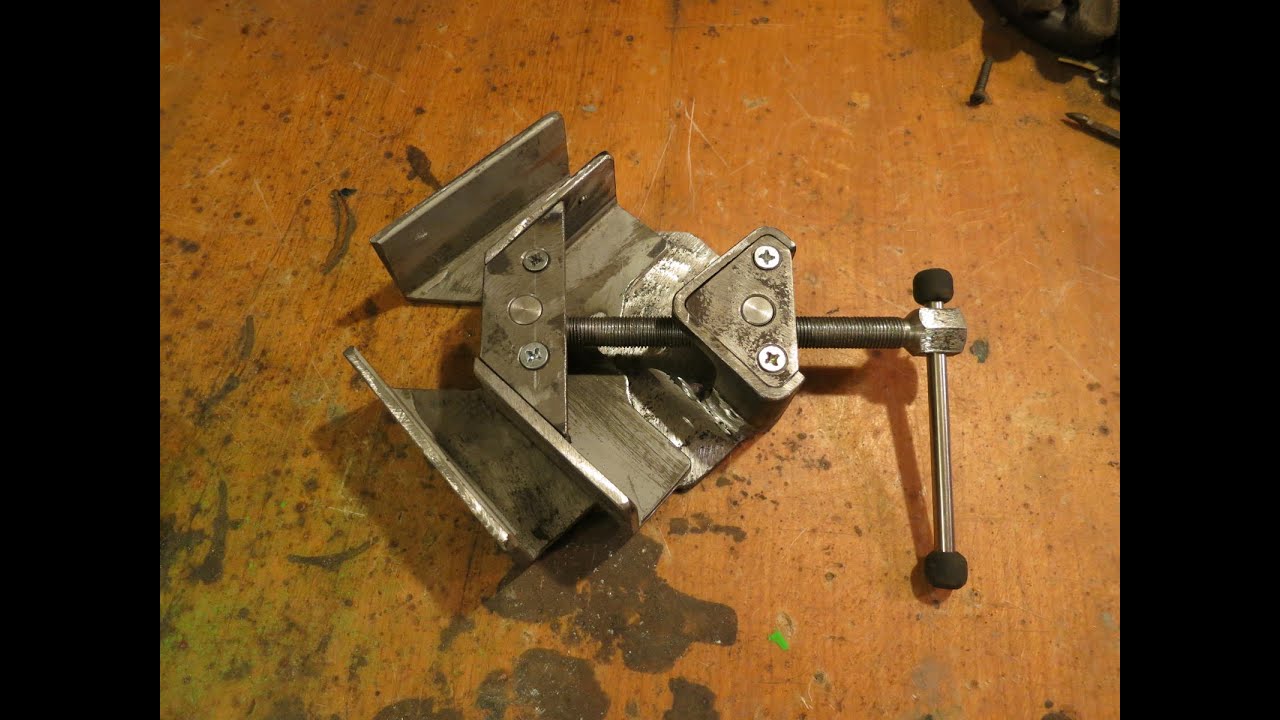
Angle welding clamp
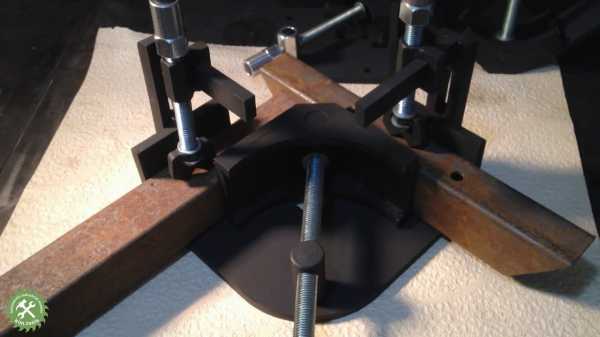
A fairly simple design of an angle clamp can be made with your own hands in a home workshop, since a factory analog is quite expensive. The material from which this type of clamp will be of the highest quality is iron.
Initially, we make the base of the structure from sheet metal approximately 10 mm thick. Next, the foundation of the design is made. To do this, we weld two corners to each other at an angle of 90 degrees; in the manufacture of this structural element, precision is needed due to the fact that these corners act as fixed clamping jaws. Before welding the corners, you need to weld nuts to each of them, which will serve to move the movable jaws. Bolt holes are drilled in two more corners. Further, these bolts are screwed into the nuts and pull the movable corner with their head, thereby achieving compression and stretching of the fasteners.
In order to increase the length on the sides of the grip, a structure resembling a compass can be made of two metal profiles connected at the end by a sleeve and a bolt. Having made two bushings that coincide in shape with the profile, a clamping screw is made on one side of the bushing, and on the other, they are attached to the existing corners. It remains to put the bushings on the profiles and fix them with screws. This achieves a large distance between the grippers and makes it possible to work with bulky objects.
The do-it-yourself corner clamp created has an advantage over factory models, primarily in variety and cost. And also such a tool will have increased strength and reliability.
Main types
At home, you can make a simple manual carpentry device.
The design of the tool will include the main details:
- frame;
- clamping couplings;
- moving part;
- screws or levers.
Homemade metal clamp
The clamp does not allow the clamped workpiece to move; for this, the compression level is adjusted. According to the form of capture of the processed materials, the installations are named:
- angular;
- assembly;
- screw;
- manual;
- quick-clamping.
For practicality, the tool is made with maximum extension and smooth working stroke. Depending on the method of fastening, the clamp can be:
- G-shaped - the most popular among craftsmen due to its simplicity of design and operation. The metal bracket has a thrust platform on one side, and an adjusting screw screwed into the thread on the other. There is a working jaw inside it, a handle is welded on top. The mechanism is convenient for processing heavy, large, but simple in shape workpieces.
- F-shaped, universal with a support surface attached to a long rod and a block with a coupling sliding along it. Fixes the clamp with an auxiliary screw.
- Pipe for fastening large parts.Adjust the grip level along the length of the rod on the support platform with sliding jaws. Tube clamps allow you to work with bulky objects.
- Corner connect the elements. To create a right angle when joining, there is an installation of 2 supporting and working surfaces. It can be 2 perpendicular screws or one with a corner block. Sometimes devices are designed to position parts at different angles.
- Tape with a clip made of durable synthetic material with a tension block. The corners are adjusted with additional plastic fixtures. Such a device is used for processing workpieces, rounded with a large diameter, when it is necessary to fix polygonal joints.
A do-it-yourself clamp can be made from wood and metal raw materials. For a home workshop, devices are more suitable:
- screw;
- quick-clamping;
- pipe.
Often it is necessary to process workpieces on an angular or pliers model.
These types do not need complex characteristics of materials, a simple manufacturing procedure.
Homemade Clamp
Joiner's clamp
Such constructions used in joinery are of the following types:
- The standard clamp, which is the most popular or simpler;
- In the form of a caliper for small parts and quick fixation;
- Self-clamping clamp for milling processes and work with different workpiece heights.
The first type is made from two pine blocks, lock nuts, rods, threaded wing nuts and thrust washers. The manufacturing process is very simple:
- We cut out working pliers from the bars, we drill holes for the studs, taking into account a slight backlash;
- We screw in the studs and counter them in the appropriate ways;
- We provide convergence with nuts, made either in the form of lambs, or standard nuts for improved tension.
The second option is used in the case when it is necessary to quickly fix small parts. Manufacturing is carried out from small blocks and thin-sheet plywood. The worm system is furniture nuts and studs. One stop is fixed, we fix it at the end of the guide rail, in which we cut out recesses to fix the moving mechanism.
There is both a portable and a stationary version of this design, where grooves are cut for movement with fixing fixed stops. A furniture nut, a hairpin and a knob act as a clamp. Due to this, you can work with workpieces of any size.
The self-clamping design has a lever with an eccentric at the pivot end. We turn it at a certain angle, a quick clamp is automatically obtained. The height is adjusted with a pin on the workbench. It is made individually for each matrix, depending on its purpose and the purpose of the work being done.
What is the bottom line
Clamps
There are no standards and serious requirements for the manufacture of clamps.
The device must fulfill its purpose, meet the characteristics of:
- Reliability and quality. Hand vices, any metal fixing device are durable and serve for a long time. Parts with different coefficient of elasticity can be tightly pulled together.
- Light weight. Such units are usually made mobile, they will have to be moved, so the mass of materials is one of the important parameters.
- Strong grip. Steel couplings allow you to firmly hold the raw material for processing. They should not make turns, slides and fall out of the groove.
- Versatility. Better to put together a tool to perform different functions. There is no need to accumulate many mechanisms with one direction. The device will be able to hold with maximum stability both an alloy of metals and plastic with wood.
Homemade holders are used to process different materials, they can have a smooth, tubular shape
It is important to choose the correct clamping tool. To do this, you need to clearly know: for what purposes the mechanism will be used
Summary
Article Name
How to make a metal clamp with your own hands
Description
Homemade metal clamp. How to make a metal clamp yourself - drawing and video.
Author
Publisher Name
Construction tool wikipedia
Publisher Logo


