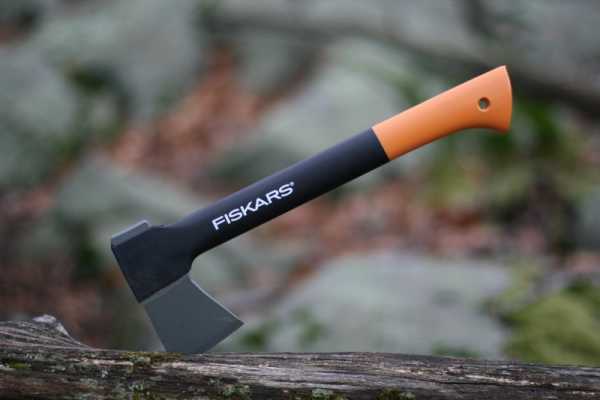
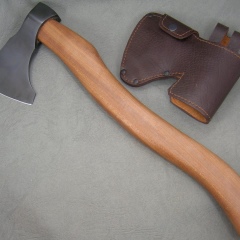
Features of a homemade ax
The ax is a simple and common tool that is difficult to surprise anyone. However, thanks to him, you can cope with many complex jobs and get an excellent result in the end. On sale you can find both simple options for axes and more interesting and original ones, for example, with decorative inclusions. If you do not want to spend money on a ready-made option, or you could not find a suitable one among those, you can do it yourself.
Many home craftsmen, not finding the right tool on sale, undertake to make it with their own hands.
Such work cannot be called impossible or super difficult, but even here it is very important to follow all the rules in order to get a good result. It should be borne in mind that there are several types of axes that you can build on your own.
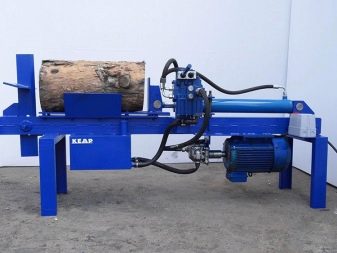
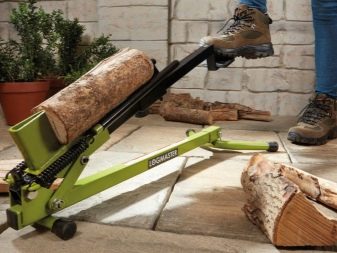
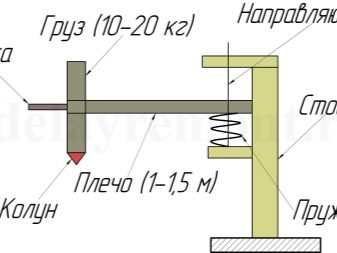
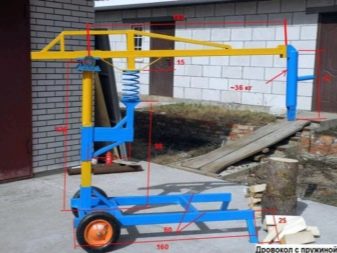
For example, there are special cleavers that are very popular today:
- mechanical;
- with electric drive.
Of course, the mechanical version is the simplest and easiest to implement. It is equipped with a manual drive. Making such a model with your own hands is not difficult. Drawings of mechanical tools are quite simple and straightforward, and the principle of their work is in simple mechanical manipulations. This device consists of the following basic elements:
- metal wedge;
- mechanism on a spring.
You should also be aware of other options for axes that many craftsmen can make on their own.
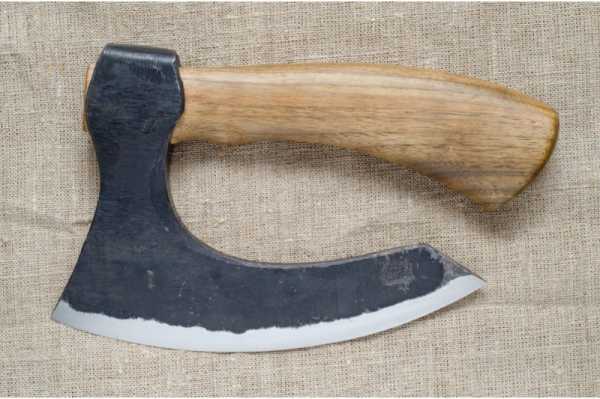
- Joiner. This tool is lightweight and lightweight, and has a sharpened blade. It is used in cases when you need the most accurate and accurate work with wood.
- Taiga. This ax can also be made by hand. It is perfect for felling trees, removing knots and bark.
- Tsalda. This tool is made to clean the area from bushes.
- Kitchen. Such tools are made exclusively for cutting bones. A kitchen ax is a small device with a short handle and a large blade.
- Lumberjack. Suitable only for cutting down trees. Made from a long ax and a wide, sharpened blade. It also has other names, for example, felling.
It is the taiga types of axes that are recognized as the most popular and practical. They are distinguished by the following features:
- little weight;
- small area of the piercing area;
- unusual sharpening of the blade (the edge on the back is several times smaller and thinner than the front).


Any homemade ax is distinguished by the fact that it is ideal for the master who works with it. Making this tool with your own hands, there is an opportunity to adjust it for yourself, for your hand. The result is the most convenient, practical and easy-to-use devices.
Preparing an old ax found in a barn: first steps
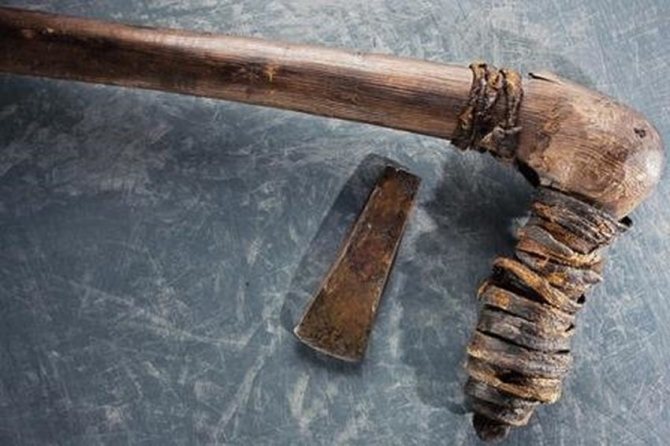
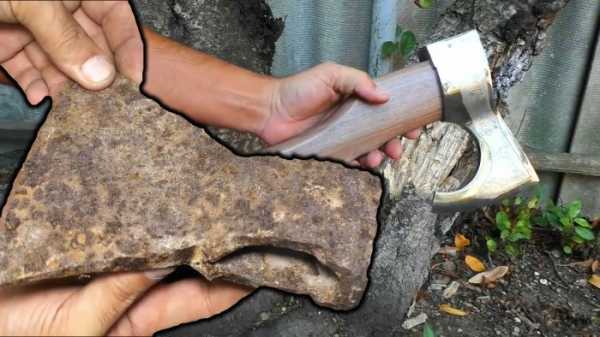
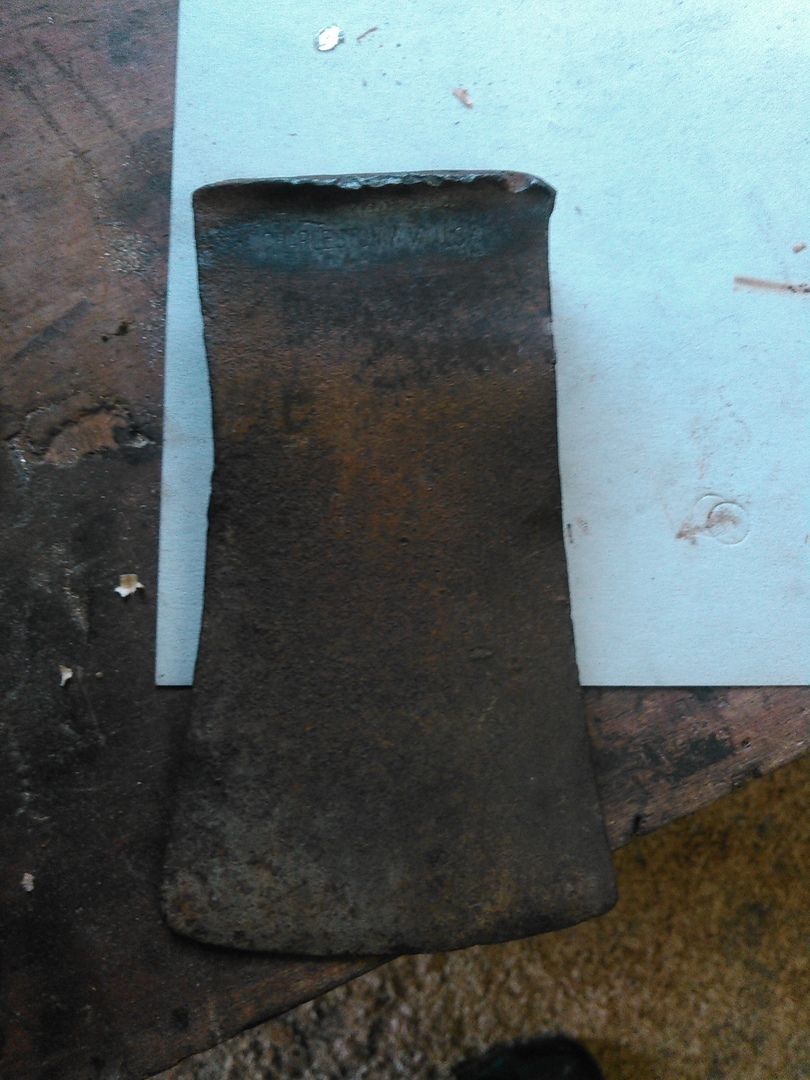
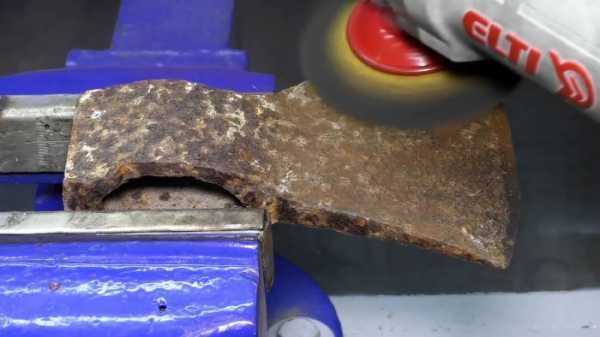
An old rusty ax can be found, probably, in any cluttered barn or garage. And with the right approach and the absence of laziness, it is quite possible to make an exclusive gift from it, which the new owner will be proud of. Today we will try to consider just such an example of making a beautiful and functional thing from what is at hand.
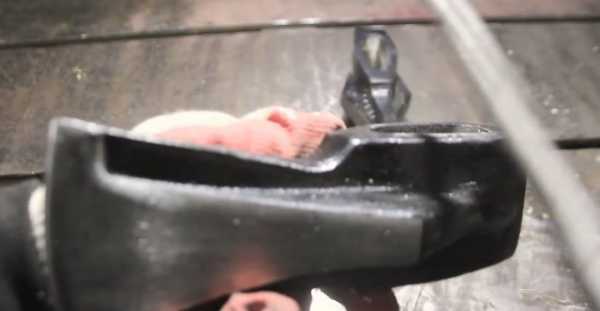
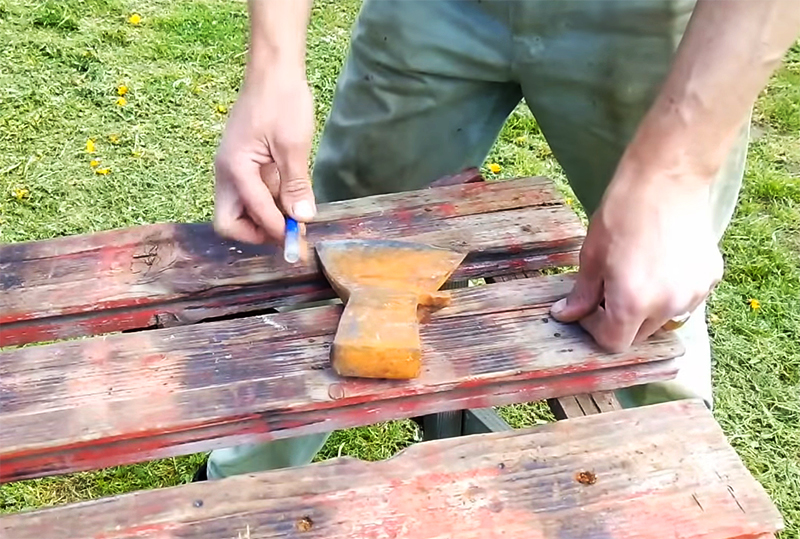 PHOTO: youtube.com Here he is, the hero of today's master class
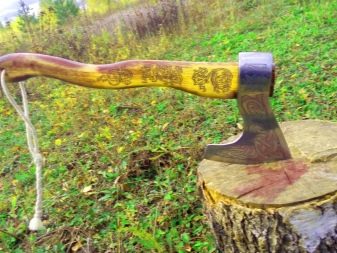
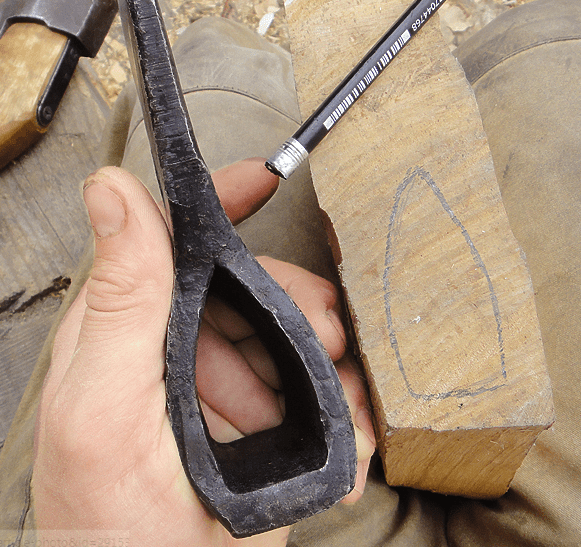
It is clear that rust on it is completely useless. However, before removing it, you should give the ax an interesting shape. Any historical weapon taken as a basis can serve as a prototype. Well, then everything will depend on imagination. In this example, it was decided to make something like a Viking ax.
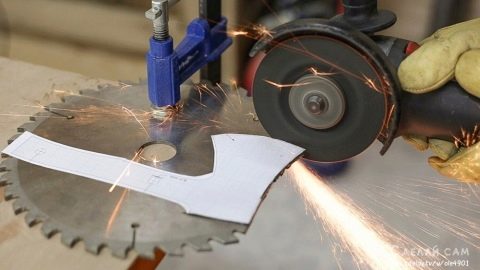
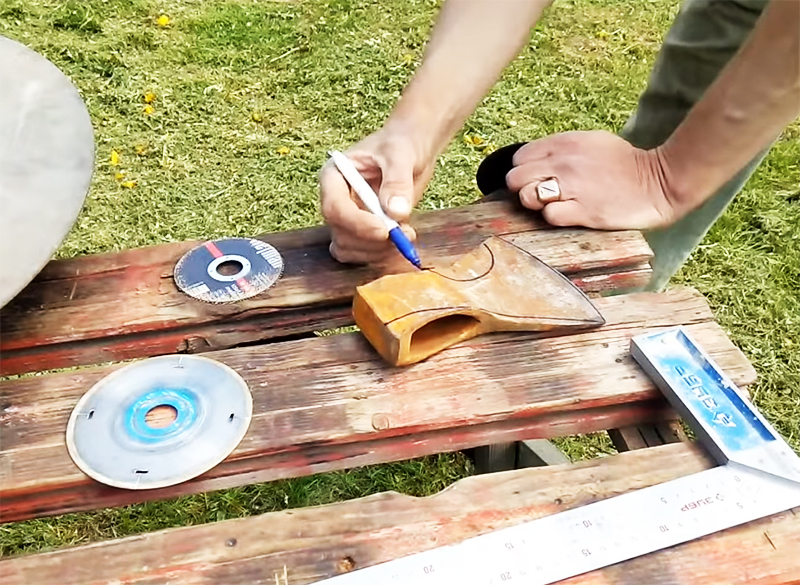 PHOTO: youtube.com The edges are outlined, you can cut the blank
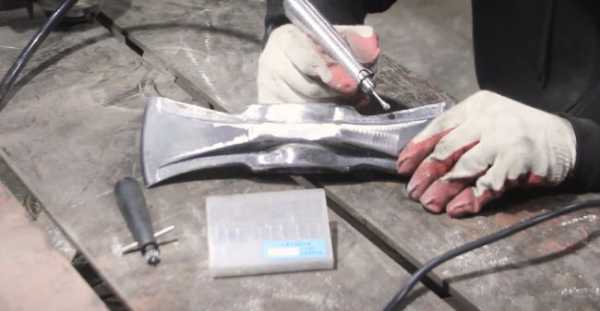
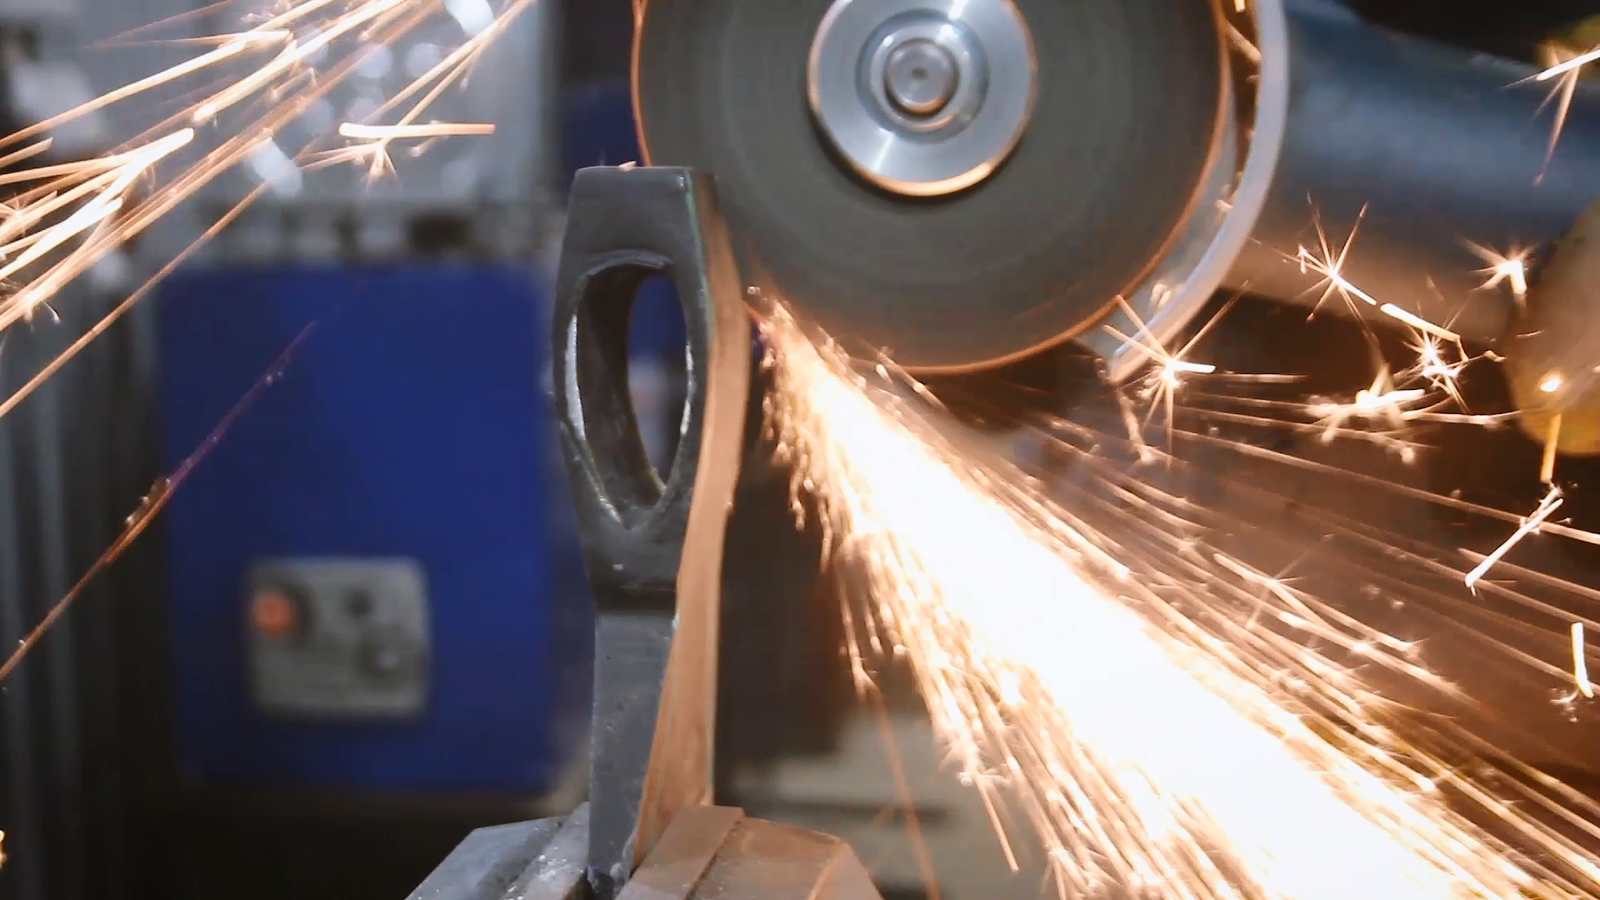
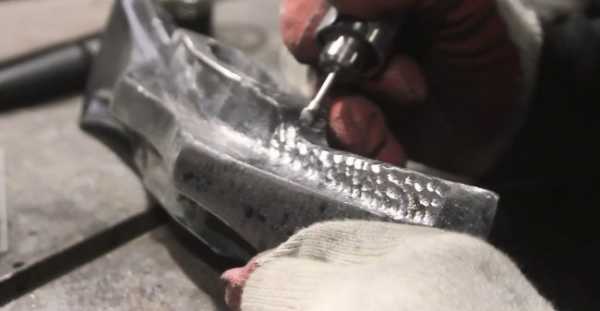
Shaping and grinding the ax
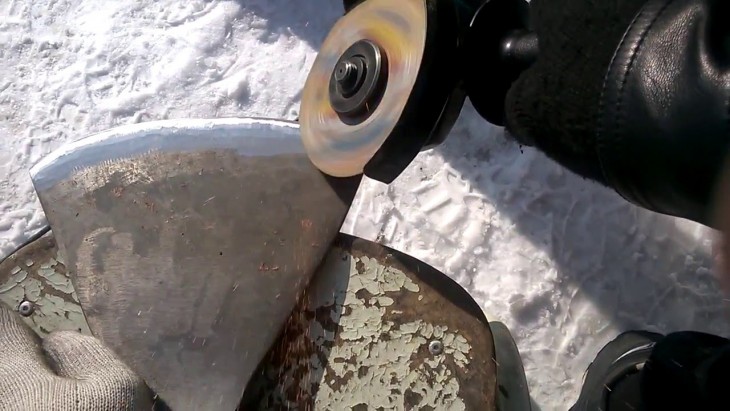
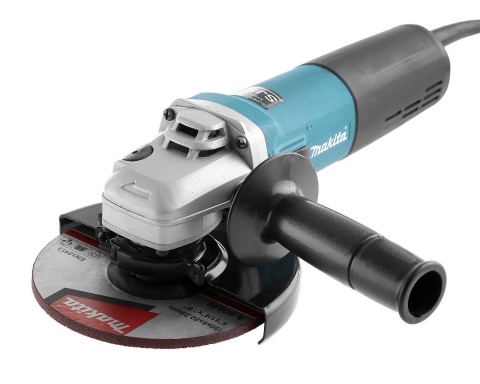
Along the outlined contour, it is necessary to cut the workpiece. To do this, you can use a conventional grinder with a cutting disc. This work is not easy, despite the seeming elementary character, but quite doable.
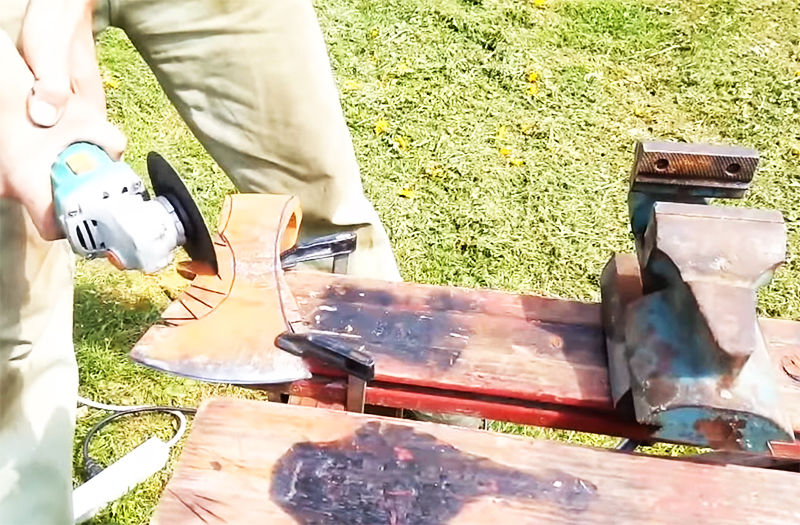 PHOTO: youtube.com
After the workpiece looks like a future hatchet, it needs to be sanded. The flap disc on the grinder will help in this work. Along the way, with the processing of the sawn-off edges, the main layer of rust is also removed. Well, after that, gradually reducing the grit of the sandpaper, the hatchet is polished until its surface becomes mirror-like.
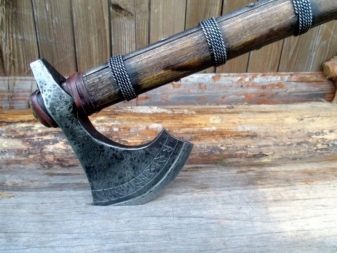
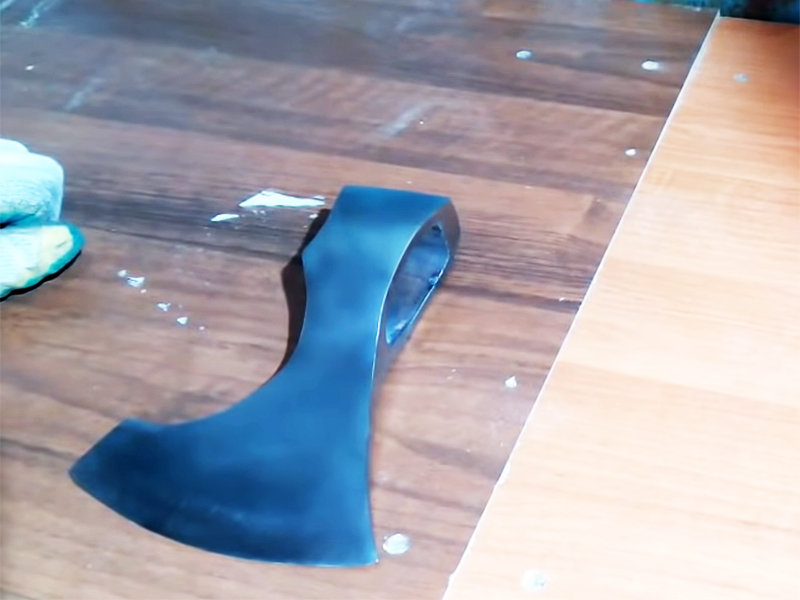 PHOTO: youtube.com The toporik is ready, it's time to move on to decorating it
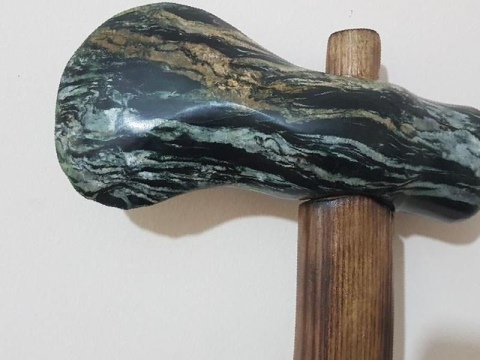
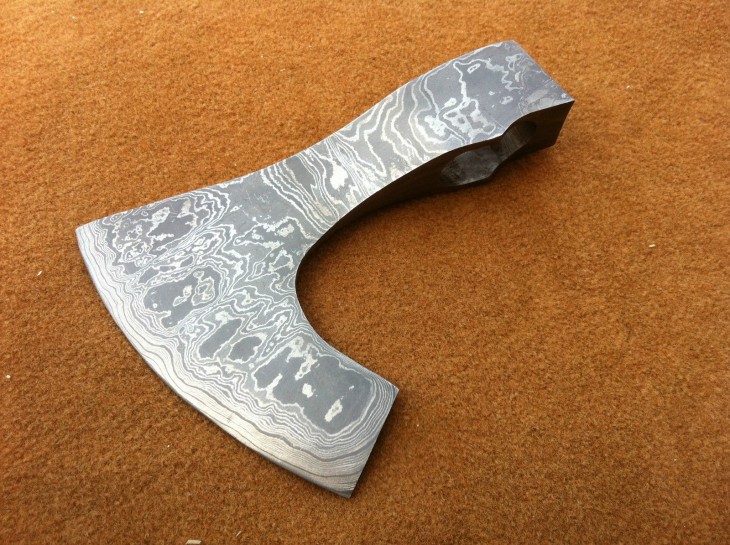
Celtic ax photo: 10 photos
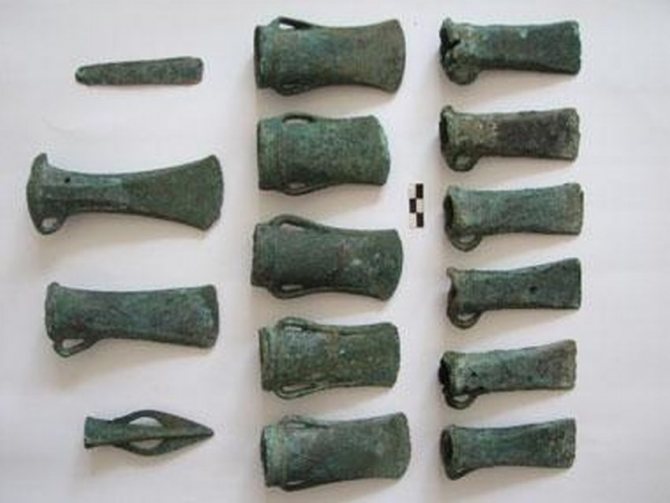
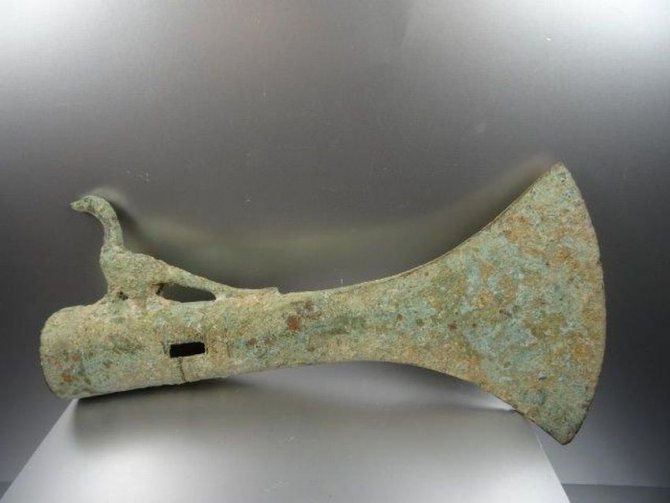
In ancient times, tribes - Celts - lived in Western and Central Europe. Many Britons now consider themselves their descendants. Their main weapon was an ax, now very often their axes are found in excavations at the sites of military battles.
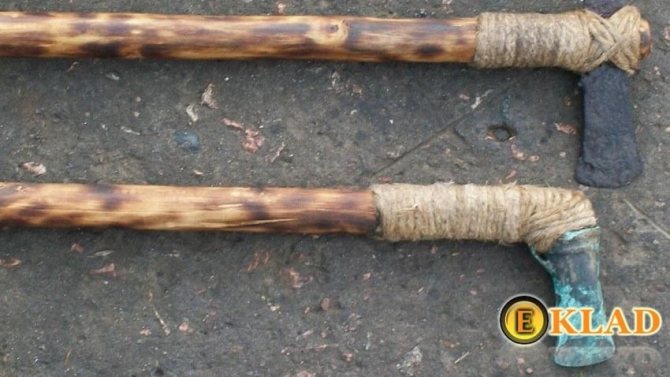
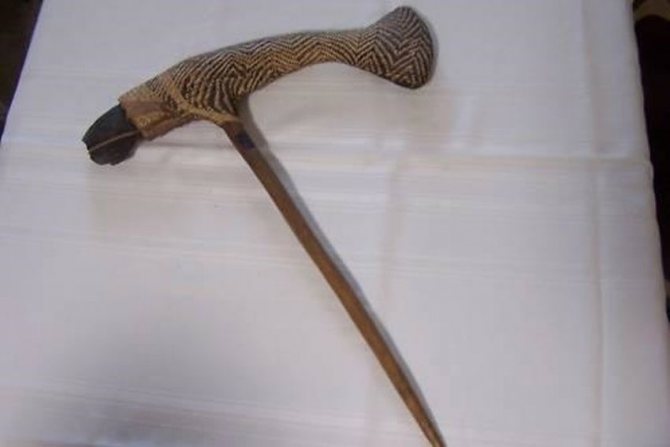
That was the shape of their hatchets.
The handles on these axes have already been made in our time.
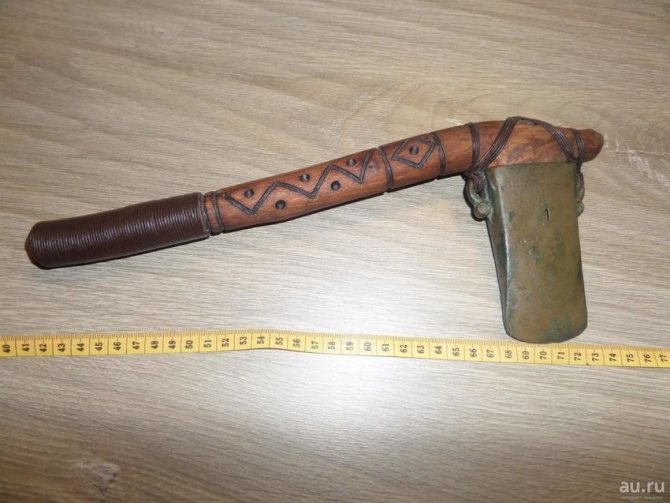
The copper ax of the Celts is a very rare find.
The bronze ax of the Celts is the most common.

Here is another type of ax found in the excavation.
Here are the main 3 types of Celtic axes.
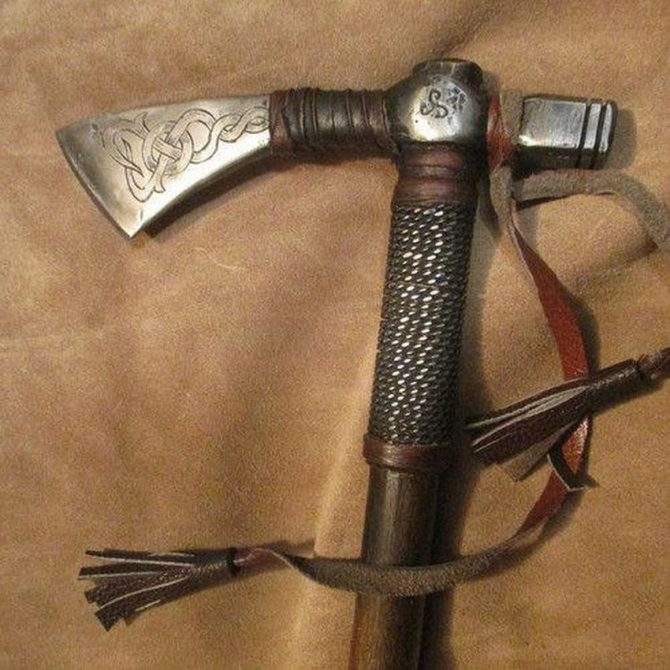
This is already made ax in our time and is called - "Celtic T1"
A restored ax by one of the Russian craftsmen.
A very interesting model of a Celtic hatchet.
This ax is excellently crafted.
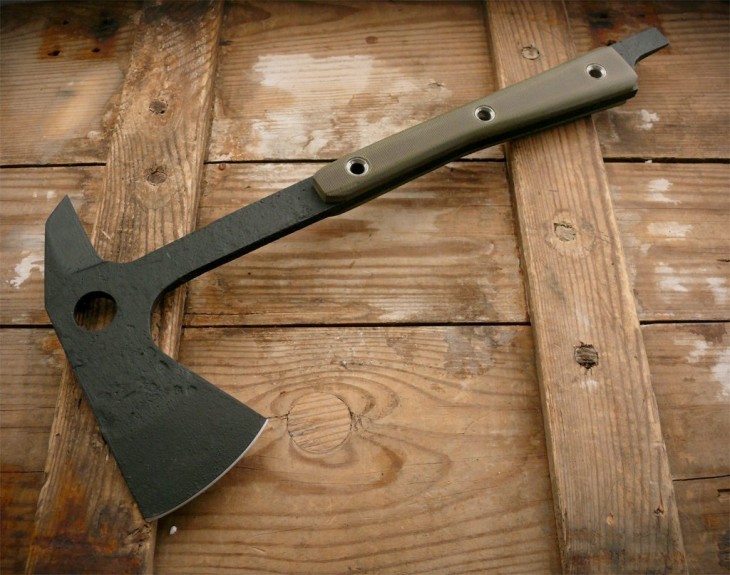
DIY making
You can make any kind of ax on your own. It can be simple, hunting, Scandinavian, marching, designed for throwing (throwing) or just decorative - there are a great many options. It is also permissible to update the tool and build a completely new and convenient tool of labor from the old ax. In order to do such work yourself at home, you first need to make an accurate drawing with all the indicators of the planned tool

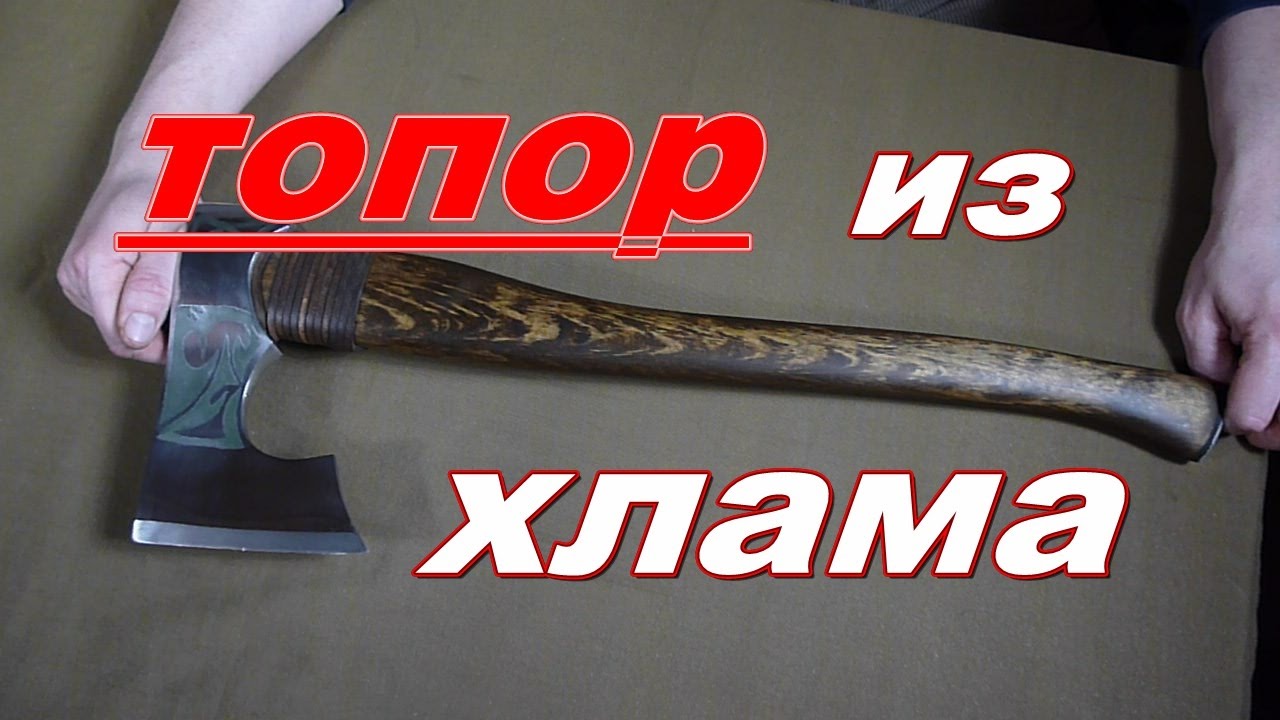
It is important to indicate the sizes of all parts, because they can vary greatly. For example, an ax handle is not only quite large, but also medium or small, like the blade
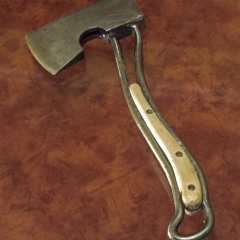
From the spring
A small hatchet can be made from an old spring. It can be not only a worker, but also an original decorative tool, similar to a Viking ax. You need to do such a thing as follows.
- It is necessary to take an old spring from a car with a width of 10 cm and a length of about 40 cm. Using a previously prepared template, apply the contours of the planned device to the springs using a marker.
- Draw out the outlines of the ax using a grinder with cut-off wheels. Then carefully grind the cut out workpiece, giving it the desired shape.
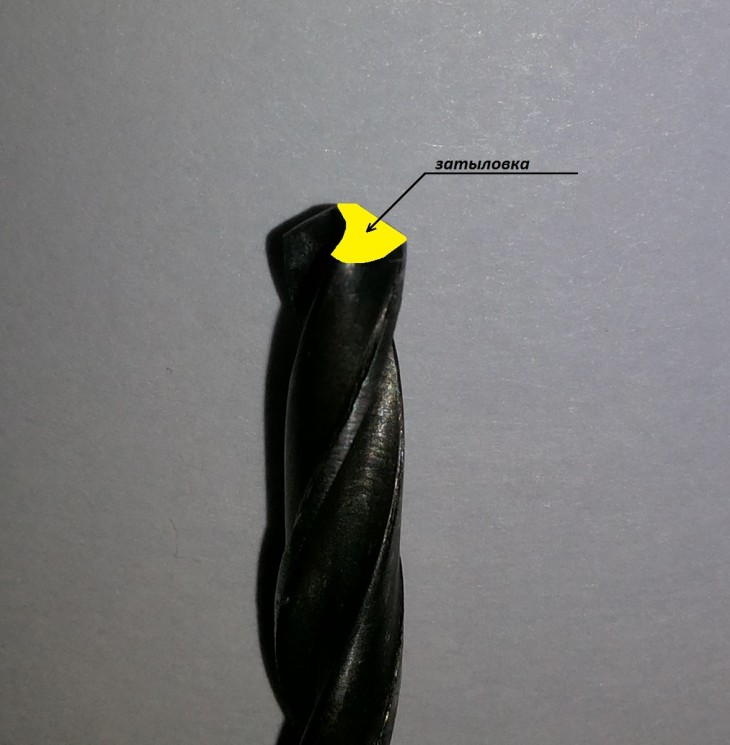
- For particularly complex metal work, it is permissible to use a drill.
- An old chair leg can be used as a handle. Drill 3 holes in the spring for fastening to the handle.
- Cut a piece of the desired length from the leg. Saw this piece into two halves. Drill 3 holes in each of them. After that, you need to assemble the handle, fixing it with bolts and screws. Draw the shape of the part on a grinder.
- Finally, sharpen the blade. The result is a beautiful mini hatchet. It is suitable for outdoor recreation or in a summer cottage.
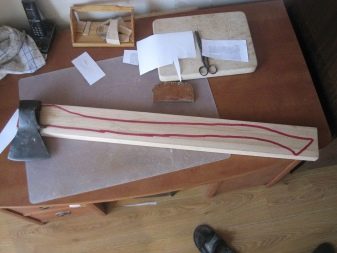
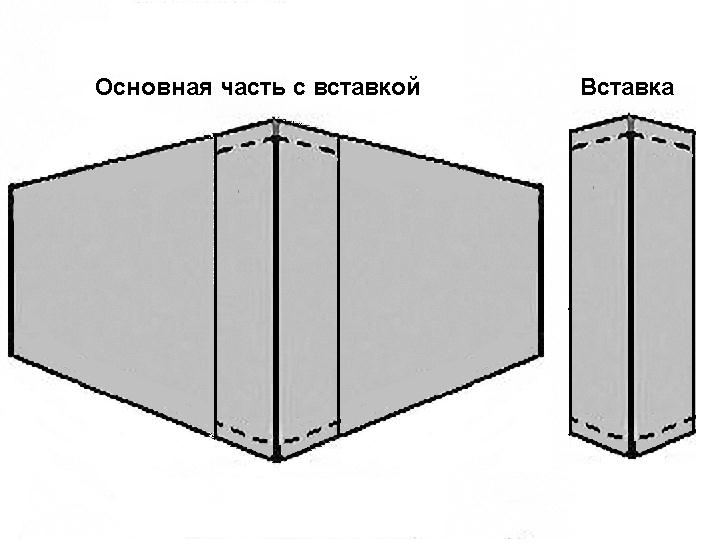
How to make a do-it-yourself ax case out of tarpaulin
A sharp edge guard can be made from different materials. Many people make it out of tarpaulin, which is easy to cut from a bag or camping tent. But it is better to buy a new one, otherwise the old one may have wear and tear, and it will soon wear out. If there is no tarpaulin, the pouch is made of thick cloth or leather.
Nuances of work:
- The pattern should be drawn on the seamy side. It is allowed to translate it with a marker or ballpoint pen.
- Even a regular pencil can leave a mark that can be very difficult to remove. Experts recommend drawing a pattern on the material with a small piece of tailor's chalk or a piece of soap.
- When working with products made of tarpaulin, due to the thickness of the material, "gypsy needles" are often used. They are large and very comfortable, but if they are not available, use a simple crochet hook.
- The process of punching holes is carried out using an awl.
Required tools and materials:
- a piece of tarpaulin;
- threads (preferably wax);
- ordinary and "gypsy" needles;
- zipper snake;
- fasteners, buttons, buttons;
- pencil, paper or cardboard;
- knife, scissors.
Step-by-step instruction
There are several options for making the cover.
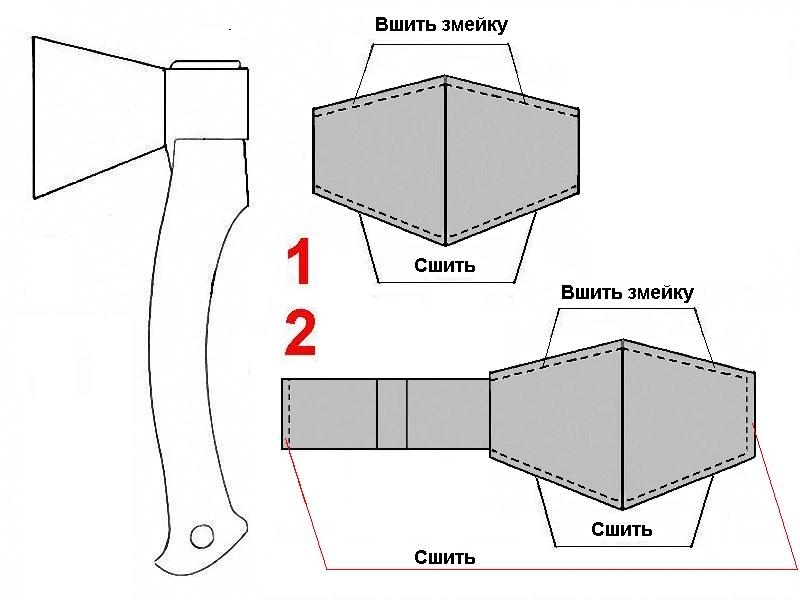
The first (only for the main part) is made like this:
- A pattern is drawn.
- The bottom seam is sewn together.
- The halves of the zipper snake are inserted from above.
The second option is similar to the first, but it also covers the butt. In it, it is necessary to sew not only the lower halves, but also the side ends.
It is better to choose a plastic snake "lightning". It is less susceptible to weather changes.
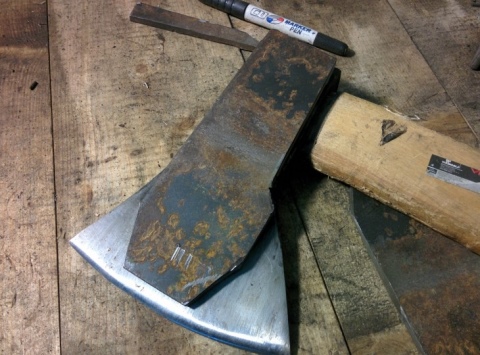
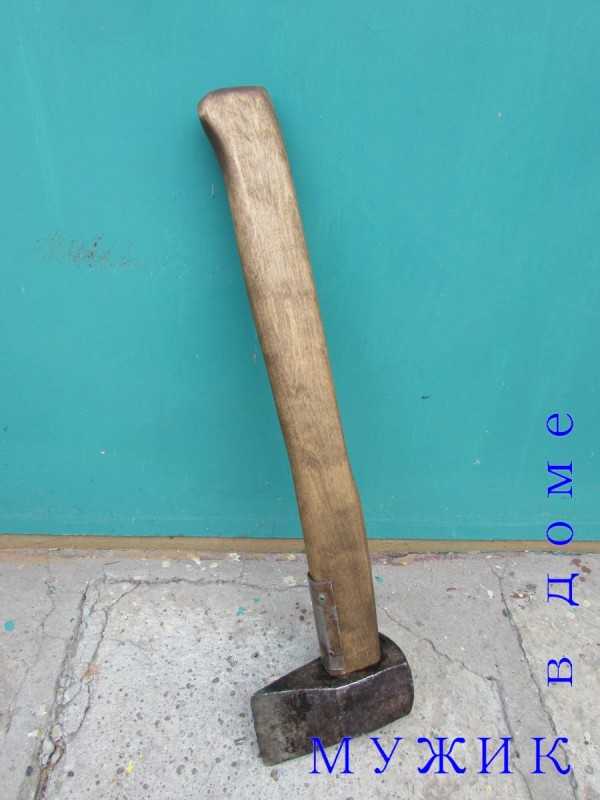
Do-it-yourself taiga ax - we make a tool head
It will not work to forge or pour out the metal part at home, so let's go the simplest way and in a few steps we will make a taiga out of an ordinary carpenter's ax.
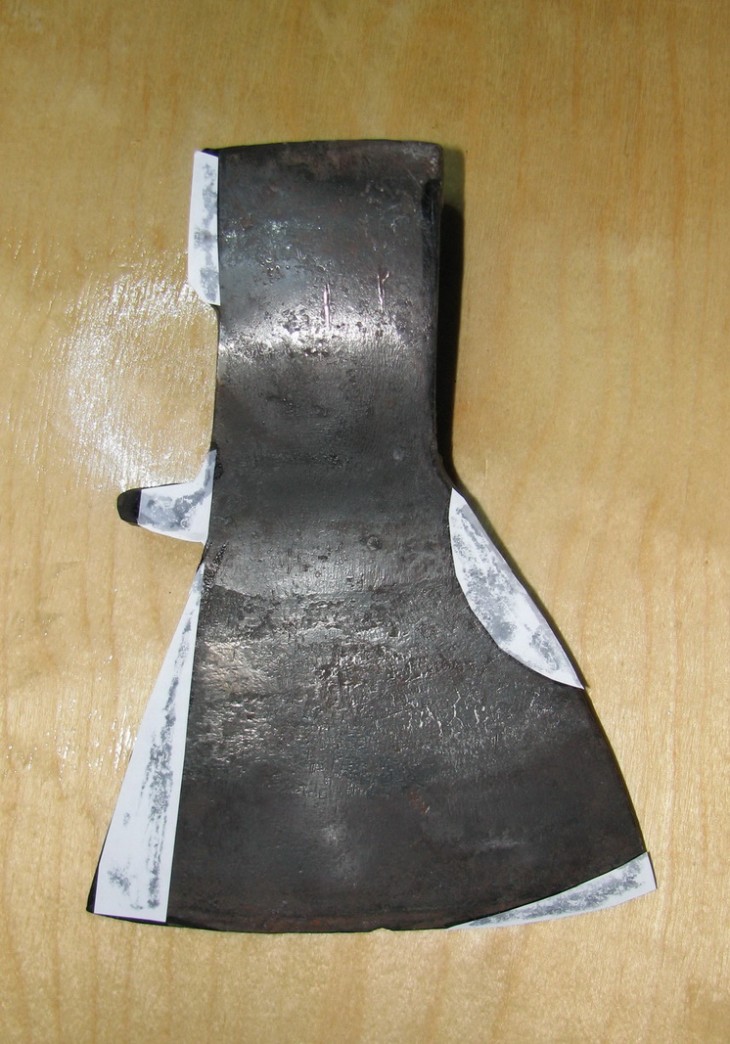
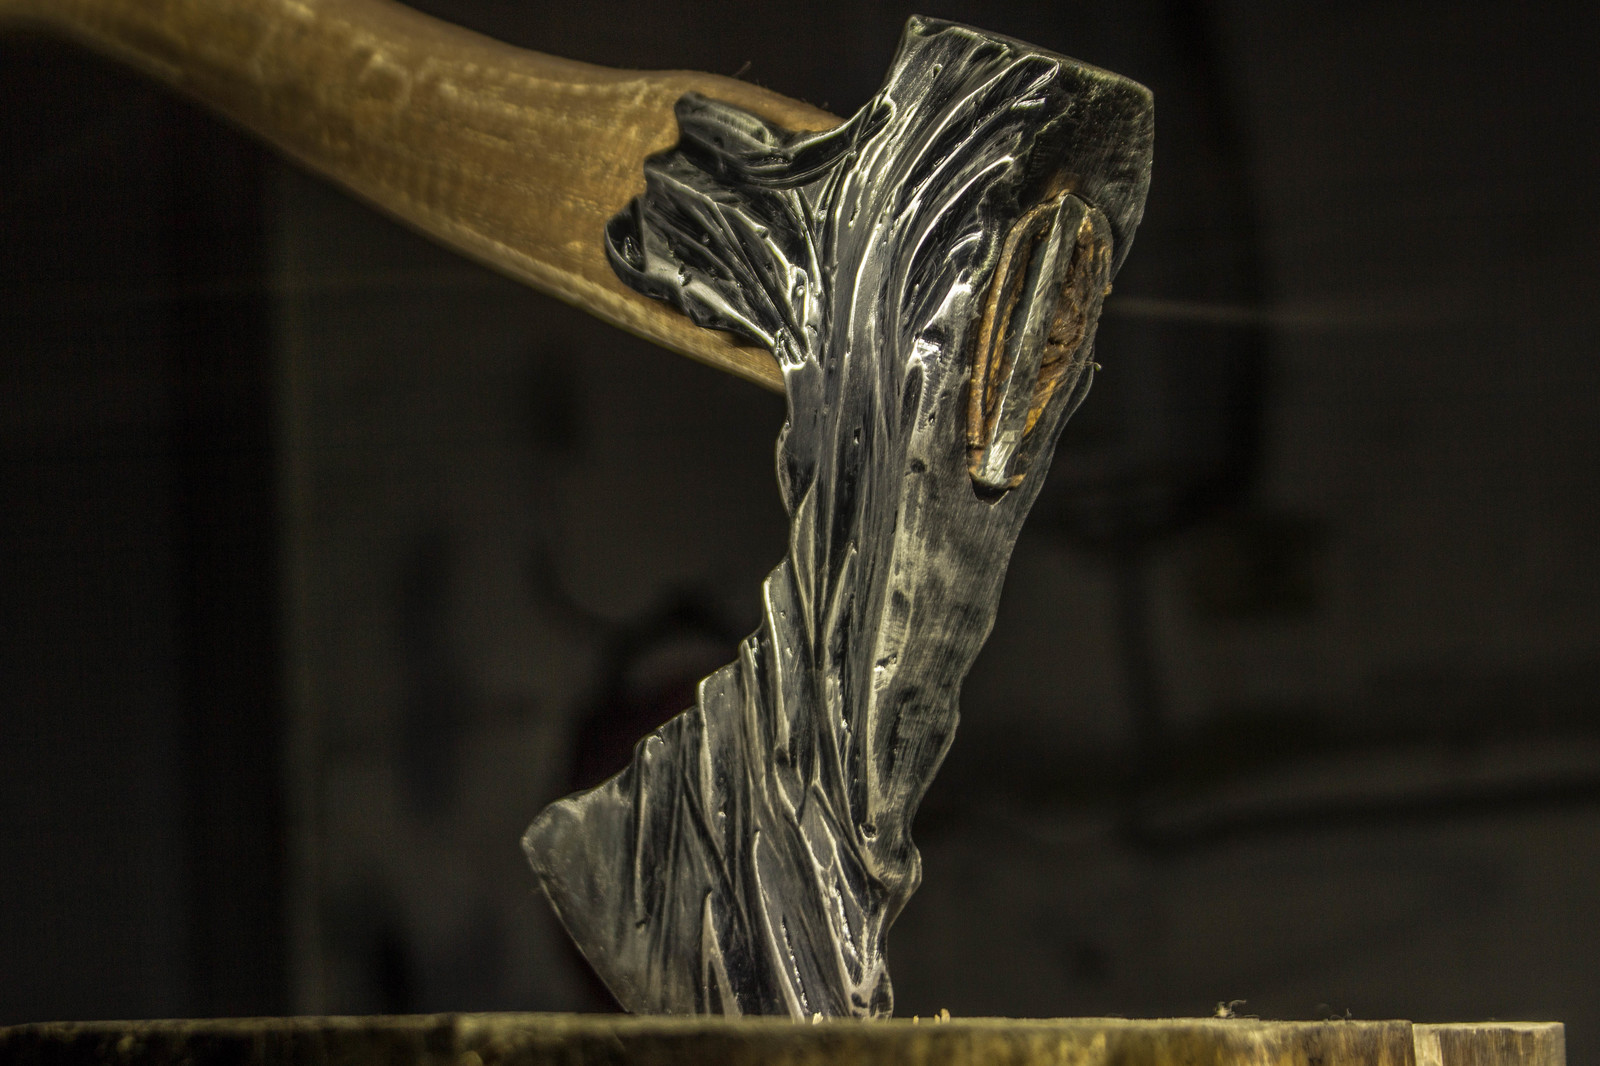
STEP 1: we take an old metal head from an ax, the weight of which is about 1400-1600 grams (the best option) and cut the front ledge of the blade flush with the butt. A 5-8 degree protrusion is allowed, but it is better to remove it if you need the right ax.
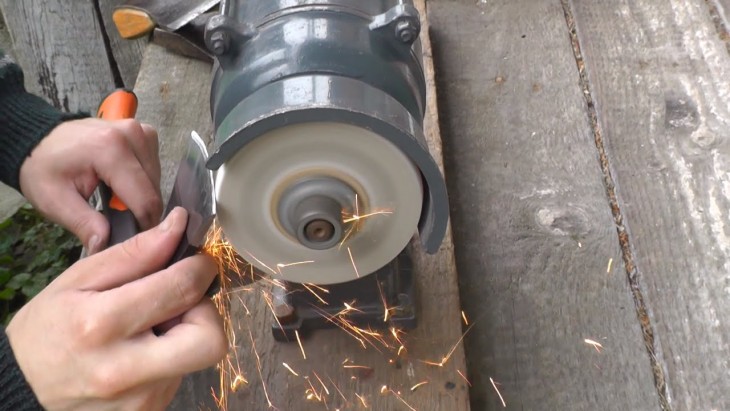
STEP 2: make the back of the blade rounded, cut the metal so that the entire touching surface is without corners. This can be done with a conventional grinder or medium-grain emery wheel.
STEP 3: cut out a semicircle in the inner part of the blade. It is necessary for a comfortable grip of the ax when it is necessary to cut something off or for more precise work. With this shape of the ax, you can pull up small logs or hang the ax on a branch of a tree. In addition, you can reduce the weight of the head by 150-200 grams.
STEP 4: saw off the top corners of the butt. This will reduce the weight and increase the maneuverability of the tool. This operation can be omitted if the ax suits you.
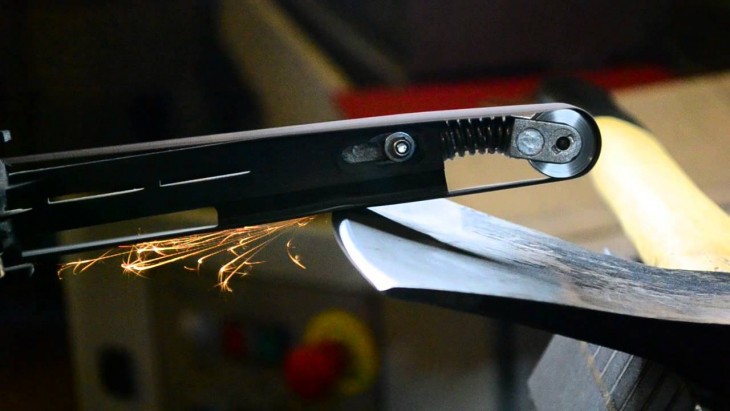
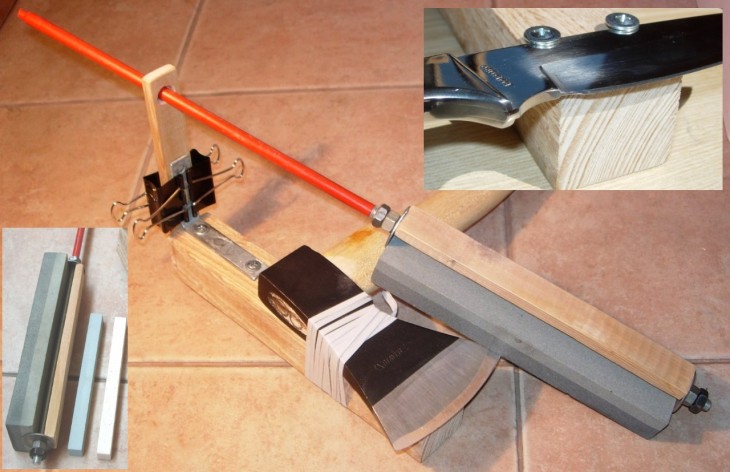
Now all that remains is to choose how to sharpen the ax
It is very important to use a low-speed tool (you cannot use a grinder!). Large circle, medium grit sanding machine - ideal
Sharpening must be double-sided and with a moderately sharp edge (a very sharp one will die on the first tree).
Metal hardening
This procedure also consists of several parts at once:
Annealing. The first step is to blunt the edge of the blade by a millimeter. To do this, you need to heat it up to about 760 degrees (the metal will acquire a red-burgundy hue) and then slowly cool it down. Then remove the scale.
Hardening. It is necessary to warm up the blade to 830 degrees and prepare two metal buckets - one should contain just warm water, the other should contain oil. The blade must be lowered into the water for just a couple of seconds and only by about 4 cm.And already in the oil - completely
It is important not to forget about safety when working with fire.
Vacation. This stage is important for strengthening the steel
The blade must be cleaned. The vacation must be carried out within an hour at a temperature of about 200-300 degrees. You can use a regular home oven.
In addition to color changes, the temperature of the blade can be checked with an ordinary magnet. The cloth will not react to it at temperatures exceeding 768 degrees.
The details of the hardening procedure can be found in the video.
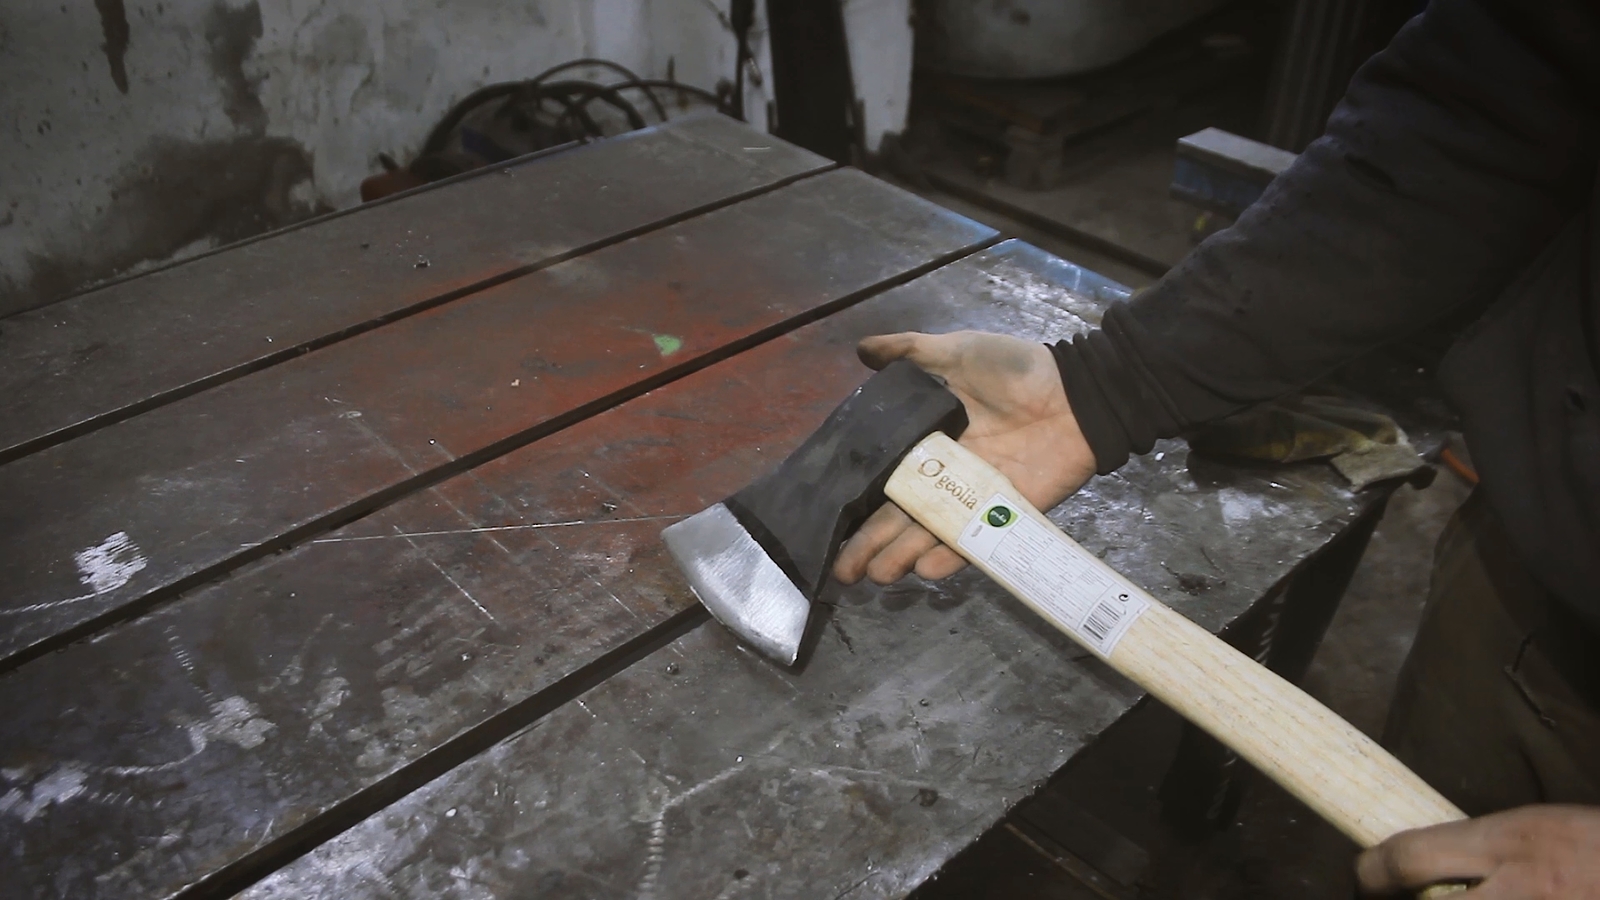
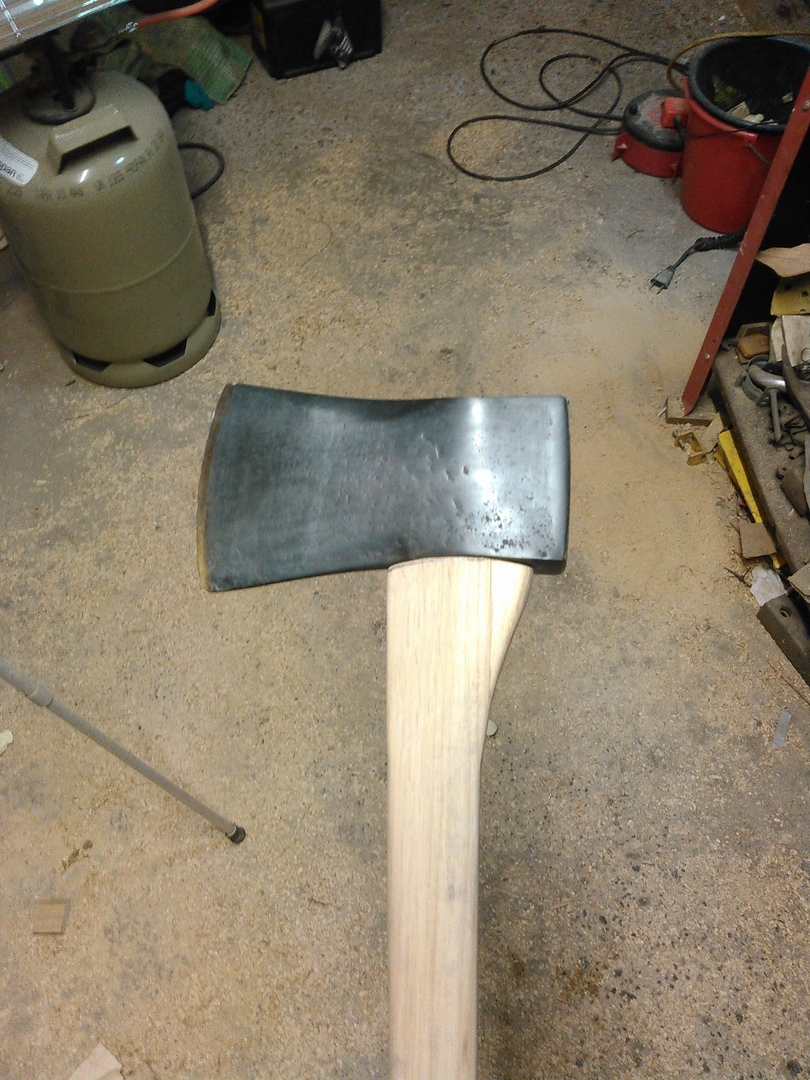
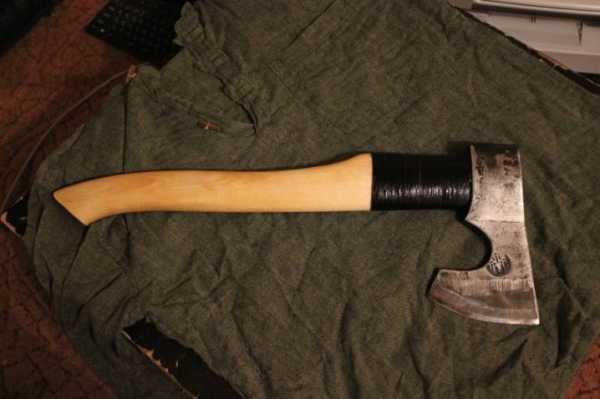
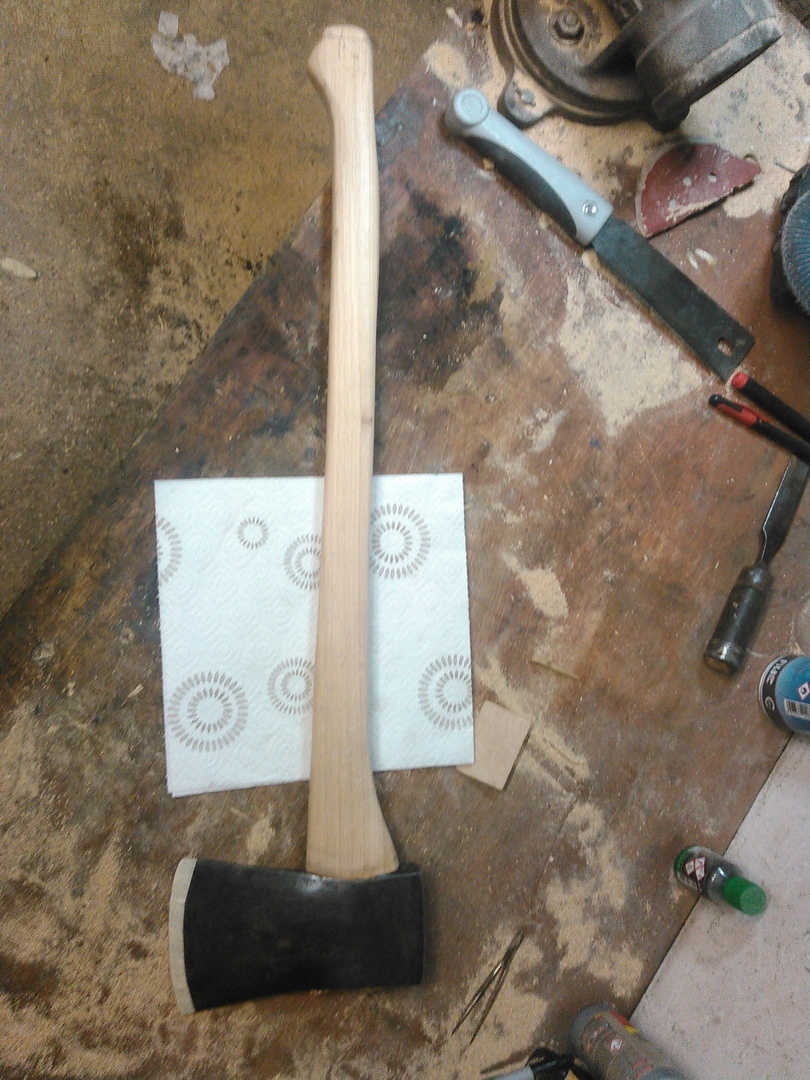
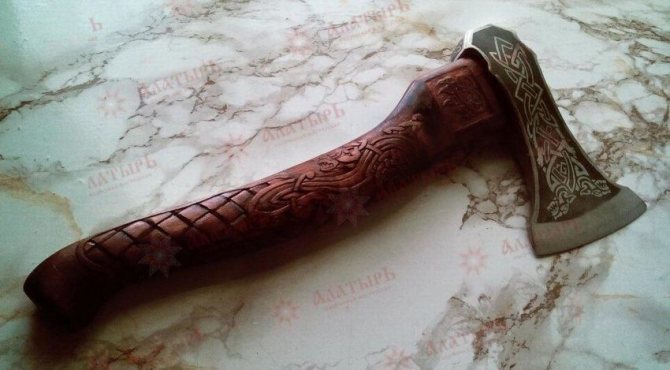
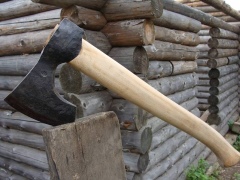
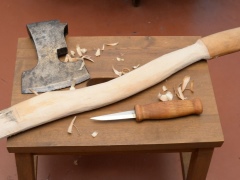
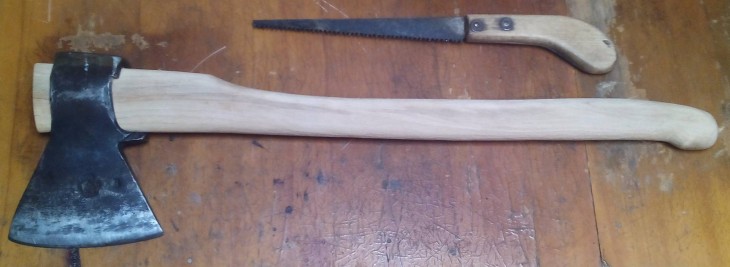
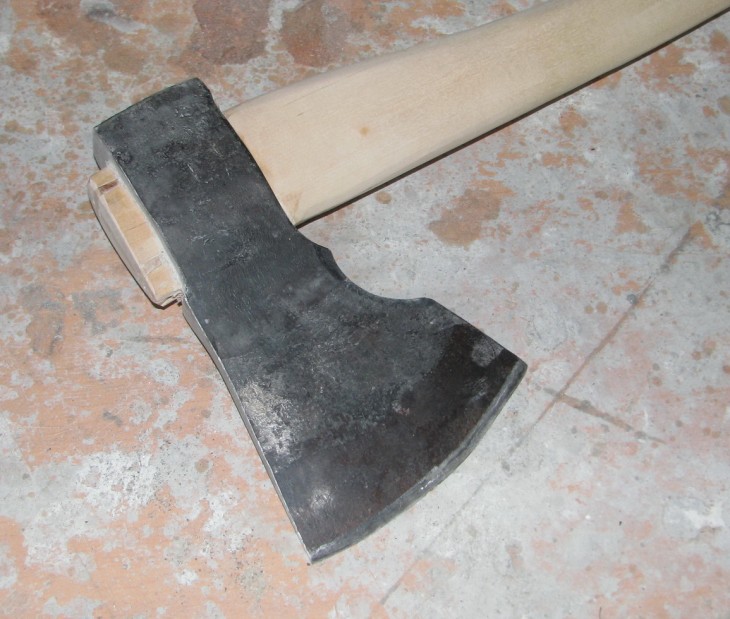
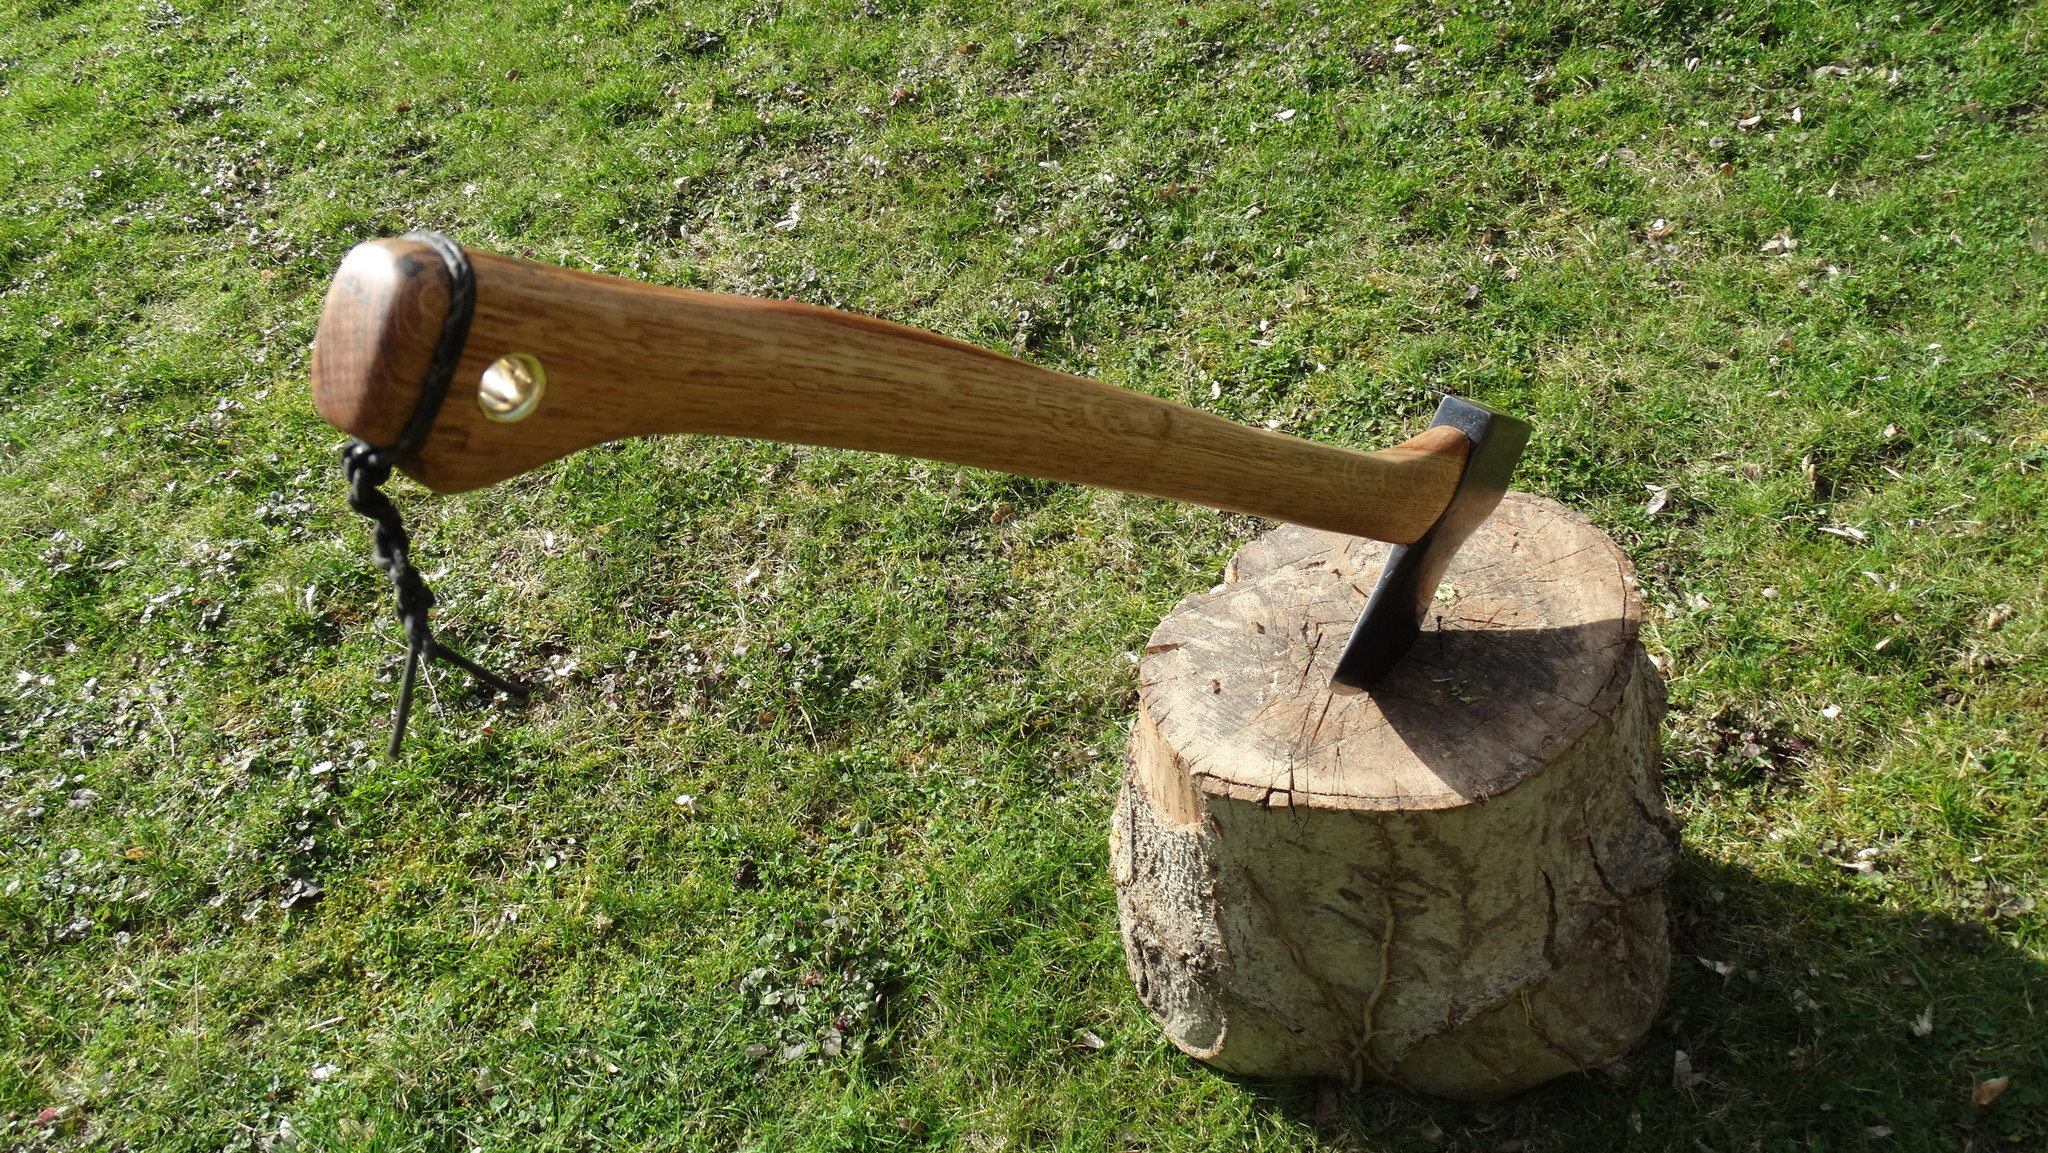
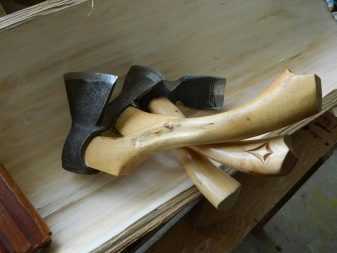
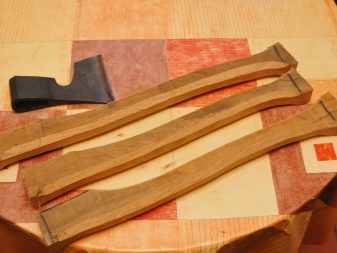
Handle (hatchet)
- Carve out a simple ax from a bar.
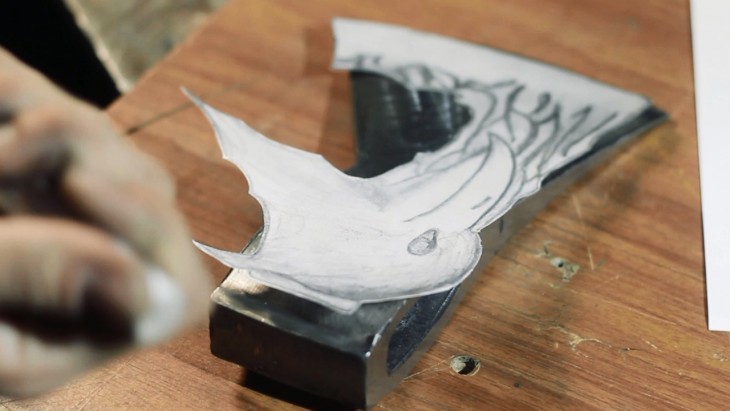
- To decorate it, you can choose any Celtic ornament you like, transfer the drawing with a pencil to the tree and then develop it with a drill.
- To protect the handle from moisture, you need to varnish the wood.Flaxseed oil can be used as an alternative.
Now you can connect the handle to the blade and drive in the pre-prepared wedge.
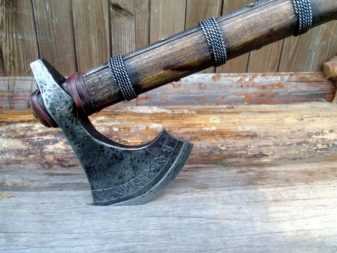
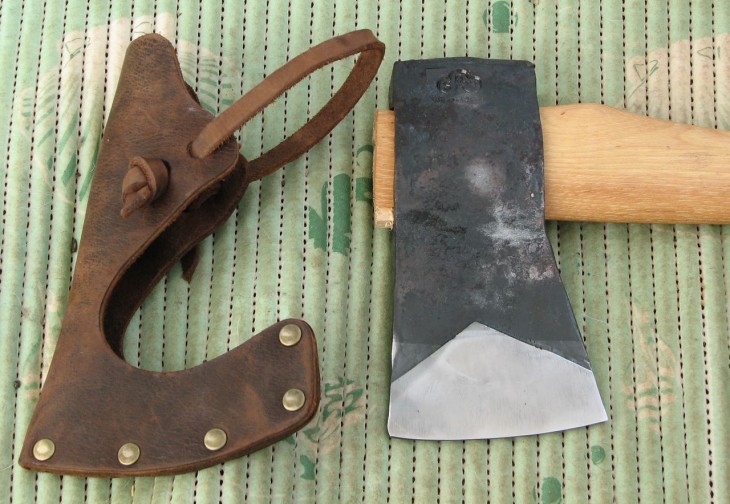
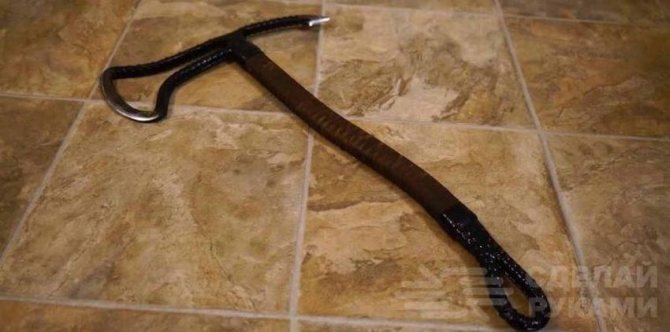
Hatchet braid
When the ax itself is ready, all that remains is to make a comfortable sheath for the handle. It will perform not only protective, but also decorative functions.
How to make a braid:
- Cut a rectangular piece of leather (or leatherette).
- To fit it in size, you need to wrap the material under the butt.
- It will be easier to work with the section if you pre-treat it with linseed oil - this will soften the fabric.
- Cut out the butt shape for the best fit.
- Make holes for the seams closer to the edges of the fabric. You can use an awl or even just a nail.
- Sew the section, securing the material to the hatchet.
- The last step is to treat the braid and handle with oil.
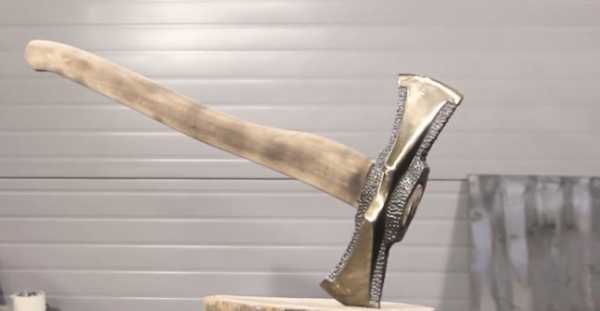
The Viking Age Scandinavian Ax is ready!
Diy ax photo
Note!

Note!

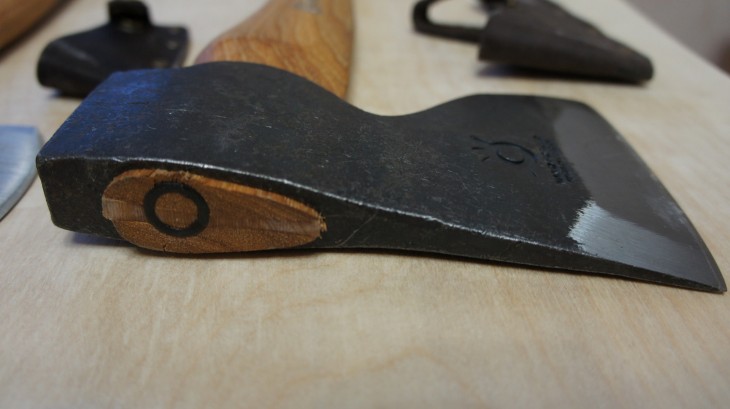
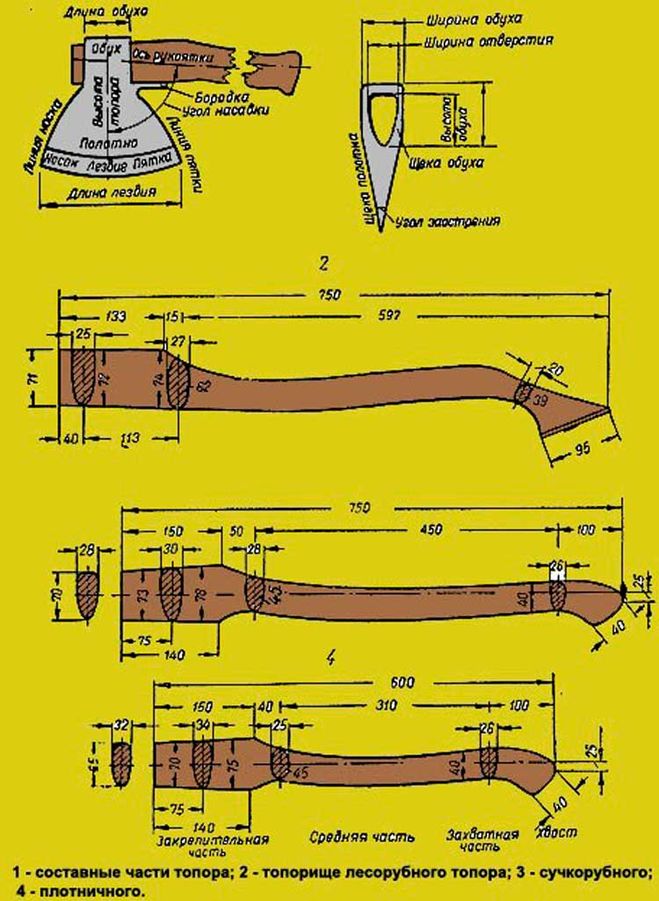
A wooden handle for an ax (hatchet) is a responsible product, and therefore a lot is taken into account in its manufacture - material (grade and moisture content of wood), direction of fibers, type of ax (carpentry, joiner's or cleaver) The safety and ergonomics of the finished ax depend on the correct manufacture.
For carpentry and joinery axes, the ax is made depending on the weight of the piece of iron. For axes weighing up to a kilogram, the handle length is 40-60 centimeters, one and a half kilograms and more - 55-65 centimeters.


The most suitable wood for axes is birch, oak, ash, maple. Any tree for a hatchet is dried for at least a year in natural conditions (not dryers) in the shade of well-ventilated rooms.
We do not have oak, ash or maple, they will not talk about the quality of the axes made of them. But I made more than a dozen hatchets out of birch, and I will talk about it. By the way, those who worked with axes made of different types of wood claim that only birch does not "dry" the worker's hand, because of the viscosity of the fibers.
Harvesting of birch for the handles of axes, hammers, knives and other hand tools is carried out in the winter, at least in early spring before the start of sap flow.
The root (butt) part of the tree is used. A birch block splits into blocks. It is splitting and not sawing along the length, in order to see the natural direction of the fibers, and in accordance with this, further make blanks.
Bars with a cross section of about 70-80 mm are gouged out of the blocks. by 120-150 mm. and put it away to dry. During the drying process, the birch will dry out across the fibers and the workpiece will become smaller. The workpieces are dried for at least two years in a ventilated room without being exposed to sunlight (usually this is an attic)
Fugue a well-dried workpiece on one side, see if there are any cracks. If everything is in order, we display the total thickness in two layers of 45 millimeters.
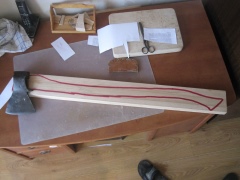
We put the workpiece on the face and orient the template relative to the fibers
The patterns of the axes, their dimensions - length, thickness, section at the main points, also differ in the purpose of the axes themselves -
On the end part of the workpiece, we outline the shape of the eye of the ax with a pencil along its inner part, aligning it with the exit of the fixing part according to the template.
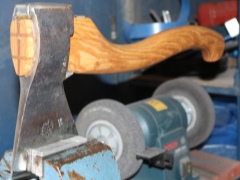
Now makes rough machining of the workpiece according to the template. This can be done with another ax and a wide chisel, I just cut it out with a jigsaw along the contour. And there are fewer chips, there is no load on the tree from blows, and it looks more cultured.
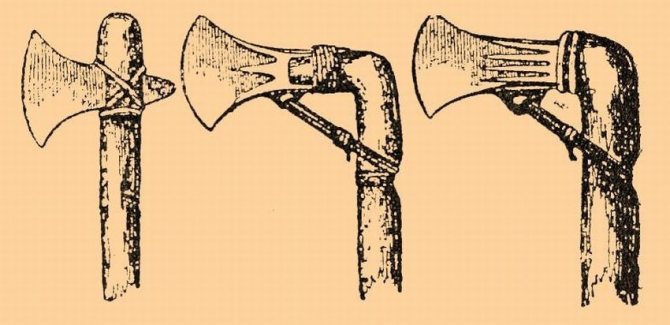
We round the corners of the handle, in the upper part of it in a semicircle, and to the bottom a little on a cone. It is this "inverted drop" shape that is most comfortable for the hand. Now we will plant the piece of iron on the hatchet.
The ax attachment is made "in tightness" The hatchet is pre-sawn under the wedge (wedges) to a depth of two-thirds of the eyelet width with a through hole at the end of the puncture, along the cut.
Wedge, I personally make for a birch ax from a pine resin board. Holds up perfectly.One wedge is enough if the birch handle is very well dried and does not dry out anymore.
Having planted an ax, twist it in your hands, remove with a large file those places where the ax is not comfortable in the palm of your hand. Do not worry that you will deviate from "standards" and "templates" if you make the ax for yourself. Let it be at least three times unsightly, but if it fits perfectly in your hand, then you will get less tired and productivity will increase, and the mood from working with an ax, which is an extension of the hand, will be good.
After the ax is ready and planted. Treat it with linseed oil, preheating it. I am soaked on hot with only carpentry axes. Joiners are almost always indoors. I simply wipe the cleavers' handles several times with light transformer oil.
Well, of course, every carpenter and joiner, over time, develops for himself the most optimal shape of the hatchet, with the desired placement of the center of gravity, length and thickness of the handle. There are a lot of options, as well as masters. However, GOST did not bypass this most necessary tool -

An ax is a versatile tool that may be needed in the country, on a hike in the forest or just on vacation near a river, in everyday life for household purposes. Despite its simple design, this device has many uses and varies in manufacturing methods and quality.
Advice
The handle for the ax should be made so that it does not slip in the hands. That is why it is not recommended to lubricate this part with paints and varnishes or use any special linings. They can lead to the fact that the tool simply slip out of the hands at a crucial moment.
The material you use to make the blade should be free of damage, dents, or strange serifs. Brand new ready-made items can shine like spoons. Make sure that there are no curvatures on such objects.
The types of wood from which it will turn out to make a good handle are acceptable. But it should be borne in mind that not every natural material is suitable for the manufacture of this part. Before engaging in work, the wood should be thoroughly dried.
The wood blank for the handle will need to be dried in a dark place. It is advisable to store it for at least a year, and preferably all five years, before using it for the manufacture of such tools. Only in this case can you be sure that the ax handle will not change its size over time.
Saturate the wooden handle with special agents that will make it resistant to moisture and moisture. Flaxseed oil or good old drying oil is ideal. It is advisable to apply the selected impregnation in several layers.

The ax must be sharpened correctly. For example, when using a grinding wheel, the butt will need to be held at a slight angle of 45 degrees. At the same time, movements should be calm, smooth. No need to jerk.
Do not neglect drawing up a drawing of the future design. Many beginners skip this crucial stage, considering it not the most important. In the future, such people face a lot of problems and inconveniences. It is better to prepare all the necessary templates and diagrams in advance. Having them in your hands, making an ax with your own hands will not be difficult.
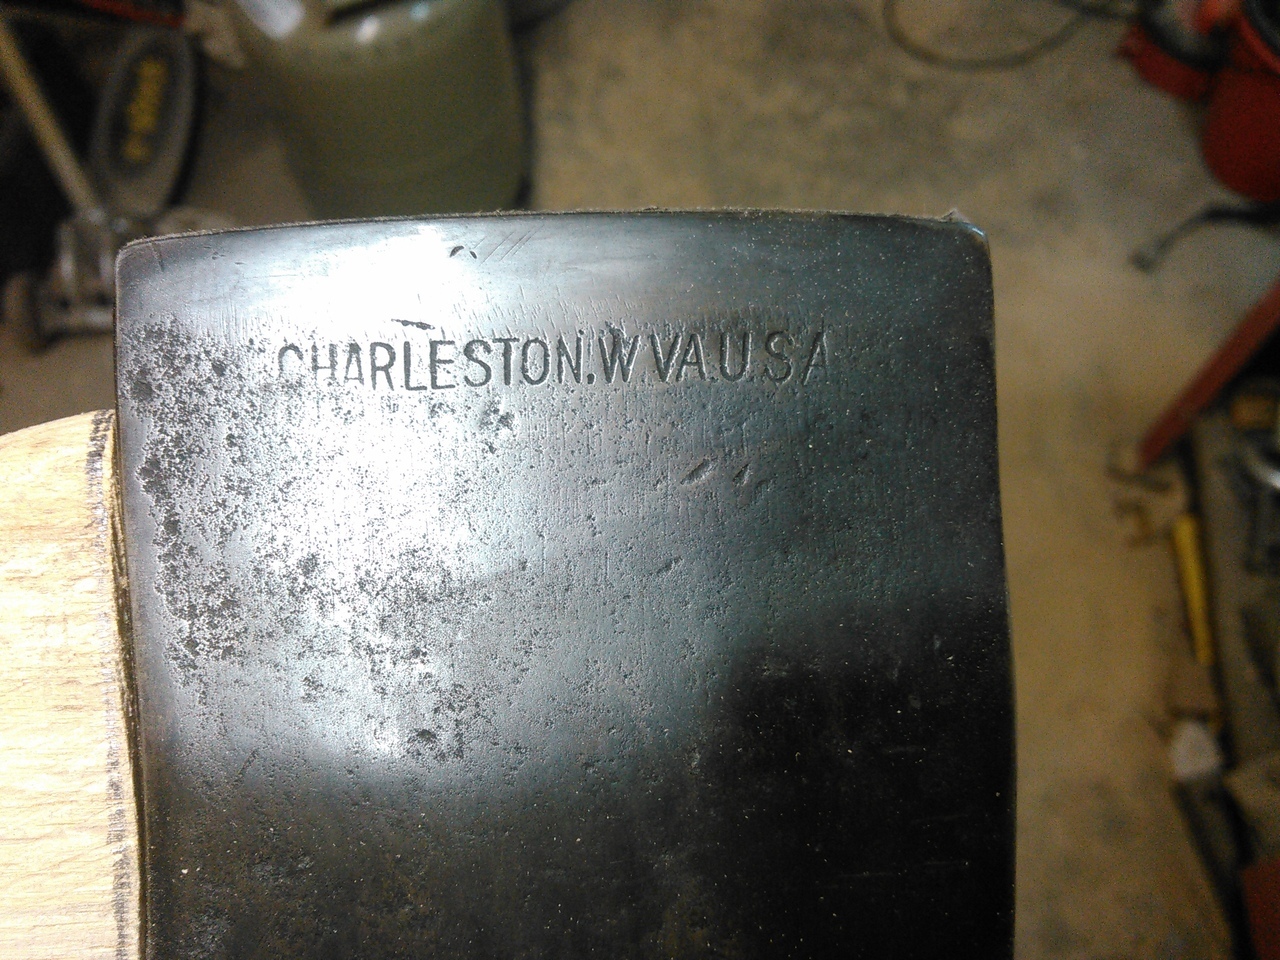
When buying a ready-made piercing part for an ax, it is very important to pay attention to its markings. Its presence will indicate that the element meets the necessary GOSTs. Items with suitable markings are listed above
The blade should also have an eyelet for installing the handle. It usually has a cone-shaped structure.
Items with suitable markings are listed above. The blade should also have an eyelet for installing the handle. It usually has a conical structure.
How to make an ax with your own hands, see the video below.

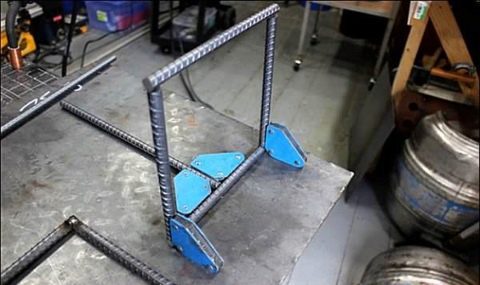
An ax is an important item in the everyday life of a skilled craftsman.Axes are solid-forged, made of metal and a shaft, and axes are also made of reinforcement. Below will be presented 8 photos of ideas for models of an ax from reinforcement, which you can do yourself.
The photo shows what bends an ax made of reinforcement should have.

Red-hot fittings - gradually turn into a blade.

Another type of rebar ax.

Ax from armature, ready for battle.
The ax is at the bench, almost ready.

Ax from a piece of reinforcement.
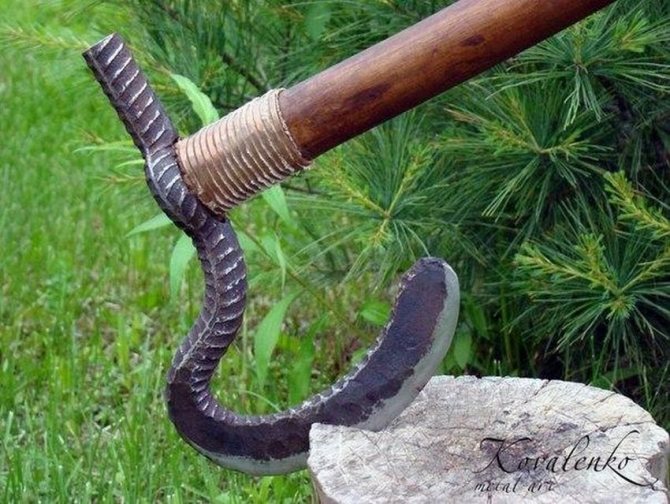
An ax made of reinforcement with a tied handle.