Shelving unit on wheels
A small rack on wheels is more suitable for those who do not have the ability to mount the storage system to the wall or who need a mobile version of the device. This product has some understated elegance that is inherent in simple loft-style models.
To make the shelving sturdy and inexpensive, we will use pine wood. With this material, there are no difficulties in work, and it is also quite strong and durable.
Prepare everything you need
- 15 pine planks 2x6 (5x15 cm) 8 feet (243.8 cm) long;
- 4 pine boards 2x4 (5x10 cm) 8 feet long (243.8 cm);
- 10 pieces 1x2 (2.5x5 cm) 6 feet (182.8 cm) long;
- 2 boards 1x2 (2.5x5 cm) 8 feet long (243.8 cm);
- 1 pine board 2x2 (5x5 cm);
- 2-8-foot (60.9-243.8 cm each) boards;
- dowels;
- 4 metal rods 67.25 inches (170.8);
- 4 metal corner brackets;
- 4 metal furniture wheels ranging from 4 inches (10 cm) to 6 (15.2 cm);
- 2 inches (5 cm) screws;
- sandpaper;
- wood glue,
- putty;
- primer;
- paint or varnish for finishing.

In addition, you will need to use a pocket hole device, drill, level, tape measure, square, pencil, circular saw, grinder.
The dimensions of the rack and the location of the components can be found by looking at the figure below.
Open the rack parts according to the list:
- 15 blanks for 2x6 (5x15.2 cm) shelves 64.75 ″ (164.5 cm) long;
- 10 long shelf end pieces 1x2 (2.5x5 cm) 66.25 ″ (168.3 cm) long;
- 10 side shelves 1x2 (2.5x5 cm) 16.5 ″ (41.9 cm) long;
- 10 blanks of side bars 2x2 (5x5 cm) 11 "(27.9 cm) long;
- 4 parts - side vertical posts 2x4 (5x10 cm) 75.5 ″ (191.8 cm) long;
- 4 steel rods 67.25 "(170.8 cm) long.
Work order
Start your shelving by assembling five identical shelves. Each shelf will consist of 7 parts.
- Prepare pocket holes in 2x6 (5x15.2 cm) planks 64.75 "(164.5 cm) long, they are marked in red in the picture. Assemble three planks together using screws and wood glue, applying it to the joints.

- Next, install 1x2 (2.5x5 cm) 16.5 "(41.9 cm) long strips on the short sides of the future shelves. They are highlighted in blue in the figure. Use screws and glue.
- Similarly, attach the long 1x2 (2.5x5cm) 66.25 "(168.3cm) end strips highlighted in yellow to the shelves.
- Assemble the side racks of the rack. To do this, use 2x4 (5x10 cm) strips with a length of 75.5 ″ (191.8 cm), marked in green in the illustration. First, referring to the schematic image, mark the attachment points of the crossbeams.
- Prepare pocket holes at the ends of the short 2x2 (5x5 cm) 11 "(27.9 cm) long planks. Make connections in the marked places with screws and glue.
- Choose a convenient location for the metal bar-limiter, prepare through holes for it, corresponding to its diameter, on one (rear) vertical bar of each of the two "ladders". Drill carefully, not too close to the edge of the plank, otherwise the wood may crumble.
- Assemble the rack, starting with the installation of the bottom and top shelves. Then attach the averages one by one. Use screws and glue.
- Place the steel rods in place. Secure their position with suitable nuts.
- Fill the recesses in the place of fastening with screws with putty. Leave the rack until the composition is completely dry.
- Use emery paper or a sander to remove residues of the product and, if present, large imperfections on the wood surface. The rack should not have perfectly smooth surfaces, but given that the structure will be movable, it should be safe to use.
- After removing the dust, apply a protective compound (e.g. wood stain) to the wood. Leave to dry.
- If you want, you can varnish the shelving with wood.Such a finishing treatment is not required, but it will protect the wood from aggressive external influences (moisture, temperature drops, etc.). Leave it on for a while to allow the varnish to dry.
- Install metal corner strips on the top and bottom corners of the product using a drill and screws.
- Lay down the shelving unit carefully. Screw the four metal wheels onto the screws to the bottom (at the corners).

Our guide allowed you to assemble with your own hands not just a shelf on which it is convenient to store tools, but a versatile, functional piece of furniture. If desired and some amendments are made, it can serve in the office, living room, kitchen, etc.
Shelving is the main piece of garage furniture
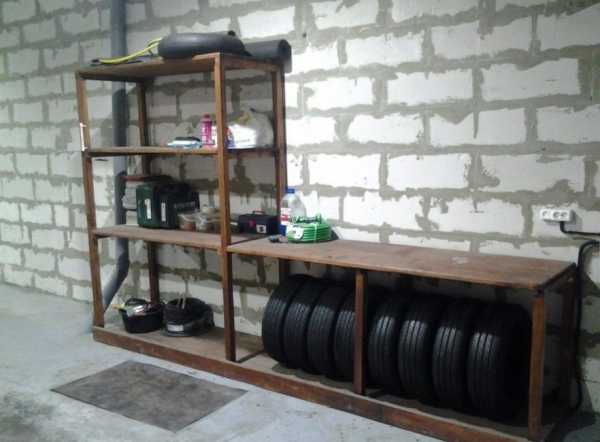
Having decided to make a rack, you need to plan in advance the design features, the location of the cabinets, the very dimensions that will not interfere with the free movement of the garage, as well as the entry of the car. Usually, one wall is allocated for the rack. The height is determined based on what items and parts will be stored here. Determine the number and size of shelves and cabinets, the project is first drawn on paper. The lowest shelves are made wider and higher than the rest, and are securely reinforced. A set of winter tires, jacks, fuel cans, and other large items are stored below. The base of the bottom shelf should be made of a thick board or a sheet of metal in order to prevent it from breaking from the load of heavy loads. Racks built on the entire wall from floor to ceiling have found their practical application. You need to decide on the width depending on the parts and the tool that you plan to place in it. Do not forget about the passage between the machine and the rack, it must be free.
 For parameters - practical depth - width, up to 60 cm of depth per 1 meter of width is selected. In such an opening can fit most power tools, metal, jacks, a car first aid kit, even a spare wheel. Having marked the dimensions of the rack for your garage, you need to take care of reliable structural elements, since it is being built for more than one year. For the base of the rack, a corner is suitable, which you need a lot. The structure is connected by welding, with fastening to the wall. The metal corner is cut into two groups according to the intended dimensions:
- Vertical racks;
- Rack crossbars.
Let's place the vertical racks in place of the new rack along the wall. By welding, you first need to connect the elements from the corners, which will be the basis for the cabinets and shelves of the rack. The main thing is to make sure that after welding the pieces of the corners are strictly in the horizontal plane. Next, we move on to welding the entire frame. After the end of welding, the seams are thoroughly cleaned, then primed, the entire frame is painted from corrosion and other metal influences.
The last step in creating a garage rack on your own is the selection, marking and cutting along the contours of the lines of the wooden floors of the structure. We decide on the location of the board - the laying is carried out along the future shelf or across. Before installing the boards in the rack, wooden floor elements are treated with special protective compounds against mold, rot, insects - pests
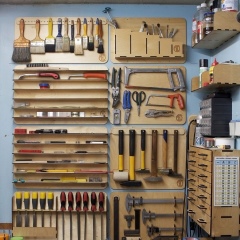
After processing, the board can be opened with enamel. The board is fixed with screws, while screwing it is worth paying attention to the tightness of the board to each other. The finished rack is fixed to the wall using large anchors drilled into the wall, or with tacks using a welding machine to fittings protruding from the same garage wall For the most comfortable sorting of tools, an oblong small container can be attached to the sides of the rack using bolts or screws ( previously produced with graphite, solid oil) for storing screwdrivers, testers

Features of arranging a garage with shelving
The main purpose of the garage is to store cars, motorcycles and other vehicles. And the racks in them play the role of a kind of "organizer" for tools. The main purpose of shelf and rack systems is to facilitate household work. In general, there is a simple pattern: the more shelves of different sizes, the less the likelihood of a chaotic dump. Self-made systems provide more placement options. The dimensions and location of the shelving structures depend on the size of the garage and transport. When arranging a garage, the first thing to do is to determine the materials. Keep in mind - the ideal shelving system is strong but lightweight. The tiers are made of boards or thick plywood sheets, the base is made of metal pipes, corners. The height of the "floors" is calculated so that items of the same type are stacked on top of each other. Also keep a ladder in the garage.
Main technical characteristics of shelving shelves
The main components of any rack are: racks, crossbars, shelves, if necessary, lateral tightening. Puffs allow you to strengthen the product and are two metal strips that are welded or screwed to the racks.
For the most convenient use of a metal garage rack, during the design and installation, you must adhere to a number of rules:
- shelves for any type of structure must withstand a certain load and resist deformation;
- the design should be as functional and compact as possible;
- the overall dimensions of the shelves can vary: width - 1.5 - 2 meters, height - 20 - 100 centimeters, depth - 20 - 20 centimeters.
In addition to choosing the basic structure, you can also beat the type of shelves themselves, the main ones among which are:
- open. Can be vertical (for wheels), horizontal. When installing such shelves, all things will be in the public domain;
- closed. Allow to prevent the loss of things;
- removable. They make it possible to vary the overall dimensions (length and height) of the structure;
- separated. A distinctive feature of a storage system with such shelves is that the shelves are conditionally divided into cells, allowing you to organize and organize things.
Shelving Ideas
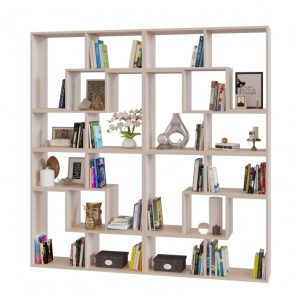
The design of the wooden shelving unit is distinguished by an abundance of identical end-to-end open shelves. The simplicity and versatility of the design determines its practicality, perfect match to any interior style and room.

In the children's room, the rack will accommodate all toys, books and trinkets, while, thanks to the openness of the shelves, it will visually expand the space.


In the office, a half-closed shelving unit is useful in the entire wall with the maximum number of surfaces for placing books, folders or office supplies.

The most common place for shelving is the living room, where this object of time has more aesthetic tasks: spectacular accessories, frames with photographs, sets, indoor flowers are symmetrically and organically placed on the shelves.

For dishes, jars of cereals or spices, they also put a rack in the kitchen.

Size and height
The standard version provides for the average value of these parameters. The height is usually 180 cm (from the floor to the top shelf), the width of the structure will be at the level of 1500-1600 mm. The height of the shelves is of fundamental importance. The ideal value is at least 35 cm, however, options with a 30 cm height are often found. The first shelf is located differently: 60 centimeters from the floor; lower seating is inconvenient. The ideal width (depth) of the shelves is 40-50 cm. Another method of sizing provides for consistency with the height of the room; it is better to use all the space below 50 cm from the ceiling. Hanging shelves can fit the full length of the wall with 10 cm of mounting headroom. The ideal depth of such shelves is 50-60 cm.However, to store boxes, parts, rims and tires, it is recommended to look elsewhere or use hanging shelves with adjustable height and width from 80 cm.


