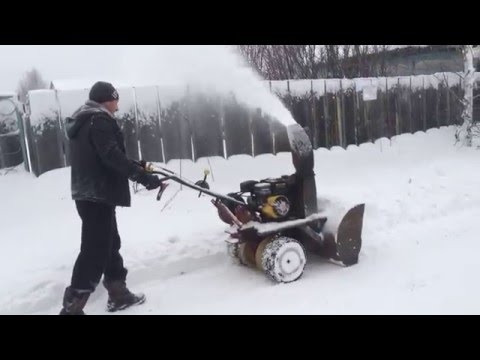
Step-by-step instruction
The entire assembly process can be divided into the following steps, which are recommended to be performed in the following sequence:
- The body of the future snow blower needs to be welded from sheet iron. This should be done so that this box is larger than the Druzhba chainsaw engine or another brand that you use. If you do not follow this recommendation, the unit will rumble and quickly fail.
- In the resulting box, you need to cut a hole for the future outlet pipe. The optimum diameter for this hole is 16 cm.
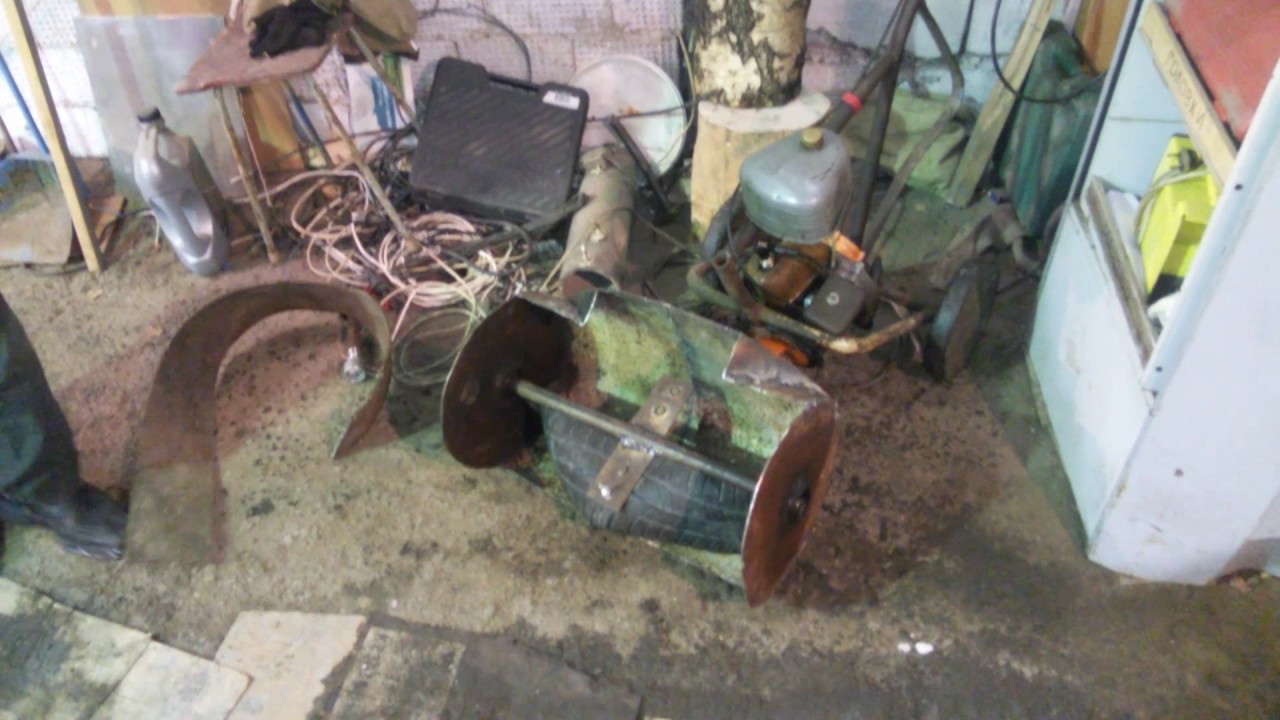
- Next, we start making the auger. You can buy a ready-made pipe on the market, or take it from the pipe from the front pillars of the car. Two blades should be welded into the center of the pipe (dimensions 140 × 100 mm).
- On the sides of the center, where the two blades are located, two blades are welded on each side. They can be purchased separately or made from steel sheet 3 mm thick. For this, four circles with an outer diameter of 3 cm are cut out. Holes with a diameter of 2.2-2.3 cm are made in them.
- Next, you need to cut the disc on one side and stretch it. The end result is something like a spring.
- We install the finished screw structure on bearings.
- It is best to use sealed bearings to prevent snow from getting inside.
-
The auger shaft itself is mounted in the box, and the blades are mounted in the hole on the pipe. They are connected by an asterisk from a bicycle.
- We turn to the manufacture of the unit frame. It is best to make a frame from various cut pipes located longitudinally to the snow blowers themselves. In this case, they will also perform the role of runners, for better movement of the unit.
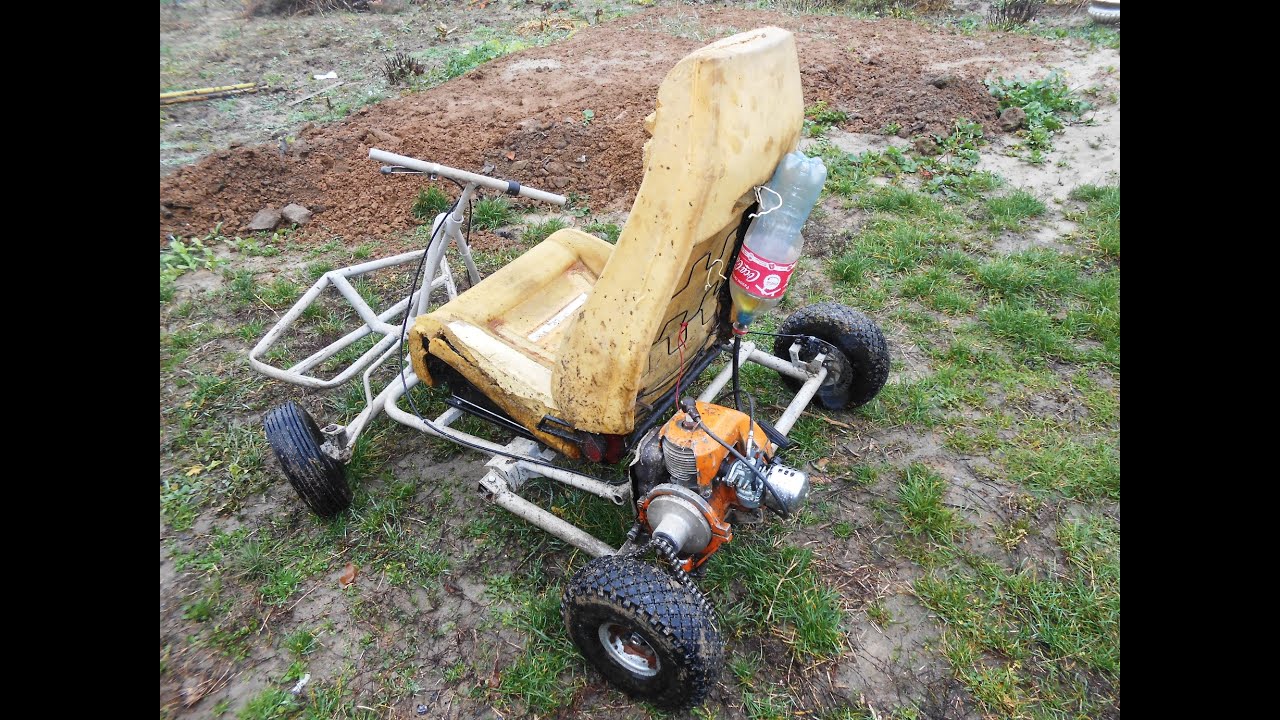
- So, two longitudinally located pipes are welded with two transversely directed sections of other pipes. The chainsaw engine will subsequently be located on the transversely directed pipes. Remember that the distance between the longitudinal pipes must not exceed 70 cm.
- We make a side panel that hides the auger mechanism. We need plywood with a thickness of about 10-15 mm.
- For better gliding of the unit, skis can be made from wooden beams.
- Next, we assemble the entire structure. The body and the screw mechanism are installed on the longitudinal tubes of the frame. They are connected by cooking. The engine from the chainsaw is installed on the transverse tubes of the frame. Make sure the drive and driven sprockets are level with each other.
- At the end, a handle is installed to make it easier to control the structure. A lever is also installed there, which is responsible for the throttle valve of the motor used.
Assembling the snow blower
A homemade snow removal design includes several key components. Among them:
- engine;
- wheelbase;
- tank;
- cardan shaft;
- bearings;
- leading star.
First you need to ensure a strong fastening of the structure. The motor should be positioned strictly in the center to avoid uneven scooping of snow or distortions. It is supplemented with a gas tank, which, for convenience, is attached to the steering support by means of a bolt connection. From an old motorcycle, you can take the throttle grip with a cable, which will allow you to easily control the throttle valve of the motor.
 The bucket will require 20 x 20 x 1.7 mm square pipes. On their basis, you need to assemble the frame, then cover it with galvanized steel so that the bucket does not rust or rot in the future.Steel must have a thickness of 5 mm or more to avoid mechanical damage. The metal sheets are attached to the frame with aluminum rivets. For easier use of the structure, you need to weld a metal plate to the bucket, which will allow it to more easily move in the snow. The plate should be up to 60 cm wide and up to 4 cm long, respectively. It is better to cover it with polyethylene: then snow will not stick to it.
Shaft design
The shaft is one of the key elements in the harvester design. It consists of a pipe, to which screws are welded.
For the shaft you will need to take:
- steel pipe;
- a driven star welded to it;
- bearings for fastening inside the auger tube;
- wing rotors and two rotor blades;
- augers;
- blade wings;
- two support corners.
The propeller shaft is a rotor to which screws are welded parallel to each other, which look in different directions. First you need to take a steel pipe, at the ends of which bearings will be installed. For this purpose, a trunnion is welded on to the end of the pipe, and then closed-type bearings are mounted on it.
 Then you need to install an additional star in the center of the shaft, which will transmit torque from the motor to the shaft. The elements will be connected by a chain, it can be taken from an old motorcycle. Such a star must have 33 teeth in compliance with the step 12.7, it is fastened with special bolts. To ensure that the circuit and other parts of the system are not exposed to negative external influences, it is recommended to provide a housing for the structure.
When the star and bearings are installed, blades are welded to the shaft to clear the snow. You will need 6 steel strips located on each side of the shaft.
The finished rotor should have two 2 mm steel-based duralumin blades. Instead of steel, you can use stainless steel, which will be more durable.
 The blades are placed symmetrically, due to which they will be reliably protected from mechanical stress. Once installed, the structure should appear balanced and symmetrical. To connect the gearbox and the gear sprocket in the process of improving the engine, it will be necessary to replace the drive sprocket of the gearbox with a 17-tooth design, observing a step of 12.7. It is placed on the driveshaft at the end of the second elbow. When working with a wheelbase, you need to take into account that it must have an axle with a pair of bearings, rollers or trunnions are placed on them. They are welded onto the ends of the pipes.
The wheels can be equipped with built-in bearings, in which case it is much easier and faster to replace or repair them. The axle and wheels are secured with M10 bolts.
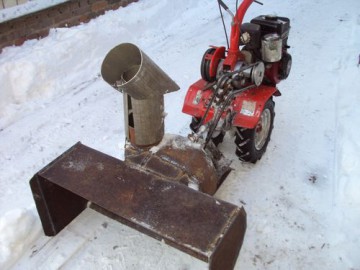
The final touch to the assembly of the machine is the installation of the snow guide. A sleeve is welded to the bucket, snow on it after assembly will go out. If the engine for a snow blower has a power of 7 horsepower or less, then in case of large snow drifts, it may fail.
Sawmill
Several self-made sawmills using chainsaws have been invented. They are:
- Stationary motionless. In them, the chainsaw is placed in a special machine and remains in place - a log moves towards it. Cutting quality is high; workpieces of any length can be cut. But the structure has a complex log feeding mechanism.
- Stationary mobile. Option with rail guides, along which the carriage moves with a fixed saw. The workpiece is motionless. The option is easier to operate, but the length of the logs is limited.
- Mobile. The saw head moves along the log. It is not heavy and can be carried. The workpiece itself serves as a guide. The option is convenient for one-time work or a small amount of cutting. Requires a lot of effort to move the saw.

How to do it yourself?
Before proceeding with the design, it is necessary to approve the drawings in accordance with the selected parameters.In the diagram, you need to clearly indicate the dimensions of the parts and how they are connected. The process of self-manufacturing a household snow blower can be divided into the following stages.
Frame making
The integrity of the internal device and, as a result, its service life directly depend on the strength, shock resistance and balancing of the frame. It is recommended to assemble the base of the frame from metal pipes of the same thickness. Further, pipes with a smaller diameter will be attached to the supporting frame
When welding the frame, special attention should be paid to the longitudinal pipes, over which the box will subsequently be located. They, in addition to the bearing function, play the role of runners for moving the product.
All holes in them must be welded.
To create a platform on which the power plant will be fixed, you need to attach one crossbar to the rear edges of the longitudinal runner tubes and another one closer to their front edges, 20 centimeters from the first. Further, these crossbeams are connected by a pair of longitudinal pipes of a smaller diameter, on which the drive is subsequently fixed. The factory sprocket for the transmission of rotation is replaced by a small sprocket (for example, from an old motorcycle). To ensure easy sliding of the snow blower on the surface, it makes sense to weld an aluminum plate along the width of the runners to its base, to which a layer of polyethylene should be attached to rivets.
Assembling the snow intake module
The auger is an axis on which the knives twisted in a spiral are fixed. Their task is to crush the snow and move it to the middle of the box. There, the crushed snow mass is sent to the cavity of the snow plow by rotating blades. For the manufacture of a shaft, you can take a pipe of small thickness. Its length is selected in accordance with the dimensions of the bucket based on the drawings drawn up earlier.
Two rectangular blade plates are welded to the middle of the shaft.
For the manufacture of blades, it is necessary to cut four circles of the same size from sheets of steel. A hole is cut in the center of each circle for the thickness of the shaft, then the resulting ring is cut along the radius and stretched to the sides. The resulting figures (spiral turns) are welded to the shaft towards the blades
Please note: the blades of the knives should be placed on the shaft at the same distance. Otherwise, the balance will be disturbed, and the device will stagger from side to side during operation.
Manufacturing of the cover and groove of the snow plow
The bucket cavity is made of a metal sheet bent so that the bending radius exceeds that of the blades by several centimeters. In the upper part of the sheet, a cut is made for the snow pipe, in the back - a hole for the chain. It is also recommended to make side walls of metal, however, plywood sheets can also be used. Hubs are located in the middle of the side walls, a shaft with a screw is installed. Before this, it is necessary to put the temporary drive pulley on the trunnion. An asterisk is installed on the edge of the shaft, connecting it to the drive with a chain through a hole in the box.
Connecting parts
It is recommended to paint the metal parts before final assembly to protect them from corrosion. On the platform of the frame there is an engine, a bucket with a screw. The chain is installed. The drive is connected to the switches on the handle.
Chainsaw rotary snow blower
Such a device works as follows:
- The moving auger, which has two inlet turns, moves the snow mass towards the blade.
- This part, when working, throws snow to the side through a pipe.
Such a device is capable of capturing the removed layers on an area of 50 x 40 cm. If it is necessary to increase the productivity of the unit, then it is possible to slightly increase the size of the rotor (by 30%) and make appropriate changes to other parts. The assembly technology is as follows:
- A box of the required dimensions must be welded from a sheet of iron or steel.They should be chosen so that the box is more calm. If this is not done, the machine will rumble during operation due to the friction of the parts.
- A hole 16 cm in diameter is made in the box. It is needed to output the pipe. If you draw a conclusion of a smaller caliber, then during operation it can become clogged.
- For the auger shaft, you can use a ready-made, steel pipe, which is bought on the construction market. The tubes of the front struts from a passenger car, for example, a VAZ 2210, are also suitable. Two blades (metal) measuring 14 x 10 cm must be welded onto it. On both sides, next to them, 2 blades are screwed, which are made in the form of a spiral with two links. They can be purchased on the construction market or made from a sheet of steel with a thickness of 2-3 mm.
- The shaft must be made composite, of two halves. It can also be made from corners that are welded along the fold line. but using a cut pipe gives better results.
- The finished auger must be mounted on bearings of the appropriate diameter.
- All moving parts should be located underneath the removable parts to make it easier to clean the machinery after work.
- The main, propelling auger and motor are electric, therefore, to protect them, the rotor must rotate in sealed bearings.
- The vanes must be installed in the pipe opening, and the auger in the box. Now they are connected with a sprocket that can be removed from the bike.
- Now you need to attach the resulting device to the gasoline saw. When carrying out this operation, you cannot rush - you must correctly calculate the clearances.
- Cook the main frame. An electric motor is installed on it with the help of channels and bolts and connected by a chain with a screw sprocket. Then the gasoline saw is strengthened on the base. The outputs of its generator are connected to an electric motor. You can also make a direct conclusion from the chainsaw - then its sprocket must be connected by a chain to a gearbox, which, in turn, is connected by a chain drive to the auger shaft. The choice depends on the person who is working on this device and the ability to purchase or obtain the necessary parts.
- Thick plywood sides cover all the main mechanisms of the device. For this, a chipboard sheet with a thickness of 1-1.5 cm is suitable.
- They center the auger, check by hand the ease of rotation of the shaft, blades in the pipe hole.
- You can install a homemade snow blower on the wheels, but they can get stuck in deep snow. Therefore, it is best to mount the unit on skis. They are made from two pieces of wood and fixed on the sides of the apparatus. To make them glide better, you need to put thick plastic pads on the boards. They are made from boxes for electrical wiring.
- Now we need to take care of the appearance of the unit made. It can be painted in any desired color.
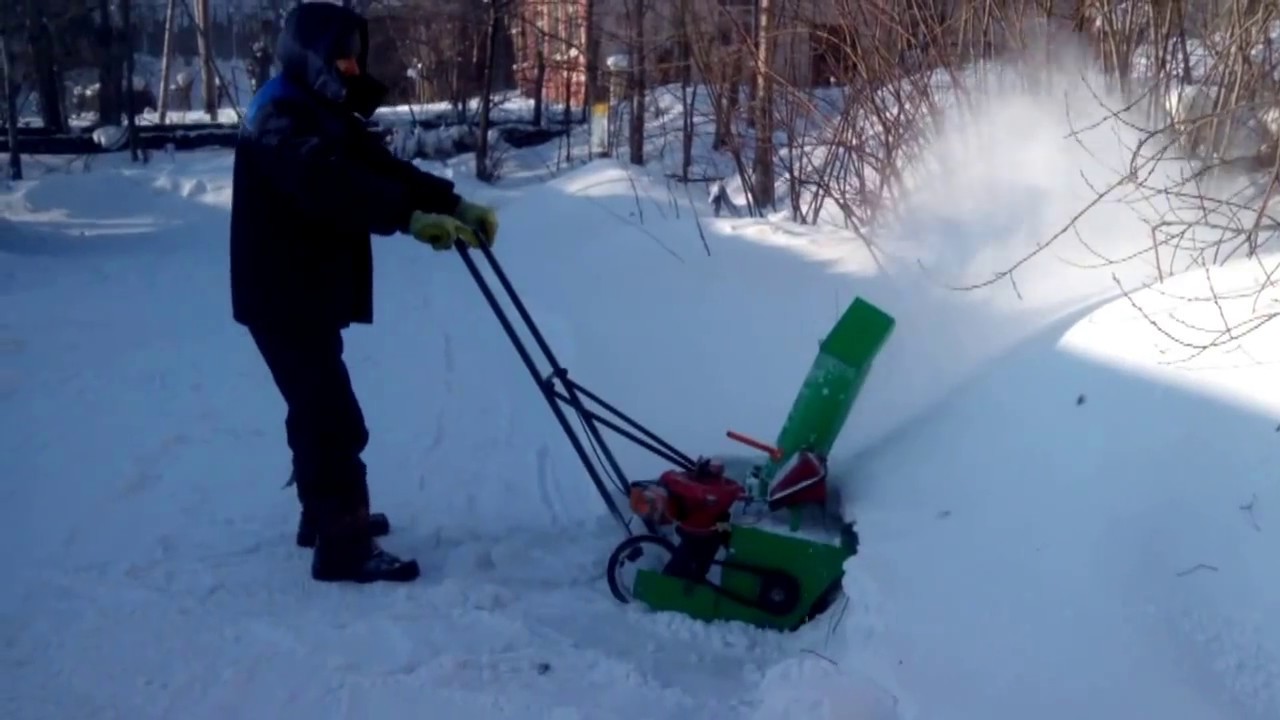
- After that, you need to install the pipe in place and pour gasoline into the tank. They bring the apparatus into action and, slowly bringing it to the snowdrift, allow the auger to enter the depths of the snow mass. Snow dust should fly out of the pipe.
- If everything is in order, then you can start clearing the road from snow drifts.
Currently, there are a large number of different equipment that makes it easier to work in the house and on its territory. In winter, a technique that helps clear snow is especially popular. The structure of the snow blower is simple, so you can, having the necessary materials, make the assembly of the snow blower from a chainsaw with your own hands.
Boat motor
The saw headset is removed from the chainsaw engine, the drive sprocket is removed. The clutch is redesigned by grinding out a smaller cup and replacing the tightening spring, which makes it possible to reduce the mass of the unit and reduce the adhesion force. Connect the shaft of the motor and the gearbox through the coupling.

A channel is used for installation:
- the necessary holes are arranged in the upper shelf for mounting the engine with a gearbox;
- the bottom shelf is provided with a hole, a tube is welded into it coaxially with the output shaft of the gearbox.
A shaft is threaded through the tube, which transfers the rotation to the propeller, and is connected to the output shaft of the gearbox. A fastening-rotary assembly is attached to it, which is used to install the motor on the transom of the boat, raise and lower the propeller into the water.
A gearbox is installed at the lower end of the tube, which receives rotation from the vertical shaft and transmits it to the horizontal one. On the latter, a propeller is installed, which will move the boat.
Which chainsaw is right for a snow blower?
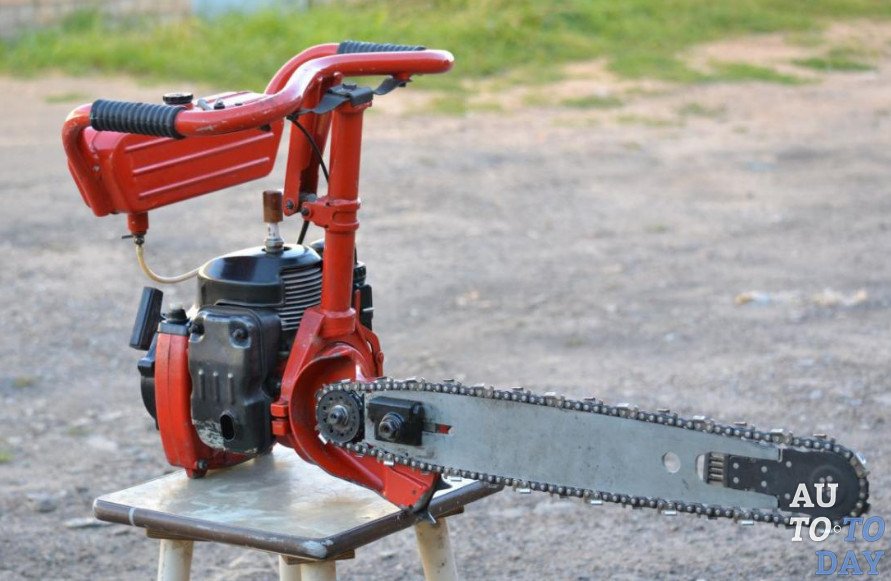
In order to independently make a snow blower from a chainsaw, you will need, in fact, a saw. You can take any brand and model that is available. Craftsmen recommend using the saw "Friendship", "Ural" or "Calm", as they are the most suitable in terms of technical characteristics and differ in the quality of the engines.
friendship
The advantage of the Druzhba saw is its simplicity of design and therefore it is very convenient to disassemble it. In addition, there are no unnecessary bells and whistles in the tool that modern saws can boast and which only interfere with assembling a snow blower. But there are also disadvantages - the Soviet saw is heavy and obsolete.
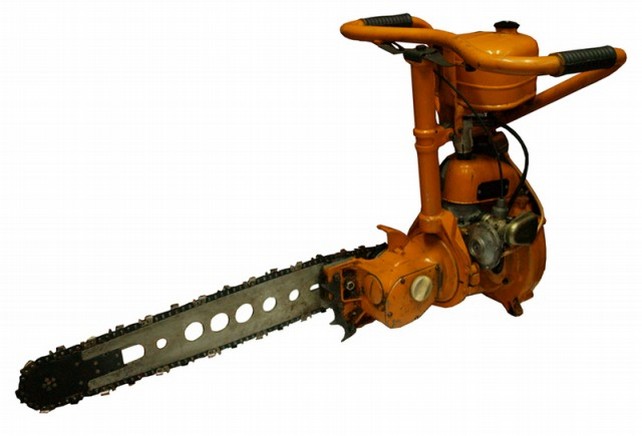 Chainsaw "Friendship"
Its technical characteristics are as follows:
- power - 1 kW;
- weight - up to 12 kg;
- 2-stroke engine;
- tire length - 45 cm;
- gasoline as fuel.
Ural
The excellent technical qualities of the Ural professional saw are the best fit for creating a homemade snow blower based on it. The mechanism is distinguished by its power and performance, moreover, it is adapted for use in severe cold conditions.
 Ural chain saw
Technical details
- engine (gasoline, two-stroke, single-cylinder);
- power - 3.68 kW;
- weight - 11.7 kg;
- parameters - 46 x 88 x 46 cm.
Calm
The "Calm" chainsaw also has sufficient characteristics to be used in a homemade snow blower design. The most important thing is that the power of the chainsaw is enough to start the snow blower. In addition, the calm engine is distinguished by its quiet operation, which will add additional comfort to the movement.

What skills are needed
You do not need special skills to assemble a homemade snowmobile, but it is desirable to be able to work with welding and have a welding machine. To use the above diagrams and drawings, it is advisable to be able to understand them. There is nothing complicated in the design, so almost anyone can assemble such a technique.
Auger, auger body, drive
We turn to the working bodies of the Ural snow blower, namely the auger. It is made from a piece of small diameter pipe. Any shafts up to 80-850 mm long can also be used. An important condition is the selection of bearings for the shaft. This shaft length is needed to ensure its drive, which will be located outside the housing.
Further, 4 circles with an outer diameter of 300 mm must be cut out of sheet metal with a thickness of 2-3 mm. Holes with a diameter of 220-230 mm are cut in these circles. Further, the existing discs are cut on one side and in the place of the cut the disc is stretched, forming a semblance of a coil of a spring. This must be done with all 4 blanks.
Then you need to calculate the center of the shaft, taking into account its segment, which will be used for the drive. In the center of the shaft, two plates 130 mm long and 150 mm wide will need to be welded to it. They should be parallel to each other. These plates will act as snow throwing blades.
The prepared screw tapes are welded on one side to the blades, on the other hand spacers are attached to the shaft, to which the other ends of the tapes are welded. It is necessary to arrange the tapes so that their turns along the movement are directed to the center. That is, on both sides of the blades there should be two ribbons installed in parallel and directed to the center with their turns. Moreover, this entire structure in length should not exceed 700 mm in length, the rest of the shaft will go under the drive.

We pass to the body. It is made of round sidewalls, which should exceed the auger in diameter by about 50-70 mm. Next, a sheet of metal with a thickness of 1-1.5 mm is taken. It bends around the circumference of the sidewalls, and is welded to them, forming a semicircle. Holes are made in the sidewalls in the center, into which the finished auger is inserted. From the outside of the sidewalls, bearings are put on the shaft, pressed against the sidewalls and fixed, while the position of the shaft is centered. To fix the bearings to the sidewalls, you can make cages, or simply weld them to the sidewalls with external cages, but then the structure will be non-separable.
Next, you need to make a snow deflector. It can be made from a piece of aluminum pipe with a diameter of 150 mm and a length of 100 mm, as well as pieces of sheet metal from which you will need to form a box. The section of pipe will be the base of the snowmobile. To install it, a hole is made in the auger body of the required diameter, located so that it is slightly behind the auger blades. A piece of pipe is inserted into the hole and fixed in it with a bolted connection, and a prepared box is already attached to the pipe.
A driven rear sprocket from the indicated motorcycles is put on the section of the shaft reserved for the drive and fixed to it by welding.
It remains only to put together the structure. The body together with the auger is placed on the longitudinal elements of the frame and welded into it. The power plant is fixed to the cross member, but so that the driving and driven sprockets are located in the same plane. A motorcycle chain will be used for the drive. Its tension can be realized in two ways: tension due to the movement of the power plant, but for this it is necessary to ensure the possibility of longitudinal movement of the motor with the possibility of fixing it at any point. It is also possible to implement a bolt-on tension sprocket to the auger housing.
It remains only to attach a control handle made of pipes to the frame, and to bring the engine throttle control to the handle.
Before a test run of the snow blower, you need to check all the connections and make sure that the auger rotates easily and does not cling to the housing elements. Video review of a homemade snow blower from the Ural chainsaw:
Choosing a chainsaw for a homemade snow blower
The power and performance of a snow blower is directly dependent on the engine you choose. This basic element is removed from the chainsaw. The higher the saw power, the better. Engines in household models are two-stroke, power varies from 2 to 10 horsepower. For a homemade snow blower, 5 horsepower will be enough. Below we will consider the most popular brands of chainsaws, which are often used for a homemade snow blower.
Chainsaw "Friendship"
This chainsaw was developed back during the USSR, in 1950, after which it began to be mass produced in the Soviet space. Since then, the technical indicators and characteristics of the saw have become significantly outdated. The weight of the unit is 12 kg, in addition, the saw is large. Experienced owners say that the first saws, which were assembled in the first decade of the plant's existence, still work properly.

Chainsaw Friendship
Gasoline-powered saw "Ural"
Another representative of the domestic production of chainsaws. Ural tools can be called a kind of improvement of Druzhba saws. With the same weight "Ural" has a greater power of a two-stroke petrol-driven engine (5.5 horsepower) and smaller dimensions. In this regard, the performance of these devices is much higher.

Chainsaw Ural
German chainsaw "Stihl"
Imported sawing equipment is often much better in quality and performance. Foreign factories such as the German concern "Stihl" are always trying to produce technological innovations.Of course, this also affects the cost of the equipment. Shtil is one of the most popular companies among the Russian population, because it has high power, excellent quality, long service life and a relatively low price.

Chainsaw Calm
Variants of making a snow blower from engines from different chainsaws
Different chainsaws are equipped with different motors. In this regard, when assembling a snow blower, the manufacturer will need to make certain changes to its device. Let's consider them using the example of those chainsaws, the engines from which are most often used for the manufacture of homemade equipment.
Chainsaw snow blower Friendship
To make the assembled homemade product reliable and balanced, you will need to study the diagrams before assembling it. The drawings should guide the manufacturer on the correct procedure and methods for assembling the components into the general arrangement of the snow blower.
The engine from the Druzhba chainsaw is distinguished by high power, therefore, unlike imported saws, during operation it vibrates and makes noise quite strongly. To make the operation of a snow blower from a Druzhba chainsaw more convenient, you will need to install a thick piece of rubber when installing the motor between the frame and the engine. It will significantly reduce vibration to the frame and to the operator handle.
To reduce noise during the constant operation of a homemade snow blower, the engine built into it will need to be equipped with a muffler. To do this, you need to take a metal one-piece pipe, which must be bolted to the motor or welded. Inside the metal pipe it is necessary to install a rubber gasket, also folded in the form of a pipe.
It must be remembered that due to the high power, a snow blower from a Druzhba brand saw will need to be equipped with a stronger chain. It must withstand high loads, otherwise, the snowplow will fail quickly enough.
Chainsaw snow blower Ural
Like Druzhba saws, Ural garden chain tools have an increased supply of torque and traction. Therefore, when assembling a snow blower from a Ural chainsaw, you can draw in advance a diagram of a large-sized machine with a wide volumetric bucket and a powerful auger mechanism.
The base of the snow blower will be a frame consisting of three rather than two longitudinal tubes. An additional pipe is needed to increase the stability of the machine on slopes and slopes. At the rear of the frame, 3 transverse narrow steel plates, at least 5 mm thick, must be welded. Install the engine over the pipes and fix it with 5–6 powerful bolts.
The motor must be connected to the wheels and auger by means of a chain drive. For its installation, 2 large sprockets are required. During intensive work of the snow blower from the used chainsaw, they must be lubricated, otherwise the parts will quickly heat up and crack.
To operate a home-made machine, you will need a powerful auger consisting of a shaft with a diameter of 5 to 7 mm, as well as 4 screw plates. They should be parallel to each other on the shaft and point directly to the center of the bucket. Bucket welding requires 2 sidewalls and a semicircle made of galvanized steel.
After assembling the snow blower, all metal parts must be painted to protect them from corrosion.
Chainsaw snow blower Calm
A machine made from a German brand chainsaw will turn out to be small-sized and quite maneuverable. Before you start assembling it, you will need to carefully study the drawings, which will indicate the dimensions of the parts and their location in the general device of the snow blower.
The role of the base of the chainsaw snow blower will be played by a sturdy metal frame. A motor must be mounted in its rear part, under which it is necessary to first install and fix rubber, 5 mm thick.Between the two longitudinal pipes of the frame, a chain drive must be carried out, under which a galvanized steel plate must be welded to the pipes.
Next, you need to weld the intake bucket. For a snow blower from a household chainsaw Stihl, the dimensions of the bucket should not exceed 60 × 50 cm in width and height, respectively. An auger is mounted inside the bucket, consisting of a 65-cm shaft and screw plates located on it.
A ready-made snow blower from a Stihl chainsaw will be able to remove dry and sticky snow, as well as clear snowdrifts up to 50 cm high.
Useful Tips
To prevent the snowblower from crashing into the ground, the edge of the blade is sheathed with metal. It will also strengthen the strength of the finished product. If the dimensions of the blade are 45x25 cm, then it will have the shape of a bucket. To extend the life of the snow blower, at the first check, every 20 minutes, inspect all fasteners of the elements, and then continue working. You should also check the condition of the V-belt and other important components and systems of the manufactured structure.
Tighten the screw connections regularly. To avoid metal corrosion, you need to treat metal surfaces with special solutions to protect against rust. If these conditions are met, the snow blower will work effectively for many years. People who made a snow blower on their own leave positive feedback on its work.
If you make snow blowers with your own hands, observing all the above rules, then the tool will be durable and reliable. Always, before starting the assembly of the device, follow the drawings with an accurate indication of the dimensions of the parts and assemblies of the future unit. If you do not have the skills of a welder, then you need to invite a professional to join the parts.
Moped
The procedure for converting a bicycle into a self-propelled unit is as follows:
- Remove the cover and dismantle the tire from the motor housing.
- A creeper is made in the form of a shaft, on which small and large sprockets from a bicycle are attached at different edges.
- A small sprocket is installed on the engine output shaft, and a large sprocket is installed on the bicycle wheel, next to the existing one.
- Mount the motor and creeper at the back of the seat on an additional frame.
- Chains are put on, connecting the smaller and larger sprockets at the engine with the creeper and at the latter with the bicycle wheel.
- A lever is brought out to the handle of the bicycle handlebar, which regulates the supply of gasoline in the power unit.

Why from Friendship
The main advantages of the Druzhba chainsaw: simplicity of design, reliability and low cost. It was developed in 1953 and was produced until the early 2000s. During the entire production period of the saw, its design remained unchanged, but some units were modified.
The technical characteristics of the Ural chainsaw are higher than those of the Friendship saw. It has a more powerful engine (5 HP), lighter weight (11.6 kg) and high productivity. But due to the high fuel consumption and the automatic chain lubrication system, in the manufacture of home-made devices, such a saw is used less often than Friendship.
Manufacturing of imported production will cost more. To operate such a device, you will need high-quality oil and fuel. And in the event of a malfunction, specialized and expensive repairs will be required.
Snow blower
The homemade product is simple, it is not difficult to do it yourself. First, a frame is made, which is welded from pipes of 3-4 centimeters in diameter. Its shape is U-shaped, with 2 additional crossbars located at the rear of the frame at a distance of 20 cm from one another.
The longitudinal frame elements are used to move the snow blower, being runners. Their ends are made oblique, the holes are welded to avoid clogging with snow. Crossbars are needed to accommodate the power unit.
The motor from the chainsaw is freed from the frame and reworked:
- remove the drive sprocket;
- a small sprocket is installed in its place, which is used as a drive in motorcycles "Voskhod", "Minsk".
Making a self-made snow blower auger:
- For the shaft, an 80-85 cm pipe section of the same diameter as for the frame is used. In the center, on the sides, 2 plates 13 cm long and 15 cm wide are welded. They are needed to eject snow.
- 4 circles with a diameter of 30 cm are cut out of sheet metal with a thickness of 2-3 mm. The inner parts are removed - discs with a diameter of 22-23 cm. The remaining circular elements are cut in one place and stretched, giving them the shape of springs.
- Each pair of springs is placed symmetrically to the shaft, welded with one end to different sides of the central plates at their end sections. The other ends are connected to the shaft through metal spacers. The direction of the turns is towards the center of the shaft. The length of the screw part is 70 cm.
- A metal case is made of sheet metal to accommodate the auger. It consists of 2 vertical sidewalls with straight lower and front edges, while the back edge is made in a circle. The latter is covered with a sheet of metal. The dimensions of the body must ensure free placement inside the auger. The size of the gap is 5-7 cm.
- The auger is inserted into the holes on the sidewalls. The ends are placed in bearings welded to the latter from the outside. On one side of the shaft, a driven sprocket from the same motorcycles is attached.
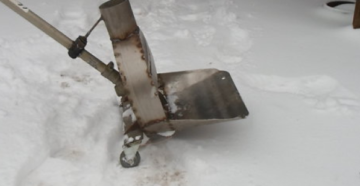
For the manufacture of a snow plow, a piece (10 cm) of aluminum pipe and a box are used, which are welded from sheet metal. The first is fixed in a hole, which is arranged in the center of the housing cover approximately in the middle of its width. The box is bolted to the segment.
The housing in which the auger is installed is placed at the front of the frame. The sidewalls are welded to the longitudinal pipes. The motor is fixed to the frame crossbars, placing the driving sprocket and the driven one, installed at the end of the auger shaft, in the same plane. The sprockets are supplied with a chain, not forgetting to arrange a tensioning mechanism (an additional sprocket, bolted to the sidewall of the auger body).
To control the unit, a tubular handle is arranged, a lever is brought to it, which regulates the fuel supply to the engine.
Conclusion
Designing a homemade snow blower from an existing chainsaw is a fairly optimal way out of a situation when there is not enough money to buy a snow blower in a store.
Taking into account the fact that the cost of even the cheapest unit can be at least 15 thousand rubles, this issue becomes quite acute. (read the article on choosing a gasoline snow blower)
The use of the engine from a chainsaw is also good because its power is enough for cleaning fairly large amounts of snow. At the same time, the power of a home-made snow blower is almost identical to that of store models (see the Lynx snow blower).


