How to make a homemade pipe vise
Vise for clamping pipes differs from ordinary locksmiths both in appearance and in operating features. The movable jaw moves vertically. It is necessary to clamp round objects in these vices, and then use a gas wrench to forcefully twist the stuck coupling or cut a thread in the pipe with a die. In this case, the vise should keep the part from turning. And the pipe must be tightened firmly, but carefully so as not to wrinkle it.
To meet these requirements, a cutout is made in both jaws in the form of a triangle with a height of 30 - 40 mm with a notch on the sides.
Pipe vices
Materials and tools
As raw materials for the manufacture of a vice, several cuts of pipes with a diameter of 0.5 and 1.5 inches and a length of up to 200 mm are needed, cutting of profile pipes with a cross section of 50 × 30 mm, 40 × 25 mm and 30 × 20 mm. The movable jaw requires a piece of sheet steel with a thickness of 10 - 15 mm. For the lead screw, the trapezoidal thread is cut on a 10 - 12 mm bar.
Blueprints
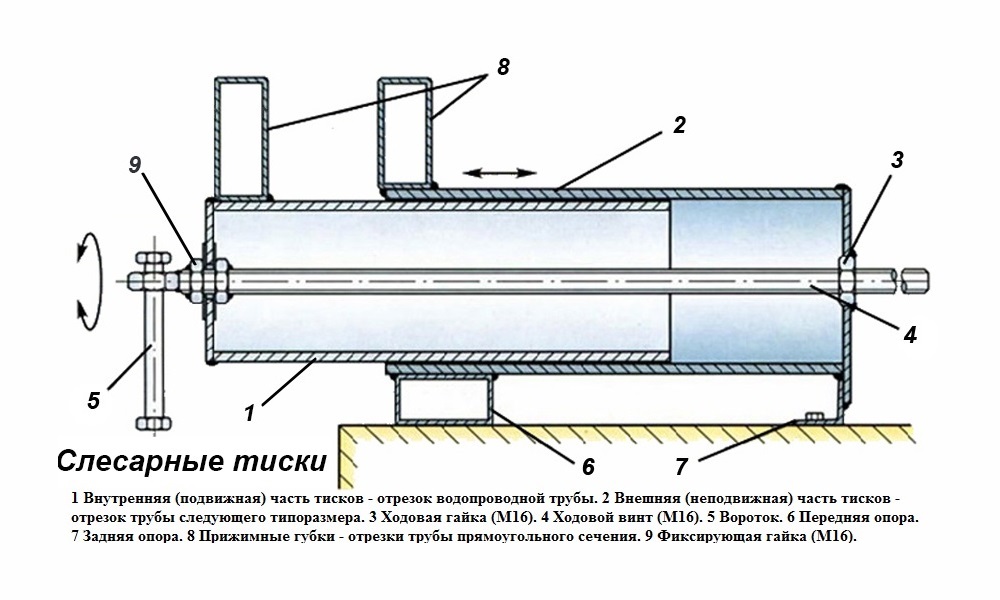
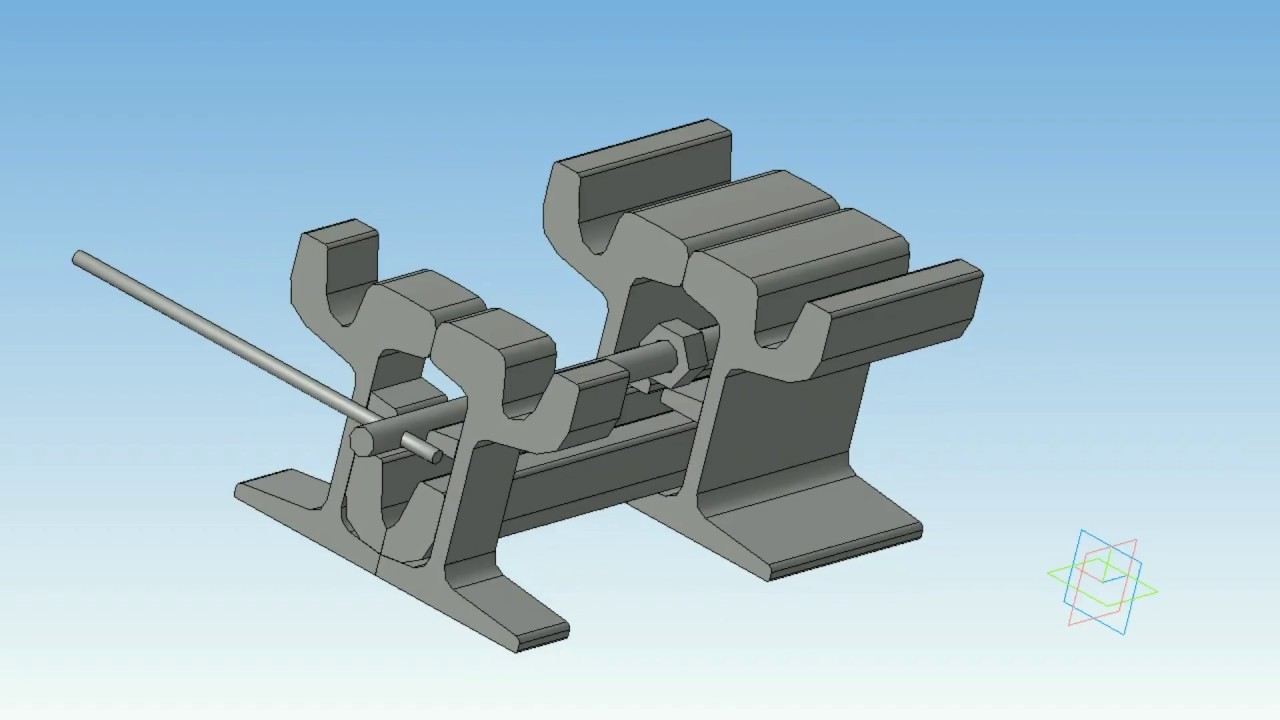
Below is a diagram of the work of a pipe vise. The sizes are chosen according to individual requirements.
Pipe vise scheme PHOTO: Leonid Shalman
Manufacturing instruction
Round tubes are used as vertical posts of the vise frame, profile ones are used as horizontal components. A short section of the profile pipe is welded onto the upper crossbar to form a thread for the lead screw. Sponges are cut from pieces of thick sheet. It is better not to make the lead screw yourself, but to find a ready-made one, for example, from an old valve.
To grip thin pipes, the upper jaw must be made smaller in width than the lower one.
Specialized fixtures
We looked at options for how to make a classic vise. However, for a full-fledged locksmith or carpentry work, special tools are needed:
Corner
Designed for fixing workpieces at right angles.
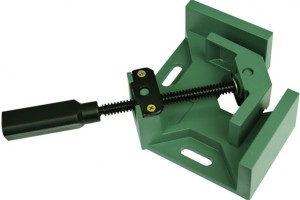
Industrial Corner Vise
Despite the seeming complexity of execution - such a clamp can be made by hand.
The bed is welded from steel with a thickness of at least 4 mm. The stop corners are located strictly at an angle of 90 °. A bracket for a running nut is installed symmetrically to the thrust planes.
With the help of a hardened steel pin, a movable retaining angle, also 4-5 mm thick, is fed to the stops. In the center of the retaining corner, a wrench flange is mounted.
IMPORTANT! The thrust nut and flange must not be firmly fixed. Otherwise, only workpieces of the same thickness can be clamped.
When carrying out welding work, it is just necessary to fasten workpieces of different sizes.
To do this, the thrust nut and the flange on the retaining angle are attached using an axis that makes it possible to change the position of the crank pin horizontally.
Homemade corner vise from the corner
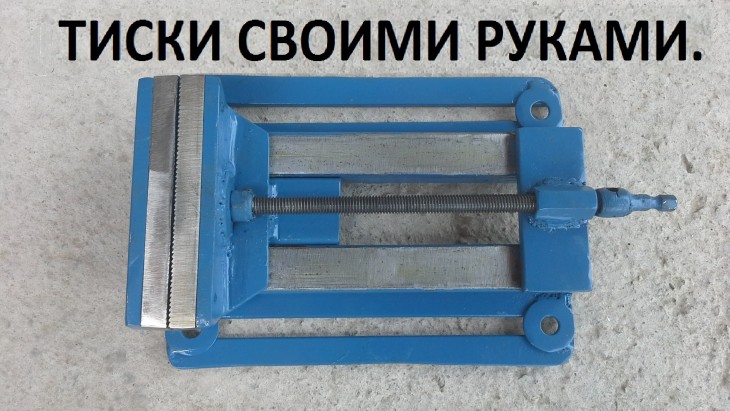
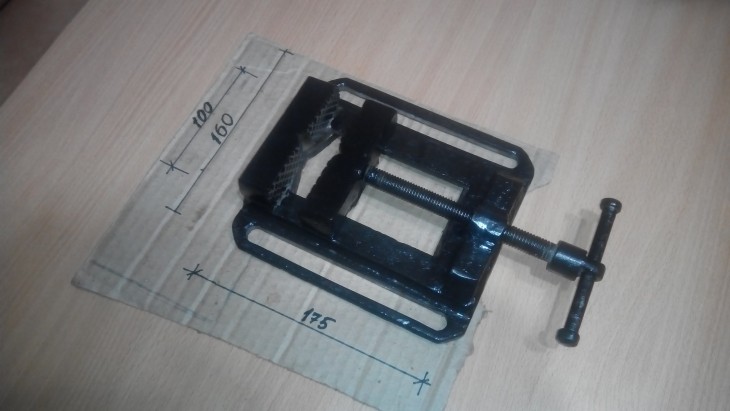
Drill vise
A fairly common device of narrow specialization. Drilling machines are usually equipped with clamps, but this increases their cost.
The device can be made by yourself. Moreover, for most drilling work, a device made of wood will suit.
For manufacturing you will need:
- plywood sheet 10-12 mm;
- two smooth pins for guides;
- threaded pin for the knob;
- furniture persistent nut;
- screws, nails, PVA glue;
The frame is made of plywood. It is necessary to draw a drawing, and carry out all the work at the place.
We take a sheet of plywood
Next, we glue the sandwich for the manufacture of sponges and a stop bar.
Clamps can be taken less than in the photo if you use a 40x20 square pipe for clamping
From the resulting array with a thickness of 25 mm, we cut the same bars.
We cut the bars
Trying on the blanks on the bed.
Blanks according to the drawing
We use steel or aluminum tubes as guides. All holes must be strictly parallel to each other. For high-quality holes, it is better to use not a drilling machine, but a router with a slot cutter. Checking the assembly.
IMPORTANT! The play in the holes should be minimal.
Marking and drilling bars
We install the furniture nut in the stop bar. We fix the bars on the bed.
IMPORTANT! The movable jaw should not touch the bed, for this its height is reduced by 1-2 mm.
Assembling parts
To fix the crank in the movable lip, ordinary nails were used, in the form of locking pins. Homemade vise for a drilling machine is ready:
General view of the finished plywood vise
Design features
Starting the difficult process of making locksmith yews at home on your own makes practical sense due to the achievement of great advantages. Such a necessary tool:
- useful to everyone who is fond of metalwork - carpentry, plumbing;
- you will need it in an apartment, in a country house, in your house;
- allows you to perform with high precision various works - surface treatment, deburring, drilling, chamfering and more.
An additional motivation for making a do-it-yourself locksmith vice is cost savings. The finished products that are sold in stores are expensive.
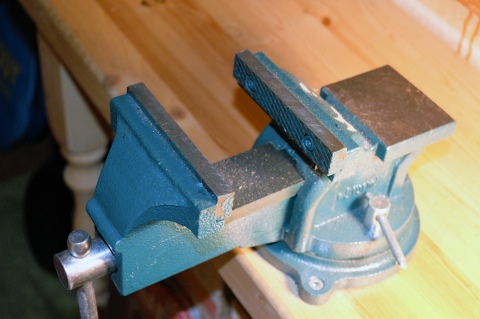
Locksmith vices, installed in various factory workshops, consist of structural cast iron (bed) and tool steel (stop screw, handle, clamping jaws, bolts, nuts and other fasteners). Due to technological and objective difficulties, it is not possible to make the necessary tool for the house from the alloys listed above. Therefore, home craftsmen have to look for an alternative, choosing a design where the use of cast iron is optional.
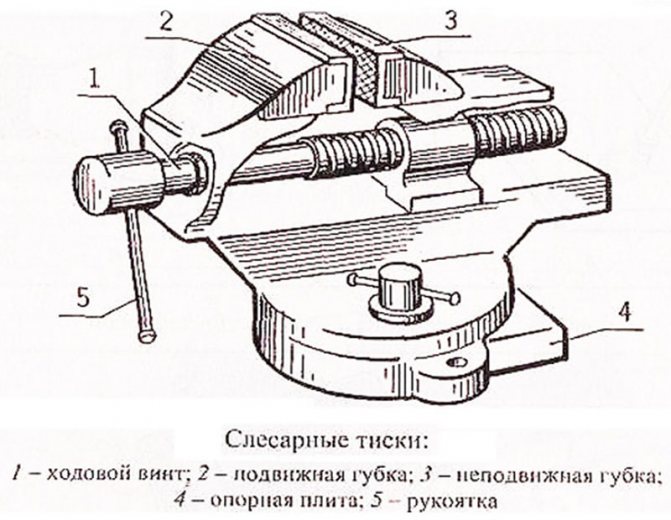
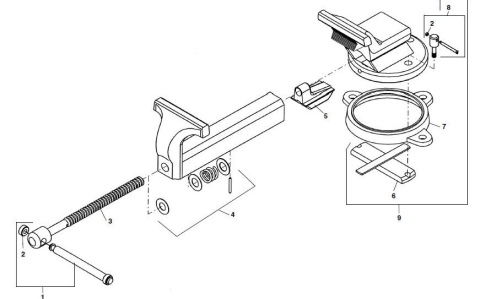
To understand how to make powerful locksmith yews without outside participation for their own needs, a person must know the device of standard samples installed in factories, as well as the specifics of the operation of such devices. Structurally, a locksmith vice consists of several main parts:
- base;
- movable and fixed jaws;
- parallel replaceable plates;
- thrust and clamping screws;
- inner nut;
- a pen.
In popular models of factory vices, a rotation mechanism is provided for a certain number of degrees. For home modifications, it is not of much interest, so craftsmen who make a vice for their own needs do without such a widespread improvement.
Before starting the required actions, the foreman pulls back the movable mechanism with a replaceable metal plate using a long handle. Next, he inserts a part, a workpiece into the formed gap and begins to twist the mobile part of the vise until it stops, with a clamp, applying characteristic forces.
The fore / aft adjustment of the vise with a movable jaw is carried out by a long screw with an inch or trapezoidal thread, with a large pitch, which moves sequentially inside a fixed nut installed in the body. The rotation of the mechanical device is performed after loosening the clamping screw and is carried out by the master using the necessary efforts.
Some men, in order to save finances and personal time, make miniature locksmith's vice from improvised tools. The most famous version of a simple device used at home is the improvement of pliers. A through hole is drilled in the clamping jaws, a thread is cut.A bolt is screwed into the prepared hole on one side, and a nut is screwed on the other. During operation, the part is inserted between the jaws and clamped by a bolt / nut pair. It is difficult to prove all the advantages of a mobile design, because it is still better to use a stationary vise to achieve comfort and safety.
Required tools
Before starting work, you should carefully think over all the nuances, especially when the time comes to draw up a drawing, because in the project it is necessary to take into account the specifics of the design of yews. For example, it is advisable to provide a small anvil for processing various parts with a hammer, the ability to achieve a minimum backlash of the lead screw, the option of removable plates on the jaws, as well as a method of attachment to a workbench or other suitable table. And you will also need professional tools.

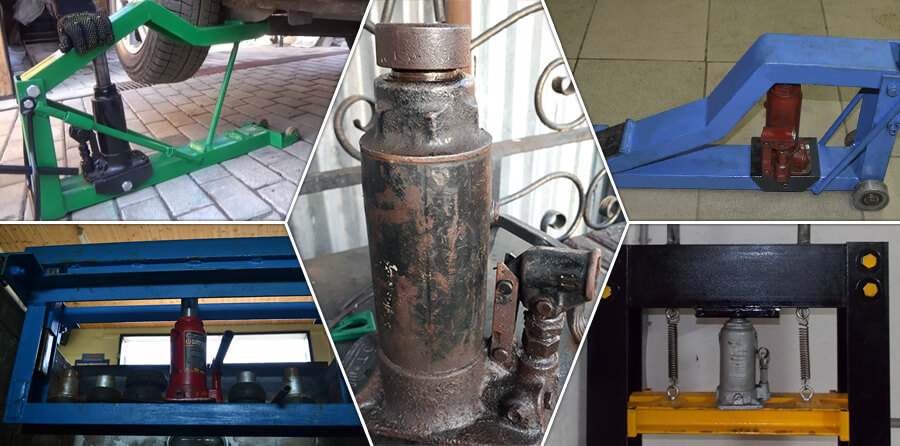
And also devices can be assembled from a hydraulic device, if, for example, the unit has broken down or is no longer in use. There are no plastic, plastic or wood parts in the locksmith vise, therefore all parts, except for the stops on the handle, will be made of metal.

To make a small locksmith vice, you will need to prepare a drawing or sketch and a tool in advance:
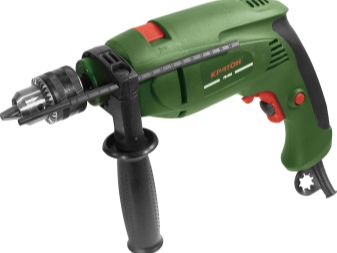
- electric drill;
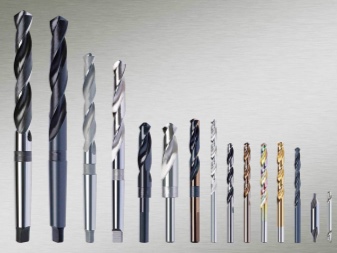
- drills of different diameters;
- pencil or felt-tip pen;
- file;
- tap, knob;
- a set of keys;
- angle grinder;
- ruler;
- welding machine.


Materials required:
- a metal sheet;
- corner, channel or other profile;
- a piece of pipe for a handle or a rod;
- workpiece for a stop screw;
- bolts, washers, nuts;
- dye.
The above list is approximate, because the equipment for making a vice depends on the model.
Do-it-yourself vise at home
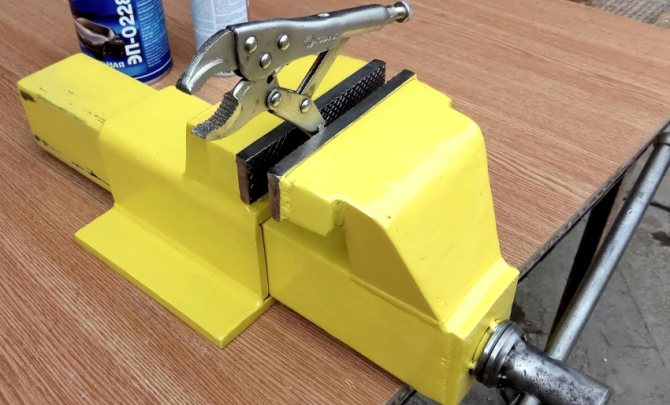
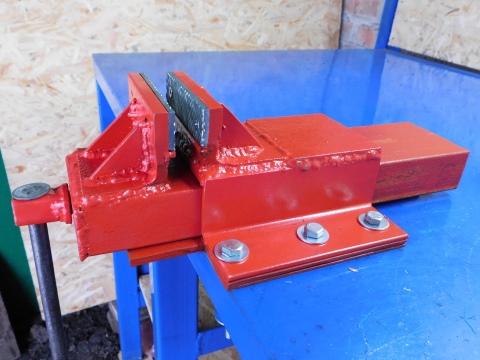
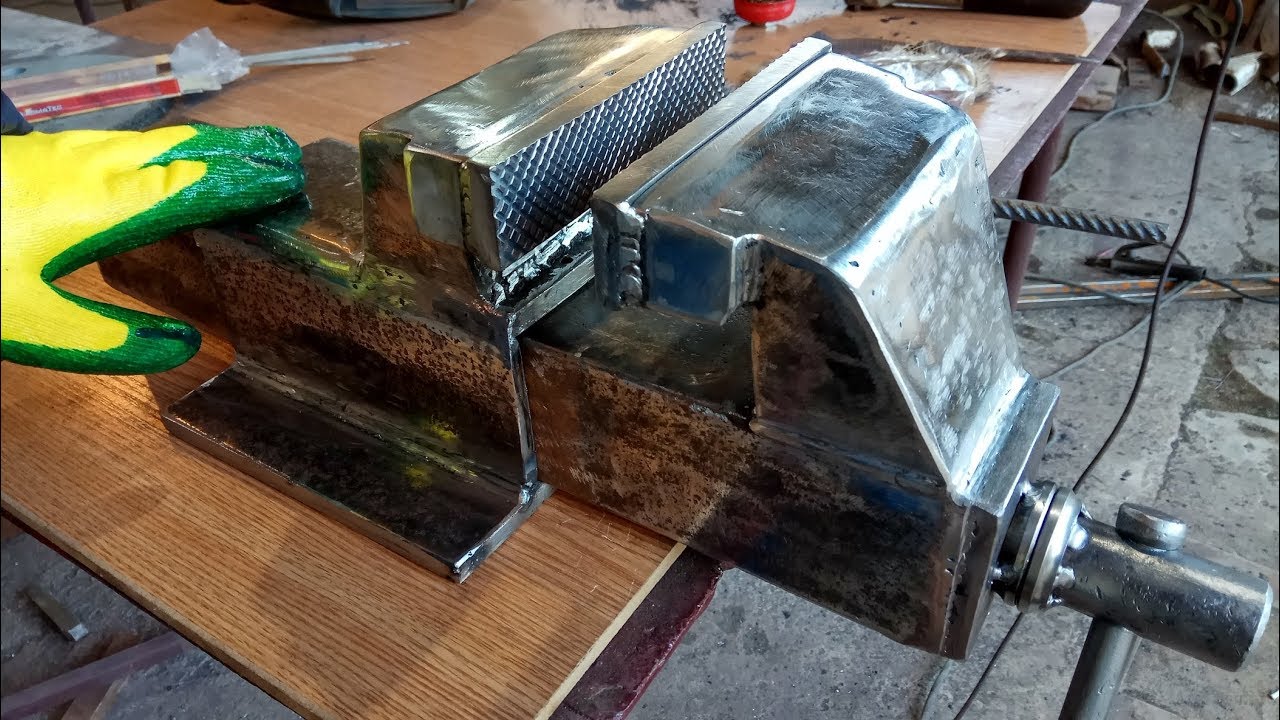
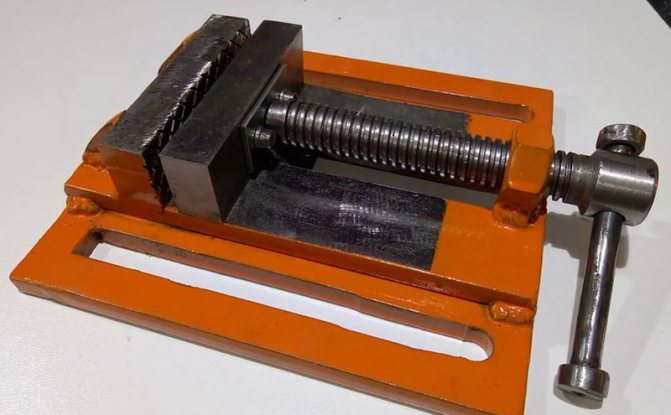
So, for example, a do-it-yourself locksmith vice from a channel, a corner and a plate was chosen. Material - steel of unidentified grade (theoretically St5). Used products from an old plumbing valve are used as a lead screw and nuts.
Fastening - welding, we will cut the metal with a grinder.
How to make a homemade vise:
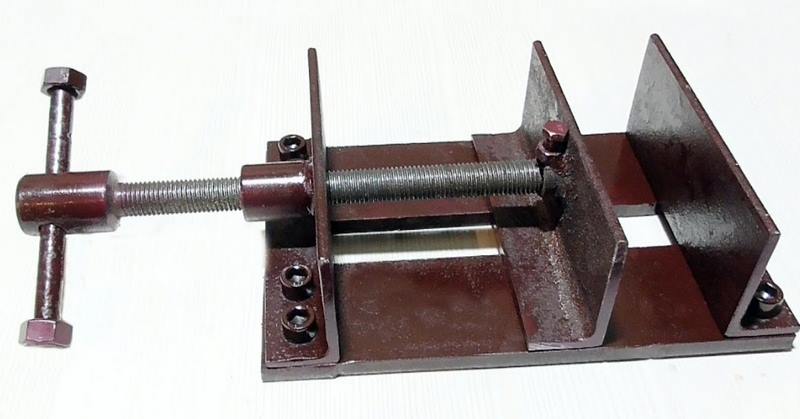
- cut off a piece of the channel of the required length, pick up two plates of thick sheet steel for attaching the lead screw to it. One is placed at the end of the section, the other - approximately in the middle;
- a base part is cut from a plate with a thickness of at least 3 mm (preferably 5 ... 8 mm). Additionally, three parts are made from the corners and the plate (for the welded holder);
- the holder can be connected to the base plate by welding or bolts. Below is the variant with bolt holes. A running nut is attached to the base plate
- clamping jaws are made from the corner and the plate. You can fasten the parts by welding or bolting. If you plan to use a homemade vise for a drilling machine, including for work with shock loads, it is better to refuse welding - with such an effect, the weld may disperse;
- all that remains is to mount the clamping jaws on the vise from the channel (the drawings show exactly where it is better to fix the parts) and install a metal rod in the hole at the end of the lead screw. It will play the role of a lever for turning the screw and, accordingly, moving the movable jaw. To prevent the rod from flying out of the hole, at the end it is counterbalanced with a nut.
If desired, you can strengthen the design of the jaws by welding additional elements to them - kerchiefs.
If the steel is susceptible to corrosion, it is better to paint a homemade vise for a drilling machine after all work is completed. You can do this with your own hands with a brush, since a spray gun or roller is inconvenient in this case. Disassembled vise is painted.
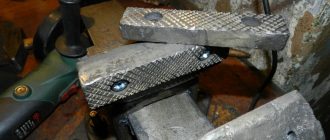
On the jaws from the inner, working side, you can additionally attach pads made of an aluminum corrugated corner - this will improve adhesion between surfaces.
The video describes in more detail how to make a vice at home with your own hands.
Varieties of vise: which fixtures to choose for different jobs
There are several types of vise, which are classified according to different parameters. One of the main identifying elements is the type of clamping mechanism. Based on this factor, the following types of vice are distinguished:
- screw;
- wedge-shaped;
- with installed diaphragm;
- eccentric;
- with pneumatic device.
Depending on the purpose, the vice is divided into the following types:
- carpentry;
- locksmiths;
- machine tools;
- manual.
Taking into account the material used, these devices are also divided into types. Joiner's vice for a workbench is most often made of wood, and locksmith's - of metal.
Vices are available in wedge, screw, eccentric and pneumatic
A locksmith vise is the most common type of tool in question. These devices have their own subspecies, they differ in size, or rather, in the width of the jaws. This figure can vary from 63 to 200 mm. Small vices are used mainly for household purposes. They are fastened with a lower clamp screw on a small machine, but more often on a table or an ordinary stool. Larger vices are installed in industrial workshops and large workshops for the purpose of processing large parts.
Locksmith vices: price, features and varieties
A vise for locksmithing is a must-have item in any industrial workshop. Such equipment is necessarily present in the workshop of an experienced, self-respecting master. Moreover, depending on the shape, type of fastening and the material to be processed, they are divided into several types.
Pipe vise is used to fasten pipes or cylindrical parts.
The main advantage of the rotary vise is the ability to fix the part in the required plane and at the right angle for organizing the workflow. With their help, it is possible to process the most inaccessible parts and their areas. At the same time, it is almost impossible to do this on an ordinary vice. Like all installations of this type, rotary products can be stationary - these are bench joinery vices that are attached to workbench tables. Another subtype is a vise with a built-in clamp for attaching to a table.
A vise for locksmith work is a necessary tool not only in an industrial workshop, but also in a home workshop.
Hydraulic vise is designed to provide more reliable fixation of especially large parts. Clamping in them is carried out under the pressure of compressed air. Basically, such tools are installed in large industrial enterprises. The price of this type of joinery vice is high, and the device is rather complicated, so the tool is not intended for home workshops.
Self-centering vise is necessary in high-precision production, that is, wherever precise fixation of a part in a certain position is required. Typically, this type of vise design requires a bearing base.
Features and varieties of joinery vice
Joiner's vice is used for processing wood parts. This type of work is specific, therefore it assumes a special design of the tool itself, which is different from the device of a locksmith's vice. Most often, joinery vices are made from solid wood, and the parts are fixed with wooden vise sponges. In this regard, they should be wider than that of a locksmith's vice, in addition, they assume a significantly larger clamping area.
Joinery vice most often has one base, but two guides. With their help, the movable jaw is held, which makes it possible to avoid distortions. In this case, the guides can be an integral part of the workbench, or they can be removed if necessary.
Joiner's vice is designed for processing wood and plastic workpieces
Carpentry vices are also classified based on the technology used in the screw activation process. On this basis, they can be manual or pneumatic. If design features are taken into account in the classification, then the vice is subdivided into rotary and non-rotary.
As mentioned above, carpentry models are used to process wood and plastic blanks. Therefore, wooden parts are mounted on the jaws, which helps to avoid clamping marks. When the device is front mounted, there is a chance to work vertically with fixed parts.
What to expect from self-made
The described device is, of course, temporary - all of its parts grind rather quickly, even if the tree is pressing against the tree. Therefore, let us first deal with the question: what homemade vise is worth making?
Clamping devices of the most varied kinds are innumerable in technology; patents for them number in the thousands and tens of thousands. It makes sense to make a vice, first of all, the most common ones on your own. Secondly, they do not require special materials, production equipment and complex technologies for the manufacture.
Ordinary locksmith's vice (item 1 in the figure) will have to be made non-rotating. Otherwise, you will have to look for either a ready-made pair of neck-skirt (see below), which, moreover, can be taken away during assembly by welding, or the opportunity to use a shaping machine (simply shaping). Of which there are very few on the go, labor-intensive and energy-intensive shaping processing is increasingly being replaced by precision casting, stamping and robots.
Variety of vice
Adjustable (mobile) mini-vice, pos. 2, seems to be simpler, but for their manufacture you need especially high-quality and, accordingly, difficult-to-process materials. The fact is that the pressure of the hand vice is determined by the muscular strength of the worker. And the cross-section of the parts of the vice with a decrease in their size decreases according to the quadratic law, i.e. quickly. The paws most often break off just at the mini-vice. However, it is not difficult to expand their functionality on your own, see below.
Ordinary carpentry vice, pos. 3, are part of the carpentry workbench and are inoperable without it. But then we will look at how to make a Moxon vise for woodworking, which turns any work table (including even a writing one) into an almost full-fledged carpentry workbench.
Here's what a home craftsman really should do on his own is a one-coordinate machine vice (simple non-rotating table) to the drilling machine, pos. 4. They can also be used independently (separately from the machine) for a wide variety of jobs. The material for machine tools is usually commercially available; work on the manufacture of machine vices that are not inferior to the proprietary ones, literally nothing is required.
Jewelry vise hand (item 5) and table (item 6) are the most convenient pieces for small precision work. But alas - special materials and equipment are needed for their manufacture, which is available at any general machine-building plant. At home, you can make good substitutes for the "frog" vice, pos. 7, which, by the way, are often included in the set of table jewelry vices, pos. eight.
But with an angular vise (pos. 9) for clamping parts connected at an angle, the case, as they say, is dull. It is possible to make their similarity with your own hands (pos. 10), but, firstly, it turns out that it is very difficult to secure the clamp already at a fixed angle of exactly 90 degrees, and if you succeed, then the angle then quickly "floats". There is no need to talk about a homemade corner vise with an adjustable clamping angle. The same applies to 2-3 coordinate manual machine vices (pos. 11-14) and, for example, devices for knitting fishing flies (pos. 15), which are no longer a vice, but a narrowly specialized machine.
Manufacturing instruction
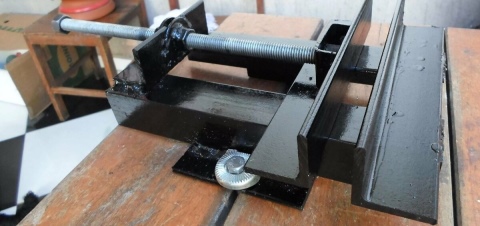
It is necessary to start the process of assembling locksmith yews when all the tools and materials are prepared, and the dimensions applied in the drawing are not in doubt. First you need a steel channel, an angle and a metal sheet. The channel will be used as a fixed part in the manufacture of a useful device.
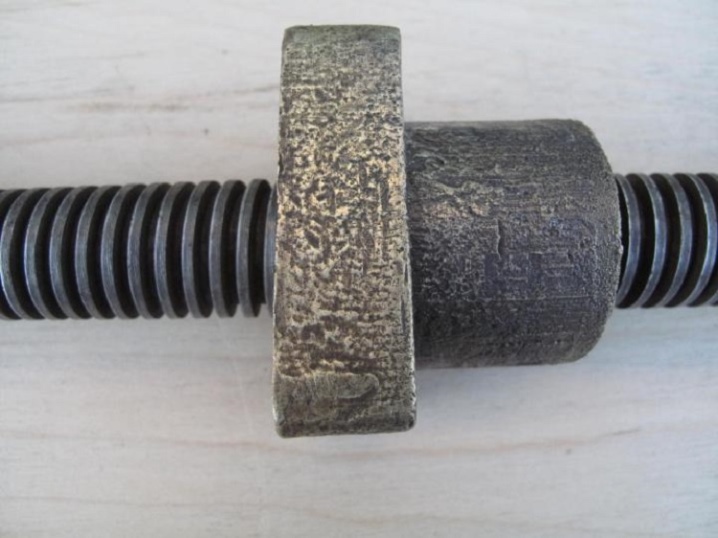
Why is the question of the experience of the machine operator so important? Because, as a rule, a trapezoidal thread is used on the lead screw and in the counterpart, the nut, which must withstand heavy loads. Only a qualified turner with proven practice will be able to cut such a profile without defects. Threading errors can be detected immediately after assembly of the bench vise, when a large backlash is evident, or later in the event of premature wear of the part.

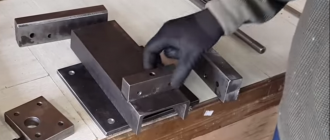
Further, when the screw and nut are made, it is required to cut the channel to size, and attach the mating parts on the workbench. Since the screw will move inside the channel, you will need to cut two plates and characteristic notches from the sheet metal with a grinder. Then the plates are bolted together and welded to one end of the channel. A screw is inserted into the recess with a special neck and screwed into a nut, which is fastened in the inner cavity in the middle part of the channel.

Now you need to make the movable part of the bench vise. Here you should cut 2 corners to size, mark the workpieces with a measuring tool. And also it is necessary to apply a marker on a metal sheet with a marker, as indicated in the drawing, and cut out the required plates. Prepared corners before welding must be attached to the structure and see if everything is done correctly.
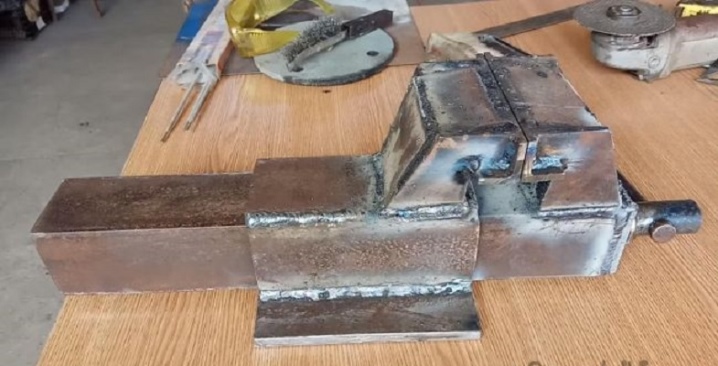
Place the blank in the form of a characteristic letter "P" on top of the previously prepared profile. If everything is as it should be, remove the product and drill 6 holes along the edges for inserting fasteners - bolts. In order to strengthen the structure, make the same holes in the metal sheet. That is, the result will be the following: the sheet will be laid on the workbench, followed by the part of the letter "P", and in the resulting space - the finished channel.
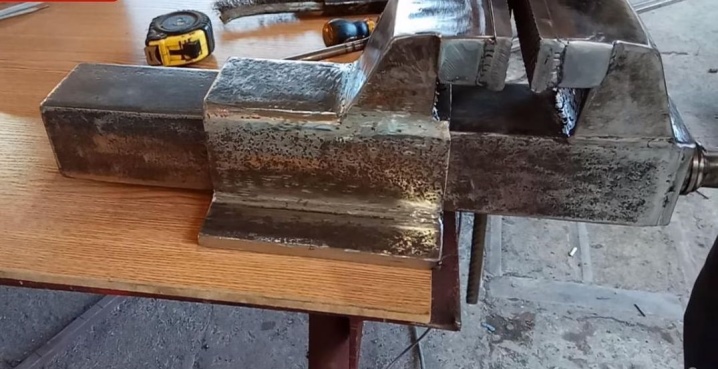
The next step is to cut the sponges out of the corner. An angle grinder is also used for these purposes. The contour can be selected in the shape of a trapezoid. Try on the finished parts for the main product. Interchangeable plates are manufactured separately and subsequently bolted to the jaws in pre-drilled holes. If all goes well, weld the sponges according to the drawing.
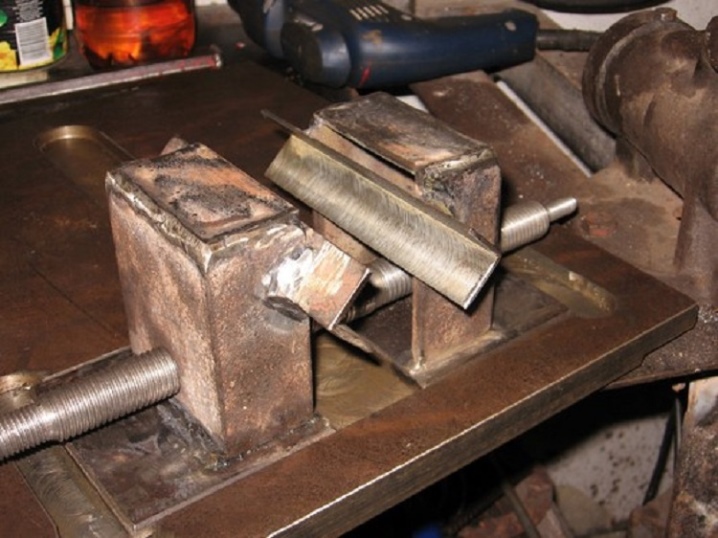
The last step is choosing a metal handle. It is made from a hollow tube or thick rod. When ordering a simple part from a turner, you can ask the machine operator to grind special necks on both sides during work in order to be able to make characteristic stops from rubber rings. Then the handle of the yew for the house will not fall out of the hole when the movable jaw is rotated. Homemade vise can be installed on a workbench and finally bolted.

Device and principle of operation
Large joinery vices have several advantages over other designs. They can be installed either on a workbench or on any suitable support in the workshop. It is also easy to remove them from the surface at the end of the work. So, despite the size, the tool does not take up too much space, while you can work even with large parts.
It includes more than just a handle, tripod and anchoring leg. The design of any vise includes:
- support with all stationary parts;
- a movable jaw designed to fix the material to be processed in one position;
- wings that move the part during processing;
- lead screw;
- gate that transmits torque to the screw.
The support is attached to a workbench or stand using self-tapping screws or bolts.The strips on many factory models of the jaws can be changed depending on the level of wear, but this possibility increases the price of the vice several times.
Also, the bench vice includes a spring, with which you can work with truly dimensional parts. The lead screw holds it in place with ease. If it is not in the design, then the master will have to bend over to hold the spring with his own weight, which greatly complicates the work. It is best to navigate the manufacturing process on the drawing of the selected model in order to avoid mistakes.
Step-by-step instruction
A relatively small number of tools are required to work. The entire manufacturing process can be divided into several main stages:
- To begin with, the profile pipe is cut into the required pieces. For this, various tools can be used: a grinder, a hacksaw for metal. The cutting of the required elements is carried out in accordance with the drawing. It should be borne in mind that some elements will be bolted together, for which you need to create the appropriate holes. After preparing the required elements, all burrs are removed with a grinding wheel.
- The next step is to create a lead nut. It will be used to transfer force to the workpiece. It can be made from a regular nut of the corresponding diameter, but from hardened steel.
- The running nut is fastened to the base of the future vice by welding. It is the weld seam that has the required strength. When creating a homemade structure, you can use a small welding machine. Electrodes and voltage are selected in accordance with the thickness of the metal and its composition.
- Next, the lead screw is screwed in. You can make it yourself only if you have a lathe with a threading function. After that, the installation of two halves with sponges is carried out. It is possible to make two elements that will be compressed using the same profile pipe.


