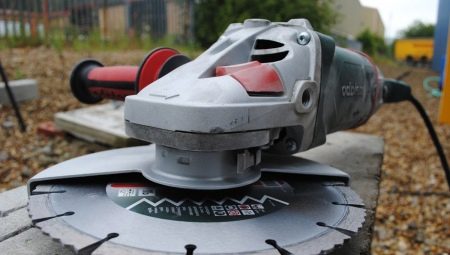
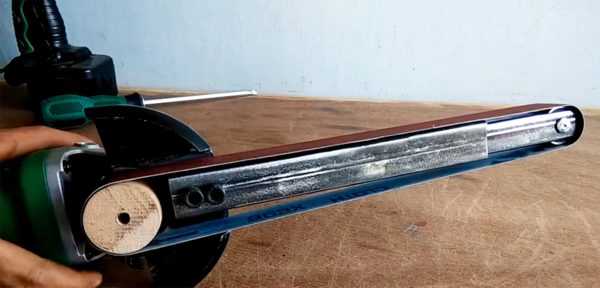
Final Stage: Moving on to checking the branch shredder
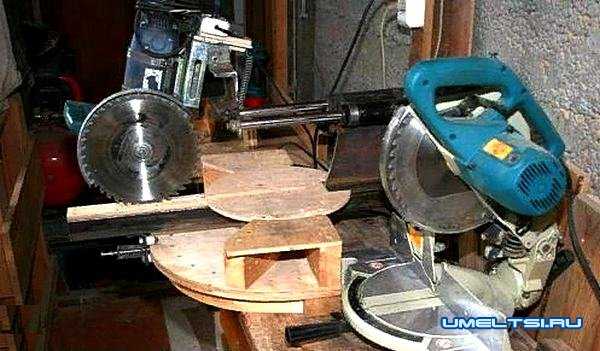
When the disc was installed, I put all the parts together. Not to say that I really liked the appearance, but I have already said that the main thing is that the unit regularly performs its functions.
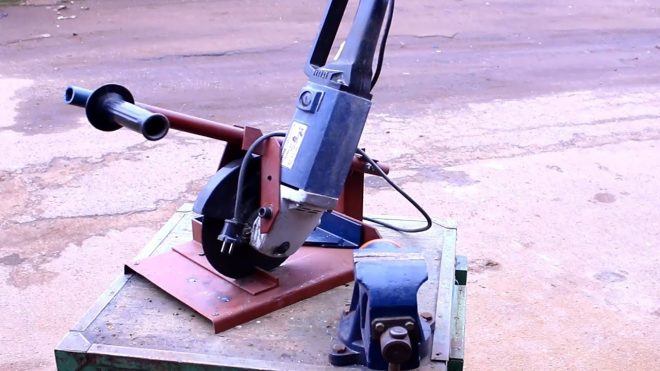
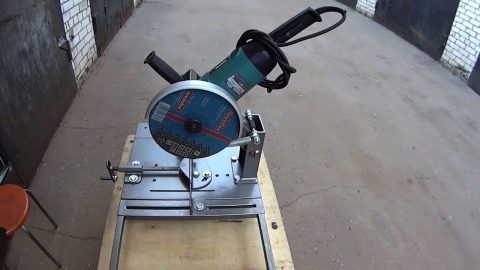
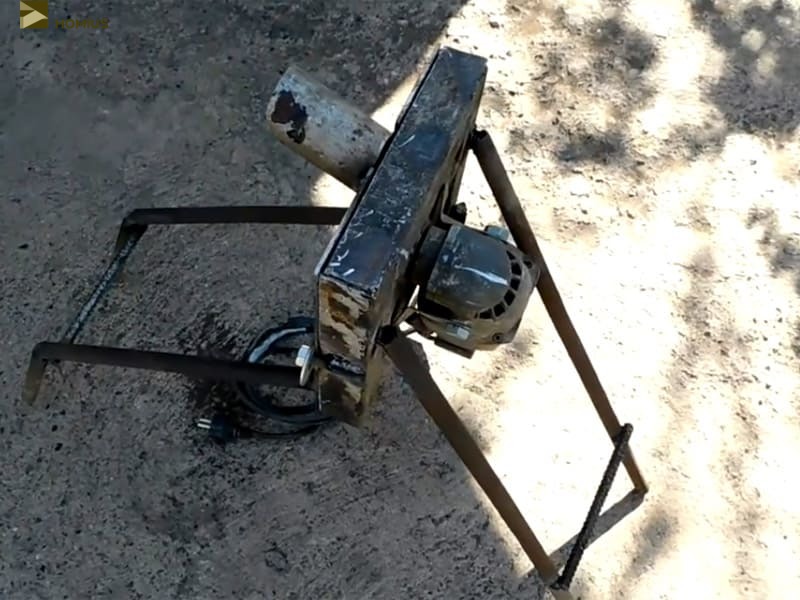 Here is such a "machine" turned out at the end of the working day
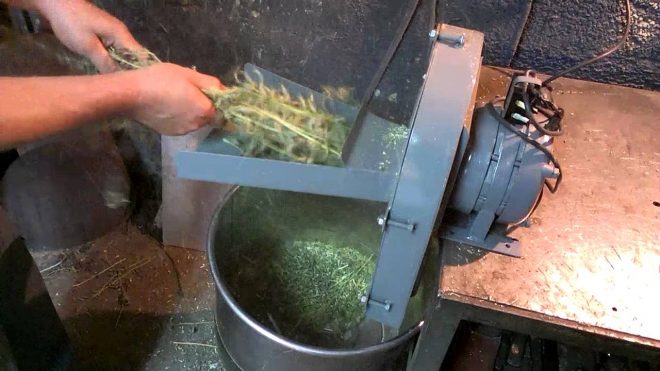
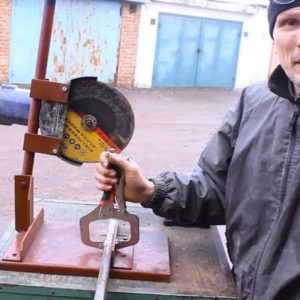
Now it was necessary to check how well the shredder was doing its job. Especially for these purposes, I brought several "different-sized" branches into the yard from the garden. Although, to tell the truth, I thought that with a drive from a conventional grinder, the unit would be able to chop only thin twigs and stems of burdock, which unexpectedly appeared on my site last year. However, I was pretty much wrong. But I started checking, naturally, with the thinnest branches.
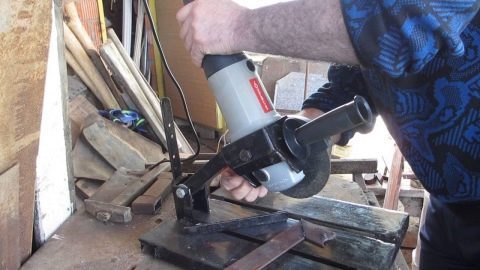
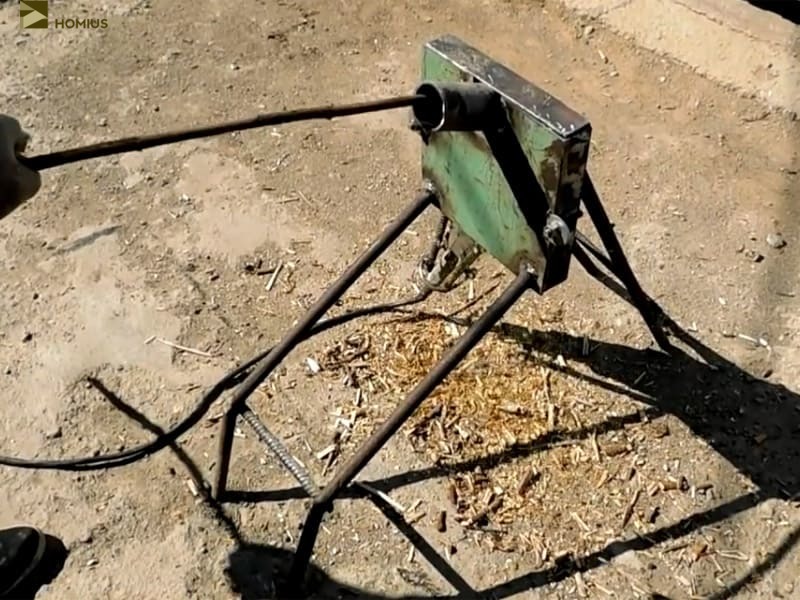 The chopper did not even feel the thin branch
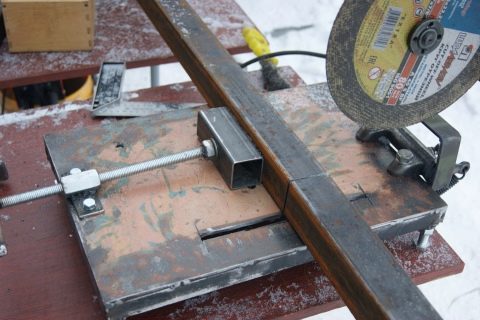
Inspired by the result, I tried to pass a not too thick rail through it. The result was the same - wood chips. Then I got excited, and the check went not according to the script. A branch, slightly thinner than a welded pipe with a diameter of 50 mm, went into the shredder. To say that the result struck me a little. The thick branch turned into wood chips without any problems, so I decided that the test passed as "excellent". This is exactly what I sought, although I doubted it would work.
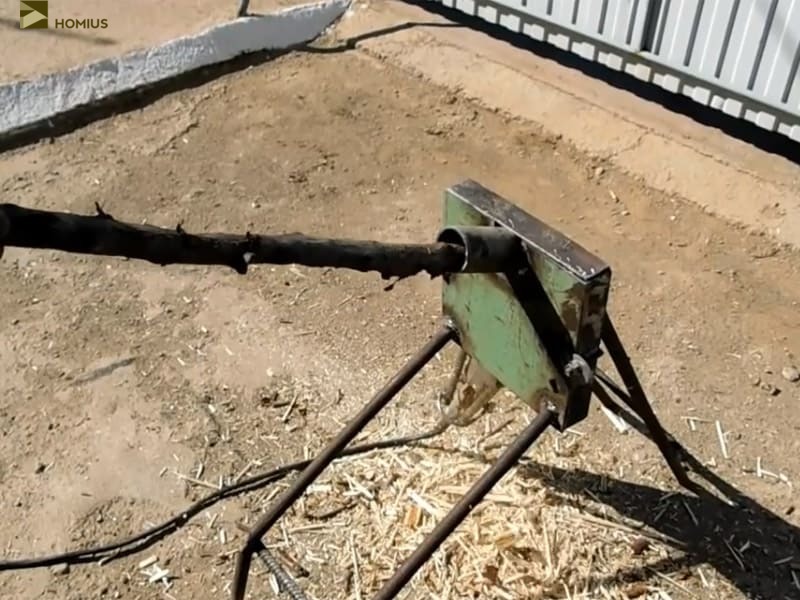 The thick branch turned into splinters very quickly.
The chips into which the shredder turns branches are a bit large, but here it all depends on the speed. Again, if the rotation is faster, the power of the chopper will decrease, and this is already a definite disadvantage. And such chips go well for covering the beds. It can be used to fill a compost pit, and for a smokehouse this size is ideal. This means that the unit made by me performs its function 100%.
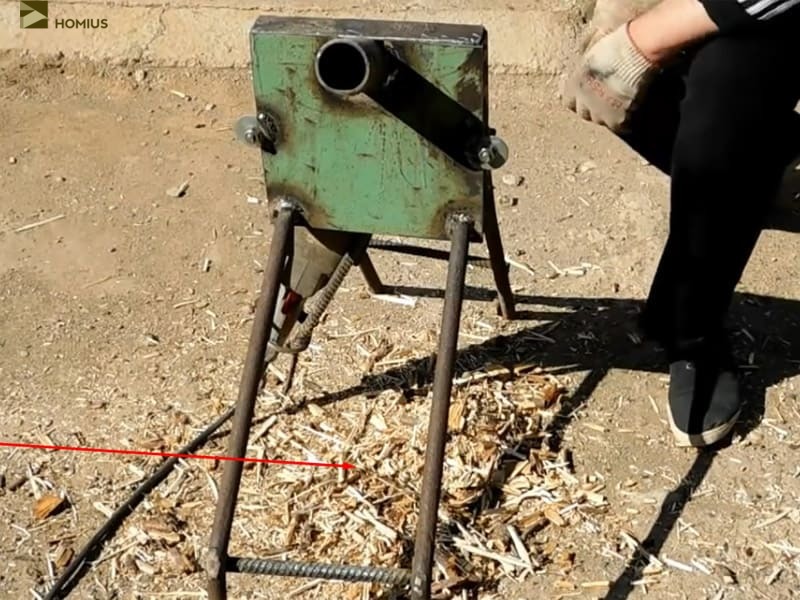 These are the chips left after checking the branch shredder
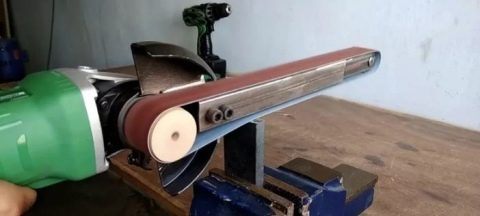
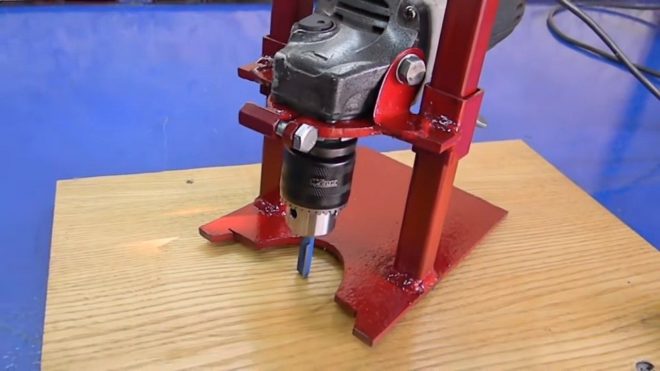
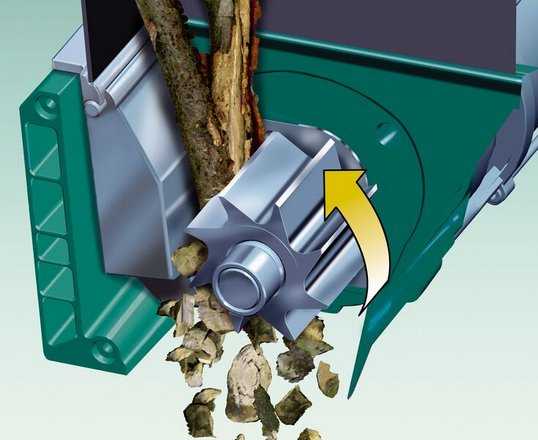
From a planer
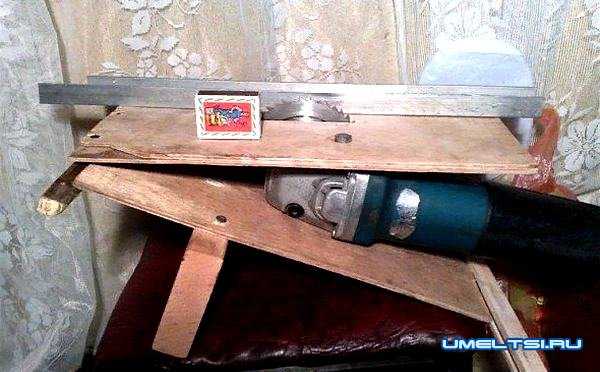
A shredder of this type is more powerful and allows you to chop branches and branches up to 7 cm in diameter. It is made on the basis of the machine, which means that the bed does not need to be made. It is only necessary to make a branch feed box.
To work, you should stock up on the following tools and materials:
- planing machine;
- welding machine with electrodes;
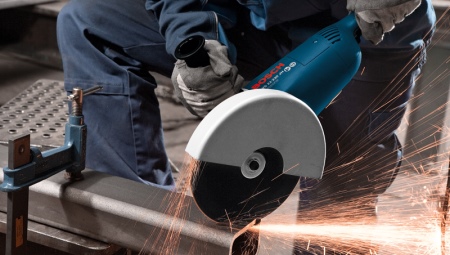
- Bulgarian;
- sheet metal 3 mm thick;
- fasteners (bolts, nuts, washers).
The work begins with cutting a sheet of metal according to the dimensions required for the manufacture of the box. Then the sheets are welded.
- The type of shaft is determined. If desired, it is possible to place 2 cutting planes on one structure (with a package of circular and plate knives) or some one cutting surface.
-
The shaft is made and installed on the bed.
- The box is fixed for feeding to the bed.
There are a lot of options for garden shredders: from the simplest to very complex units. The latter can grind branches with a diameter of 10 cm. When using them, it is necessary to install a separate circuit breaker and observe safety regulations.
A garden shredder is a mechanism designed for the processing of plant waste generated during the mowing of the grass cover, sanitary or annual pruning of trees, grapes and various shrubs. The resulting small pieces of grass or branches can be used as livestock feed or fertilizer. The use of this unit allows gardeners, owners of summer cottages and lovers of beautiful lawns to get rid of organic waste faster and with less labor. The device is relatively easy to set up, for this reason it can be assembled with your own hands without special financial costs from old parts and scrap materials. This allows you to save money on the purchase of a ready-made factory device.
Varieties of engines for assembling homemade products
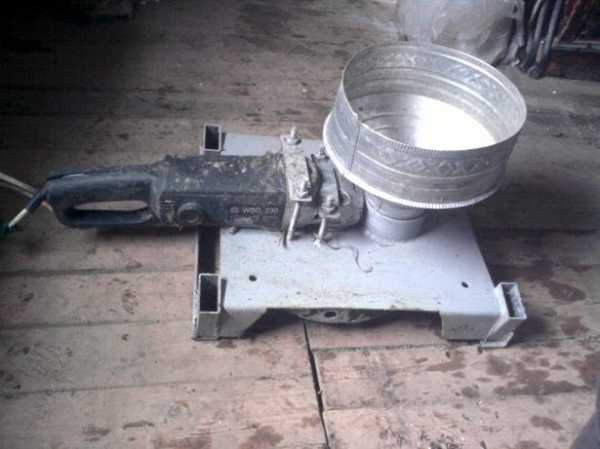
Electric and gasoline engines removed from unused equipment are used as a drive for homemade products. Each of these two options has its own advantages and disadvantages. Models with an internal combustion engine are more convenient in that their operation does not require a nearby power supply. But in general, they are more expensive and have a more complex structure than their counterparts equipped with an electric motor. Therefore, it is easier to make electrical equipment, moreover, more compact.


The maximum thickness of the cut branches that the chipper can grind depends on the power of the electric motor installed on it and the characteristics of the blades.
- Models with a motor up to 1.5 kW are capable of grinding sticks up to 20 mm in diameter. They are designed for low intensity work.
- If an electric motor from 3 to 4 kW is installed, then such units can chop branches already up to 40 mm thick.
- More powerful electric motors (over 4 kW) are used to make a shredder for wood with a diameter of 7-15 cm.
To create a homemade shredder, you can use electric motors from a grinder, washing machine, trimmer. They must be adapted to work from a stationary network with a voltage of 220 V. In order to grind material as thick as possible at home, it is recommended to equip the shredder with an electric motor for 1500 rpm with a power of about 3.5 kW. This parameter for internal combustion engines corresponds to 5-6 horsepower.
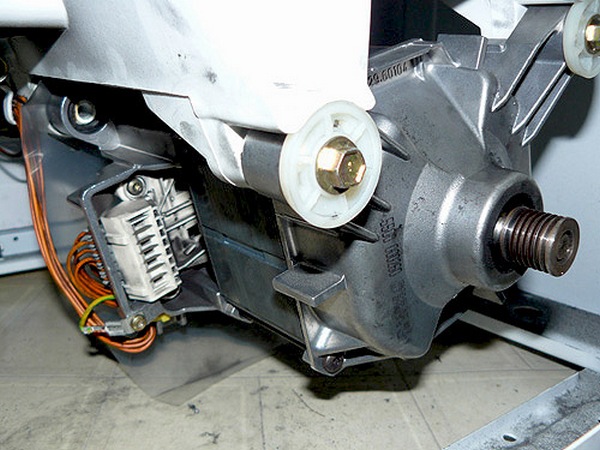
Engine from an old washing machine
Homemade Electric Shredder
A do-it-yourself shredder can be made if you have the necessary elements. The most practical is a wood crusher consisting of two shafts. For manufacturing, a drawing is created, according to which the assembly is performed.
Initially, the necessary material and tool are selected:
- electric motor with rated power up to 4 kW
- a pair of steel plates up to 10 mm thick
- two gears made of high-strength steel
- a pair of pulleys
- shafts hardened and machined
- bearings for secure shaft attachment
- directly cutting blades made of steel
- metal case
- steel pipe of the required diameter
- set of wrenches
- welding machine
- powerful drill or hammer drill
We grind shafts from both sides from a square workpiece. In the center we drill holes for 4 knives, a thread is cut into them. The rounded edges are inserted into the bearings. A drum is made of 4 studs, and two steel plates in which holes for bearings are cut.
Bearings and pulleys are firmly fixed on the shaft, gears are installed on the opposite side. We install the housing with the cutting mechanism and the engine on a previously prepared frame. The transmission of torque from the drive will be carried out using belts through pulleys on the motor shafts and knives.
The receiver body is made of sheet metal cut in the shape of 4 trapeziums. Using a welding machine, they are fastened together in the form of a truncated pyramid. The box is connected to the body of the cutting mechanism using a bolted connection.
Garden Shredder From Washing Machine
To assemble a branch chopper with your own hands, you need to carry out the following manipulations:
- The activator is removed from the old type washing machine.
- The prefabricated knife is mounted directly on the motor shaft.
- The size of the working tool is made slightly less than the diameter of the drum.
- A hole is cut in the lower part of the body from which chips will pour out.
- The body is attached to the hole.
Homemade grinder from the grinder

Making a wood chopper with your own hands from a grinder is divided into several stages:
- We take a 20 liter bottle, cut off the lower part, and enlarge the hole in the upper one. This will be the receiver.
- On the side we skip the axis of the device.
- We install the cutting element on top of the shaft and securely fix the entire structure.
Crusher from trimmer


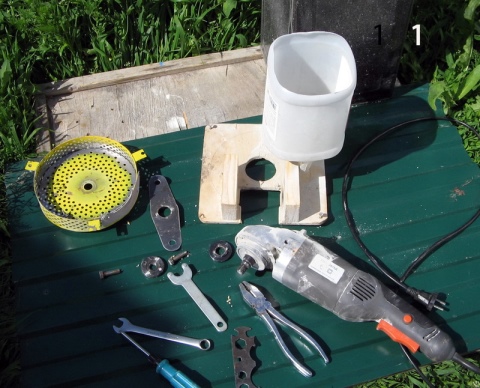
For a do-it-yourself chopper of branches from a garden trimmer, you must prepare the following necessary elements:
- a container made of plastic or metal with a volume of up to 50 liters
- several pipes made of metal with a diameter of up to 20 mm
- steel net with an area of about 1 sq. m with a fine mesh
- a piece of wood board or plywood
- it is necessary to purchase metal clamps for fasteners
- wooden bars and self-tapping screws for their screed
- the trimmer itself of any design
As an auxiliary tool, it is recommended to prepare:
- screwdriver
- anvil
- drill
- jigsaw
- bench hammer
In order to make a shredder, you must follow the step-by-step instructions:
- Initially, the capacity of the woodcutter is prepared. For this, trapezoid holes are drilled and cut at the bottom. Edges are processed.
- At the bottom, the mesh is fixed with bars. This makes a membrane.
- The container is placed at a low height using a pipe structure.
- The trimmer motor is attached to the board.
- The rod of the device is shortened slightly and is also installed on a base with a drive.
- A cutting tool is placed at the end of the rod.
- Before performing direct work, it is necessary to carry out tests. For shredding branches of different thicknesses, you can use different attachments.
What else can you make a shredder
When making a wood chopper with your own hands, any household appliances can be useful. At the end of the life of many home devices, they can be reused after some refinement. The main necessary element is the engine, it is only necessary to modify it and the mechanism acquires a second life in a new useful device.
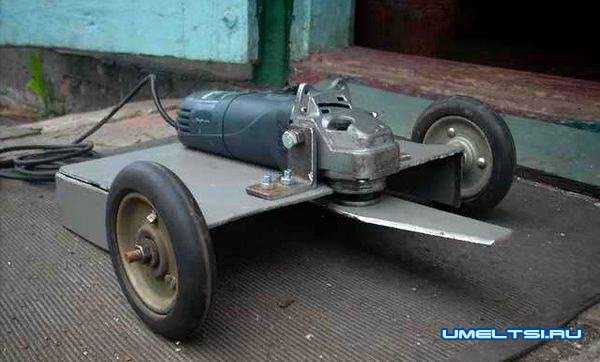
Woodcutter from a walk-behind tractor
To give a second life to the construction of a walk-behind tractor, which has worked out its life, it is necessary to prepare the following materials:
- directly motoblock
- knives
- shaft
- bearing set
- channel
- a set of keys
- grinder for cutting and stripping work
- sheet metal
- drill and safer
- hammer and electric plane
When assembling, the following manipulations should be carried out:
- The bed is formed from a section of the channel.
- A shaft from an old electric planer is installed on the bed.
- A knife and a pulley are attached to the shaft to transmit torque from the engine.
- The torque from the walk-behind tractor to the pulley is transmitted using a belt.
- A receiver for branches is formed from sheet metal by welding.
- The entire assembly is installed by a prepared walk-behind tractor and carefully secured.
- We start the mechanism, we feed the branches into the shredder, the chips fall down where the container can be substituted.
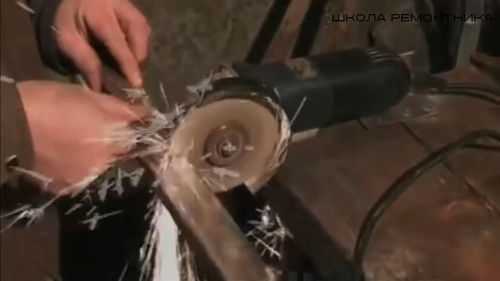
Saw blades

The disks for knives themselves are cutting blades with many teeth, onto which special carbide inserts are soldered, thanks to which the tool acquires increased characteristics. Directly the knives are mounted on a pre-made shaft length up to 80 mm, on which a thread is cut on both sides to fix the tool.
Washers are placed on the shaft between the discs for separation, since the saw teeth have a slight deviation from the plane to increase cutting properties. Due to the divergence of the teeth, the positioning of the discs close to it becomes impossible, therefore, a washer with a diameter of 20 mm becomes a necessary element in the design.
Frame design
The electric motor is installed on a bed made of do-it-yourself corners by welding, a frame is attached to it directly under the shaft with cutting discs. Holes for bearings are made in the necessary elements, a shaft is inserted into them and fixed.
Putting into operation
The loading conveyor is made of galvanized steel. The pre-cut sheets are riveted into a truncated pyramid and attached to the frame on which the saw blades are mounted.Pulleys are attached to the shafts of the engine and cutting tools, then belts are put on them with their help, the movement from the electric motor to the saws will be transmitted.
We supply power to the drive, branches and debris are loaded into the receiver, a set of discs grinds the material into chips, which crumbles down.
Assembling the shredder body from scrap metal
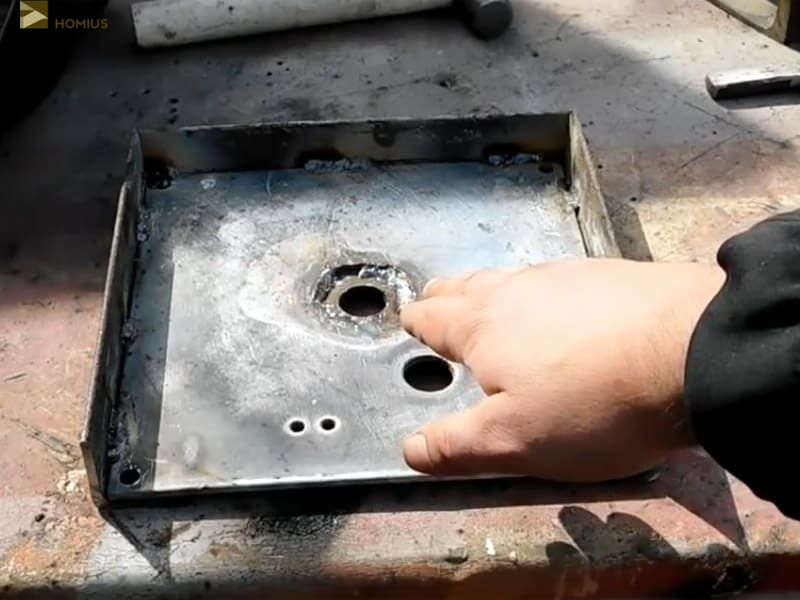
Now it was necessary to think about how best to make the side walls of the case. It was decided to weld the plate with corners on three sides. The fourth must be left open, because it is through it that the chips from the crushed branches will fall asleep. And here I came across a large washer, which I decided to weld in the center, reducing the diameter of the hole cut earlier. She came at an opportune moment.


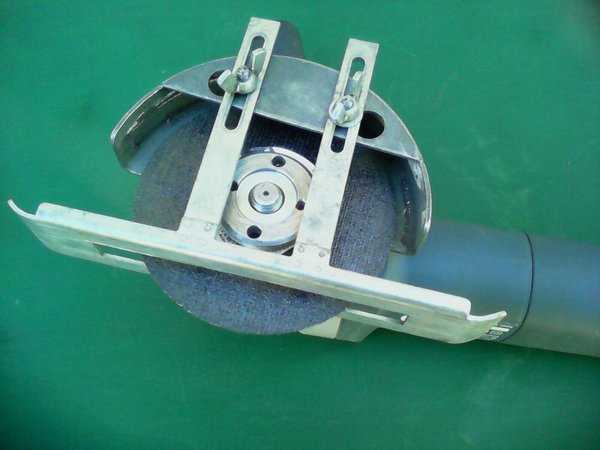
The corners were positioned as follows: a plate was welded on the inner edge, the second edge directed upwards. The washer is also located at the back. This can be clearly seen in the photo example.
 Corners and washer welded, work in full swing
Fastening brackets for fixing the grinder
Now it was necessary to think over how to fix the grinder in such a way that it could be removed at any time and used for its intended purpose. It turned out to be easy. For this, ordinary lock hinges were used. Once I did not finish them, so they remained waiting in the wings. On the grinder itself there are holes for screwing the handle on both sides. So it was decided to register for them. Having laid the grinder on top, I marked the locations of the lugs, after which they were welded. There is no need to be afraid that they will move a little. Subsequently, they can be slightly bent.
 We weld the eyelets for the lock, on which the grinder will be fixed
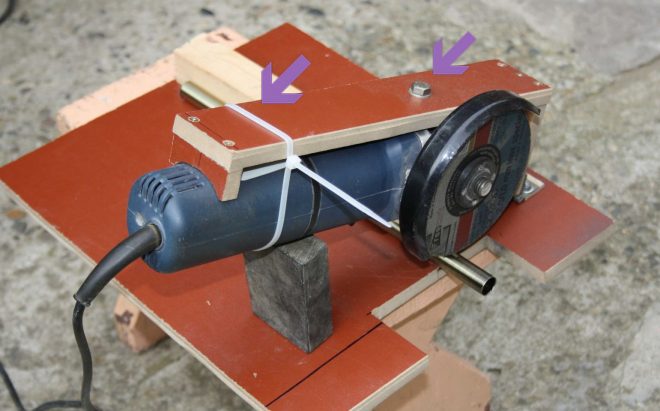
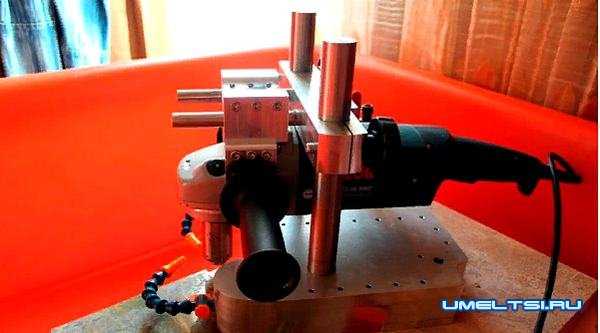
But eyelets alone will not be enough. In order to chop up larger branches, a more serious fixation is required. To do this, it was necessary to weld two pieces of reinforcement, which would be like a continuation of the platform. Their task will be to firmly "hold" the handle of the grinder. They should be located parallel to the lugs with a slight narrowing, approximately diagonally across the square of the platform. Surely it is not easy to understand this in words, and therefore there is a photo example below.
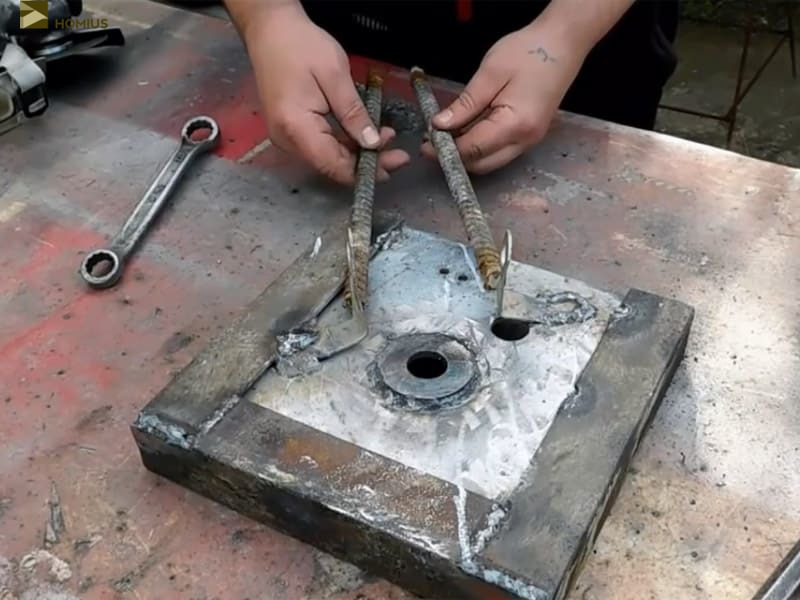 This is how the cuts of the reinforcement will be located, fixing the handle of the grinder
The metal rods-holders were thoroughly welded, after which it was possible to try on the grinder to the platform. I had to bend the eyes a little so that they fit exactly along the holes. After the bolts in them took their places, giving the structure a general look, it was necessary to think about how to fix the grinder handle on the reinforcement rods.
 The fixing bolts securing the grinder through the lugs are screwed in
The answer was found by itself - an ordinary bracket made of a hairpin with a thread cut on both sides. It was welded onto the fittings, and a small plate with two holes was located below, into which these edges of the threaded brackets will enter, grabbing the handle of the grinder. And the nuts and washers will be tightened from below. The design is simple, but trouble-free, like a Kalashnikov assault rifle. It was a matter of five minutes to bring my plan to life - I found such a bracket with a plate, and therefore I did not have to spend time on making.
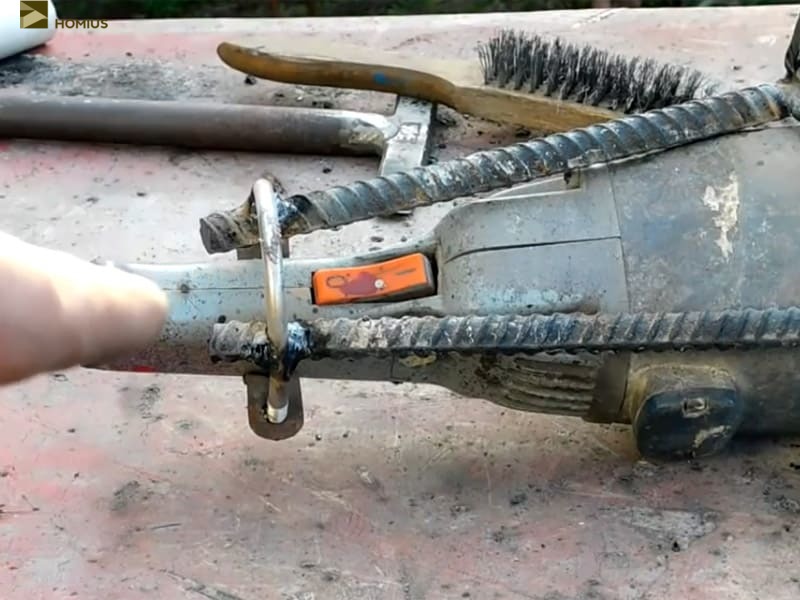 The bracket is welded, now the fixing of the grinder on the platform is as reliable as possible
DIY wood chipper (garden, homemade)
Every owner of a garden or a summer cottage has to get rid of leaves and grass from time to time, especially when it comes to cleaning the garden. Many people use the collected material for the preparation of organic fertilizers or mulch, often branches, more precisely, sawdust and chips obtained from them, are also used for heating.
In this case, it is quite difficult to do without such a versatile and practical device as chopping up herbs and branches.
Features and Benefits
Garden Electric Shredder Is a universal device with the help of which you will be able to process illiquid assets collected at the site in record time. The shredded material can be used for composting, green manure, mulching the soil around bushes and fruit trees.
Thanks to a simple and small-sized device, the answer to the question "how to grind grass into powder" will cease to worry you - you will be able to independently form vitamin tea mixtures and prepare seasonings for the winter with great productivity.

Professional wood shredder
Chopper device
The classic herb grinder is somewhat similar in principle to a meat grinder or blender. Its complete set includes following basic elements:
- receiving hopper;
- knife group;
- engine.
Some models are equipped with conveyors for feeding raw materials and removing the processed mass from the bunker, amateur models are mainly distinguished by manual loading / unloading, as well as significantly less power.
The knife group can be disk (such products perfectly cope with the processes of grinding grass, hay, small branches) or milling (industrial shredders for branches with a diameter of about 20-25 cm).
Crusher working principle
In general, grass shredders can be classified as follows:
- amateur - small-sized products with disc cutting mechanisms and power up to 2.5 kW;
- semi-professional - models equipped with an engine with a capacity of about 4 kW;
- professional - large-sized and heavy-duty units with a power of 14 kW or more, equipped with conveyors, suction funnels and milling knife groups.
Homemade wood shredder
Despite the fact that the Garden Bison chopper is considered one of the most useful units in the household, its cost is quite high, and not every summer resident and even a farmer will easily decide to buy it. There is always an alternative - you can make a shredder with your own hands. Of course, a homemade product can be less productive, however, its cost is significantly lower than that of a factory product.

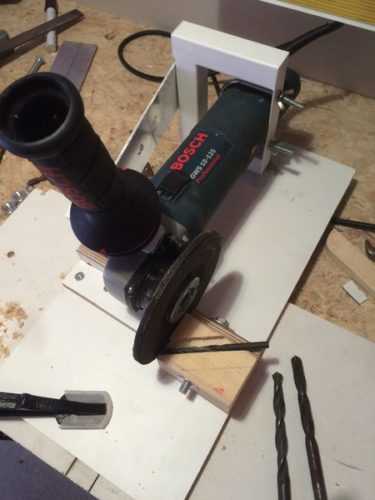


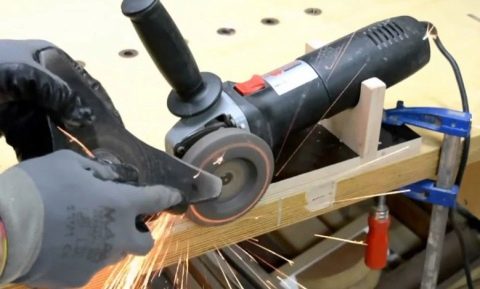
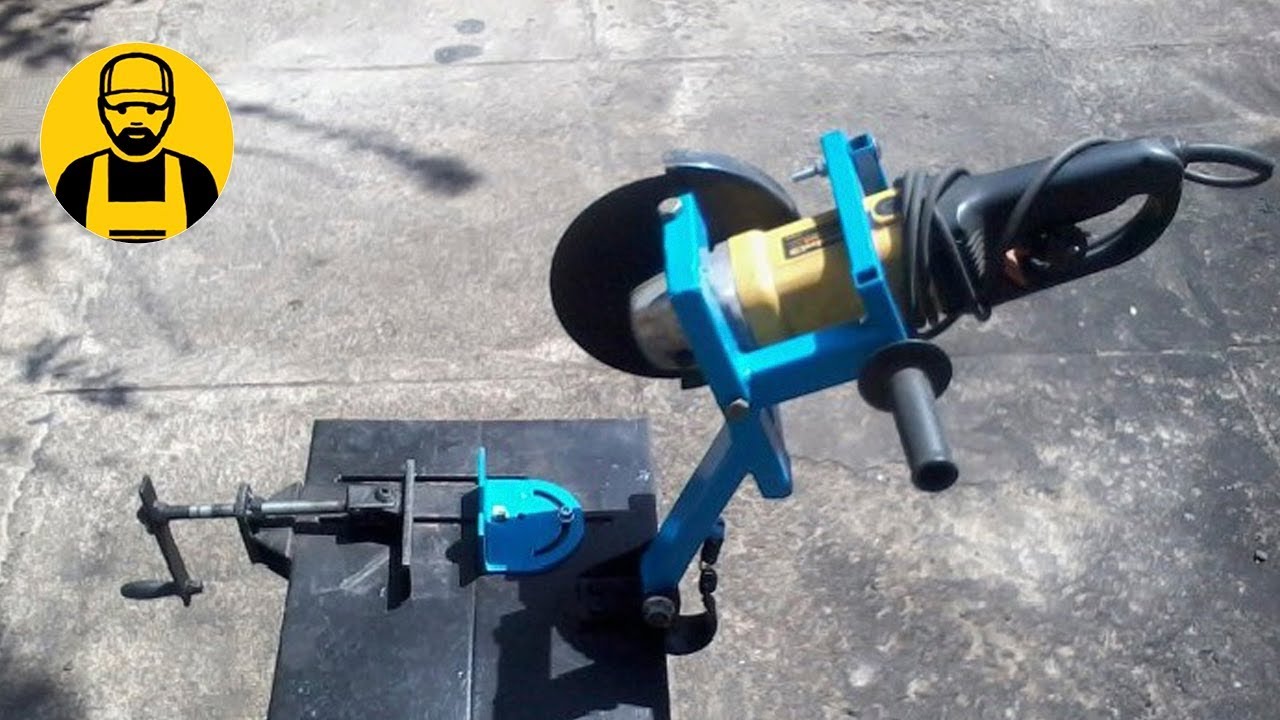
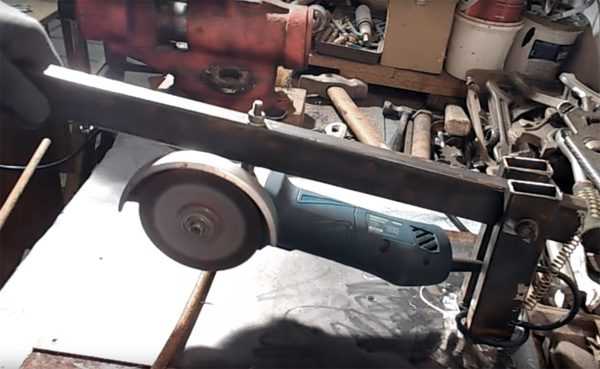
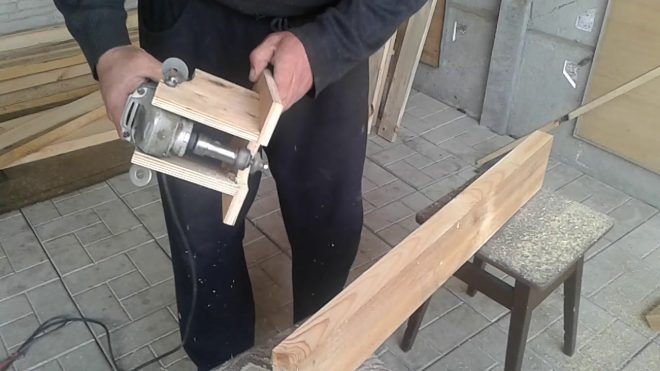
DIY garden shredder from a grinder
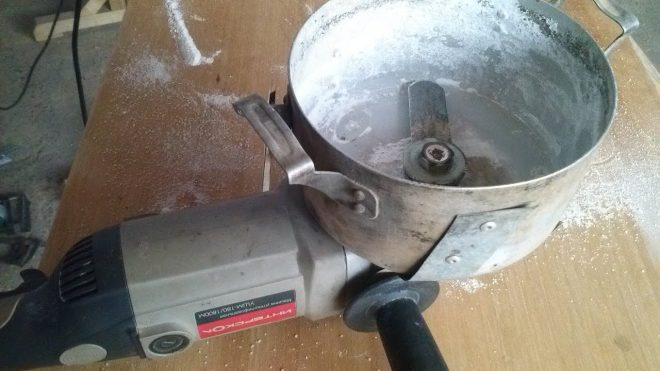
In terms of design, a homemade shredder is not much different from what the modern agricultural machinery market offers us. The function of the hopper can be performed by any old metal container with a large volume - a bucket, saucepan or barrel. In the bottom of the container, a functional hole should be drilled in advance for the device that drives the knife group.
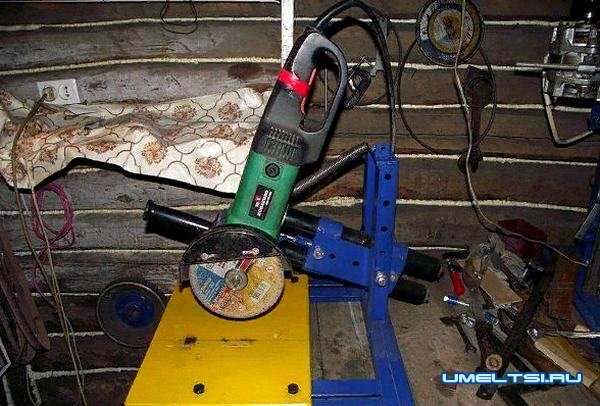
We use the simplest method and make an engine from a grinder with our own hands.
Grinder garden shredder
As for the cutting mechanism, you can make it yourself or purchase it ready-made - we recommend this particular option. However, if you are planning to make a do-it-yourself knife block, the best solution would be to use a metal plate with a sharpened edge.
It should be noted that all homemade garden tools must be reliable and stable, especially if their design involves the use of knives.
We offer the following design option:
- directly assembled wood shredder - bunker with attached and securely fixed grinder and knife mechanism;
- a metal frame made of a pipe and having a sufficiently large weight into which the device we have made will fit;
- protective cover for the hopper.
Let's summarize the work done
Such a shredder for branches, as you yourself could see, can be assembled from various "rubbish" - scraps of reinforcement, metal. The only thing worth spending money on is getting a good quality trimmer disc. You shouldn't skimp on this detail. At the same time, the assembled unit has 2 undoubted advantages:
- It is completely safe for the operator.
- At any time, when necessary, the grinder can be removed and used for its intended purpose.
Therefore, for those who are interested, I recommend giving it a try. After all, such shredders of branches in stores are quite expensive.
The Homius editorial team invites home craftsmen and craftsmen to become co-authors of the "Stories" column. Helpful first-person narratives will be published on the pages of our online magazine.
Photo: Vasily Kayumov
Previous STORIESSpeed up renovation work: do-it-yourself automatic roller
Next STORIES We level the surface without dirt and dust: do-it-yourself stretch ceilings