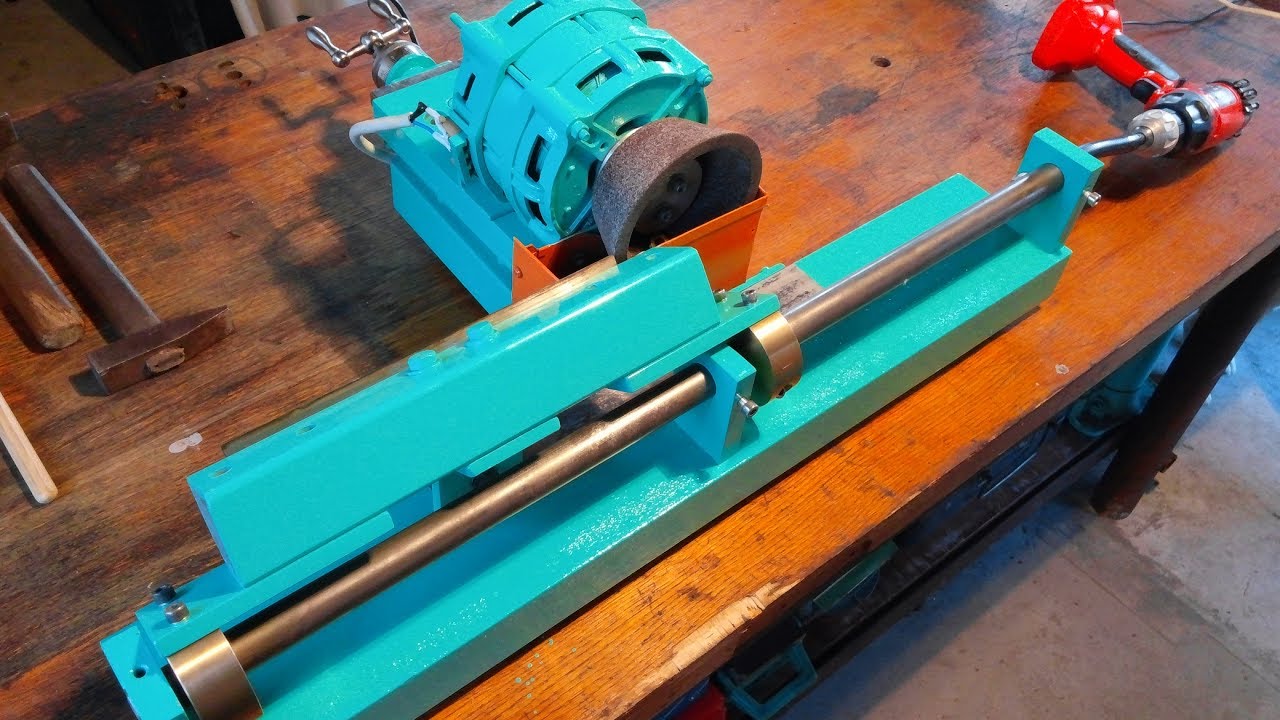
Equipment for sharpening knives at home
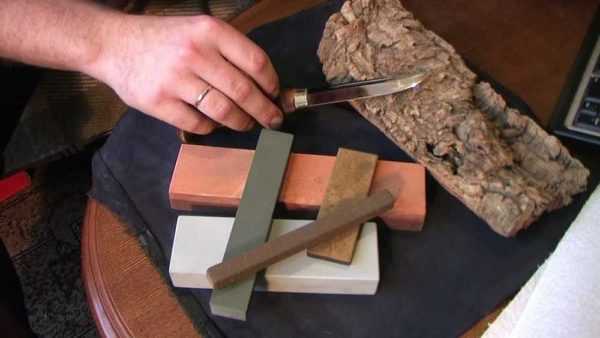
Sharpening knives with a bar
To sharpen a knife with a bar, you need to remember the main steps of the process, which include:
- Angle selection. This was written above;
- Performing work with smooth movements, excluding abrupt slipping of the bar from the blade;
- Periodic wetting of the bar with water for an efficient process.
Tip: the plane of the block should be in the predefined angle parameters in relation to the knife blade.
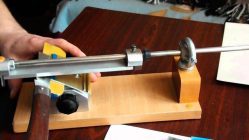
Sharpening knives with musat
The process is more complicated than using a bar, and looks like this:
- The musat is installed on the surface in a vertical plane.
- The edge of the knife is aligned with the upper part of the musat, and then the blade moves along the rod in an arched motion. The process starts from the top and smoothly goes down.
- The movement is repeated a certain number of times until the blade is sharp on one side. Then this procedure is repeated with the second side of the blade.
Important: it is necessary to provide a flat surface for a firm support of the musat
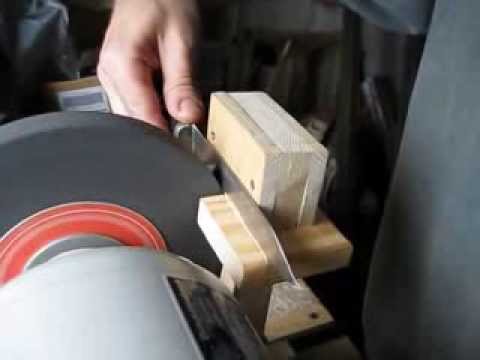
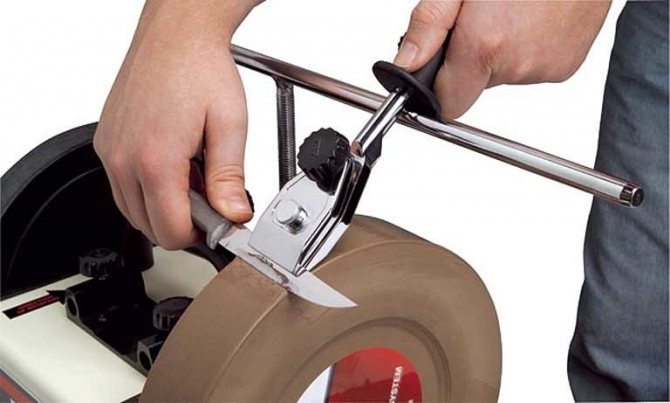
Sharpening knives with an electric machine
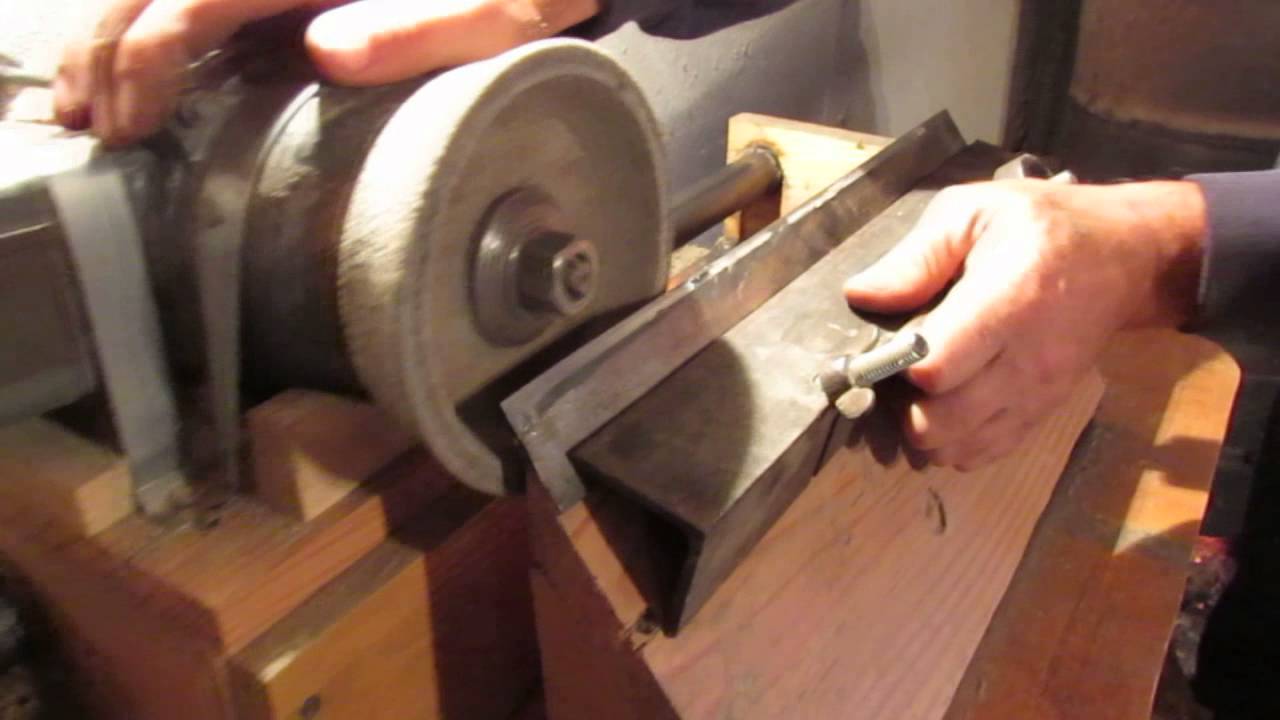
The most important thing in the process of working on an electric machine is to ensure complete process safety. Otherwise, the requirements do not differ from the method described above for sharpening with a bar or grindstone.
The only thing worth noting are some of the features that distinguish this process from the rest.
- firstly, in this case, it is not the bar fixed in the machine that is moistened with water, but the blade of the knife.
- secondly, in the process, the blade should not be allowed to get very hot. Otherwise, deformation will occur.
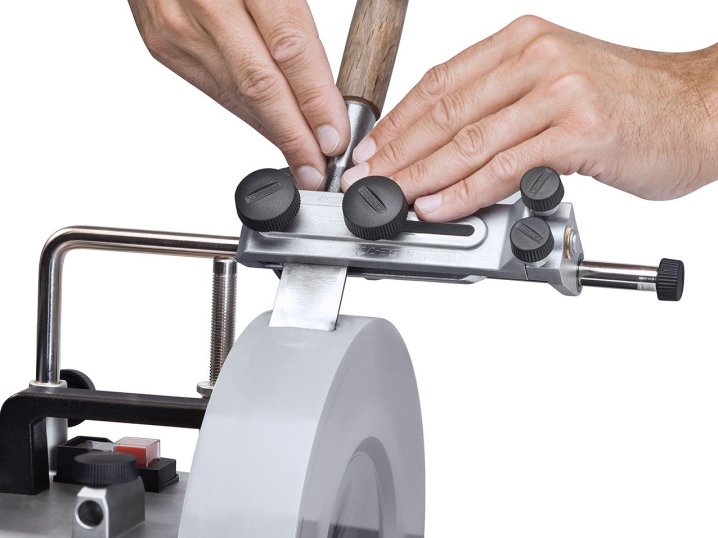
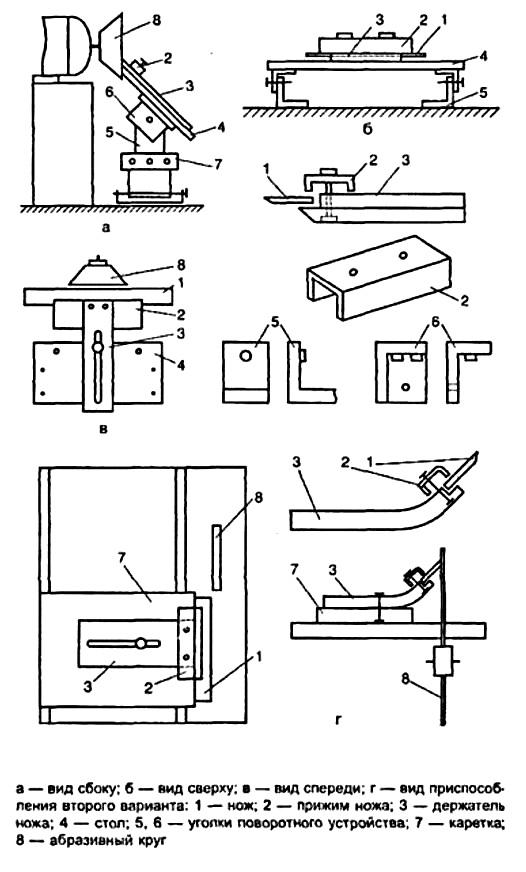
- thirdly, it is necessary to provide a fixed angle. This can be done using special devices installed on the surface of the case.
- Finally, when working, it is required to purchase personal protective equipment in order to avoid accidents.
Manufacturing process
You can make the device yourself. The instruction is as follows:
- To begin with, an abrasive of the required grain size is selected.
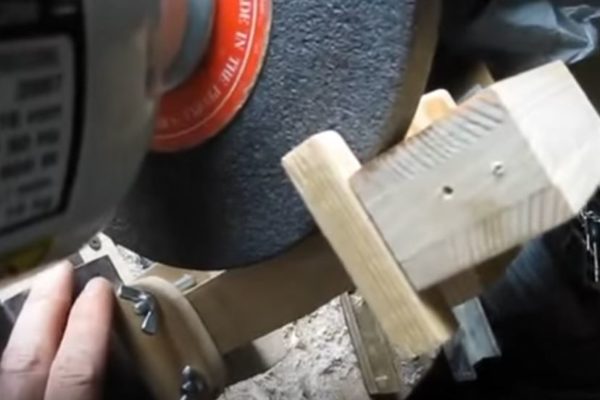
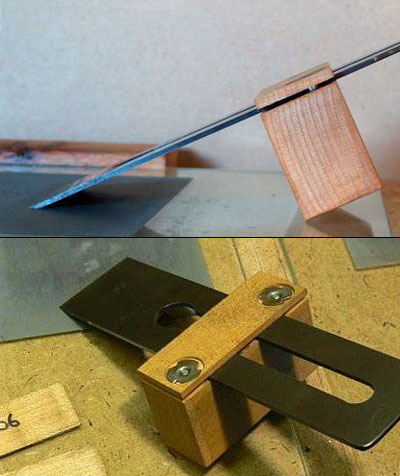
- The next step is to create the template at the desired angle. A wooden block is ideal for this, from which the material is removed at the required angle.
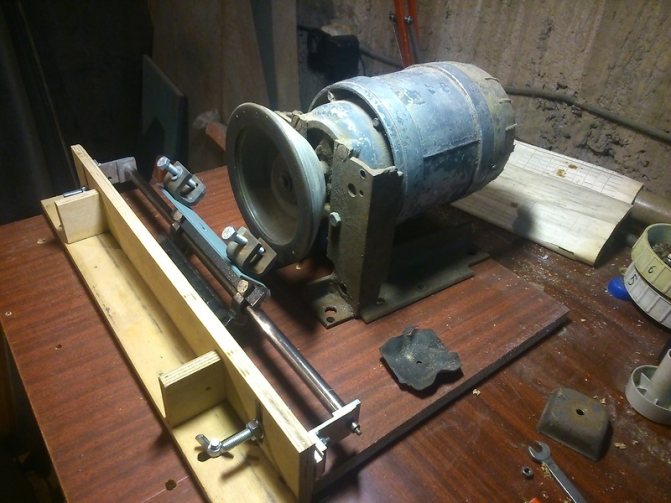
It is quite difficult to create a full-fledged machine driven by an electric motor. This is due to the fact that you need to make accurate calculations.
In conclusion, we note that a plane with timely sharpening of knives can serve for a very long period. In the manufacture of the blade, tool steel is used, which is characterized by increased resistance to mechanical stress.
Sharpener "House"
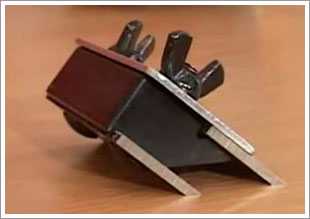
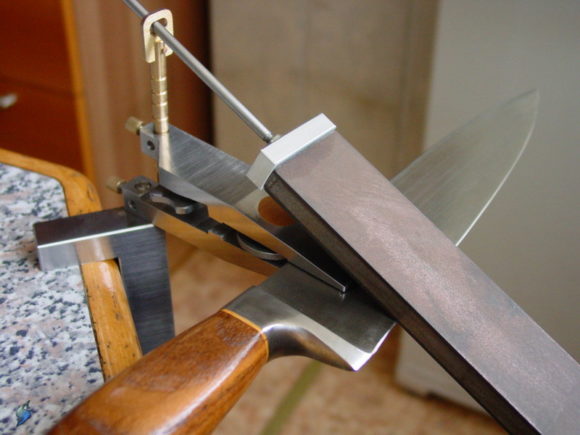
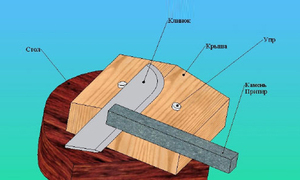 Not a bad tool for sharpening knives. Despite its simple design, the sharpener does its job well. This structure consists of a rectangular bar, the upper edge of which is made in the form of a gable roof. The angle of inclination of one face is 20 - 25 degrees, which is optimal. The product must be installed with a blade end-to-end to one of the roof ridges, then take an abrasive wheel or a block with emery and move along a horizontal line. This ensures a constant angle of inclination, which leads to an even sharpening of the blade.
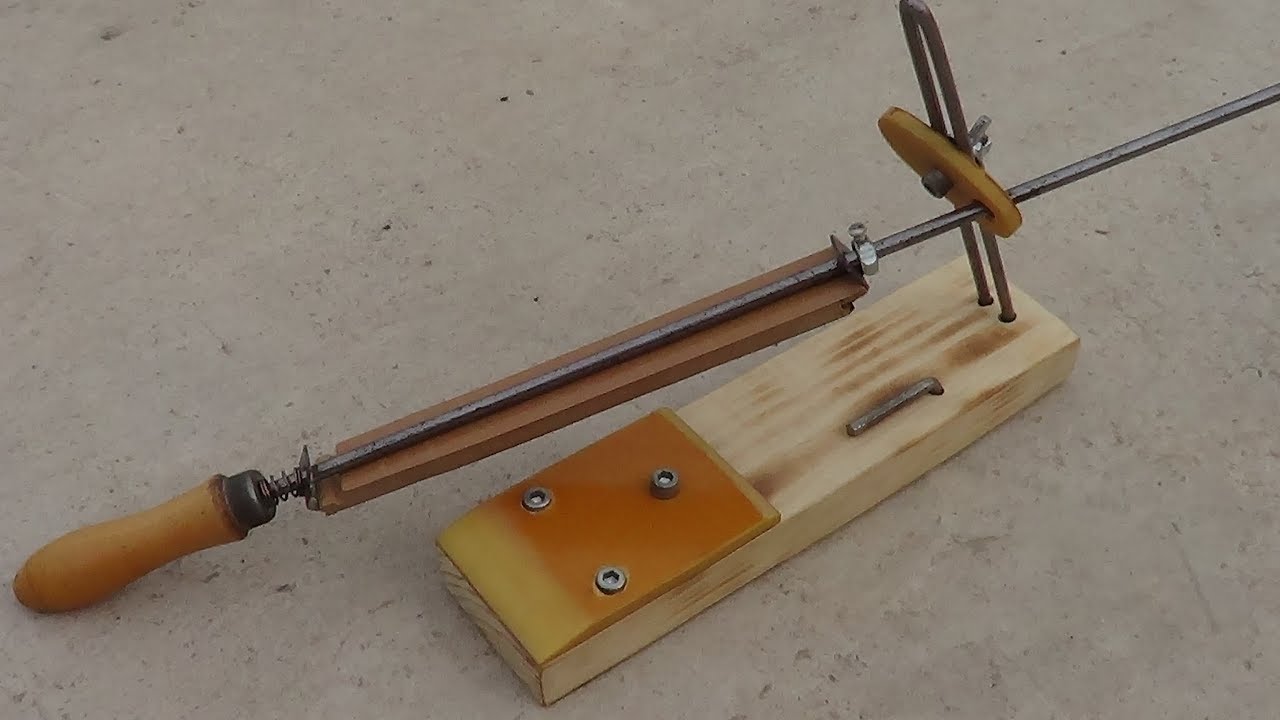
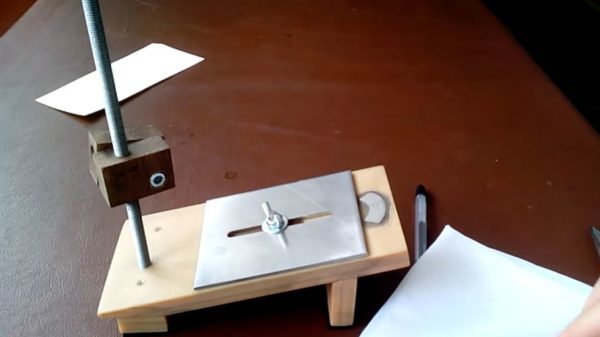
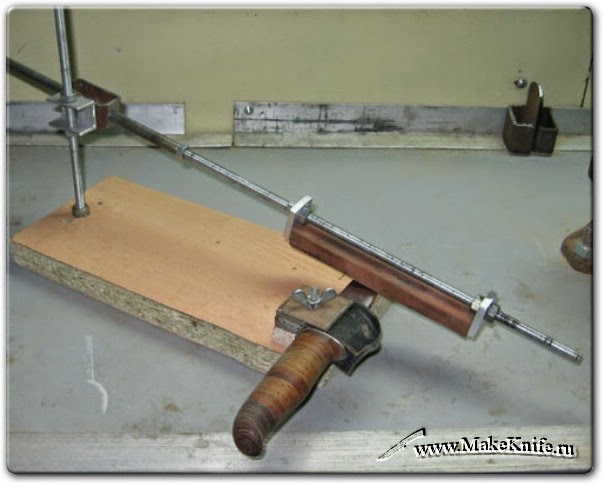
There are also complex designs of a homemade grinding machine. For manufacturing, you will need the following materials:
- A piece of board measuring 500x150x20 mm.
- A threaded metal stud that will guide the bar.
- M8 bolts and nuts and wood screws.
- Retaining nuts or wing nuts.
- Ordinary textolite or plexiglass, which will serve as a substrate for a knife and a kind of movable bed.
- To attach the knife, you should take a neodymium magnet. The usual one will not work, since its downforce is quite small.
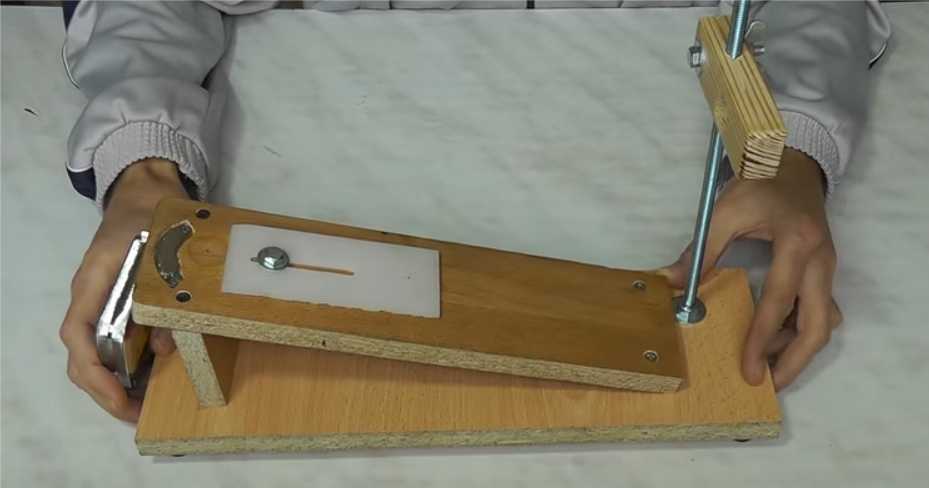
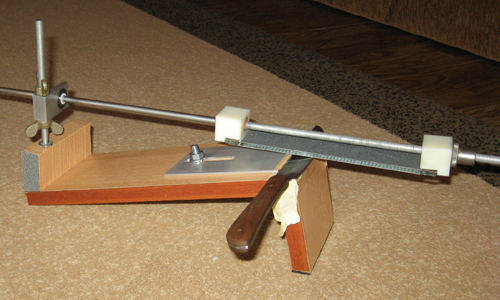
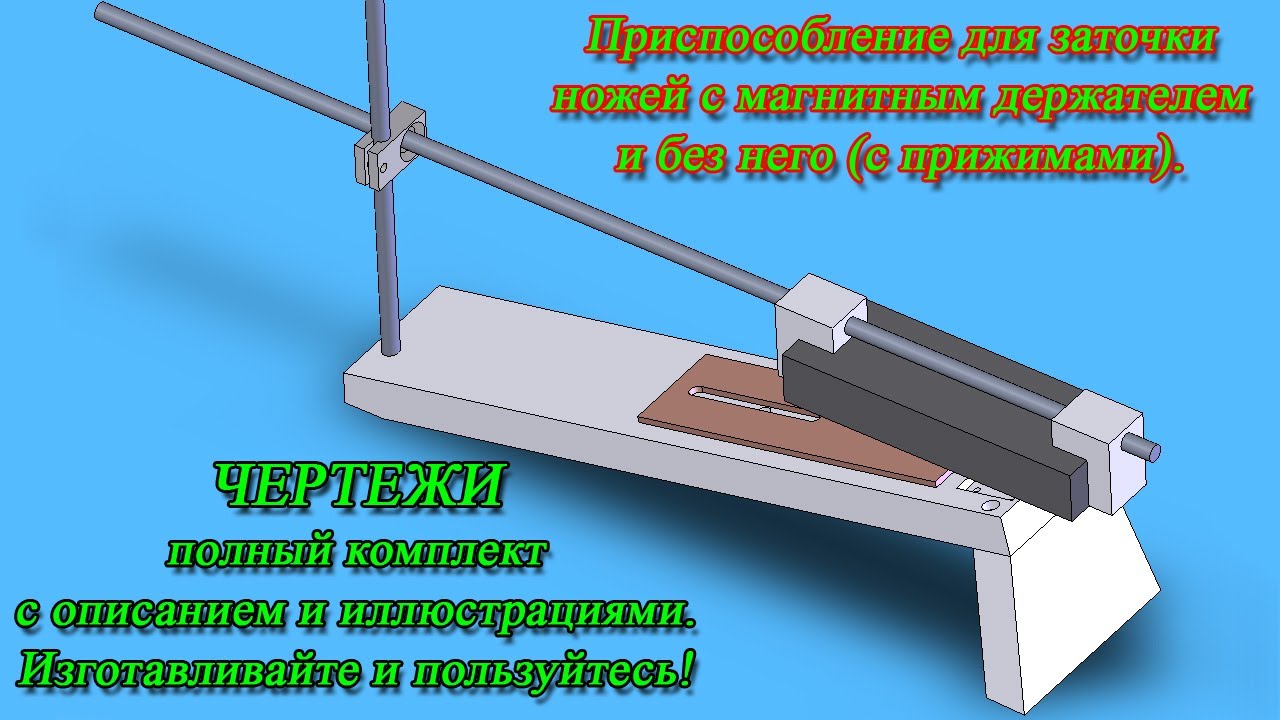
The board must be cleaned, processed, and then made into a rectangle. Another board should be made rectangular in shape, which will serve as a rack or support. Its height should be such that the slope of the main board is equal to 20 degrees. You can fasten them together with self-tapping screws for wood. Then attach the resulting structure to the workbench or cut out in advance the countertop, to which one of the studs will be attached. After securely attaching the stud to the tabletop, you need to take a 200x100 block and make two holes in it: one for the main stud, on which the movable carriage with a sharpener will be attached, and the other for the stud, which is attached to the tabletop.
Now you can start assembling the carriage with the sharpener holder. On the hairpin that will hold the carriage, you need to make two clips of wood, plexiglass or metal. Drill holes in the clamps, put them on the stud and fix on both sides with nuts. The carriage will rotate freely along its axis.
The next step will be to install a neodymium magnet on a previously prepared plate. It is necessary to make a longitudinal groove in it so that the tripod can be moved up and down. Drill a hole in the middle of the bed and insert a bolt and nut, which, in turn, will press the plate. At the end of the plate, you can simply glue a neodymium magnet to hold the knife.
The homemade device is ready to use. It can be used to sharpen chisels and planers.
Fixed blade machines
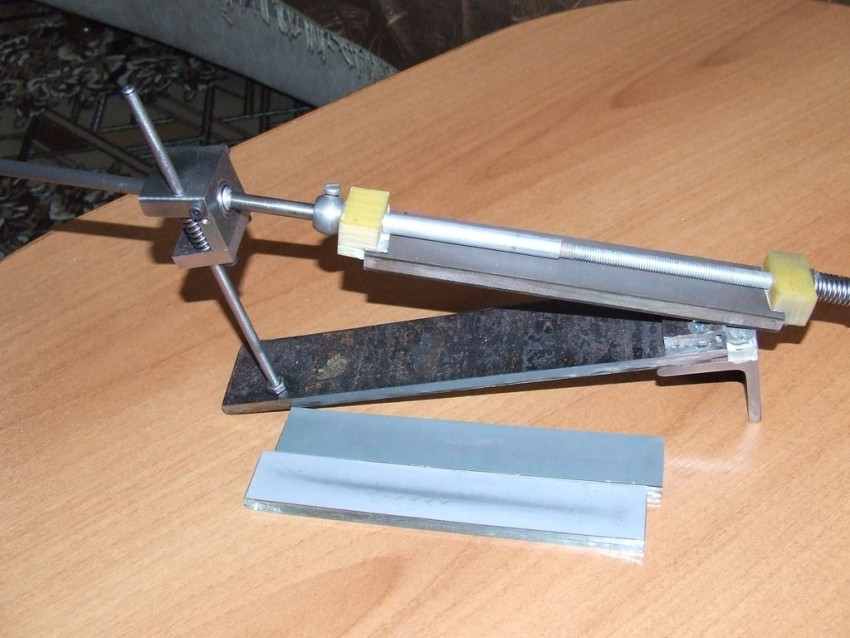
Knife sharpening machines with fixed blades will attract the attention of those people who want to sharpen a knife not only efficiently, but also quickly. The design, rigidly fixing the knife blade relative to the grinding stone moving at a set angle, allows you to precisely set the angle of inclination
To create such a homemade machine tool with your own hands you will need:
- The base is a rectangular wooden plate with dimensions 440 * 92 mm and a thickness of 18 mm.
- Wooden plate 92 * 45 * 45 mm (for fixing the vertical threaded rod).
- Wooden block 245 * 92 mm and 18 mm thick (the plate to which the knife will be attached).
- Iron plate 200 * 65 mm and metal thickness 4 mm.
- Piano hinge, 92 mm long.
- Hairpin М8, 325 mm long.
- Nuts and bolts with M8 thread.
- Drill 6.5 mm.
- Tap М8.
- Self-tapping screws 50 mm, 4 pcs.
The die for fixing the vertical threaded rod must be drilled through with a 6.5 mm drill. The hole should be located 15 mm from the edge of the die, approximately in the center.
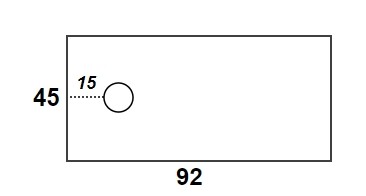
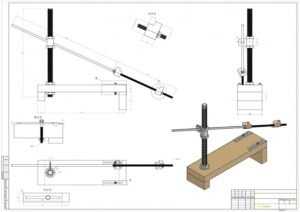
Hole layout in a wooden block
Next, in the resulting hole, you need to cut the thread for the M8 stud. The wooden block prepared in this way must be screwed to the base at a distance of 265 mm from the edge using ordinary self-tapping screws 50 mm long screwed into the back of the base.
After the block and the base are securely fastened, it is necessary to insert the M8 hairpin into the hole in the block. The hairpin should run along the entire section of the bar and base; thus, the risk of changing its position is minimized. The hairpin at the base of the bar must be firmly fixed with an M8 nut, slightly drowning it when twisting the bar in the wood.
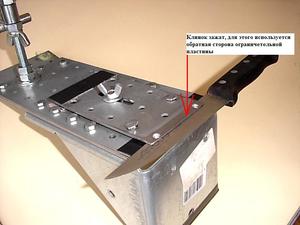
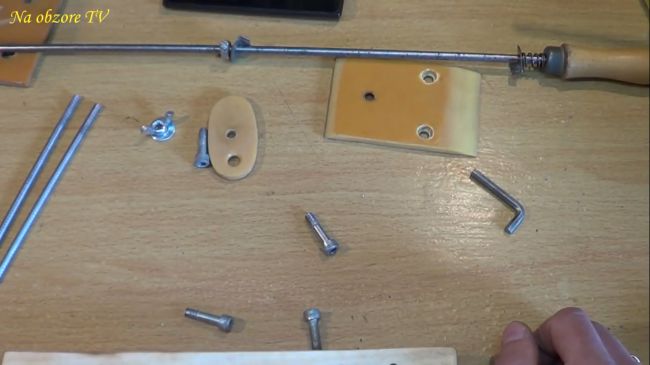
The second part of the work consists in assembling the clamping device for fixing the position of the knife. To do this, a piano loop is attached to a 245 * 92 mm wooden bar with three self-tapping screws from the end of a wooden plate, with which it will be attached to the base of the device.
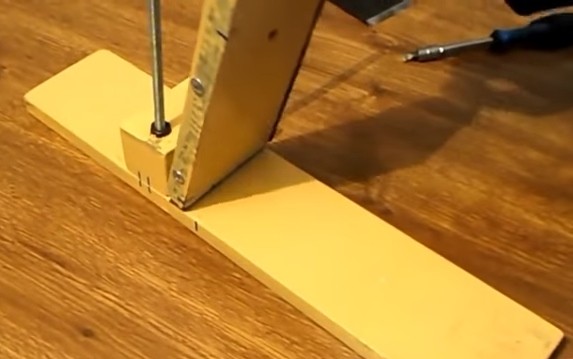
Fixing the fixing bar to the base with a piano loop
After securing the wooden part of the holding device, you can start attaching the iron plate. In the center of the plate 200 * 65 mm, you need to drill an oblong groove, 90 mm long and about 1 cm wide. The groove should be located from the edge of the clamping plate at a distance of 60 mm. Additionally, it is required to drill a hole at a distance of 20 mm from the opposite edge and cut a thread in it for an M8 bolt. Then you need to attach the clamping plate with this bolt to the previously prepared wooden base. Using another bolt and a suitable washer, fix the clamping plate in the center of the cut out groove. The fixation should be clear, but neat, so as not to damage the surface of the blade.
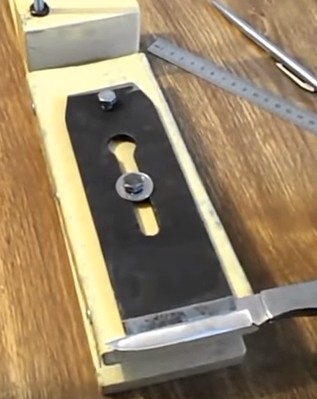
Attaching the iron clamping plate
The most difficult part of assembling this device is to prepare an adjusting device that will set the knife sharpening angle. For this you will need:
- metal square profile 40 × 40 mm;
- furniture bracket, 40 mm wide;
- a pair of rivets;
- plywood block 42 × 25 and 18 mm thick;
- bolt and nut M5;
- a pair of wing nuts M8;
- touchstone;
- steel bar with a diameter of 0.8 cm and a length of 40 cm.
A pair of holes must be drilled on a plywood block: a through hole with a diameter of 8 mm along a cross-section of 42 × 18 mm (the distance from the edge on the side of 42 mm should be set at 15 mm) and a through hole with a diameter of 5 mm on the side with a cross-section of 42 × 25 mm (distance from edge 10 mm). The square pipe should be cut in half so that you get a "P" -shaped bracket with a width of 40 * 15 mm and 20 mm ears. You need to drill 8 mm holes in the ears, into which an M8 hairpin will be inserted in the future. Connect the resulting bracket to the furniture hinge using rivets. To the resulting structure, using the second part of the furniture bracket, pull the plywood block with the M5 bolt.
Location on the spoke of the guide mechanism
Connect the touchstone to the guide rod, which is a steel rod with a cross section of 8 mm. When connecting the donkey and the guide rod, make sure that their center lines coincide. If desired, for the convenience of using the sharpener, a handle-holder can be adapted to the donkey on the back side. It remains to fix the touchstone in the guide mechanism, fix it with a lamb and the homemade knife sharpening device is ready.
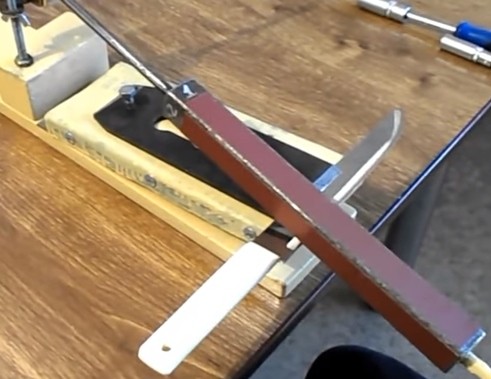
Sharpener assembly
How to sharpen a knife at home?
It is known that a sharp knife allows you to quickly cope with the process of cooking in the kitchen, leaving time for other important things. But not everyone knows how to sharpen a knife. First, you should familiarize yourself with the main rules that will help you cope with sharpening efficiently and quickly.
Injection
The angle at which the tool is held during sharpening is a significant factor. Different knives have different purposes and characteristics.
Thus, their blades are also different, and therefore it is important to place the device at the correct angle during sharpening.
Below is a list of the best angles for different types of knives:
- 55-60 - for canteens;
- 40-45 - for hunting;
- 30-35 - for kitchens;
- 35 - for knives used for cutting vegetables;
- 25-30 - for knives used for cutting meat;
- 25 - for knives used for cutting fish.
The last three options are written for those who use professional tools in their work.
What is manual sharpening for?
Sharpening of a hand plane is used exclusively for its intended purpose. Among the features of use, we note the following:
- The device is suitable for sharpening the cutting edge of a planer, as well as many other products.
- A similar mechanism can remove metal from the surface. The abrasive can have different grain sizes, which determines the amount of material removed in one pass.
In most cases, a manual device is used when it is necessary to process a complex surface. Unlike electrical equipment, the mechanism is quite simple and costs a small amount. Also, when using such a tool, a knife can be sharpened, which also has a cutting edge.
Planer blade geometry, chisels, chisels
The optimal profile of the cutting edge of the carpentry tool was formed empirically. It differs slightly from the usual section of a regular knife described in the article on the rules for sharpening the blade.
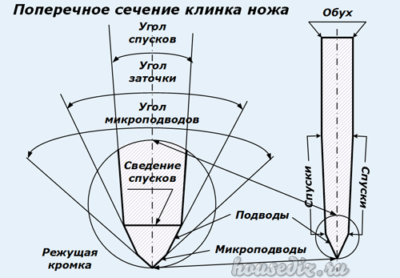
Although the blade also has a rectangular shape.

A one-sided profile is created in the cross-section of a carpentry tool blade.
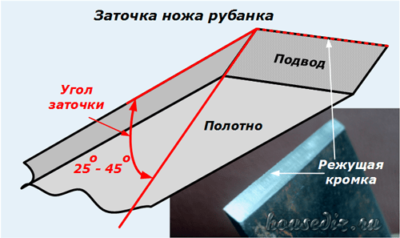
It can be said that the plane of the slopes is aligned with the feed, and the cutting edge is finally brought up due to the formation of micro feeds during polishing on the grinding belt.
The sharpening angle can vary from 25 to 45 degrees. It depends on the density of the wood to be treated.
Operating tips
The plane requires taking into account the operating rules. The same is required for the sharpening procedure. It must be borne in mind that the processing of knives should only be carried out using the following tools and materials:
- a bar, the surface of which is covered with fine abrasive grains;
- emery;
- grinding wheels;
- leather belt;
- polishing paste.

Additionally, you need to prepare another belt with which you can grind the surface. Sharpening ensures the restoration of the sharpness of the cutting edge.

If defects appear during processing, then it is necessary to use a grinding wheel. It will help to get rid of protruding burrs, and also prevent the knife from bending. Effective sharpening involves the use of emery, equipped with two wheels:
- the first has an insert of coarse abrasive grain;
- the second is the insertion of smaller particles.
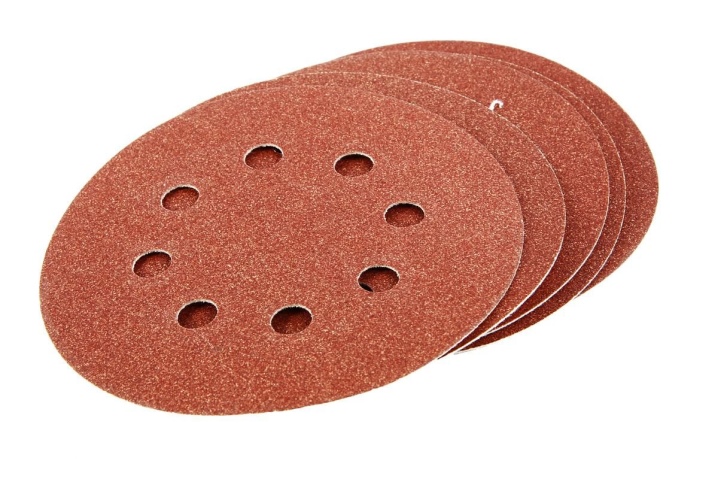
This combination provides the desired effect and increases the sharpness of the blades. Sharpening requires a responsible approach, since ignoring the requirements and features can lead to breakage of the blade and tool. An important parameter that must be taken into account when using sharpening tools is the angle at which you need to sharpen the knife. Most often, this figure should not be below 25 and above 45 degrees.
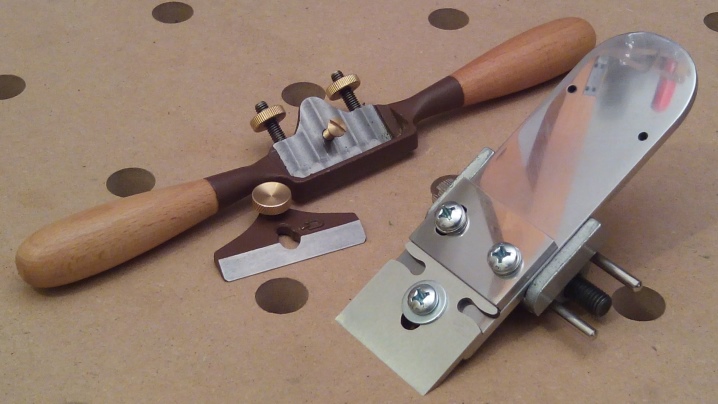
There are several guidelines to help you sharpen your planers successfully.
- When carrying out work, it is better to avoid strong pressure if you do not want to remove a thick layer of material. This error also leads to blade breakage during use of the planer due to reduced strength and improper stress distribution.
- When the knife comes into contact with the circle, its surface will heat up, which will lead to an increase in the ductility index. To prevent the blade from bending, it is recommended to cool the metal more often in a bucket of water.
- After the main sharpening, the surface of the blade should be refined, getting rid of obvious defects. This can be done using a fine-grained bar.

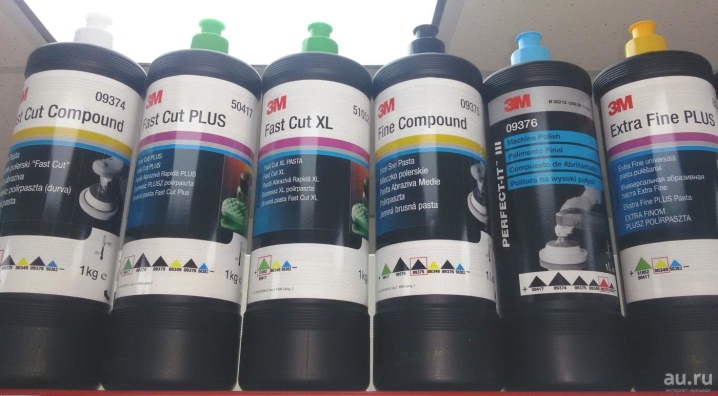
The final step is to use a leather belt and sanding paste. With their help, you can make the blade as smooth and shiny as possible. Sharpening is difficult to execute. However, it must be done regularly to prevent wear on the planer and improve work efficiency.
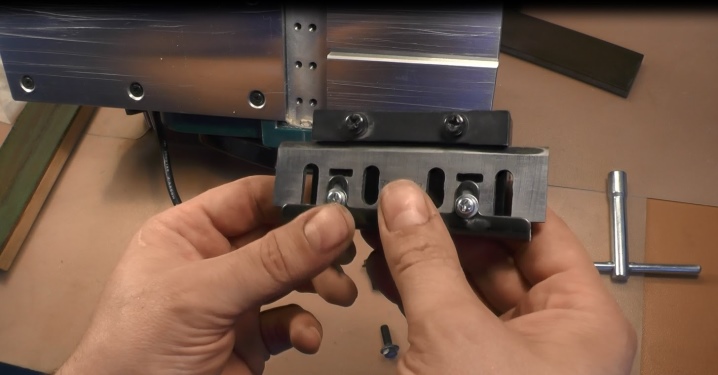
In the case of blades of electric tools, it is better to contact a specialist for sharpening. This is explained by the fact that even a minor defect that may arise during processing can damage the structure. And such planes are expensive.
Peculiarities
Today there are several attachments for processing blades. They are classified according to various criteria. The most common are the following.
- Devices are classified according to the type of use. There are manual and mechanized machines.The first option is easy to use, as well as low cost. The advantage of the second is the high speed of processing steel material, which is why such tools are more popular.
- The second classification involves the separation of devices according to the grain size of the abrasive material. Large grit results in rapid removal of steel from the blade, and reduction of abrasive stones contributes to a decrease in the thickness of the metal layer.
- The third classification option is home-made or purchased devices. If required, you can assemble the machine yourself, and this option will cost even less.
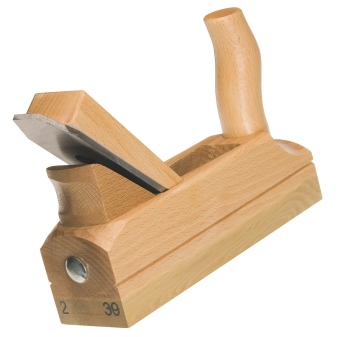
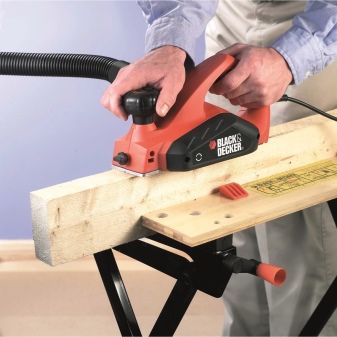
Today, many companies are engaged in the production of sharpening devices. However, you should not give up manual sharpening. Such a device has a number of advantages:
- it is suitable for cutting edges and can be used to sharpen other knives;
- the mechanism removes a small amount of metal, in the process you can use several abrasive elements of different grain sizes.
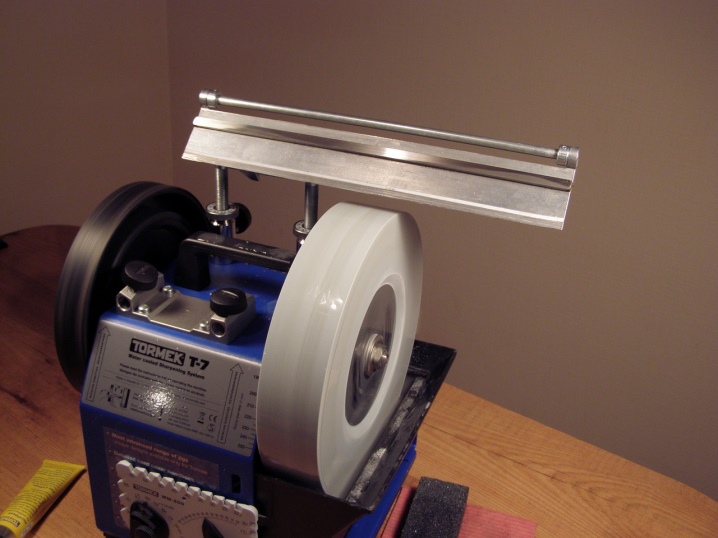
Tool for sharpening from wooden blocks
A simple tool for sharpening knives is a tool consisting of a pair of wooden slats and a pair of abrasive bars with the same geometric dimensions.
Wooden slats should be carefully sanded with abrasive paper. Then, after applying the auxiliary marking, depending on the sharpening angle of the knife, make cuts to a depth of 15 mm. Insert emery bars into the resulting holes so that each groove coincides, and then fasten them with bolts. To give the sharpener more stability, the lower part of the surface can be padded with a piece of rubber.
The types of devices for sharpening the cutting tool are different and each master will be able to opt for the manual machine that will fully satisfy his needs.
Planer knives: what can you sharpen
The main element of the mechanism under consideration is the knives. Their cutting part can wear out quickly under certain conditions.
When operating planers, attention should be paid to the fact that there are two types of devices:
- Tame people are extremely common today. In the manufacture of the main part, plastic, metal or wood can be used. The blade is manufactured using special steel, which is characterized by increased wear resistance.
- Electric planers are used when processing a large amount of material. The built-in motor can significantly increase the speed and efficiency of the process.
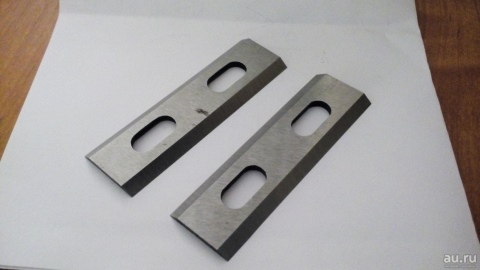
It is necessary to take into account the moment that an electric tool can have several incisors at once. Due to this, the efficiency of the process is significantly increased. The main body is made of tool steel or tungsten. It should be borne in mind that the tungsten cutting part cannot be sharpened; after heavy wear, it must be replaced. In this case, the surface may differ in shape and some other parameters.
Sharpening profiles
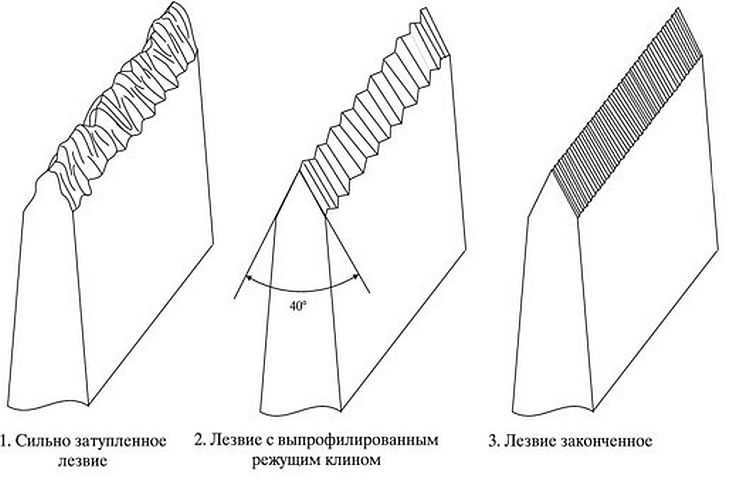
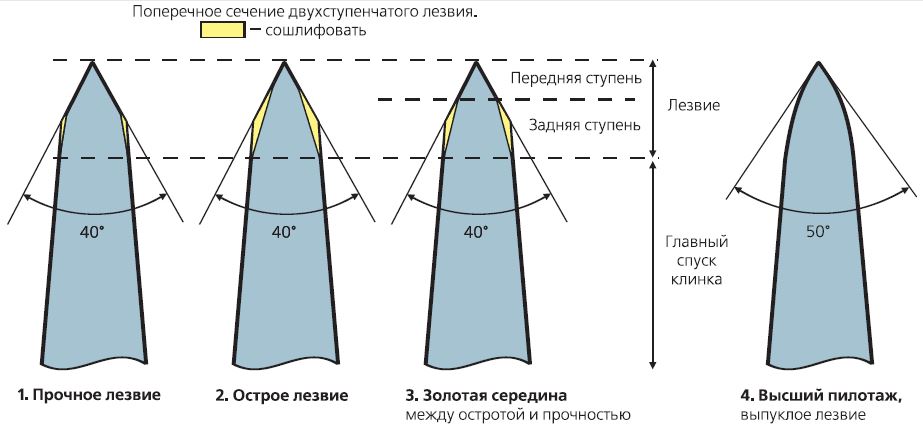
The blade profile of a knife is linked to the material properties and structure of the blade, as well as the properties of the materials for which the tool is designed. Sharpening with a simple blunt wedge (pos. 1 in the figure) gives a stable, but coarse blade: the cutting resistance is high, and the knife tears rather viscous materials. A sharp wedge (pos. 2) quickly dulls or crumbles; on viscous and / or fibrous materials, the cutting resistance may be greater than a blunt wedge due to the friction of the cut off blade.

Knife blade sharpening profiles
Ideal in all respects is the ogival (smoothly running off) profile, pos. 3. Experts still argue which generator is better - involute, hyperbole or exponential. But one thing is indisputable - it is difficult and expensive to make an ogival blade in production conditions, and it is impossible to direct it yourself.Therefore, ogival-sharpened knives are used only in special equipment, for example. microtomes - biological devices for obtaining the finest tissue sections.
For disposable blades, e.g. safety razor blades, faceted sharpening is used, pos. 4, i.e. The ogive generator, as mathematicians say, is approximated by line segments. The number of sharpening edges is indicated in the certificate or on the manufacturer's website. For thick coarse bristles, 3-4-sided is better; for delicate hair not on the face - 8-sided. 6-sided is considered universal.
Angle α
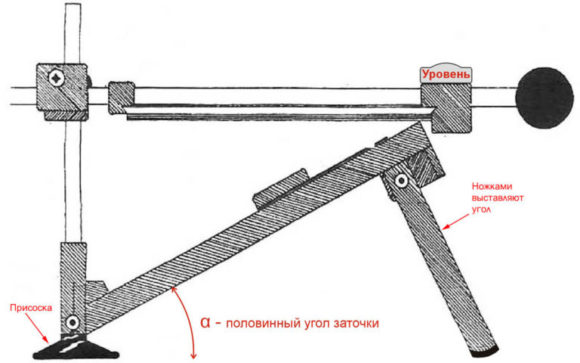
The sharpening angle is always given in half the value of α, because many tools, such as bayonet knives, are sharpened to one side. For knives for various purposes, the angle α is maintained in the next. limits:
- 10-15 degrees - medical scalpels, straight razors, art carving knives.
- 15-20 degrees - confectionery (for cakes) and vegetable knives.
- 20-25 degrees - bread and sirloin knives.
- 25-30 degrees - hunting, hiking, survival knives.
- 30-35 degrees - general purpose household knives.
- 35-40 degrees - carpentry tools, shoe knives, axes.
One and a half
Sharpening of knives, except for special ones, is done almost exclusively with a one-and-a-half profile, on the left in Fig. One-and-a-half sharpening is so named because the flat edge of the blade (escapement) is formed during the manufacturing of the blade and cannot be sharpened. In fact, guiding a one-and-a-half-sharpened knife is no more difficult than sharpening with a simple wedge. One and a half sharpening is optimal for a knife that works with a wide variety of materials, and making a sharpener for one and a half sharpened knives is much easier than for sharpening a faceted one.

Sharpening the blade of a household or camping knife
In the center and on the right in Fig. shows the stages of sharpening the blade and the numbers of abrasives used on them. The abrasive number corresponds to the number of its grains per 1 sq. mm surface. The fine-tuning stage has some features:
- Hunting and camping knives are not supplied. This makes it easier to cut hard (eg bones) with a broach (with filing). In addition, if you accidentally cut yourself, then a slightly lacerated wound stops bleeding faster, heals more easily and there is less danger of infection entering it.
- Blades of dangerous razors, shoe knives and for artistic carving after abrasive are brought to mirror smoothness on a leather donkey with GOI paste.
- Guiding and finishing the blades of kitchen knives can be done in one operation with abrasive No. 800-1100.
The main types of homemade gadgets
The main condition for homemade scissors is not to distort the angle between the edges of the blades set in production. It is not easy to withstand it by hand without a full hand and skill.
The device fixes the sharpening angle, so sharpening a knife with a special tool is much easier than with a bar.
The following are the simplest and most popular sharpeners, each of which can be made independently:
- Choosing a quality stone. If the farm has a grindstone in the shape of a roof with two slopes, they can easily return the sharpness of a blunt appliance. This “house” is easy to work with: the blade is attached to one roof slope, and its other side is sharpened with an abrasive stone, making horizontal movements. Then the knife is turned over and the second surface of the blade is processed. The convenience and efficiency of the method is that you do not need to maintain the angle between the blades with your hands, it is fixed by the shape and angle of the bar.
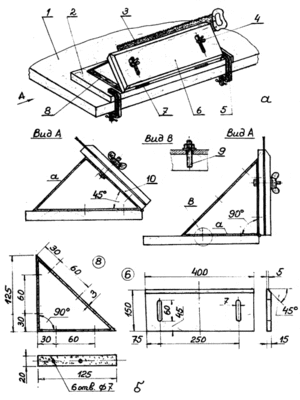
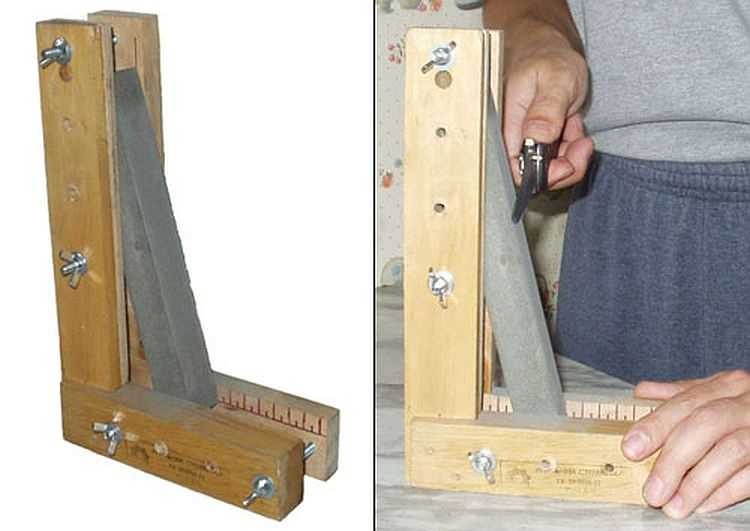
- A simple home sharpener can be made from two wood triangles. They are placed parallel to each other and connected with thumbscrews. The sharpening block is fixed between the wooden supports at an angle that can be changed if desired. The required slope of the abrasive is easy to set using a protractor or program on the tablet.
When cutting the blade on triangles, the knife must be held 100% vertical.If such a structure is used for a long time, the screeds can weaken and the set degree of the timber will change, and with it the sharpening angle.
- Instead of vertical triangles, you can make a solid horizontal base of wood, plastic or metal. It is necessary to provide for movable mechanisms for fixing the sharpening stones. The idea is that it should have been able to set a different angle of inclination of the blocks. Abrasive stones are inserted into the holes in the base and fastened. The knife "walks" vertically. Such a device must be held by hand so that it does not move on the table or fix it with clamps.
- You can make a sharpener from a stable block that attaches to a rolling cart with wheels. The knife is sharpened by moving the hand back and forth. The sharpening angle is determined by the height of the bar in relation to the working surface. This device is used for working with kitchen knives and only on a flat surface. It happens that the angle of sharpening during movement slightly deviates from the specified one. For greater accuracy, the structure must be stationary in place.
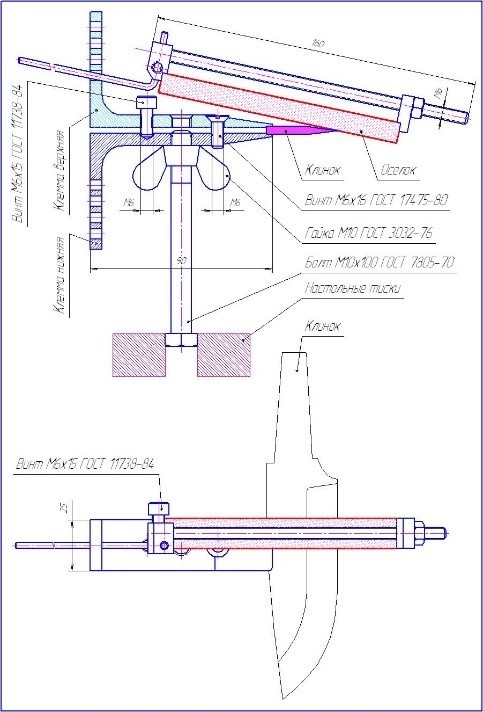
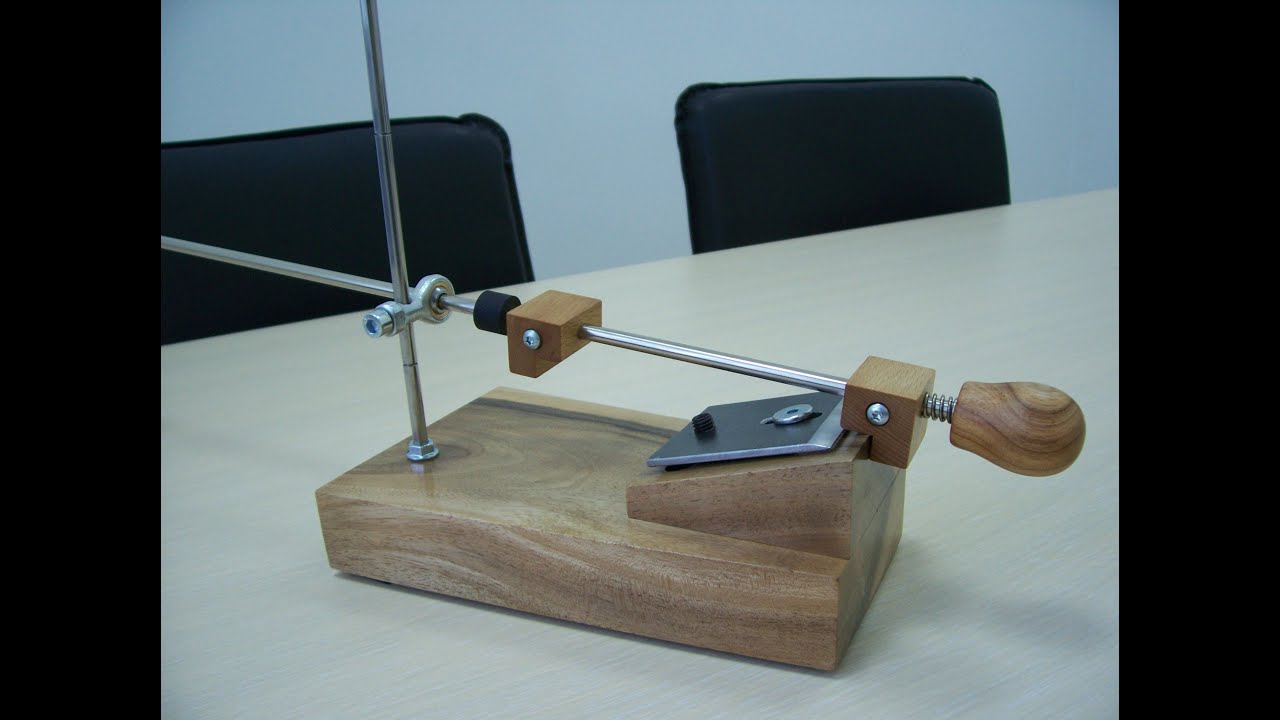
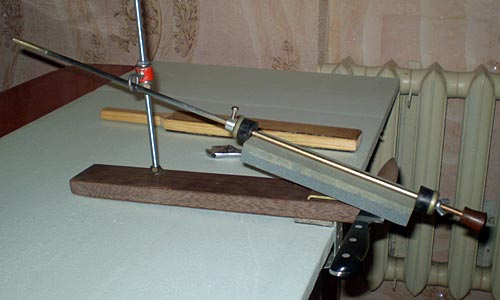
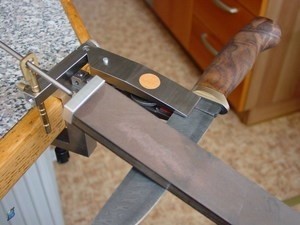
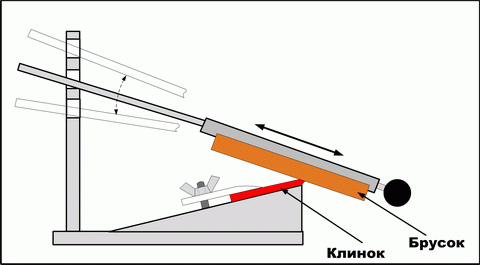
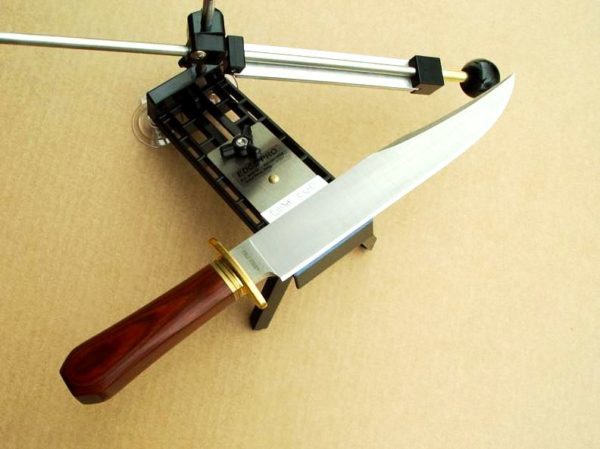
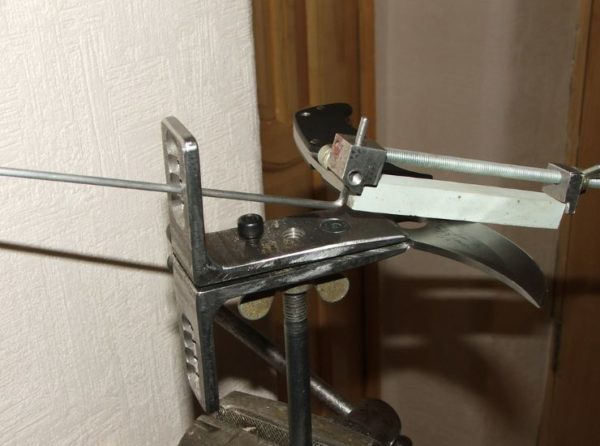
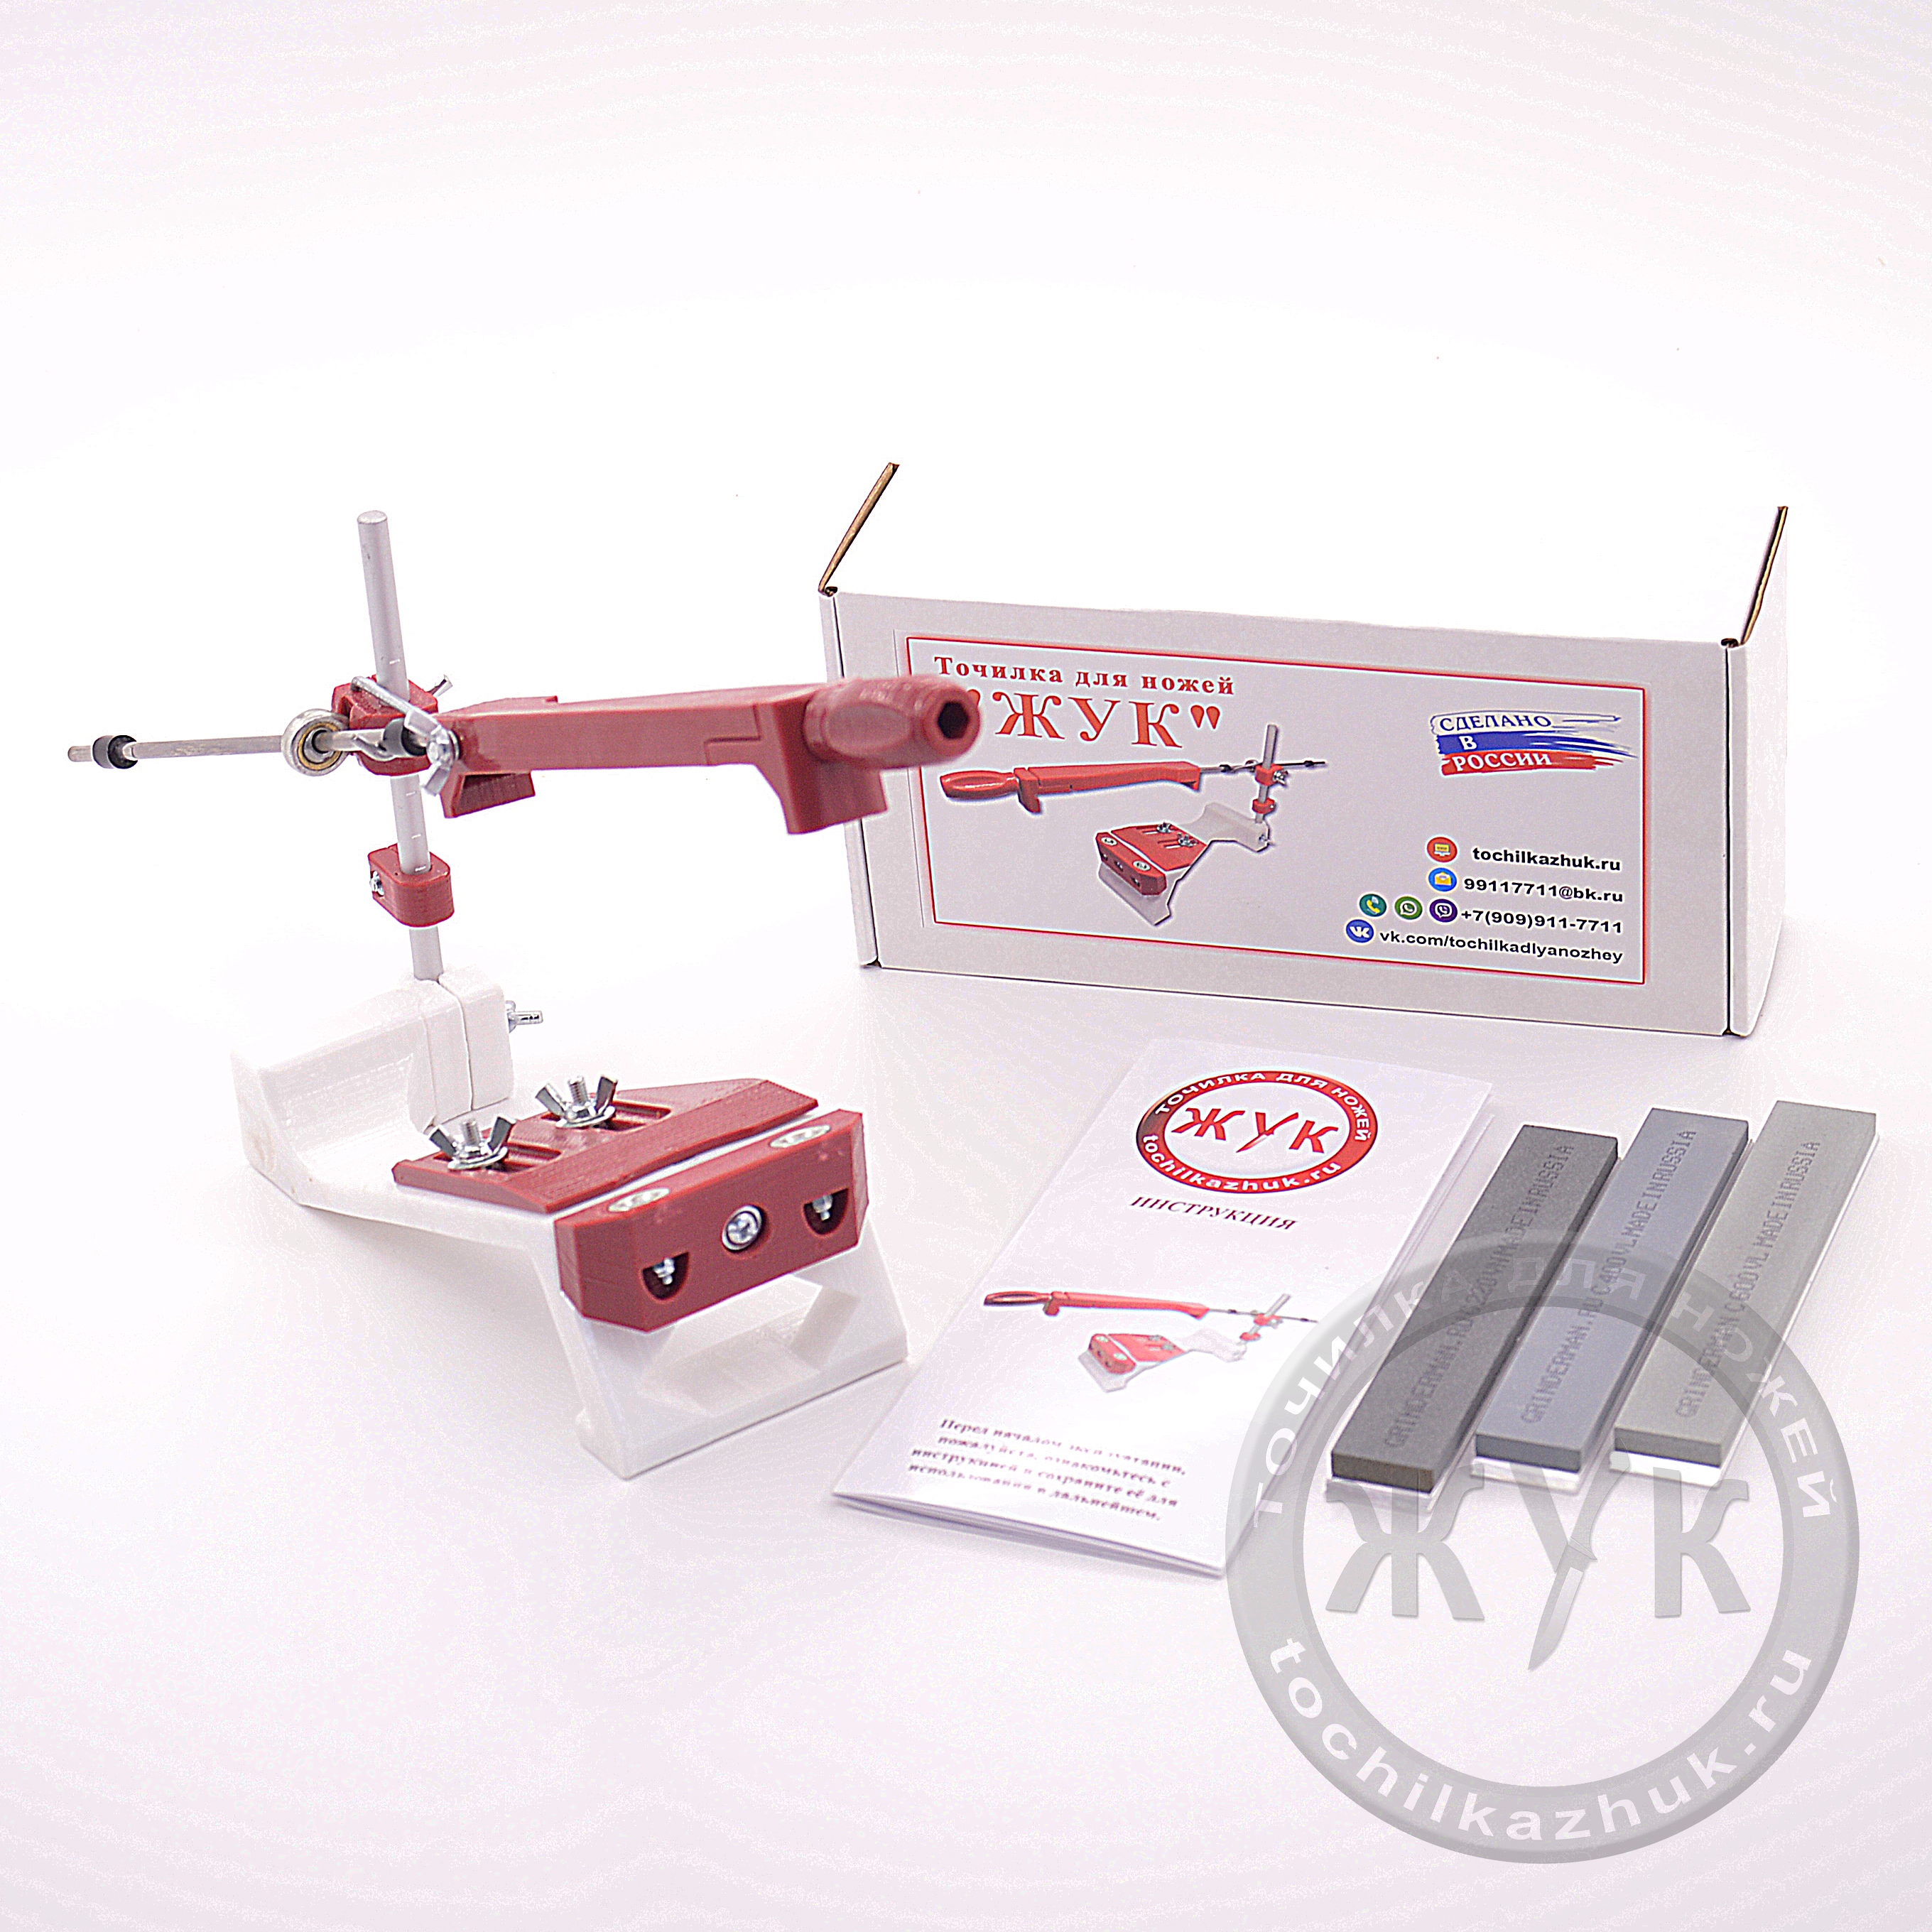
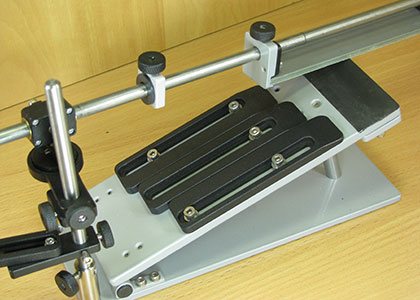
- A more complex device, the manufacture of which will take time and effort, involves not only fixing the beam, but also the ability to adjust its position. The peculiarity of the system is as follows: the knife blade is securely fixed on the horizontal support, the sharpening bar is attached to the guide, and a slotted bar is made on the vertical stand. Thanks to the hole in the vertical support, the guide with the fixed abrasive surface can be moved and the angle of the blade can be adjusted. With this method, maximum accuracy is achieved.
A sharpening (abrasive) bar or stone is a necessary element of any factory or home-made device for sharpening a knife. It is convenient when it has the shape of a rectangle (should be longer than the blade), so it is easier to sharpen the tool.
Stones come in various grains: coarse, medium and fine.
It is determined by the number of grains per unit area and is expressed as a number, the smaller it is, the rougher the stone.
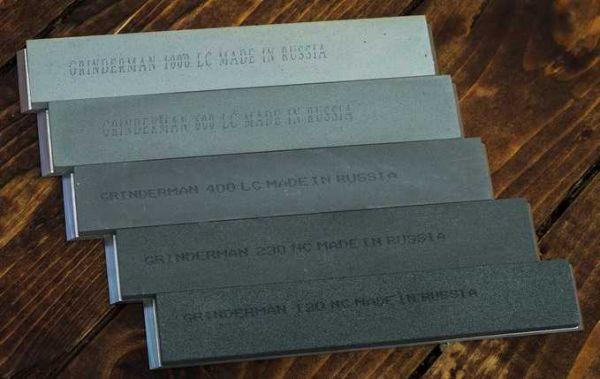
For sharpening knives, you will need medium to fine grain bars.
For sharpening knives, abrasives with a grain size of 200-350 are not used. Such grains can deform the blade. The knives are sharpened on blocks with an average grain - from 600. After the main processing, the blade is ground and polished with 1000-1200-grain sandpaper.
A double-sided bar, when on one side a rough abrasive surface, and on the other - more elegant, is doubly convenient, since they can make the main sharpening of the knife and finishing.
Stones also differ in the material from which they are made. Natural - from shale and corundum rocks. These stones are coarse grained, they grind off quickly, as they are moistened with water or oil during work. There are diamond and ceramic bars, which are more wear-resistant and will last longer than natural ones.
Why do you need a sharpener
A living relic of our days is a Finnish hunting knife. Not a bandit finca, sometimes of a bizarre shape, but a Finnish-type hunting knife, on the left in fig. Traditional hunting knives (center and left) are similar in shape, but the difference between them is very large.

Finnish knife and classic hunting knives
A Finnish knife blade is forged from blast iron, which can be smelted right in your yard from swamp ore in a blast furnace, without resorting to blast furnaces, puddling and other methods of converting cast iron into iron and steel. The viscosity of the blast iron is excellent, it is very difficult to break a blade from it. But the hardness is also low, somewhere HRS55, the knife gets dull pretty quickly. Finnish hunters did not care about this: a blade of such hardness can be directed (sharpened) with a beating on many natural stones, and there were always enough ironed moraine boulders in Fennoscandia.
They sharpen a knife with a chop in about the same way as they beat off a scythe, only the touchstone is motionless, and the blade is moved.First, it is pulled along the donkey with its butt away from itself, then it is turned over and pulled with its butt towards itself. The position of the cutting edge (RC) on the donkey is always dragging; fast movements: shirk-shirk! On each movement, you need to keep the contact patch of the blade with the touchstone (see below), but the requirements for maintaining the angle of inclination are not so strict. Learning to sharpen a knife with a chop is not very difficult, and with some skill, you can direct a smoothly running profile onto the blade, see below. However, the Finnish knife is in general a dead end for the evolution of cutting tools, which survived in special natural conditions.
A good knife was never cheap, and in an extreme situation, the durability of the blade, combined with the toughness of the blade, became vital circumstances. Therefore, even in antiquity, knife blades learned to harden from the surface and cement: the core remained viscous, not brittle, and a hard hot crust formed on it outside, see the trace. rice.:

Surface hardened and carburized knife blade structure
It is still possible to direct a knife with a cemented blade with a chop, but a skill is needed that is not given to everyone. And the abrasive is already needed from a special kind of stone - Grünstein lithographic slate. There is little of it in nature; Grunstein is still considered a strategic raw material. There is no artificial grunstein and is not expected. To spoil the cemented knife with an inept beating is as easy as shelling pears - a little somewhere the cementation crust is pulled off to raw metal (you can't see this by eye), the knife will only have to be thrown away, the blade will immediately become blunt and crumble.
Household workers do not need such stamina and toughness as hunting and marching ones, and they should cost a lot less. As a result, special steels and powder metallurgy are widely used in the production of household goods. The blade of the "eternal" kitchen knife is structured like a rodent's chisel: longitudinal layers, the hardness of which falls from the core outward. In any case, the knife has to be sharpened less often, but the beating is unambiguously excluded - the blade from it immediately crumbles.
Types and their structure
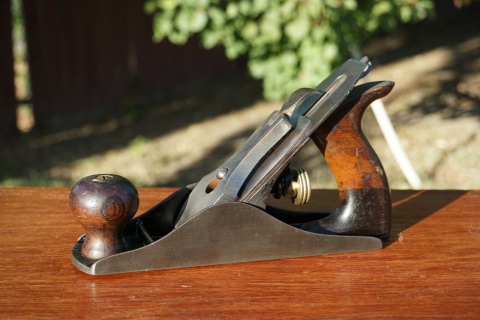
Knives are the main element of the plane, so it is worth taking a closer look at their design, structure and features. The cutting part of the blades is subject to wear during operation, so the material needs to be sharpened periodically. Today there are two types of planers that use special blades.

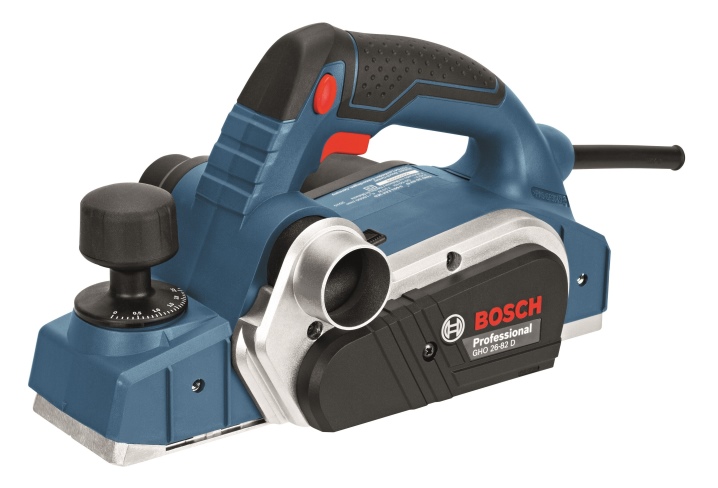
Mechanized
They are electrical tools. Designed to handle large amounts of wood, the blades are thicker and made of stronger steel. Due to the motor provided in the carriage design, the operating speed increases, as well as the wear of the cutting elements.
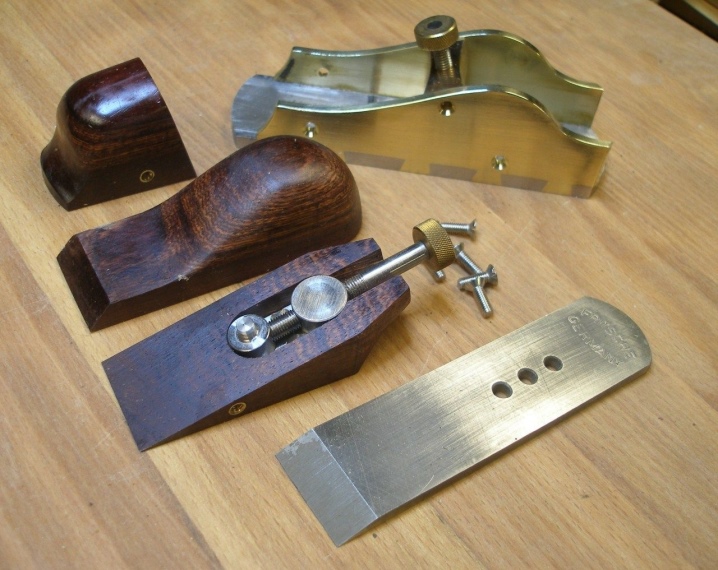
Manual
A fairly common type of tool that, if desired, can be made at home. For the manufacture of the body of the planer trolley use:
- metal;
- wood;
- plastic.

The blade has a small thickness; special steel is used to create it. A distinctive characteristic of the knife is resistance to wear. The difference between the two tools is not only in the presence or absence of an engine.
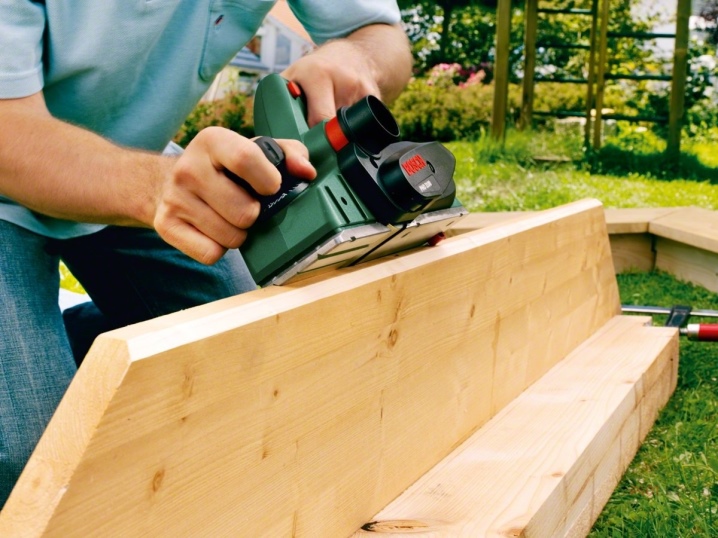
Electric planers are distinguished by the presence of multiple cutters and the ability to use double-sided blades. All of this increases work efficiency, which is why power tools are popular.
During operation, it is not immediately possible to determine that the planer knives need sharpening. However, there are several sure signs that will help you understand the need for sharpening.
- Chamfer appearance. If, during inspection, a shiny tape of small thickness is found on its surface, then sharpening is necessary.
- The appearance of a reversible knife. In this case, it is easy to determine the need for sharpening - just look at the metal after turning the element twice in the plane.
