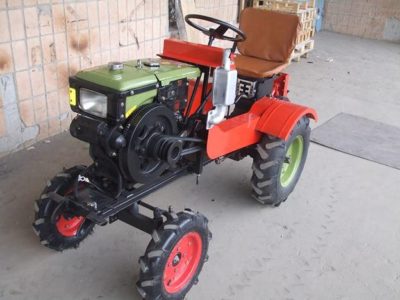
Seat - tool box
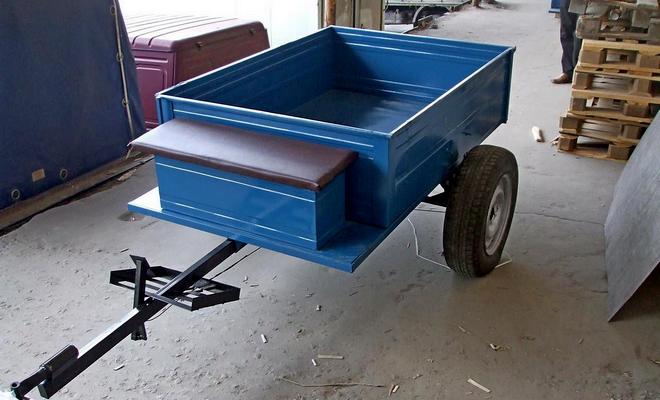
All metal parts are painted with black primer - enamel on
rust, and the body and tool box are sheathed with galvanized roofing
iron, which is set on conventional blind rivets. Frame
the tool box is welded from a corner of 20 mm and has dimensions: L 70 x W 34 x
30cm. The seat is made of a piece of chipboard and foam rubber covered with dermantine.
A lock is cut into the side (see photo).


The dimensions of this box were not chosen by chance, because as it is
the need to transport a chainsaw, an ax and a can of gasoline. And How
the long seat turned out to be more comfortable when cornering. Trailer bottom
made from two pieces of waterproof OSB 12mm thick. Subsequently from above
I will fasten a sheet of roofing galvanized.
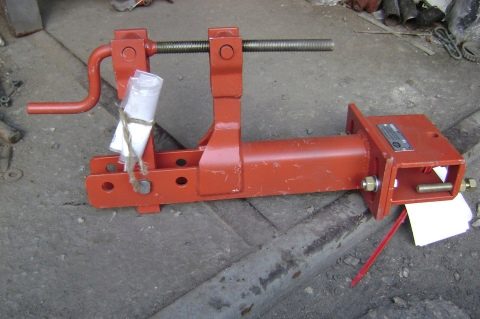
Drawings of the hitch of the walk-behind tractor
Consider a drawing of a universal coupling for the following types of motoblocks: "Pubert Quatro", "Honda", "AGRO", "OKA", "KASKAD", "MB-90", "NEVA", "FAVORIT", "SALUT".
 The purpose of the universal hitch in conjunction with a walk-behind tractor of attachments: a digger, a plow, a one- and two-row hiller, etc.


Installing a hitch on a walk-behind tractor
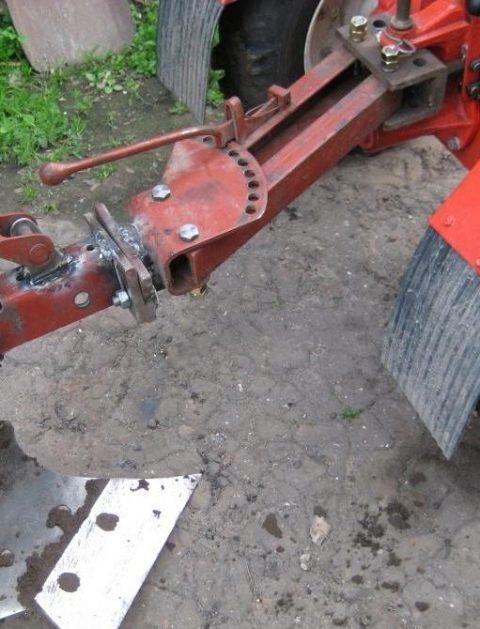
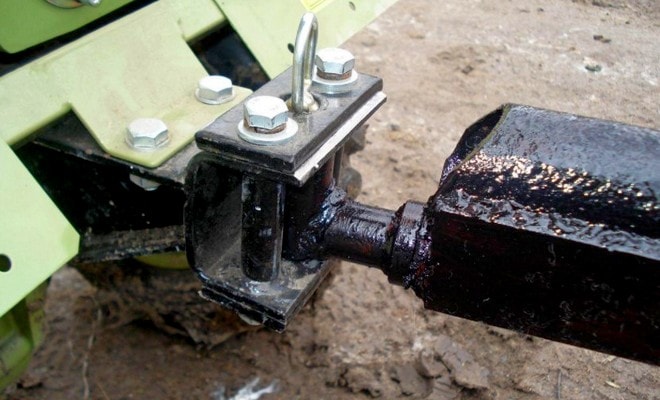
The hitch bracket is installed on the walk-behind tractor bracket, and is attached with pins. It is advisable to fix the hitch bracket with M12x60 spacer bolts, swivel to the walk-behind tractor frame.

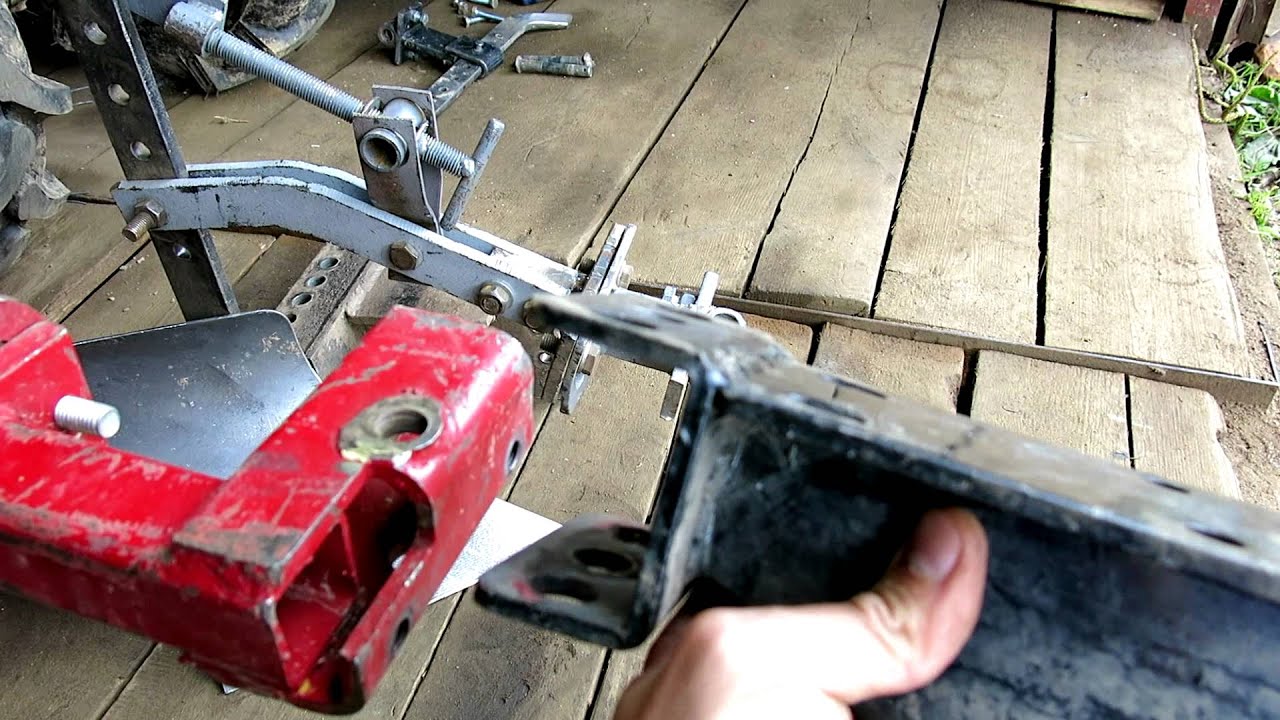
Attaching the implement to the hitch
A removable hitch axle must be installed on the implement rack bracket. Insert an axle with an M16 thread into the hole in the hitch body and screw a screw into this thread. It is necessary to match the holes for the M16x40 bolt on the tool stand and on the hitch body. Then this connection is fixed with an M12 nut and an M12x40 bolt.
Recommendations for work
Attached implements are set up and regulated individually, depending on the type of soil and the power of the walk-behind tractor. The special design of the hitch can be adjusted in different ranges. Using the initial settings, you need to set the radius grooves of the hitch to zero, the transverse grip angle, and fix it with an M12 nut and an M12 bolt. Also set the longitudinal grip angle to a minimum. The first 3-5 meters of movement, carefully observe how the walk-behind tractor works with the tool.

If you need to deepen or raise the implement, stop the walk-behind tractor, and adjust the implement by rotating the screw handle. Then you can continue driving and evaluate how the walk-behind tractor works with the tool. Also, if you need to adjust the transverse grip angle, you need to loosen the M12 nuts and M12 bolts.

Then adjust the angle in the required direction and tighten the nuts and bolts. Before starting work, all threaded connections must be tightened firmly. After the work on the soil is over, the threaded connections must be cleaned and lubricated daily. To do this, use Litol 24.
It's interesting: How to make a walk-behind tractor with your own hands with a box from a Zhiguli and a VAZ rear axle (video)
Assembling a homemade trailer for a walk-behind tractor
Getting started with the project, the DIY master needs:
- create a working project or drawing (drawing);
- prepare material for the frame and other major assemblies;
- prepare a workplace;
- mark the main elements of the trailer structure;
- to lay out and adjust the alignment angles;
- collect part templates;
- carry out the adjustment of the entire acquired nodes to the structural elements.
Required tools and materials
To carry out the work, it is necessary to prepare all the necessary tools:
- welding machine;
- grinder with a set of cutting and abrasive discs;
- measuring tool - tape measure, metal ruler, protractor, square, marker and chalk, metal scribe;
- hammer, chisel, pliers;
- locksmith vice, set of clamps, welding clamps;
- drill, set of drills for metal;
- riveter.
As necessary materials you will need:
- steel square or rectangular pipe 60 × 60 or 60 × 30 mm;
- steel square tube 30 × 30 or 25 × 25 mm;
- corner 25 × 25 mm;
- channel;
- springs of a Moskvich passenger car;
- steel sheet 2 mm thick;
- galvanized sheet with a thickness of 1 or 0.8 mm;
- fasteners, bolts, nuts, rivets.
For a model with a rigid body, instead of a spring-loaded design of a wheelset on springs, an ordinary beam will be needed.
Wheels must be selected immediately with hubs, this will facilitate the further assembly of the homemade product.
Frame
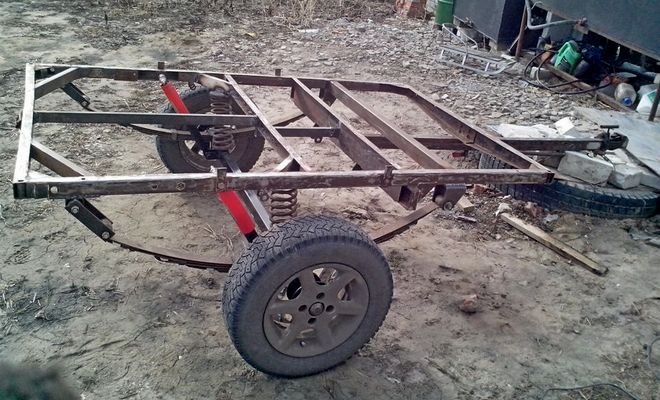
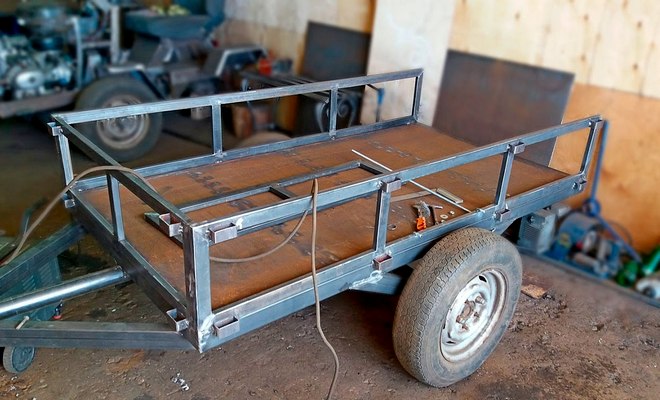
The trailer frame is an all-welded structure in the form of a square tube frame grid. Traverses from a square of 25 × 25 mm form the frame cross members, and the side members are made from a tube of 60 × 60 or 60 × 30 mm. After marking, all structural elements are cut and laid out on a flat surface, the joints are welded with small seams, each junction of the elements is checked with a square. After assembly of the structure, the final welding of all parts is carried out along the perimeter of all planes. Frame painting is carried out after surface treatment with a metal primer.
Chassis
The basis of the undercarriage is a beam with hubs at the ends. Channel bars are docked with each other in such a way that they form a square. The joints are welded with a continuous seam. At the ends of the axle, wheel hubs are installed and welded.
The accuracy of the axle assembly is checked by checking the parallelism of the planes of the rims. The connection of the frame and the beam is carried out using springs, while the ends of the springs are installed in the welded brackets on the frame, and the beam is pressed against the central part of the springs using an earring.
The chassis mounted on the frame is additionally tested for roll-over resistance. As in a car, the axle leaf spring group must have rubber bushings in the frame mounting bracket.
Body, frame lining
The platform is marked out relative to the lattice in such a way that allowances are left for attaching the side racks. The front and side boards are firmly installed, and the tailgate is removable on door hinges.
The sides of the trailer have a frame structure made of corners of 25 × 25 mm. The corners are butt-welded, the seams from the inside are cleaned at the level of the metal plane.
Removable sides are assembled in the following sequence:
- side frame;
- adjustment of the sheet of galvanized iron to the size of the frame is carried out;
- the side canvases are cut out and fixed with rivets through the corner.
The bottom of the body made of a sheet of 2 mm iron is installed on the frame and welded with a small seam around the perimeter every 3-5 cm.
The installation of the boards begins with the installation of the front board, then the side boards are installed and connected with a welding joint.
The tailgate is fixed last - first, the hinges are marked and welded, and then the latches.
Other construction details
After assembling the frame and body, a folding seat is installed - a wooden bench, placed over the front side with support on the side ones.
As a trailer braking system, it is recommended to use elements of the braking system of a car, the hub and wheels of which are used in the design. For the reliability of the brake system, it is recommended to provide an additional lever lock.
Do-it-yourself hitch for a walk-behind tractor
The great advantage of a home-made device is that the owner takes into account his requests and makes it based on the input he needs: the model of the walk-behind tractor, the load, the parameters of the attachments.
But the first thing to consider is that in any case there will be an increased load on this node, so it is important to pay careful attention to the dimensions, design and level of strength of all parts of this part. Correctly set parameters of the device will provide the most reliable aggregation with the walk-behind tractor, the necessary mobility of the unit and the durability of its use.
When deciding on the design, pay attention to the dimensions of the towbar of your walk-behind tractor and the features of attachments (already available and the one that is planned to be purchased). The primary task is to ensure maximum compatibility of the unit with all necessary attachments and trailers.
Equally important is the ease of use and the ability to aggregate with equipment with different parameters. The main working part, as a rule, has a U-shape and serves as a bracket, which, through the holes in it, is fixed to the walk-behind tractor
The attachment stand is attached to the other side of it.
The main working part, as a rule, has a U-shape and serves as a bracket, which, through the holes in it, is fixed to the walk-behind tractor. The attachment stand is attached to the other side of it.
 Before assembling the hitch, carefully read the instructions.
Trailed from the crosspiece to the walk-behind tractor
Trailed from the cross-piece of the propeller shaft to the Motor Sich walk-behind tractor photo video
Do-it-yourself trailer hitch from the drive shaft cross for a walk-behind tractor trailer photo video.
A trailer for a walk-behind tractor with your own hands and a photo video trailed from the cross-piece of the propeller shaft to it.
I repeat that many owners of walk-behind tractors themselves make a trailer for a walk-behind tractor with their own hands, and the question arises, which trailer is better and more reliable, more successful.
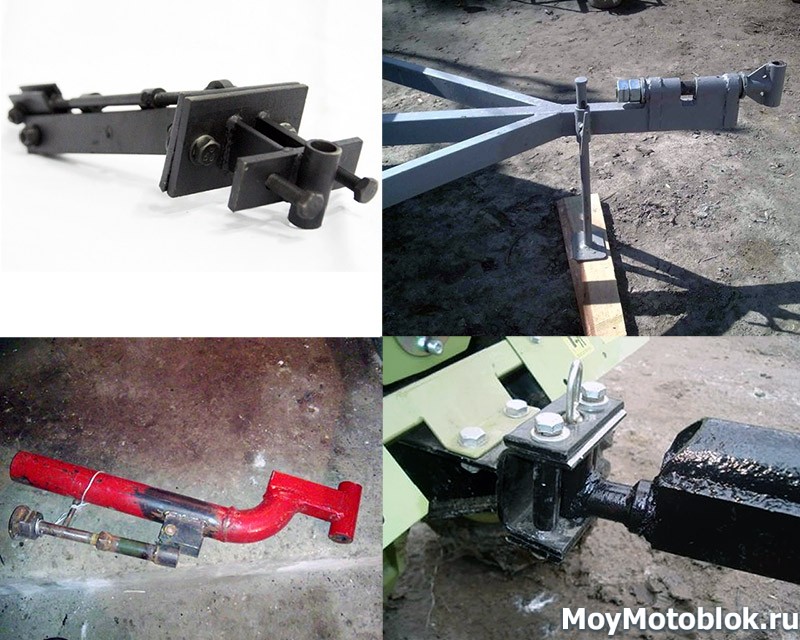
There are many designs trailed to a walk-behind tractor: from water pipes, made on a lathe, from cardan joints, etc., here each owner chooses his favorite design of a home-made trailed walk-behind tractor.
In the same article, I want to show my own, and not only my own, do-it-yourself hitch from the cross-piece of the driveshaft for a walk-behind tractor trailer.
All owners of walk-behind tractors know that over time it breaks a hole in the hitch of the walk-behind tractor and the trailer, and backlashes appear, which in some way negatively affects the control of the walk-behind tractor. and this does not add comfort.
To remove these backlashes, someone puts additional rods, someone puts liners, someone puts bearings - here each owner of a walk-behind tractor gets out of the situation himself, depending on his capabilities.
Operating my heavy Motor Sich walk-behind tractor with a home-made trailer, sometimes loading the trailer up to 1.5 tons, and sometimes more, I found that backlash began to appear in my coupling.
Having examined my hitch of a home-made trailer, I found that it was not so much the trailed trailer itself that it was breaking, as it was breaking the lower hole for the trailing pin in the hitch of the walk-behind tractor, since the hitch of the walk-behind tractor was made of cast iron.
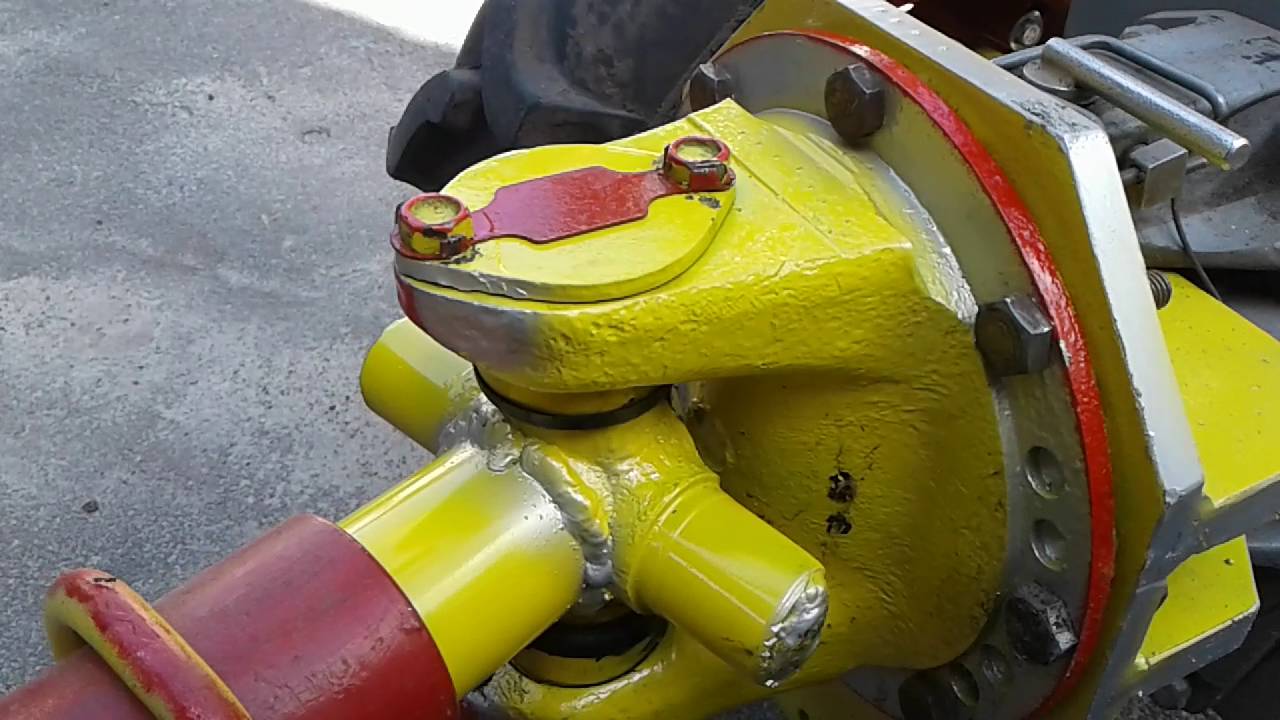
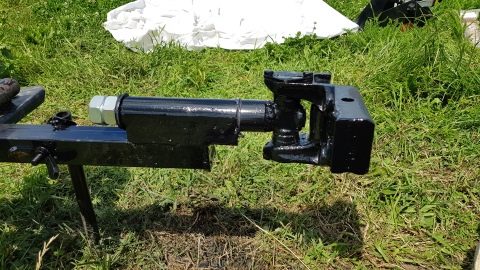
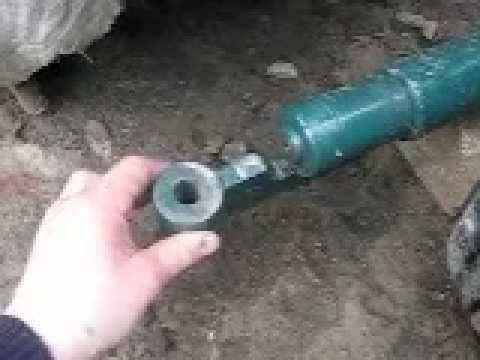
After that, I became interested in how other owners of walk-behind tractors get out of this situation, I considered many options and chose - a hitch from the cross-piece of the propeller shaft for the trailer of the walk-behind tractor.
Here are some photos that I found on the Internet, for which I am very grateful to the owners of walk-behind tractors, that they posted photos of their couplings, thereby sharing their best practices and developments with other walk-behind tractors.
Trailer hitch from the cross-piece of the cardan shaft for the trailer of the walk-behind tractor photo.
Hitch from the cross-piece of the cardan shaft for the trailer of the walk-behind tractor video.
But what happened to me - a hitch from the cross-piece of the propeller shaft for the trailer of the walk-behind tractor photo.
Trailer hitch from the cross-piece of the cardan shaft for the trailer of the walk-behind tractor video.
In any case, despite the fact that the towing device from the cross-piece of the driveshaft for the homemade trailer of the walk-behind tractor, I got a little cumbersome, it is easy to cling to the trailer with the walk-behind tractor, the control remained easy, the backlashes disappeared, that is, what I was trying to achieve with the construction of this structure - I achieved.
There is little left to do, this is running trials with a loaded trailer, and then it will be seen.
If you have any questions or additions, please feel free to write in the comments.

