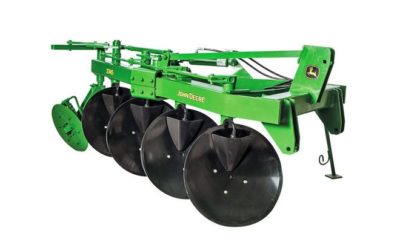
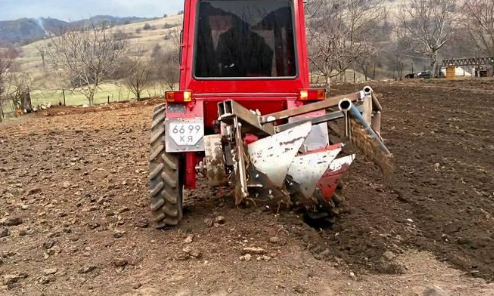
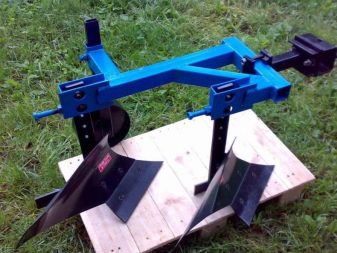
Is it possible to dig potatoes with a plow
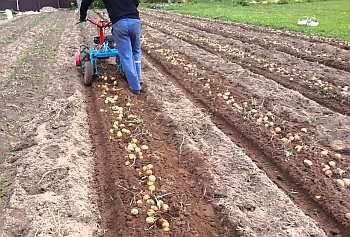
Many experienced farmers use the plow in the process of harvesting potatoes. So they greatly simplify their lives, getting rid of the need to dig out hundreds, or even thousands of potato tubers. The only question that arises is how to dig potatoes with what plow?
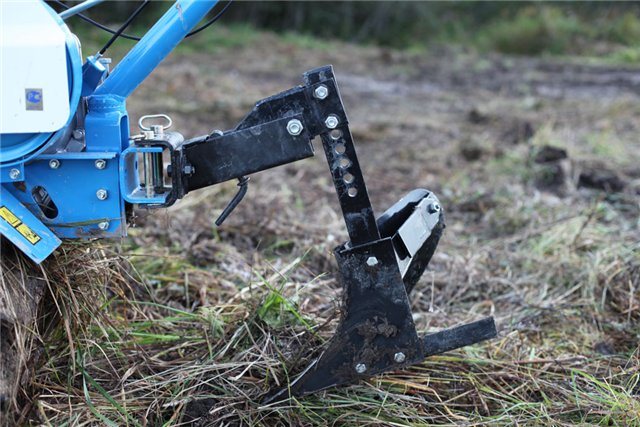
For this, special plows with deep blades are used.
But with this method, it is extremely important to take into account the depth at which the potatoes grow. Otherwise, you risk losing a certain percentage of the collected goods.
To avoid unpleasant consequences, the plow must be precisely adjusted to work in specific conditions.
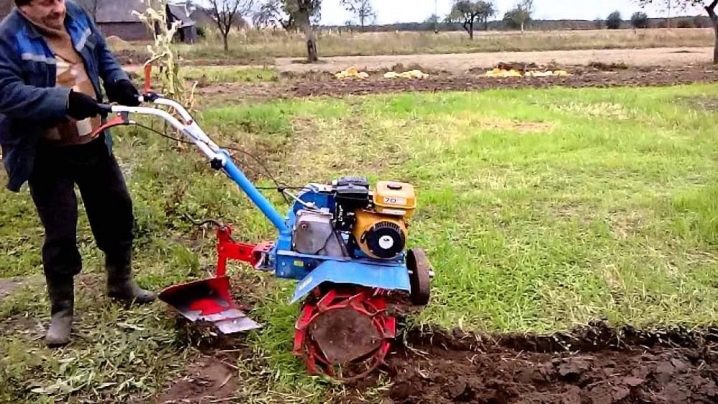
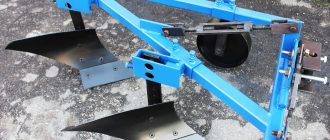
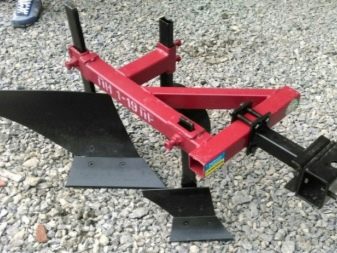
Having made a reversible plow with your own hands, you will make your life easier for many years during gardening and field work. And having mastered the business of manufacturing and selling this unit, you will certainly gain a stable income. It's time to start your own business!
The advantages of self-manufacturing and assembly
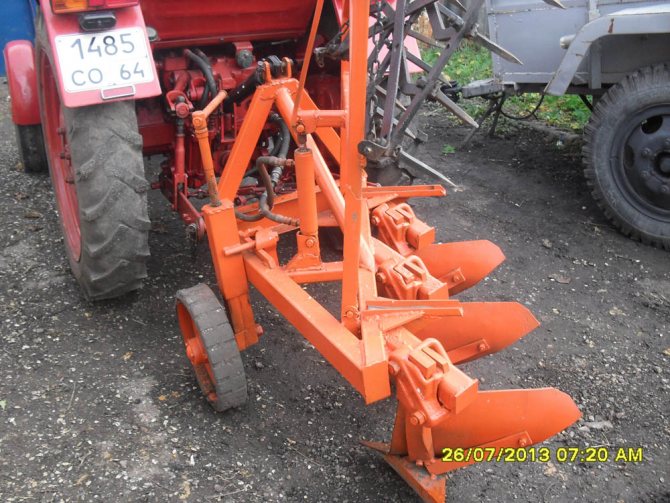
Plows collected by craftsmen from the remains of iron.
The main advantage of a self-produced plow is its low cost. You can make tooling from materials you already have, or use parts from old farm equipment. After the dissolution of state-owned enterprises, a lot of unnecessary equipment remained, which can be inexpensively converted to fit your needs.
The next advantage will be the practical compliance of the produced plow with your requirements for the processing of a particular type of soil and the necessary procedures for cultivating certain crops. You can make different working tools for different crops.
The use of materials known for their quality guarantees the successful use of hand-made devices. Shop counterparts often do not justify the specified technical characteristics and require revision and strengthening of the main elements. Spare parts and various metal structures accumulated on the farm will save you substantial finances when making a plow yourself.
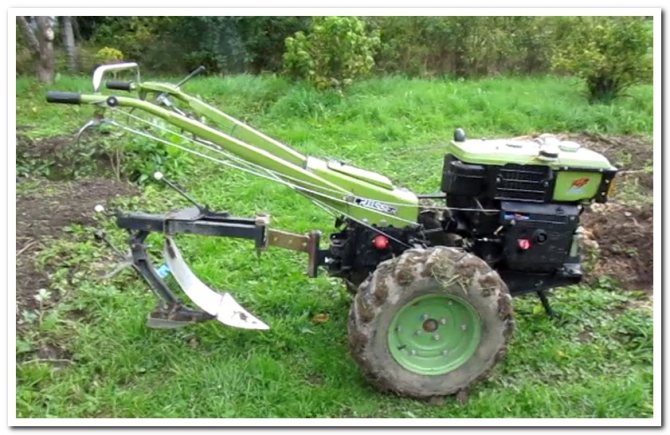
It is more convenient to adapt self-made equipment to the existing agricultural equipment. The design of the plow is calculated for a specific mini-tractor in terms of power and productivity. It is also possible to complete the equipment with various tools for combined processing of a land plot.
Types and classification of plows
There are several designs of plows:
- ploughshare;
- disk;
- rotary;
- combined;
- chisel.
The most common are plowshares. They were used by our ancestors and to this day they work on most fields. For plowing heavy lands, areas with high or insufficient moisture, disc plows are used. Combined and rotary - more complex in the device, suitable for cultivation of virgin lands. Chisel - these are special devices that do not provide for the circulation of the formation. They are conventionally referred to as plows and are rarely used, especially in private households.
By the type of traction, plows are divided into several categories:
-
Tractor. At this time, this is the most common type of plow. They are produced for different types of equipment, including for small-sized mini tractors and even walk-behind tractors.
- Horse-drawn. This group is rare today. Such plows are used to cultivate those areas where it is difficult or impossible to drive the tractor.
- Rope-traction. They are used in places where even a horse will not enter - in swampy areas, with a large slope, etc.
And that is not all. There is also a classification by purpose: general and special. General purpose plows operate on most reclaimed land. Special-purpose plows include:

- For stony soils. They have built-in safety mechanisms (lifting) which prevent large stones from damaging the plow.
-
Negotiable. They have two identical plows in a mirror image. Allows to obtain a flat surface without pronounced humps and furrows (smooth plowing).
- Long-tiered. They are used to increase soil fertility.
These are not all varieties, but the most popular and used ones. They differ constructively, and sometimes seriously.
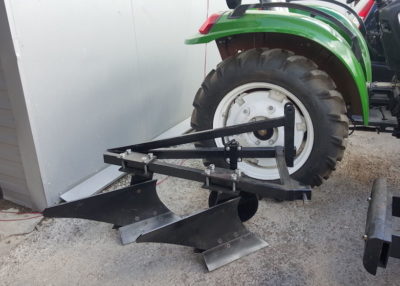
Description of assembly work
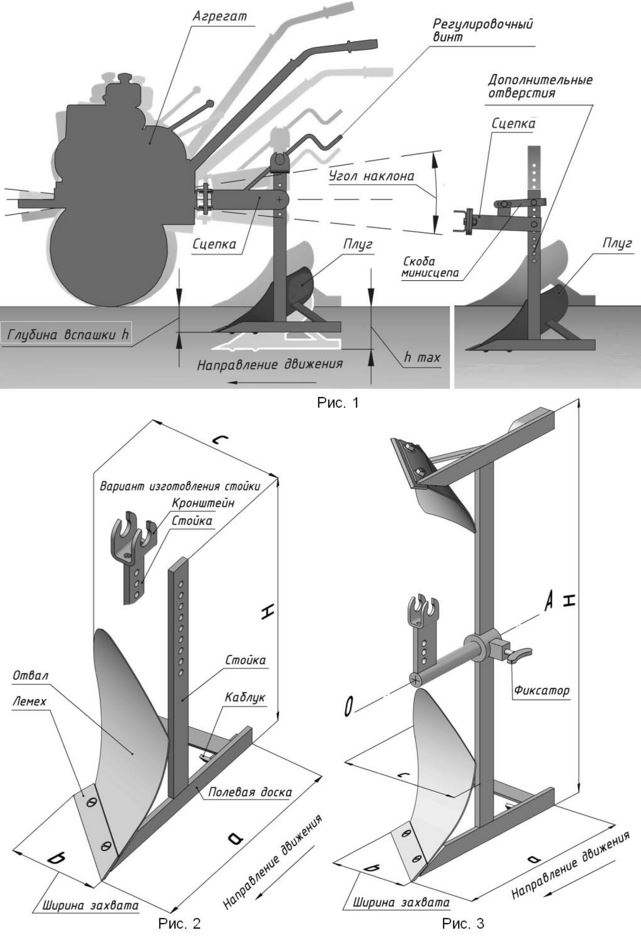
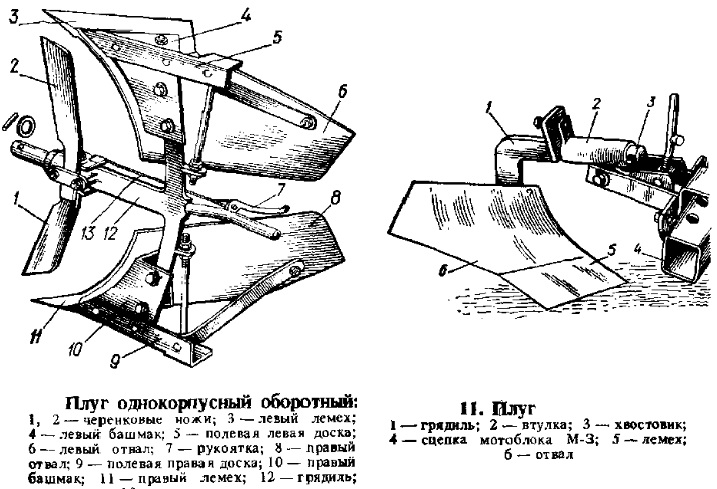
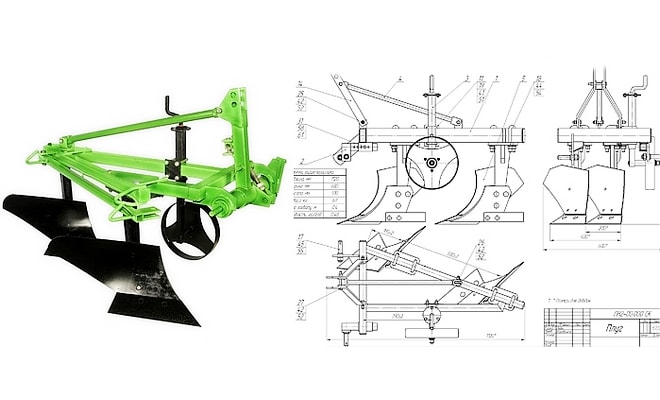
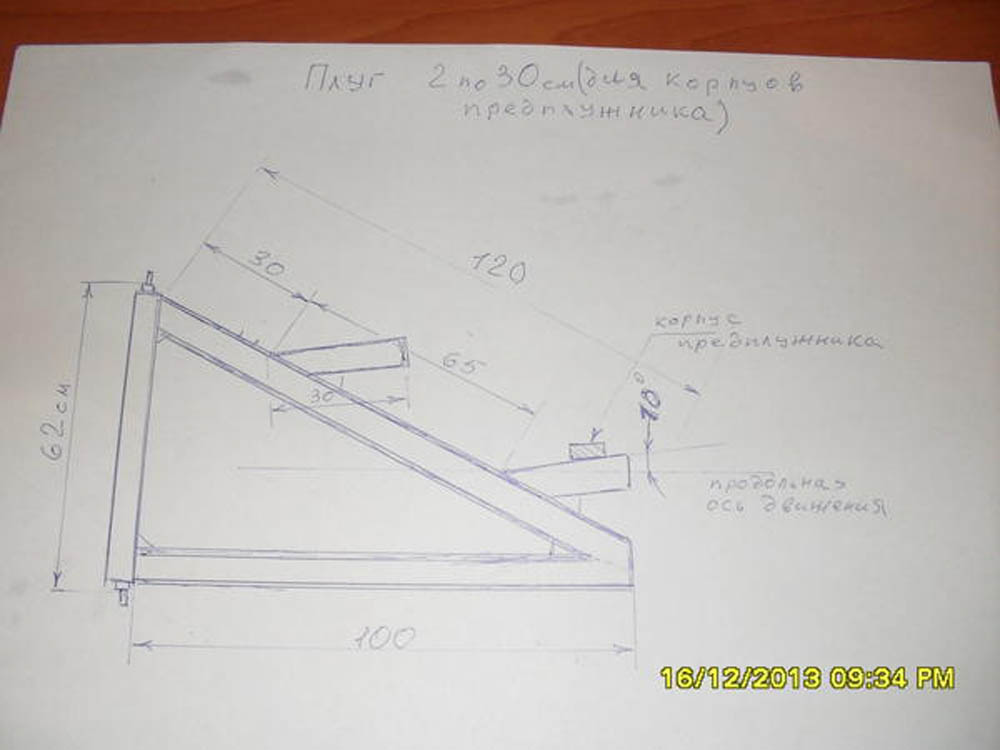
Drawing of a simple plow for a mini tractor and a walk-behind tractor.
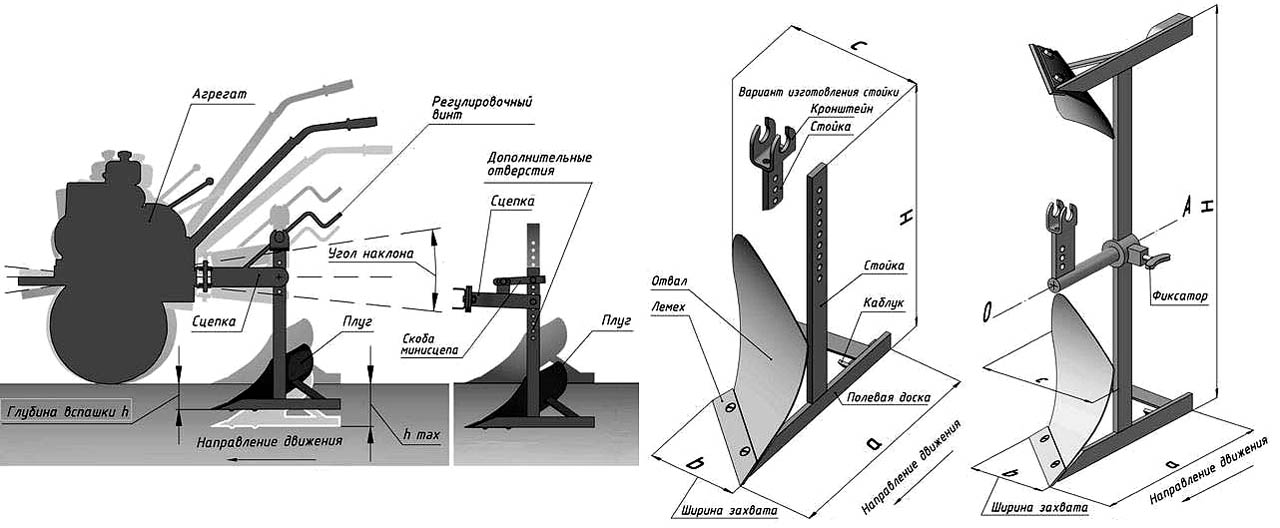
The main bearing element of the equipment under consideration is the frame on which the rest of the components are attached. It is made of a round or rectangular metal profile with a thickness of 2-3 mm. The working bodies and auxiliary elements of the plow are attached to the frame part. The shape of the frame corresponds to the number of working tools of the plow and the selected control elements.
Geometric features of the plow
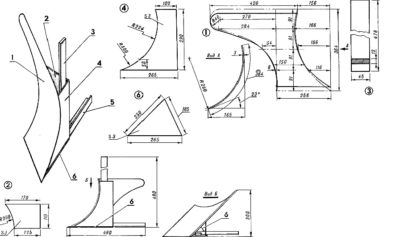
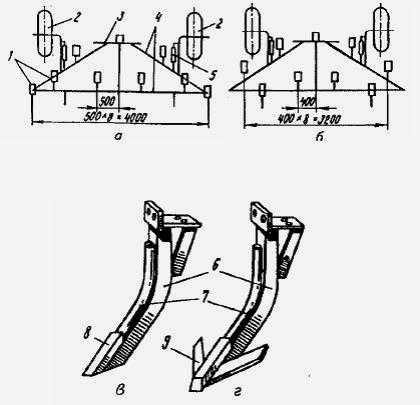
Plow share diagram.
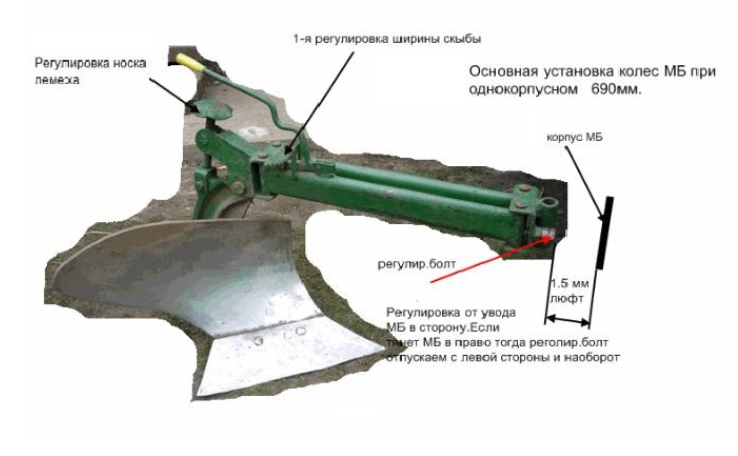
The presented drawing shows the device of the share-moldboard plow body. The ploughshare (I) is the lowest part that plunges into the soil. The soil layer moves to the dump (IV), which overturns, crumbles and shifts the soil into the furrow. The field board (II) serves as a guide for the movement of the plow and does not allow shifting towards the untreated arable land. The stand (III) fixes the working tool to the supporting frame and rigidly holds the knife in working order. The share consists of a toe, a blade and a heel (1, 2, 3), which ensure successful penetration into the ground. Upper, furrow and field cuts (6, 4,  together with the wing (5) and the dump chest (7), due to their geometric parameters, they ensure the correct movement and loosening of the formation. The plow design with two bodies allows optimal plowing of small land plots with mini tractors. On the Internet, you can find many videos describing the operation of such devices.
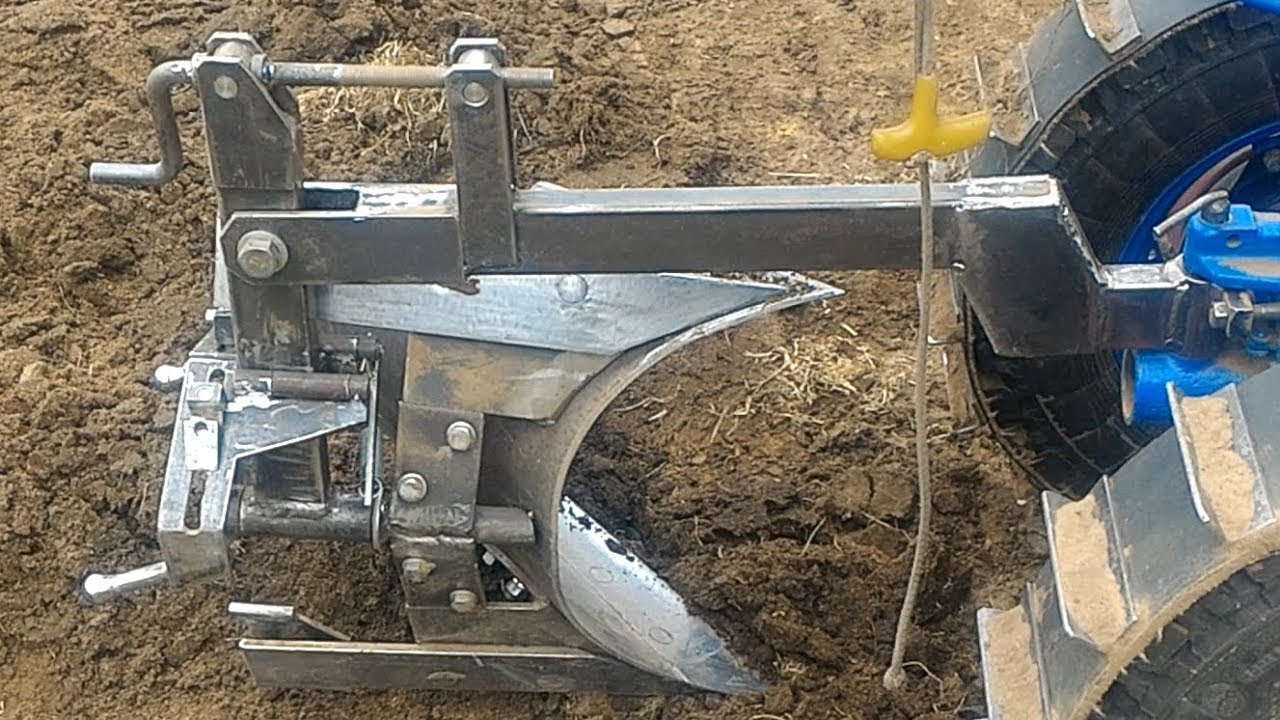
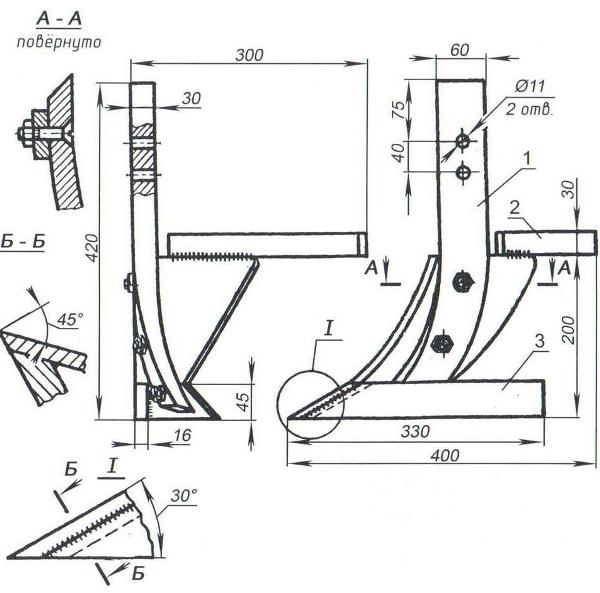
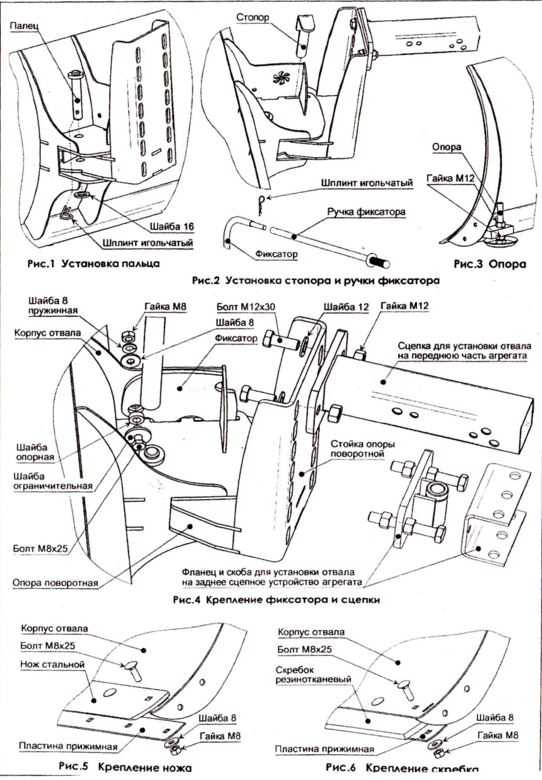
Plow shank attachment
The tine is made with adjustment holes for setting the required plowing depth. It is made of a metal plate with a thickness of 8-12 mm to give sufficient rigidity to resist high loads during operation. The stand is bolted to the frame, the angle of inclination of the body should ensure the normal entry of the share's cutting edge into the soil.
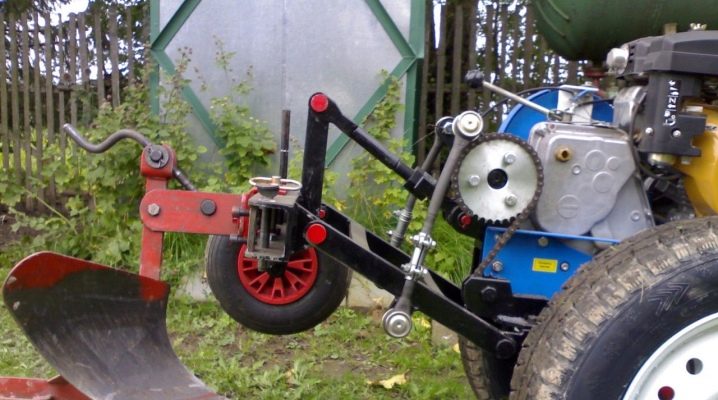
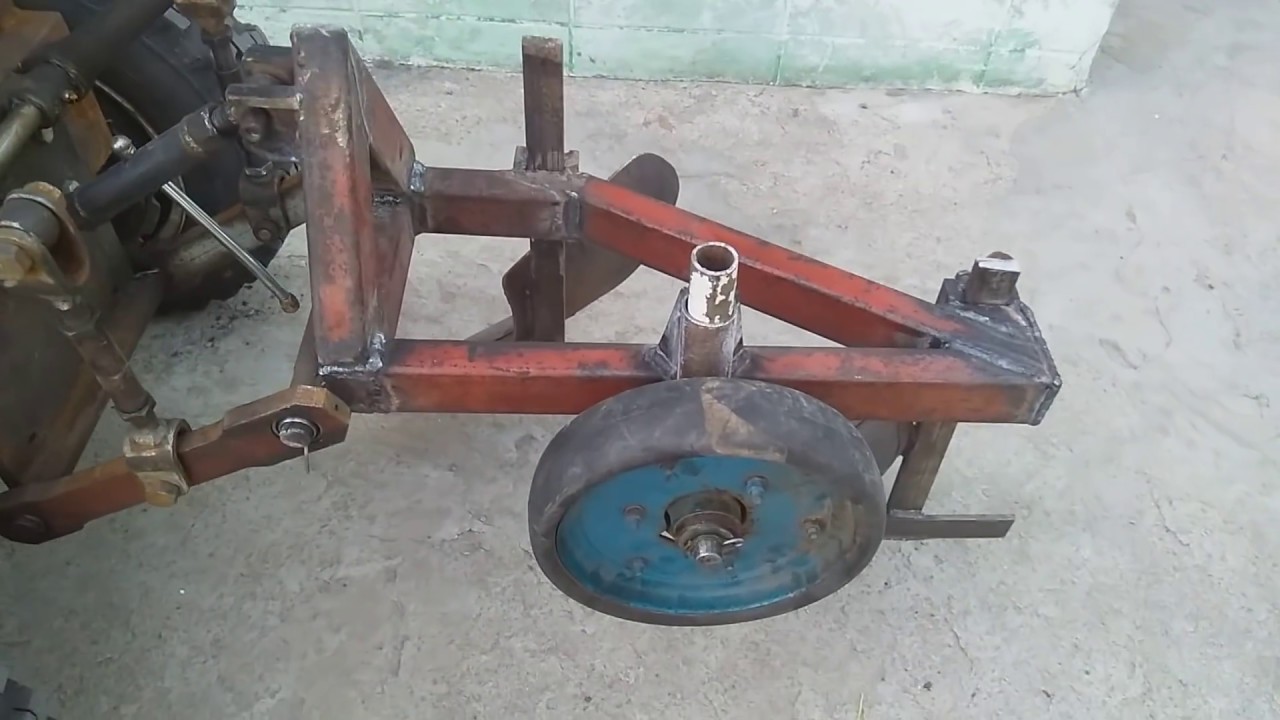
Drawbar making and wheel fastening
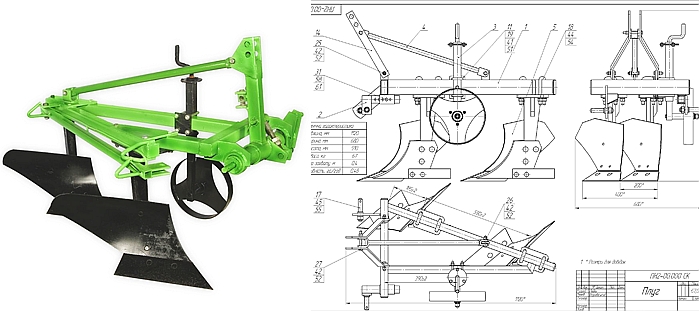
Connection of the main units of the plow.
The frame is attached to the mini tractor using a standard hitch pin or a homemade drawbar. The former can be taken from old worn-out equipment and welded to the front of the supporting structure, the latter are made by hand in the form of a drawbar with a handle (examples can be seen on various videos on the Internet). Distinguish between a straight and V-shaped drawbar, with the latter being more preferable. It dampens lateral vibrations of the plow and ensures straight-line movement.
One of their additional and control parts of the homemade earth tool is the field wheel. It serves to ensure ease of movement and prevent the working tool from sinking into the soil. These tasks can be performed by one wheel, but on advanced designs these functions are divided into two elements. The field wheel is attached to the frame on an adjustable bracket to provide the required plow settings.
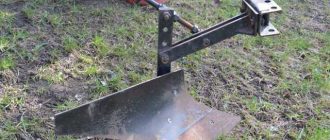
Fastening and manufacturing of the plow working body
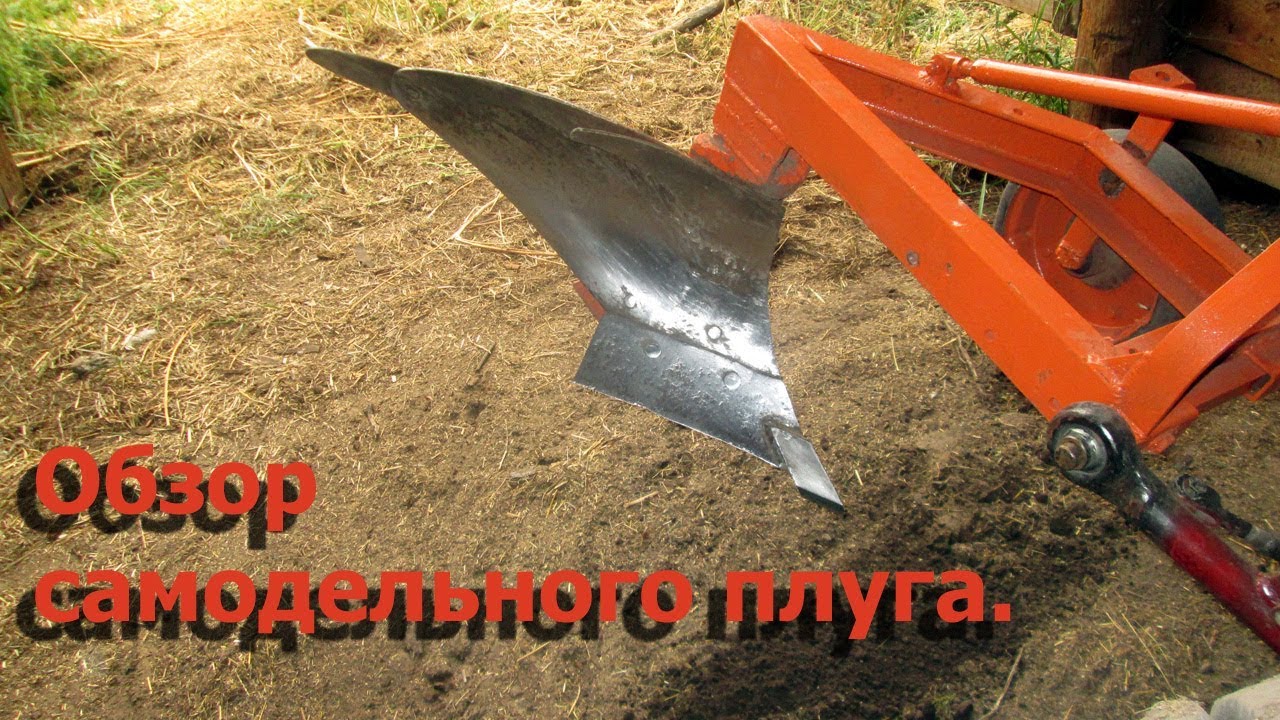
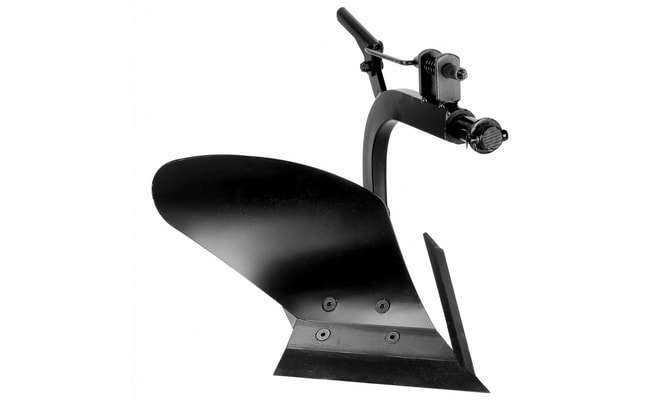
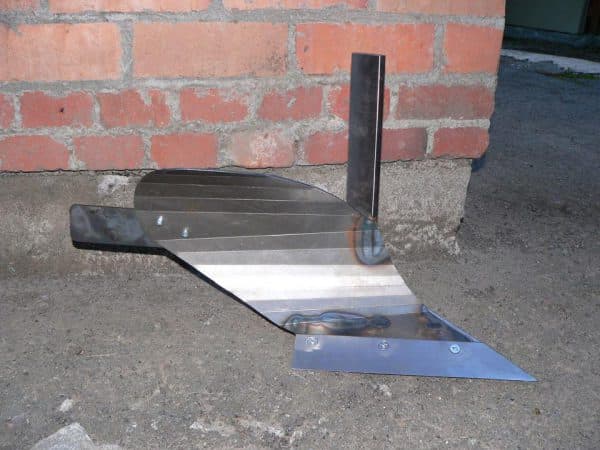
To make the main working tool of the plow with your own hands, you need to make a ploughshare and a blade. The plow body must be made of alloy steel with improved strength characteristics. In Soviet times, the methodological centers of agricultural engineering advised to strengthen the plow bodies with spring steel plates when working on dry and virgin lands.A good workpiece for the production of a cutting part is a used circular saw blade, the material of which has increased strength and stiffness. The ploughshare is wedge-shaped with a working angle of 40-42º. The ploughshare is recommended to be bolted or riveted to the blade for removal and regular sharpening.
Blade assembly
The dump is made of a sheet of metal 3-4 mm thick with subsequent bending by gas welding or on a roller machine. It is easier to make a homemade blade from a pipe with a diameter of 500-600 mm. First, a template drawing is made, then it is superimposed on the workpiece, cut off with a gas cutter and processed on emery. The blade is rigidly mounted to the plow post by welding.


Adjustment of equipment for a mini tractor is carried out on a flat, hard surface. The field wheel is mounted on a support adjusted to the plowing depth. The ploughshare is lowered to the stop with the support plane, and the heel must be parallel to the ground surface. The stand is fixed in the selected position and the rig is ready for use. To check if the plow setting is correct, you need to do a test plowing.
The assembly of the plow is shown in more detail in the video:
How to do it yourself
To create a device, you need a prepared workstation. Bring the following tools and parts in advance:
- rollers;
- a tool for cutting metal sheets;
- tube (preferably with a square section and a sufficiently thick layer of metal);
- welding machine;
- ploughshare;
- screws, nuts;
- 5 mm alloy steel sheet (this type of material withstands the load much better, therefore it is recommended to use it);
- 3mm metal sheet.
With your own hands
It is worth saying that it is worthwhile for those people who have certain skills to work with metal to start making a plow on their own, since this is a rather difficult task that requires experience.
You will need to cut out a ploughshare, dumps, wedges and other details on your own using your own drawings or those found on the Internet. It is worth warning that, first of all, it is necessary to adhere to safety precautions so that the work is not only productive, but also harmless!
Types of plows
When completing motoblocks, plows of three types are used, all of them have their own field of application:
- single-hull and double-hulled;
- rotary or revolving;
- rotary.
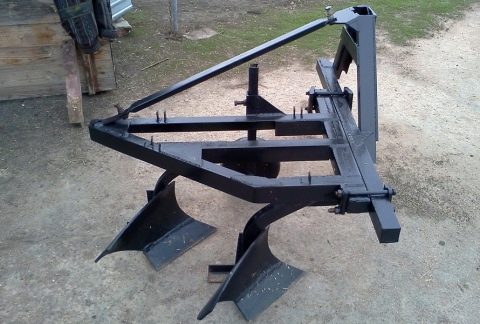
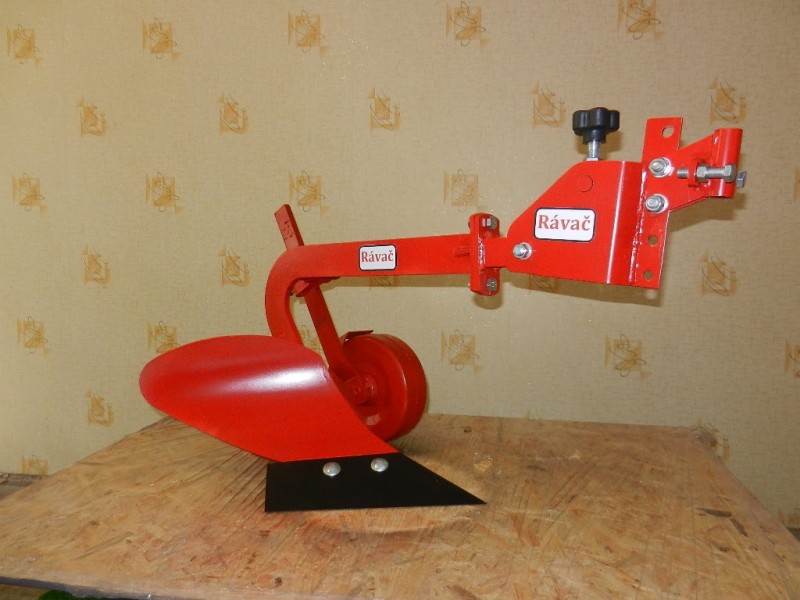
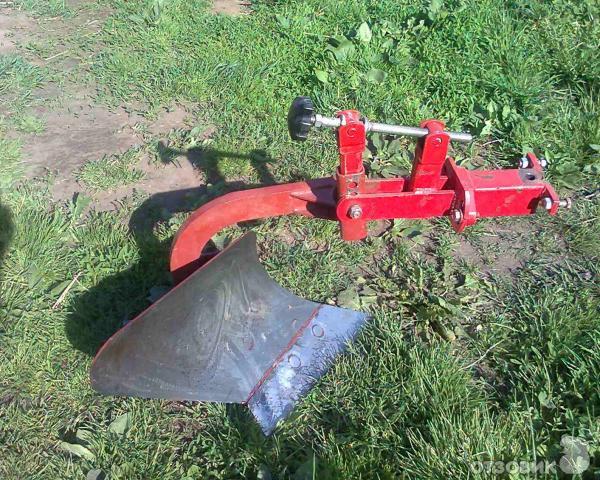
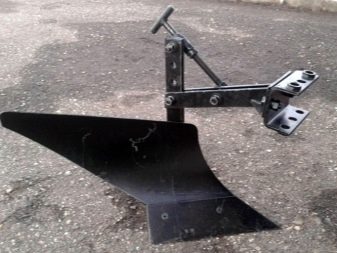
Single-body models
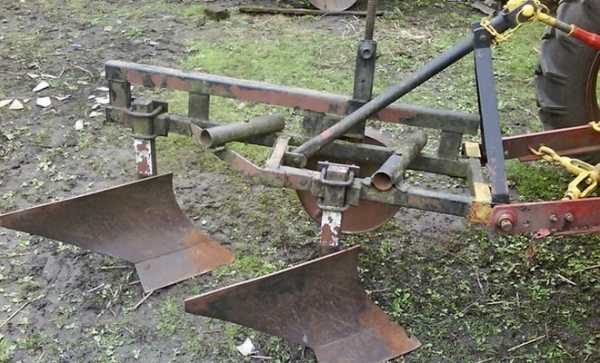
Single-body units are the simplest in design. They have only one share and are used for plowing light soils in common garden plots that make up the majority of the land. Such a plow is not suitable for plowing heavy soils and virgin lands; a more powerful structure is required here.
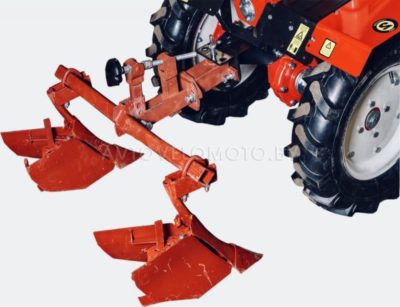
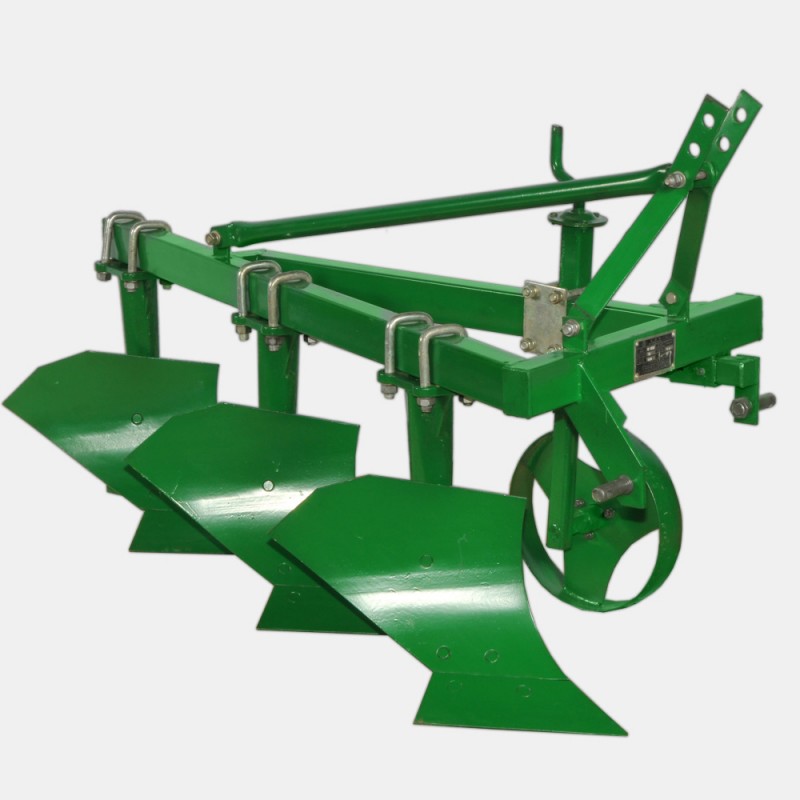
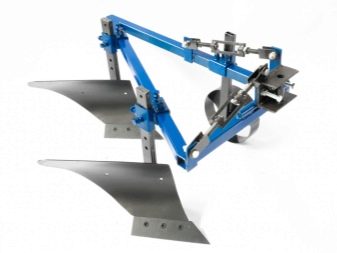
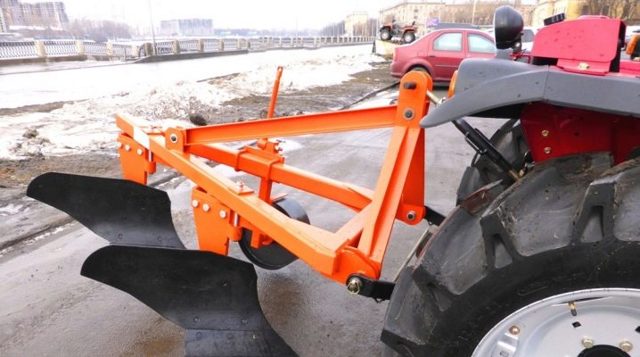
A two-body plow consists of two stapled frames with plowshares. It is used for processing various types of soils and for primary plowing of virgin lands. At the same time it will be able to carry out plowing and harrowing, provides the best quality of soil cultivation.
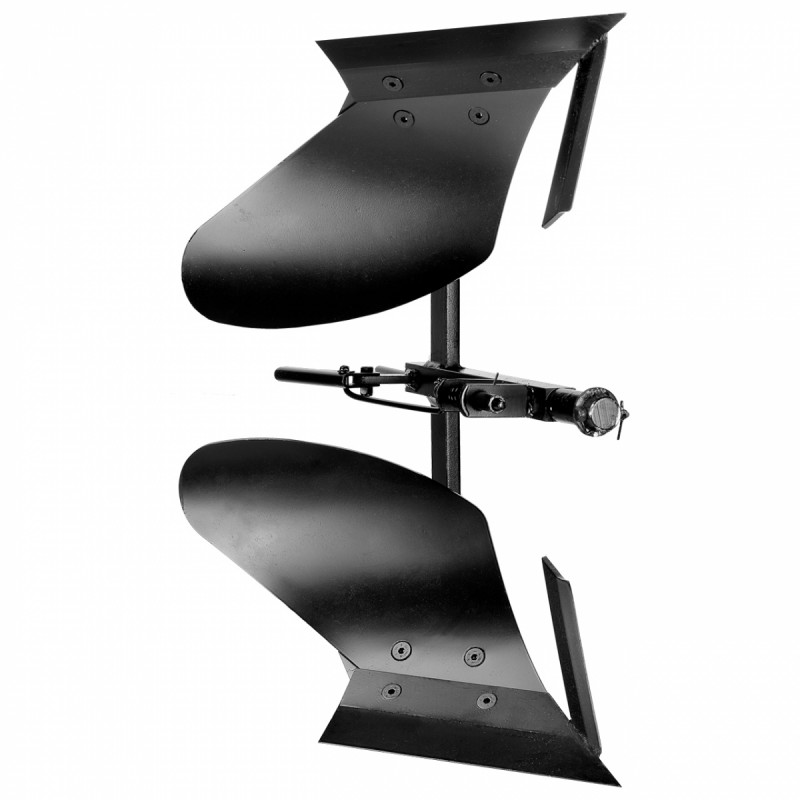
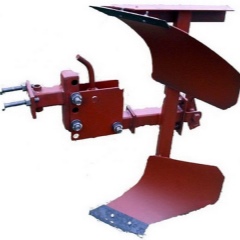
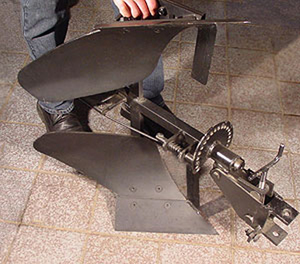
Reversible plows
Reversible plows differ in the shape of a ploughshare that resembles a feather. A ploughshare with a curved top turns the soil over. Recommended for plowing hard, hard ground. Plows of this type are compatible with motoblocks of medium and heavy classes, for example MTZ. They got their name from the device that turns the share when changing the plowing direction, which is convenient for long sections. The direction of the soil dump is preserved.
Rotary plows
Rotary models differ from other designs: the unit consists of a set of curved shares that loosen the soil, placed on an axle driven by the power take-off shaft of the unit. The depth of plowing the soil with a rotary plow is 25-30 cm, and does not require significant efforts of workers.
The rotary plow allows you to plow in different directions, which is important for plowing areas with complex shapes.This design is popular among summer residents for processing soil with a layer of sod or saturated with roots.
Rotary plows are compatible with medium and heavy tillers.
Dump and dump
By the presence of a blade, plows can be divided into two more types:
- moldboard: the design of such plows allows you to plow the soil, turn the plowed layer and loosen it;
- dump-free: intended for loosening the soil in regions with dry and windy weather.
Equipment manufacturing methods
A homemade unit can be made in two ways.
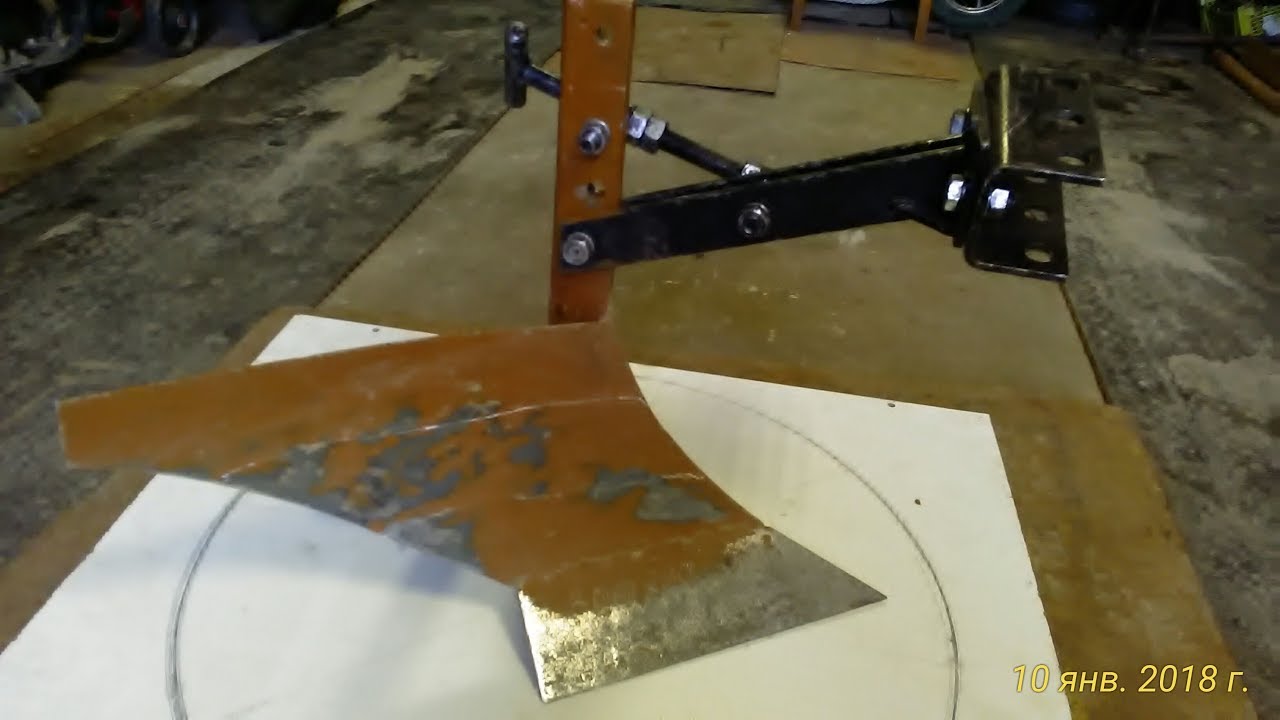
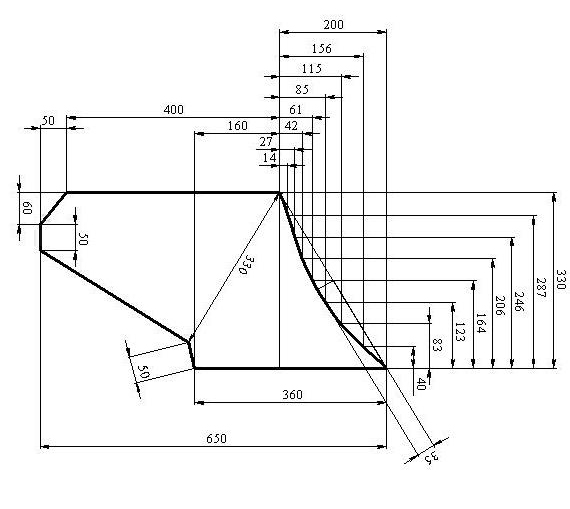
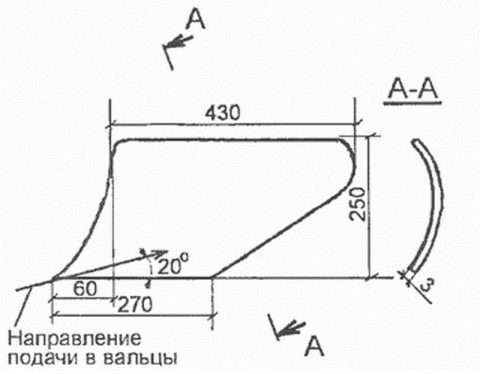
- In the first case, a steel pipe is used for the manufacture of a dump, the diameter of which is 55-60 centimeters, and the wall thickness is 0.4-0.5 centimeters. Initially, a template must be made from thick cardboard. For this purpose, the corresponding drawings are used. If you have bending rollers at hand, then the workpiece can be formed into the required shape as simply as possible. The blade is cut with scissors. When feeding it to the rollers, an angle of 20 degrees is maintained. After bending it, the rework is done with a hammer.
- The second option is a rather laborious way of making the unit with your own hands. To make it, it is necessary to heat the workpiece in a furnace or in any other convenient way. Further, it is bent along the matrix. For this purpose, the most often used blade from the attachment of the tractor T 25. As a raw material for the production of the body sheet steel is used. The next stage is the overlay of the template on the pipe with maintaining an angle of 20 degrees. The contour of the blade can be drawn with chalk. Next, you need to cut it off. For this purpose, gas welding is most often used. The contour is processed on emery. If necessary, the blade contour is reworked with a hammer.


Manufacturing technology
Initially, the elements of the unit are manufactured from thick cardboard. For this, you must also use the drawings. In order to make a homemade plow as correctly as possible, it is necessary to maintain the appropriate angles. If the parameters of the unit suit you, then it is necessary to manufacture it from metal.
After manufacturing the metal elements of the plow, it is necessary to use a steel sheet for their assembly, the thickness of which will be from 2 to 3 millimeters. It is necessary to step back from the edges of the sheet and postpone a corner on it. In order to make a plow with your own hands, it is necessary to install the ploughshare on a metal sheet.
- Correct manufacture of attachments for the T 25 tractor requires the use of welding to fasten the share to a metal sheet. Next, it is necessary to hold the side shield of the rack under the share. This is done in such a way that it is located in an upright position and extends beyond the edge of the share by about 7 centimeters. It also needs to be attached to the sheet metal and ploughshare. For this purpose, welding is most often used.
- In order to correctly make a plow for the T 25, it is necessary to try on the blade to the share. It requires the most tight fit with the canvas. The share blade and top edge must be at the correct angle. Otherwise, they will need to be finalized with a hammer.
- In order to properly make a homemade unit for the T 25, it is necessary to attach the spacer bar to the side shield by welding. If you do not know how to do this, you can watch the video on our website. The shield, ploughshare and side sheet must be welded together.
Homemade plow work
In order for the plow for the T 25 to be able to independently maintain the furrow, a two-wheel block is adapted to it. The furrow wheel should be 4-5 centimeters wide and 32 centimeters in diameter. The field wheel should be 20 centimeters in diameter.The axle for the plow wheels on the T 25 tractor is made from a pipe, the size of which is ¾ inch.
On one side, the pipe must be bent 90 degrees and a sleeve welded to it, on which the furrow wheel will be installed in the future. The field wheel is mounted on the other side of the pipe. The wheel axle is manufactured as a composite one. The pipe itself is attached to the bead of the attachment by welding.
Plow setting
On the video you can see the work of the plow (second option)
The depth of plowing of the soil with a plow for a tractor is from 20 to 24 centimeters. This is the same distance between the field wheel and the share tip. If you provide the ability to move the field wheel vertically, then the plow can be adjusted according to the plowing depth and the width of the soil during the work. If you do not know how to provide the ability to move the wheel, then you can watch a video about this on our website.
It is not very easy to make attachments yourself, but it is still possible. The main thing is to choose the right material and adhere to the production technology as accurately as possible.
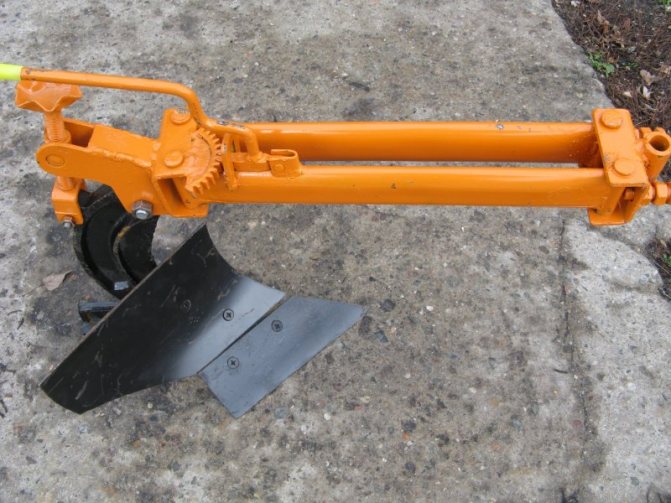
Instructions for creating a plow
We make the frame. To do this, take a steel pipe measuring 52 * 40 mm with a wall thickness of approximately 7 mm. Having cut off the wide opposite sides of the frame, we make a fork.

Then we make a middle mark on the frame for the subsequent installation of the transverse beam and spring struts for attaching the drawbar. The hole in the front of the frame structure must be welded carefully.
We attach the plow rack. To do this, in a wide piece of pipe used in the manufacture of the frame, we drill through holes with an area of 3.1 * 1.6 cm.The size of the holes in the narrow frame walls for installing the handle should not exceed 1.02 cm. We make the handles from a pipe with a diameter of 0, 5 inches.
We make a hitch. This is an important part of the plow. It is she who provides reliable fixation with the walk-behind tractor. The most popular is the U-shaped channel mount, which is installed under the steering section. In the manufacture of this element, you will need to make holes for installing the bracket and mounting pin.


First, we make a ploughshare. It will be appropriate to use an old circular saw blade here. An anvil can be used to sharpen the share cutting edge.
Then we make a dump from a steel pipe with a size of 0.6 m. For this we take cardboard or paper. We make a template from them, apply them to the pipe and circle them. Next, using a welding machine, we cut it out. We process the resulting dump with emery or a grinder.
We collect the plow. You will need a steel sheet with an area of 0.25 sq. m. All parts must be welded to it, starting with the side shield and ending with a ploughshare. The work should be done especially carefully. Next, we take a hammer and a chisel and disconnect the metal sheet on which the welding work was carried out.
Then it remains to clean the seams, grind the blade and plowshares, and paint the entire structure. These measures will give the plow aesthetics and increase its service life.
Assembling a homemade device
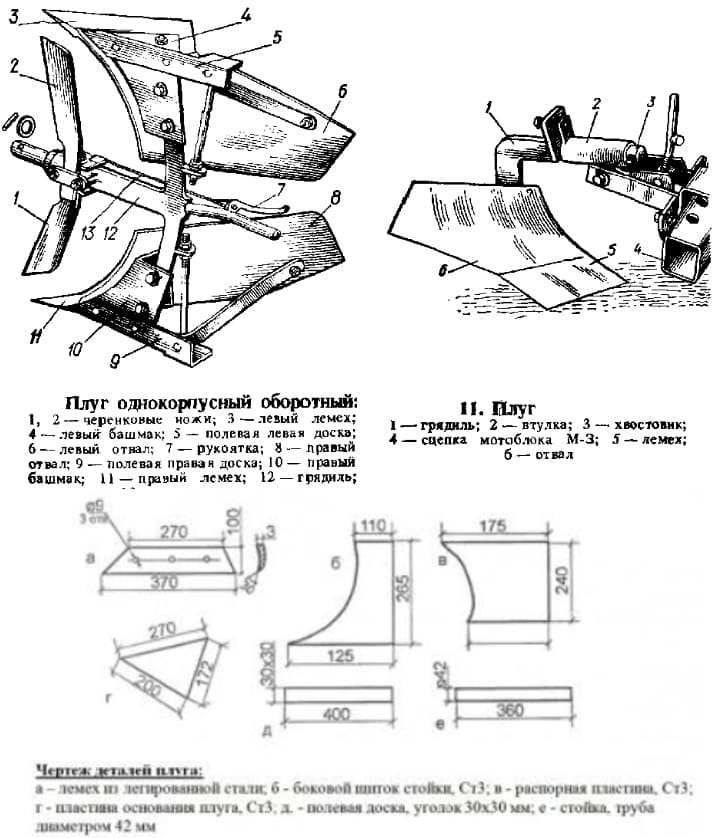
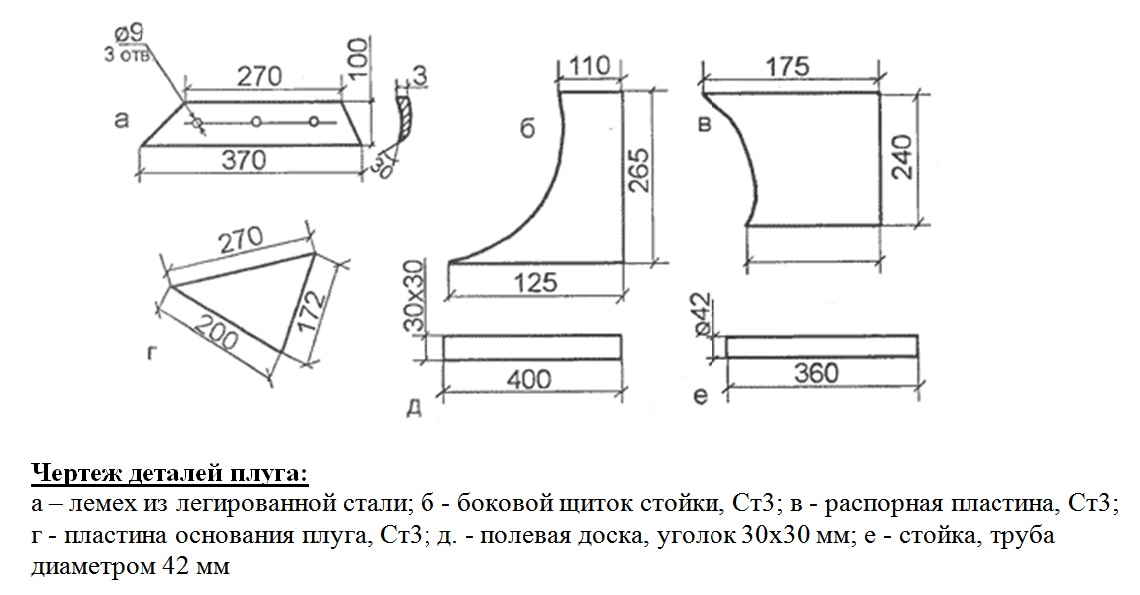
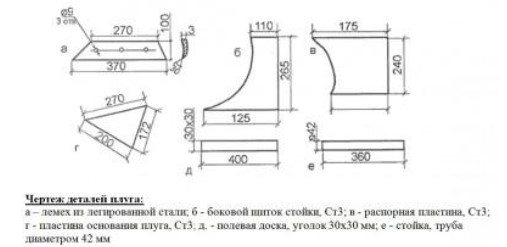
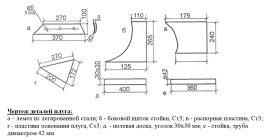
The plow drawing consists of details:
- ploughshare made of alloy steel;
- side pillar flap, made of St3;
- spacer plate, made of St3;
- the base plate is also made of St3;
- field board, corner 30 by 30 millimeters;
- rack, made of a pipe with a diameter of 40 millimeters.
Experts recommend, first, to make all parts of the device out of thick cardboard, then connect them together while maintaining the required angles. If the cardboard model suits you according to all the criteria, you can safely start working with metal blanks.
When you have completed all the steel blanks, then to assemble the body, you will need an auxiliary steel sheet of 500 by 500 millimeters and a thickness of about 3 millimeters, as well as an apparatus for welding the blanks.
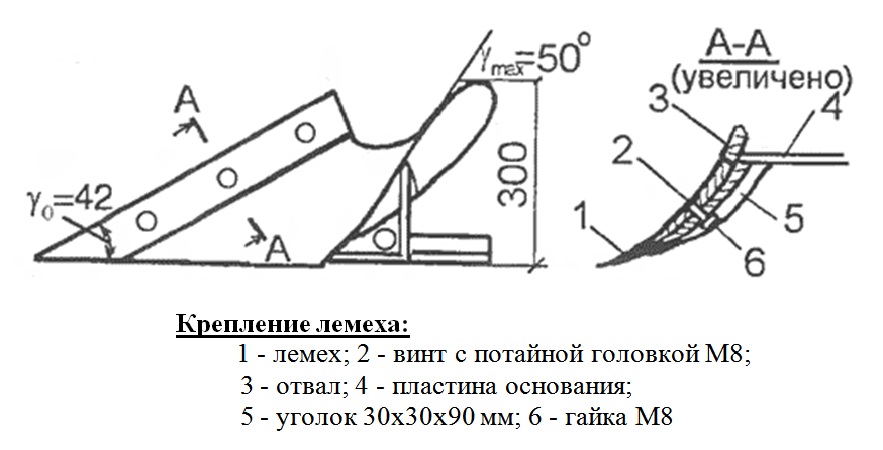
Using wedges having an angle α equal to 25 degrees, a ploughshare is mounted on the auxiliary sheet and point-welded to the sheet on both sides.
With the plow share in the vertical position, the side shield of the stand is docked so that its edge goes over the edge of the share by 7 millimeters, while the side shield must be raised higher than the blade of the share itself by 10 millimeters, so as not to interfere with cutting the soil with the share. The shield must also be lightly tacked by welding to the share and, accordingly, to the auxiliary sheet.
After that, it is very tightly necessary to attach the blade to the ploughshare so that there is no gap and they are one whole. The angle between the top of the blade and the blade of the share itself should be approximately 7 degrees.
The ploughshare attachment consists of the following parts:
- ploughshare;
- countersunk screw M8;
- base plate;
- dump;
- corner 30 by 30 and 90 mm;
- nut М8.
If during the assembly process it is found that the corners or edges do not match or do not match, then the blade must be finalized with a heavy hammer. After the necessary adjustment of the blade itself to the ploughshare, it is necessary to grab it from the back by welding both to the side shield and to the ploughshare. The flap is then finally welded to the spacer bar and base plate. Then the corners are grabbed to the plate at the base to stop the ploughshare.

The plow must be inspected once again, then it must be scalded thoroughly. Remember to dismantle the auxiliary sheet that you used to assemble the plow. You can separate it from the body using a chisel or a grinder using a cut-off wheel. The ploughshare stop corners are welded to the base plate. After welding, all welding seams must be cleaned, and the surfaces of the share and mouldboard are sanded.
Dimensions (edit)
The dimensions of different types of plows may vary. You can consider the parameters of the parts using the example of a rotary instance. It is taken into account that the rotary view of such a device is assembled from the following bases:
- side vertical part of the runner;
- horizontal plane at the bottom of the runner;
- front moldboard part.
The most productive plow is considered to be the one in which the cutting edge at the bottom of the fixed share is 20 mm below the bottom of the horizontal runner. Another well-aligned part of the plow is the alignment of the cutting edge on the side of the fixed share with the cutting edge on the side of the plow. The share and the blade must not protrude more than 10 mm beyond the boundaries of the vertical plane on the side of the runner.

There is one more important nuance - fastening the frontal plane of the blade share without visible gaps and gaps, and in the same plane. If we consider these details in more detail, then they should be well polished and, like a mirror, reflect any surfaces. There should be no protruding fasteners under any circumstances. As soon as the plow returns from excavation work, it is advisable to clean it from settled soil and foreign particles. Polished elements must be poured with oil or greased with grease. Next, the mechanisms need to be rubbed with a rag. Thus, it will be possible to protect the structure from aggressive external influences that can lead to the formation of corrosion on the plow surface.
As for the 4th correctly built structure, it includes the flat front surface of the share, which makes an angle of 20 degrees with the flat part of the plow structure. It will equal the angle at the rear of the exposed share. The cutting sidewalls of the share and mouldboard will also have corners of 20 degrees with bases on the side of the furrow. Moreover, the edge located on the side of the blade may be slightly rounded.

